CNC Bowls with Logos Through the Bottom
Click here to subscribe to my YouTube channel.
I wanted to figure out a way to add a logo into the bottom of a bowl or tray and decided that the easiest way to add a logo in the top of a carved bowl might be to add it to the bottom of the base piece of wood before carving the actual bowl shape.
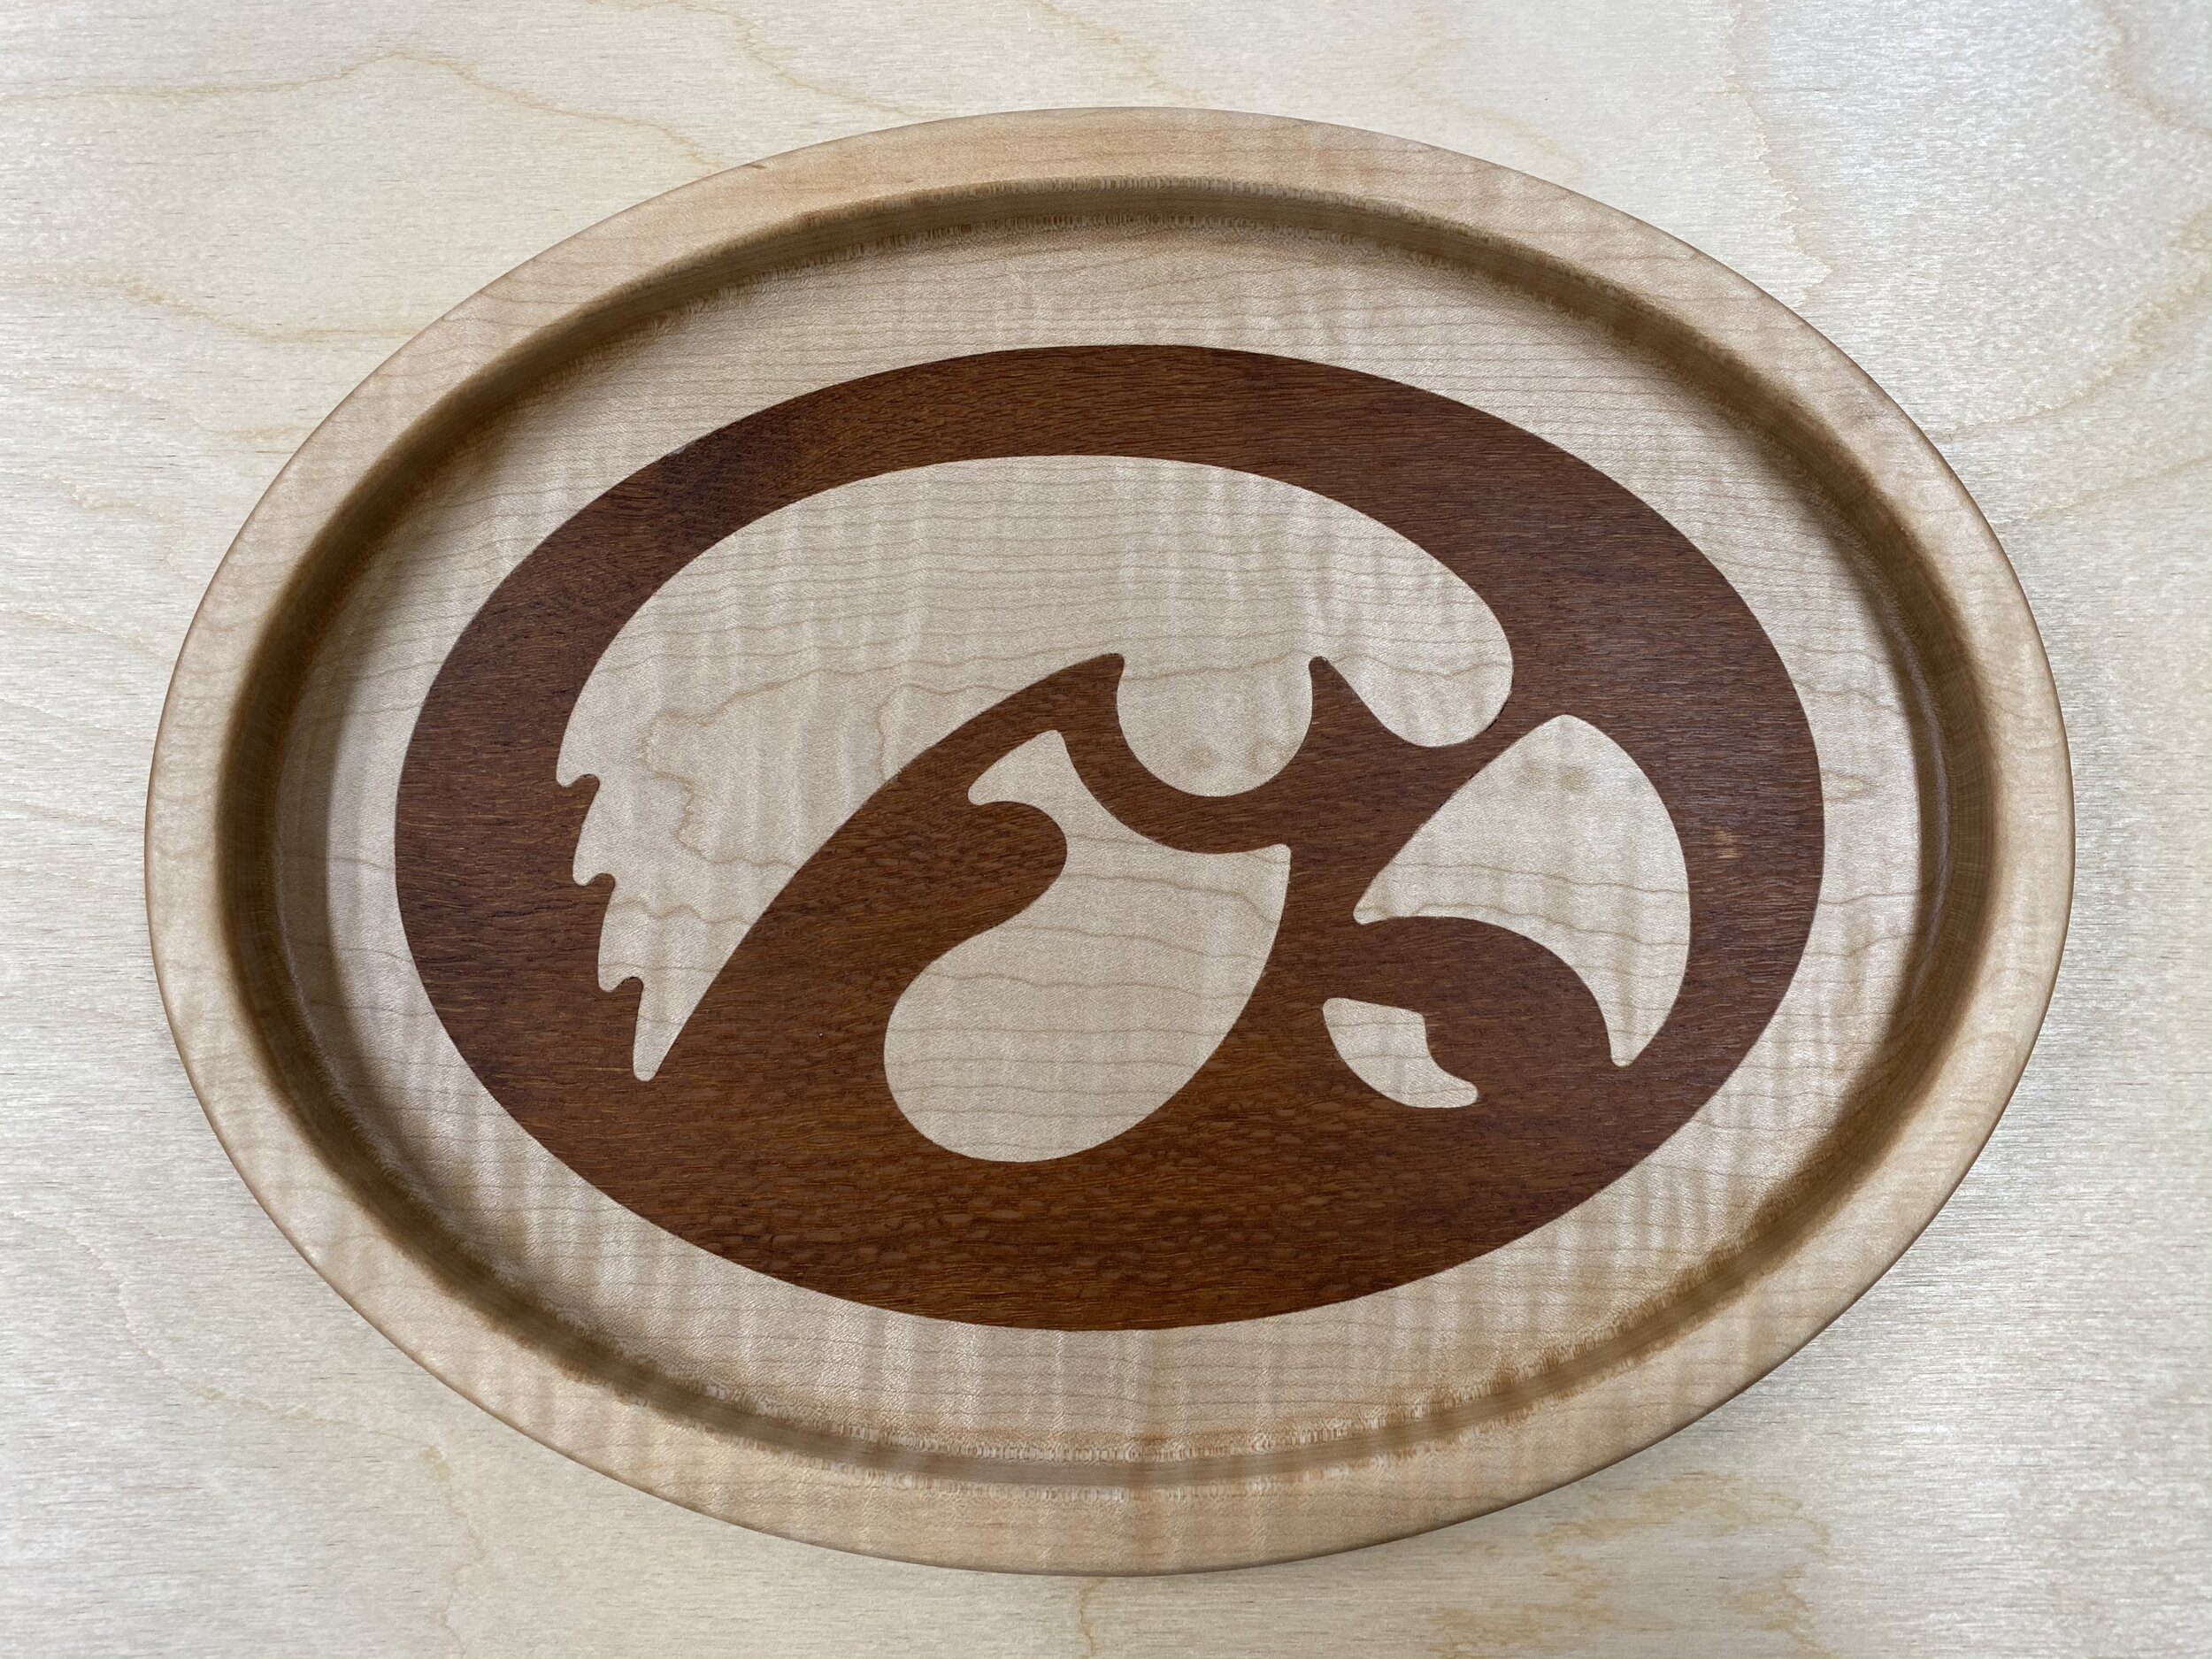
I went down this path after wanting to carve a bowl for a friend of mine who was getting married. Since he is a huge Iowa Hawkeye fan I decided to work on adding the Hawkeye logo into the bottom of a bowl. One of the biggest problems I had was how to effectively add the logo to the bottom of the bowl without damaging the bottom surface of the bowl when the router bits broke through. Another issue was how to get the logo to align properly if I somehow managed to bump the alignment of the CNC when changing the bits.
The more I thought about this issue the more I thought I better make a backup in case I messed up the first one. Then after a little more thought I decided to make a backup for the backup. I thought it would be a good exercise in figuring out inlays and carving bowls or trays on a CNC. Besides, I have a lot of friends who are big Hawkeye fans.


Step 1: Materials and Tools
MATERIALS
Wood of your choice. I used cherry, maple, padauk, and lacewood.
TotalBoat Thickset Deep Pour Epoxy - 1.3 Quart Kit - https://amzn.to/3gBziJf
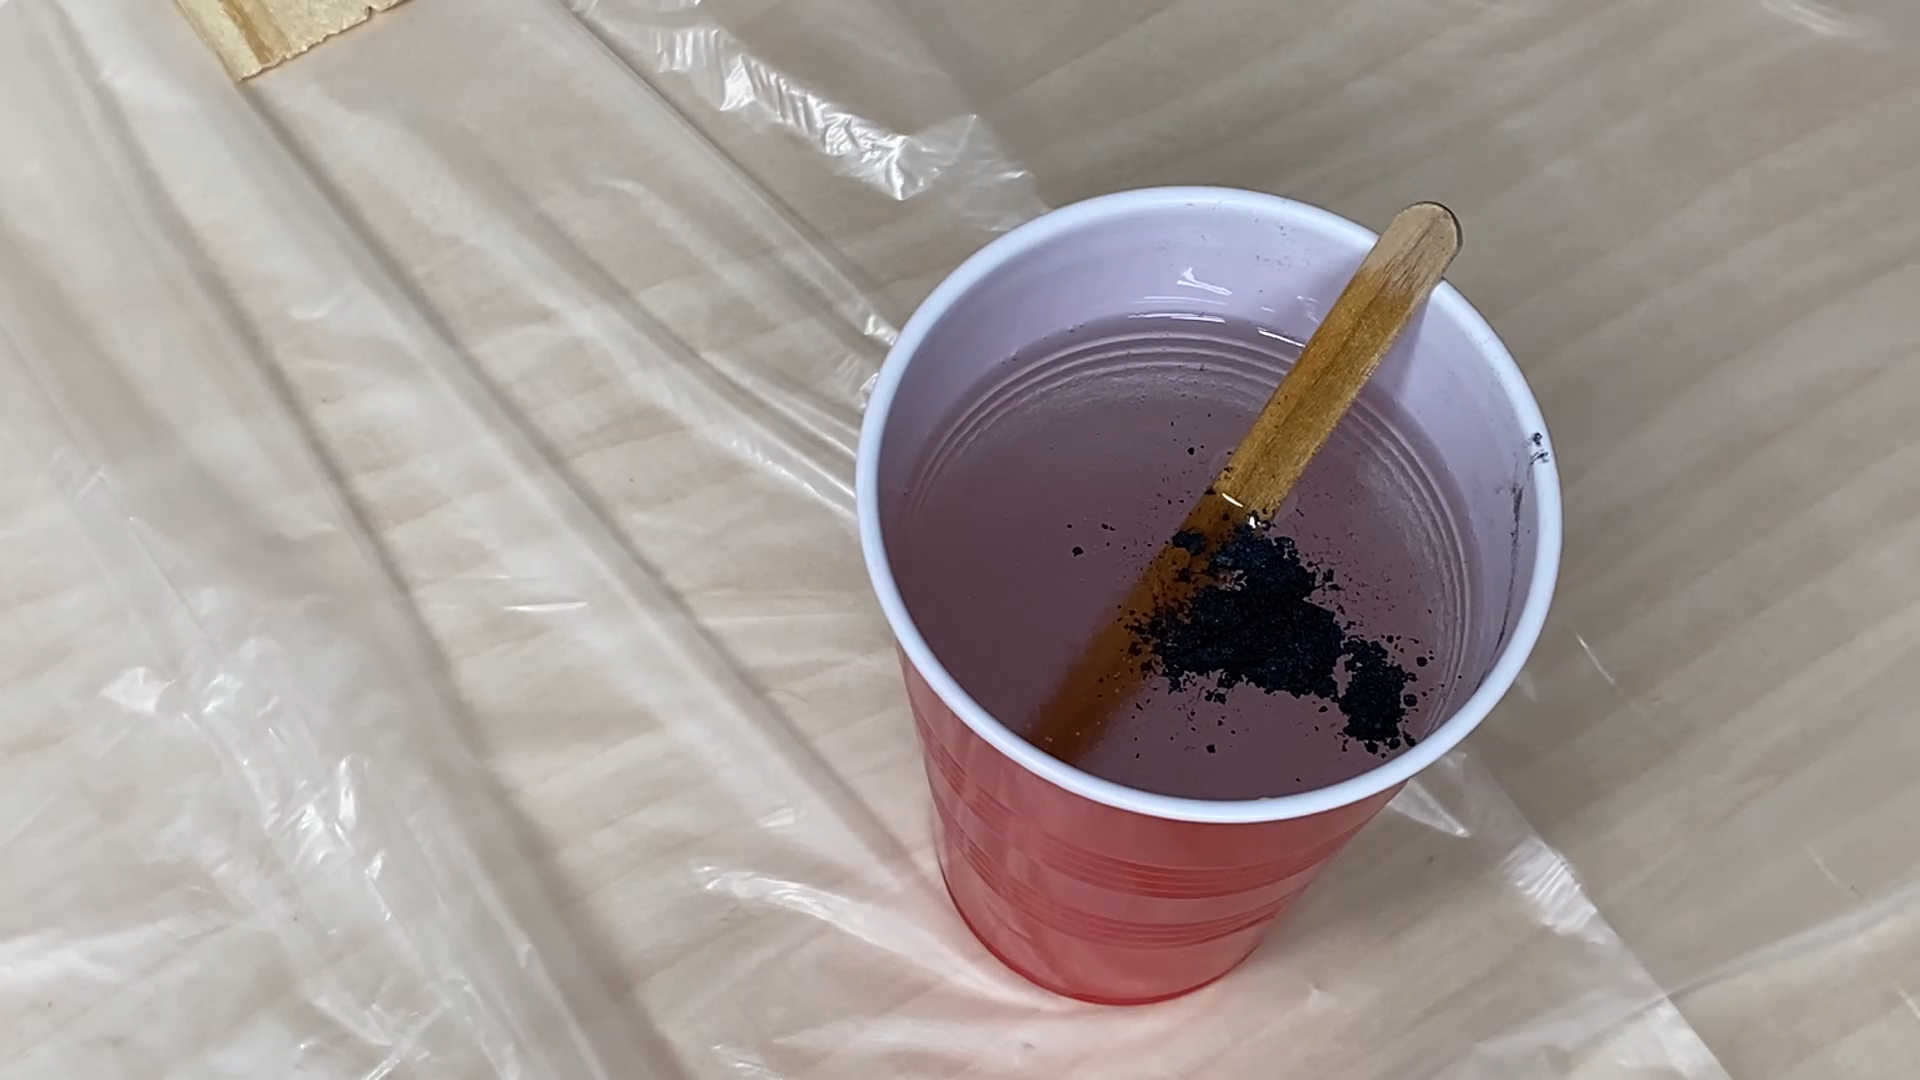
Black Diamond Pigments - 42g/1.5oz"Black Onyx" Mica Powder Pigment - https://amzn.to/34Qvt0R
You could also try a different color or try mixing several colors from a variety pack below:
Black Diamond Pigments 26 Color Variety Pack - https://amzn.to/3gHgngm
Odie's Oil - Universal - 9oz Jar (A little goes a long way) - https://amzn.to/2Fd7he6
3M Scotch-Brite Light Cleansing Pad Comparable to 0000 - https://amzn.to/2R3P9pO
Titebond Translucent Wood Glue - https://amzn.to/2FaZ5eC
Sand paper
TOOLS - The tools I used on the project were as follows:
X-Carve 1000mm CNC Machine by Inventables - https://www.inventables.com/
Saw Stop table saw - https://amzn.to/3a8znCE
Grizzly 14" Band Saw
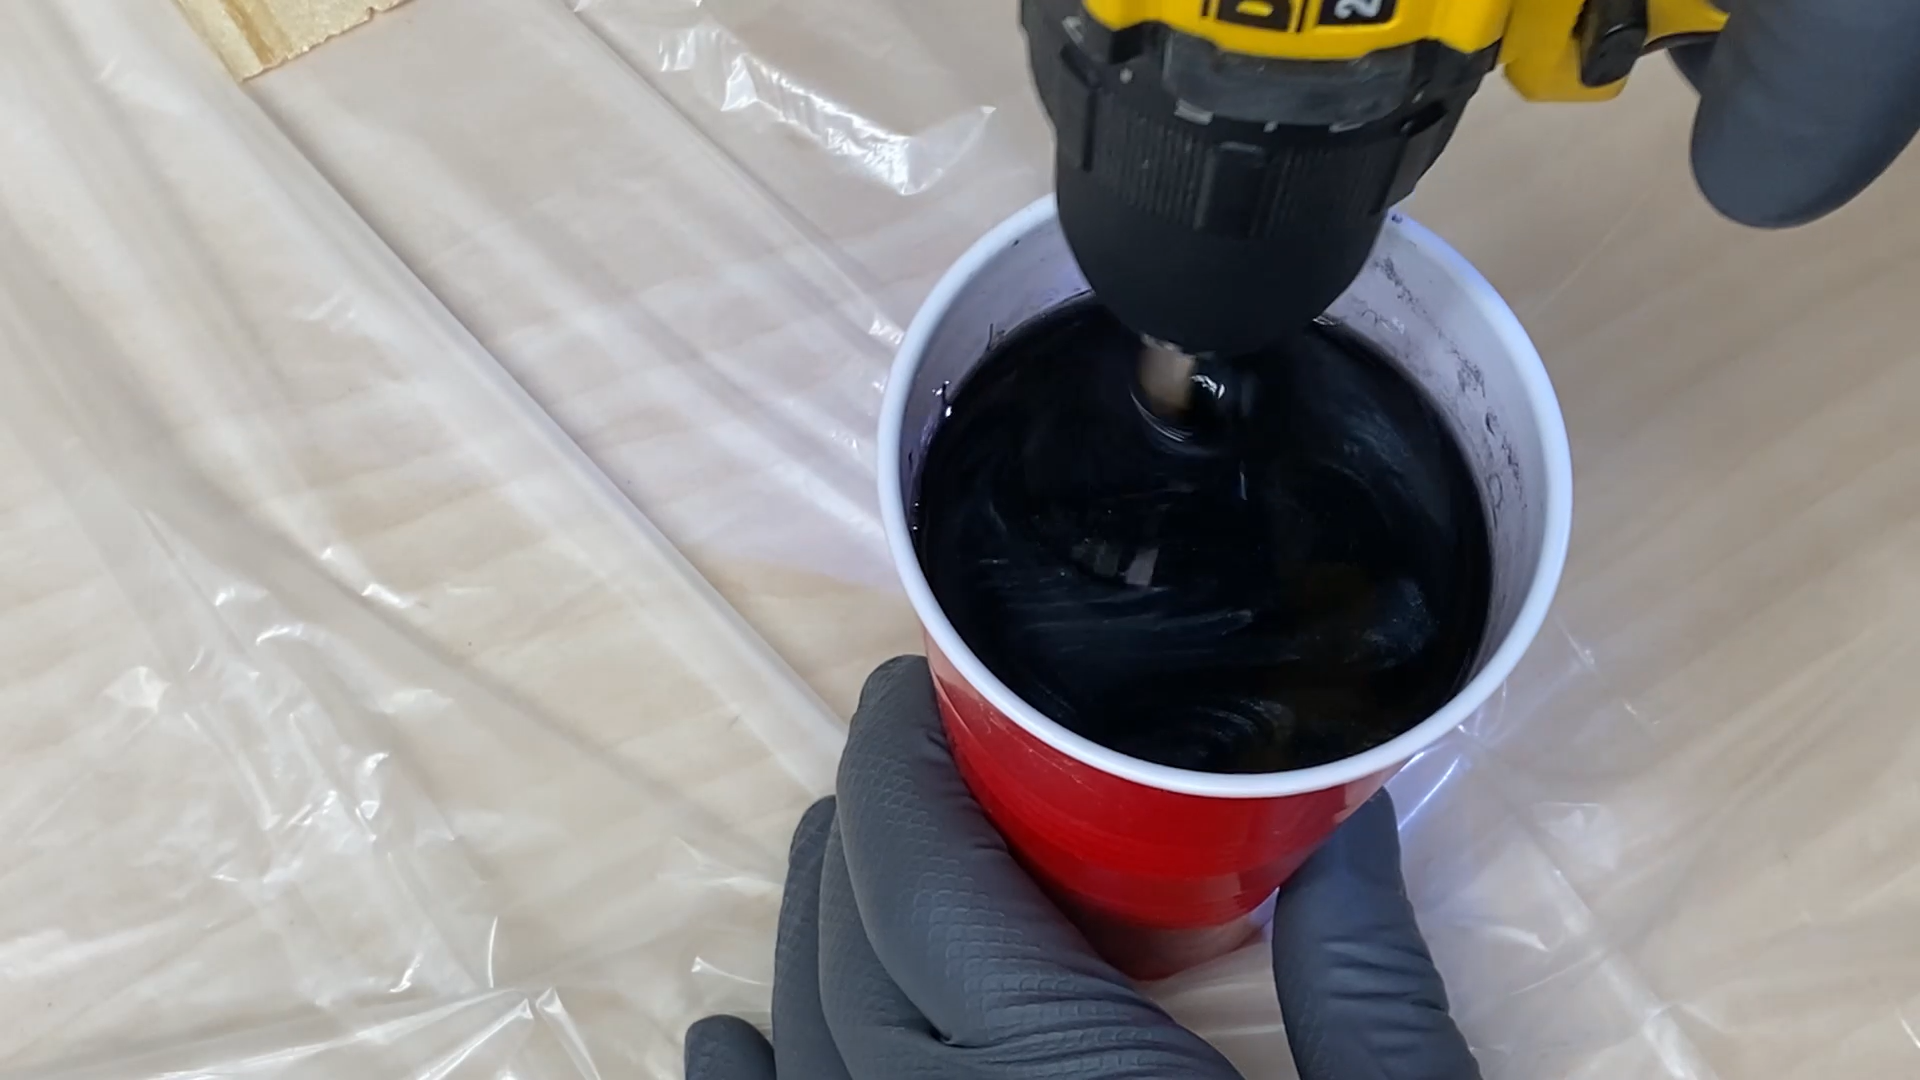
Dewalt 20 Volt Cordless drill (to mix pigment with epoxy) - https://amzn.to/3aflH9a
Ryobi Trim Router - https://amzn.to/3i9pIyQ
Random orbit sander
Shop vac
Tape Measures (my favorite two):
Fastcap PMS-16 Auto Lock ProCarpenter Tape Measure - https://amzn.to/333fTMN
or FastCap PSSR16 16 ft Standard Reverse Measuring Tape - https://amzn.to/35eQe6k
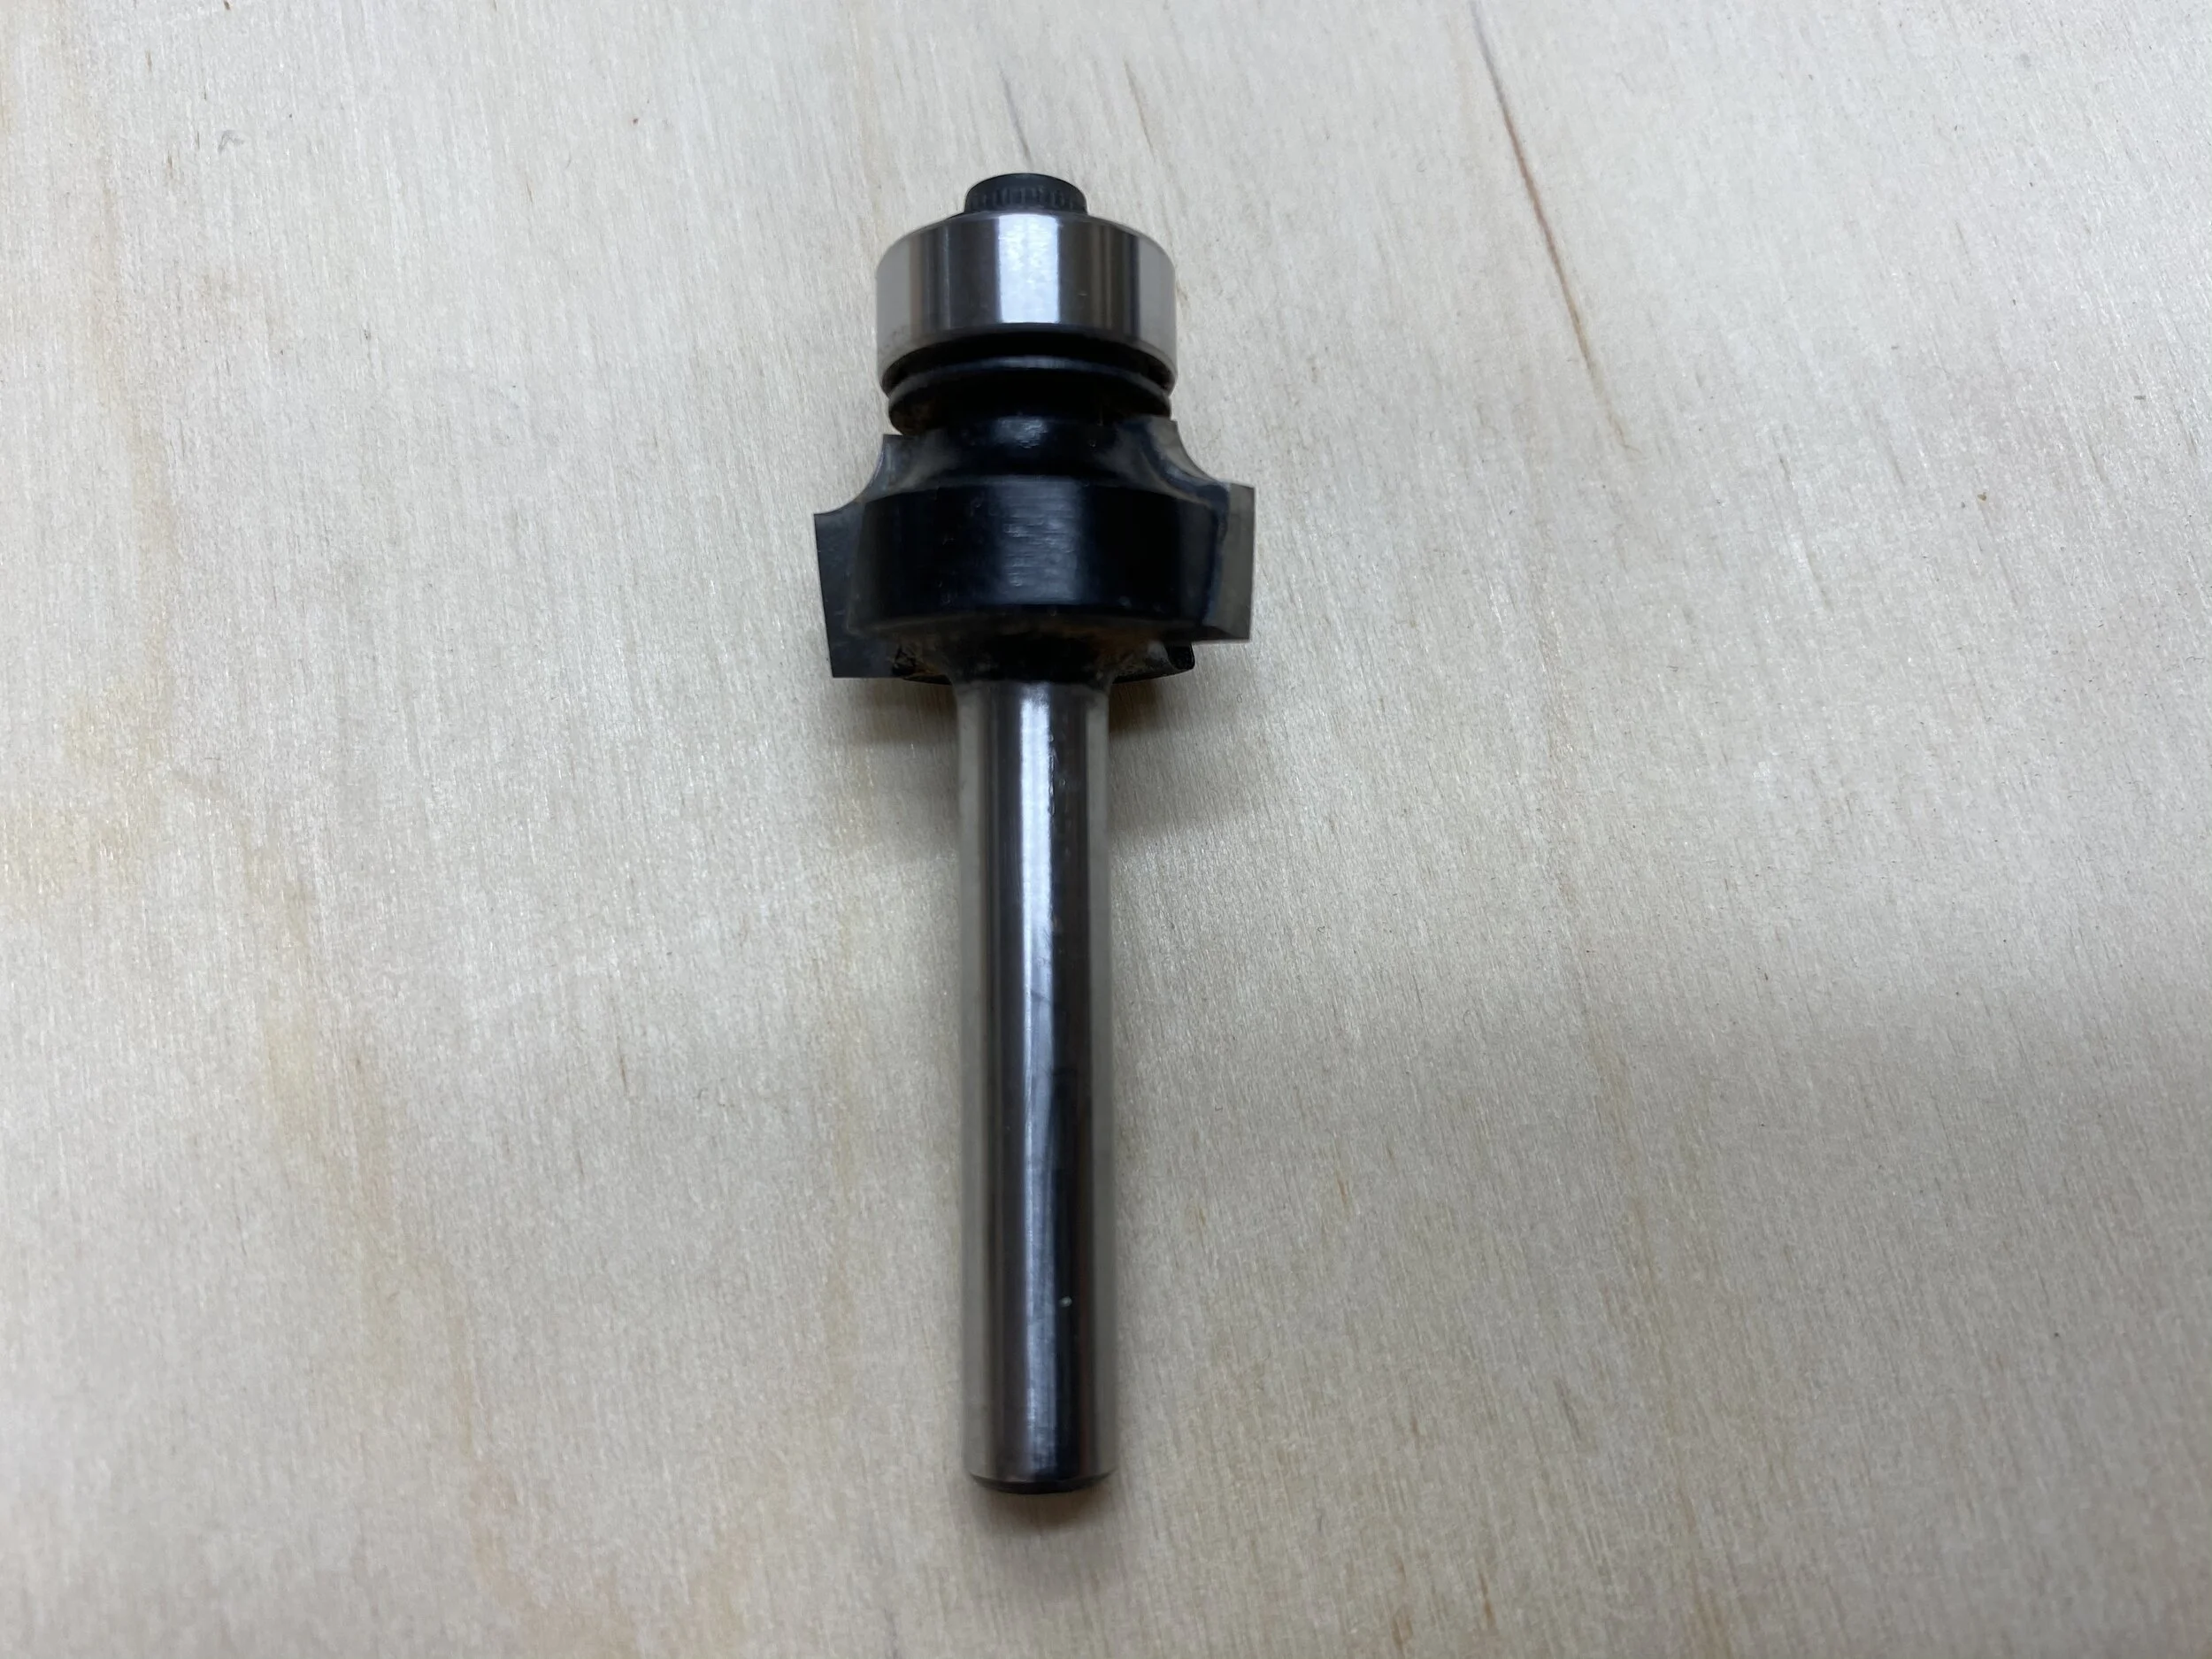
Amana Tool - 45983 Carbide Tipped Bowl & Tray 1/8 Radius - https://amzn.to/3k7nalJ
Amana Tool - 49496 Carbide Tipped Corner Round 1/8 Radius - https://amzn.to/2R1HND0
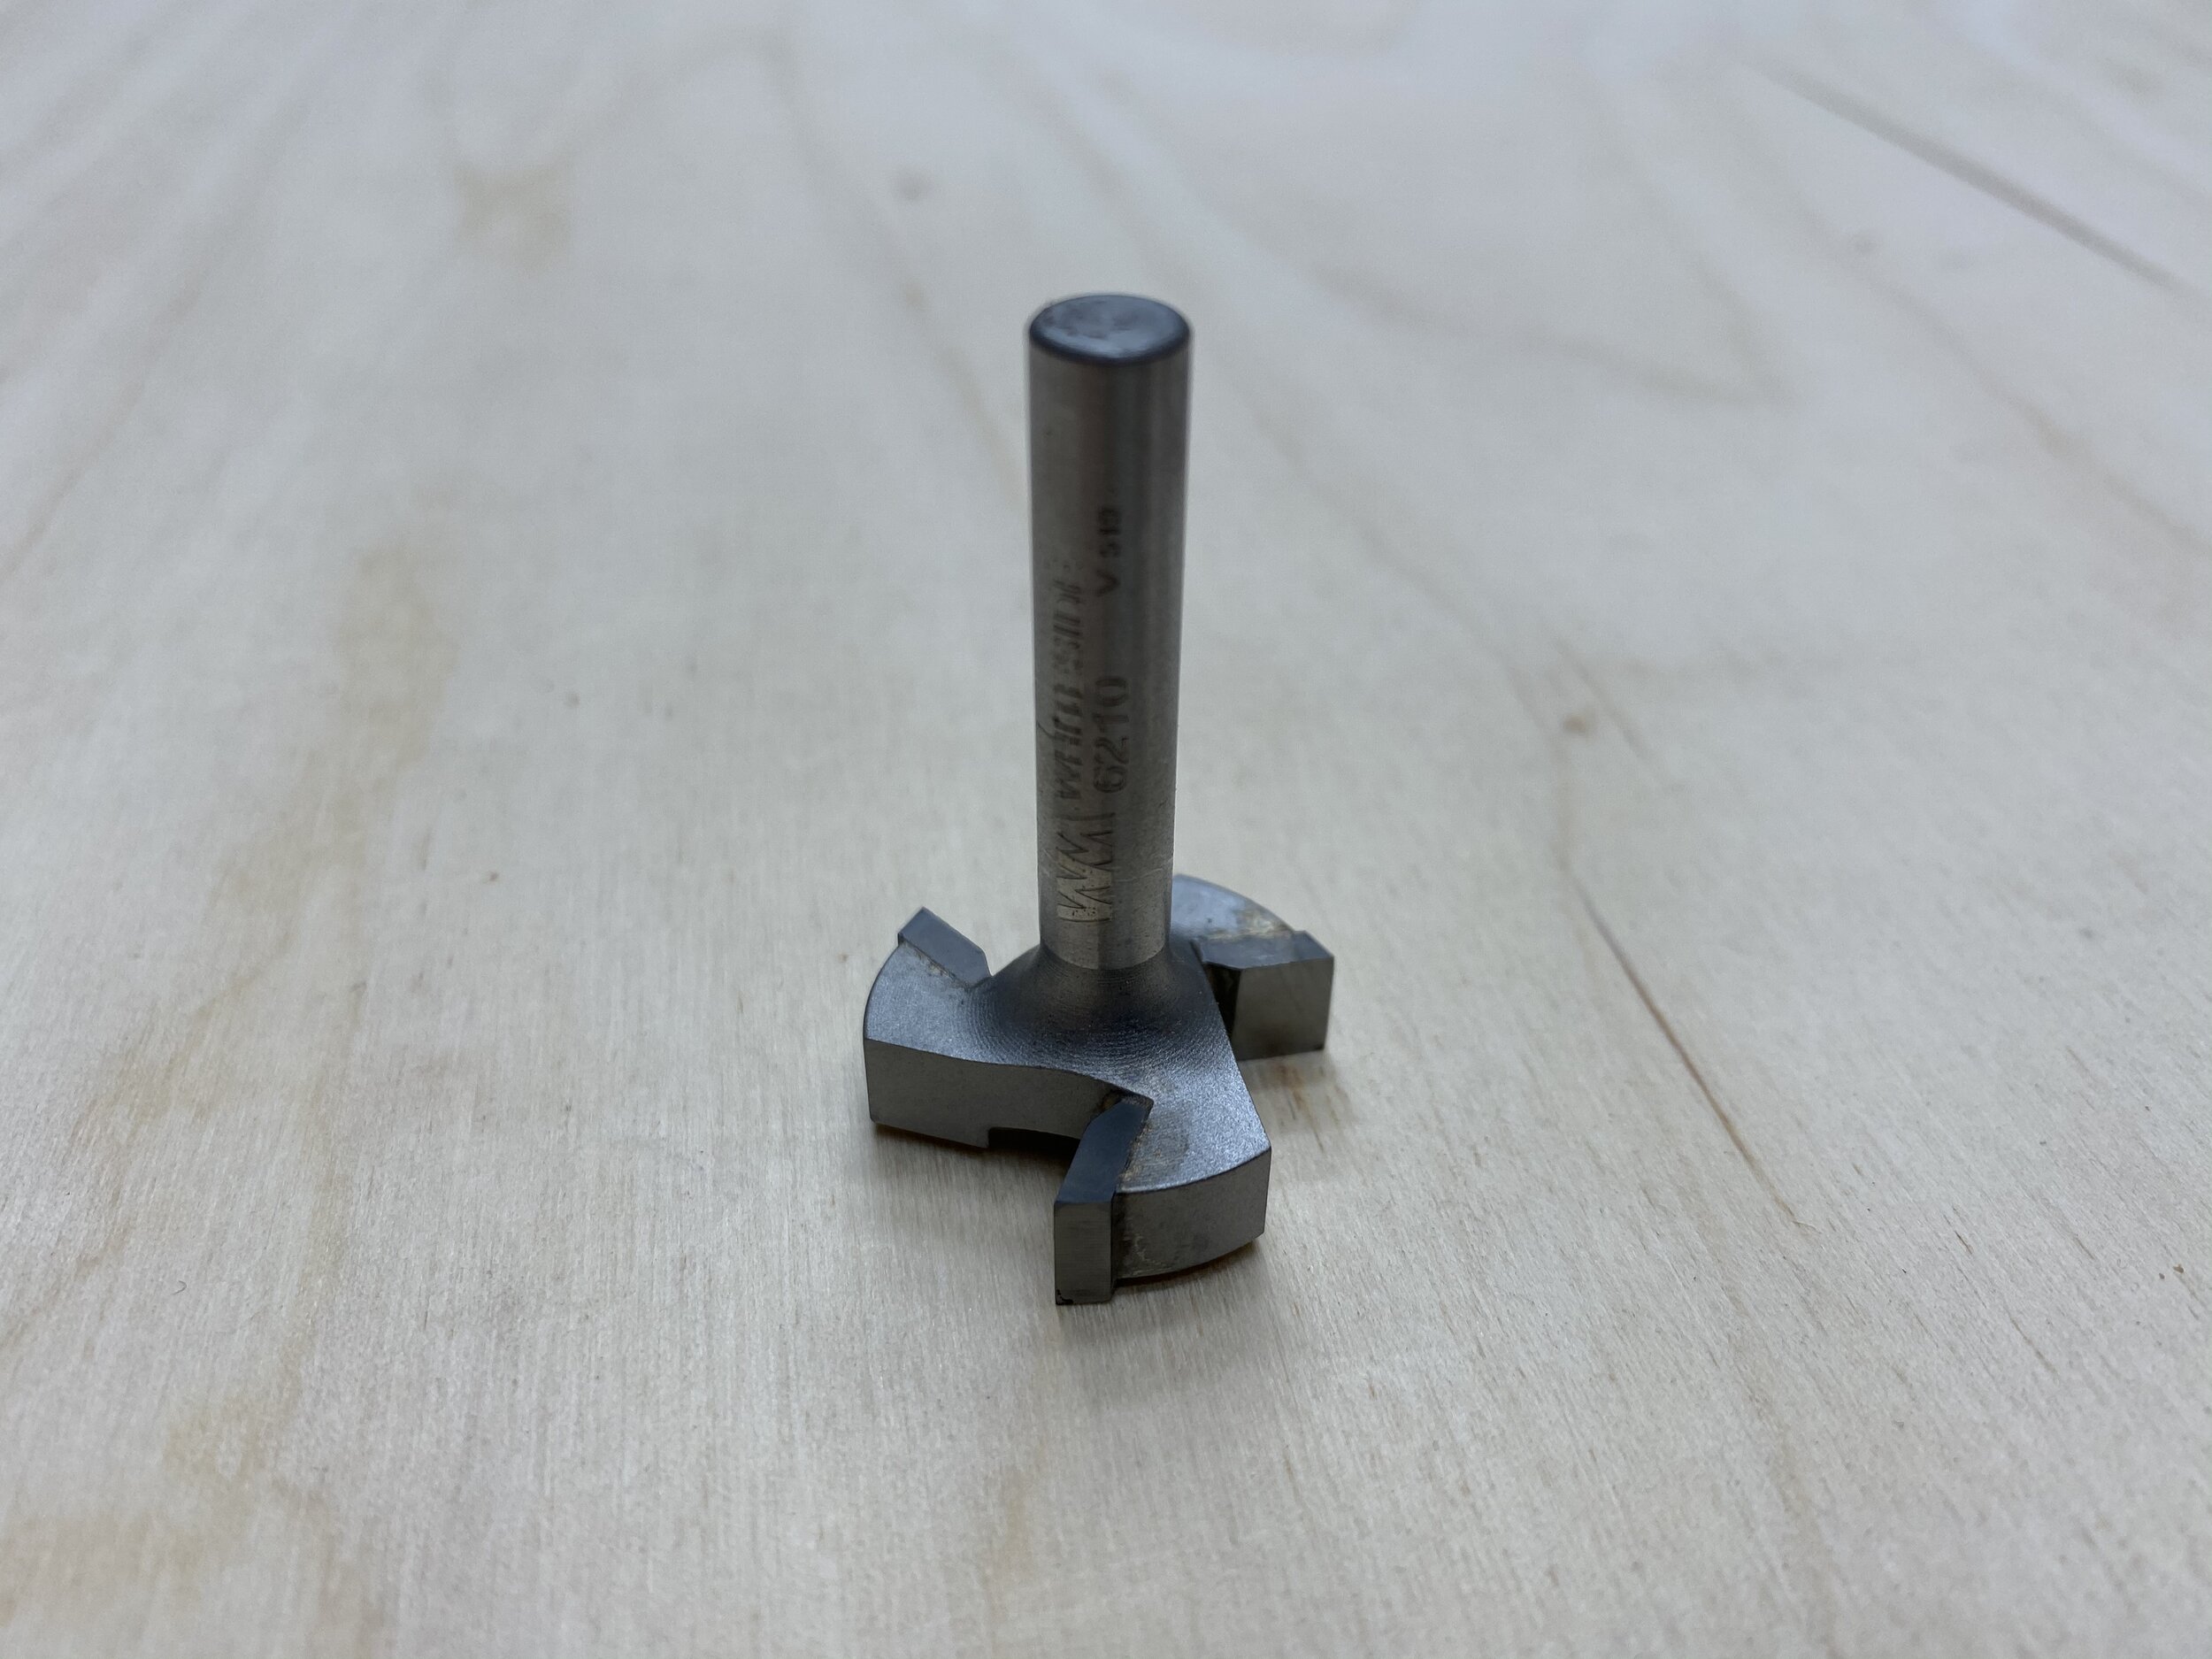
Whiteside 6210 CNC Surfacing Router Bit, 1/4" Shank - https://amzn.to/2FgoG5w
NOTE: As an Amazon Associate I earn from qualifying purchases.
NOTE: If you plan on using any tool for a project please make sure you are familiar with the tool and all of the dangers associated with it. If you are not familiar with a tool then you should ask someone who is to show you the proper way to use it. A lot of communities have classes at local colleges on the proper use of tools and machinery. There are also local woodworking clubs that offer classes at very reasonable rates for beginners. I highly recommend using these resources for your safety and for the most efficient use of the tool.
SAFETY FIRST
Always wear eye and hearing protection.
Always work safe with the proper safety equipment and guards on your tools.
Note: As an Amazon Associate I earn from qualifying purchases.


Step 2: Design and Wood Selection
Shape and Size:
The design for these bowls/trays was really based on using the favorite team logo for the person I was making this for as a wedding present.
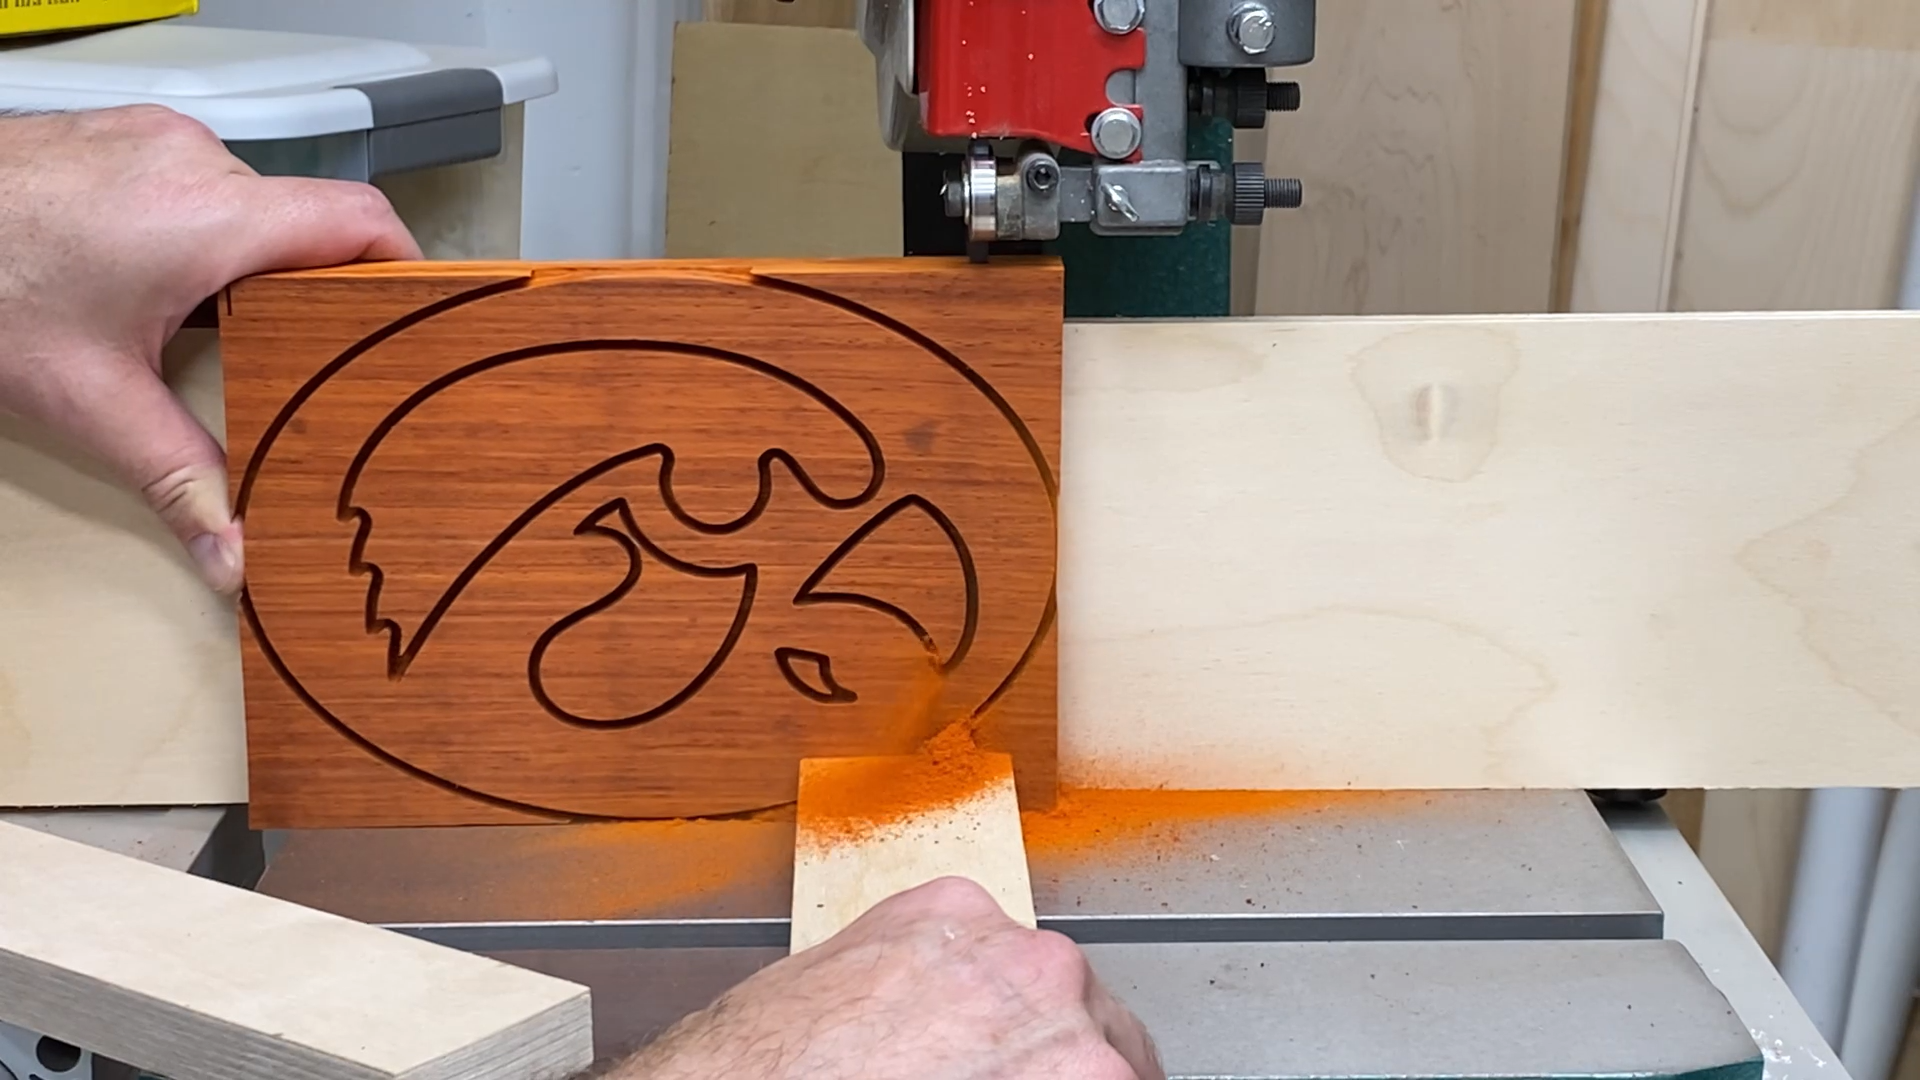
One of the limitations I knew I had was that I needed to be able to cut the logo inlay piece free from the base piece of wood. Since the cutting height of my bandsaw is only 6 inches I was limited to that height for the logo.
The next limitation I had was the height of the piece of wood that I could fit under the gantry of the X-Carve CNC machine I have. I was able to fit an 8/4 piece of wood under the gantry. That was approximately 1-3/4" thick. That worked fine, but I also had an issue with the length of the bowl cutting bit I used. The length was just long enough to carve the depth of the bowl before the collet of the router started hitting the top of the piece of wood around the edges.
Wood Selection:
I decided to make three bowls/trays for this exercise. I decided to make one as a wedding present. I then decided to make a second one as a backup in case I messed the first one up. I then decided to make a backup for the backup. I thought why not. A lot of time is wasted in setup of tools and machinery, so adding this third piece didn't add much time to the overall process.
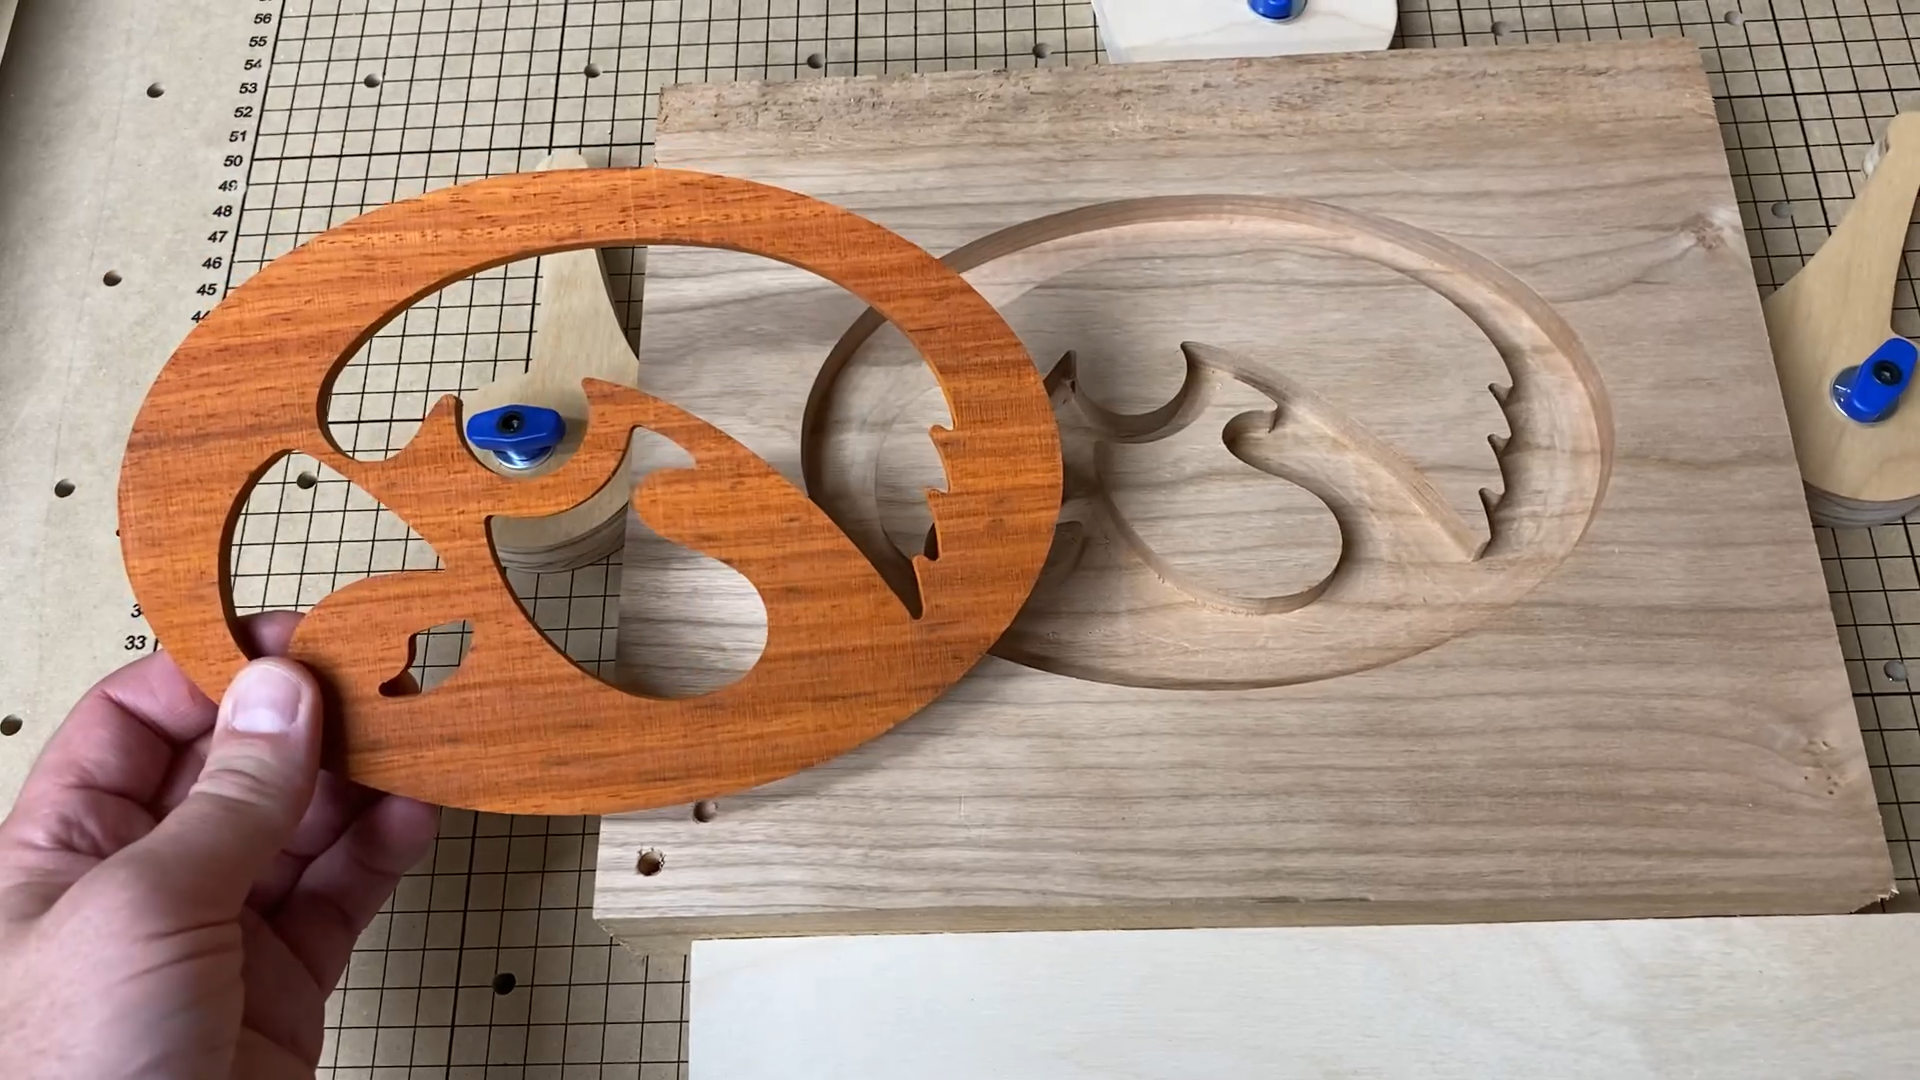
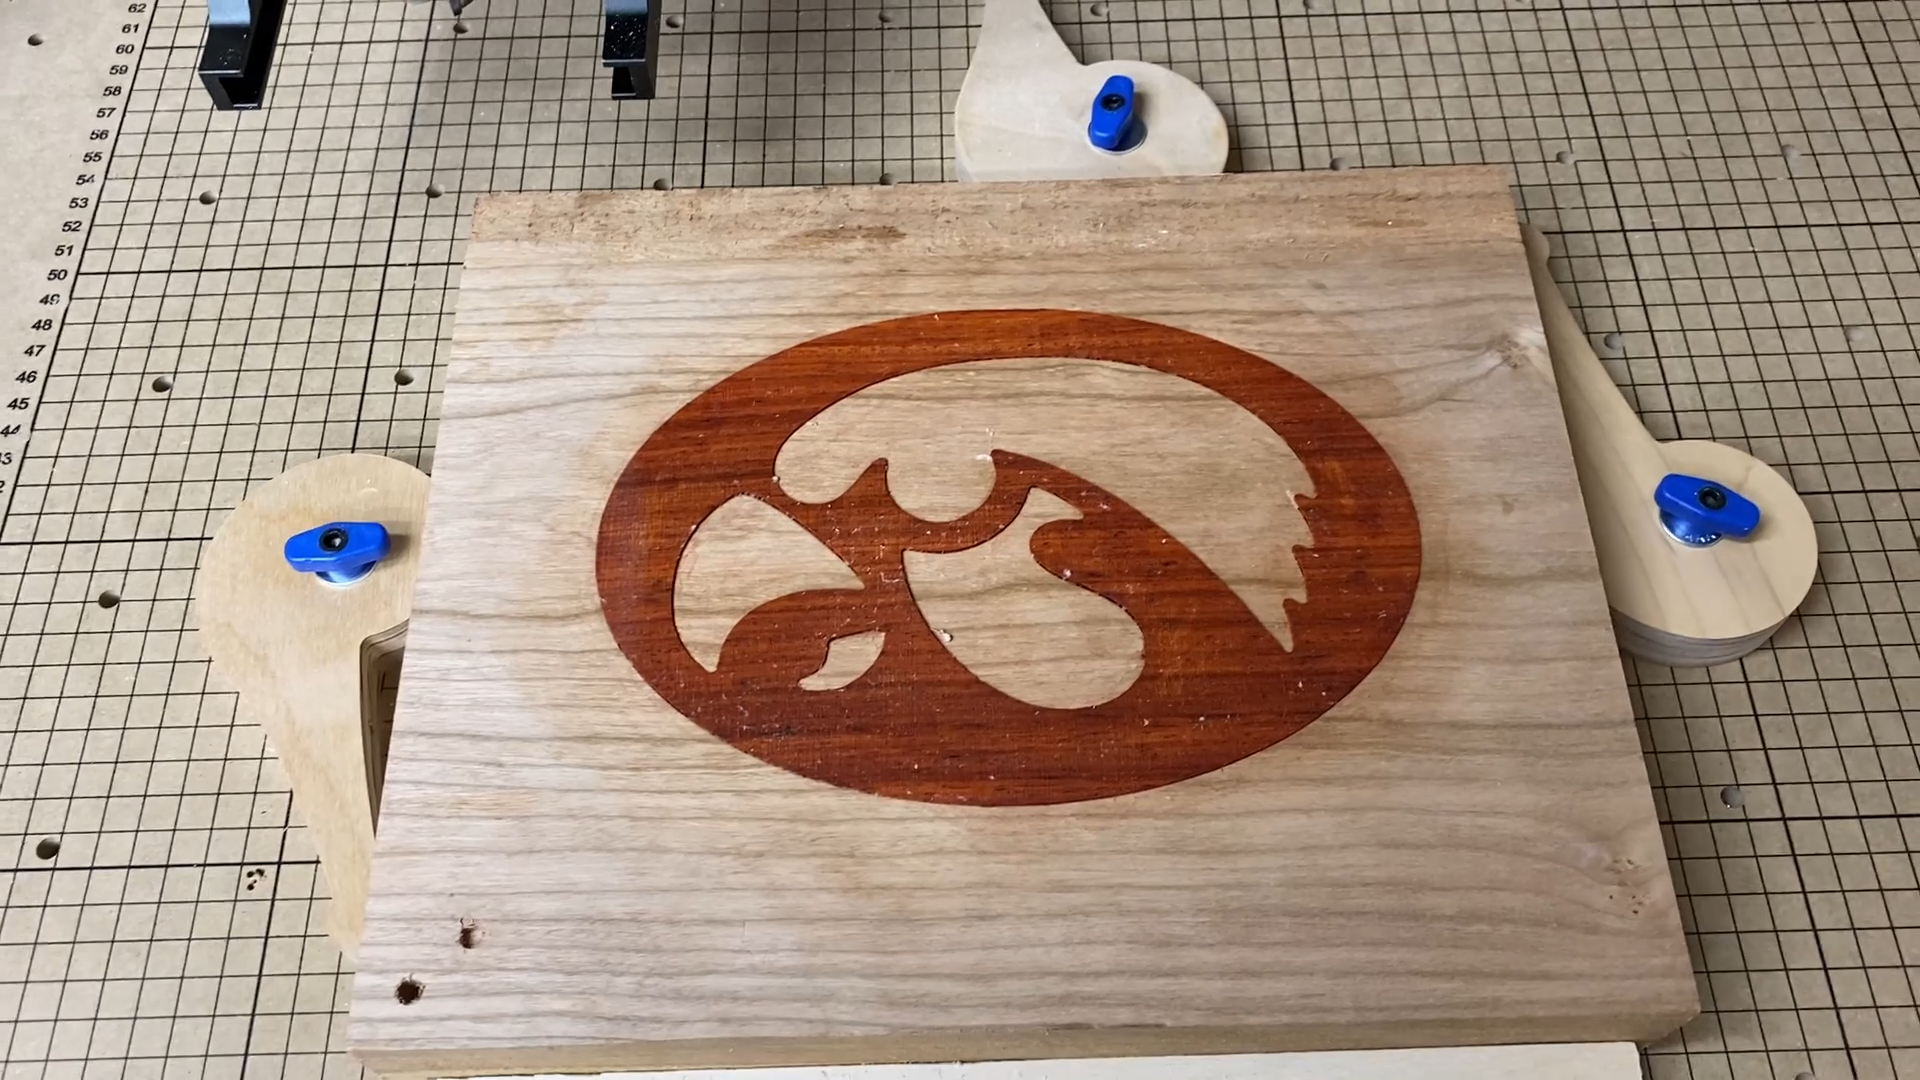
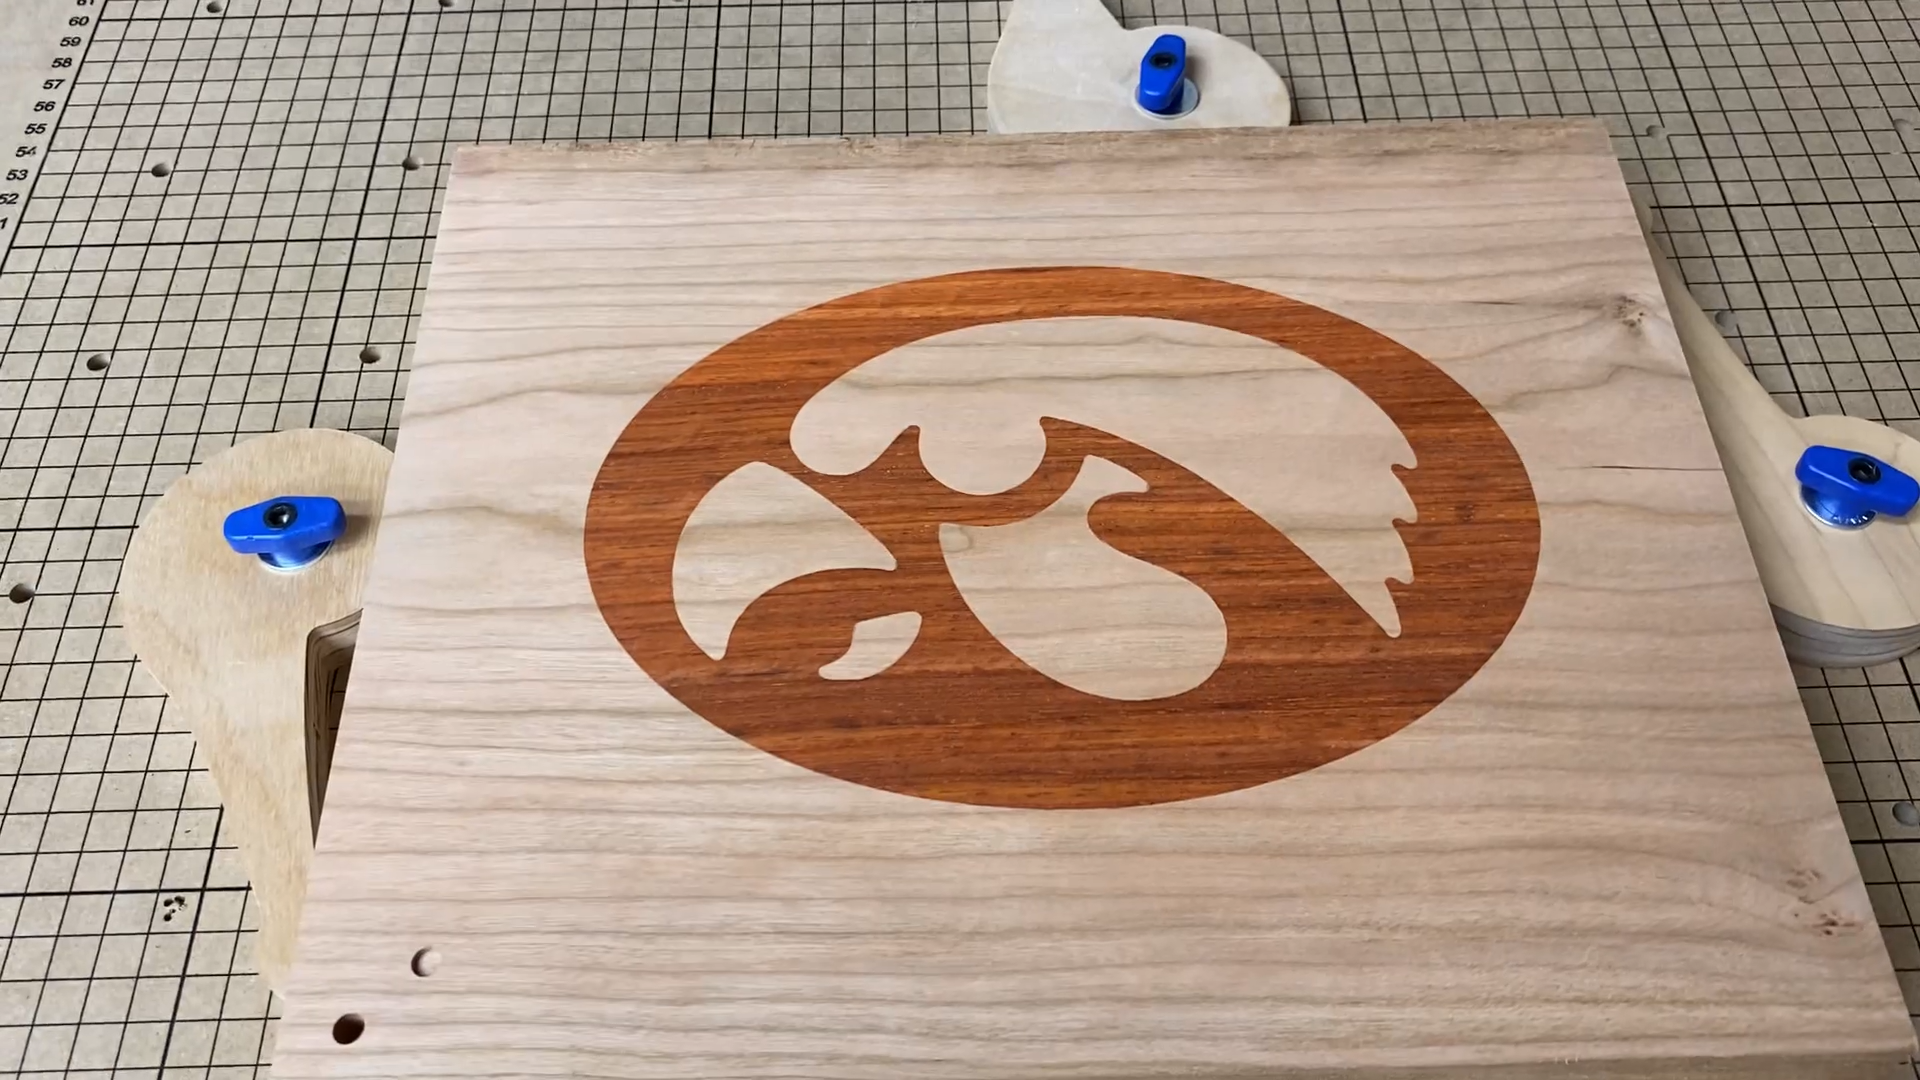
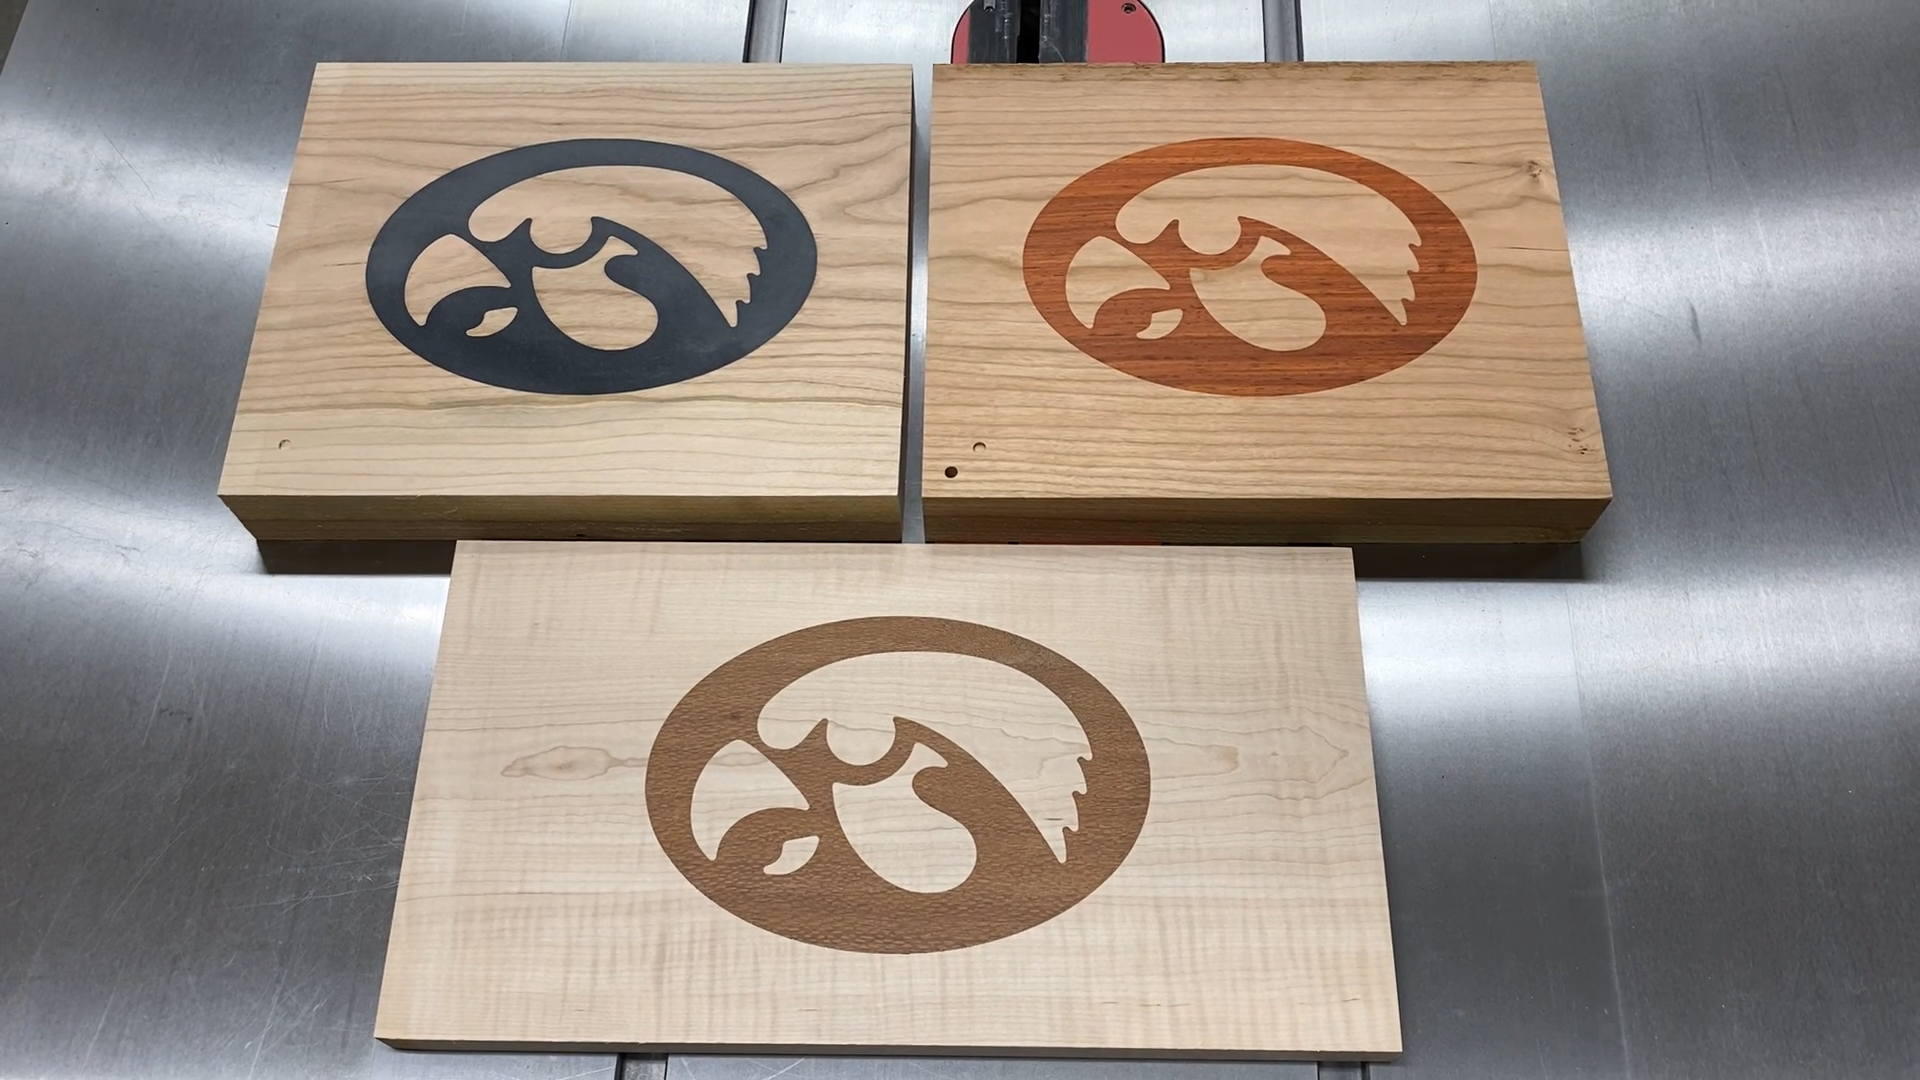
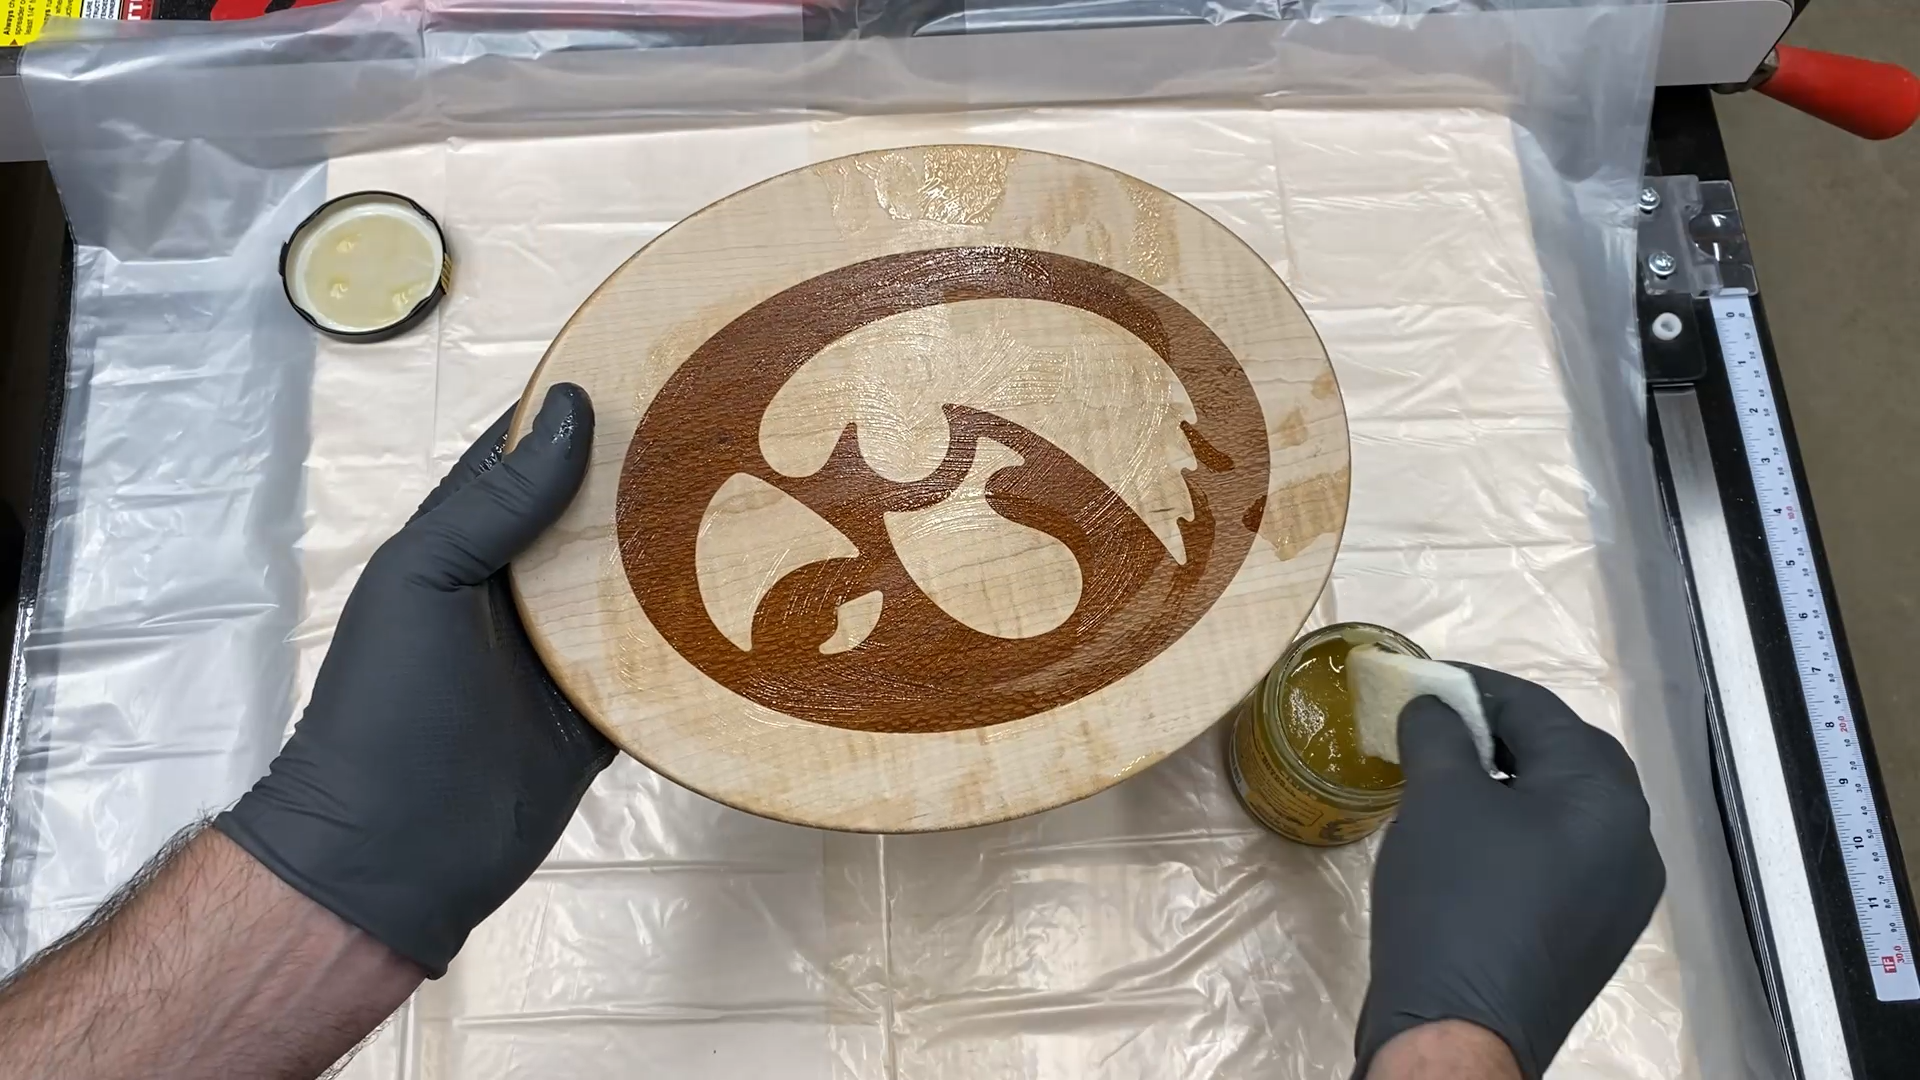
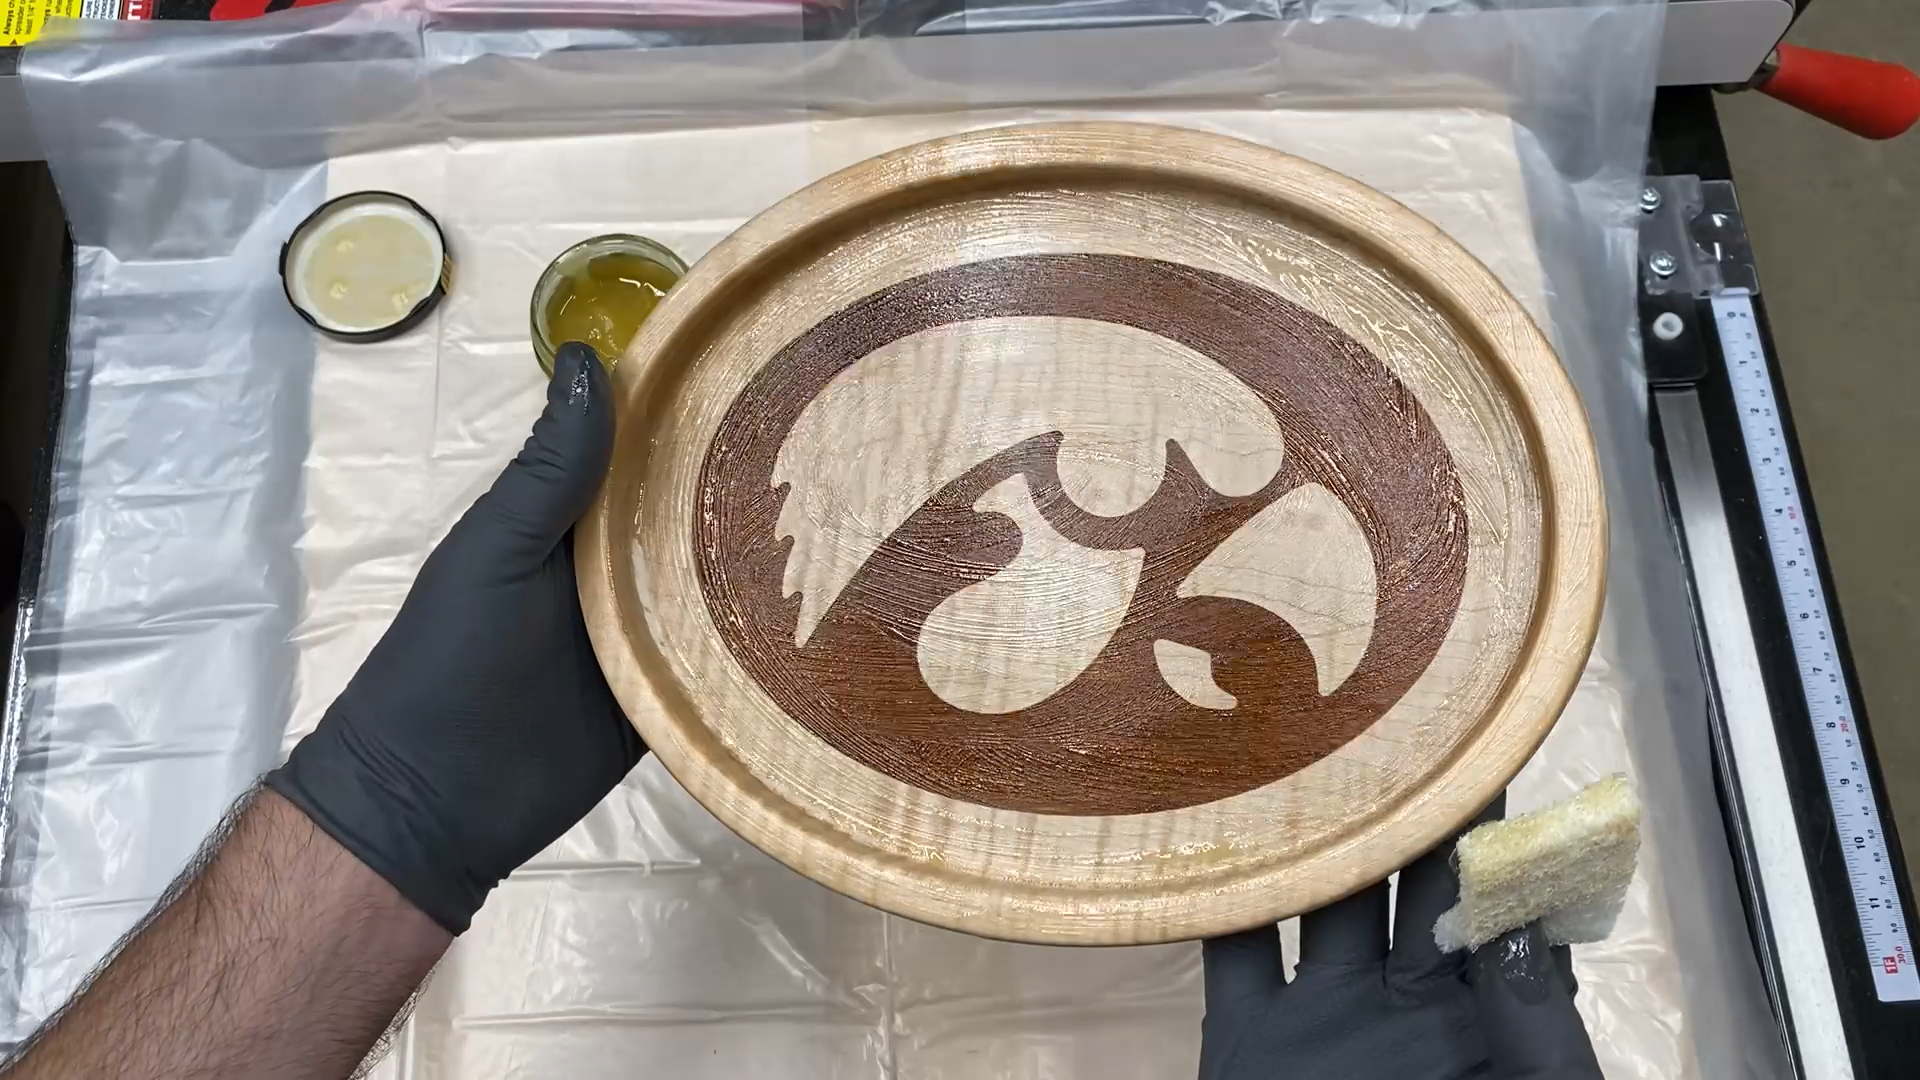
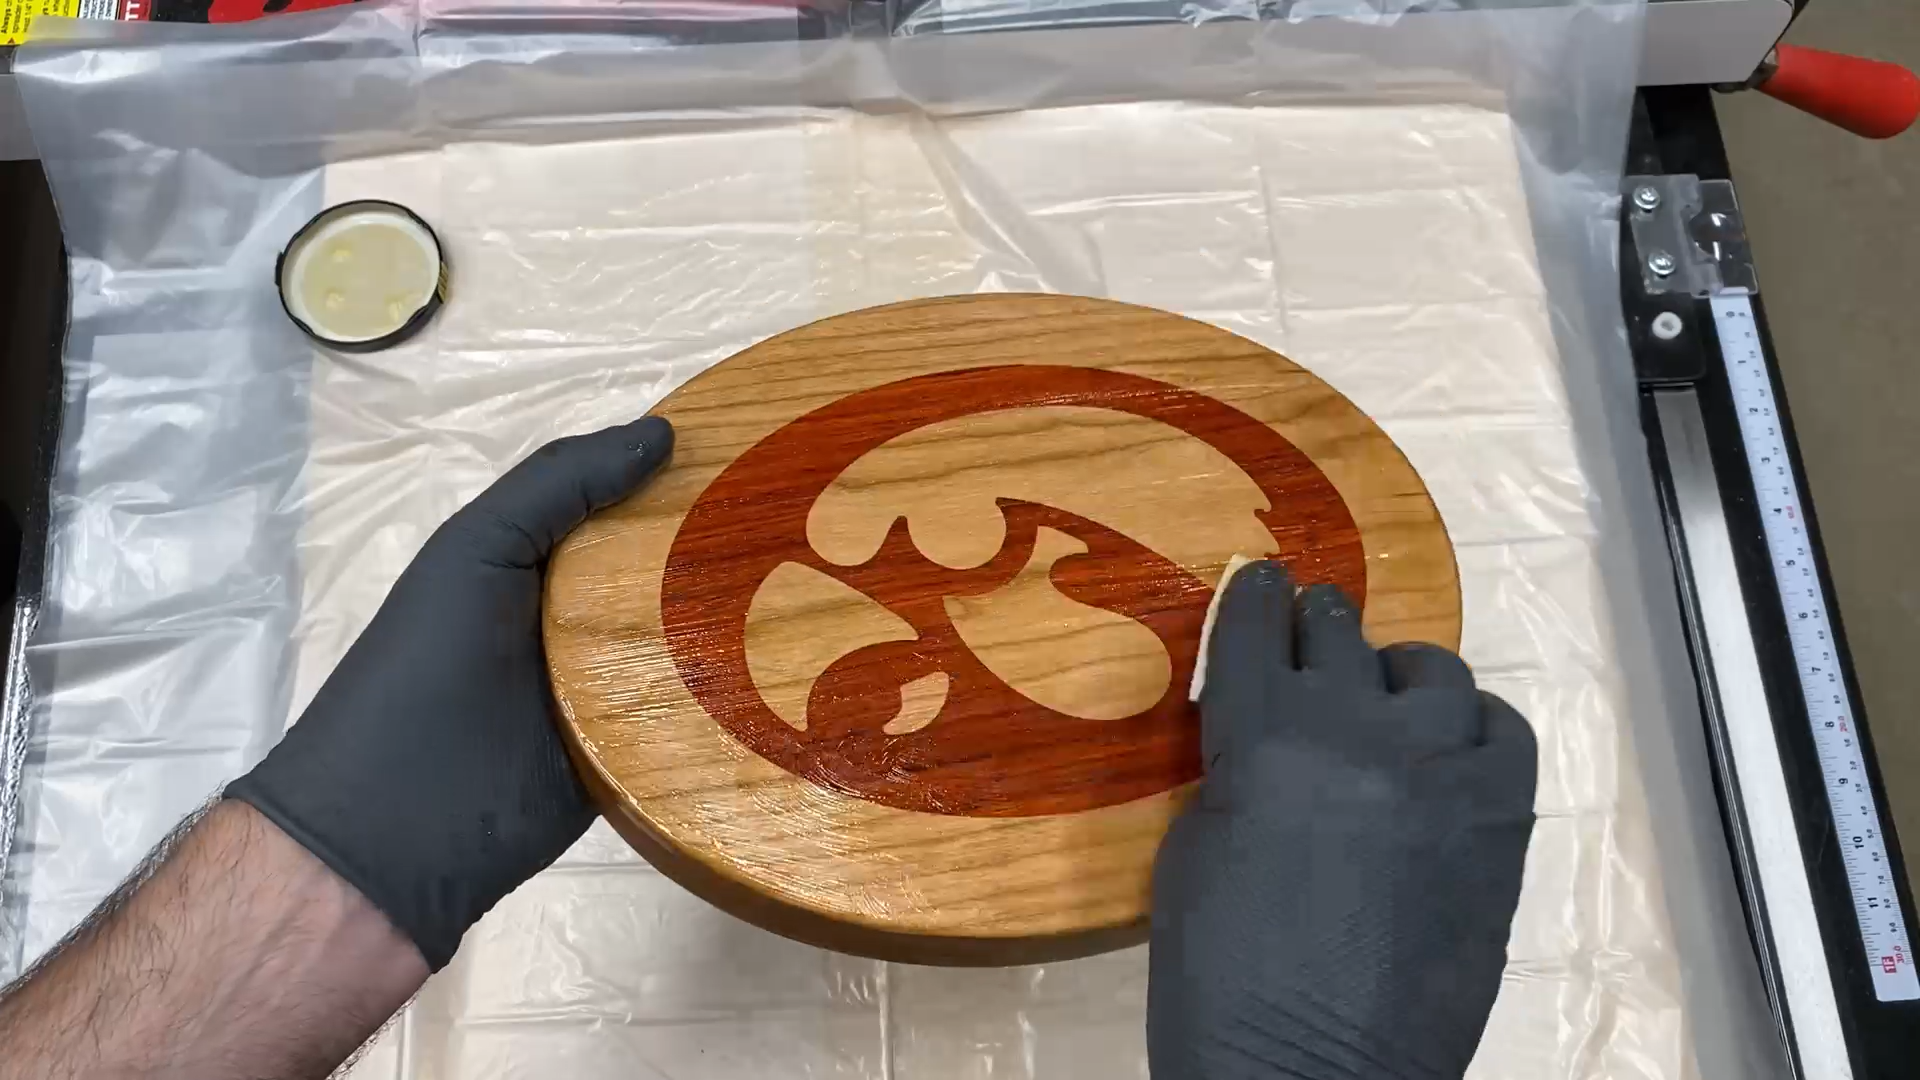
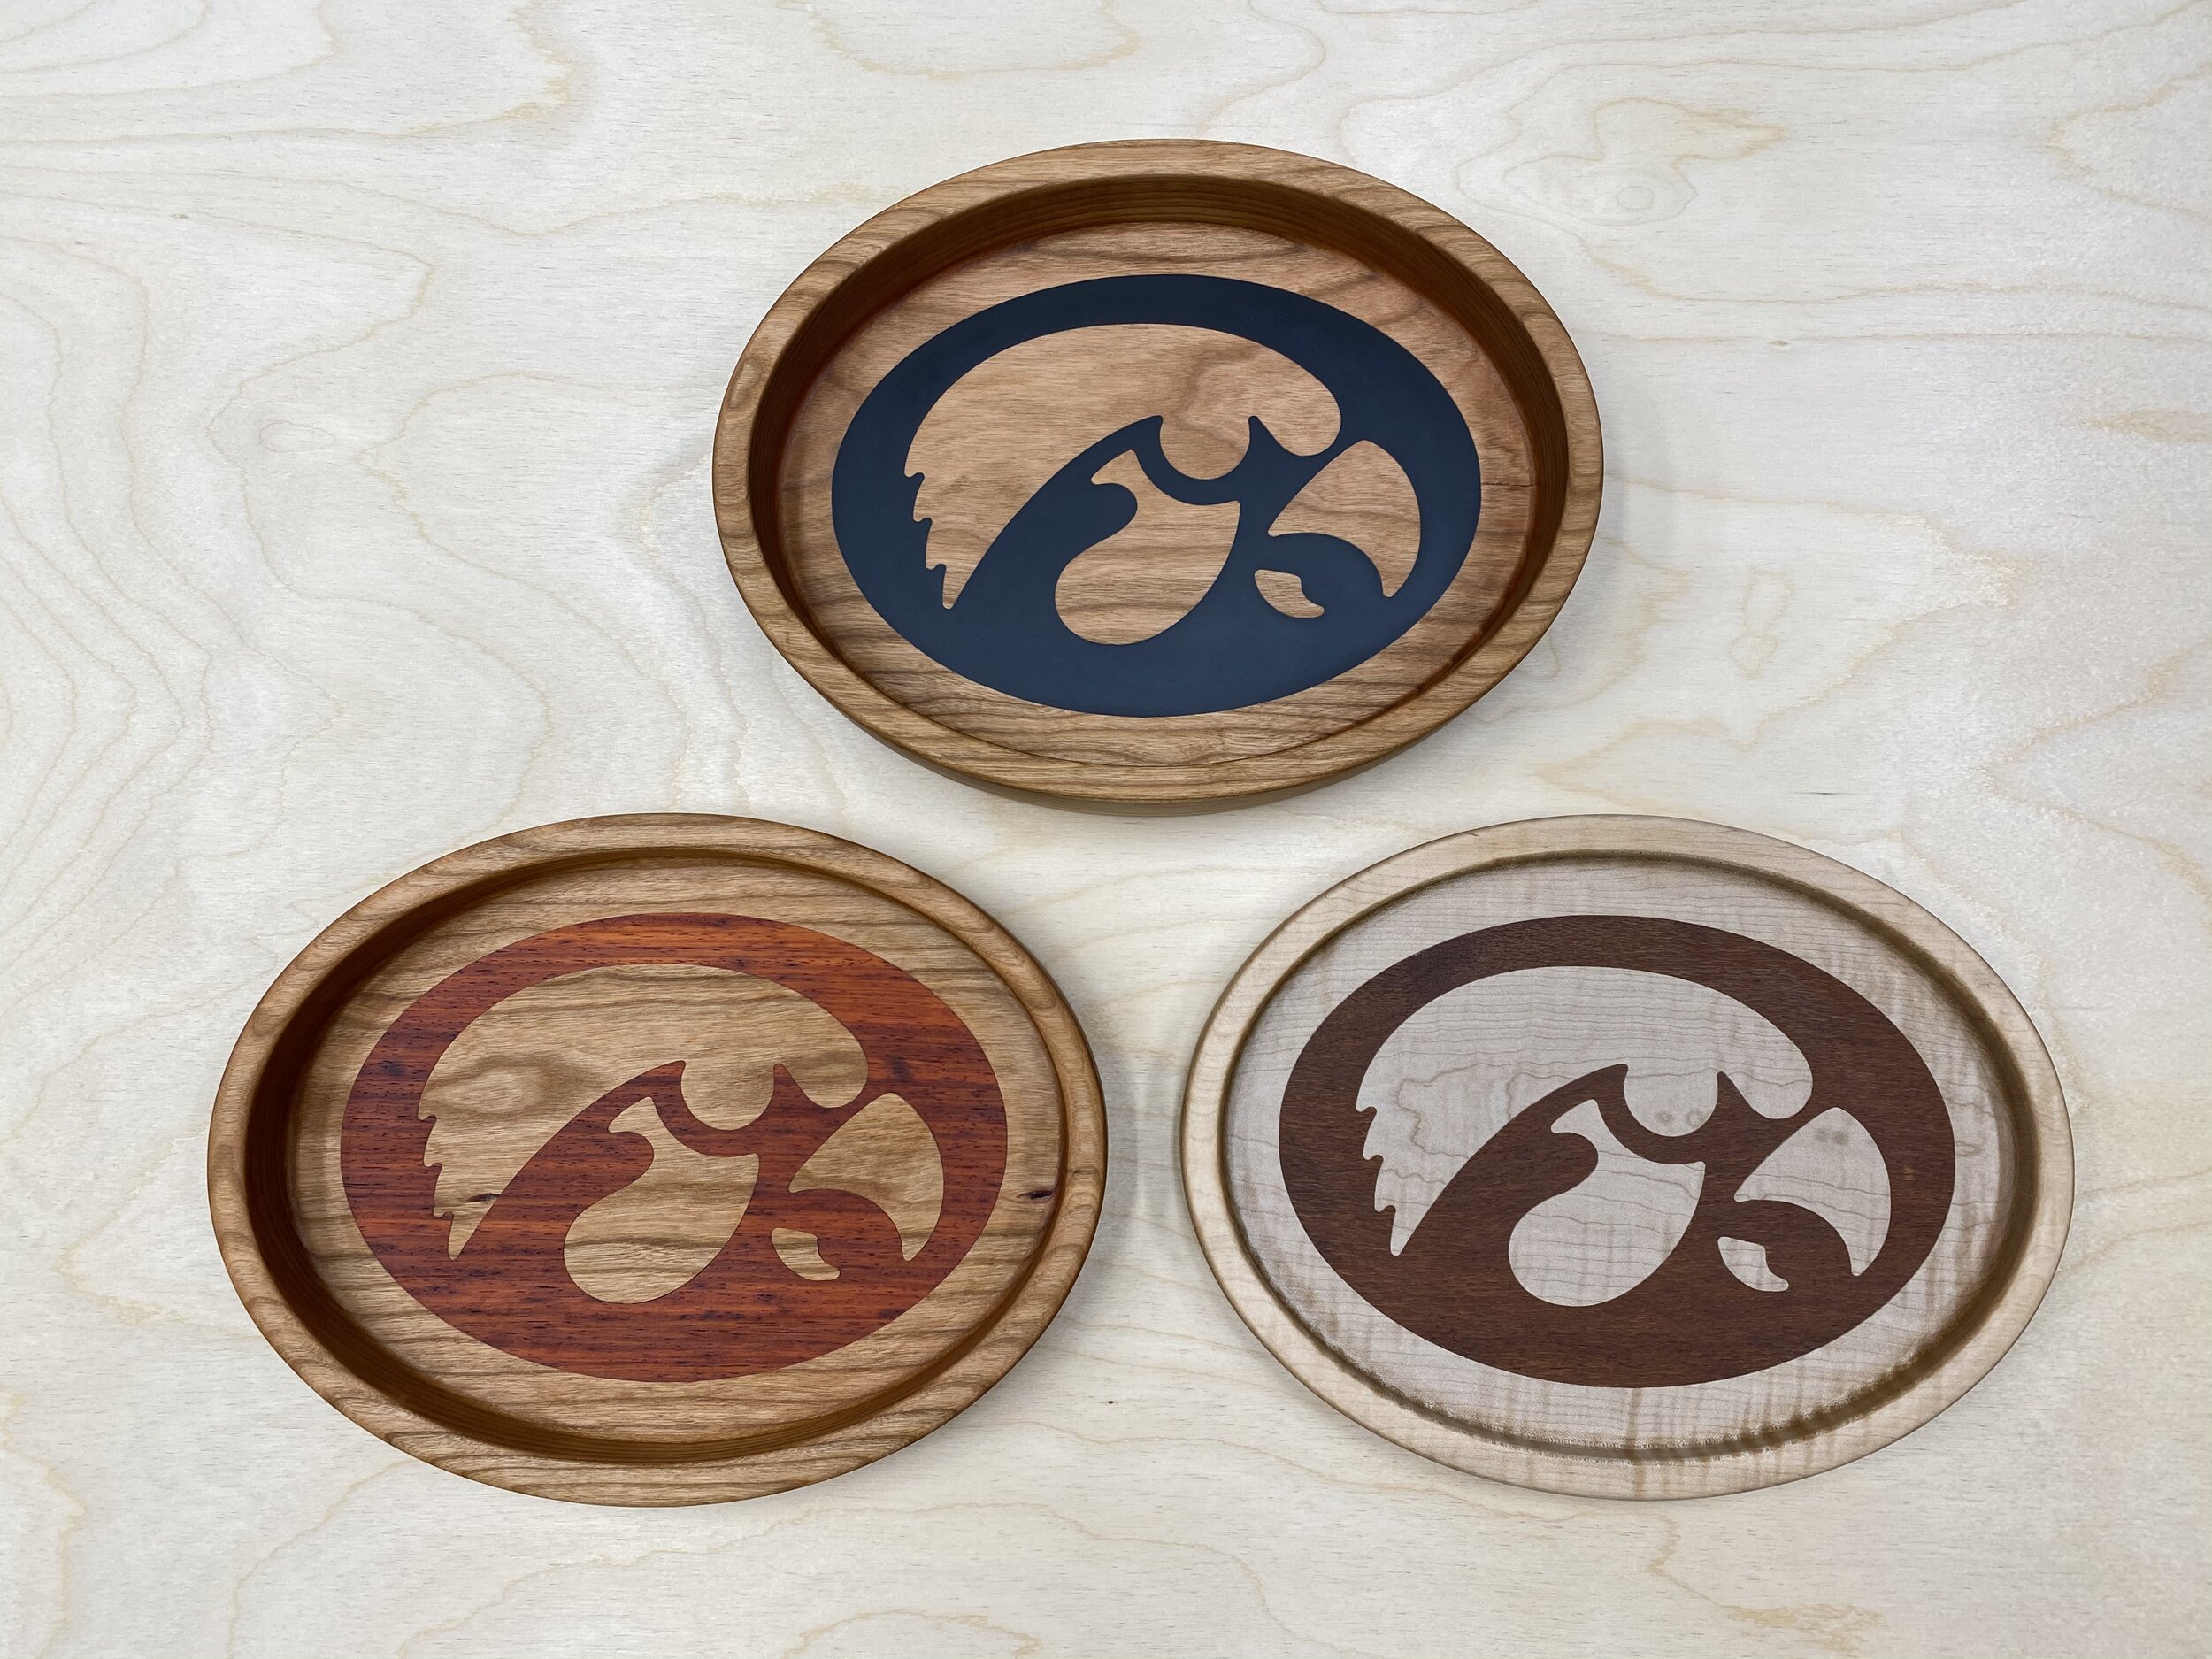
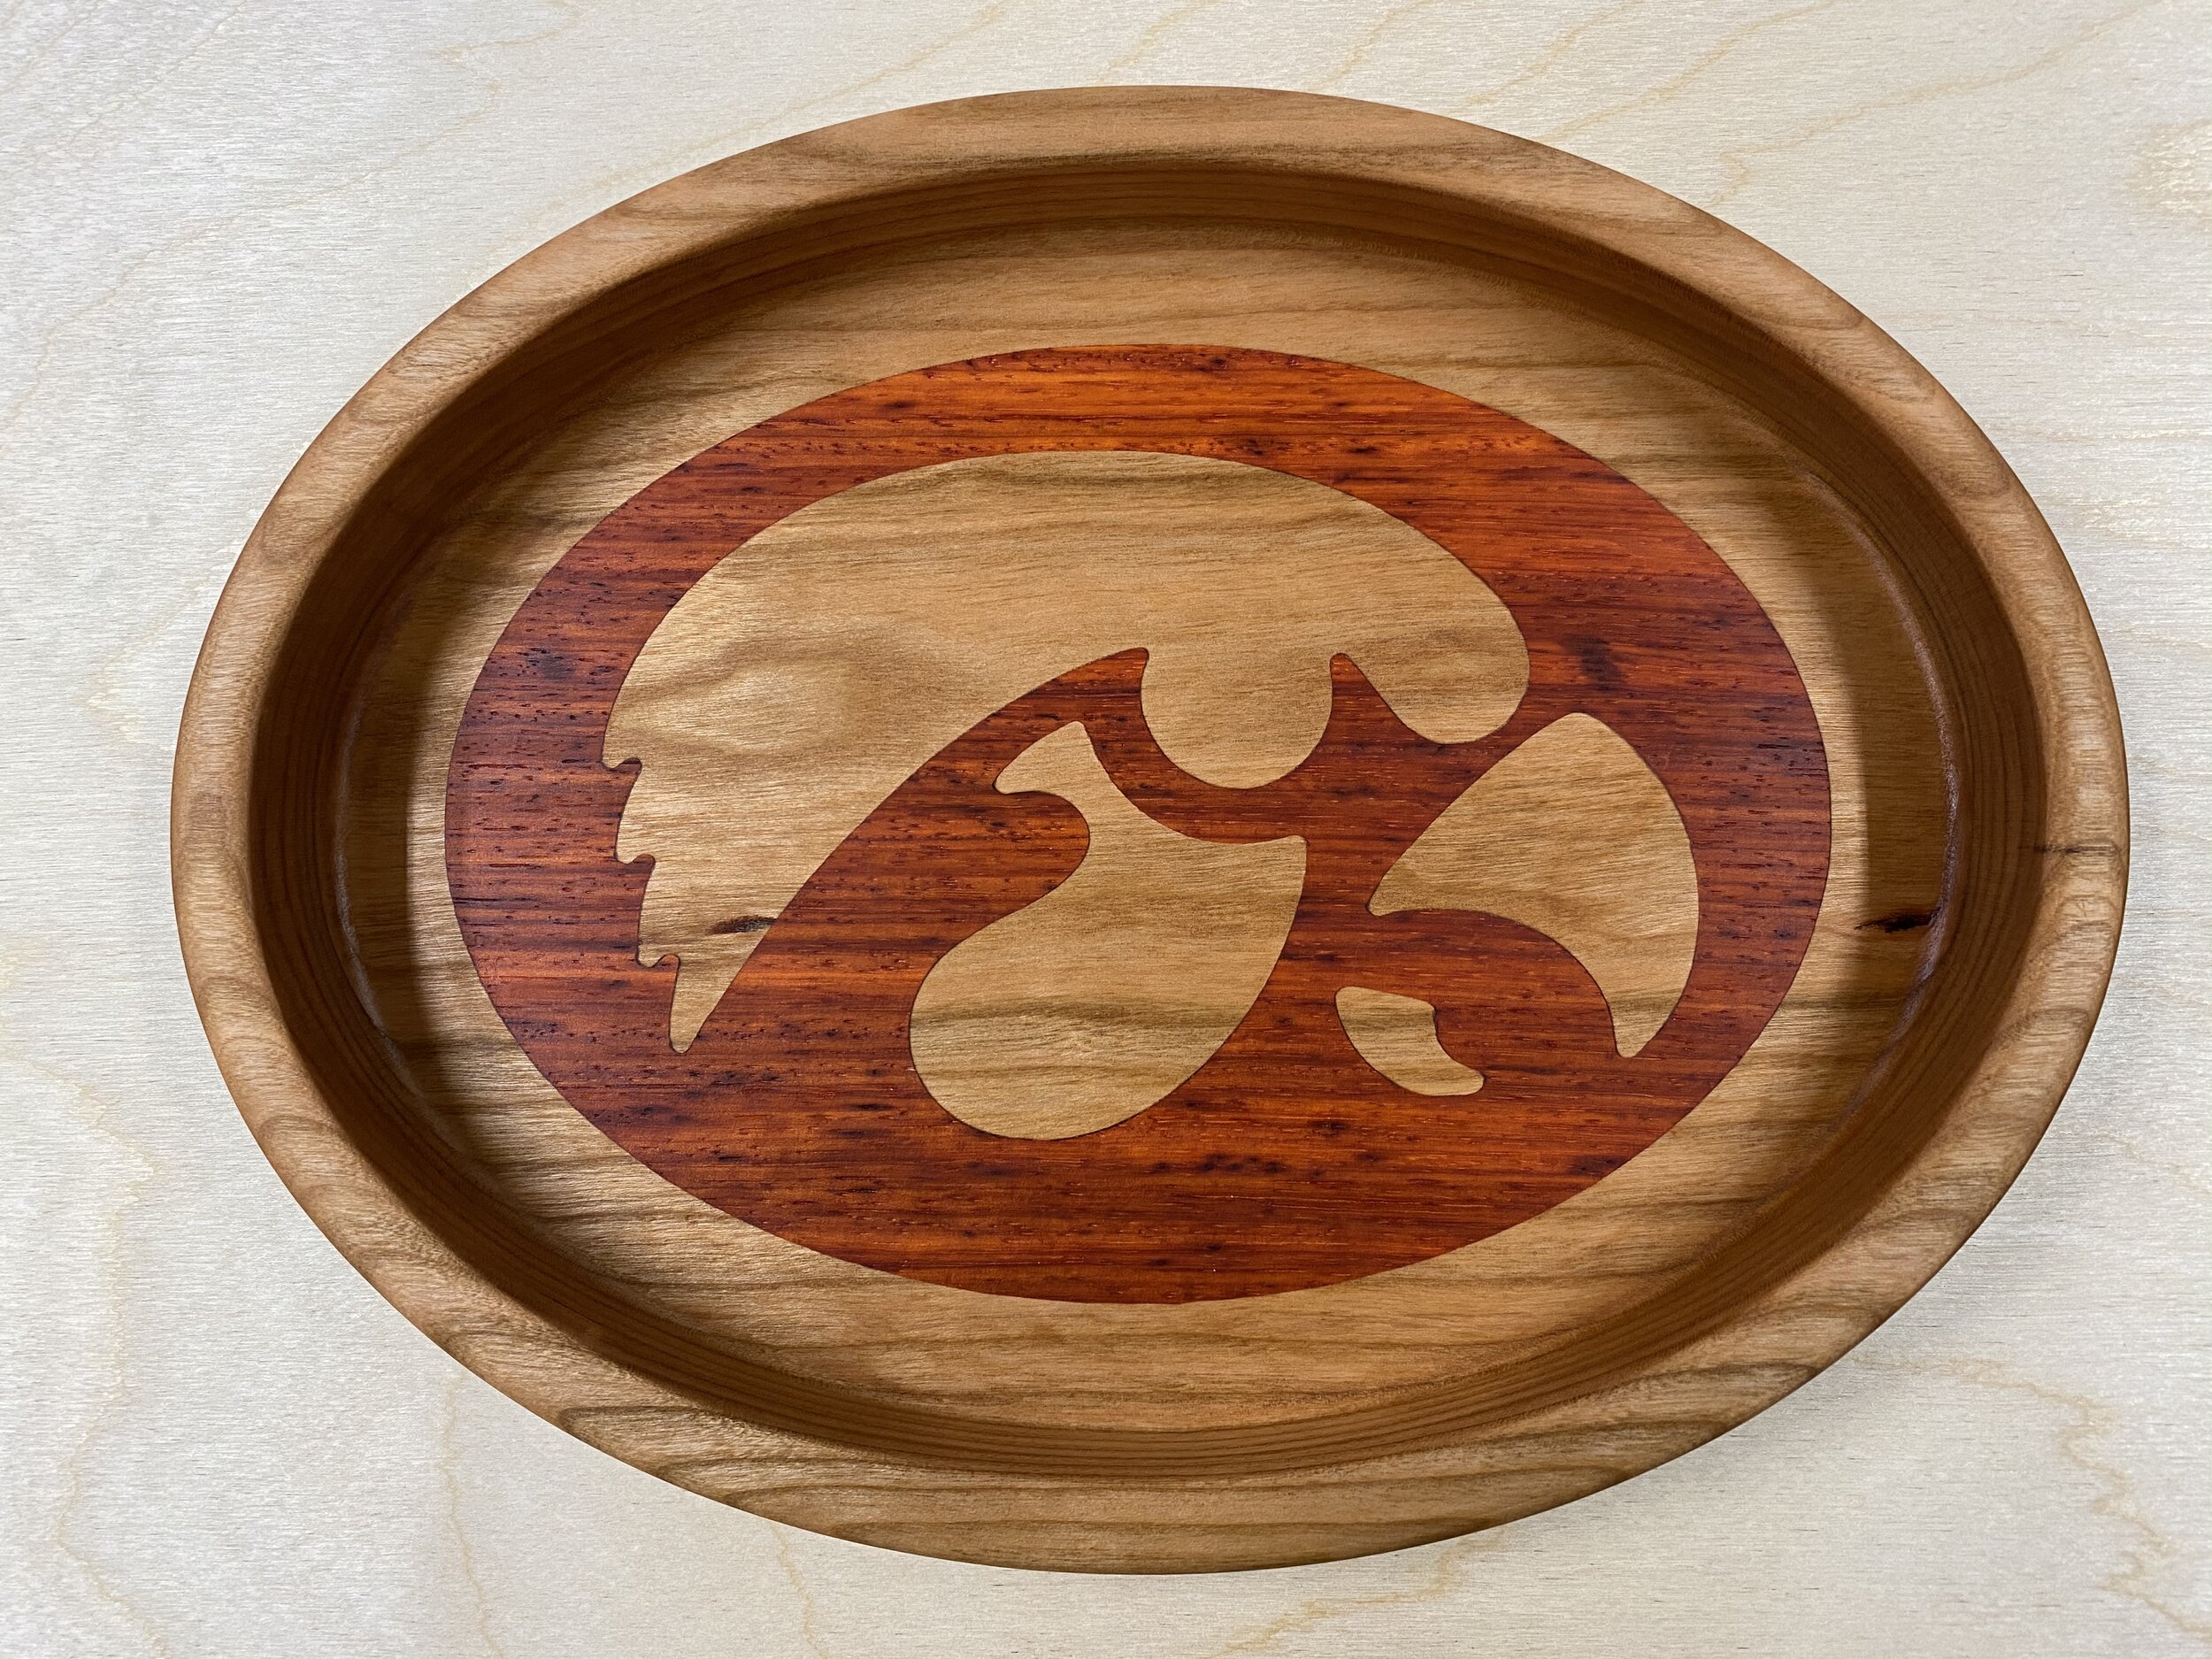
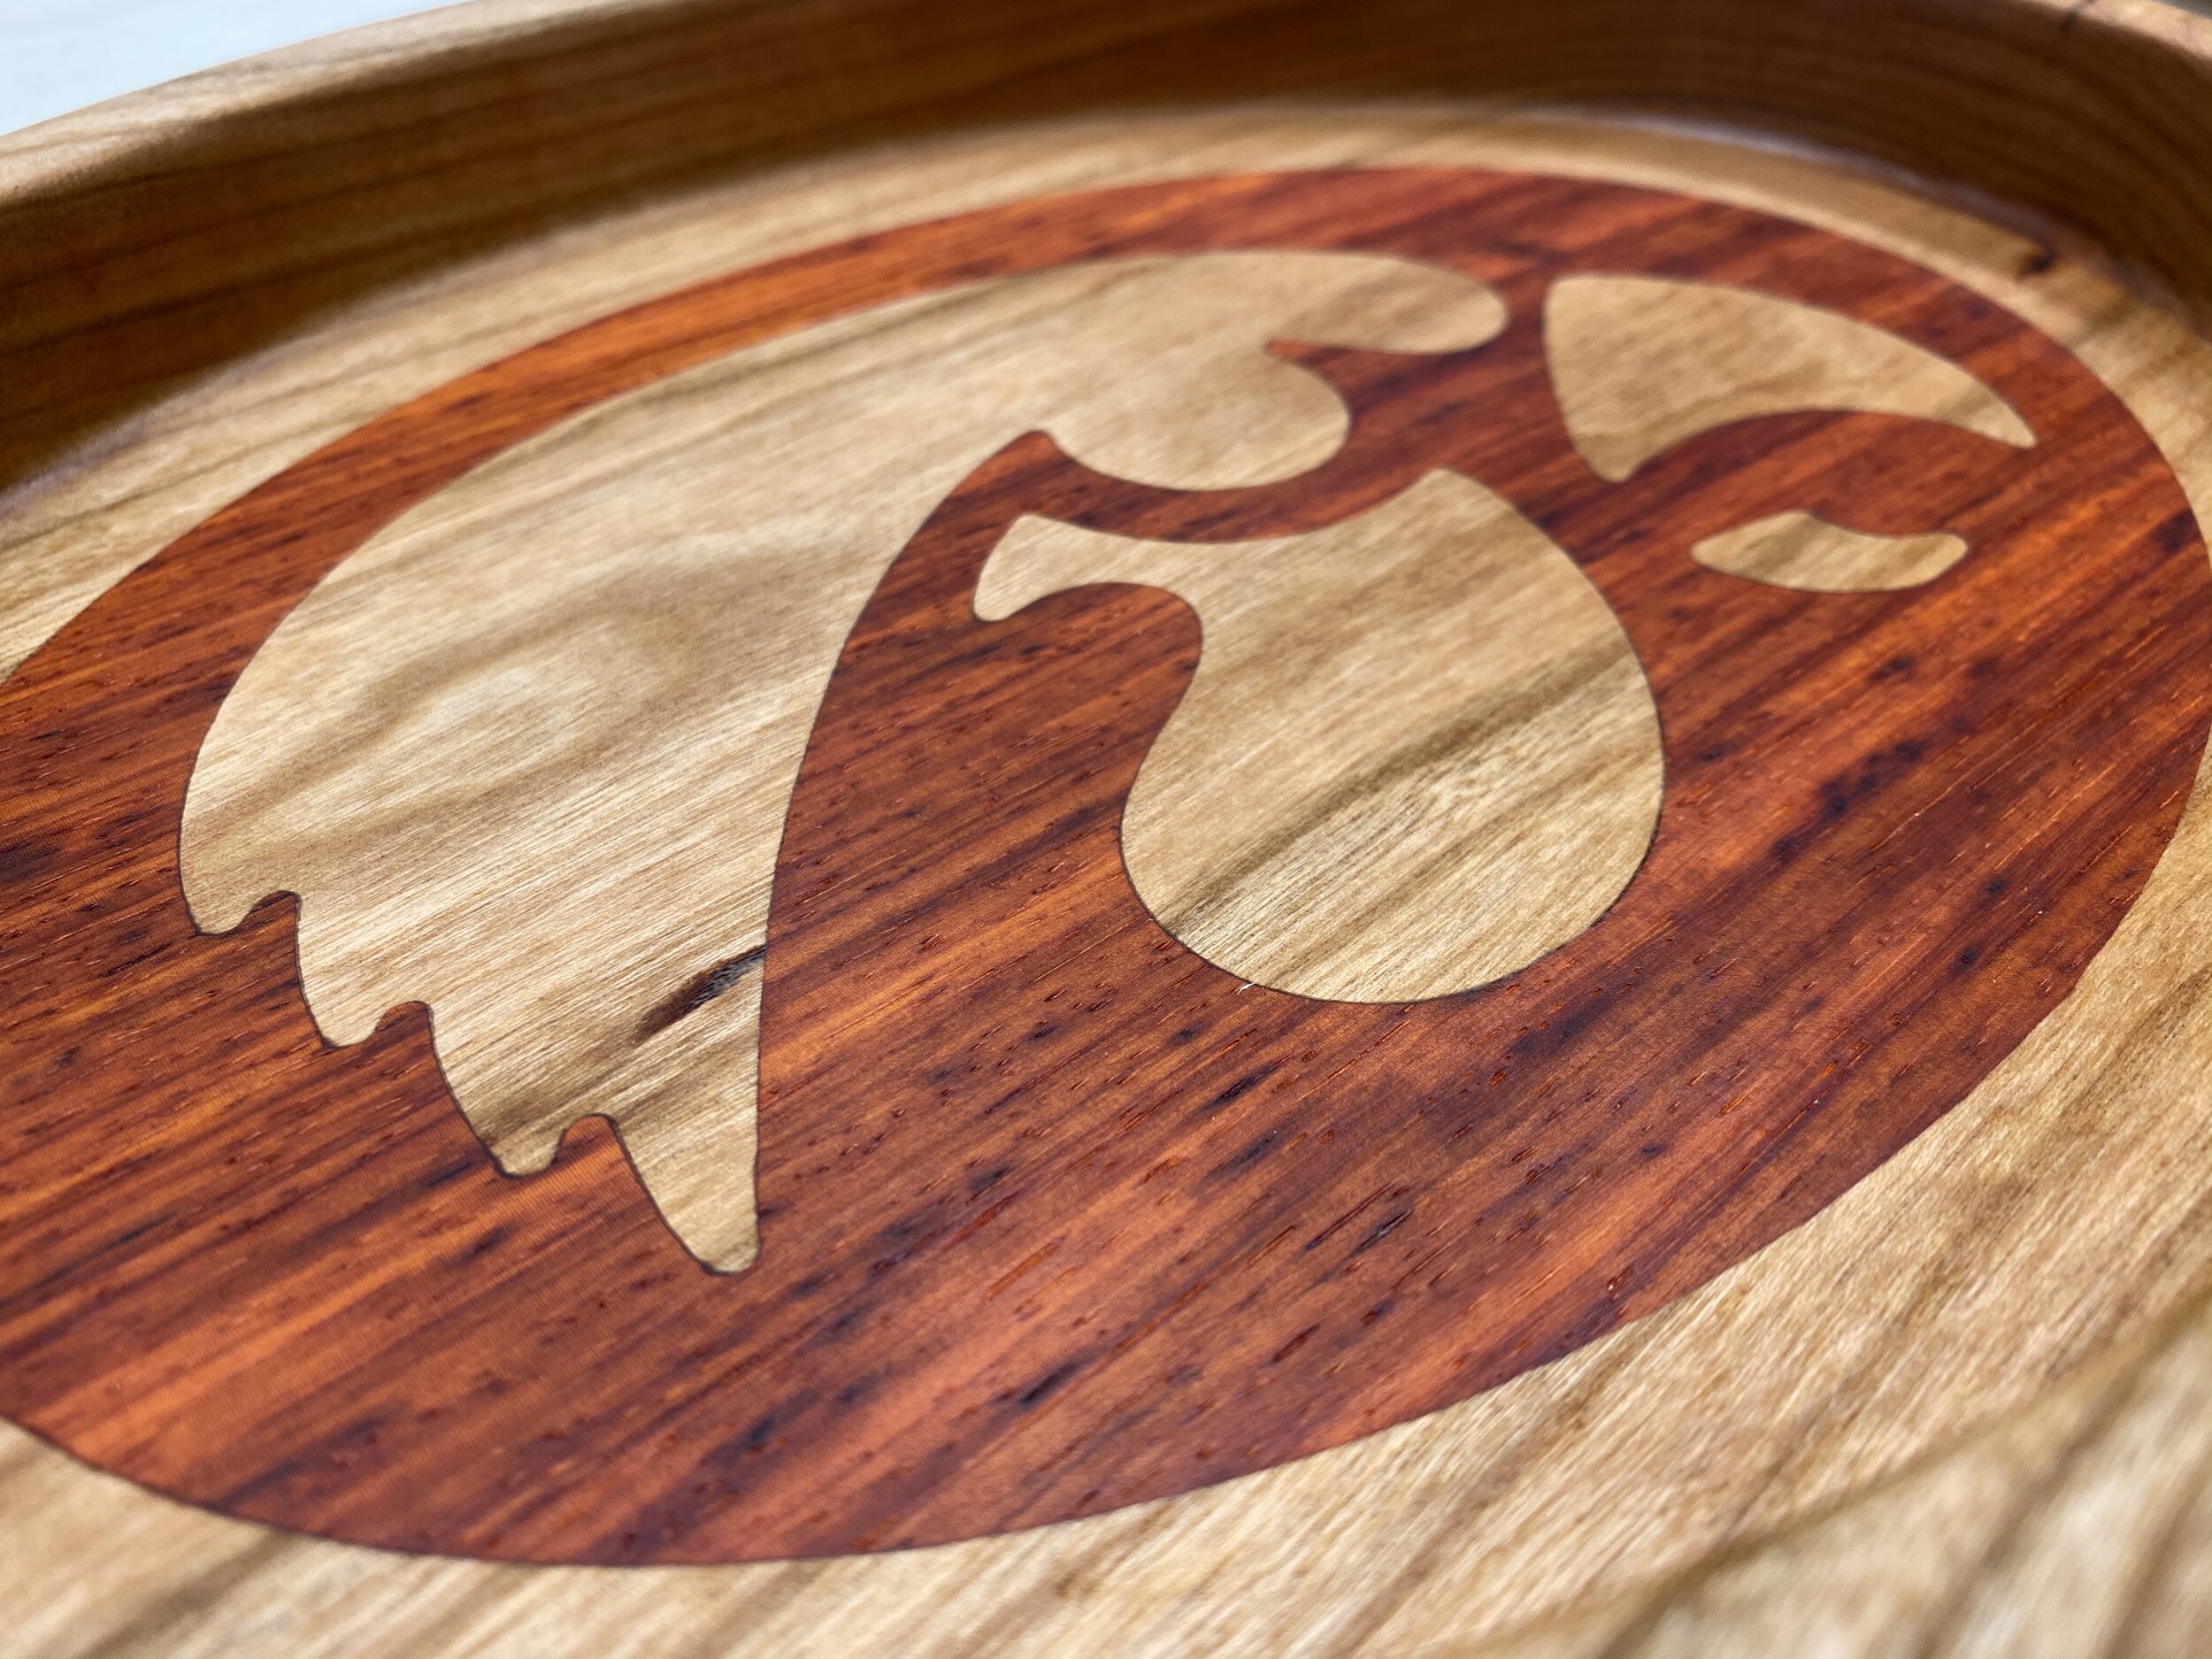
Bowl 1 had a base piece of 8/4 cherry with padauk wood as the inlay.
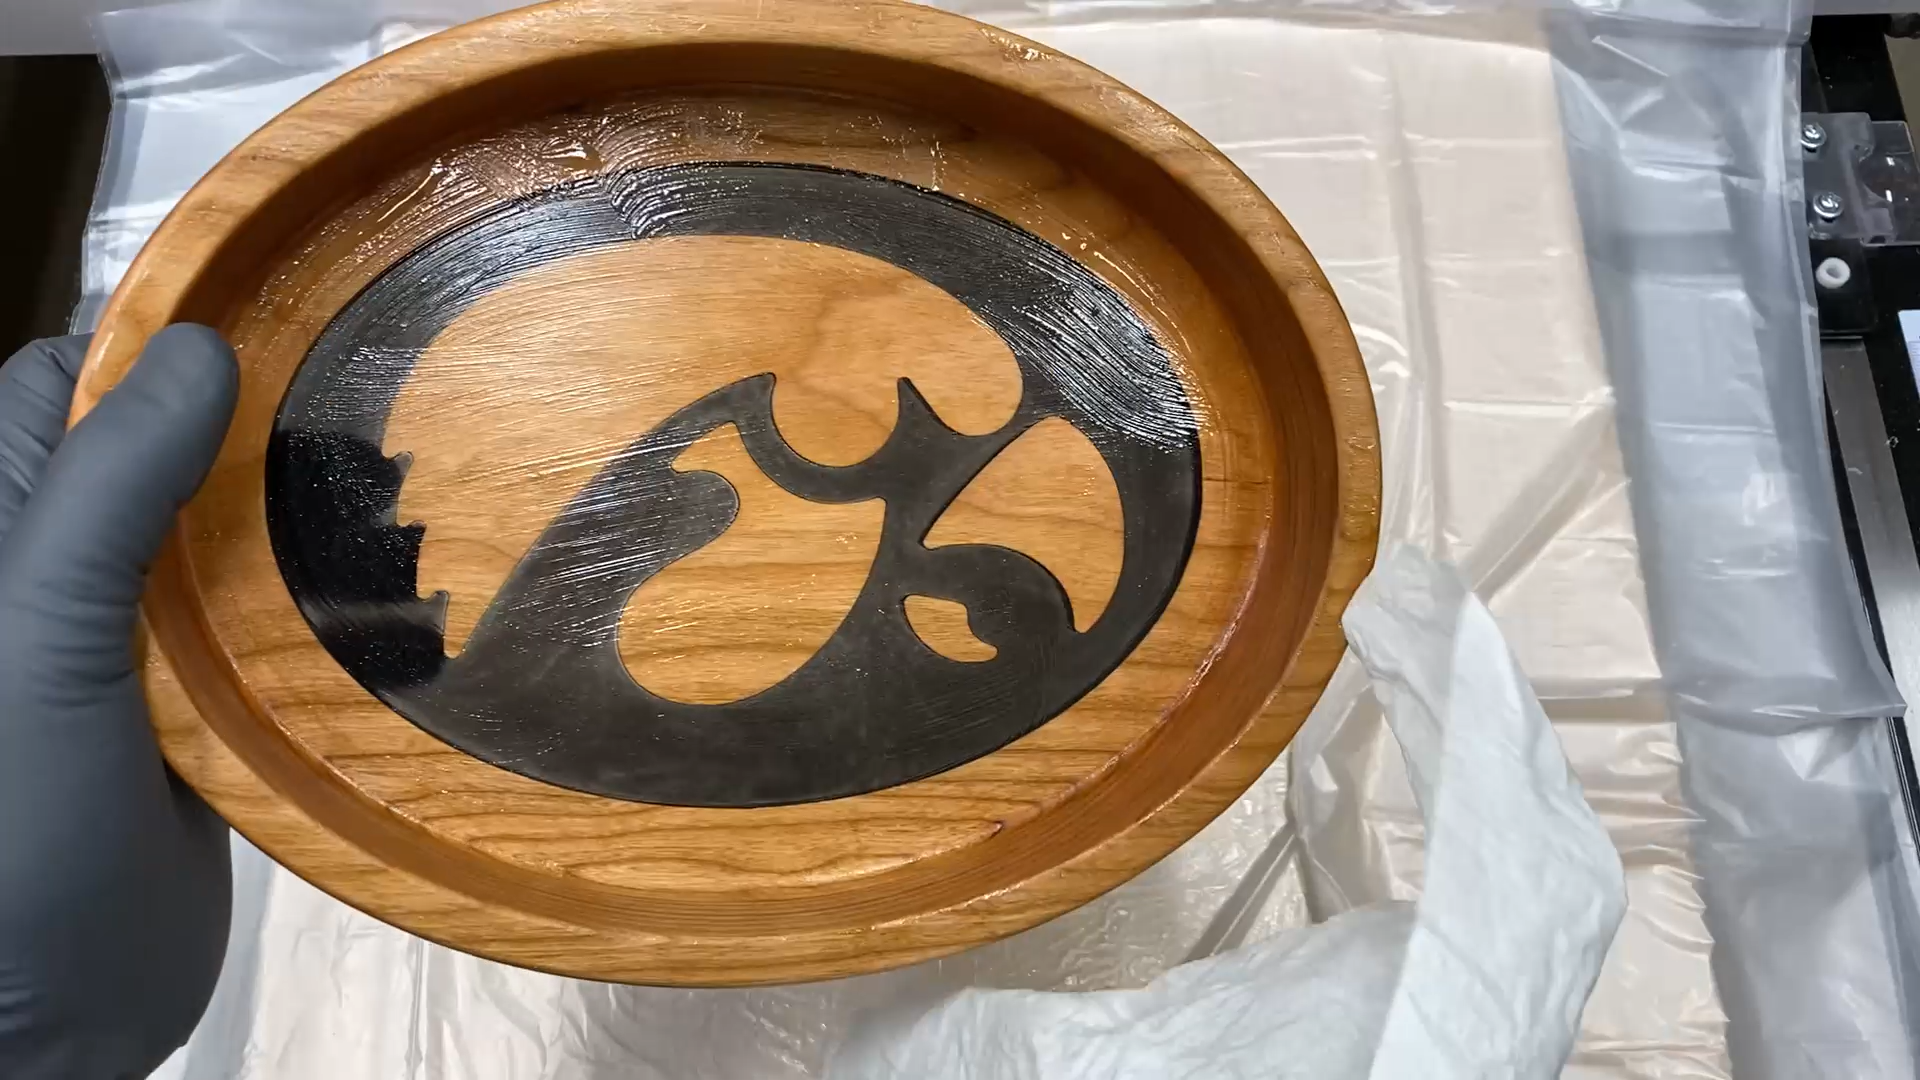
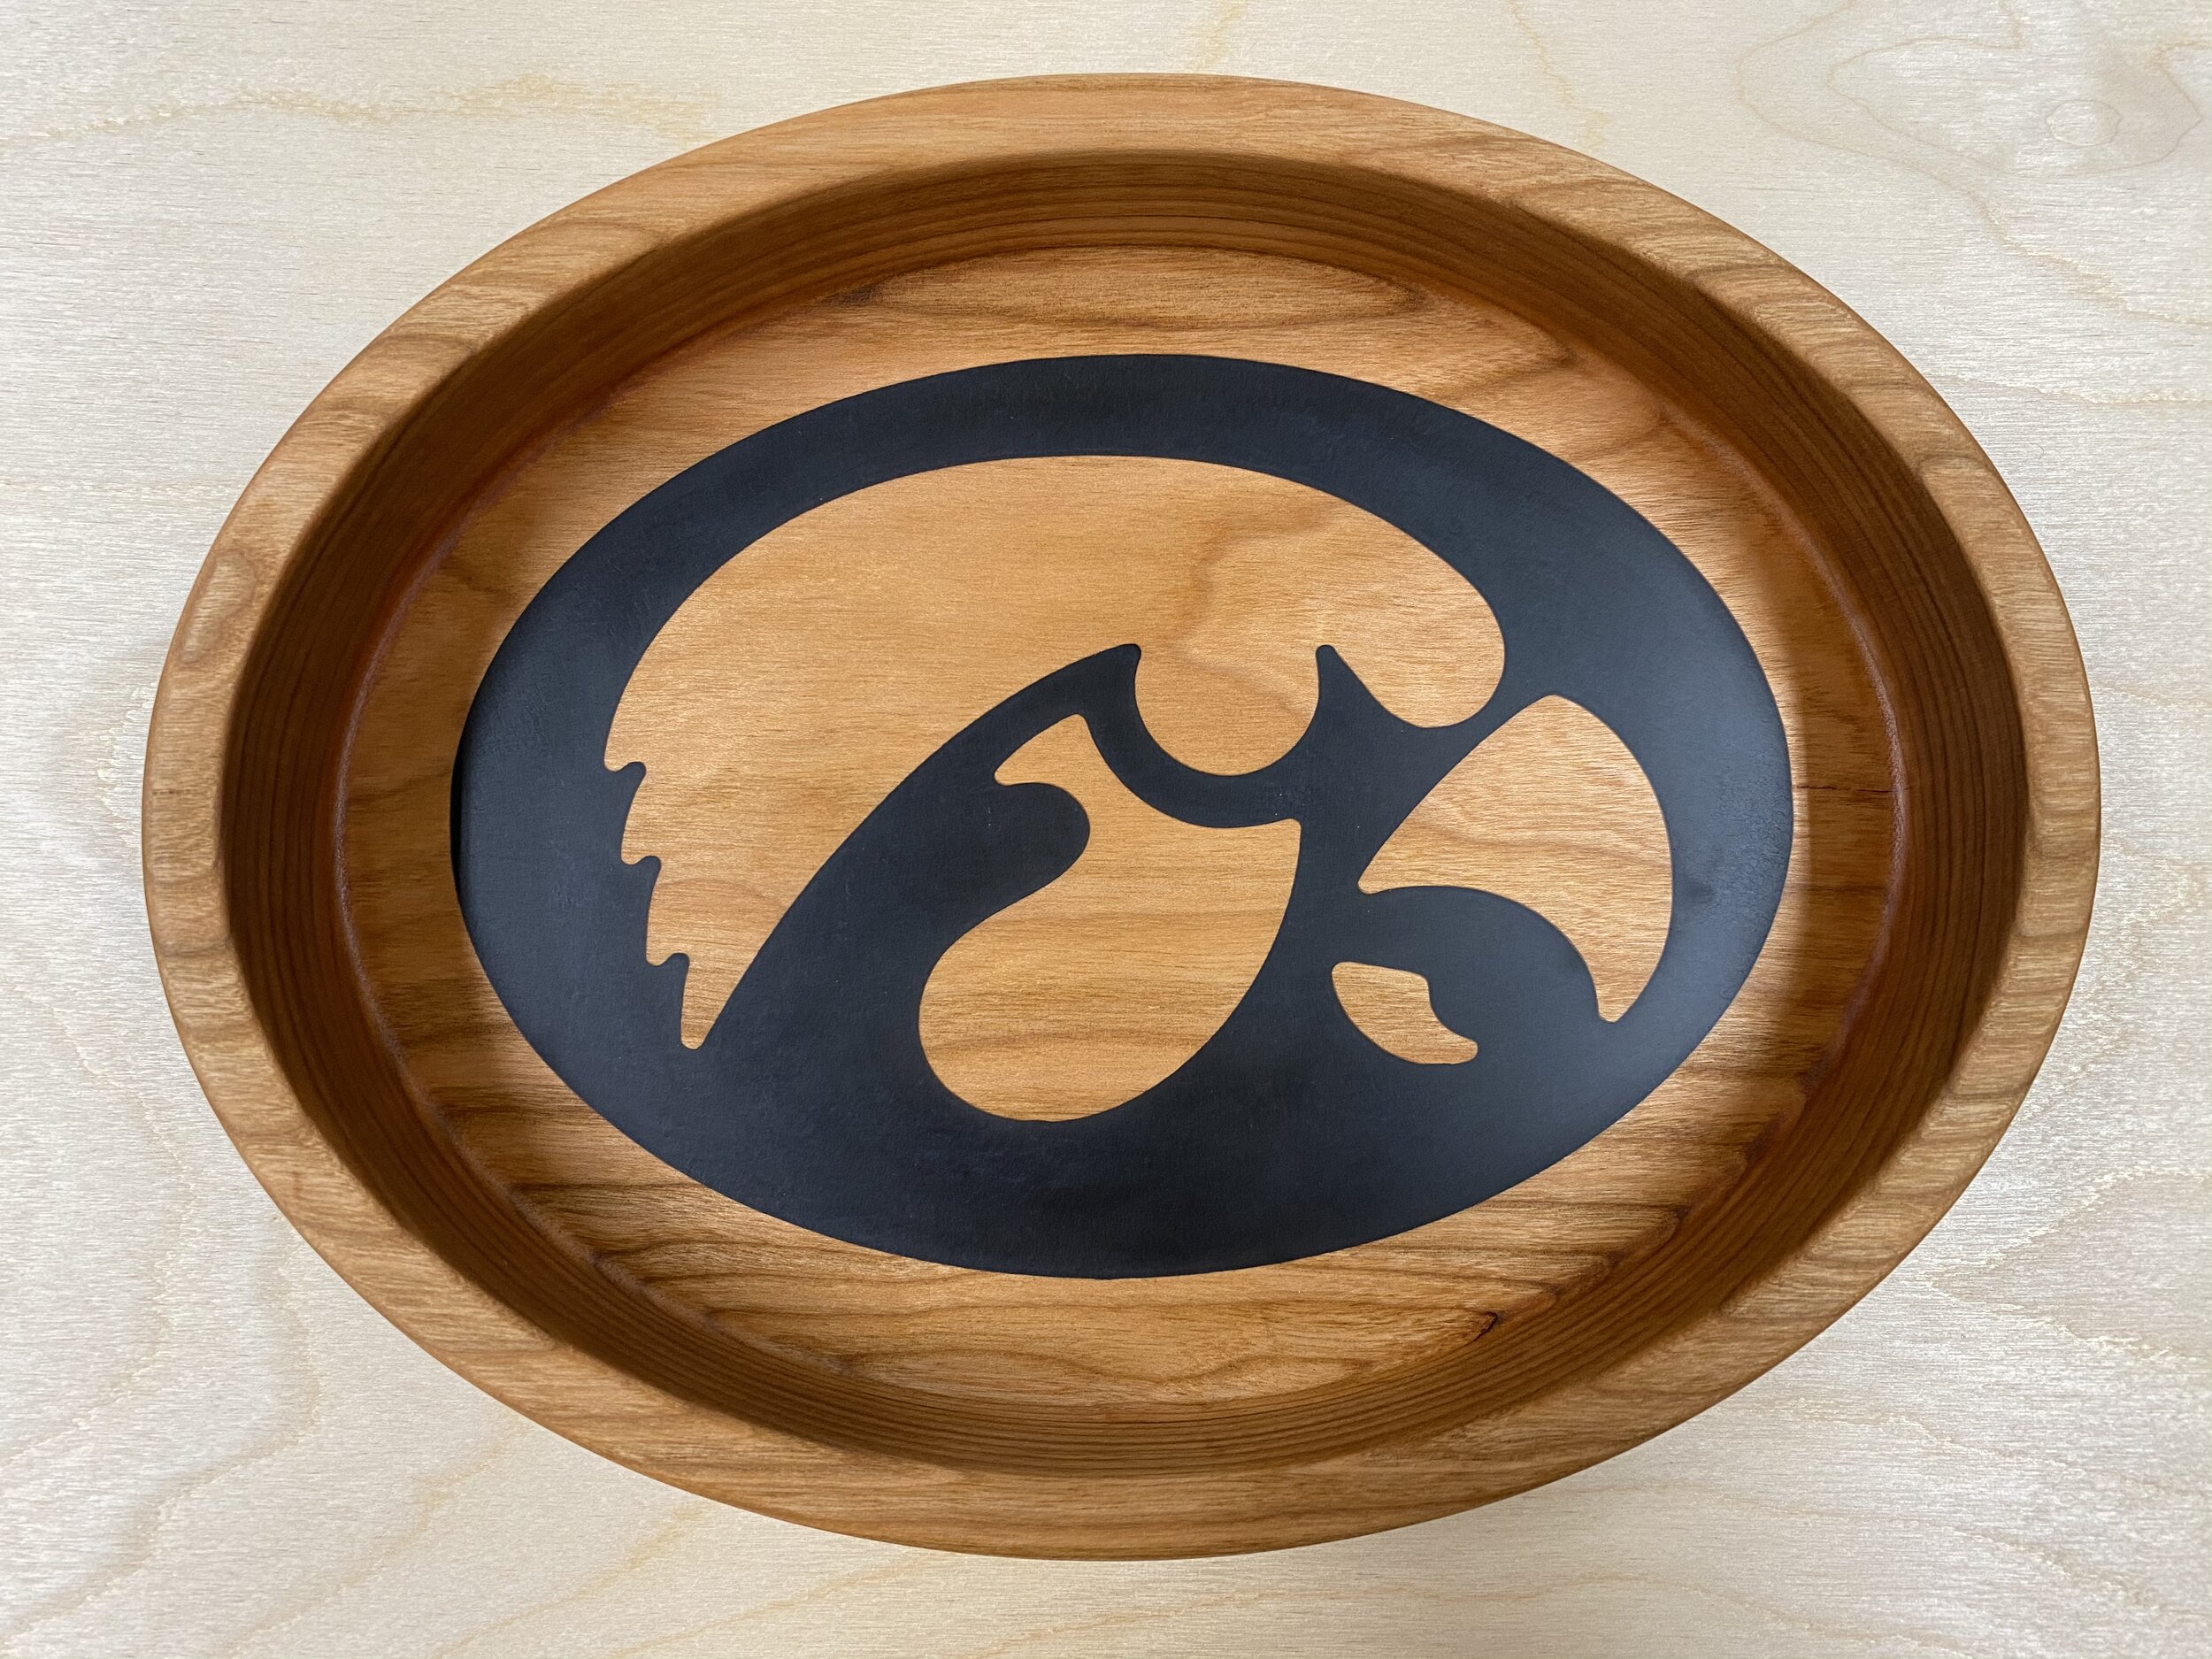
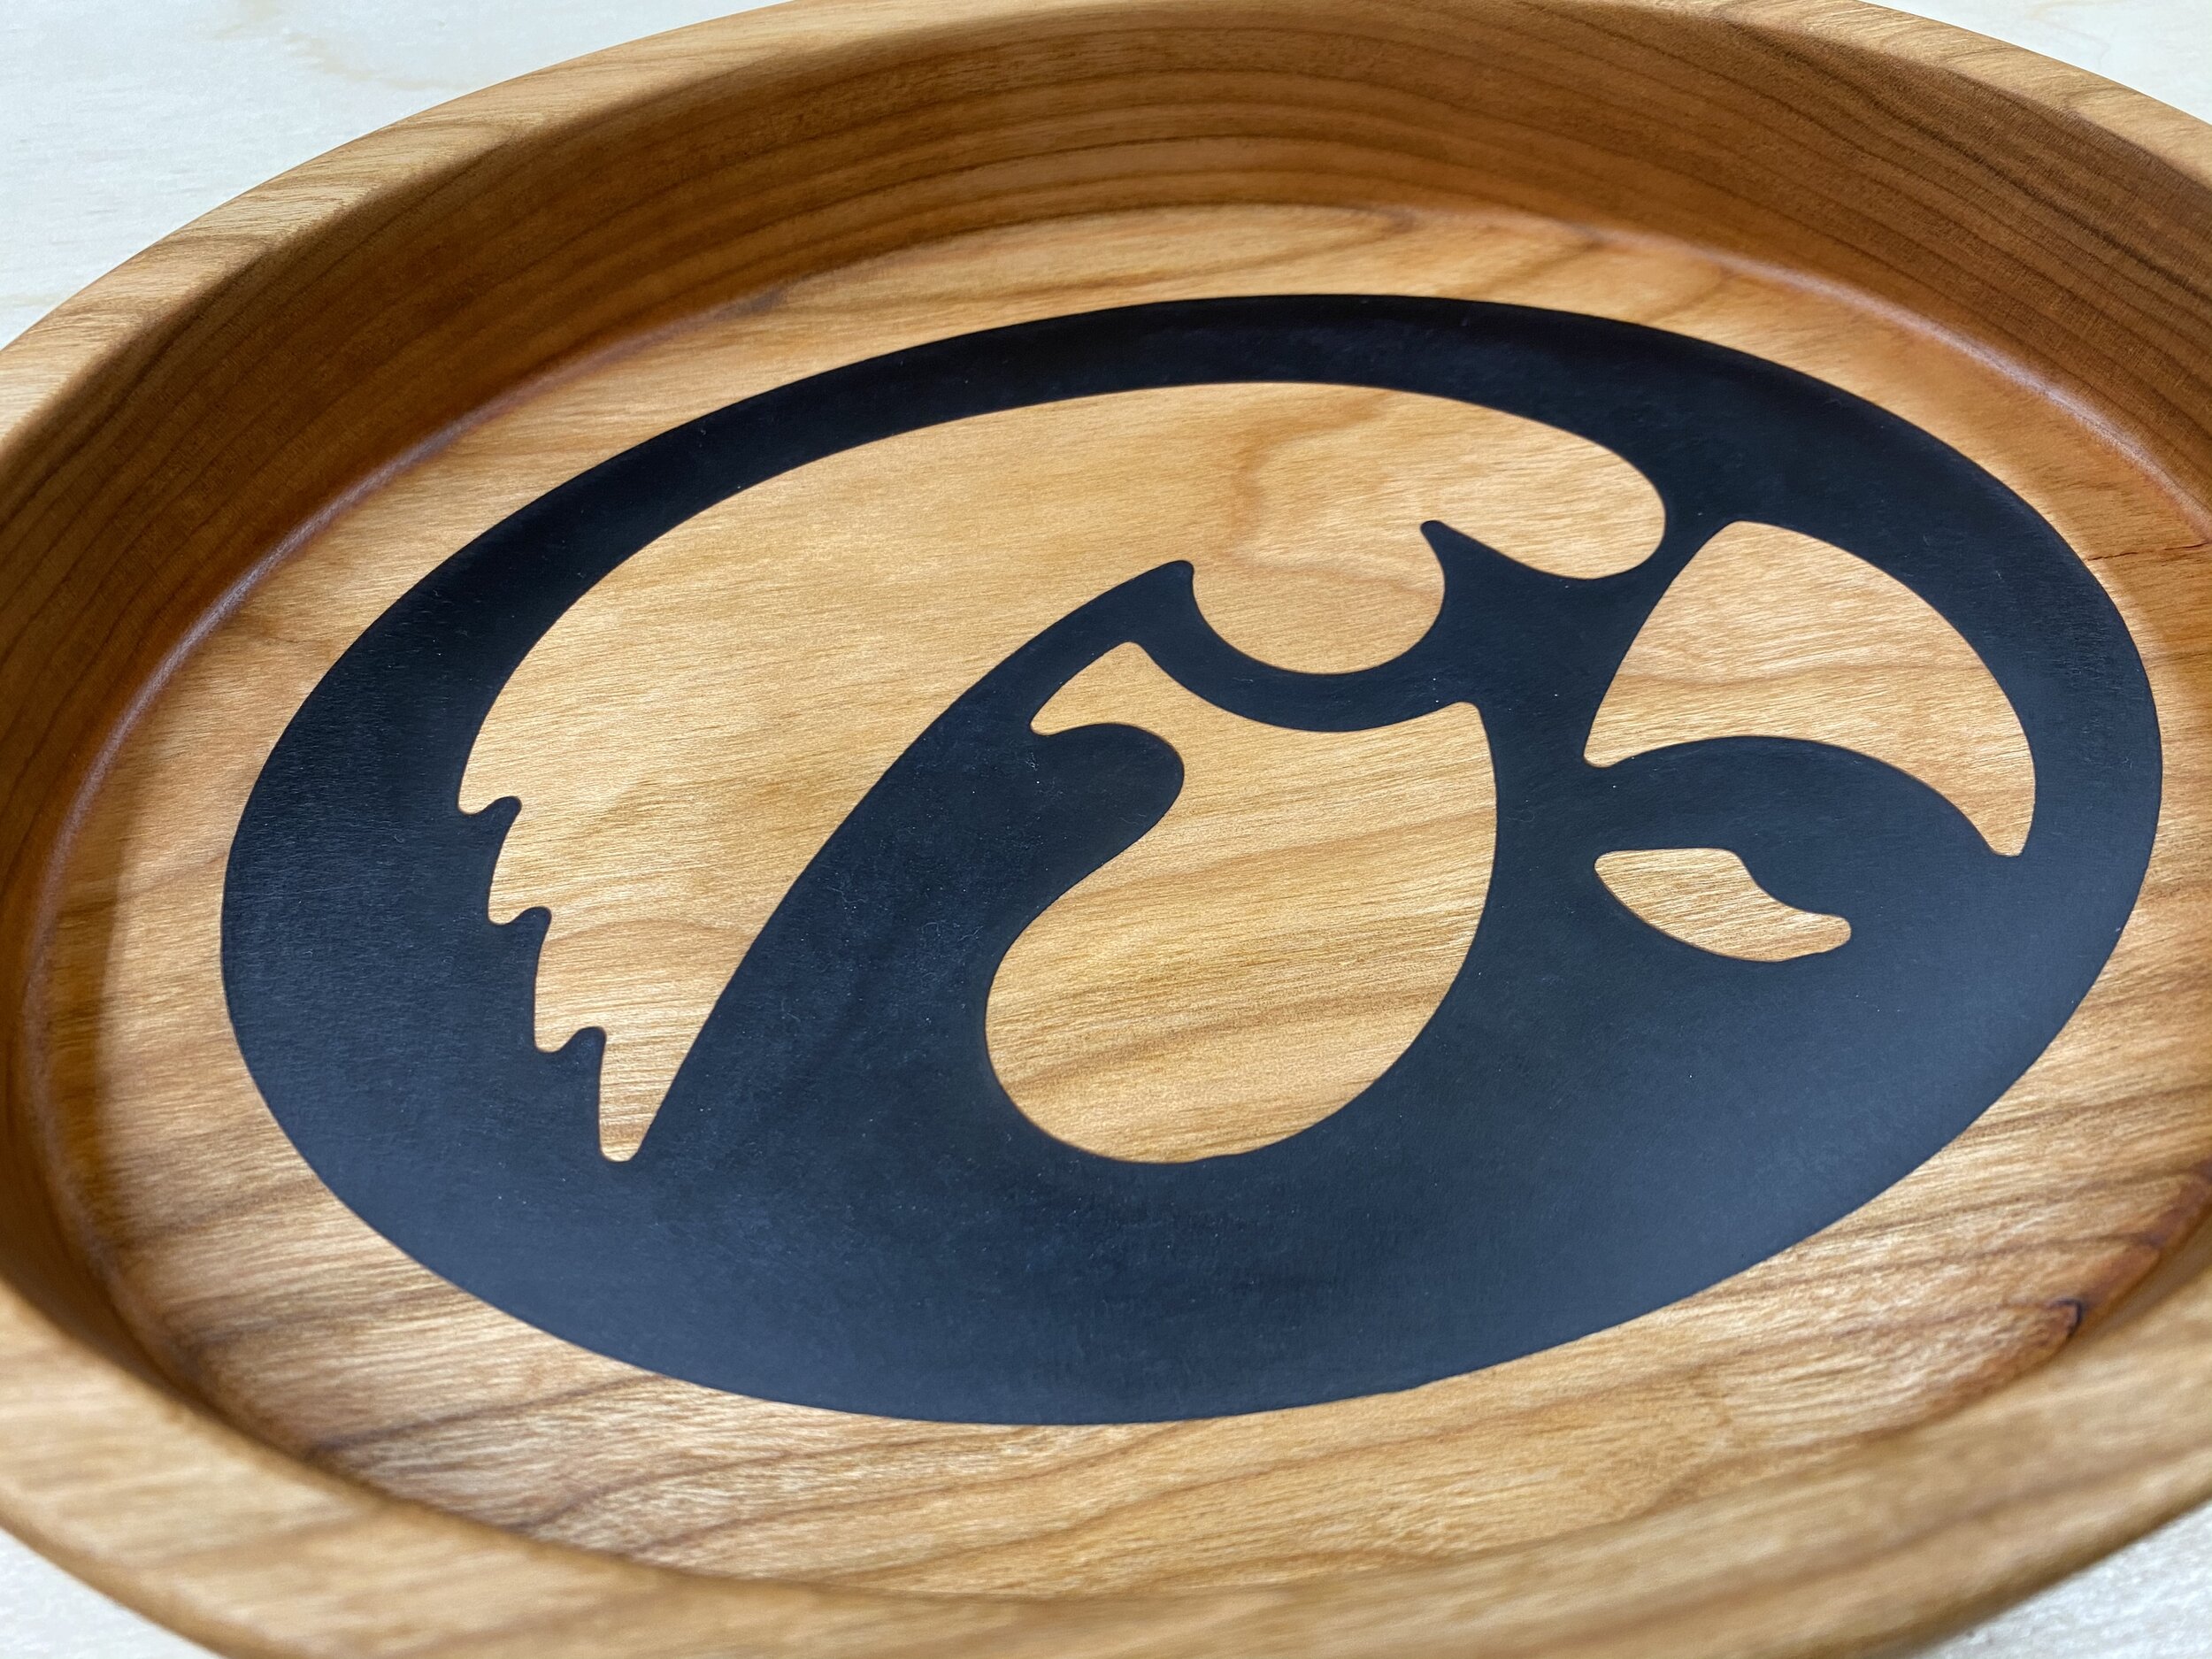
Bowl 2 had a base piece of 8/4 cherry with black epoxy as the inlay.
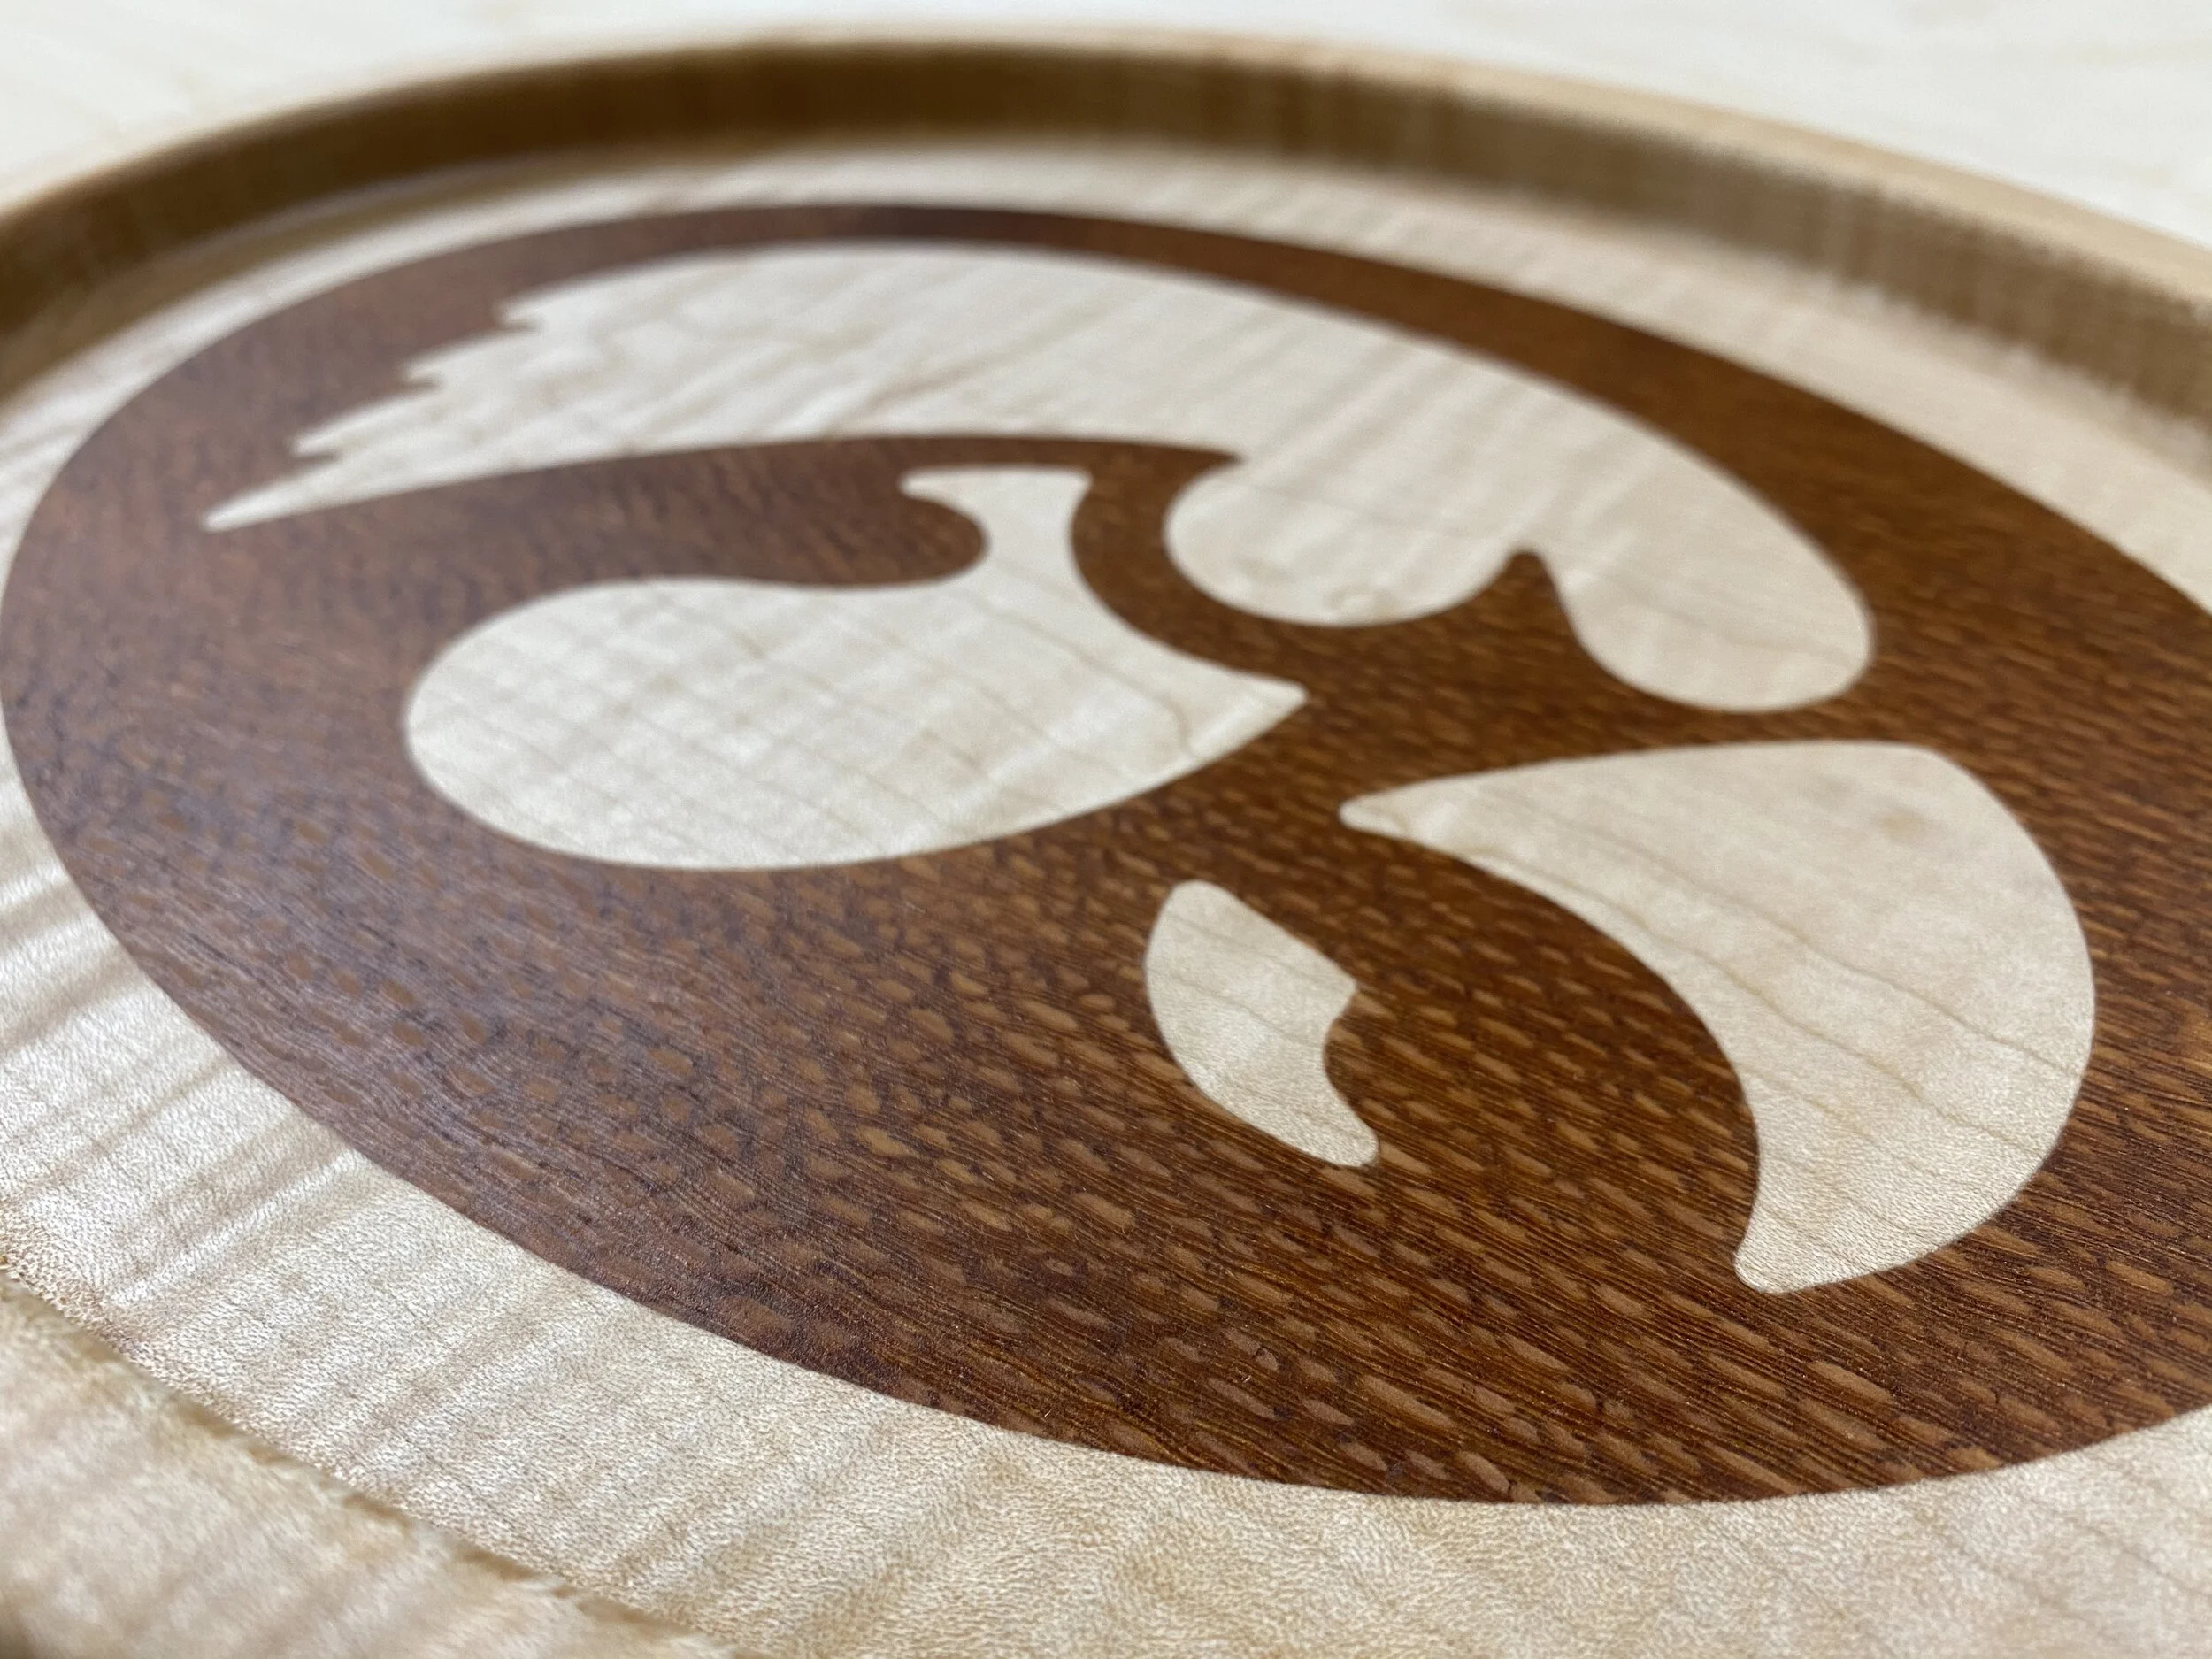
Bowl 3 had a base piece of 4/4 maple with lacewood as the inlay.
The selections all turned out to be good contrasting wood selections and I liked they way they all turned out.

The 3 different bowl options
Step 3: Choose your Logo and Divide the Carve Into the Inlay and Pocket
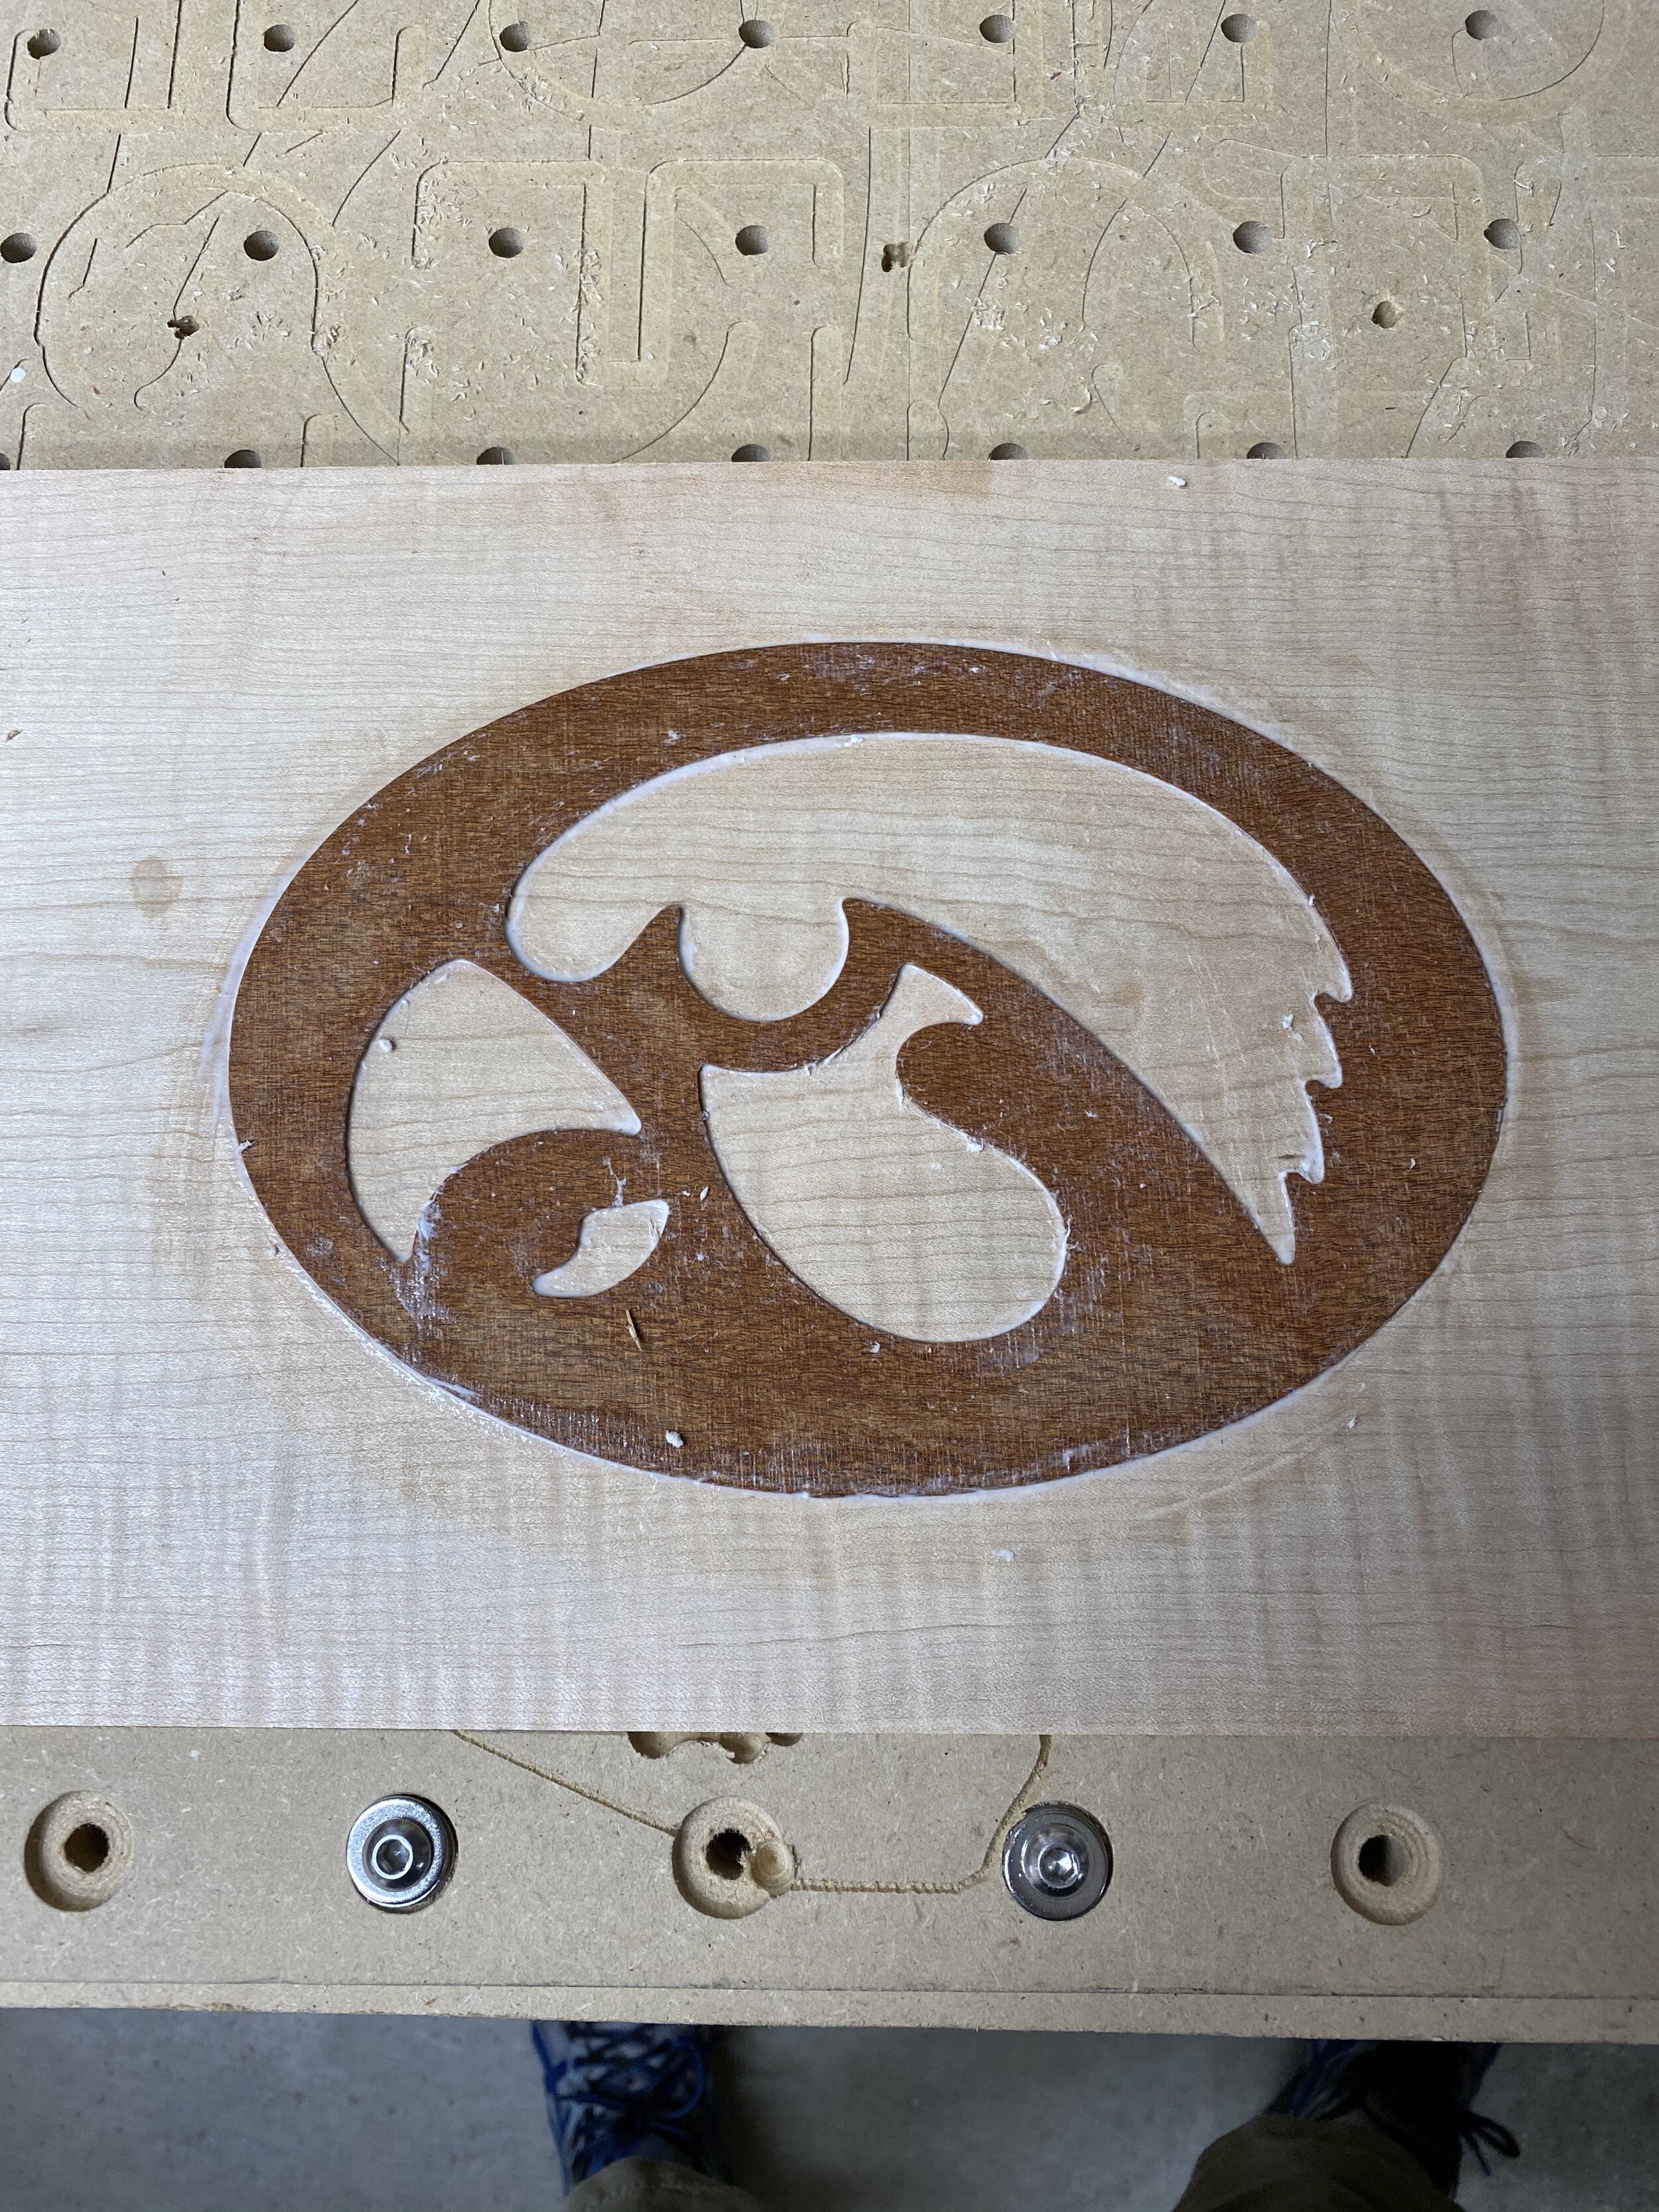
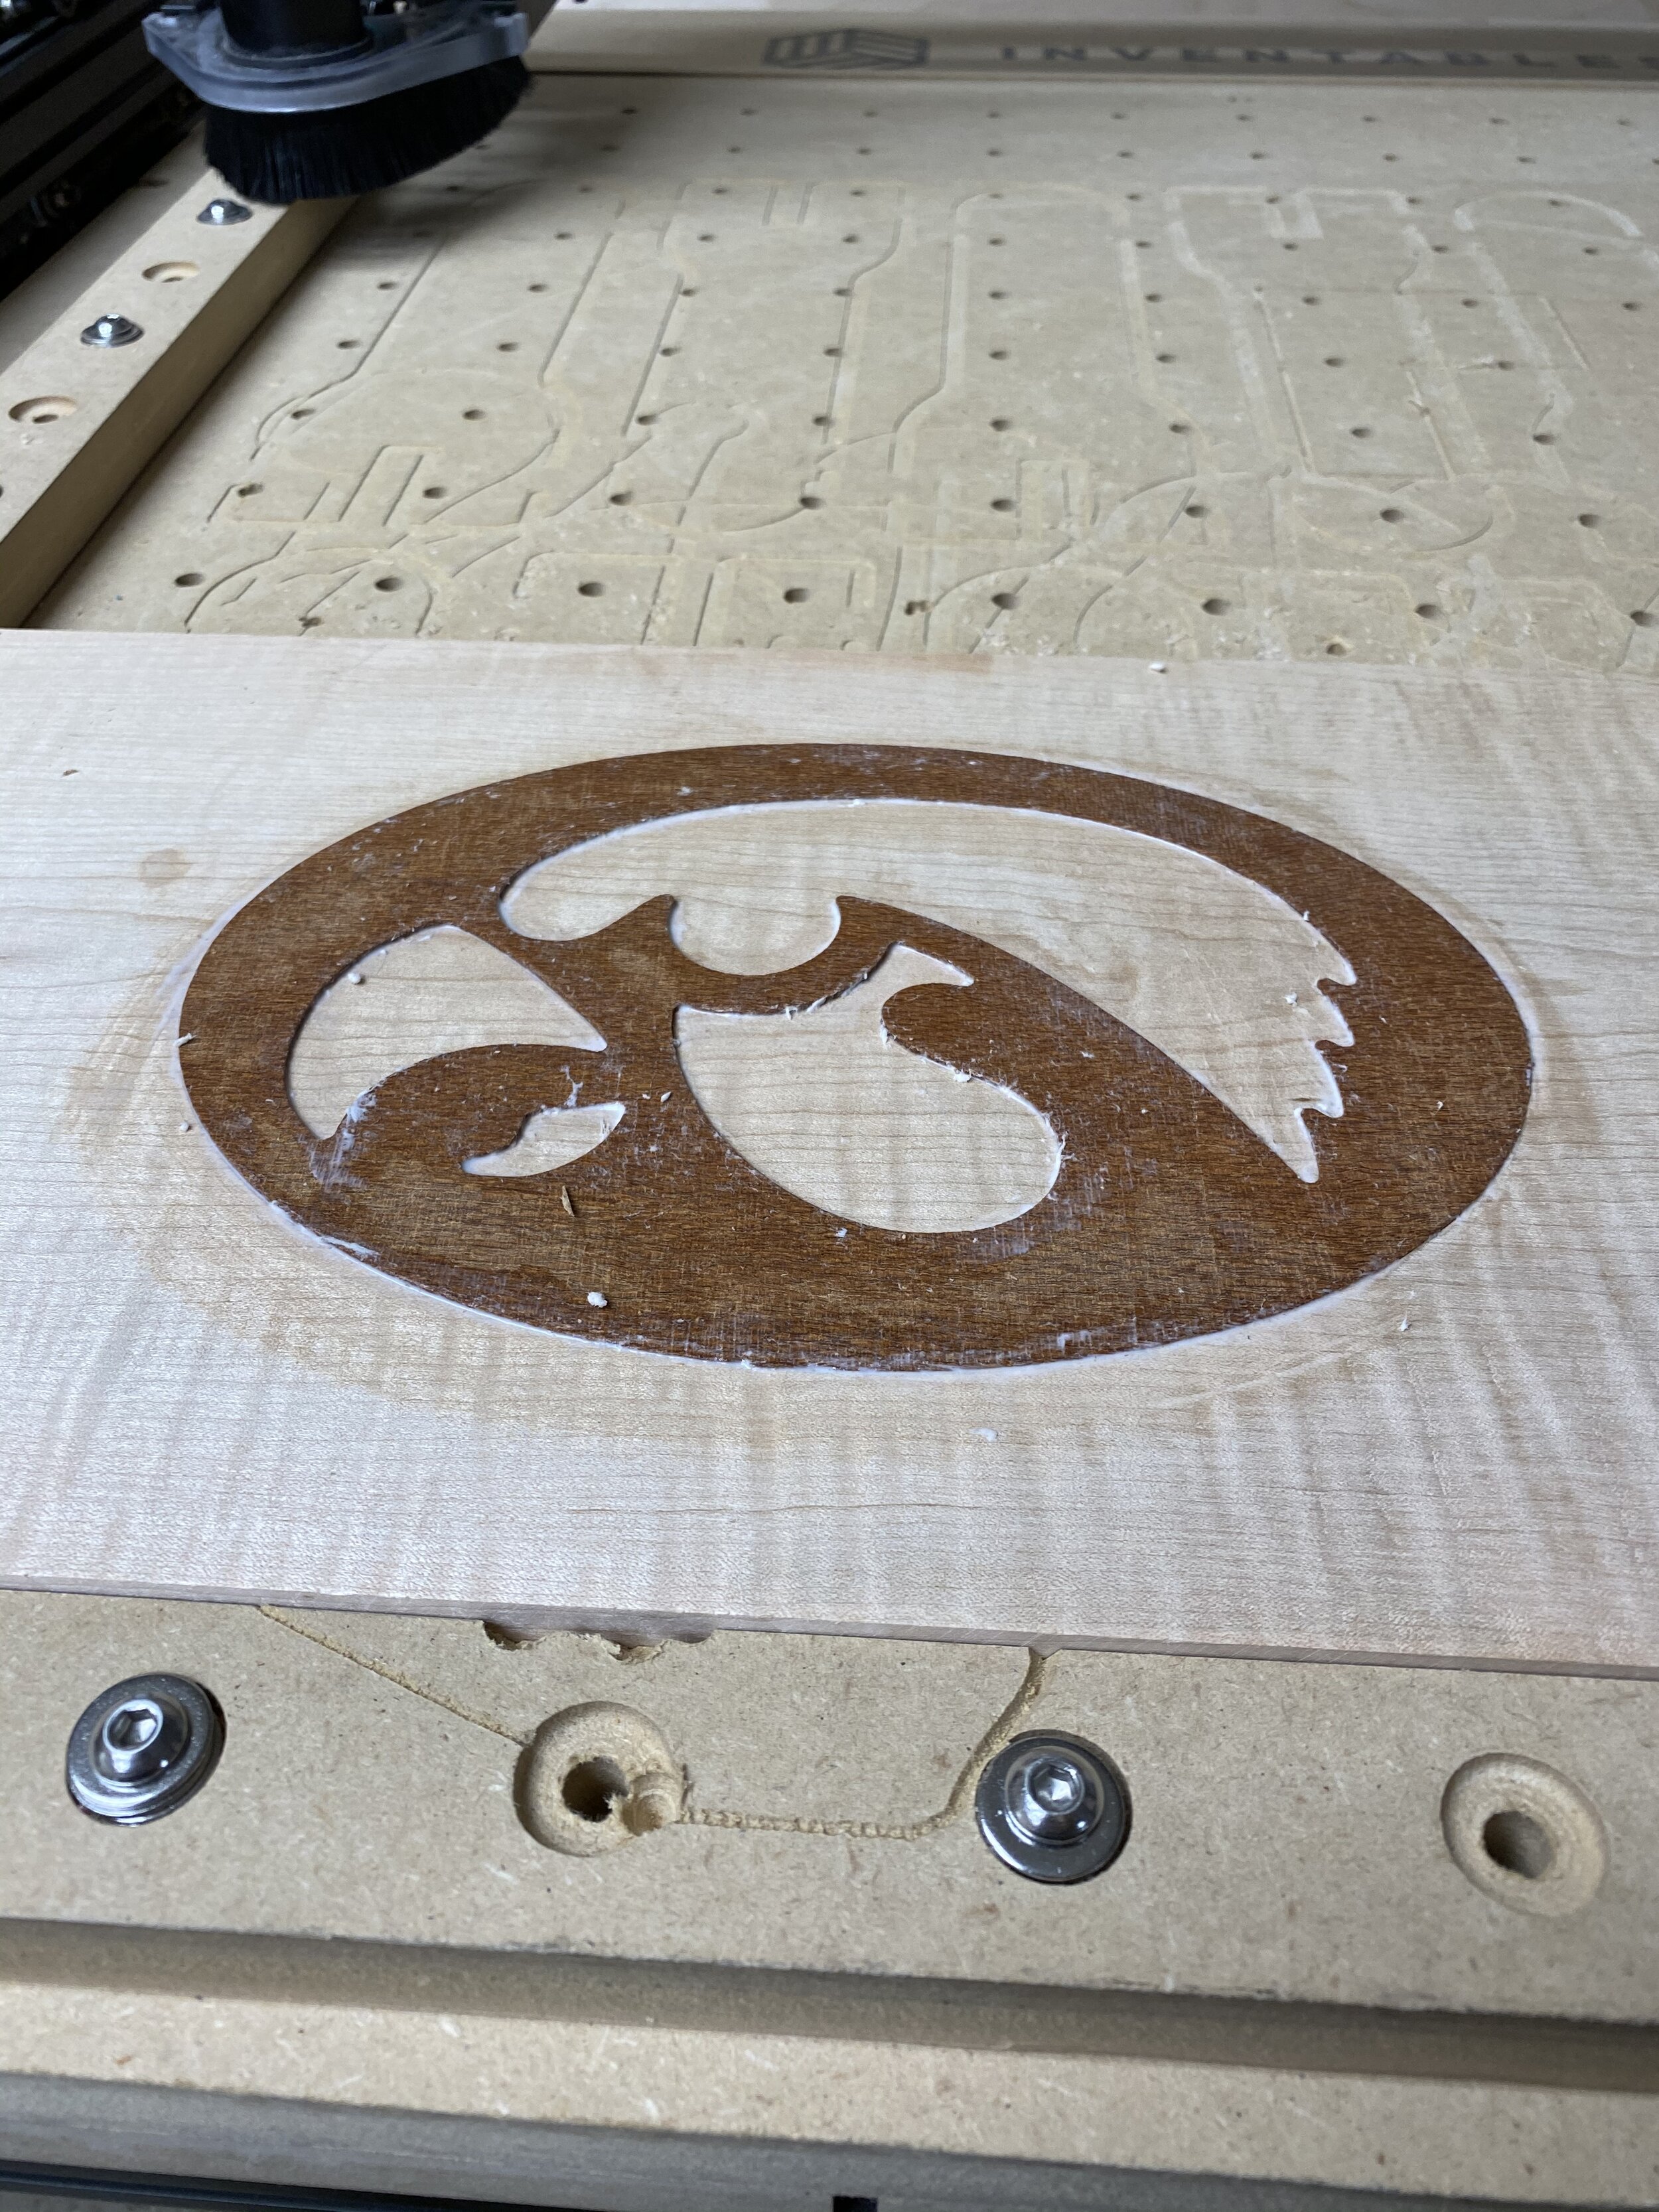
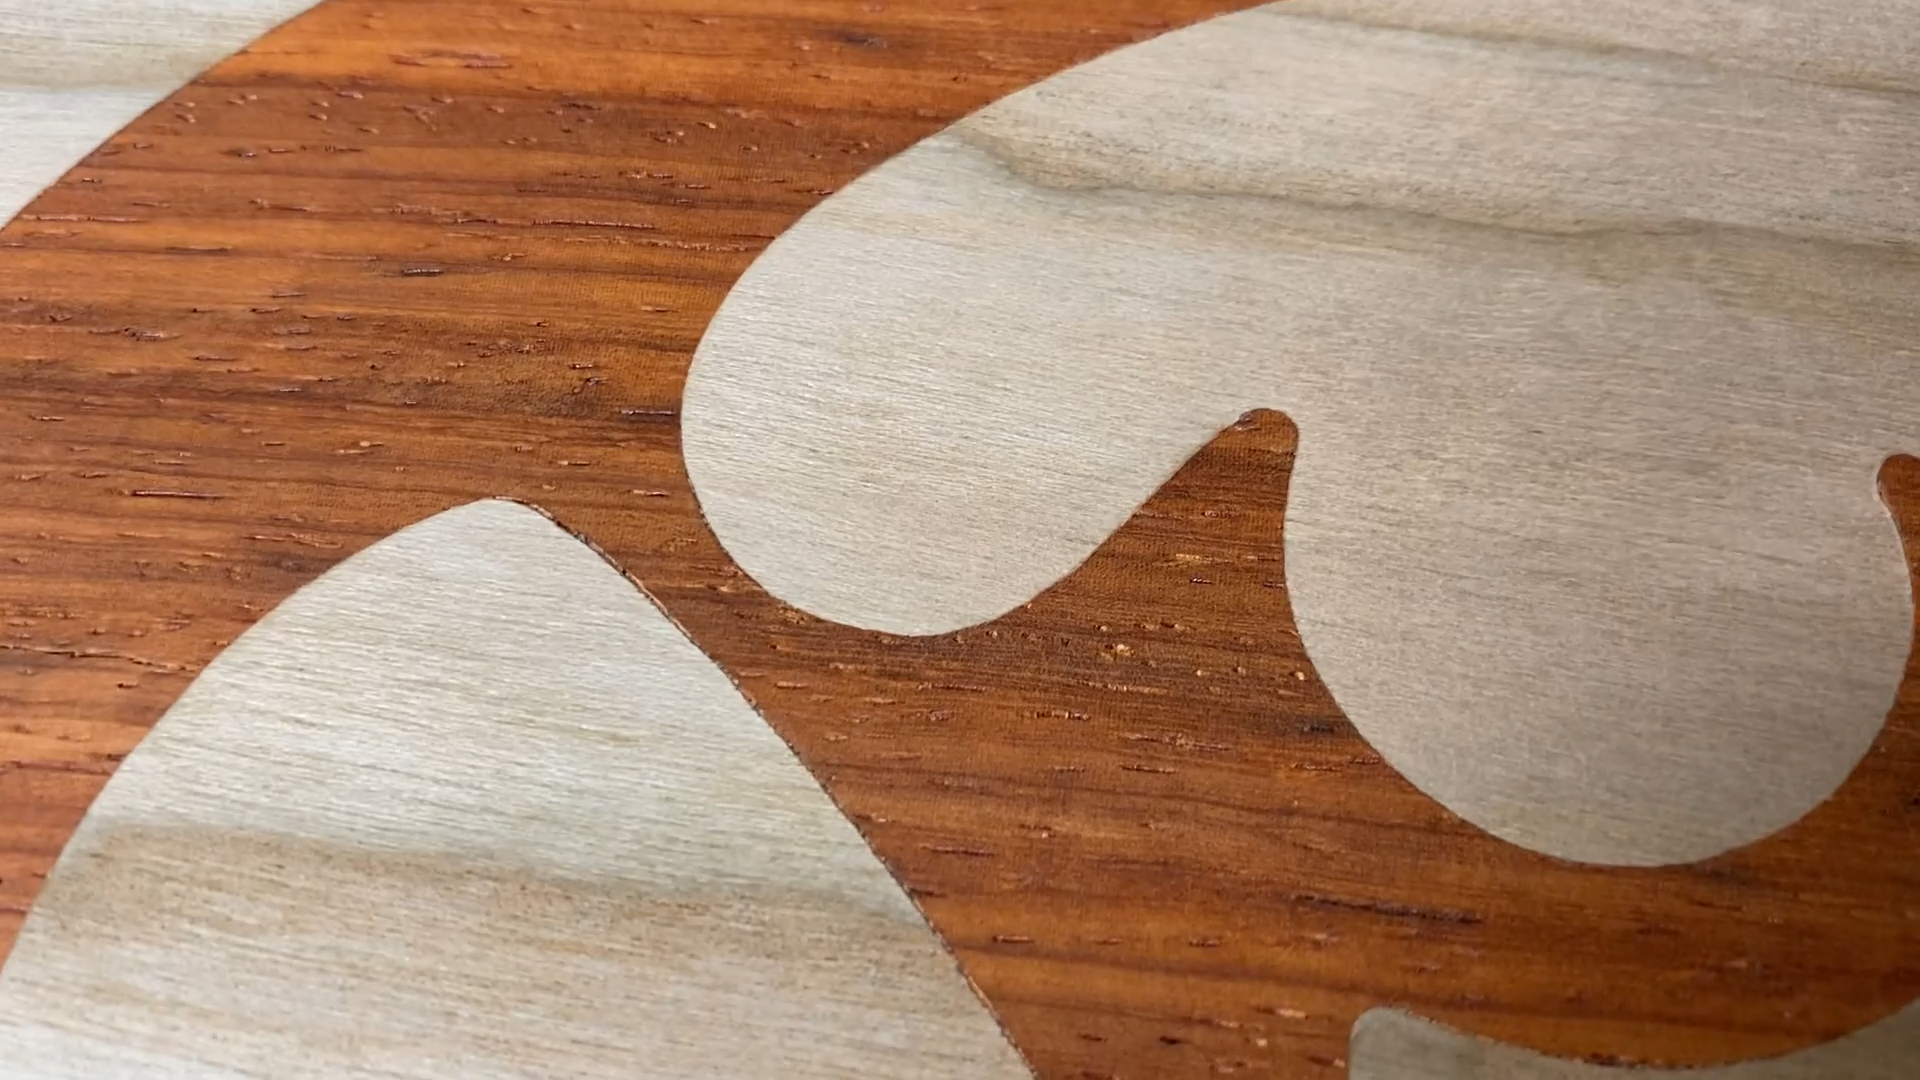
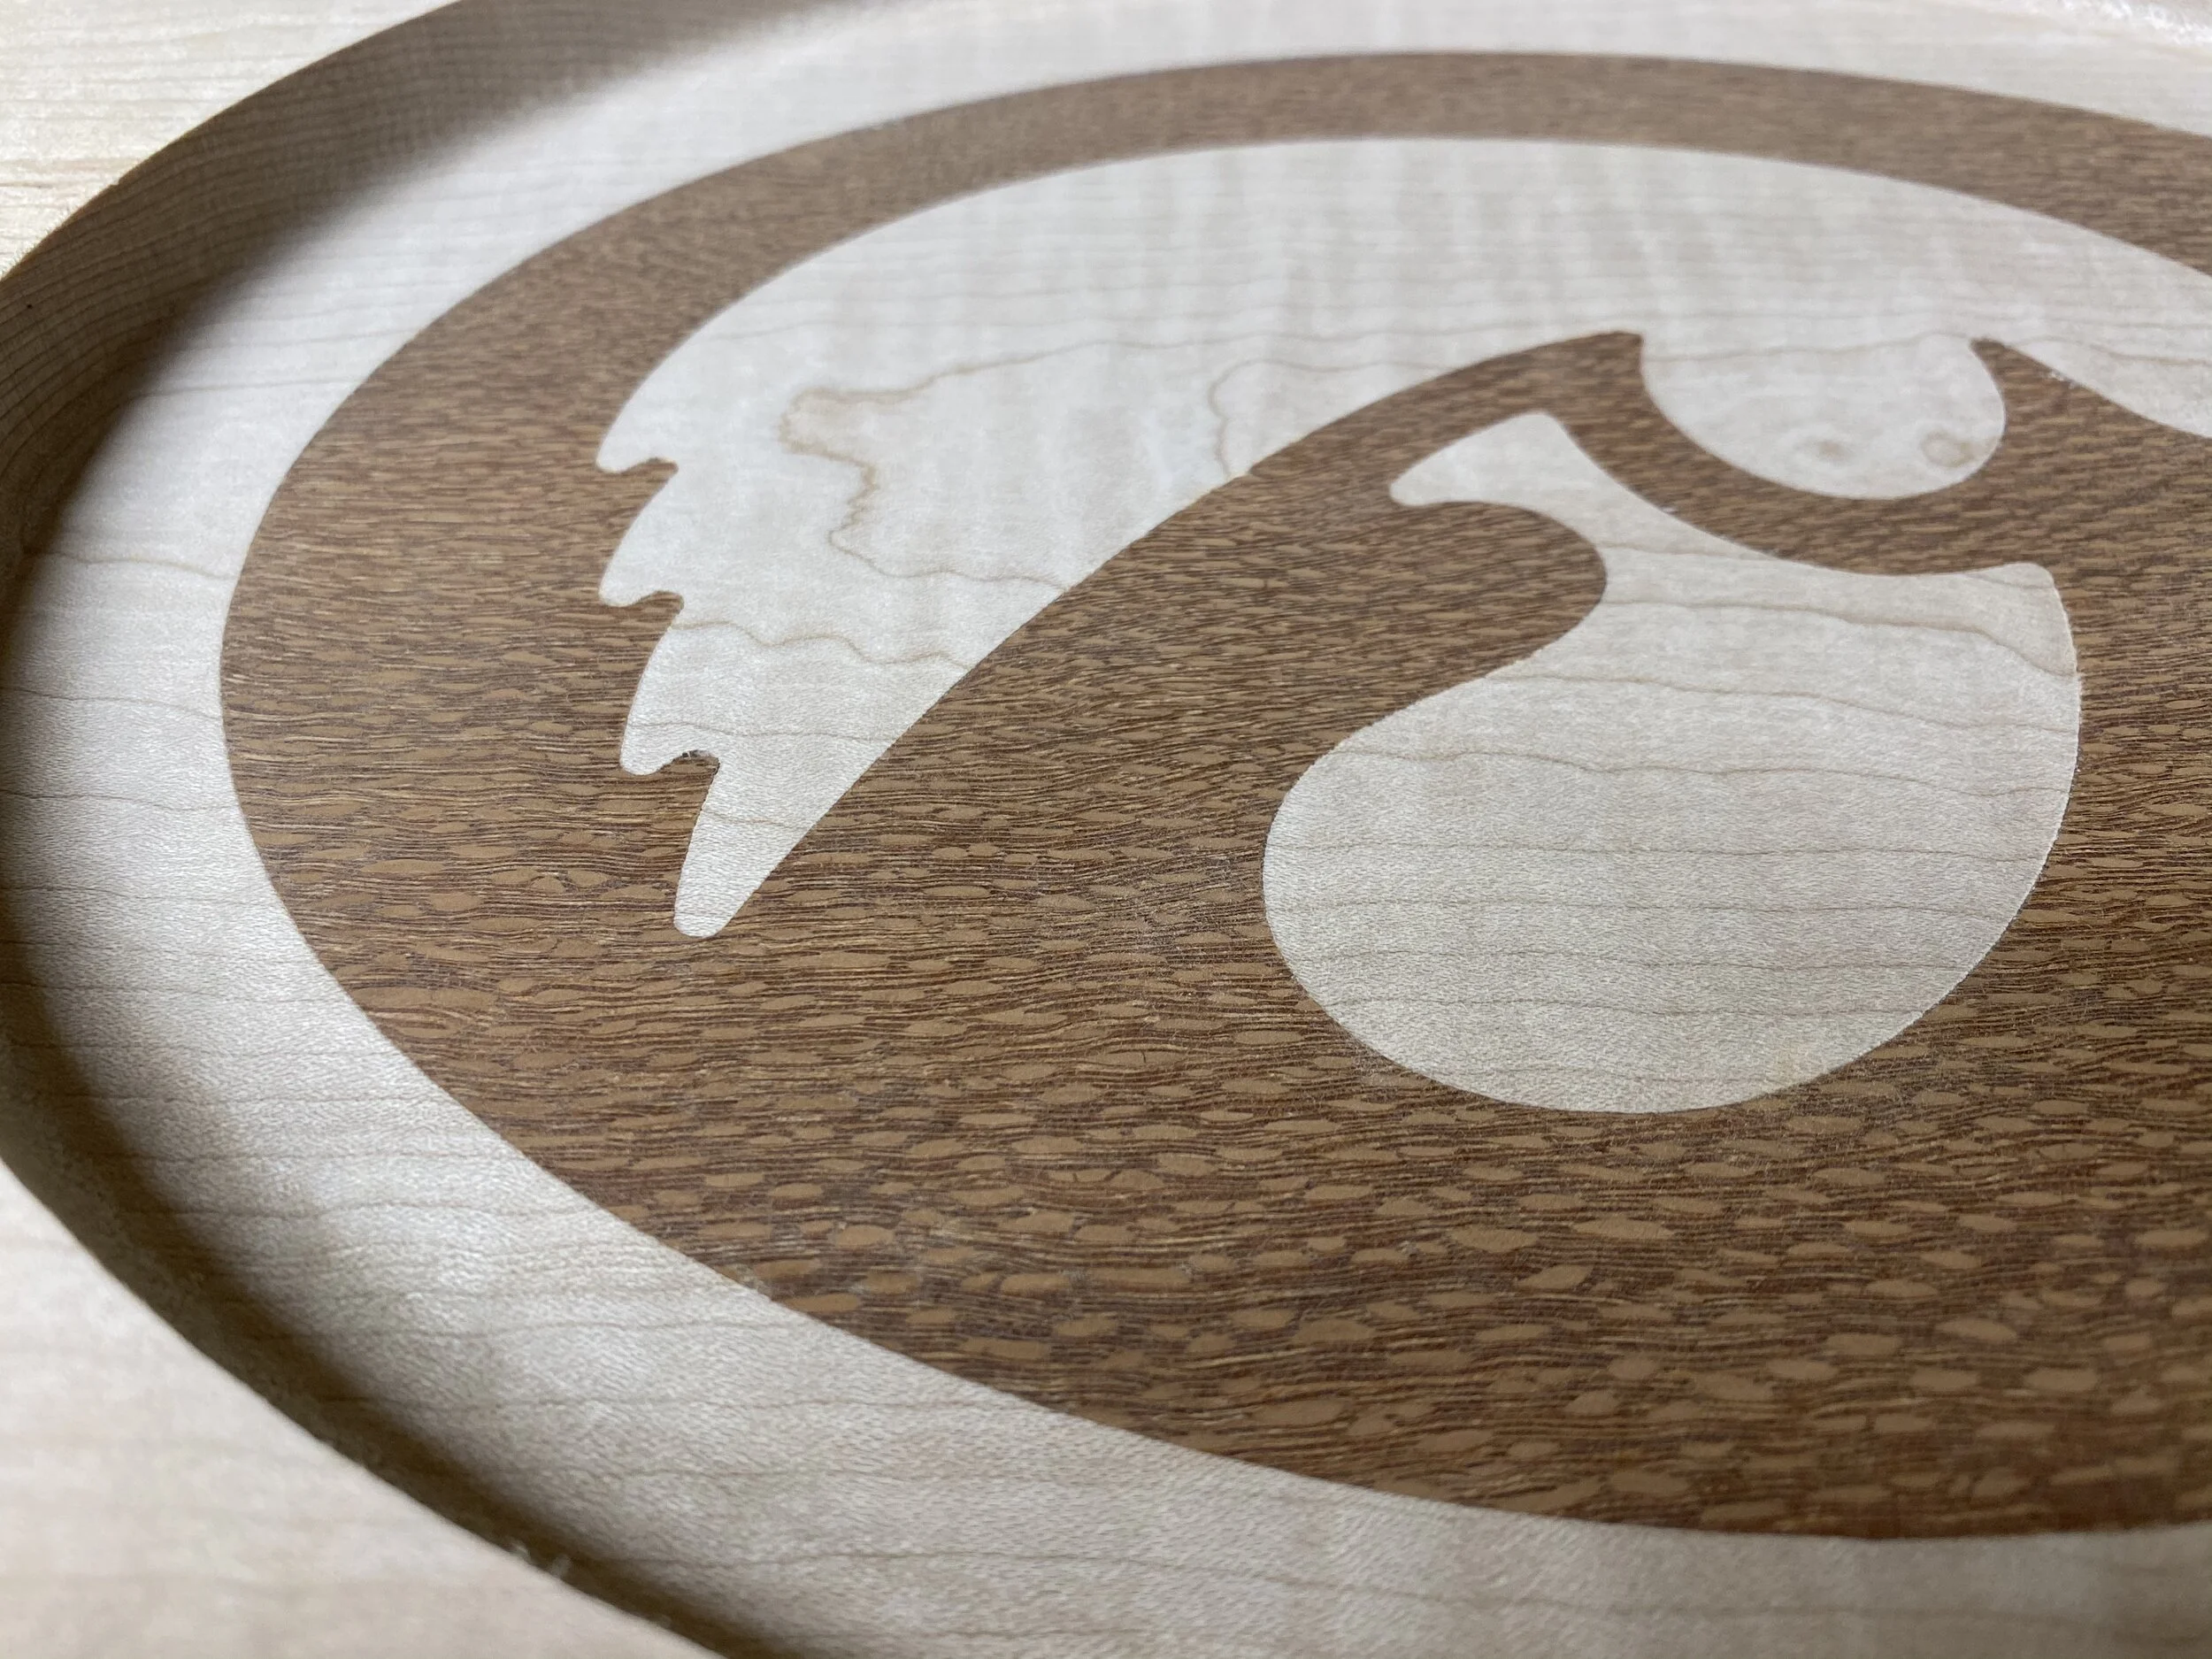
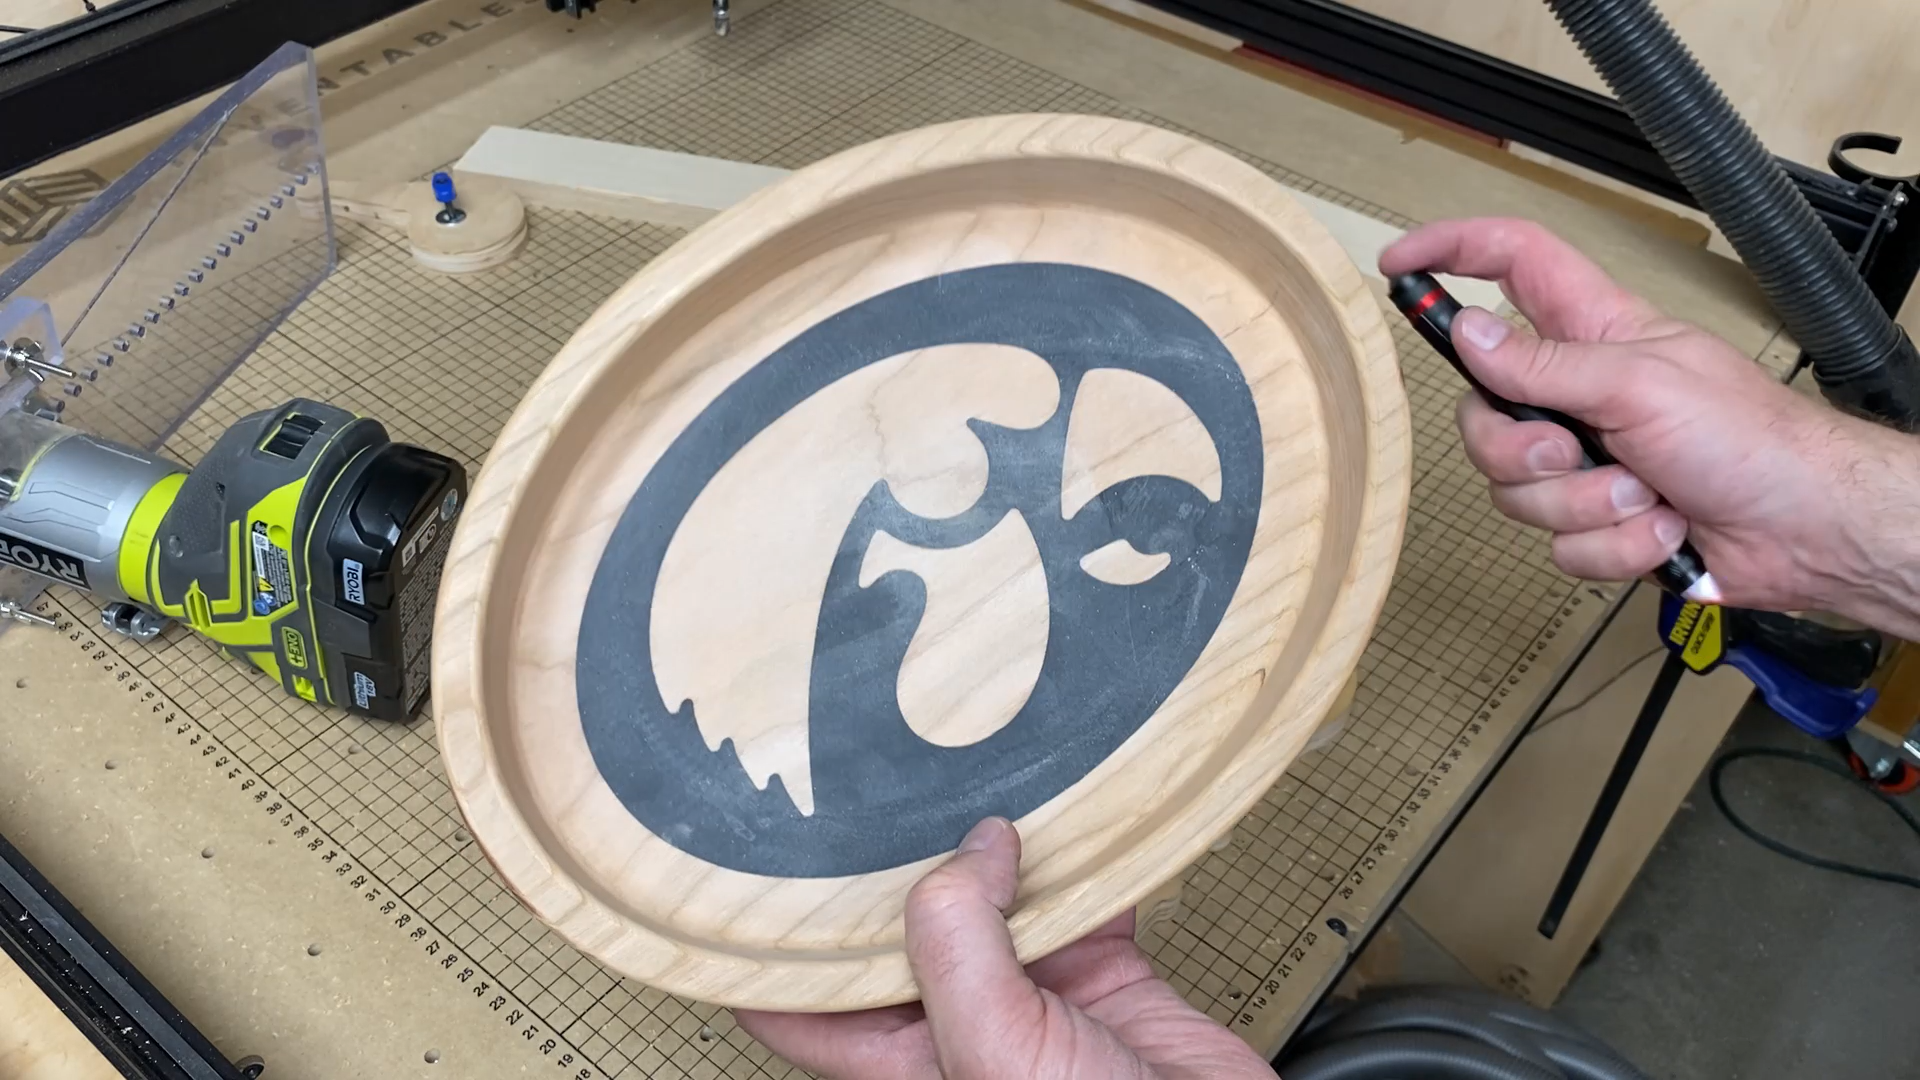
I used the Iowa Hawkeye's logo for the logo for this set of bowls I am making for gifts. This logo worked pretty well, but there were a couple sharp points in the logo that ended up being slightly rounded over. That is just part of the process and is part of making the inlay portion. Inside corners have an inside radius that is the radius of the smallest router bit you use to cut the inlay and pocket.
Use whatever logo you want, but using a vector based logo will make a big difference.
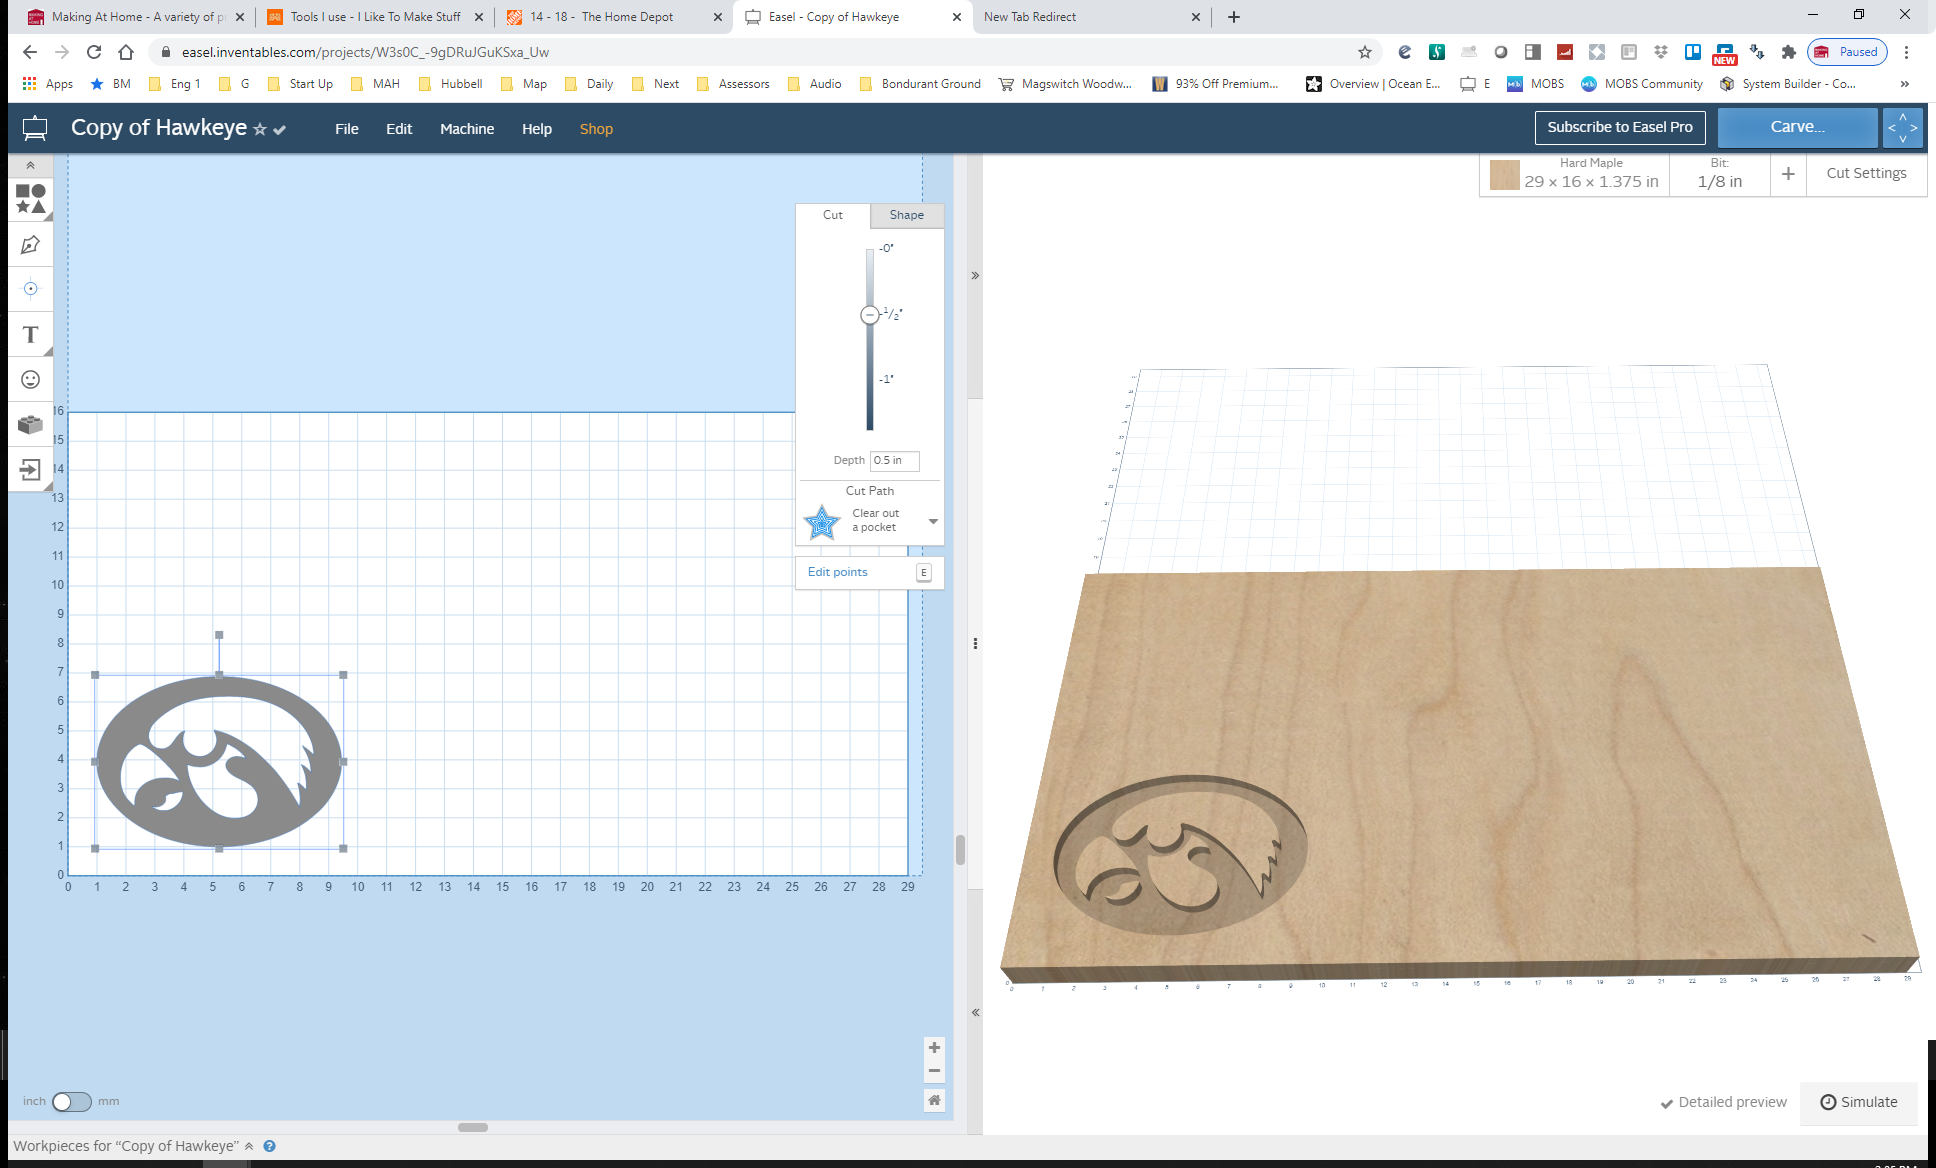
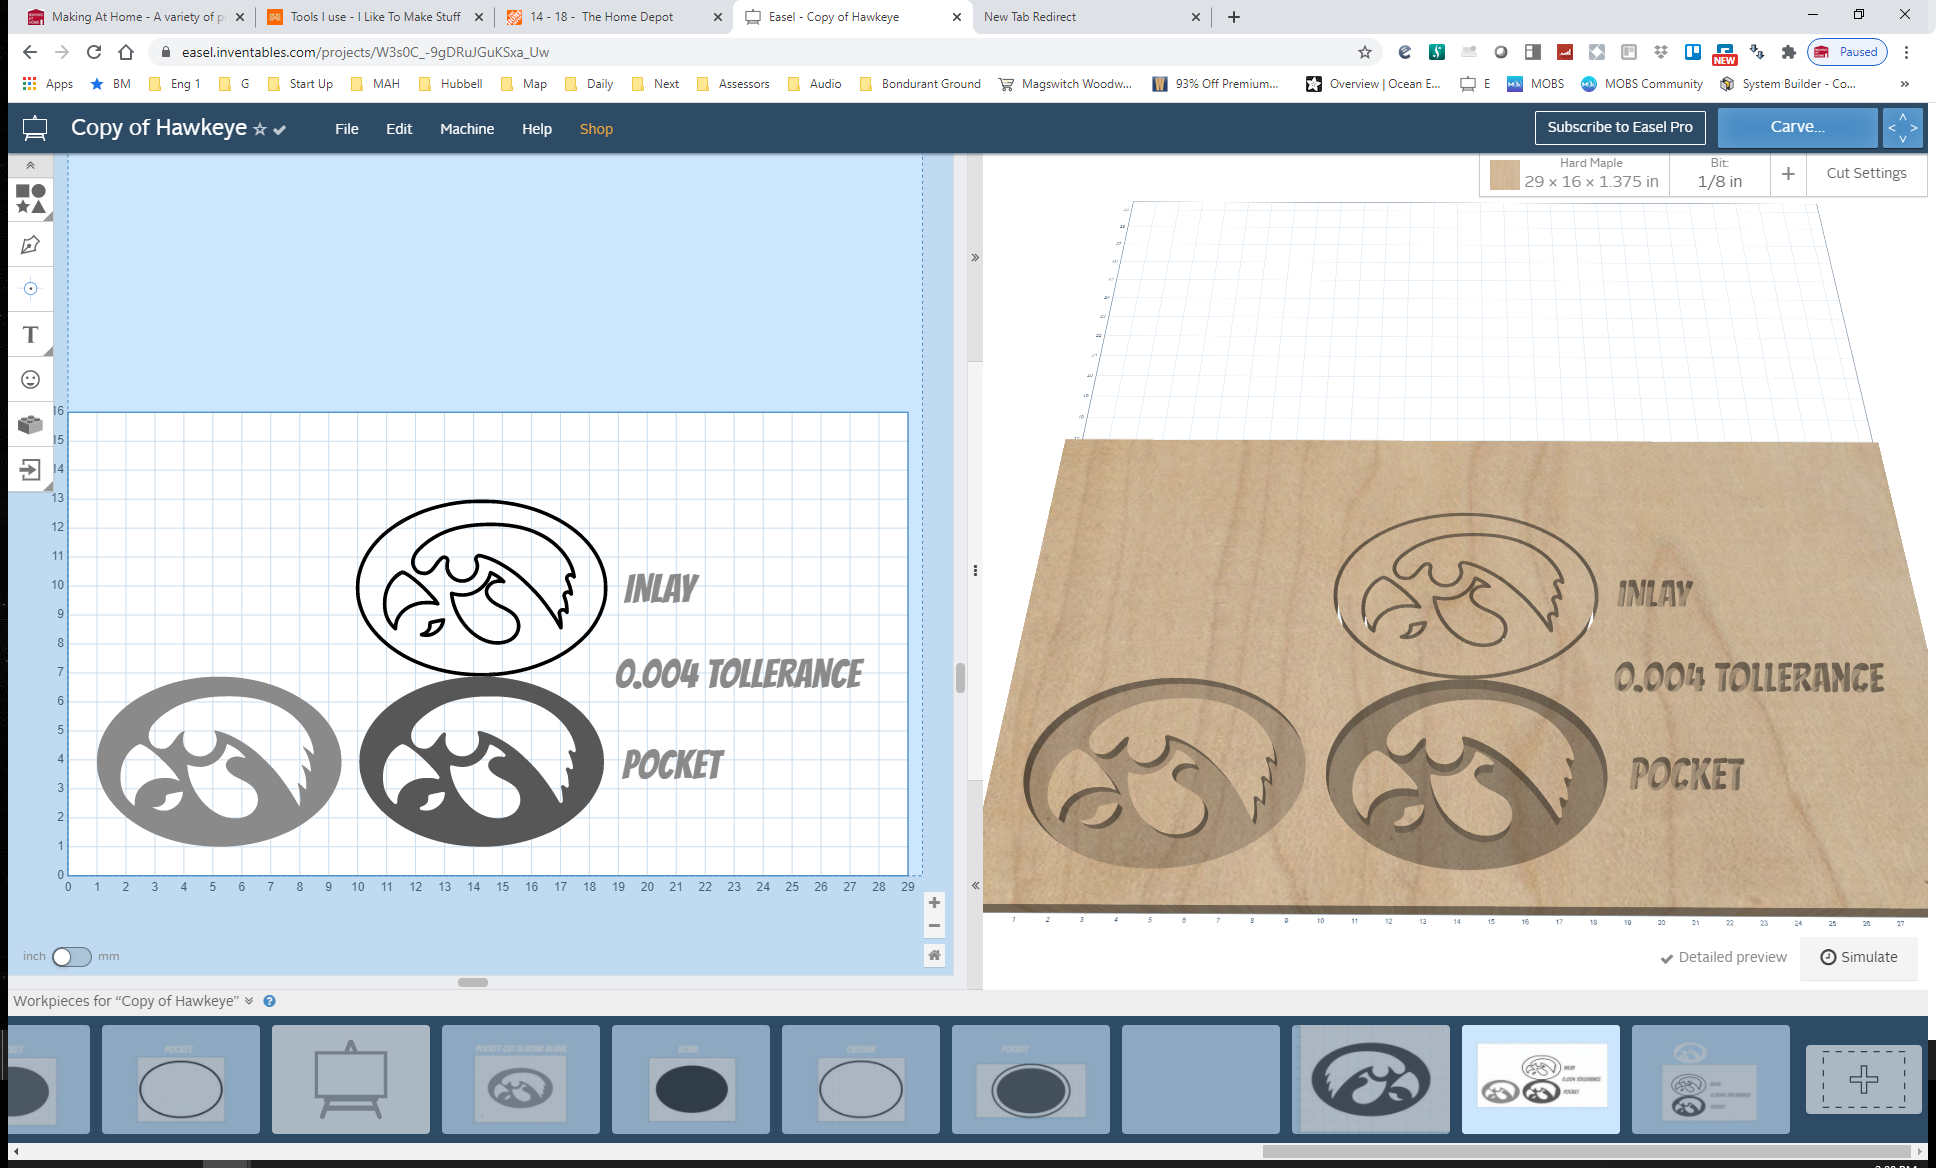
I used the Easel software app for inlays to create the inlay and pocket cuts.
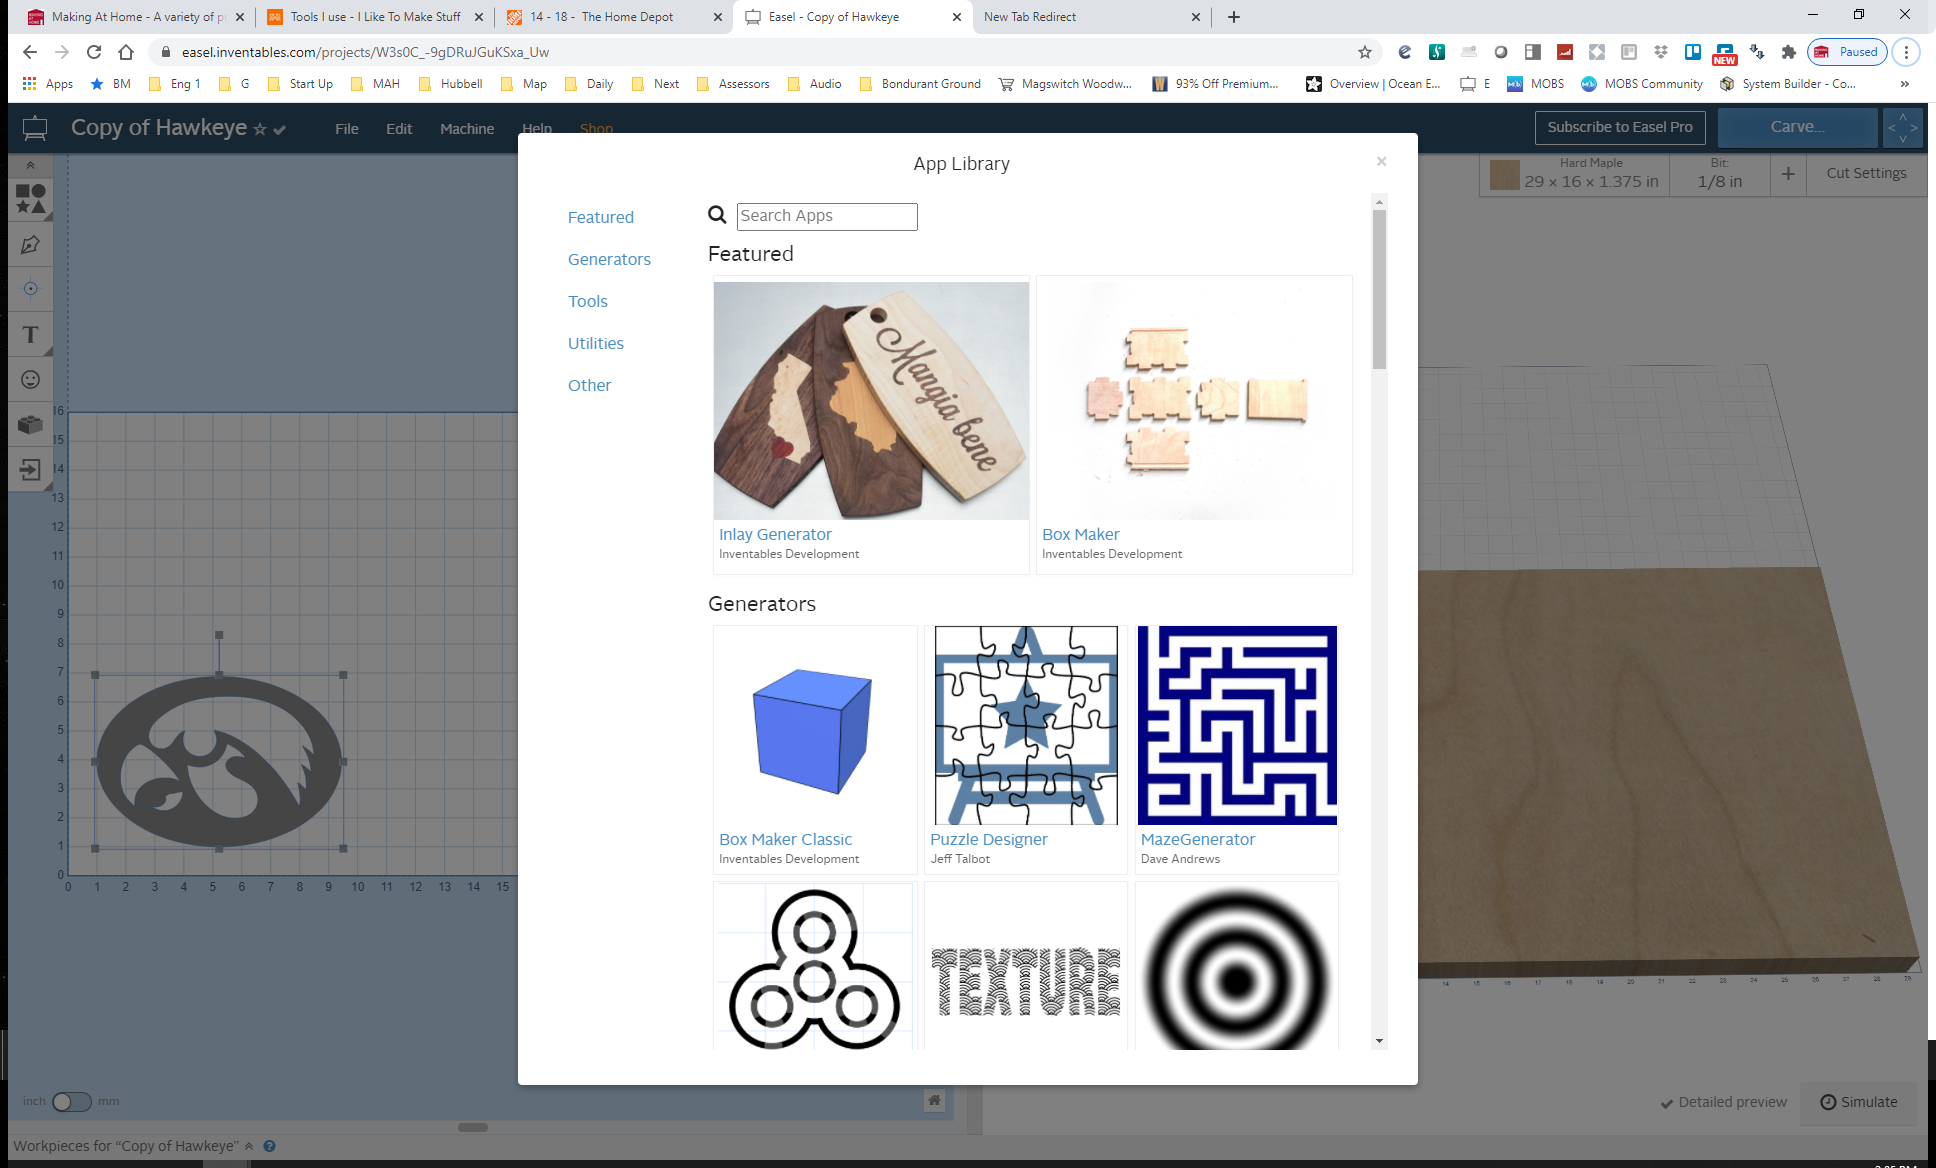
In the software you need to select the item you want to use for the inlay to be carved. Just click on it once and then open the apps choices from the menu.
The inlay generator is one for the most heavily used apps and is located at the top of the applications list. Click on that to select it.
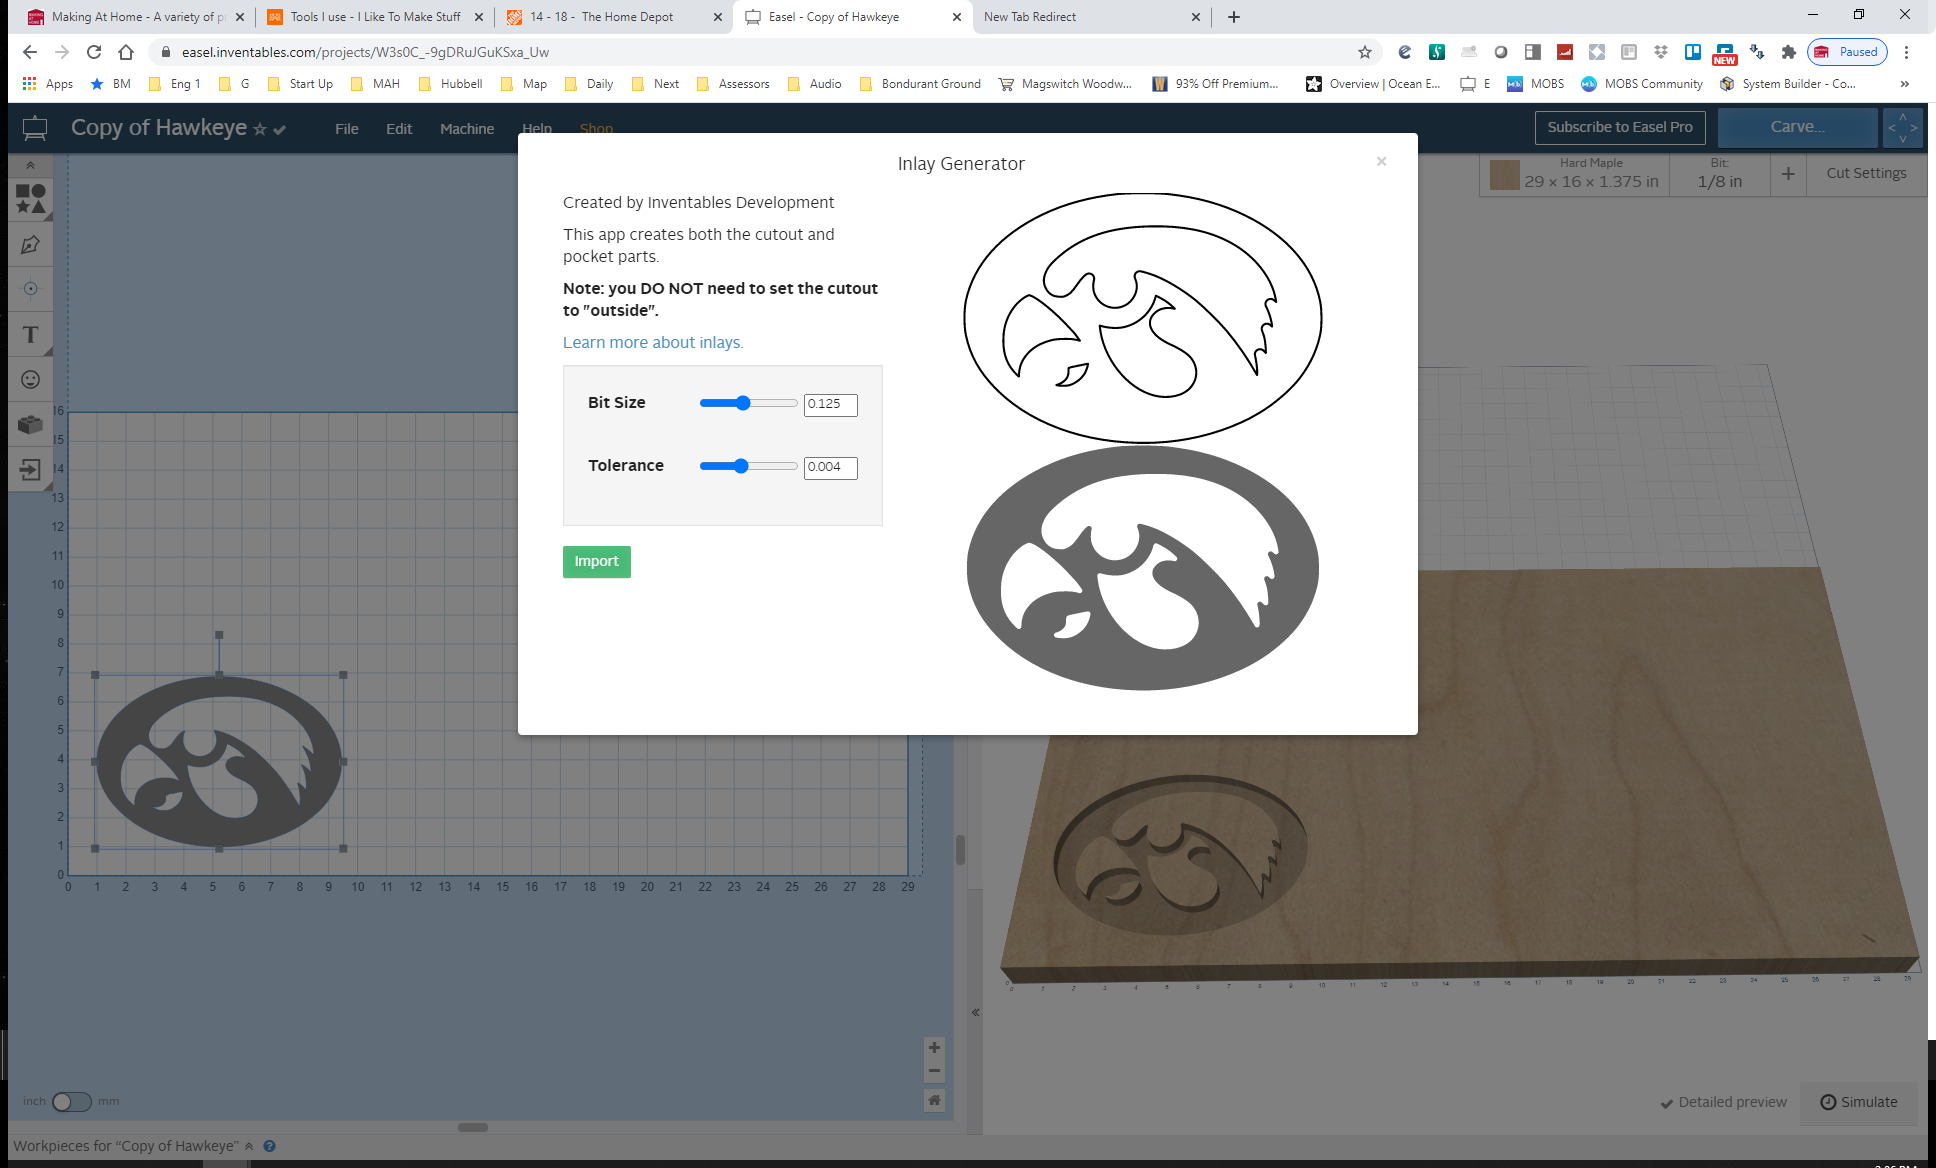
Once the app loads you will see the inlay and the pocket images. You will need to select the bit size you plan to use and the tolerance for the app. I used a tolerance of 0.004 on these bowls and I think that was too tight. I will go to a higher tolerance the next time I use the app.
If you change your settings you will see the images on the right update automatically. The bit radius will have a big impact on inside corners of the design.
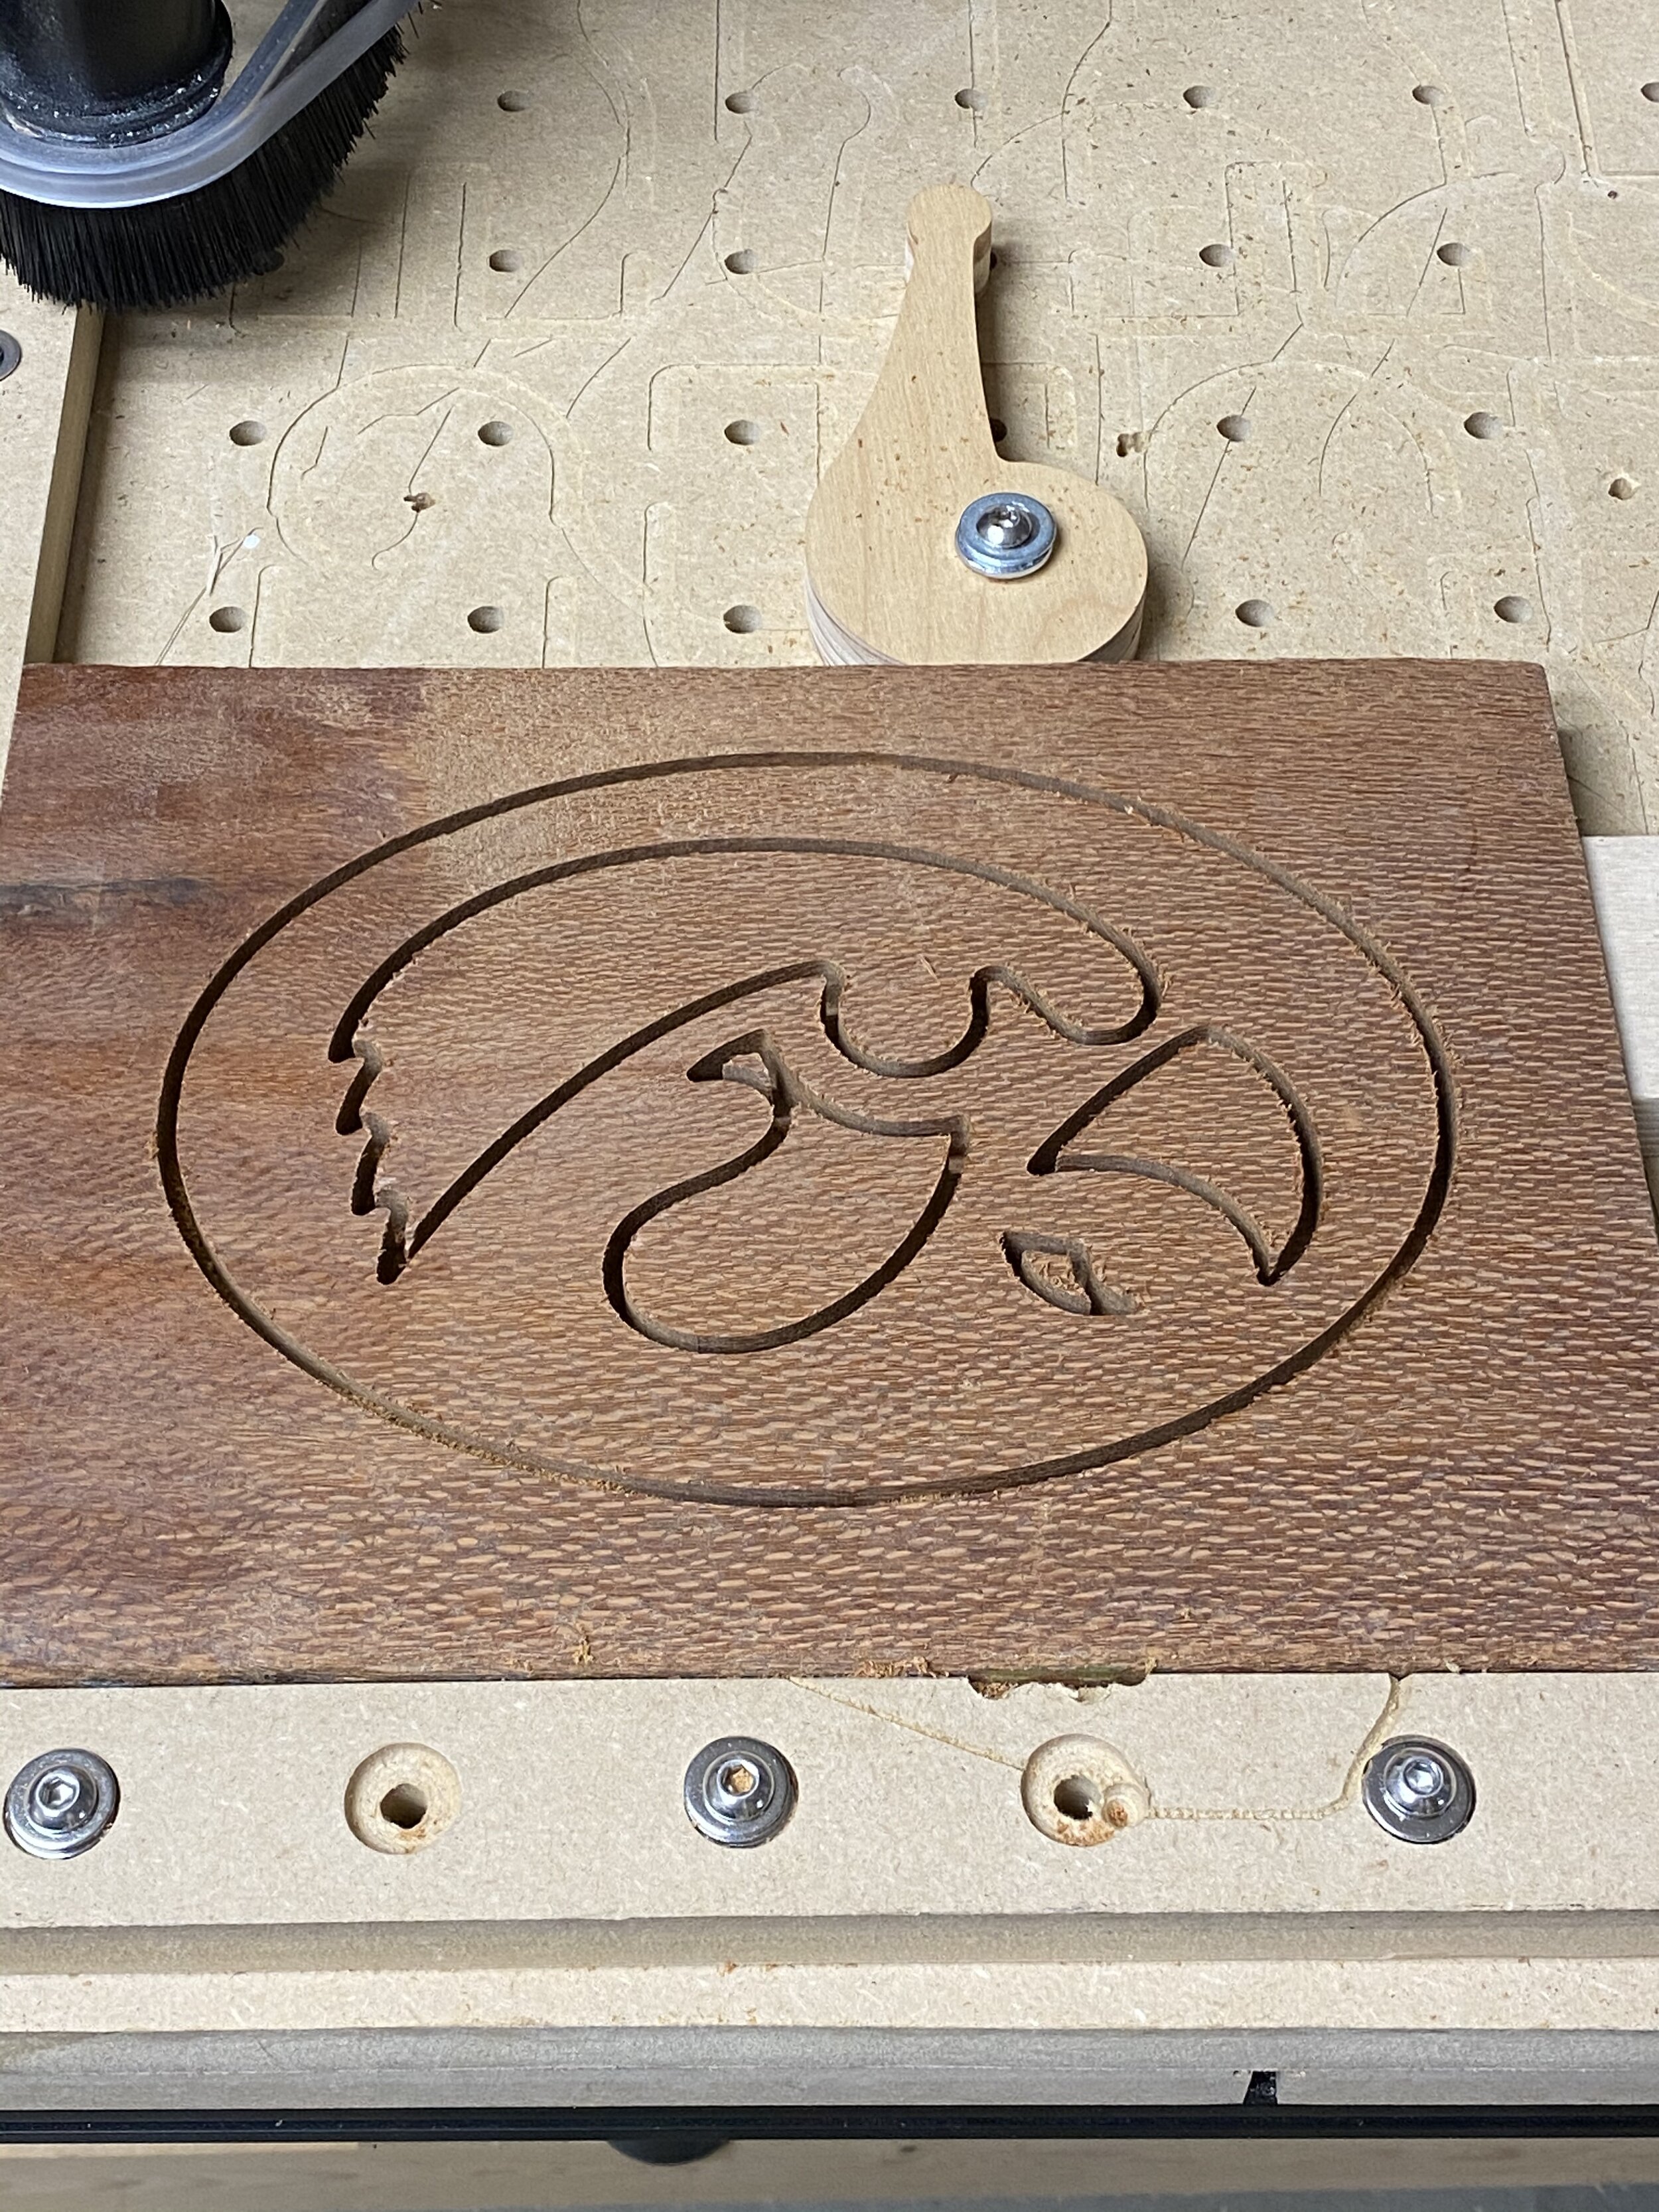
The image on the top is the Inlay and the image on the bottom is the pocket. This can seem a little confusing at first, but just take your time and you will get it worked out.
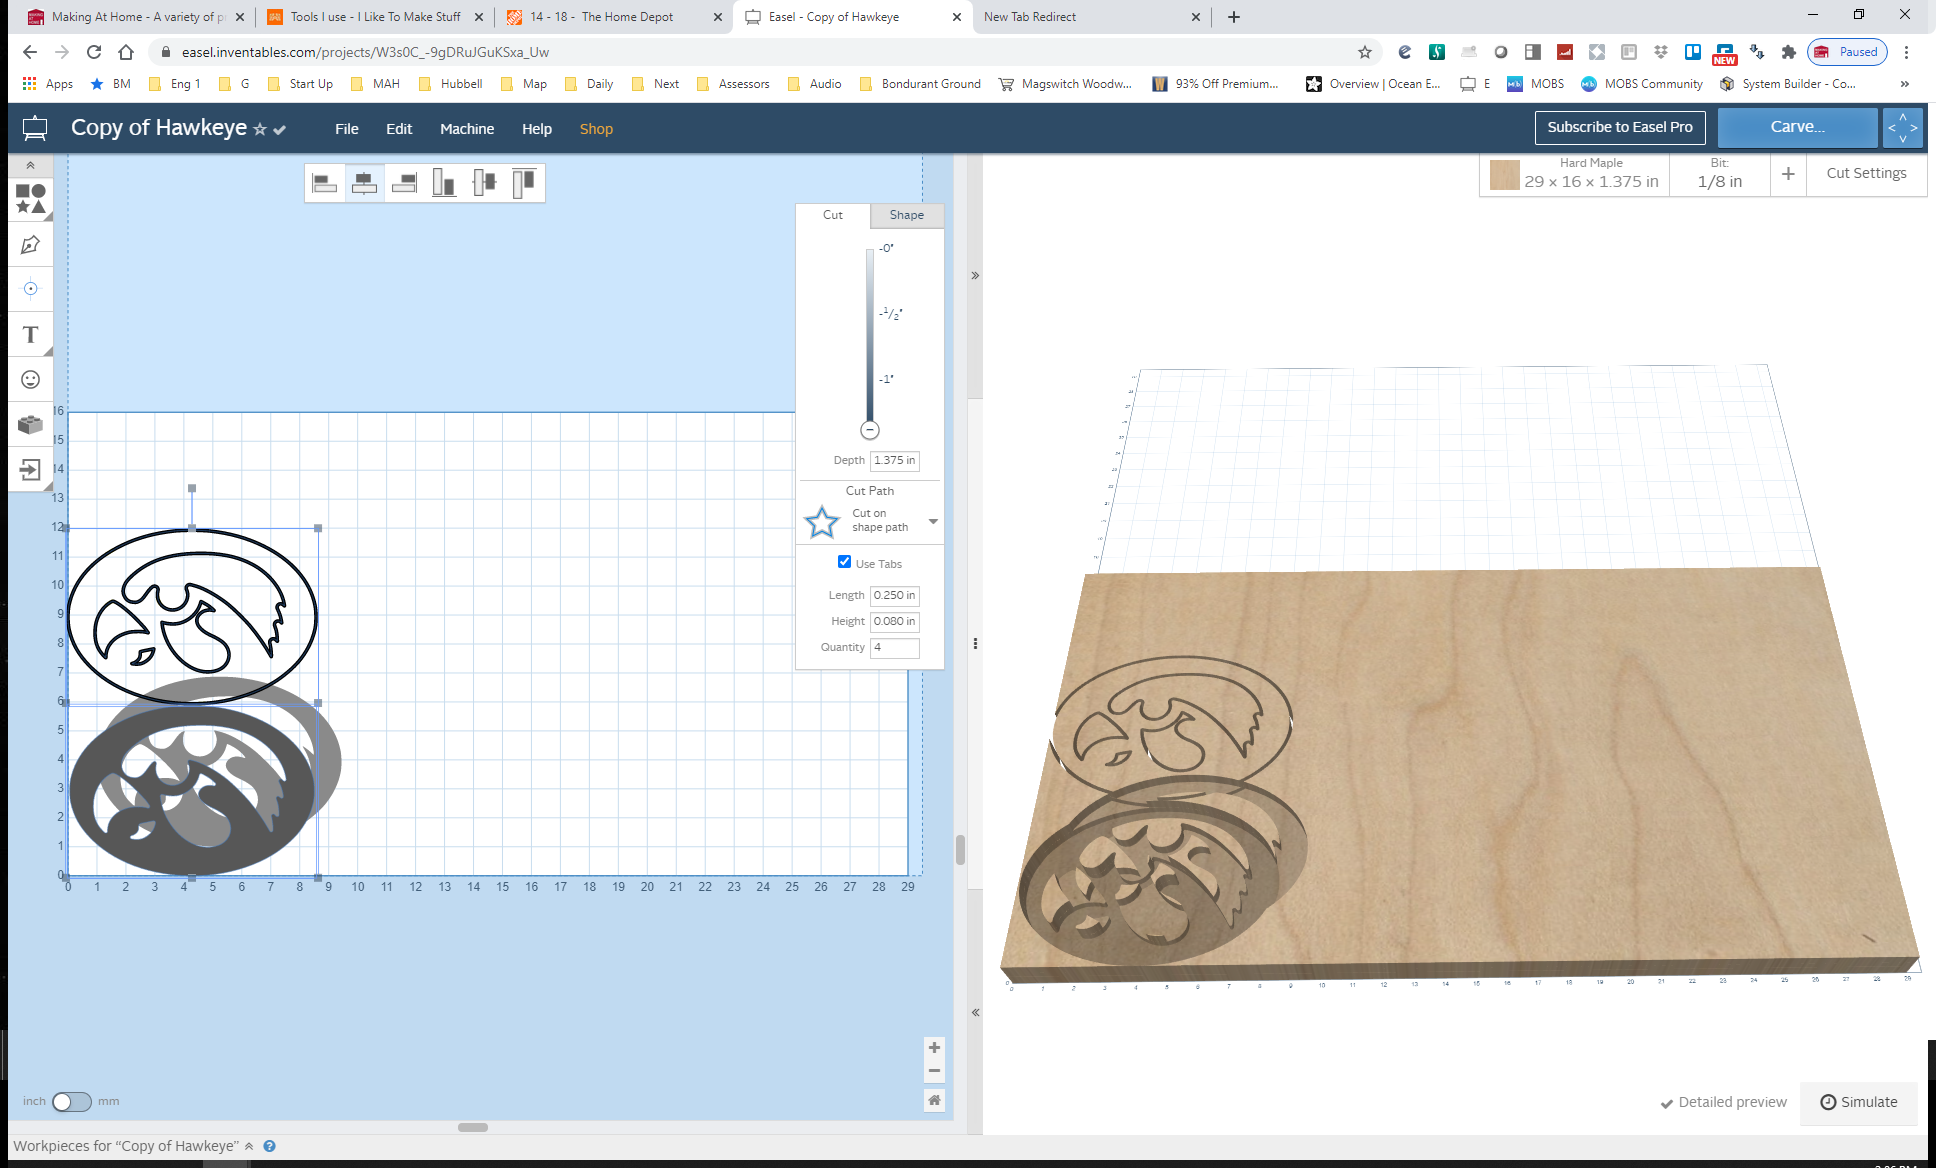
Once you finish your selections on the app you will go back to the main page and two new items will be added. The top item will be the inlay and the bottom item will be the pocket for the main piece of wood.
I always add labels like you see in the last image to keep them straight.
Next I duplicate this sheet in the page manager at the bottom of the Easel browser and then delete the pocket piece from one sheet and the inlay piece from the other. This way they have their own carve pages.

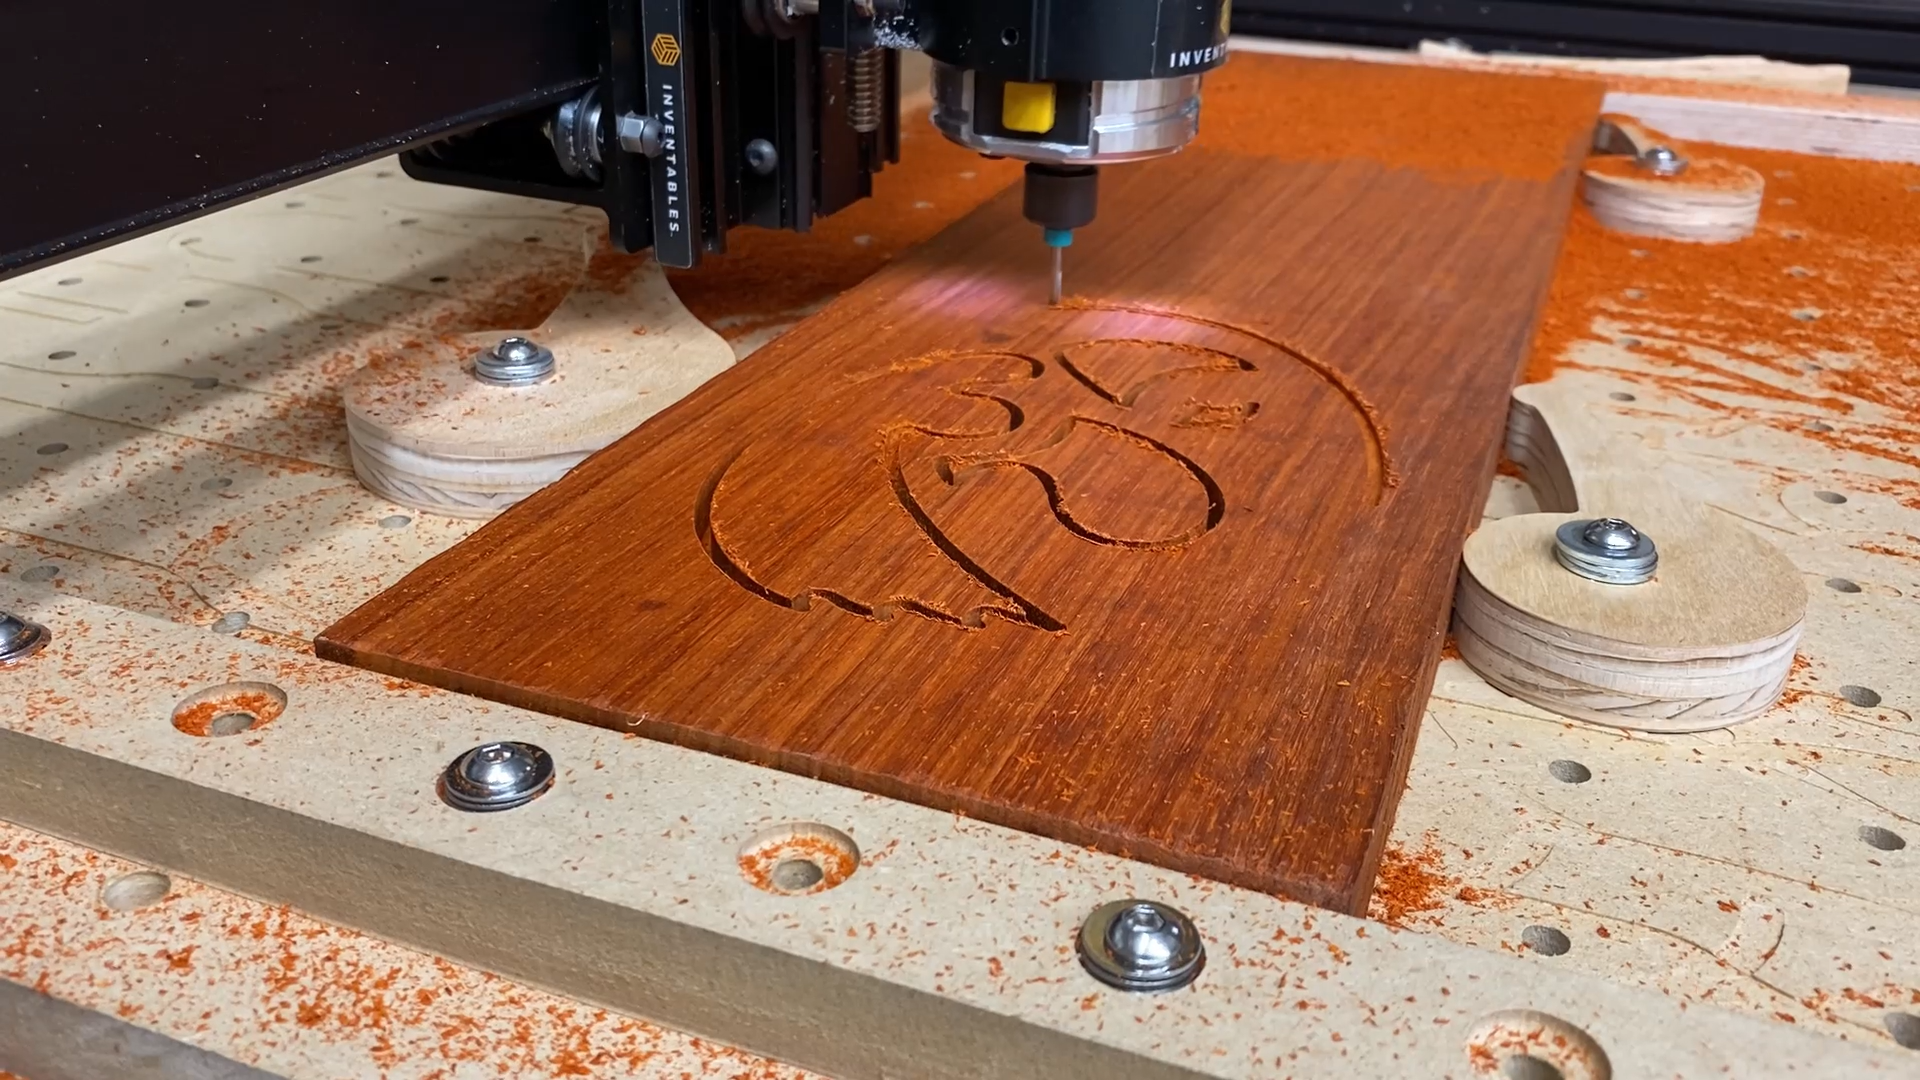
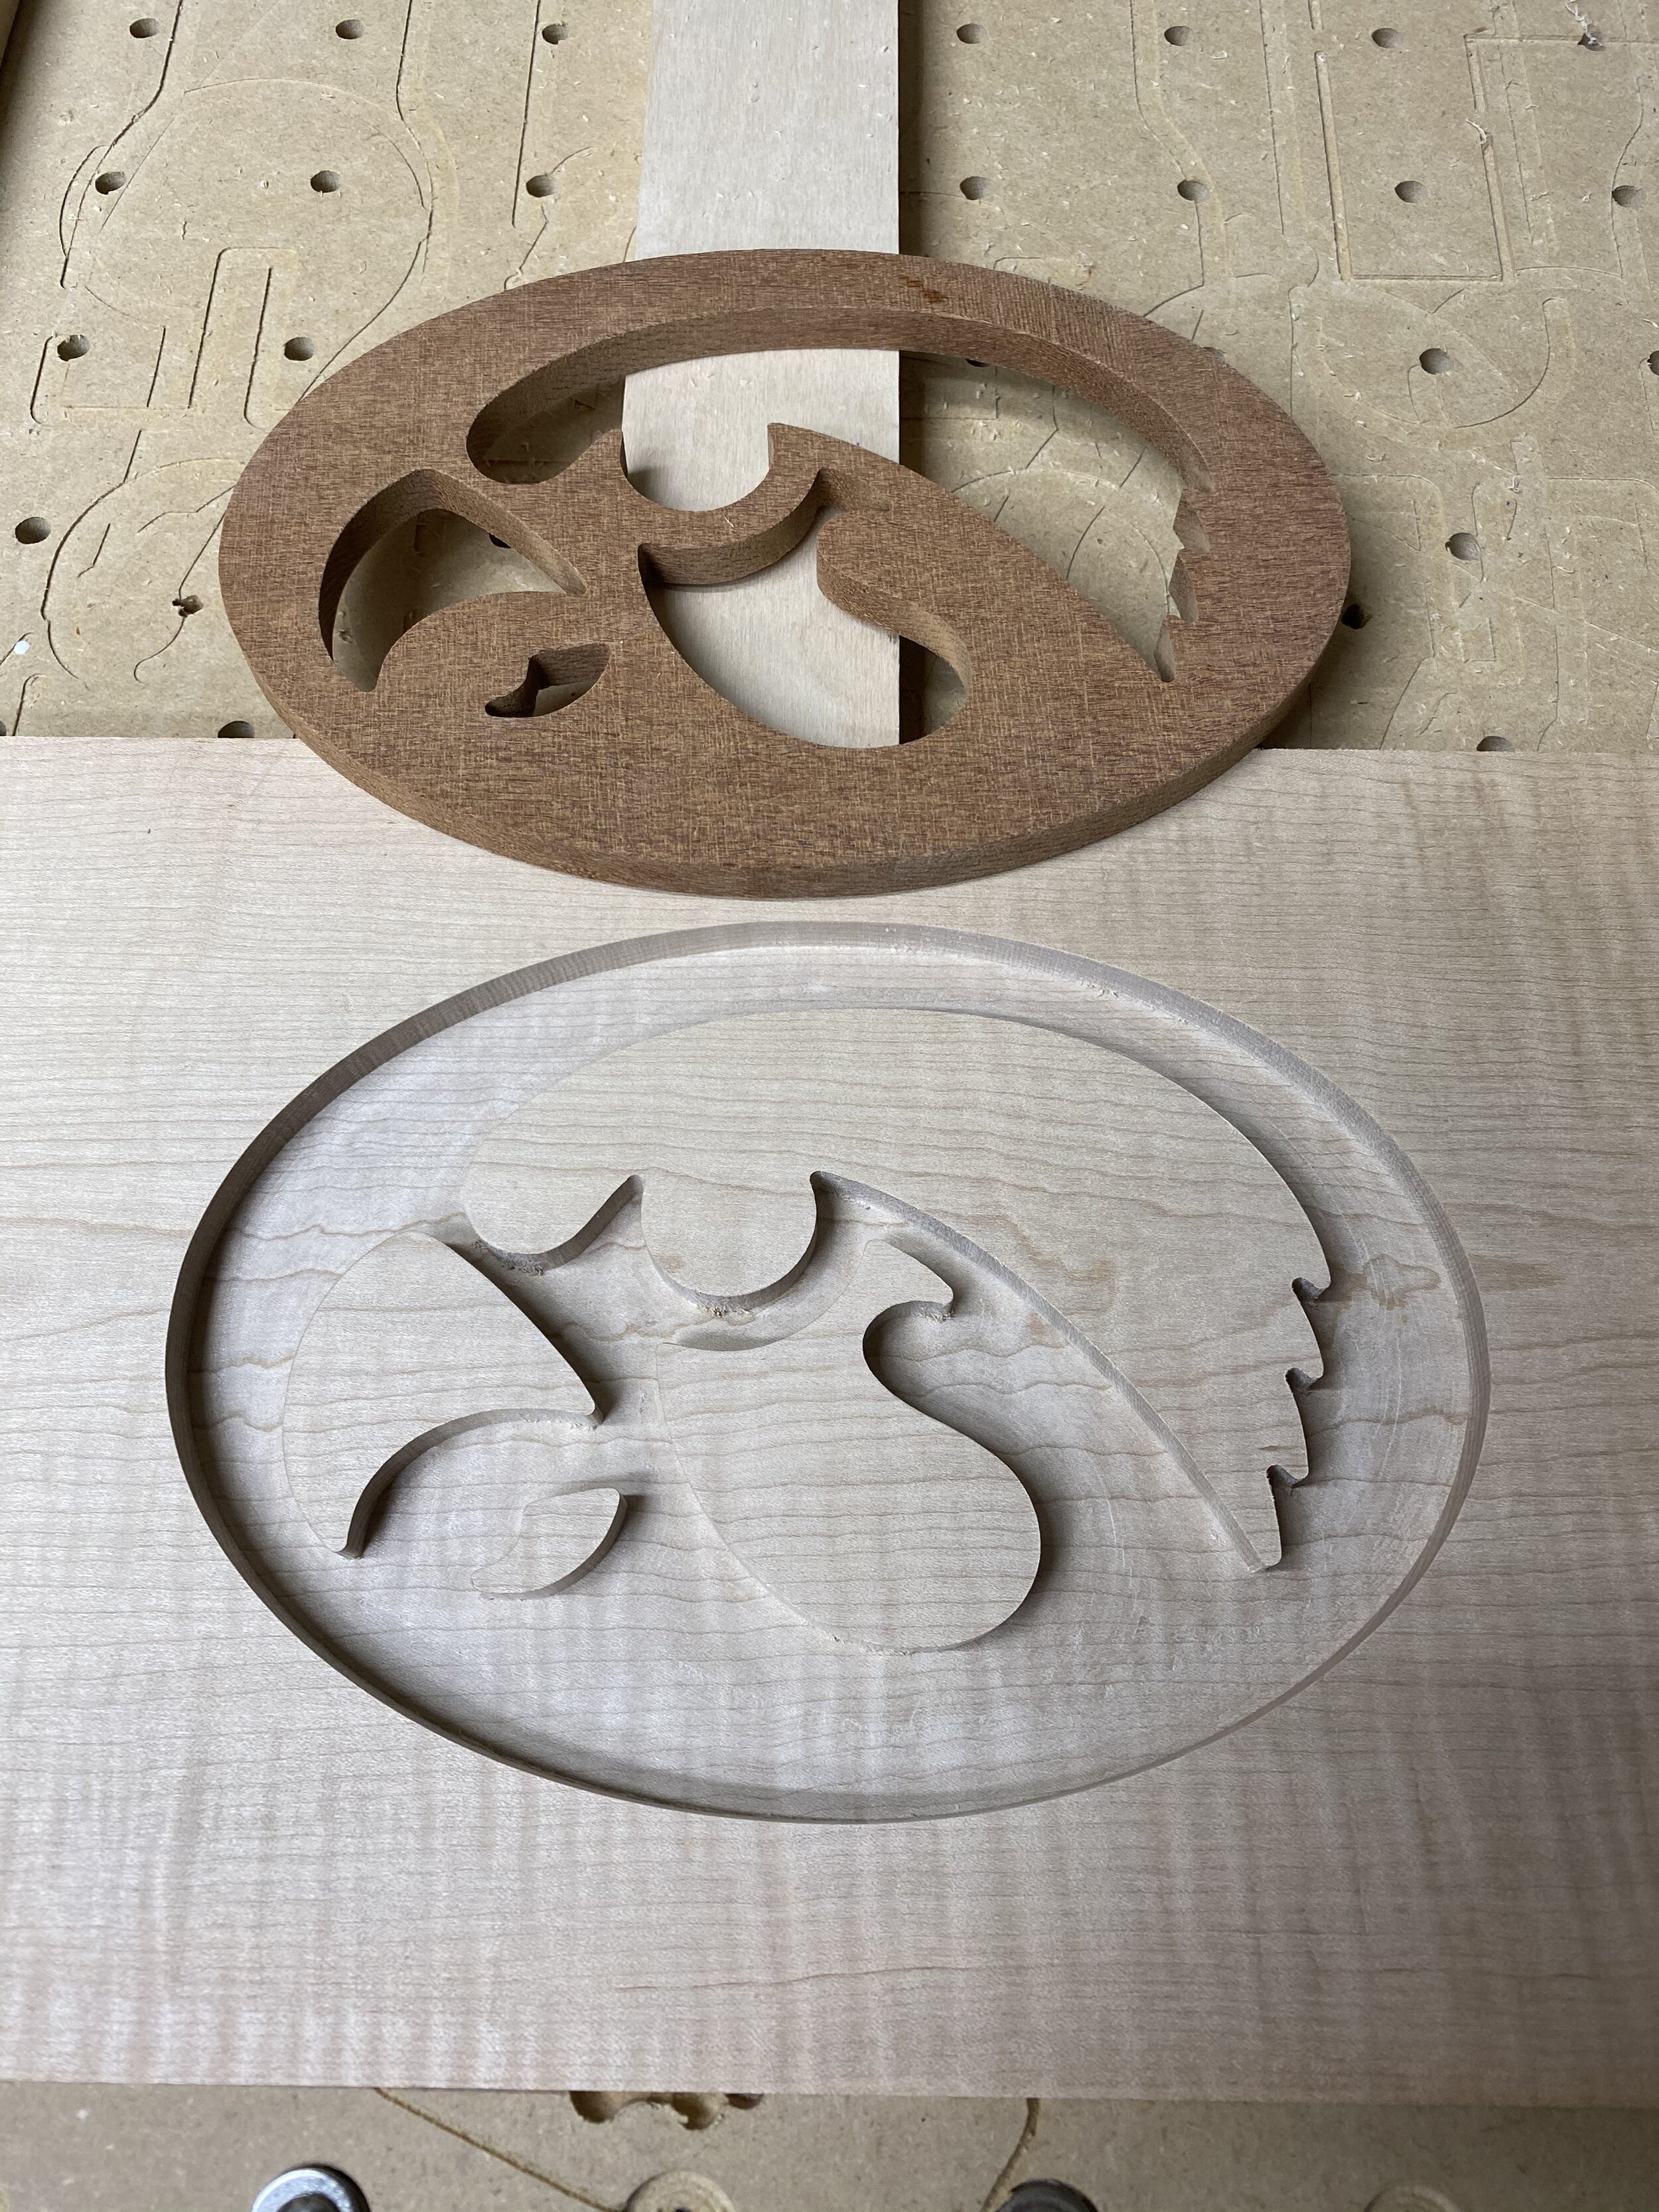
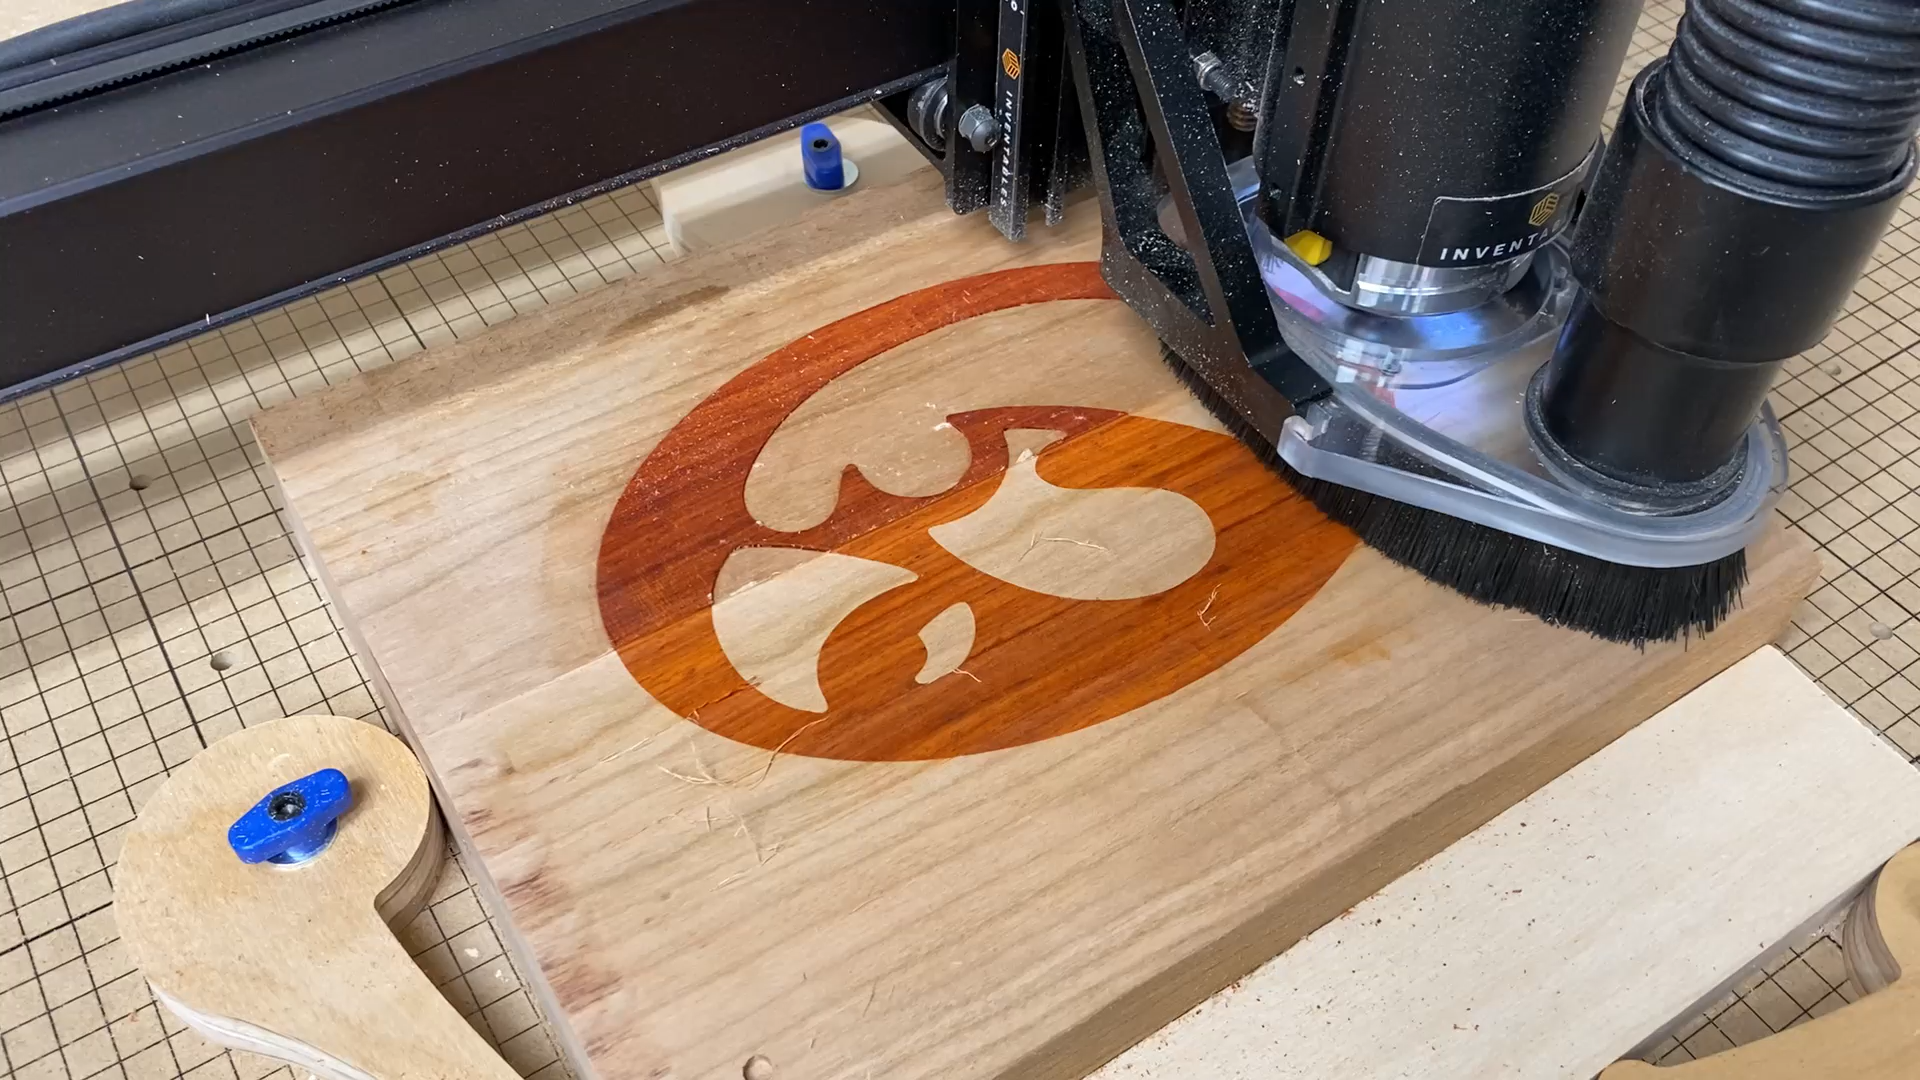
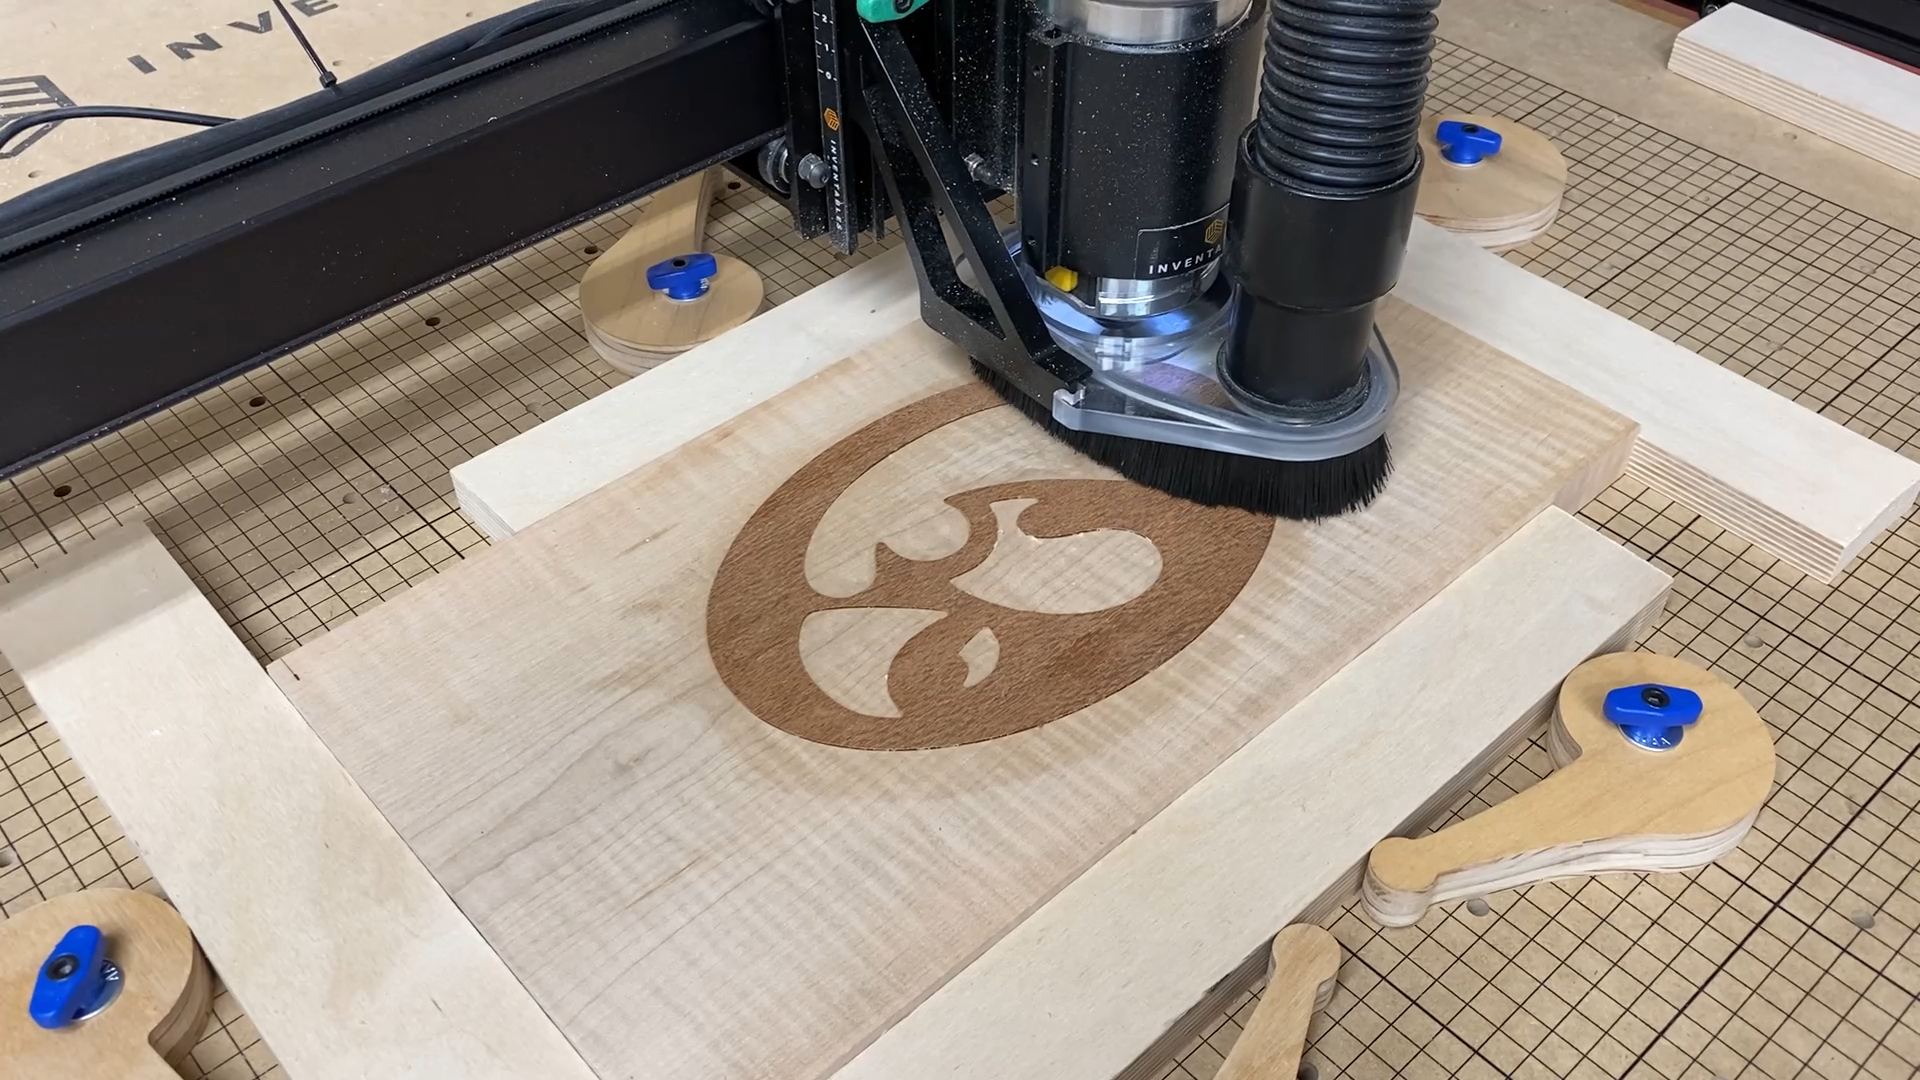
Step 4: Carve the Inlay
If you are going to pour an epoxy inlay then you can skip this step.
This Instructable will not go into the finer details of carving a shape as it is more about the details.
Once you create the inlay and pocket with the Inlay App in the Easel software, it is important that you don't change the shape in any way.
Go ahead and carve the inlay like you would any other item.
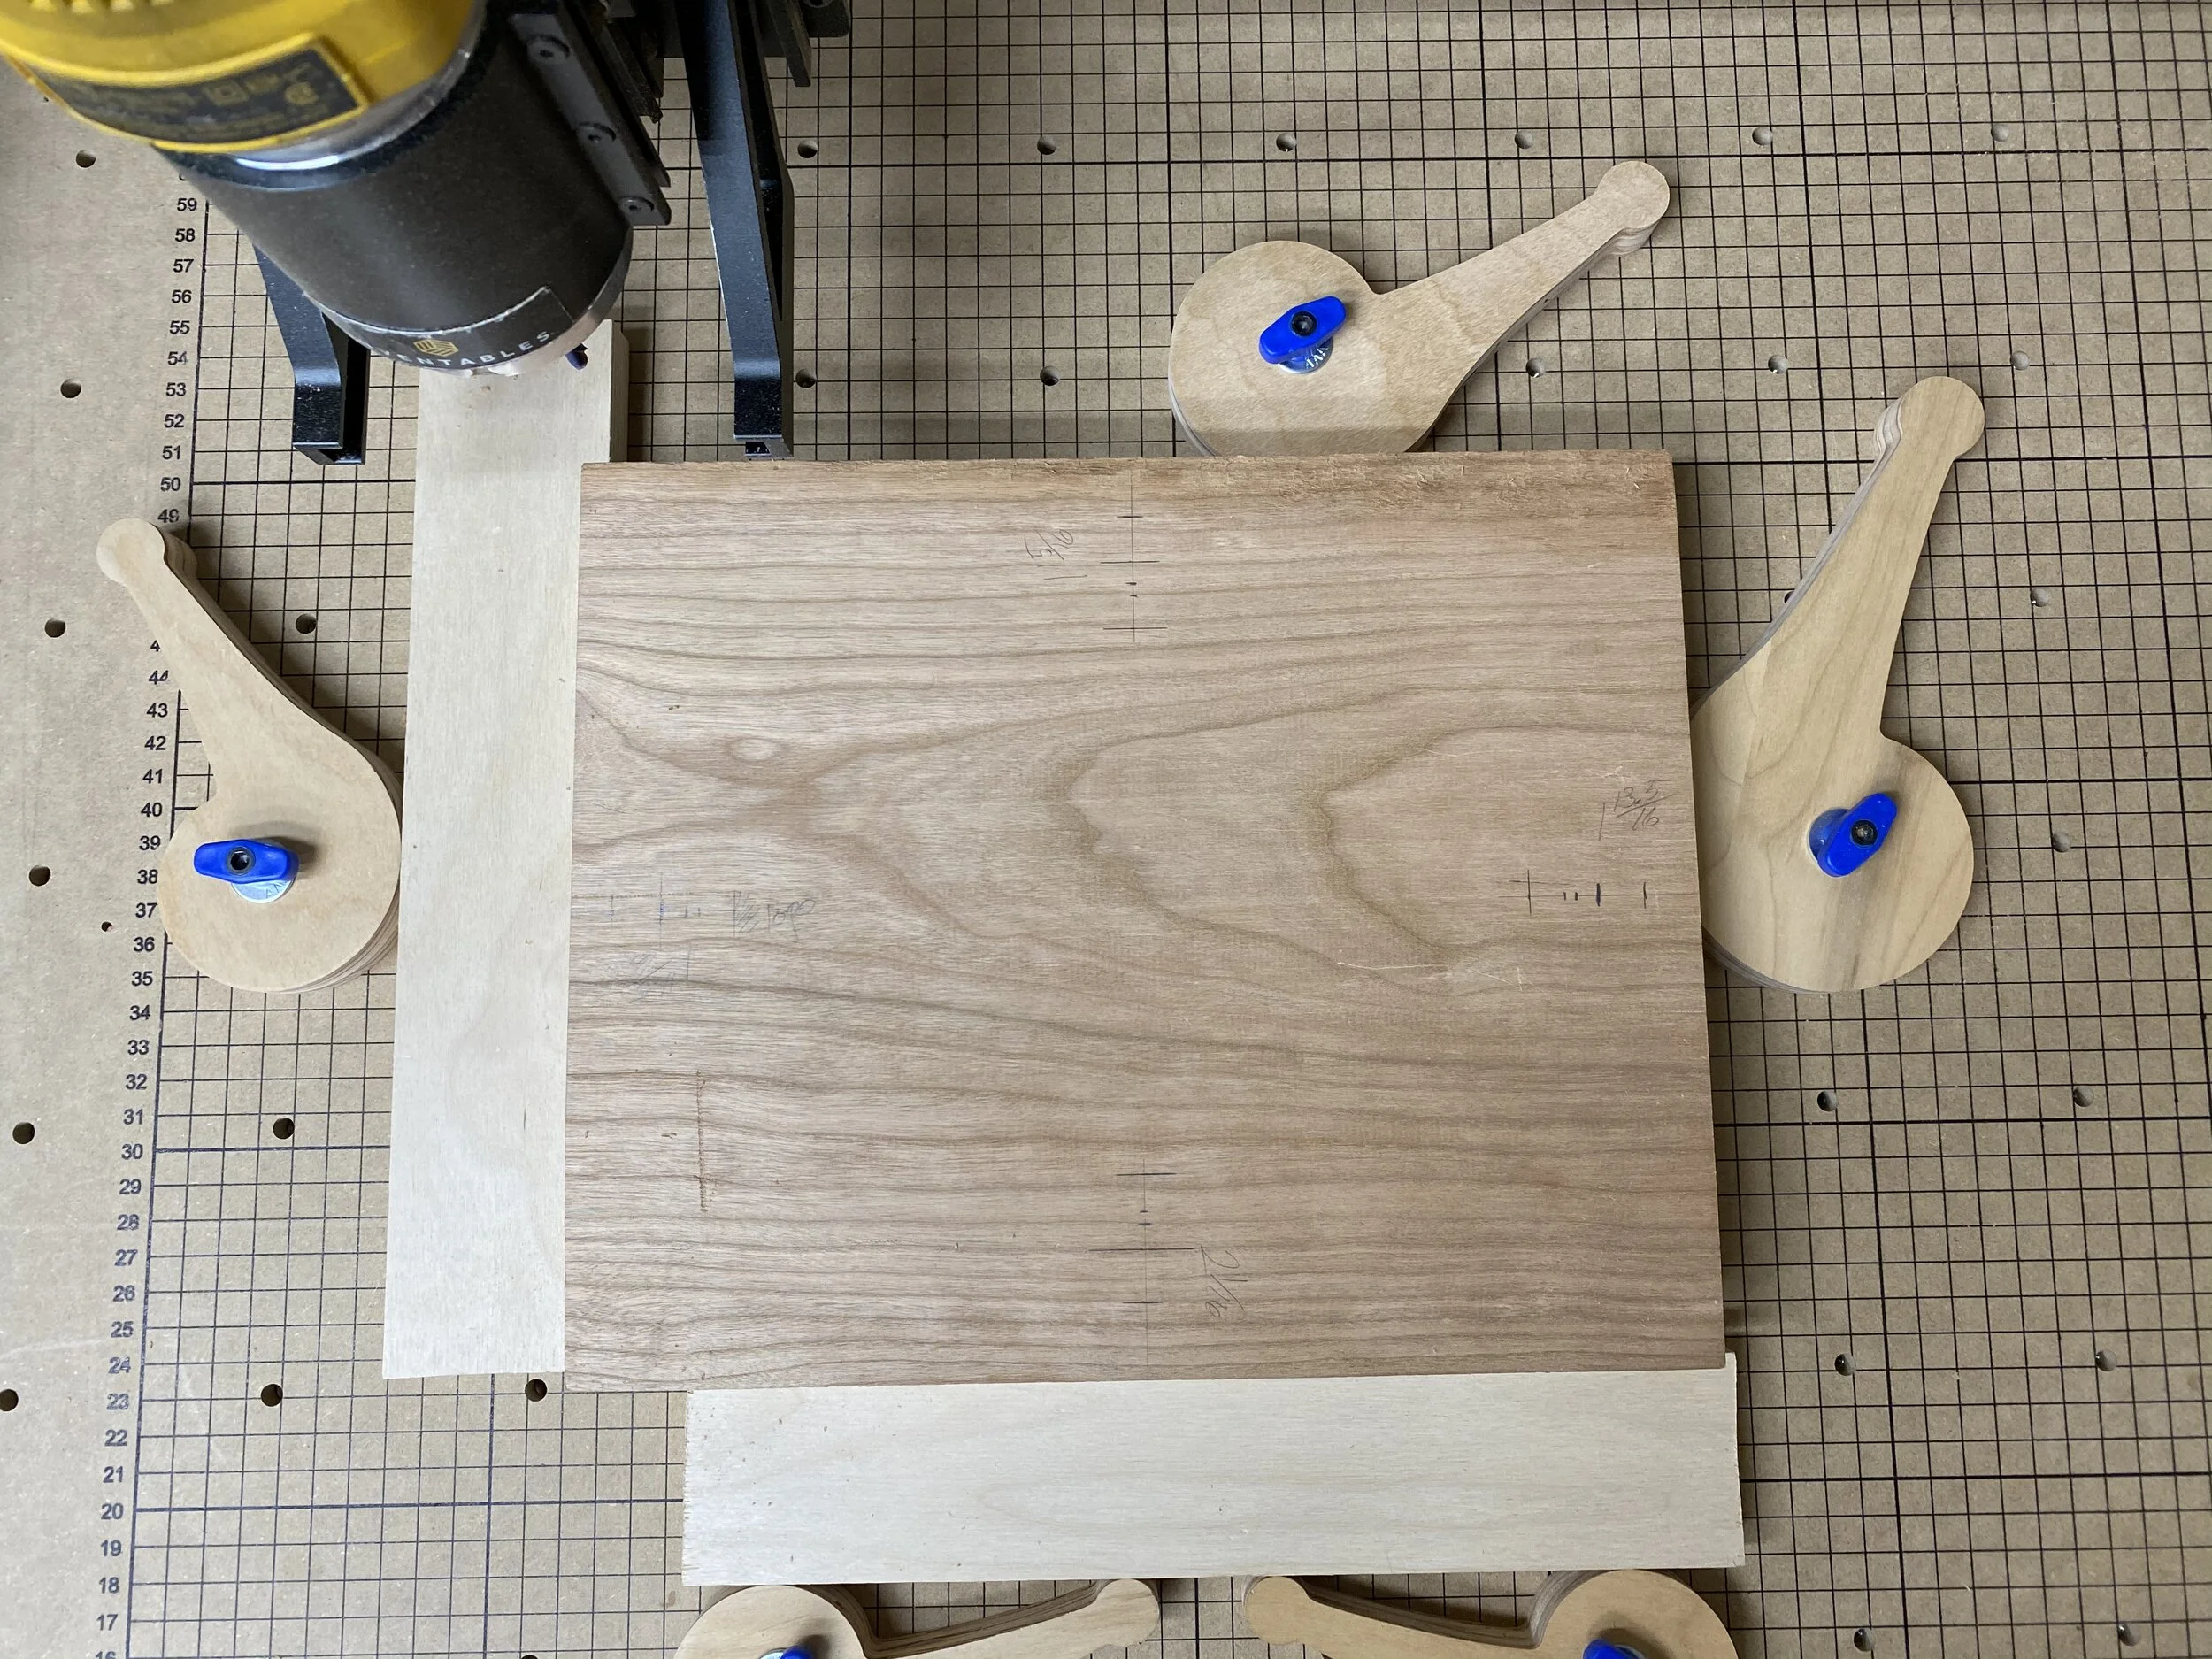
Step 5: Carve the Pocket
Carving the pocket is the second part of using the Easel Inlay App.
I centered the logo in the field of the wood I was carving into. I used my typical setting for the carve with the bowl bit.
As you can imagine, the deeper the bowl, the longer the carve for the additional material that needs to be removed.

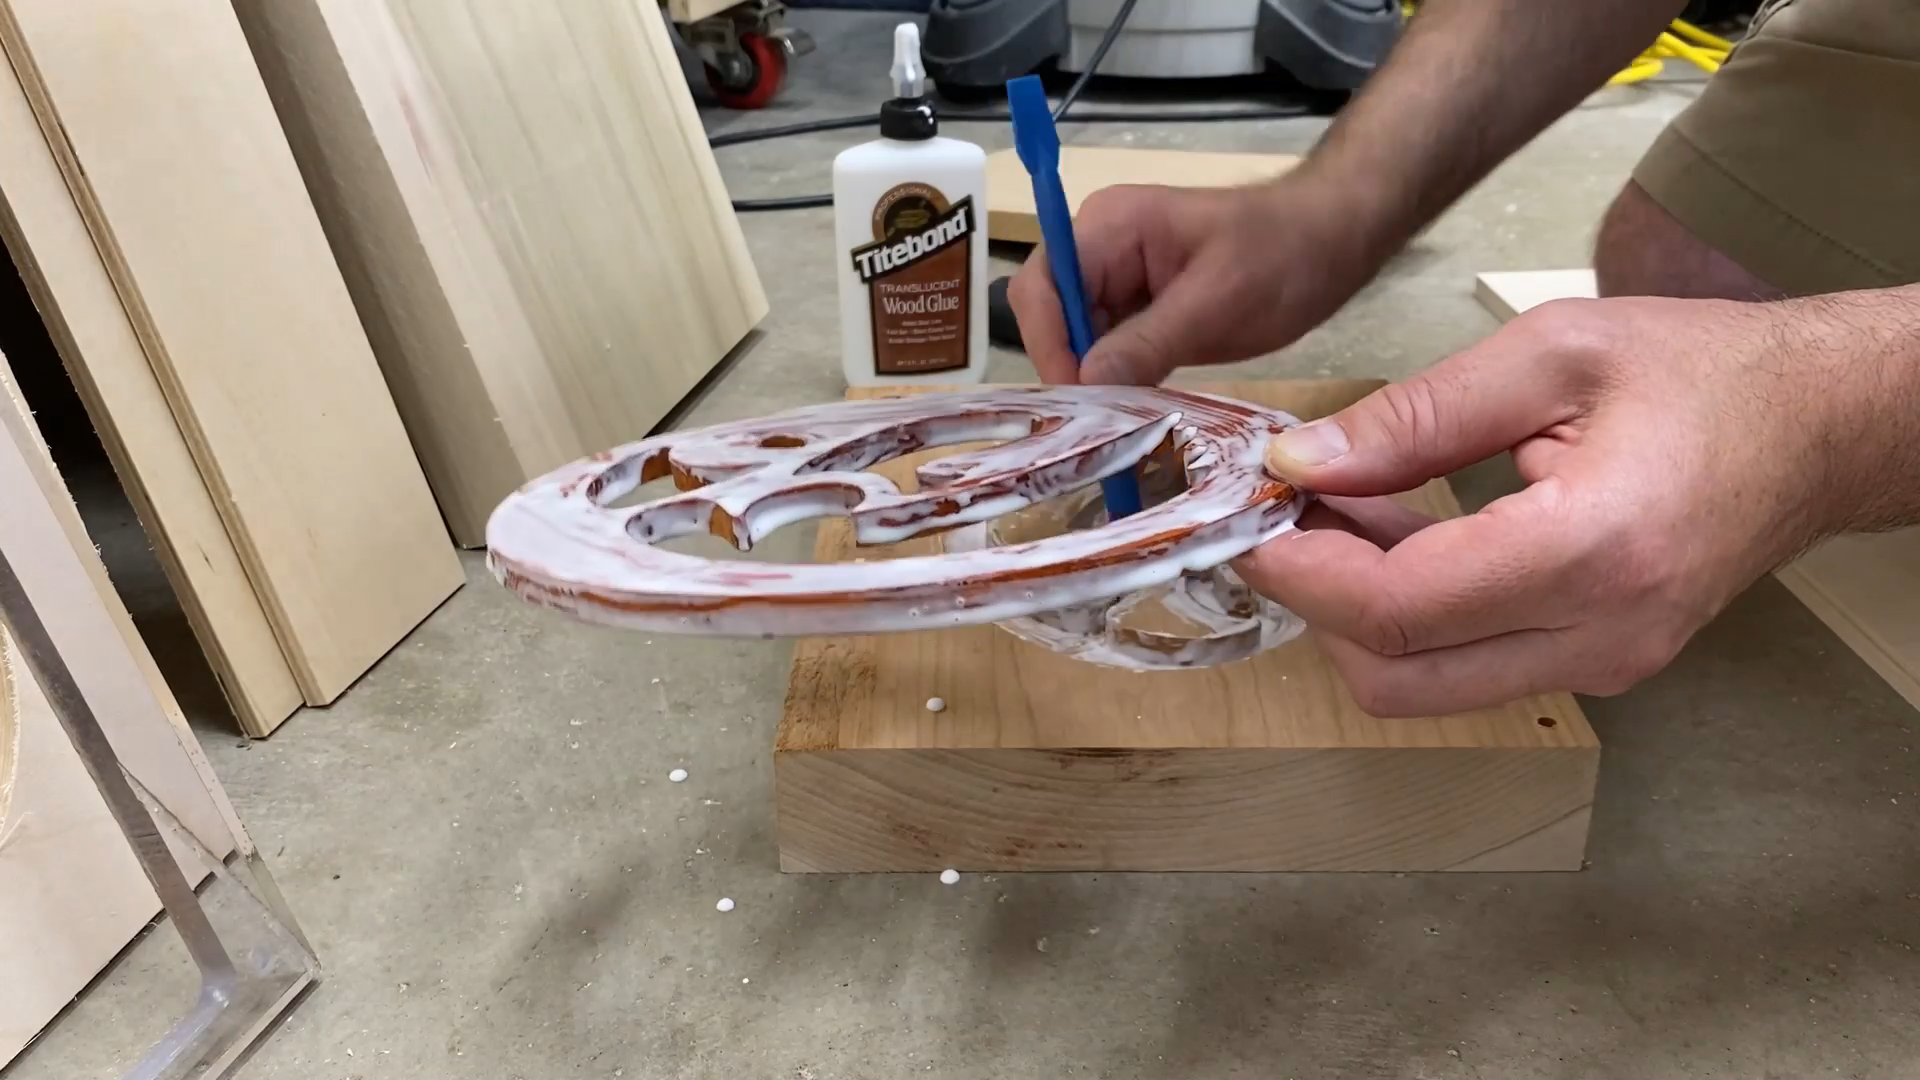
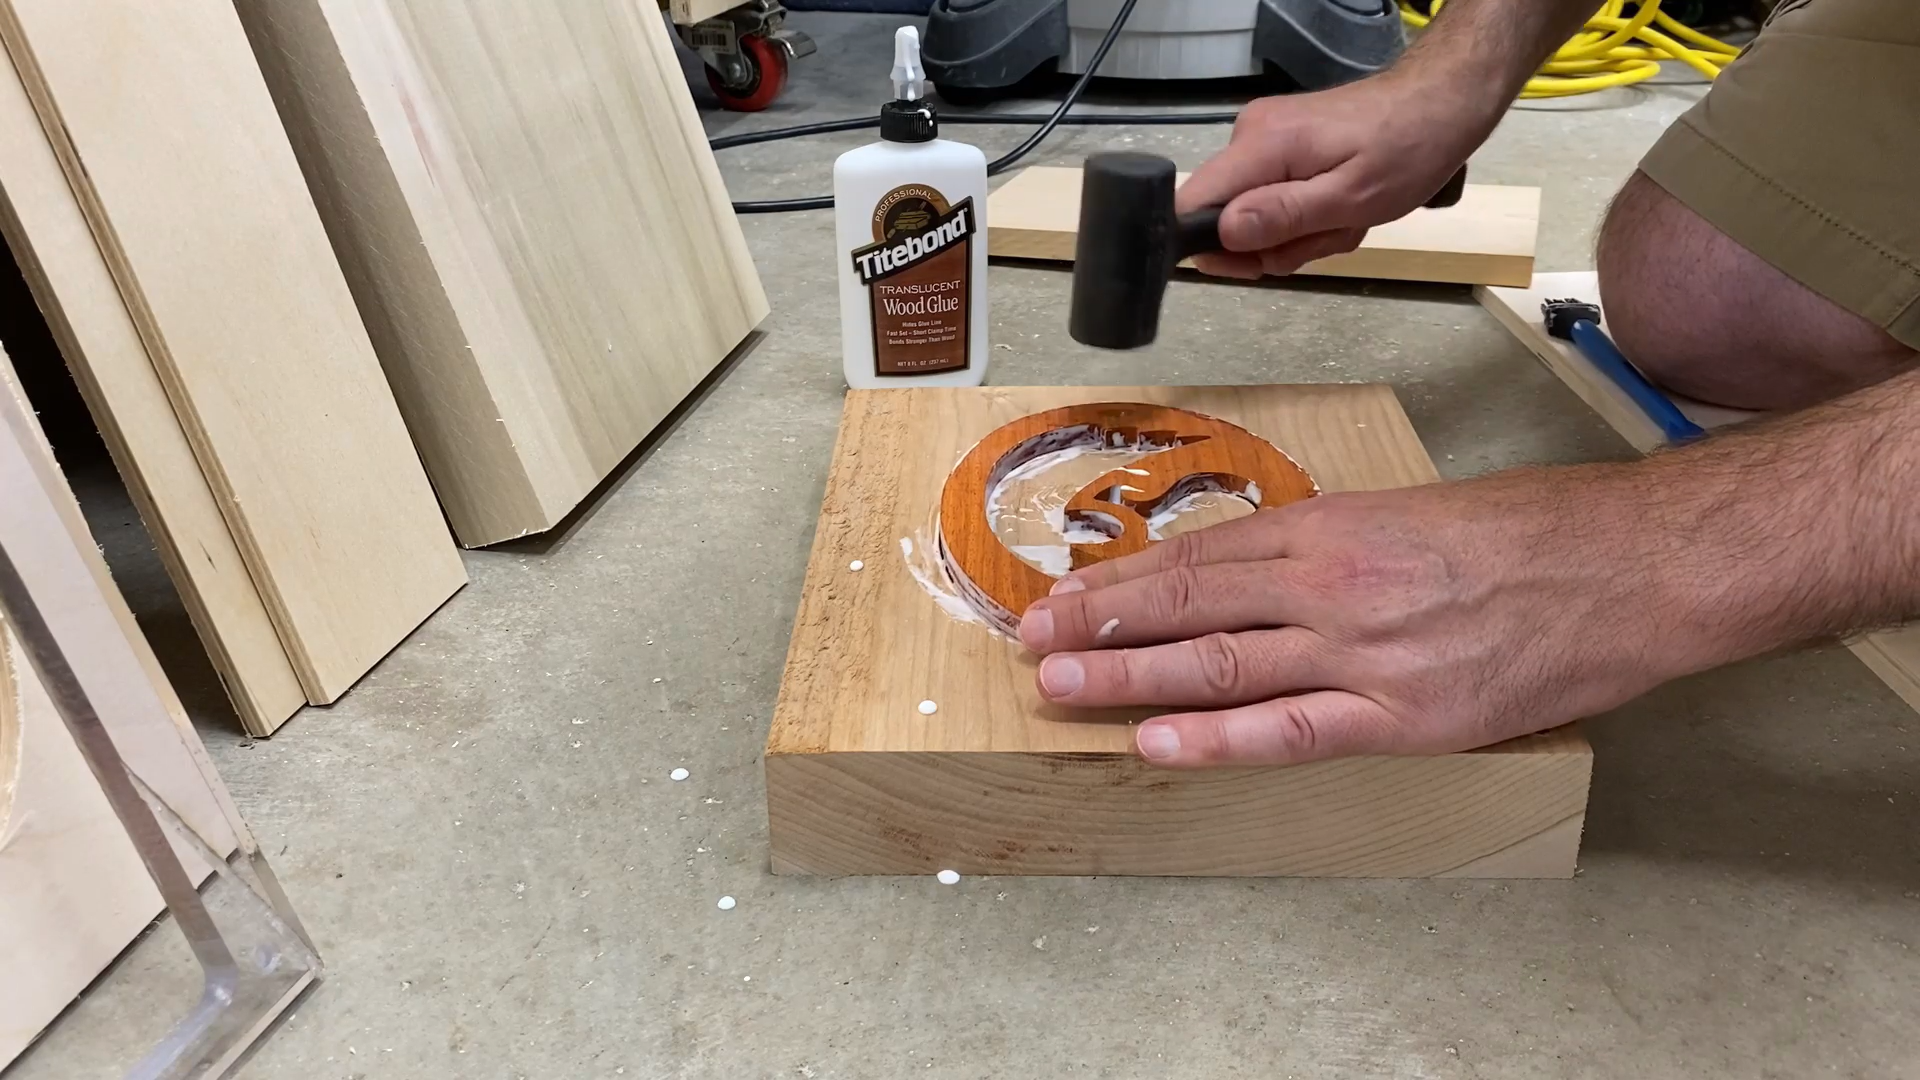
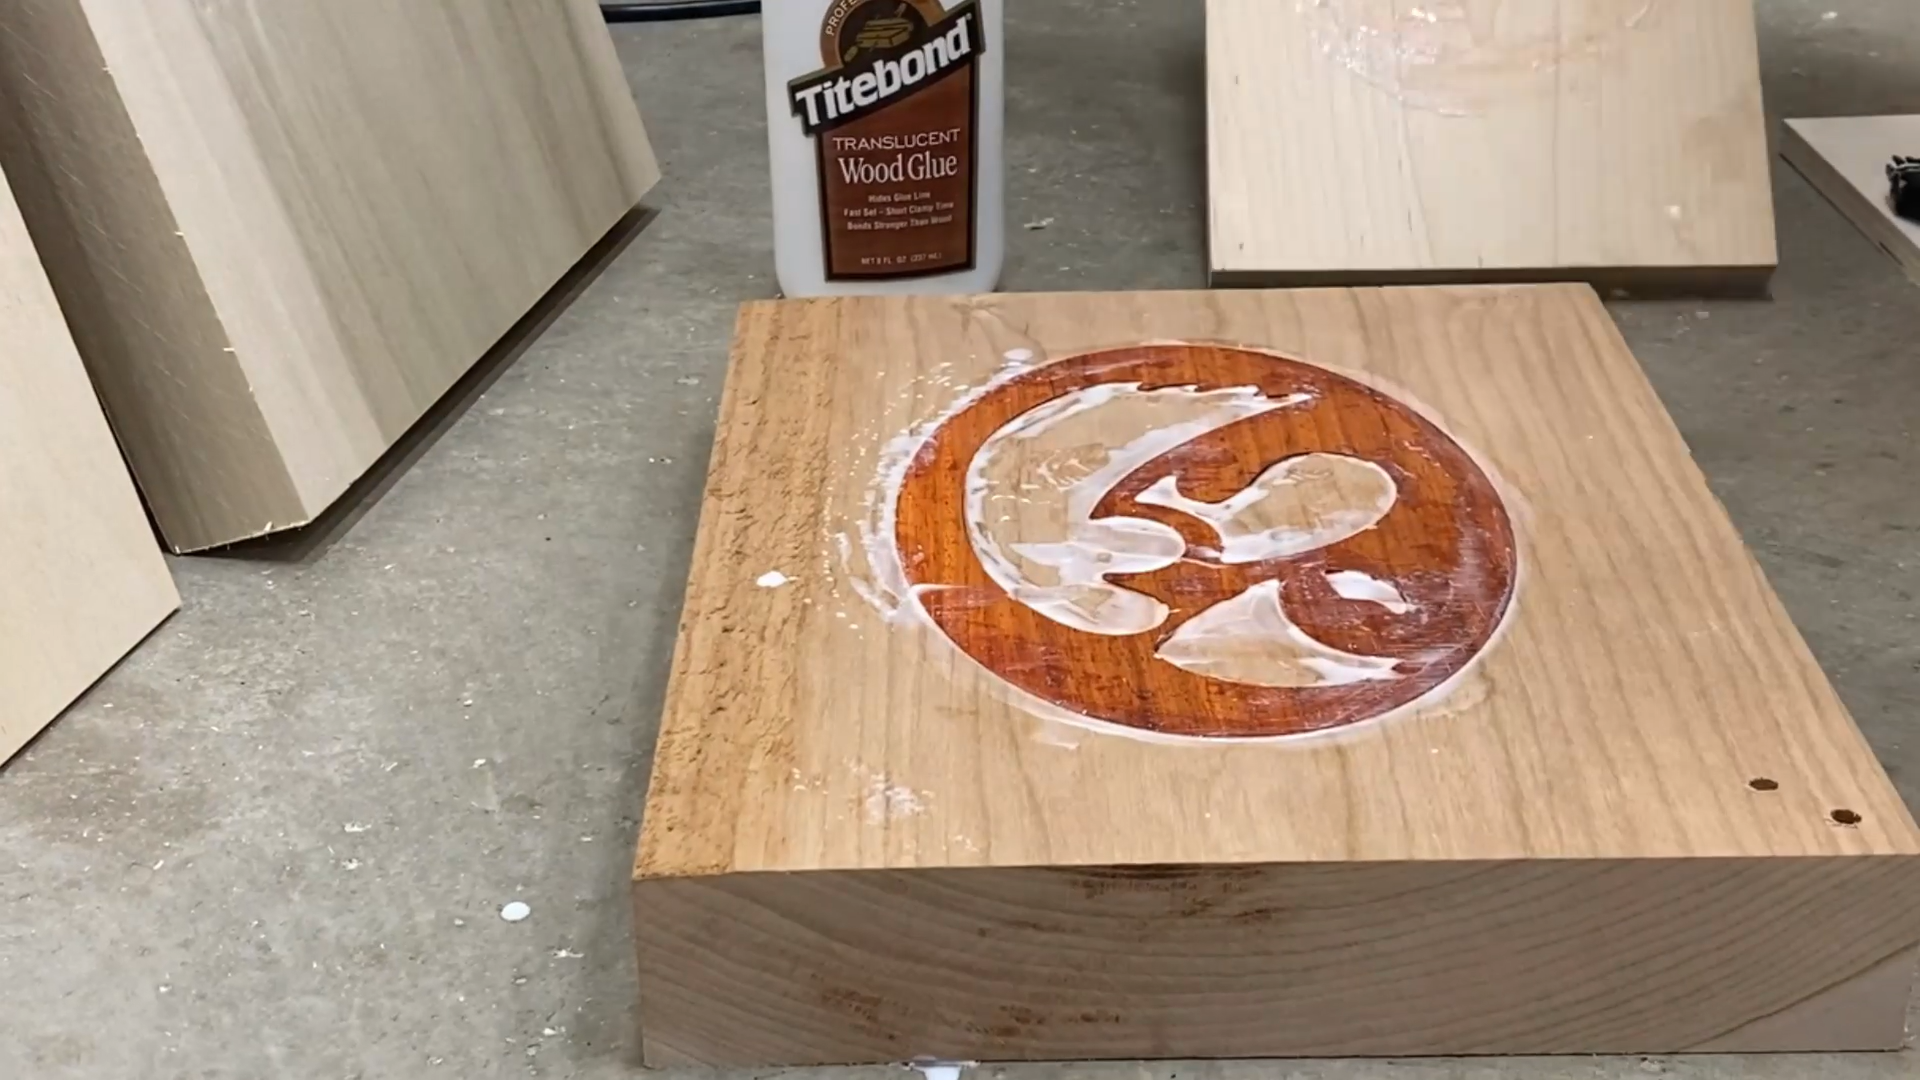
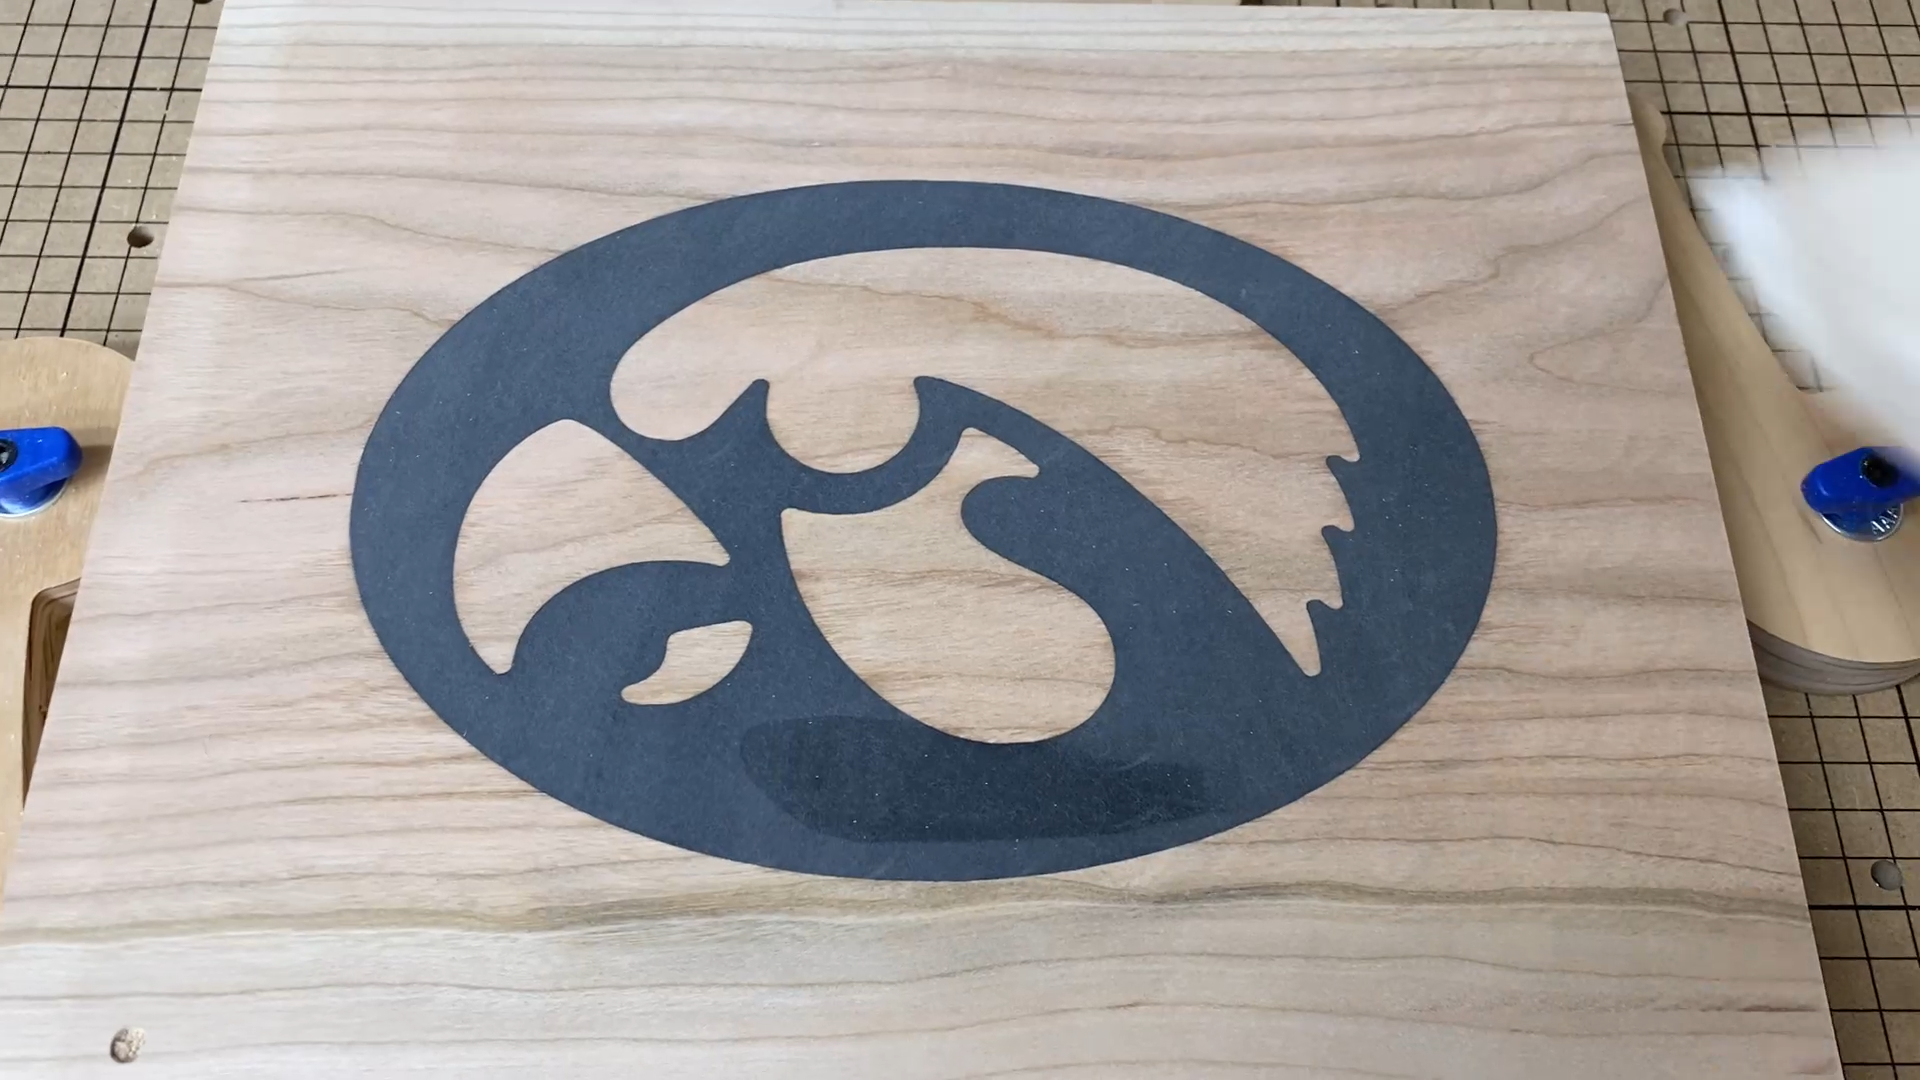
Step 6: Glue the Inlay Into the Pocket
If you are going to pour an epoxy inlay then you can skip this step.
I did some light sanding on the top of the carved logo in order to remove the small piece of wood fiber around the edges.
Gluing the inlays into the pockets can be a challenge if you have really tight tolerances. I had to coax (use a mallet) on the inlays to get them into the pockets once I added glue. Once you add glue, there is a good chance that your pieces are going to start swelling up right away. I highly recommend gluing in the inlay as soon as they are carved so there is less of a chance of your wood pieces swelling from absorbing moisture in the air.


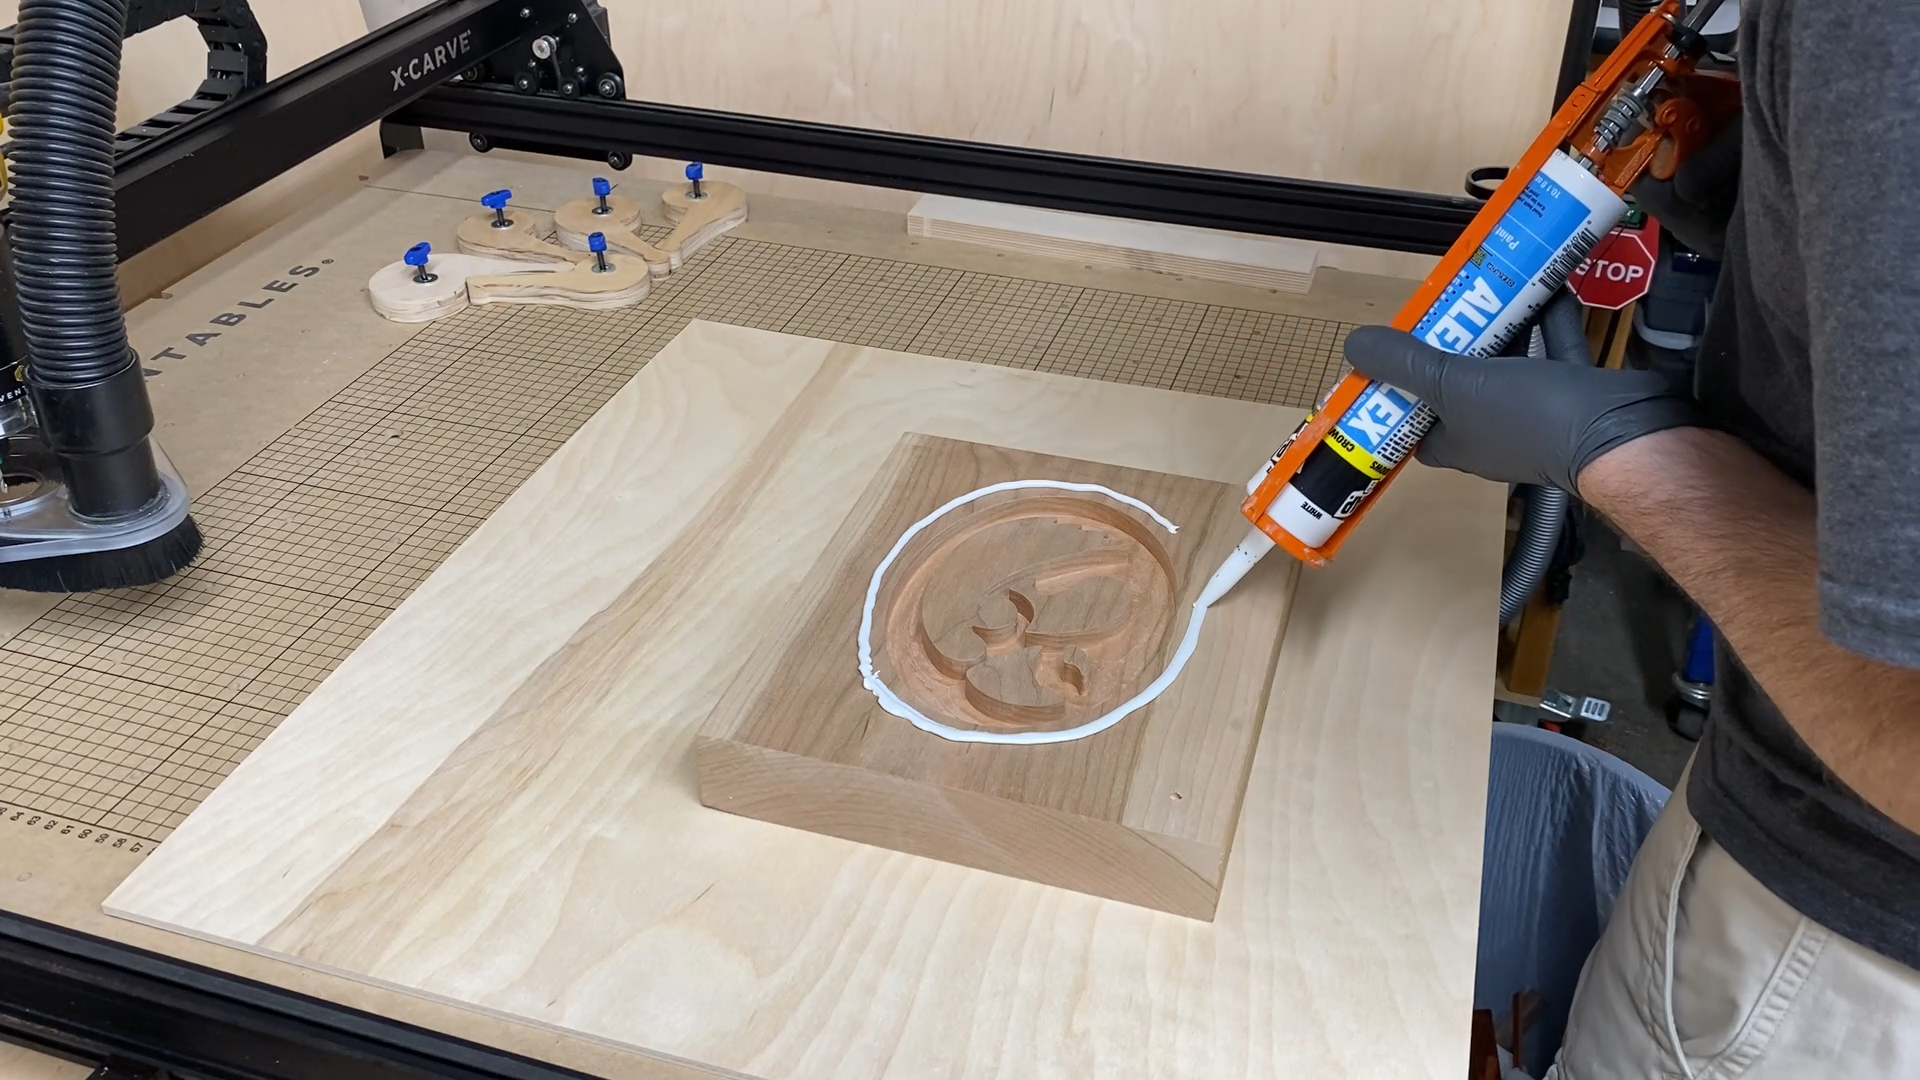
Step 7: Pour Epoxy for an Epoxy Inlay
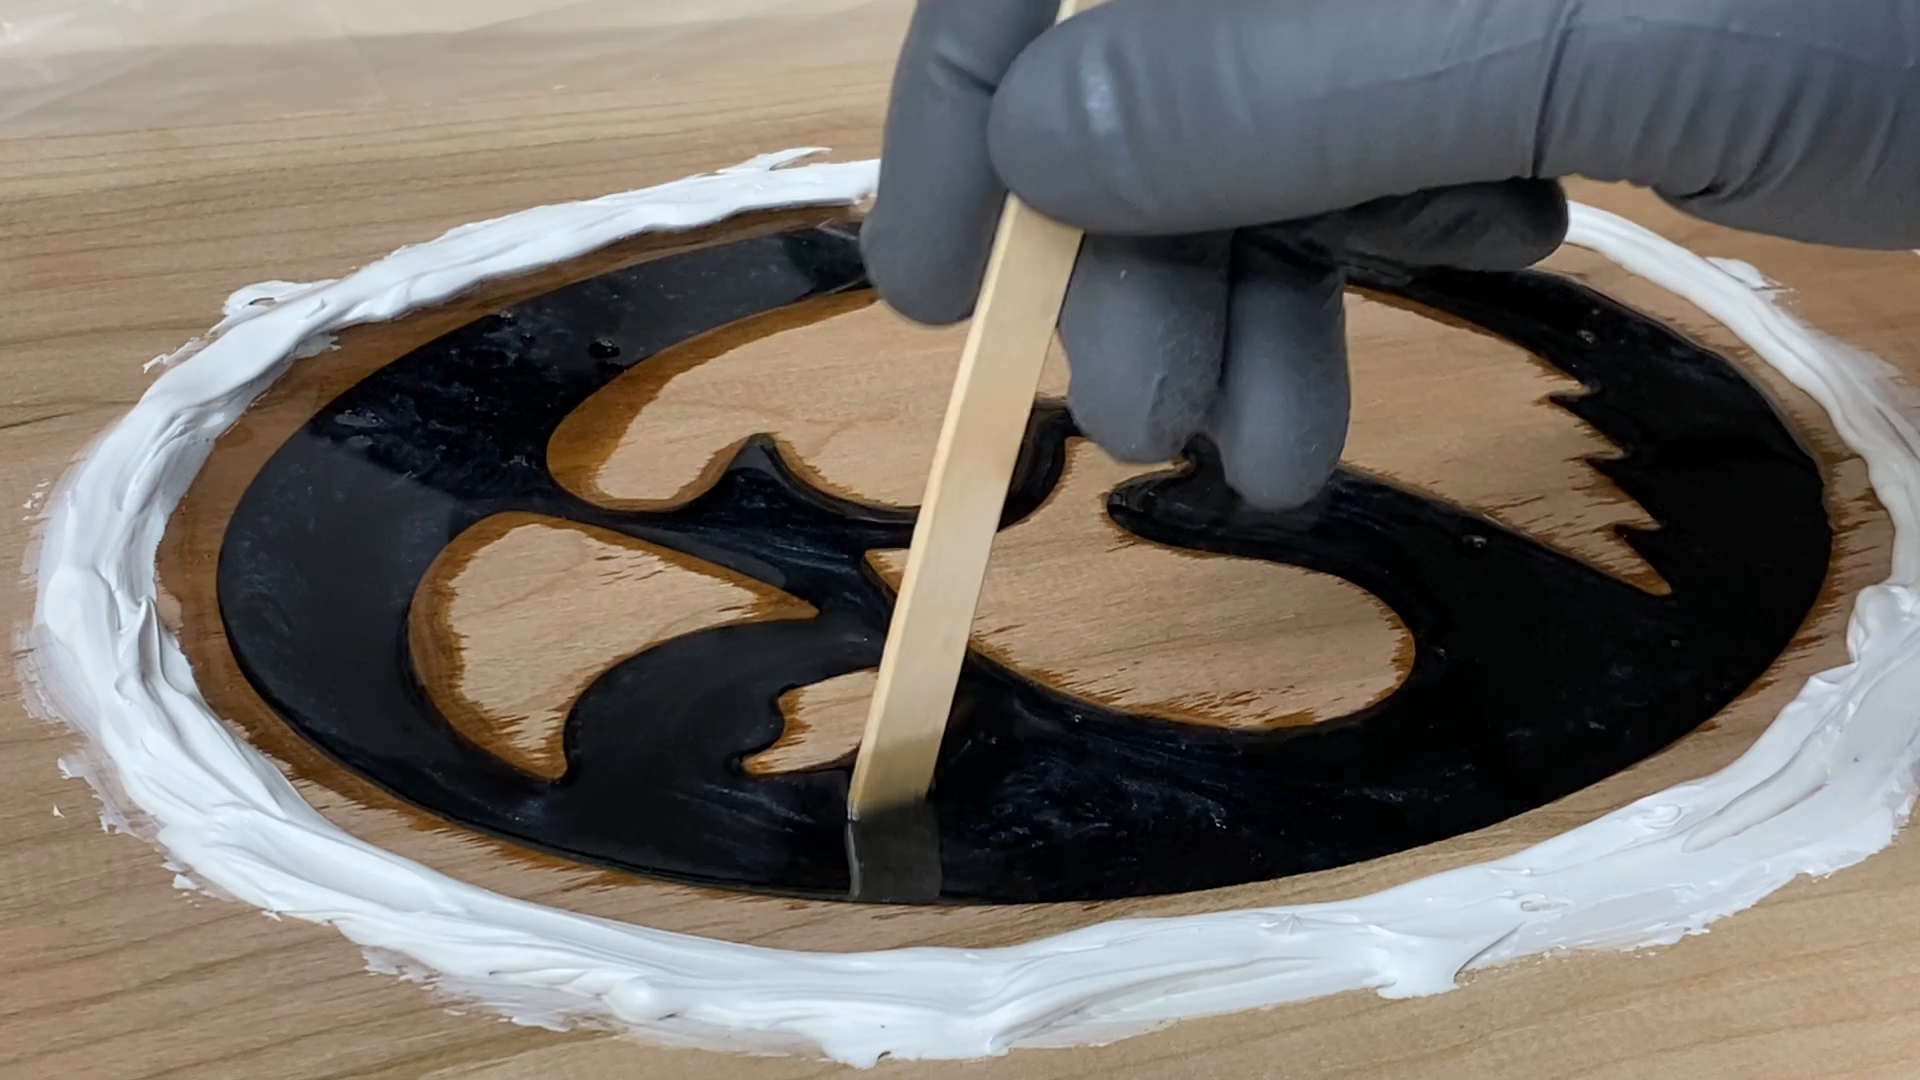
If you decided to just do an epoxy inlay then you can now mix up your epoxy and fill in the pocket that you carved in the earlier step.
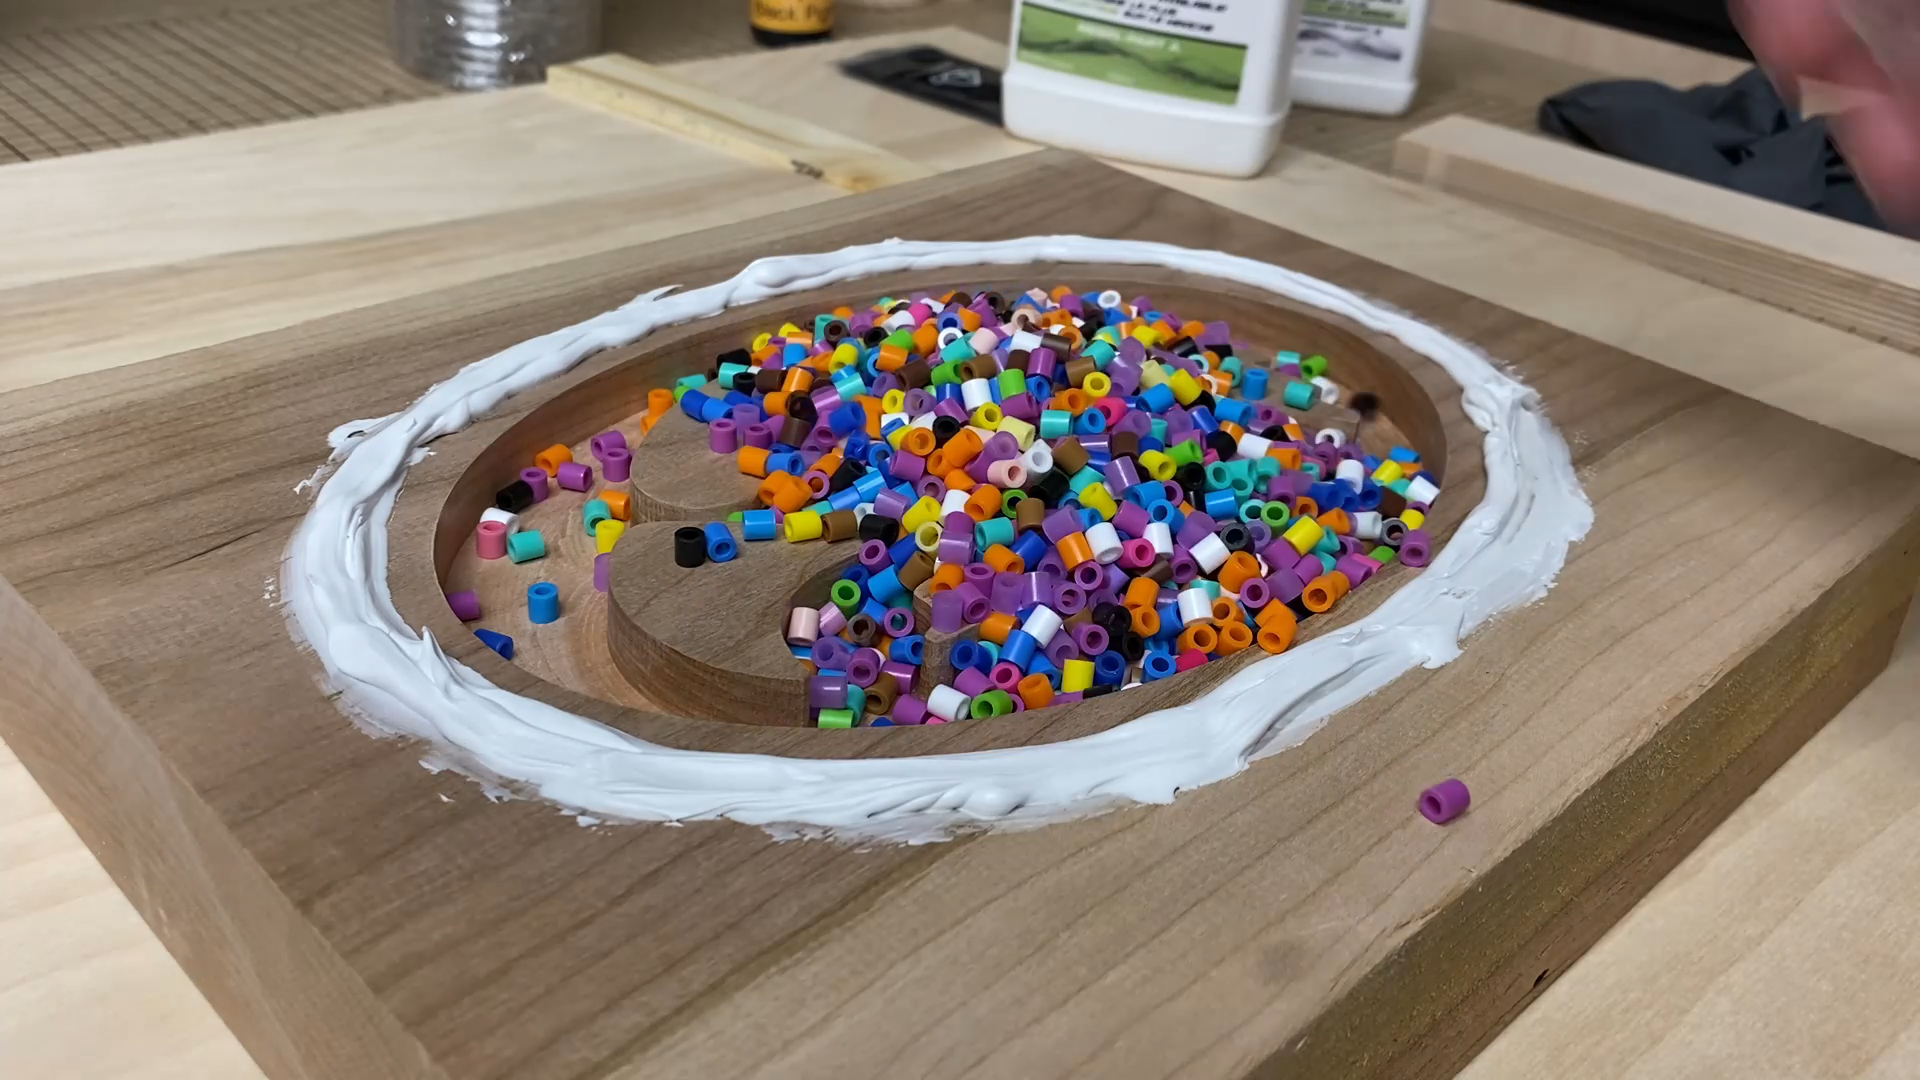
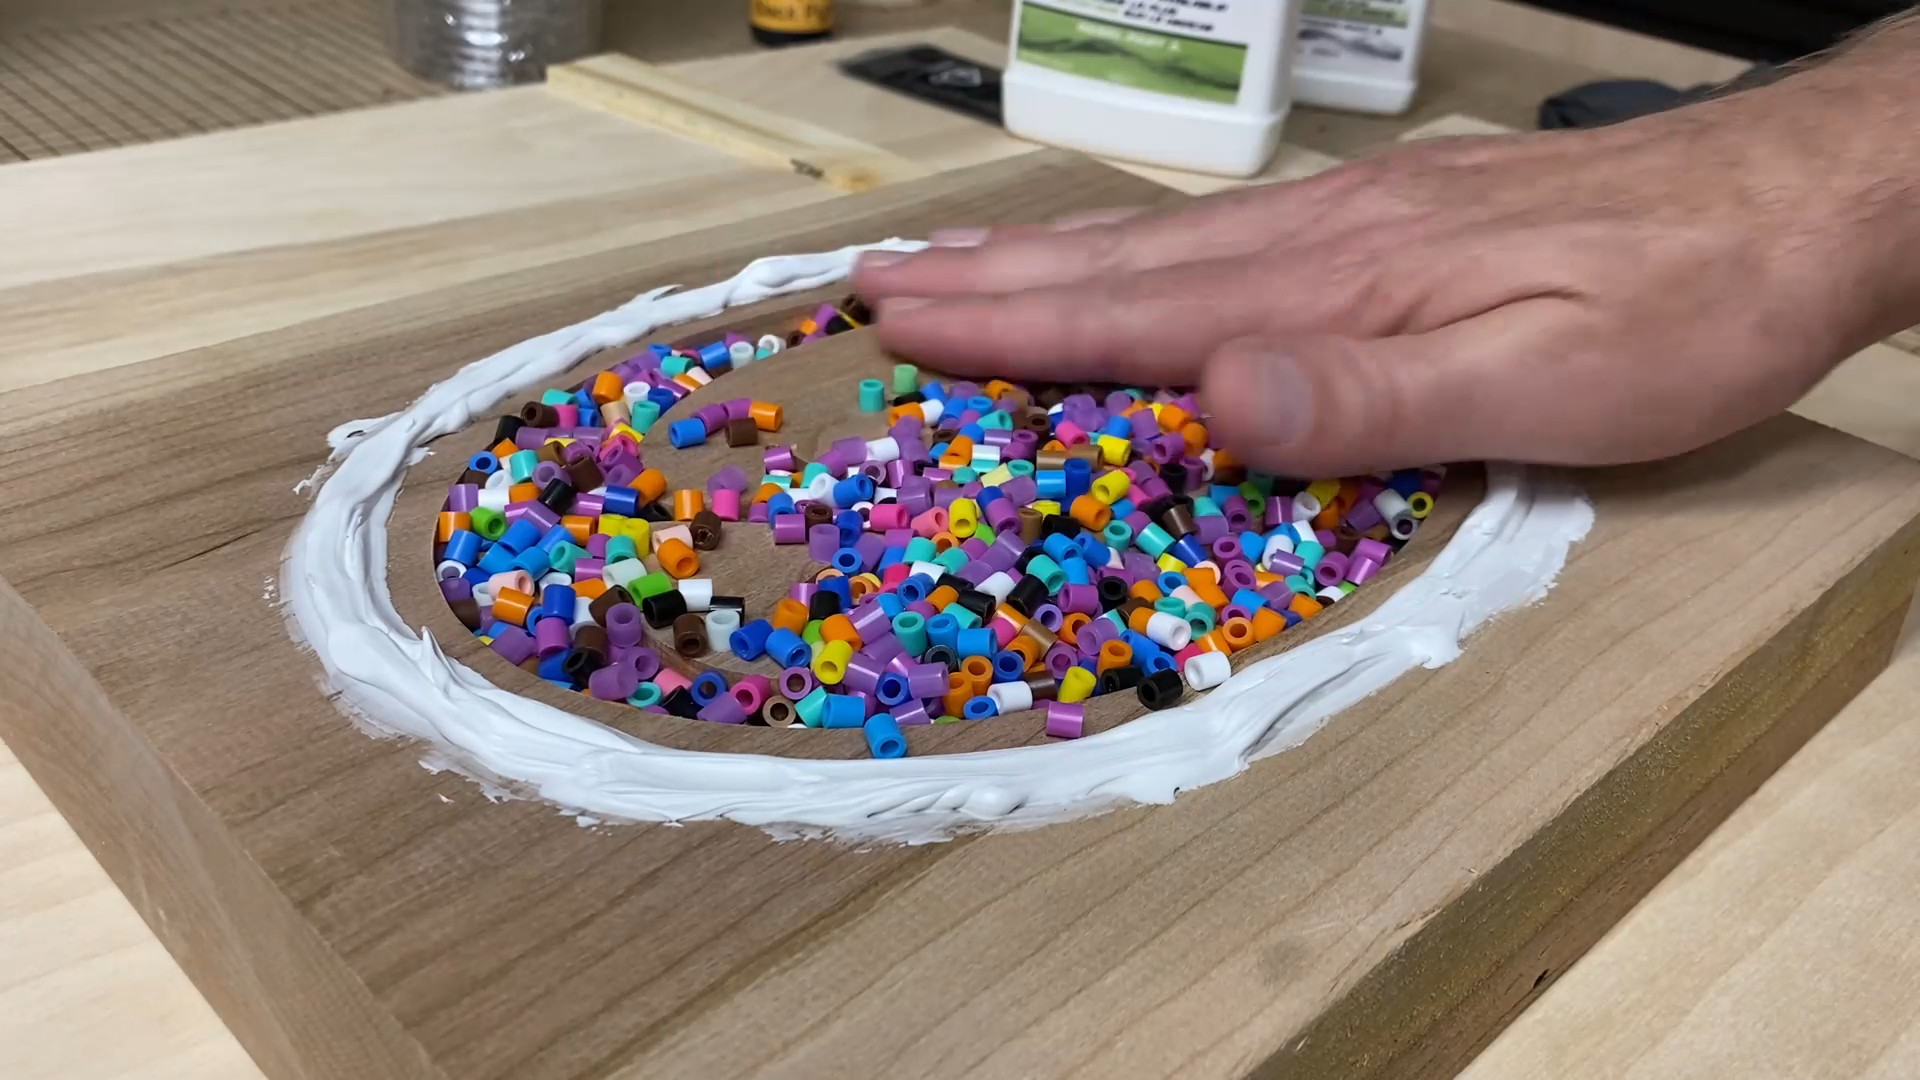
Before I added the epoxy, I added a short dam of household caulking to keep any excess epoxy from running off of the board.
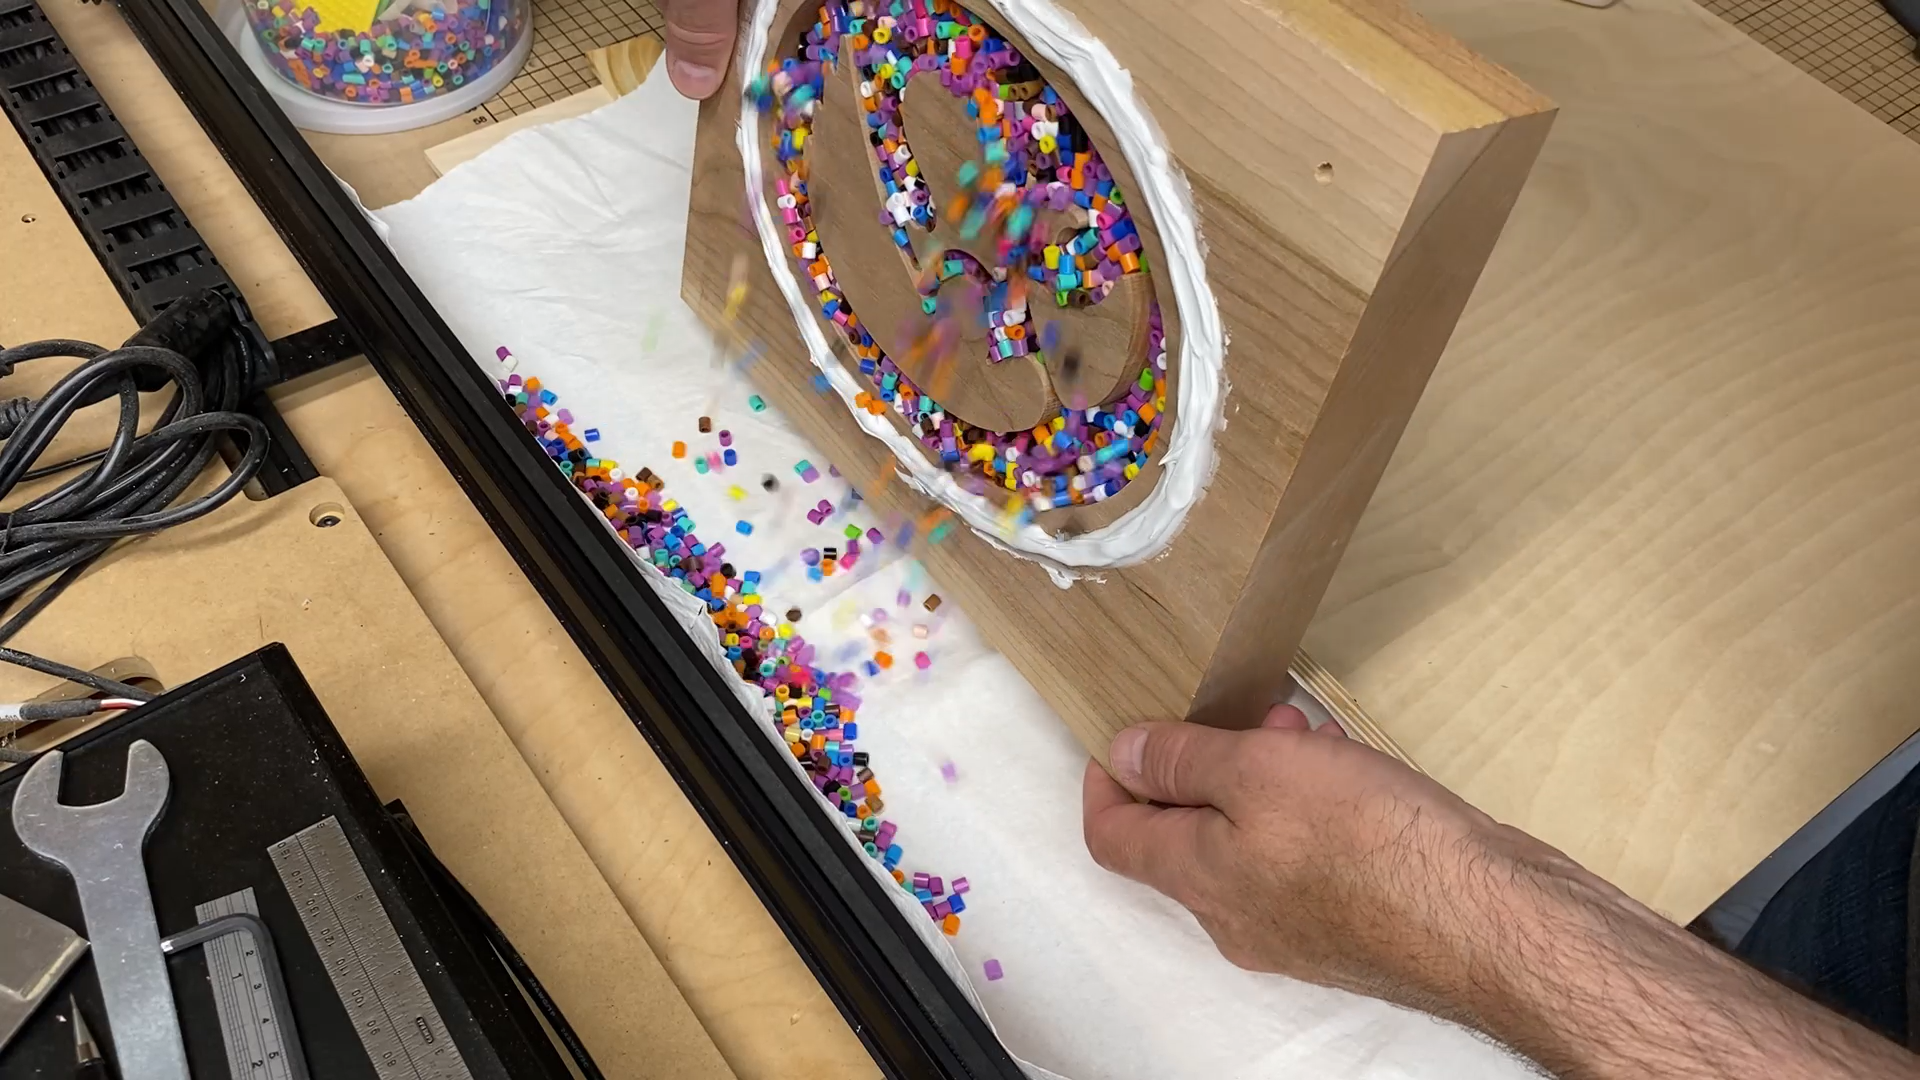
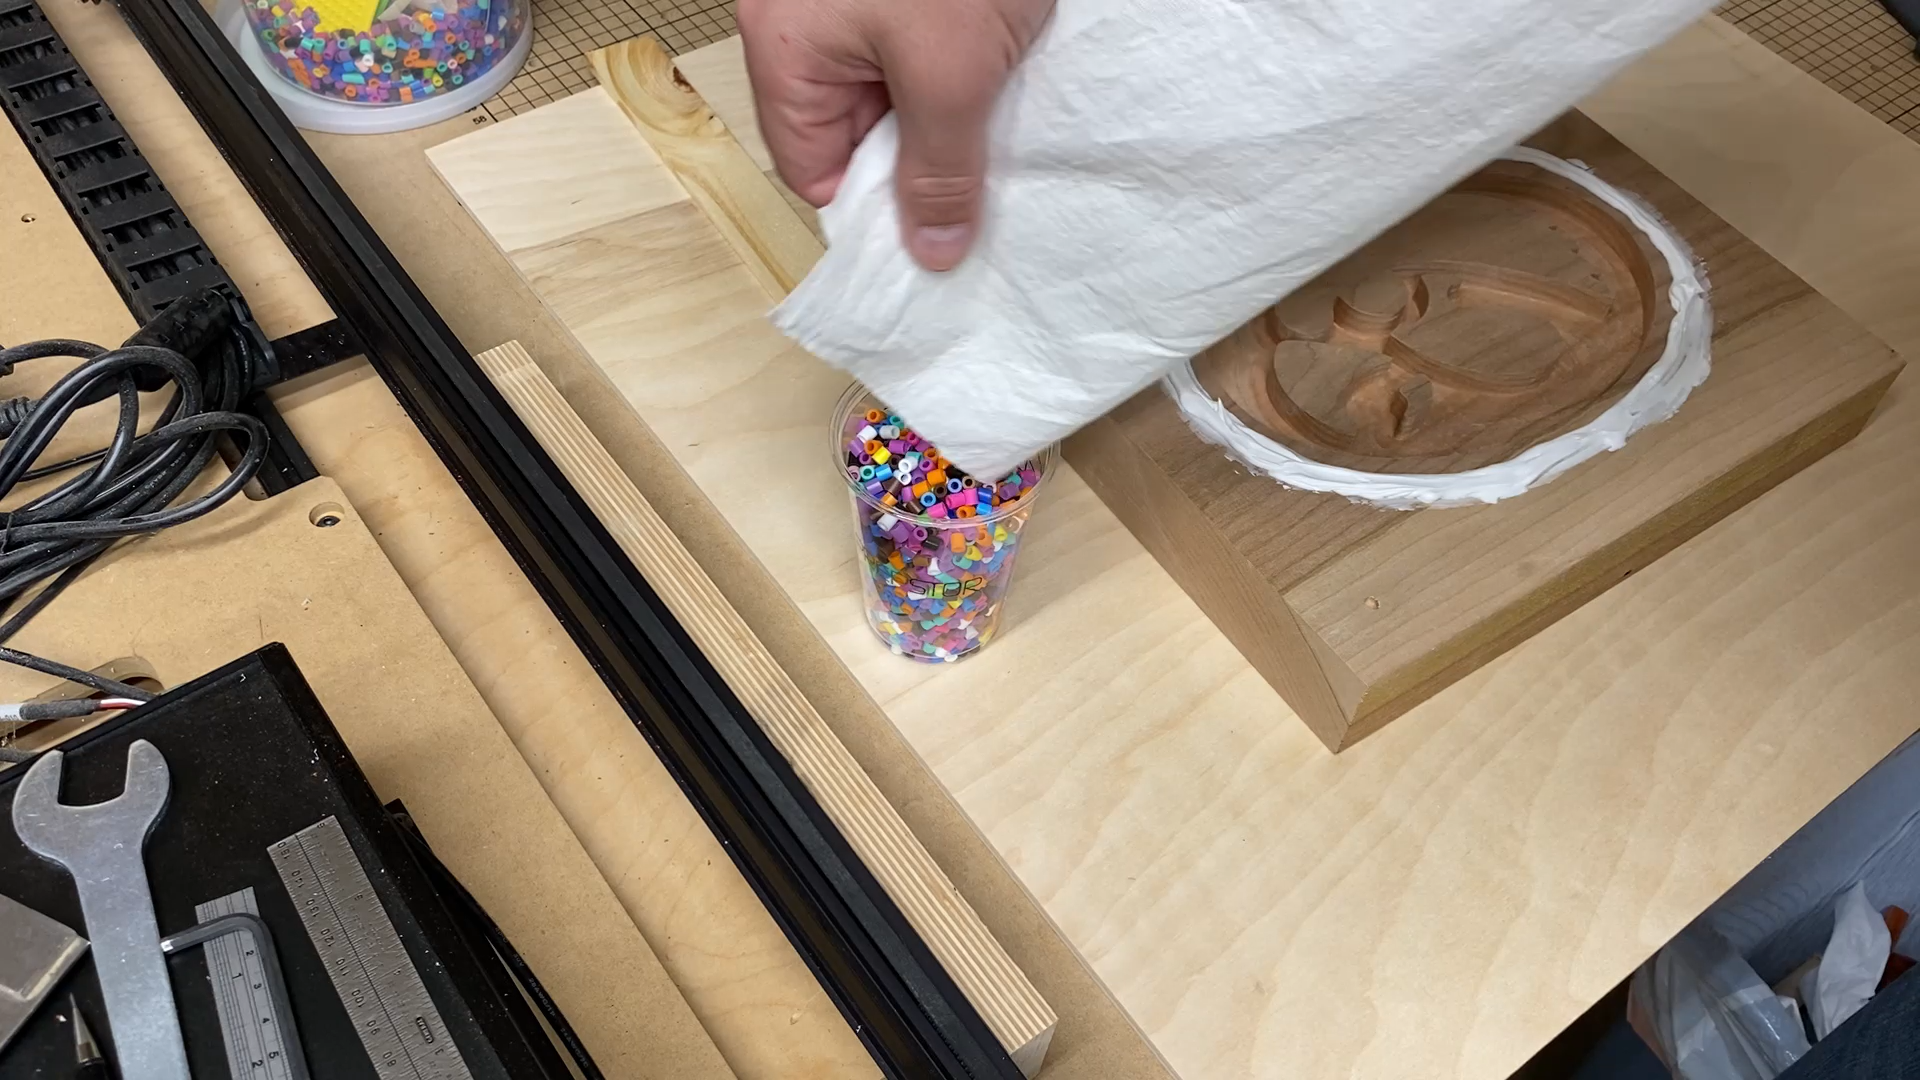
After the epoxy cured, I filled the curved pocket with some craft beads. This is a great way to estimate the volume of epoxy needed to fill the pocket. Just pour in the craft beads to the desired level and then pour them into a measuring cup. Check out more of Wicked Makers builds on their profile: Wicked Makers
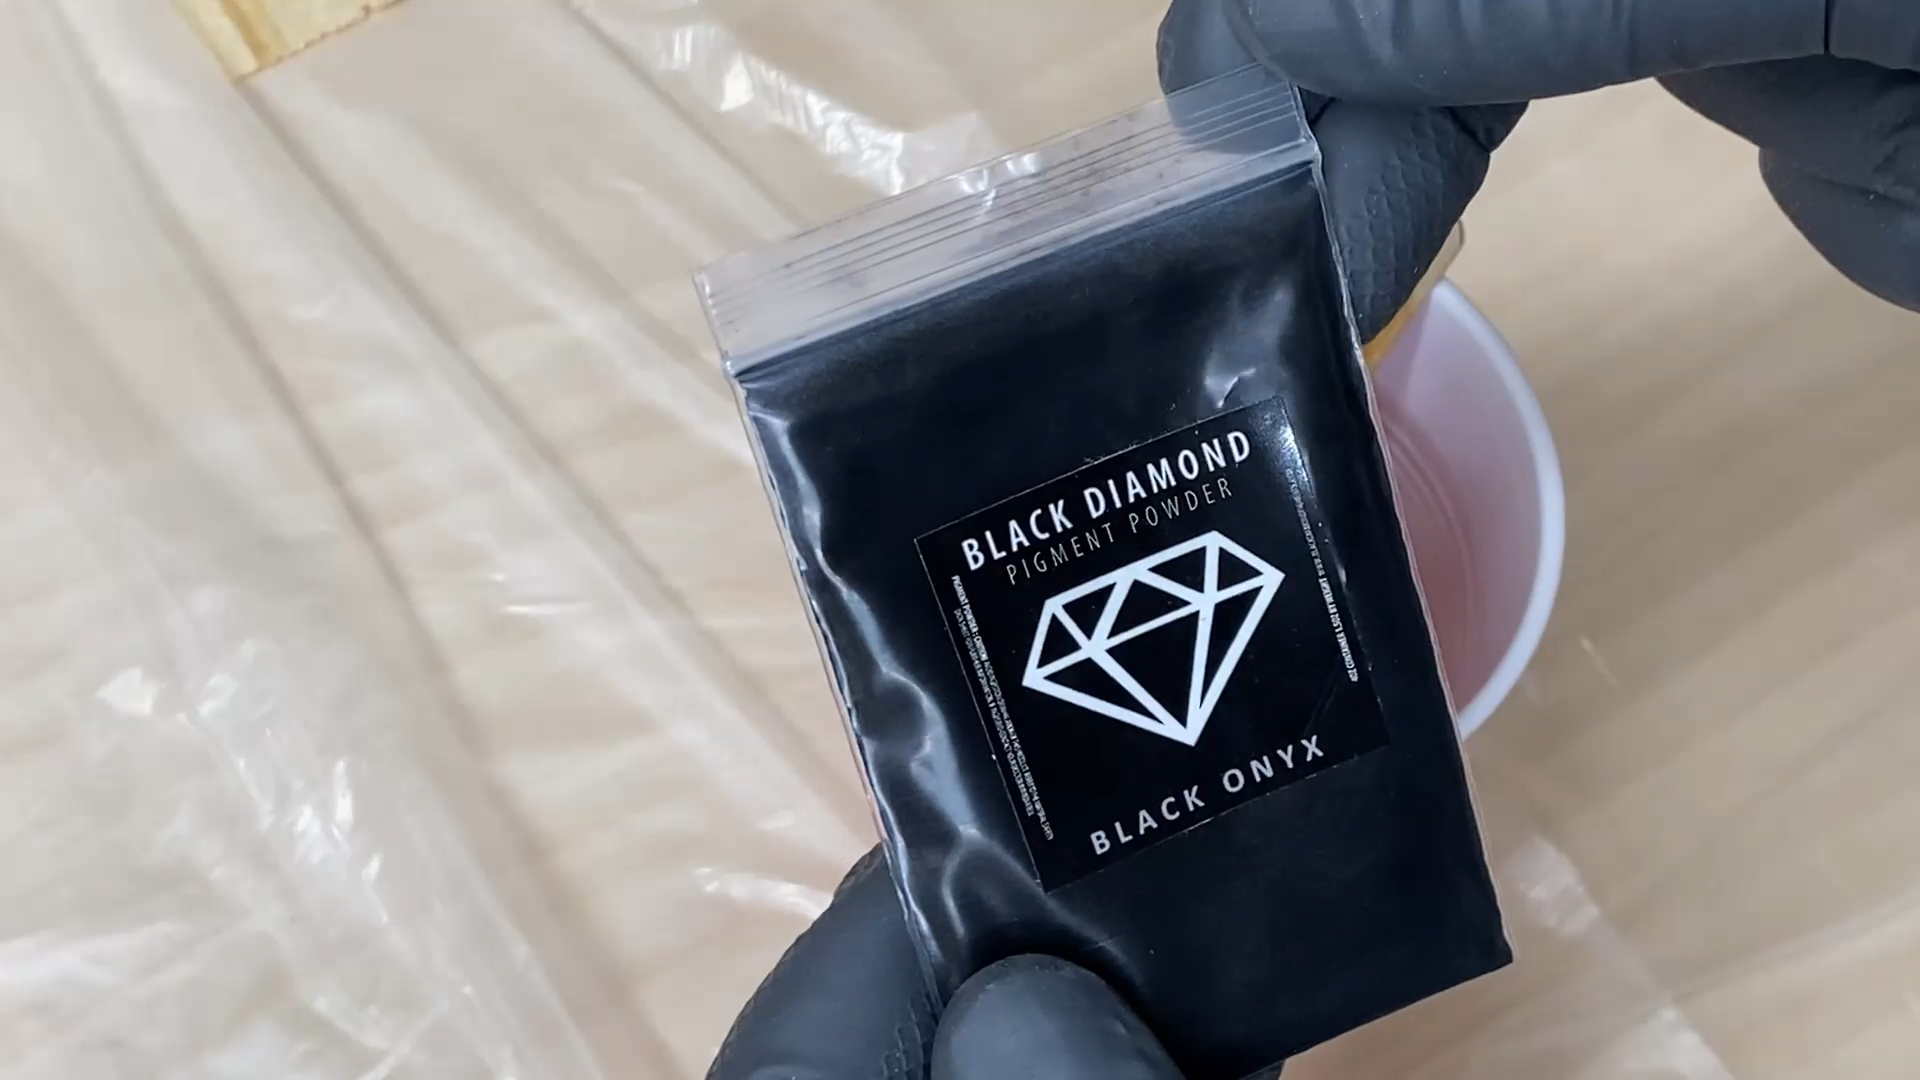
I used some BlackDiamond pigment to give the epoxy a black tint. The interesting thing about this tinted epoxy is that the logo looks completely black in the bottom of the bowl when it is flat on a surface, but pick it up and you can see through it.
Pour the epoxy after mixing to the manufacturers recommendations. My epoxy took several days to cure. I didn't worry about popping surface bubbles since I knew I would be cutting down the surface with a flattening bit later.

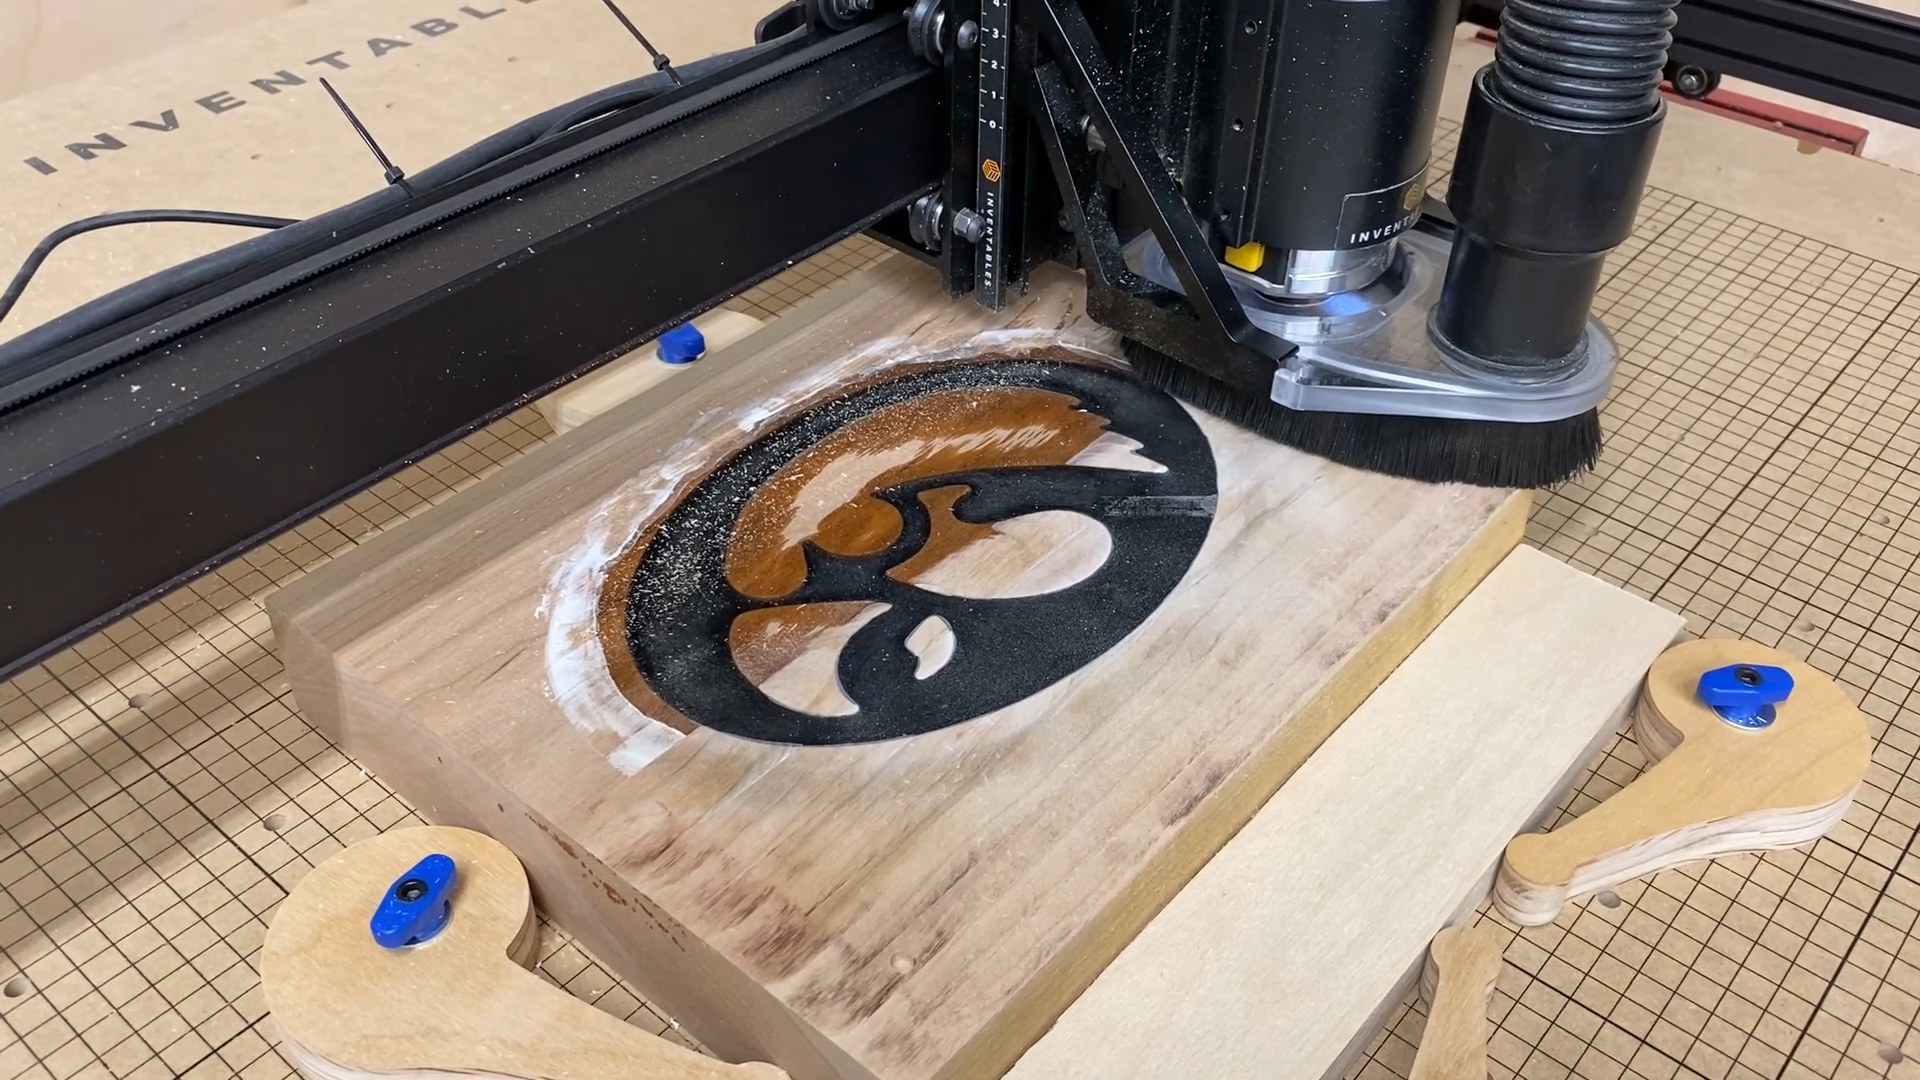
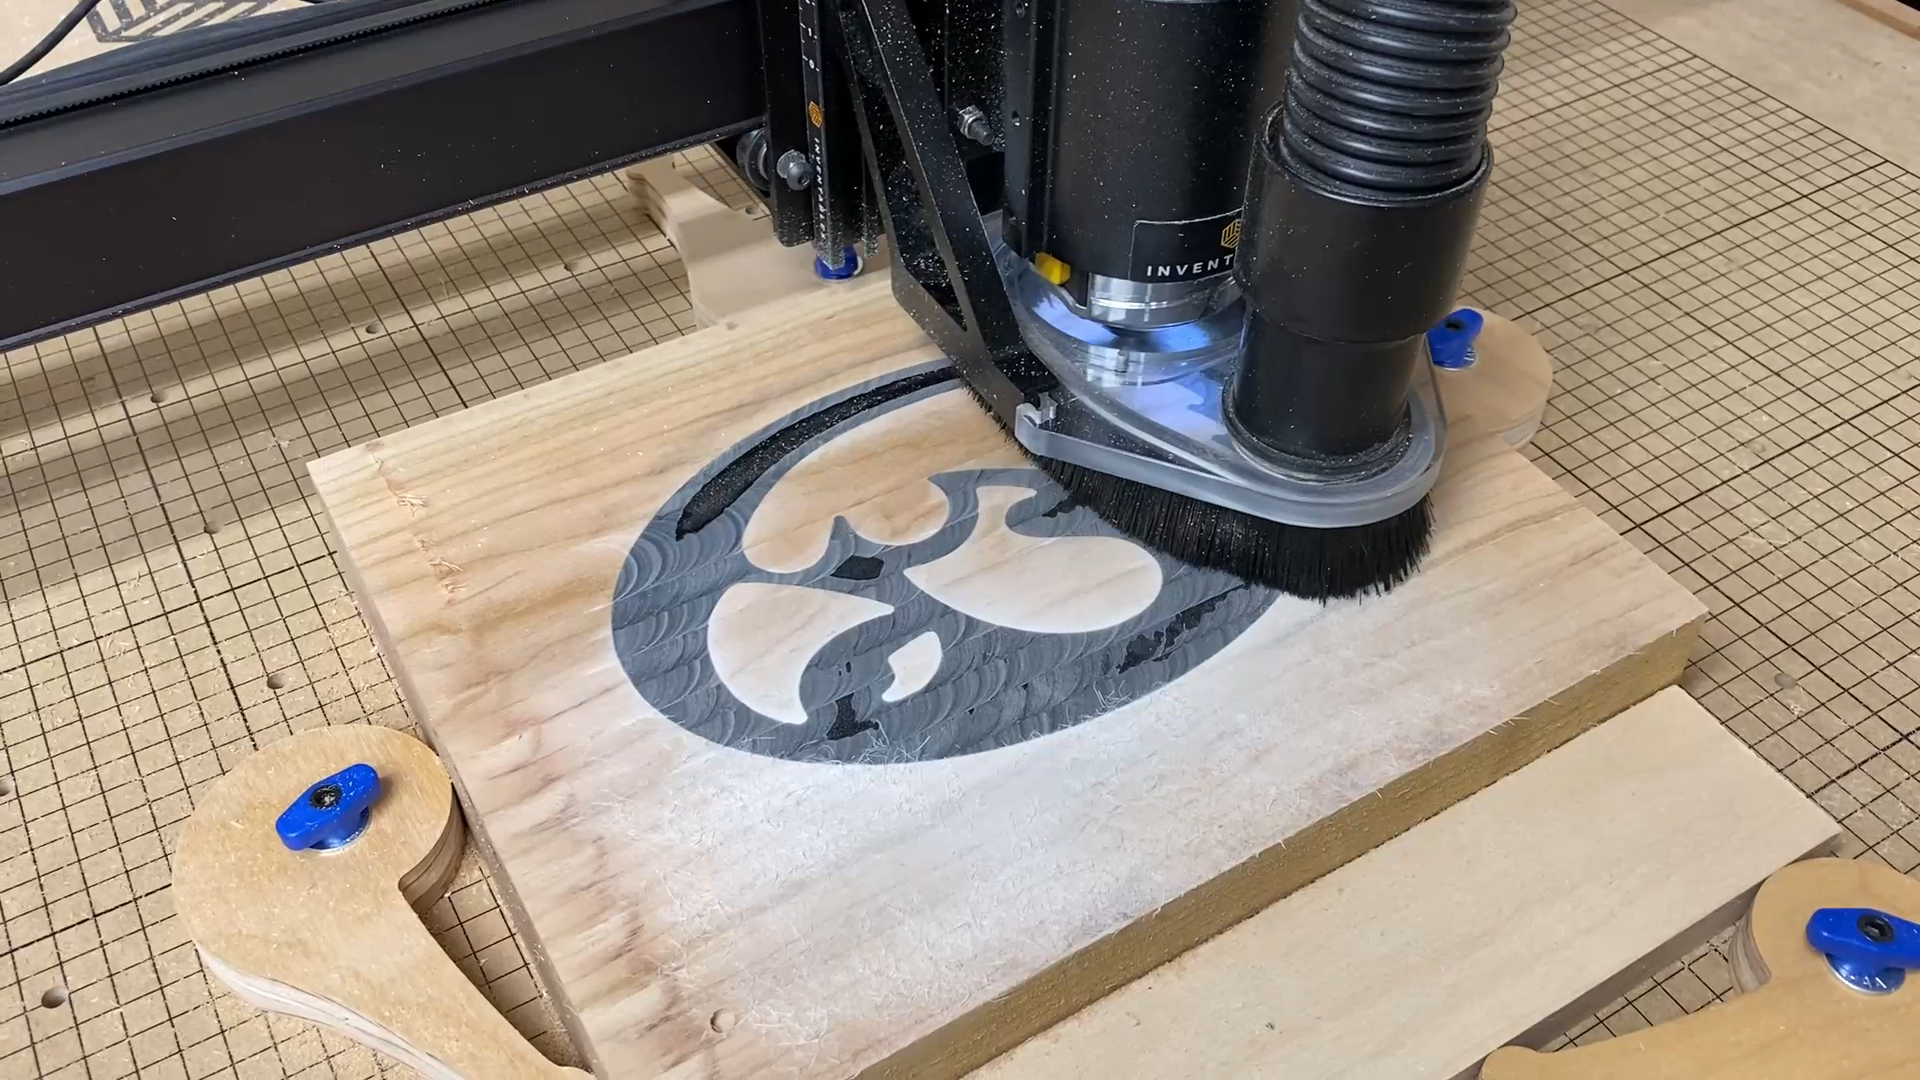
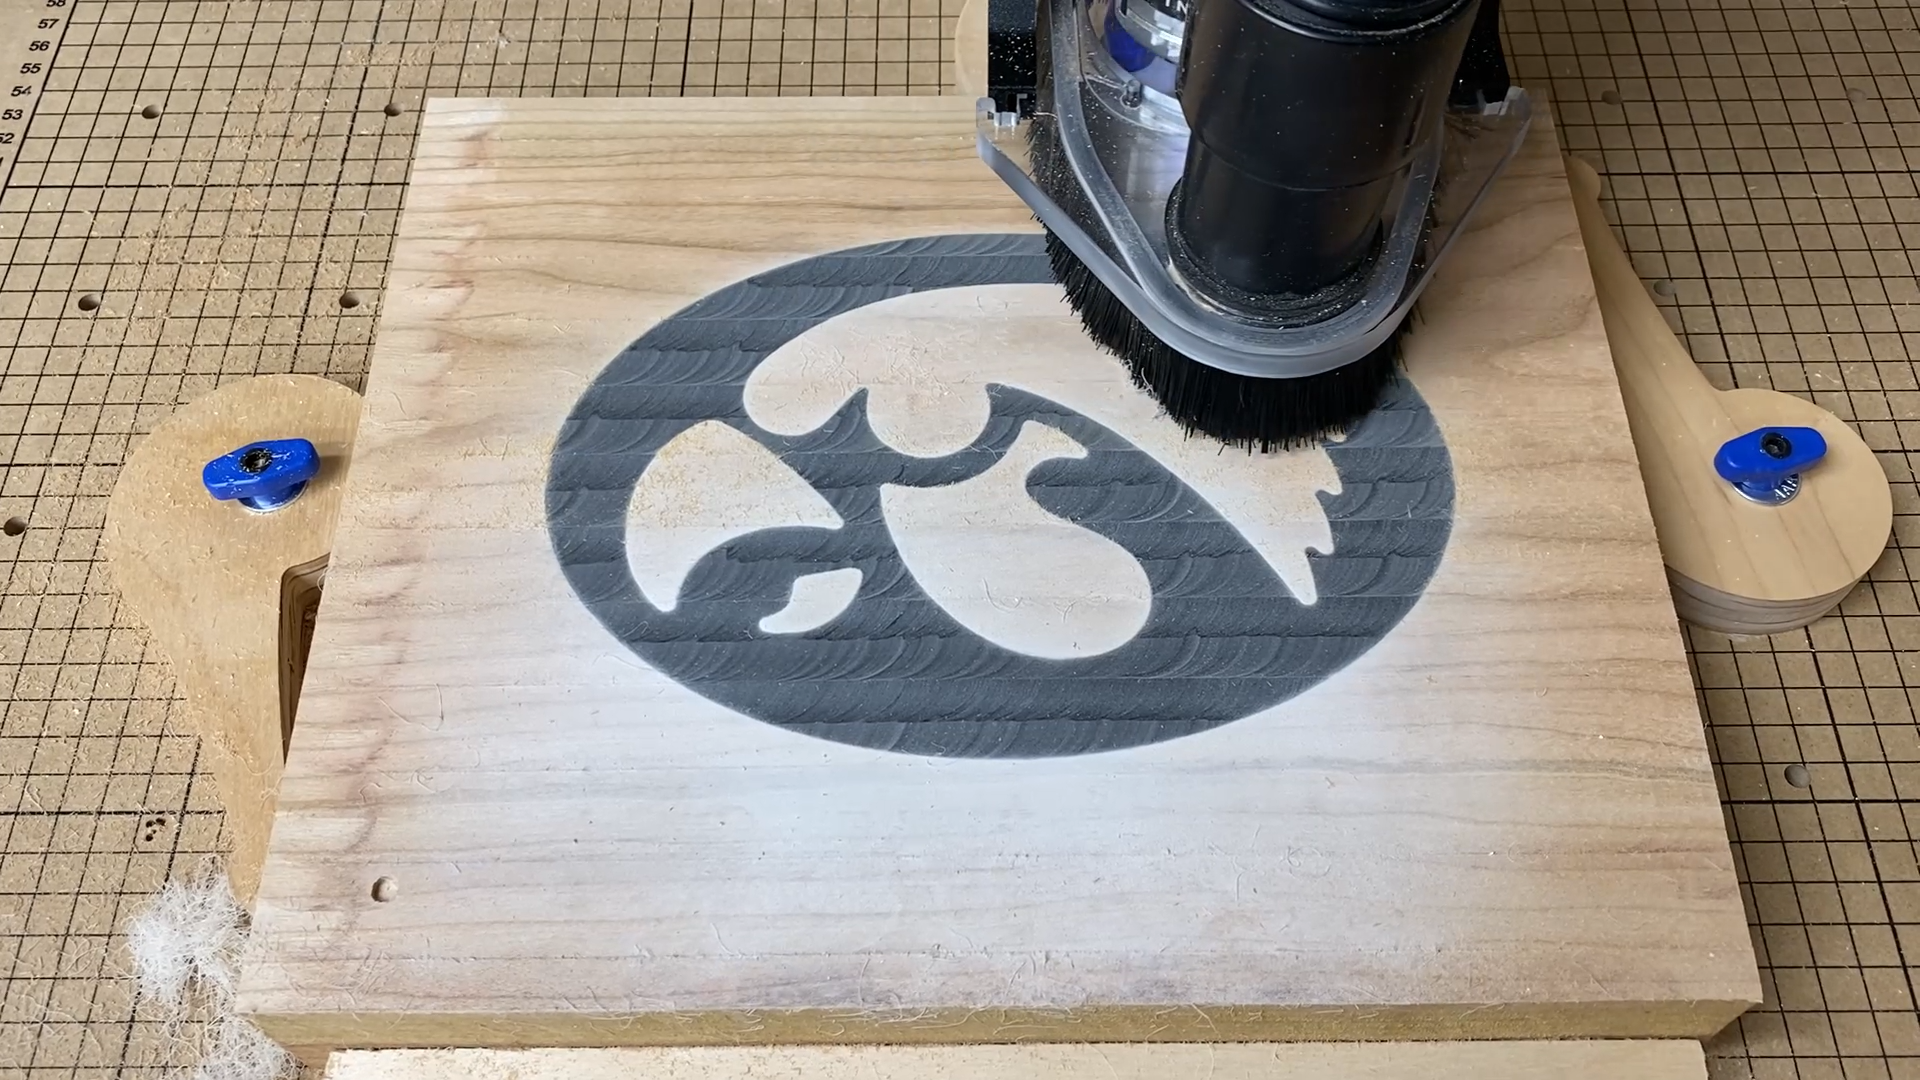
Step 8: Flatten the Bottom
After your wood inlay has dried or your epoxy fill has set, now you should flatten the bottom. I used a 1" diameter flattening bit and flattened the bottom of the tray/bowl. You will want to do this so the logo in the bottom of the bowl is flush with the rest of the surface.
Doing this will let the piece sit completely flat on your CNC.
In order to keep as much thickness as possible, I only ran the flattening bit in passes that were 0.01" thick. This takes a little time, but you can speed up the cut rate until you start making contact with the wood or epoxy.
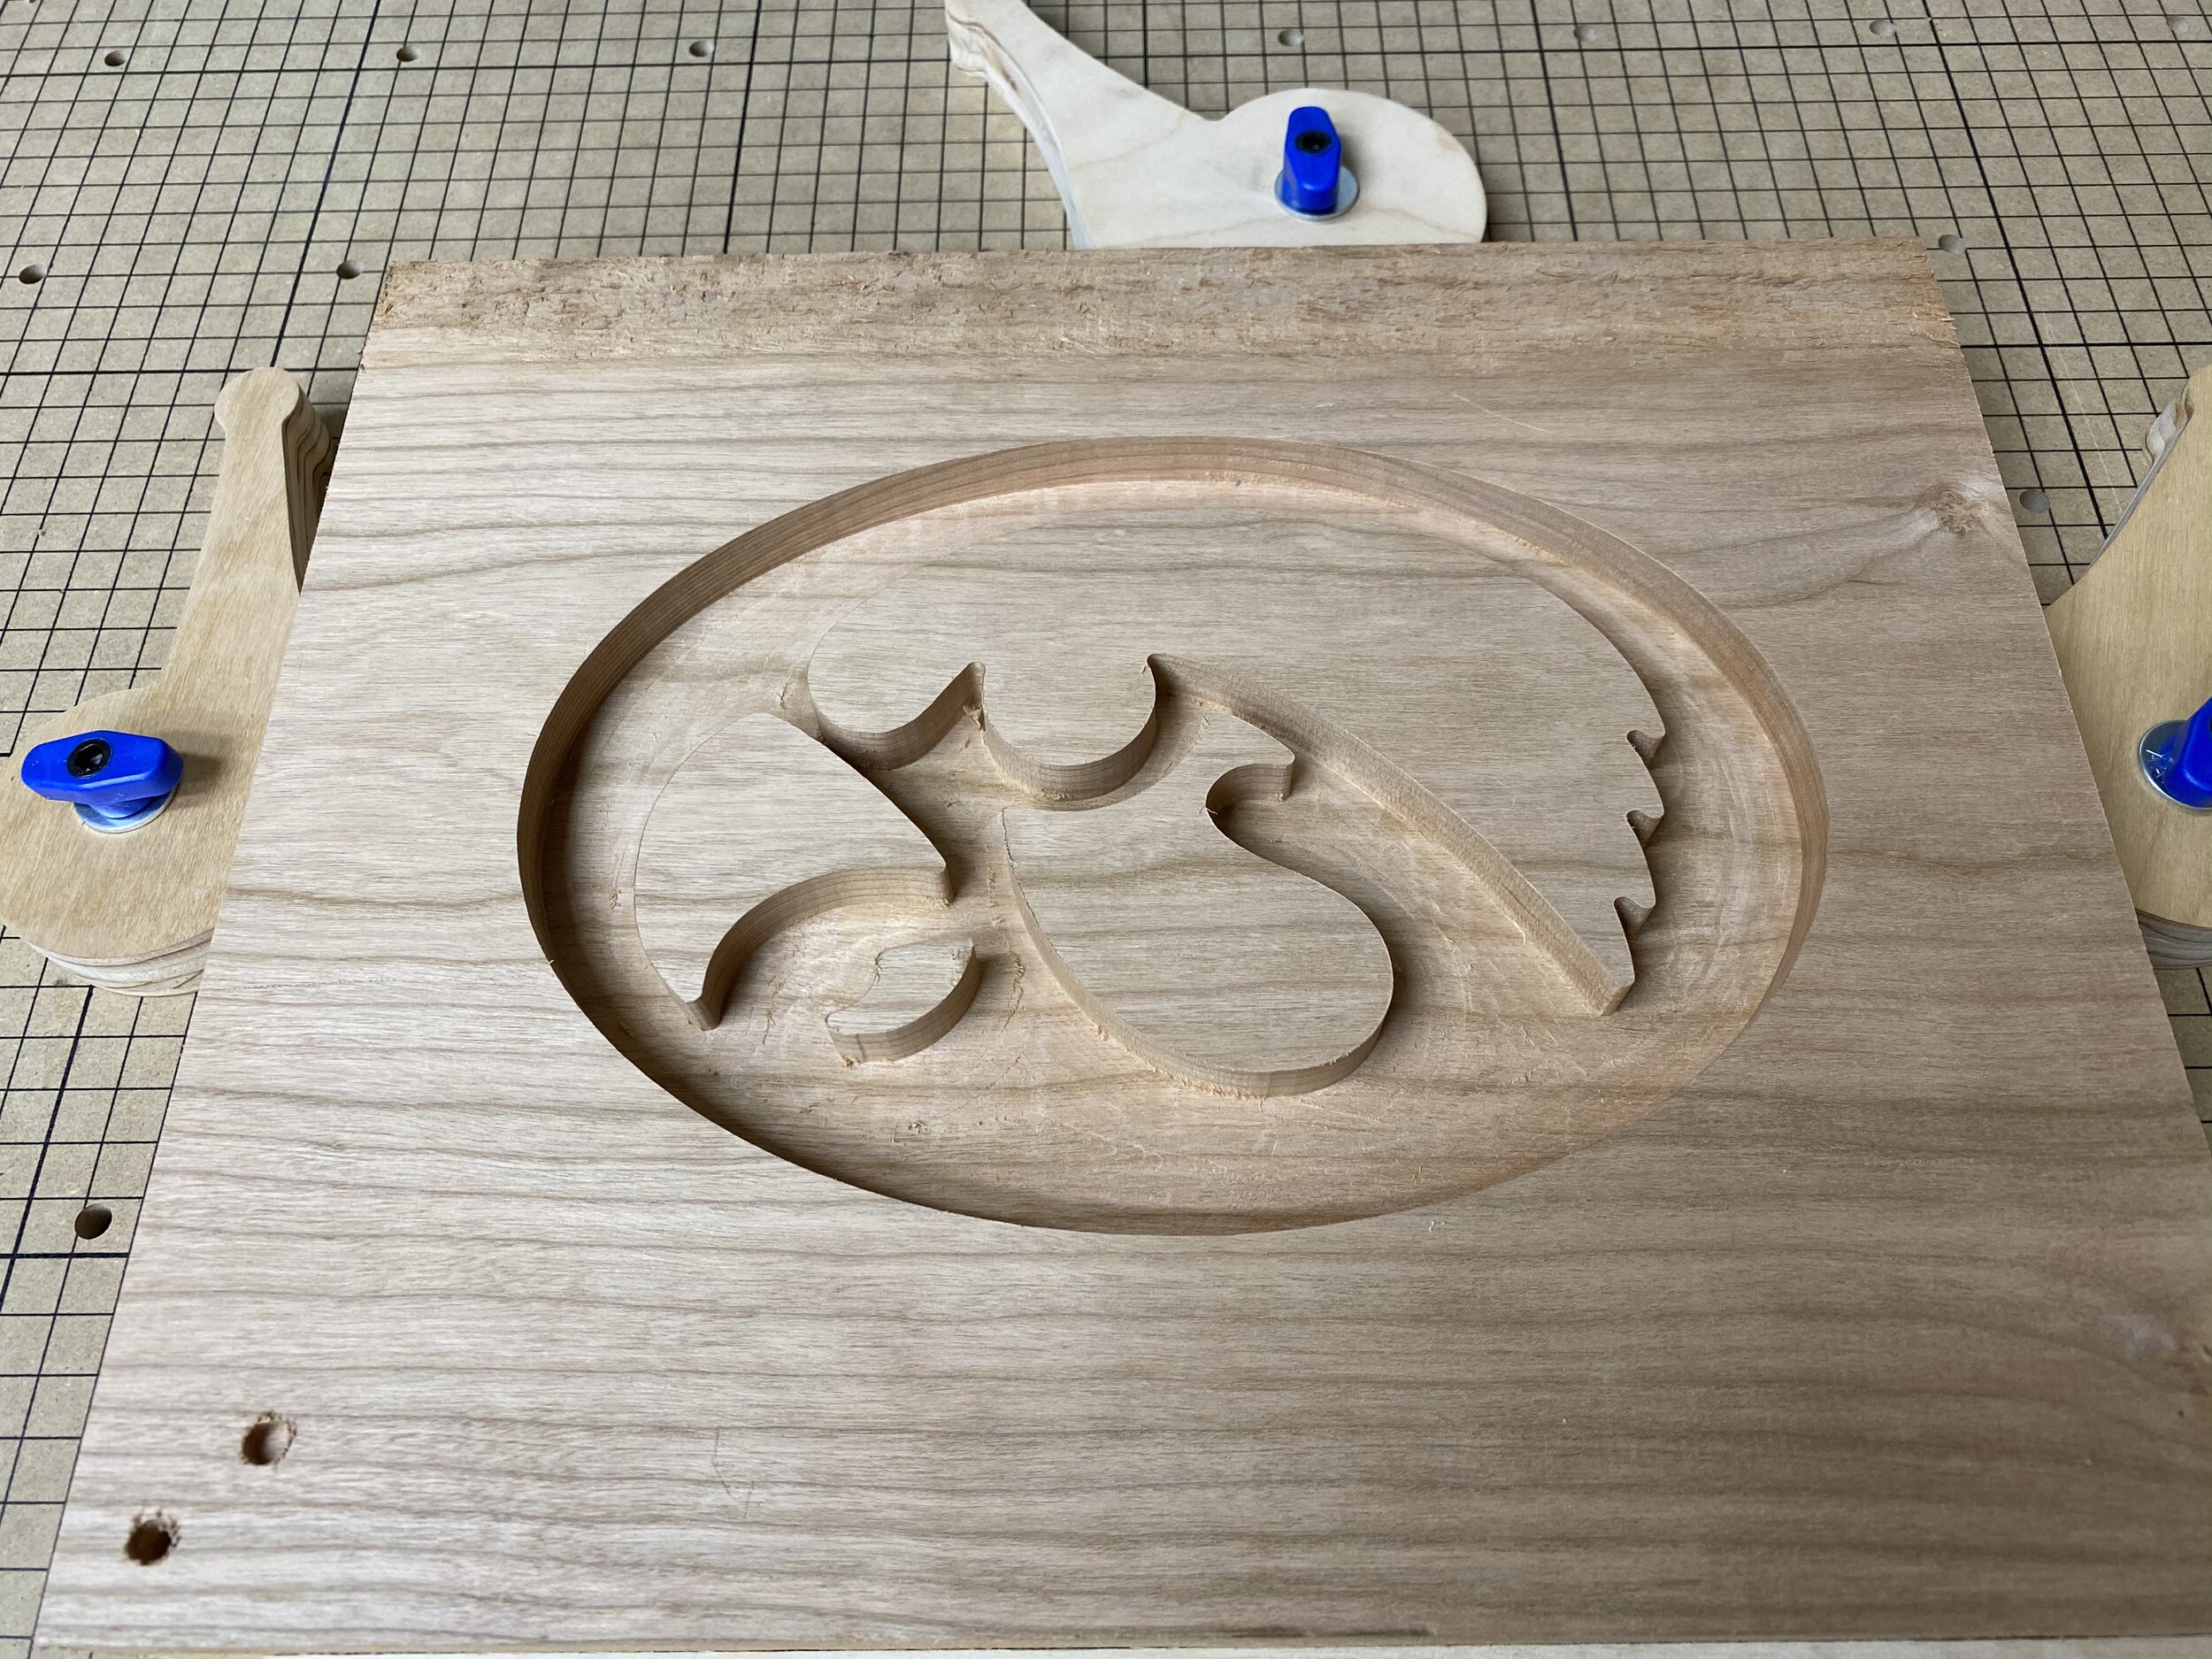
Step 9: Flatten the Top
Next I removed the piece of wood and flipped it over so the logo was on the bottom.
Since I flattened the bottom, the piece of wood sat nicely on the CNC table.
Next I secured it in place with clamps.
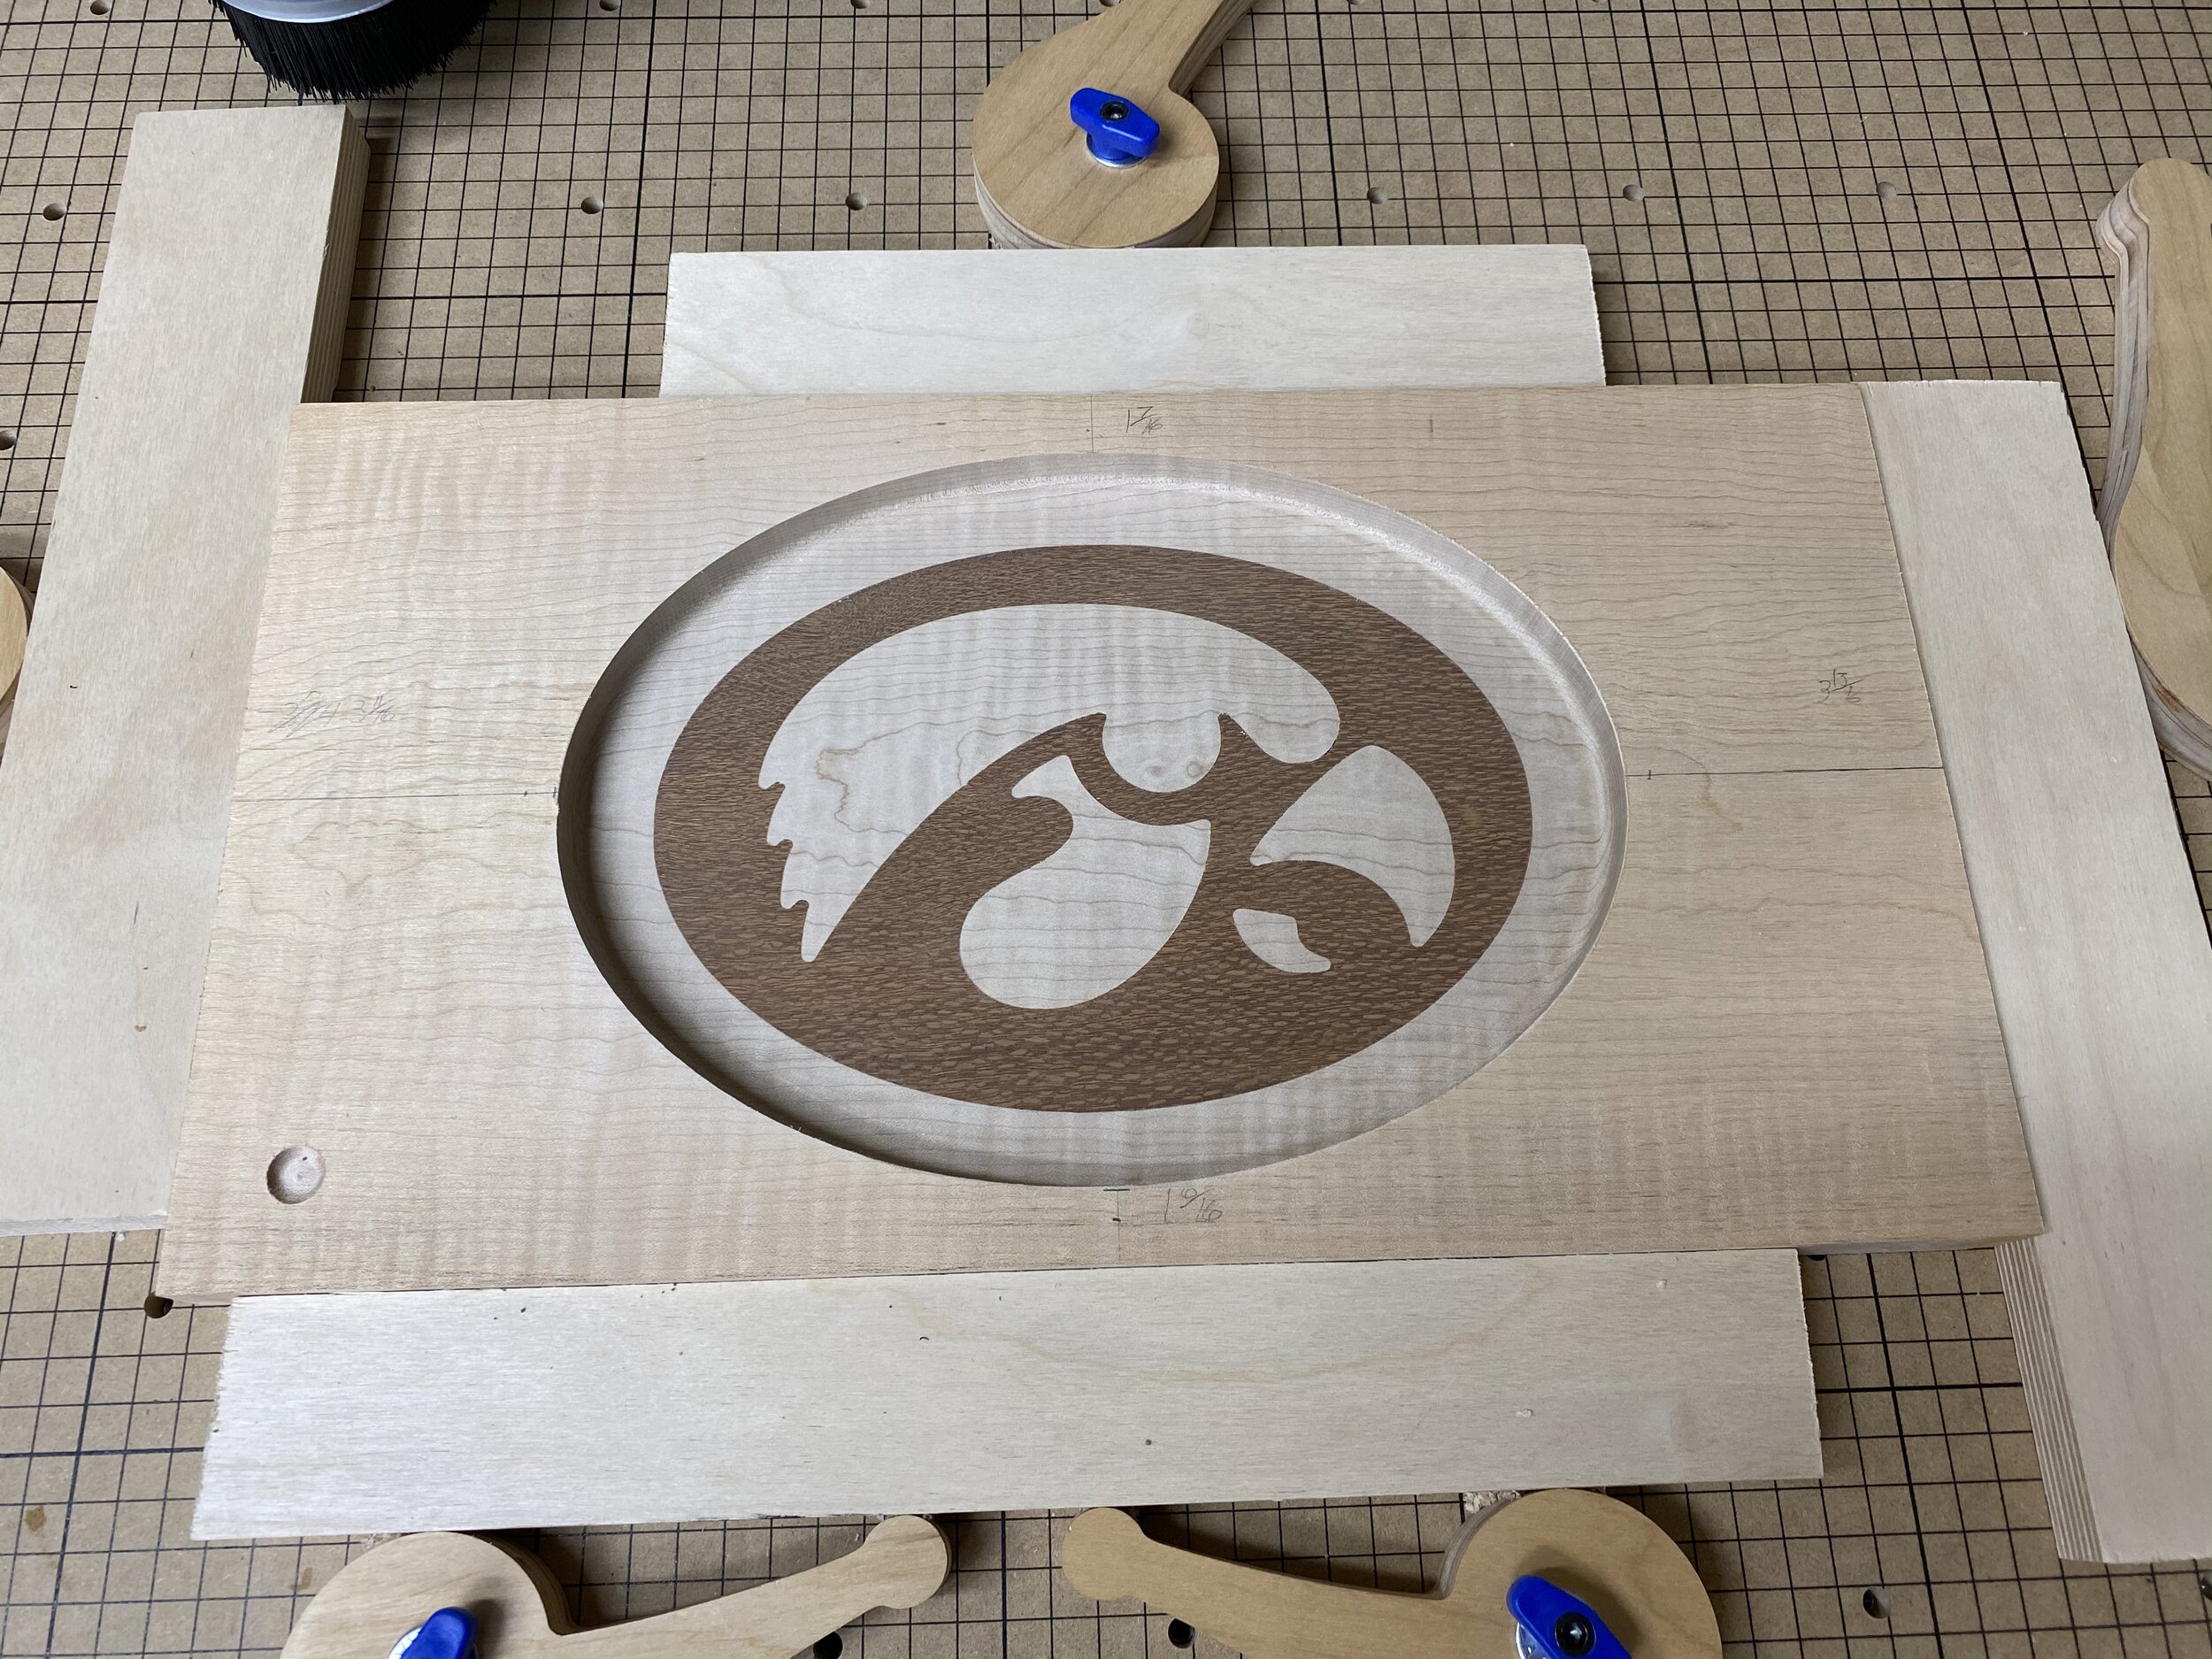
Using the same flattening bit, I flattened the top so I knew the piece of wood was nice and uniform in thickness. In order to keep as much thickness as possible, I only ran the flattening bit in passes that were 0.01" thick.
Flattening the top of the bowl blank before carving out the bowl.
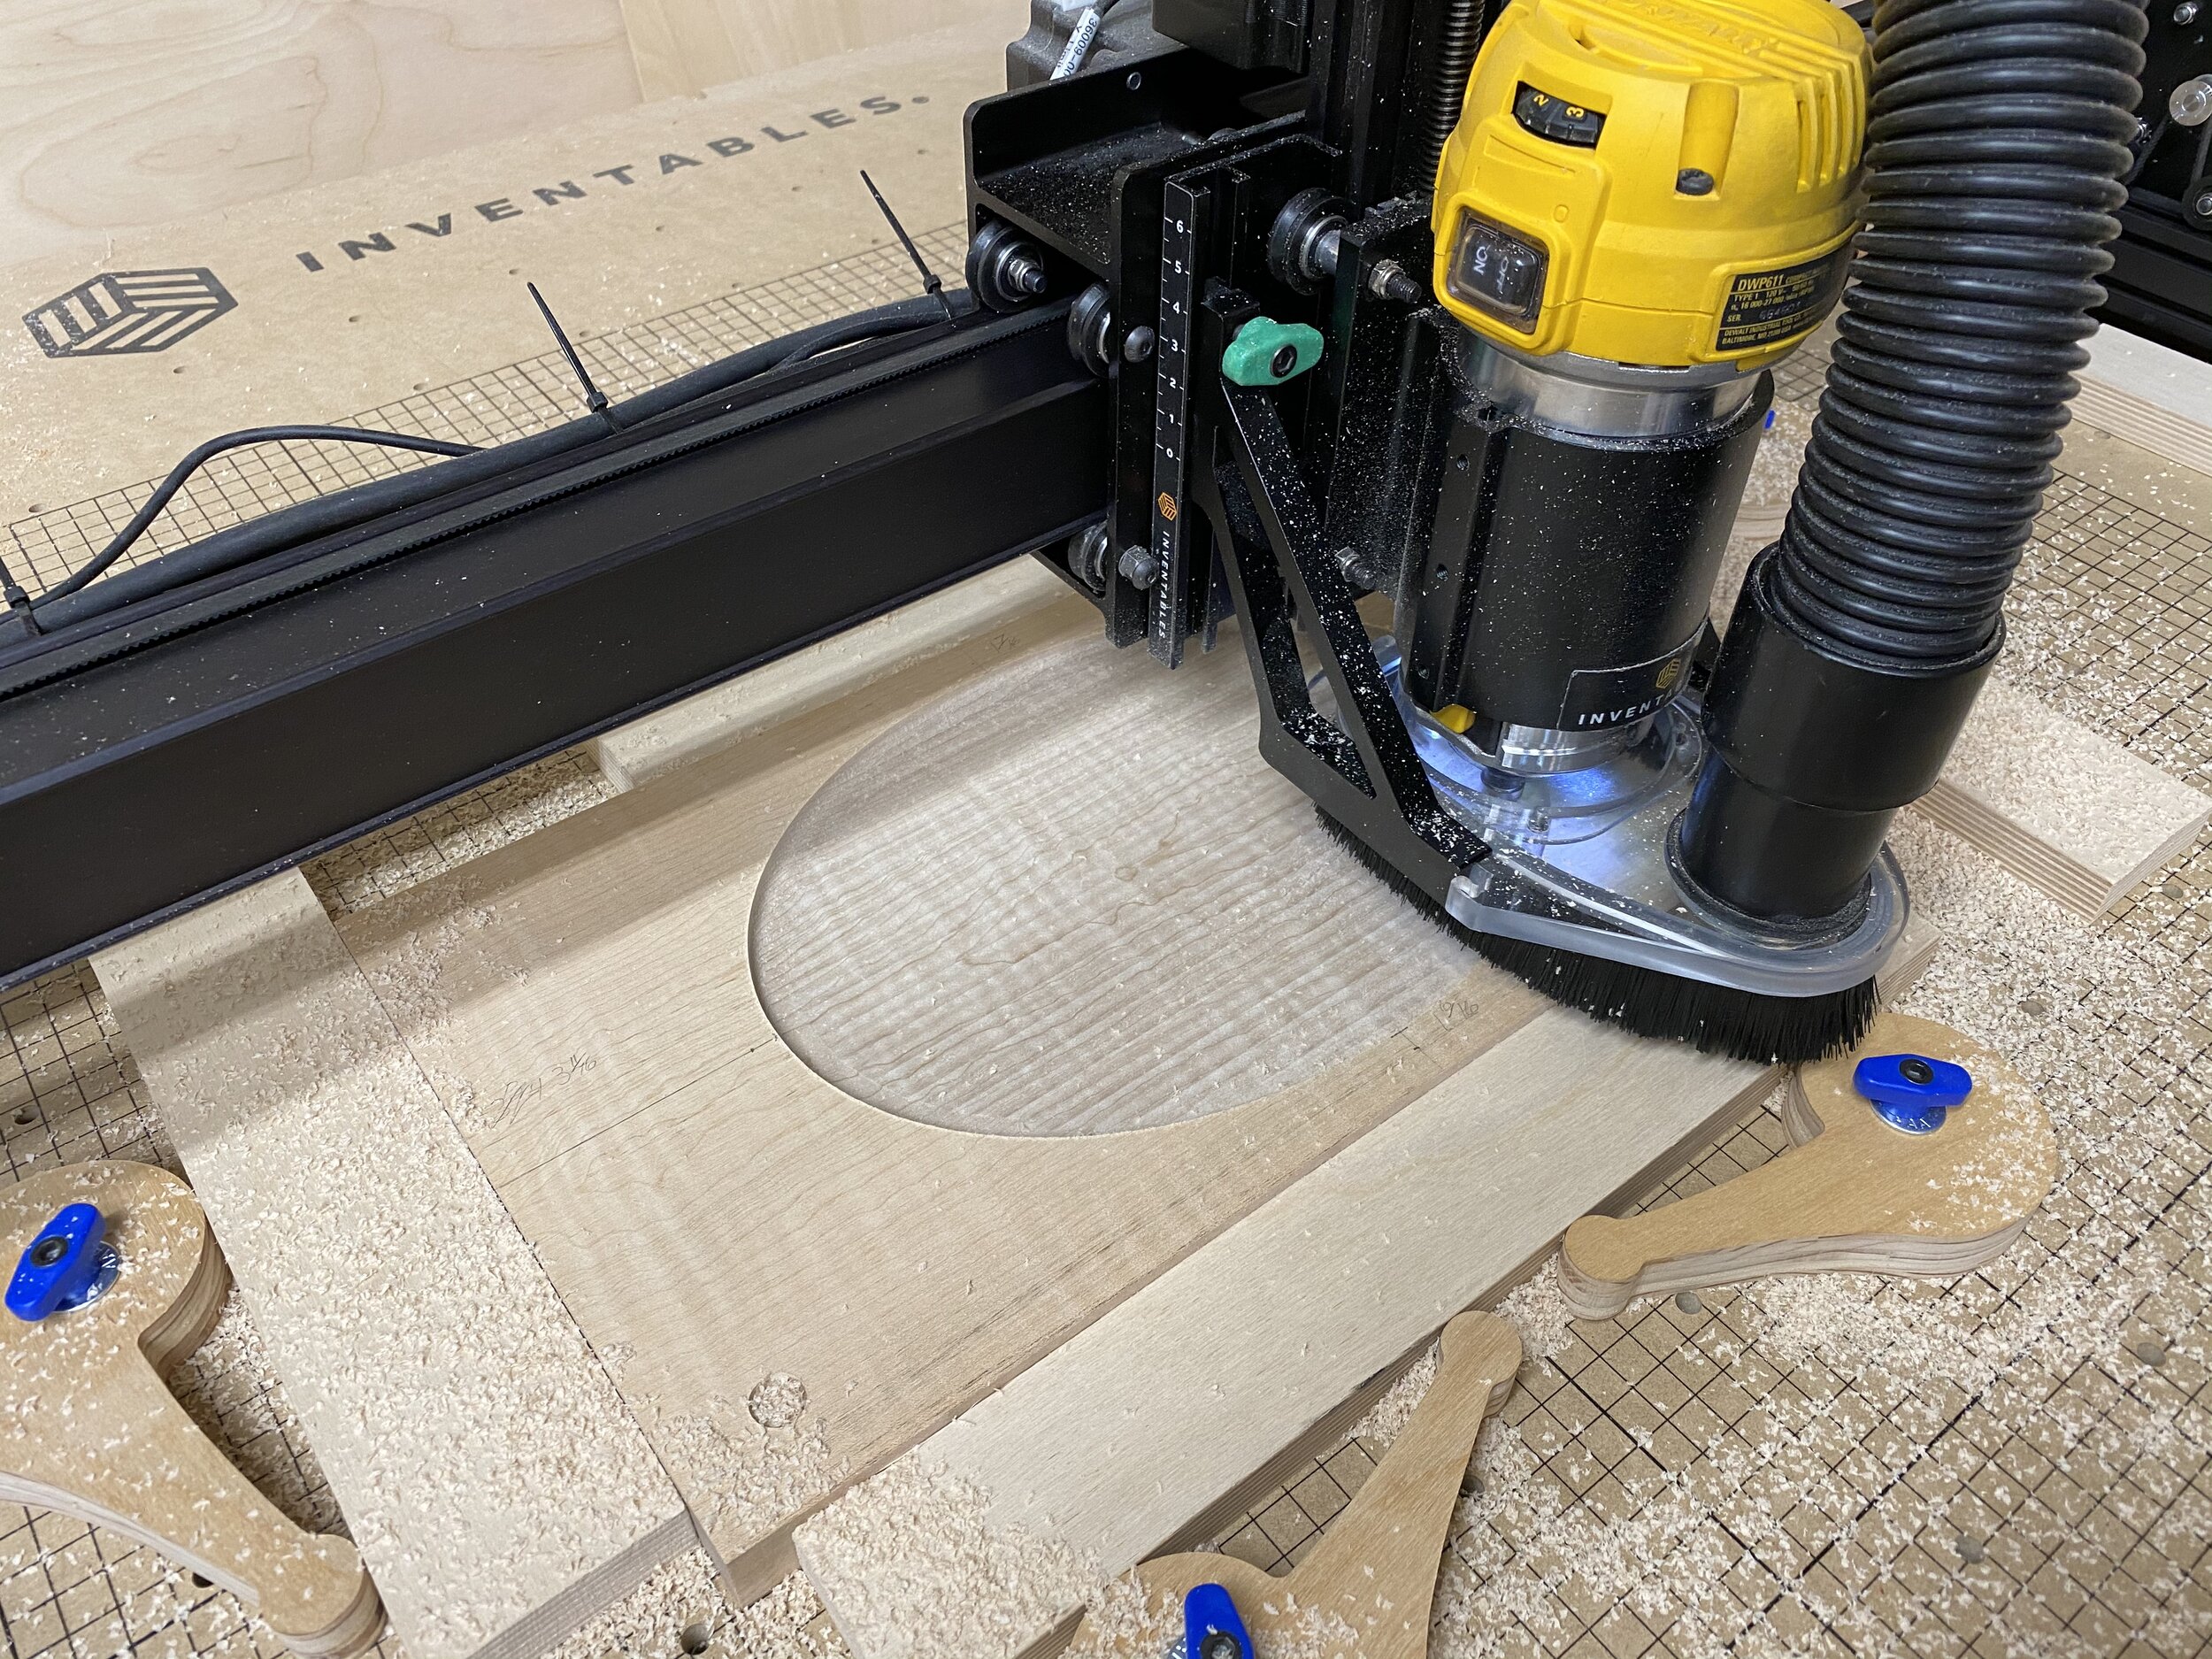
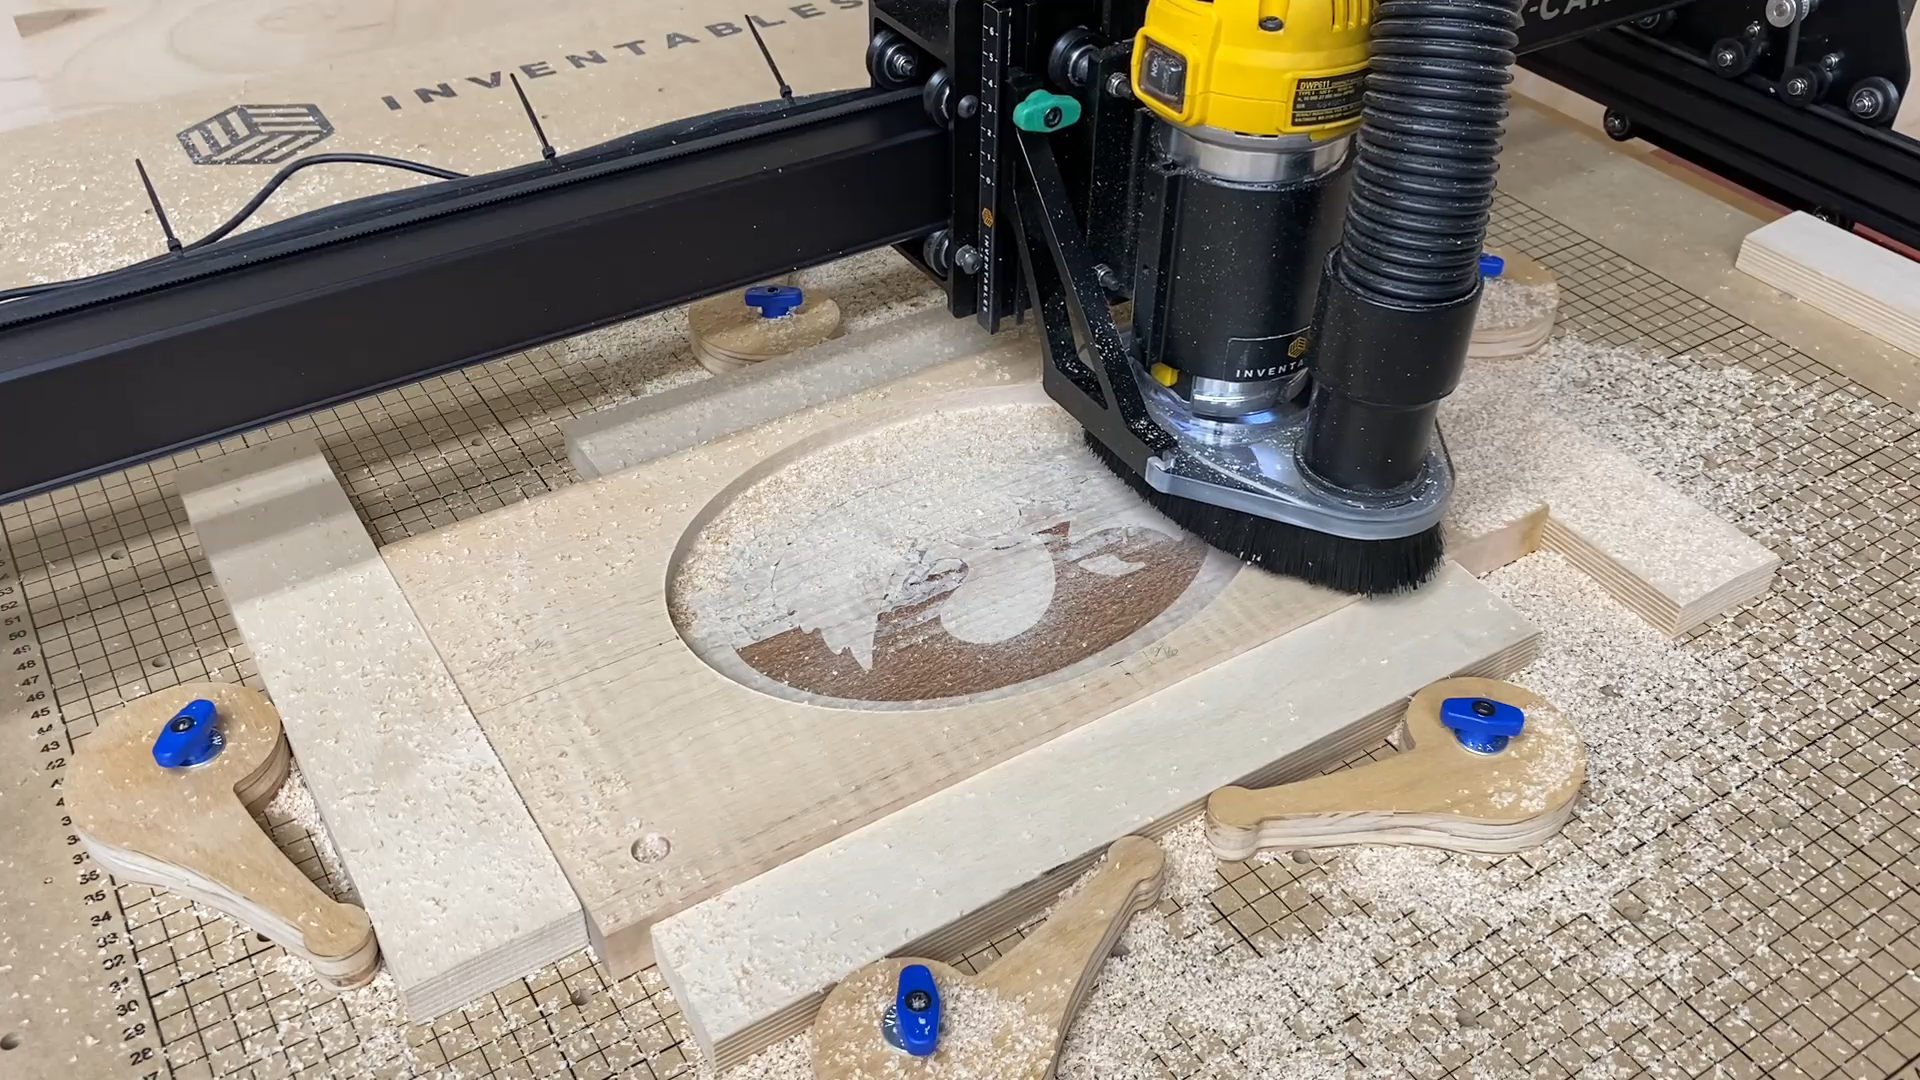
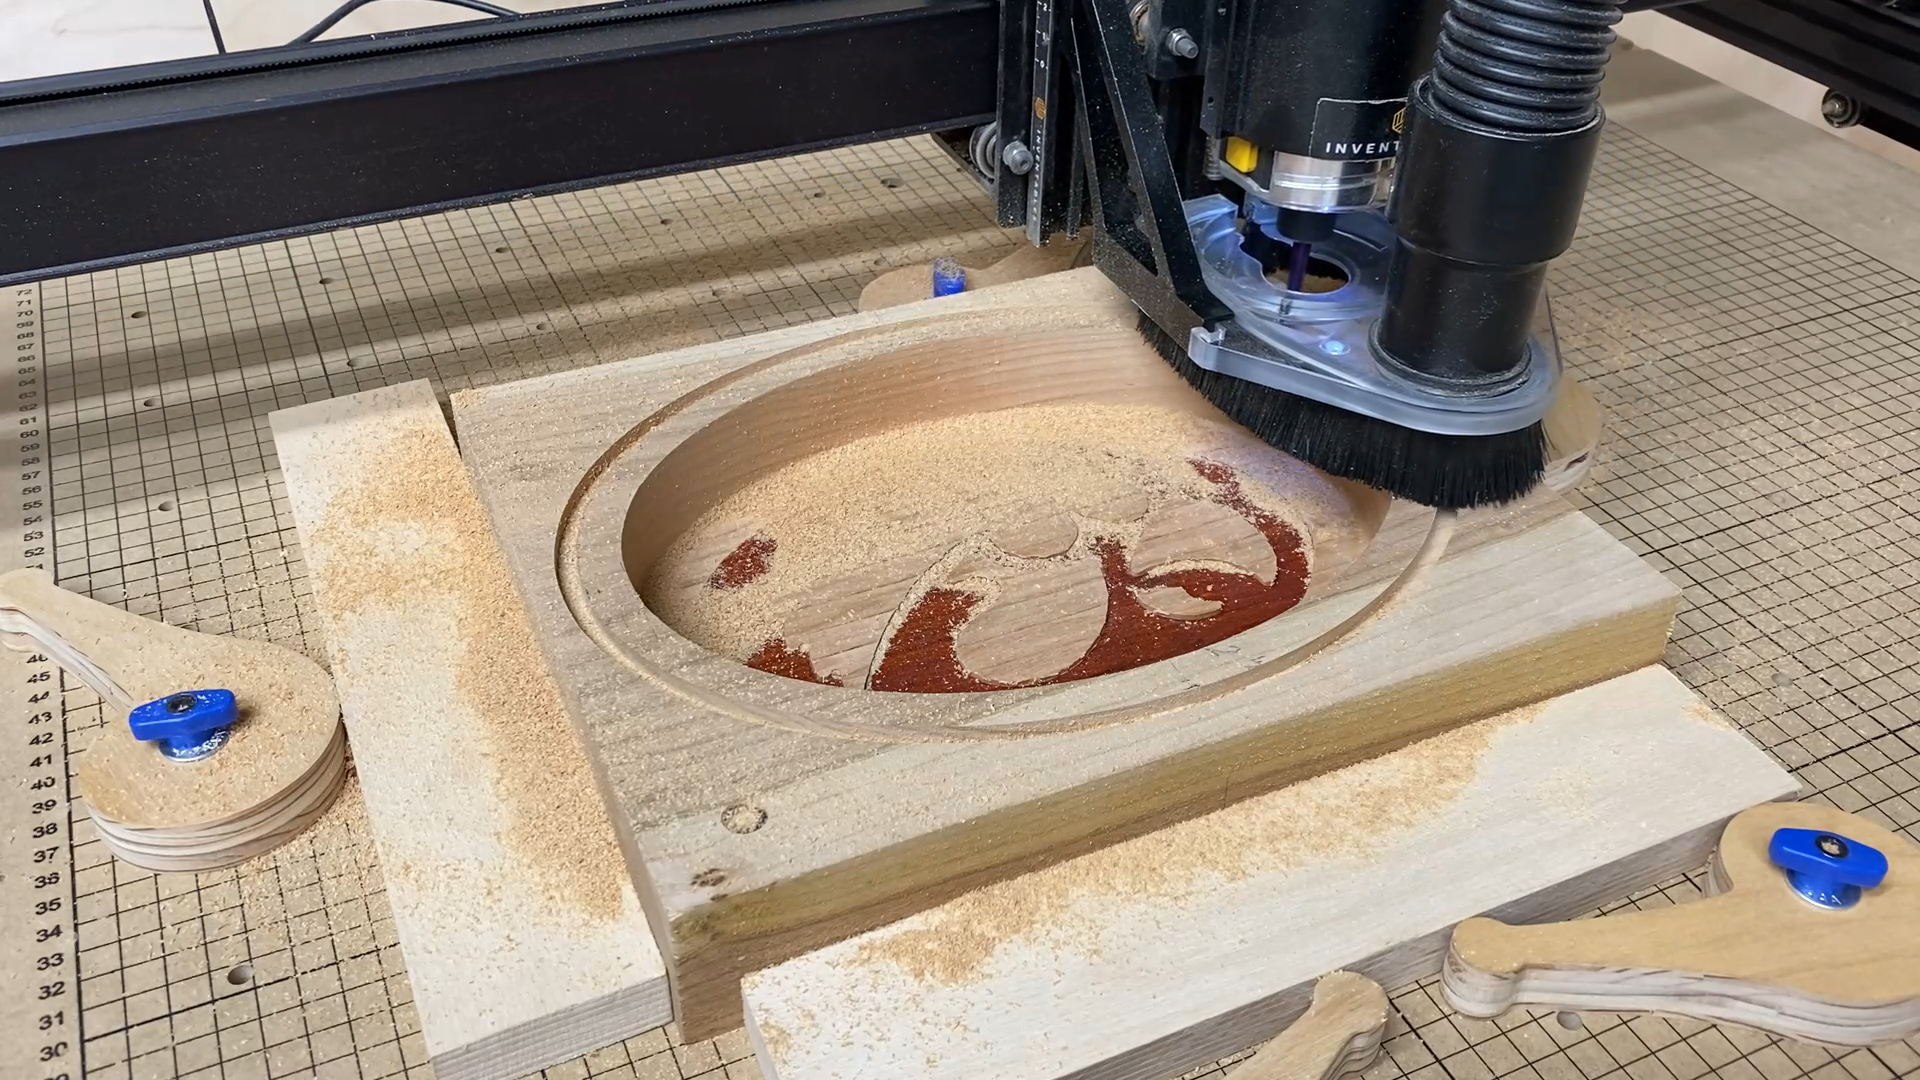
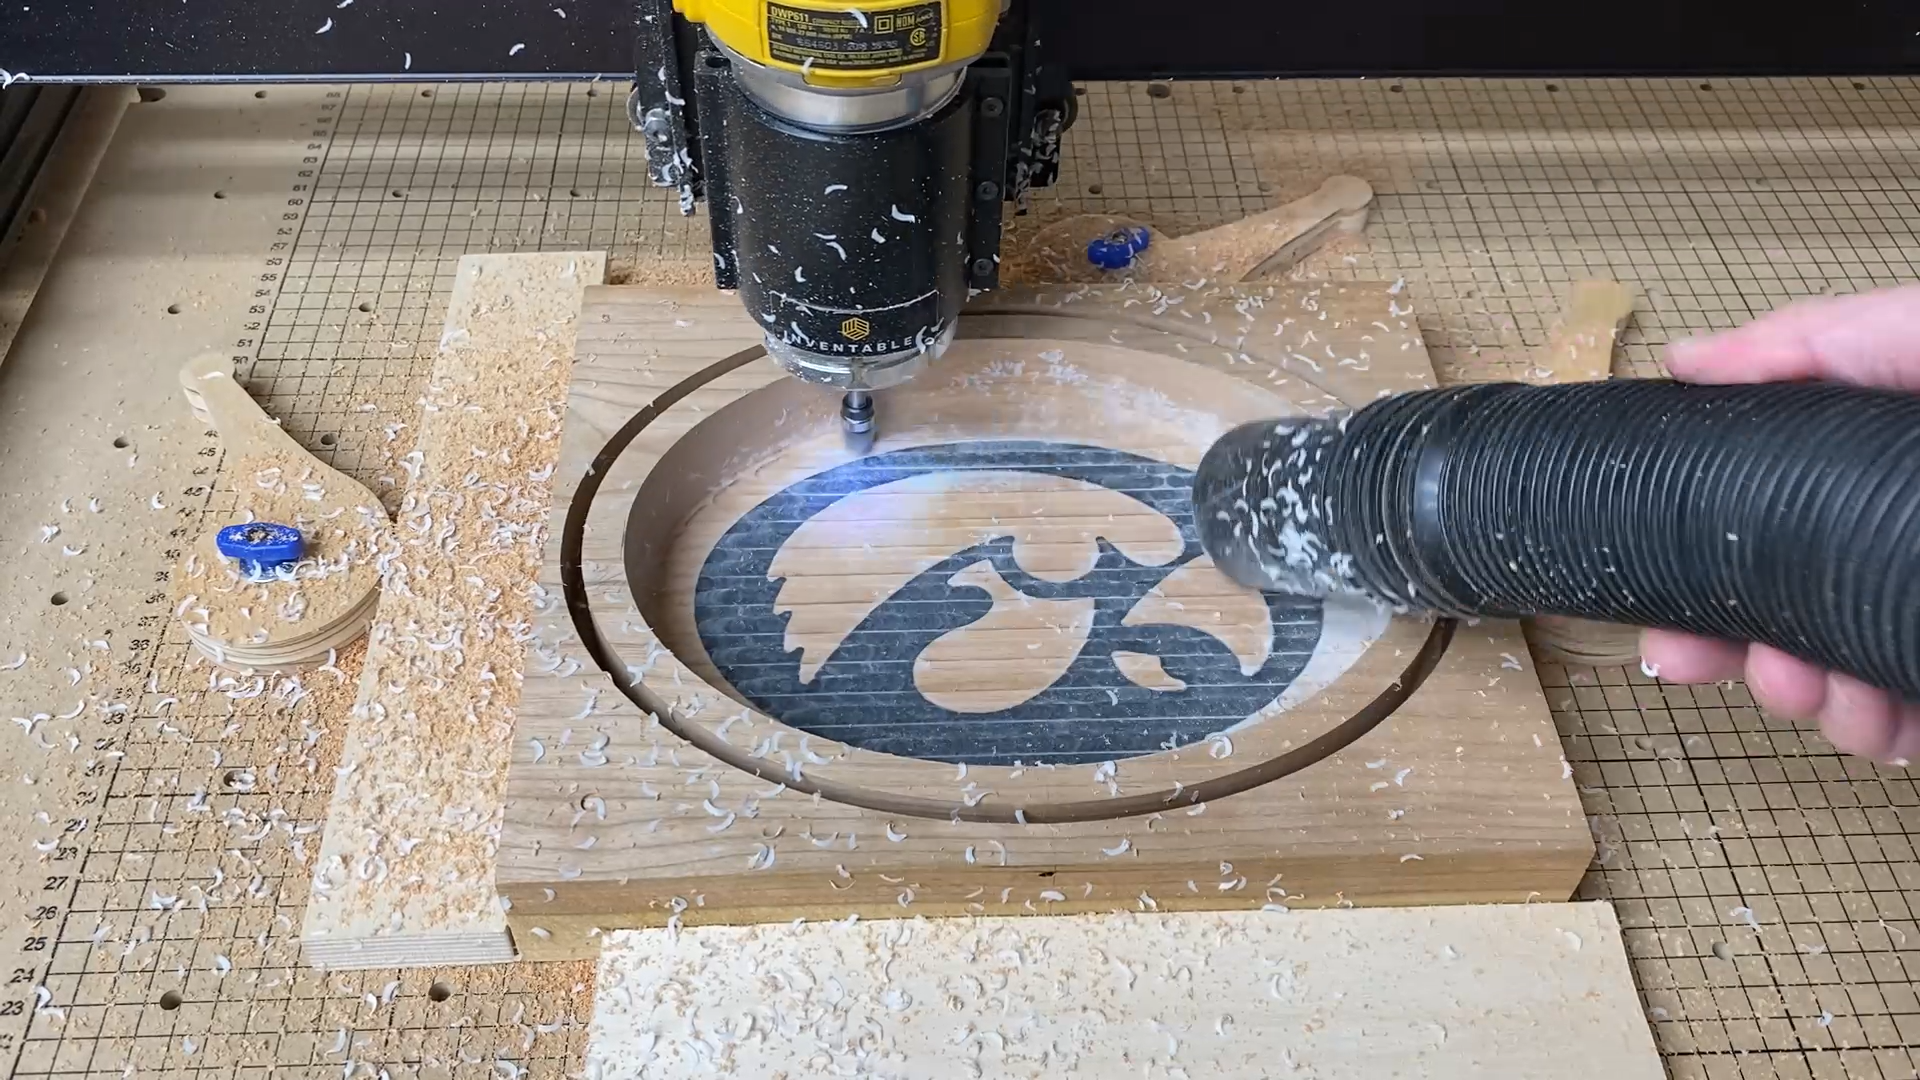
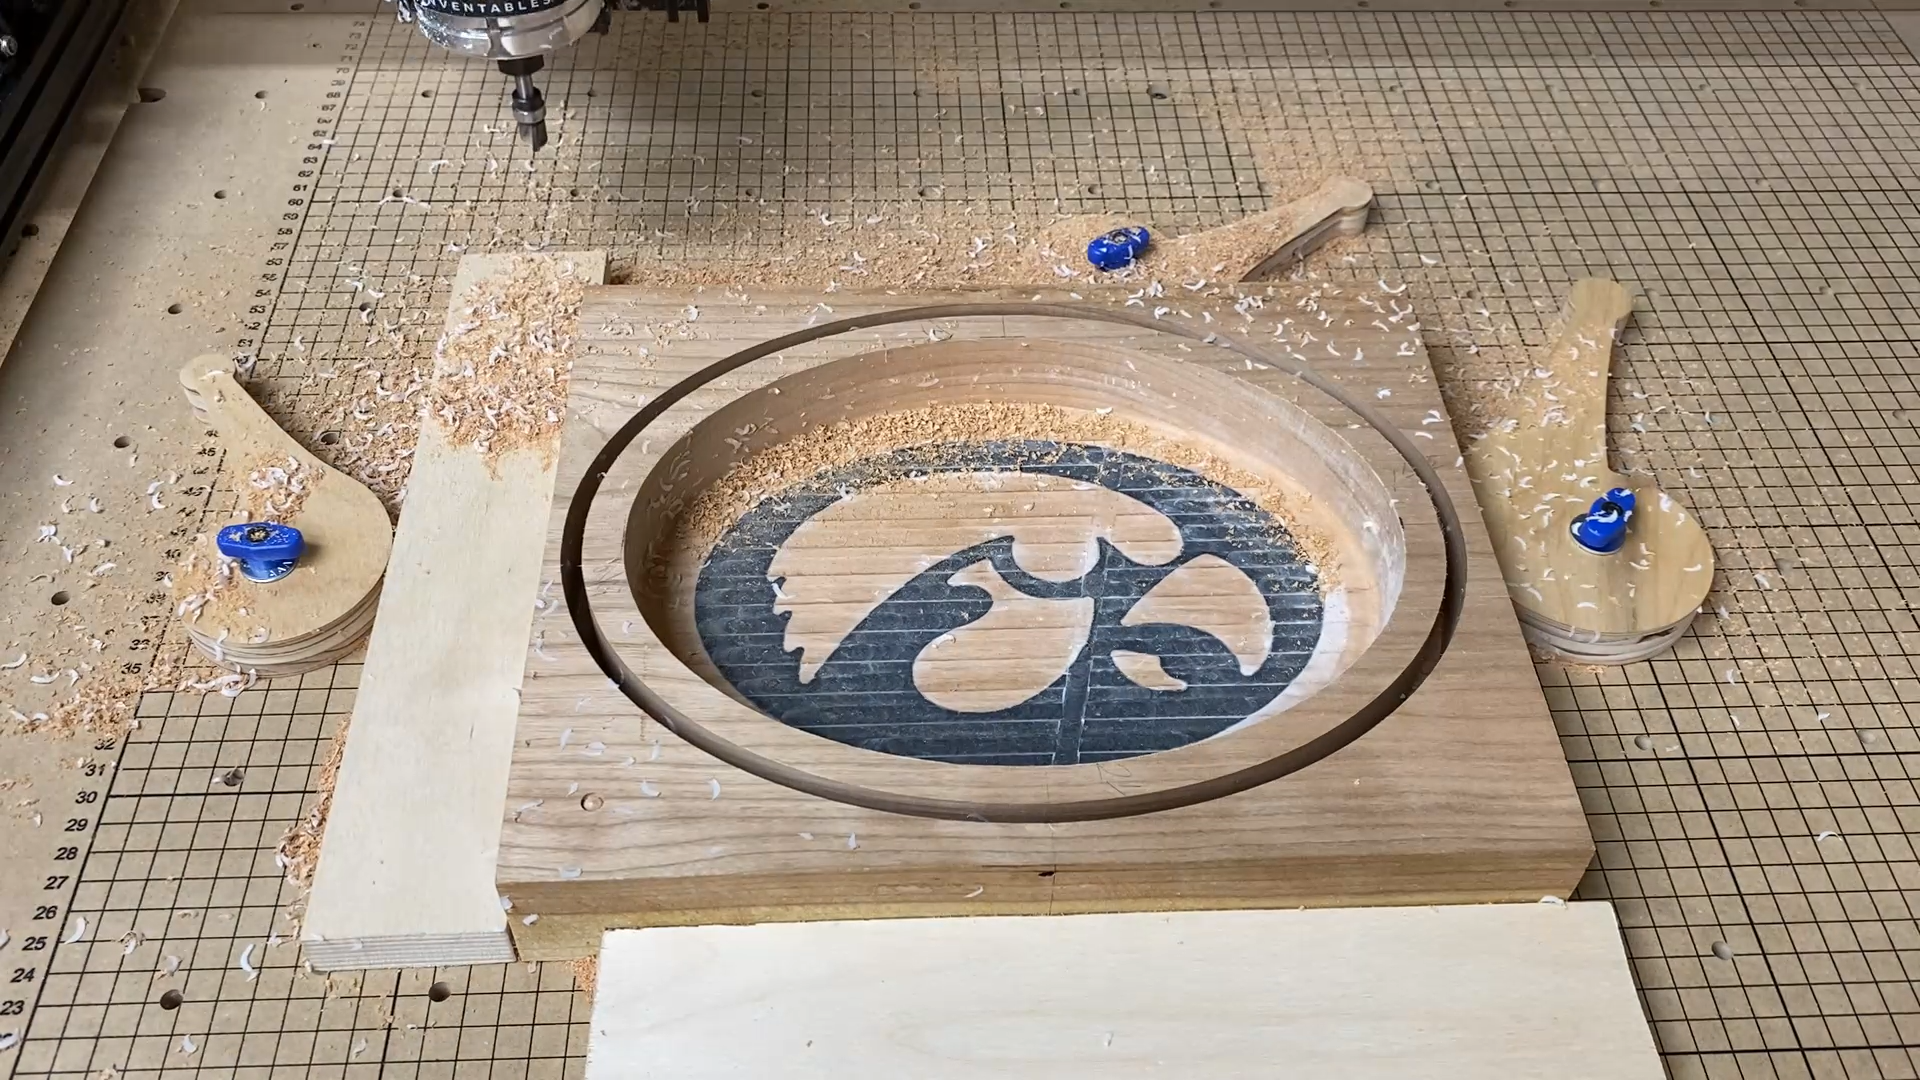
Step 10: Carve Bowl
Carving the bowl sounds like a simple hit the button operation, but I would recommend triple-checking your alignment before you start.
I actually transferred the outside edged of the oval shape from the logo to the top surface before I ran the bowl carve. That way I could run the bit at a higher setting (above the work surface) and check the alignment. I did this by setting the Z axis zero point with a 1/8" thick piece of wood underneath.
The bowl carving can take a little time and the deeper you cut a bowl increases that time as well.
I used the Amana Tool 45983 Carbide Tipped Bowl & Tray bit. See the link at the beginning of this Instructable.
The setting I used for the cherry were:
Feed rate: 28" per minute
Plunge rate: 9 " per minute
Depth per pass: 0.03”
I sped up the rate a little on the maple as that was burning a little.
The Dewalt router on the X-Carve CNC was running at setting 3.

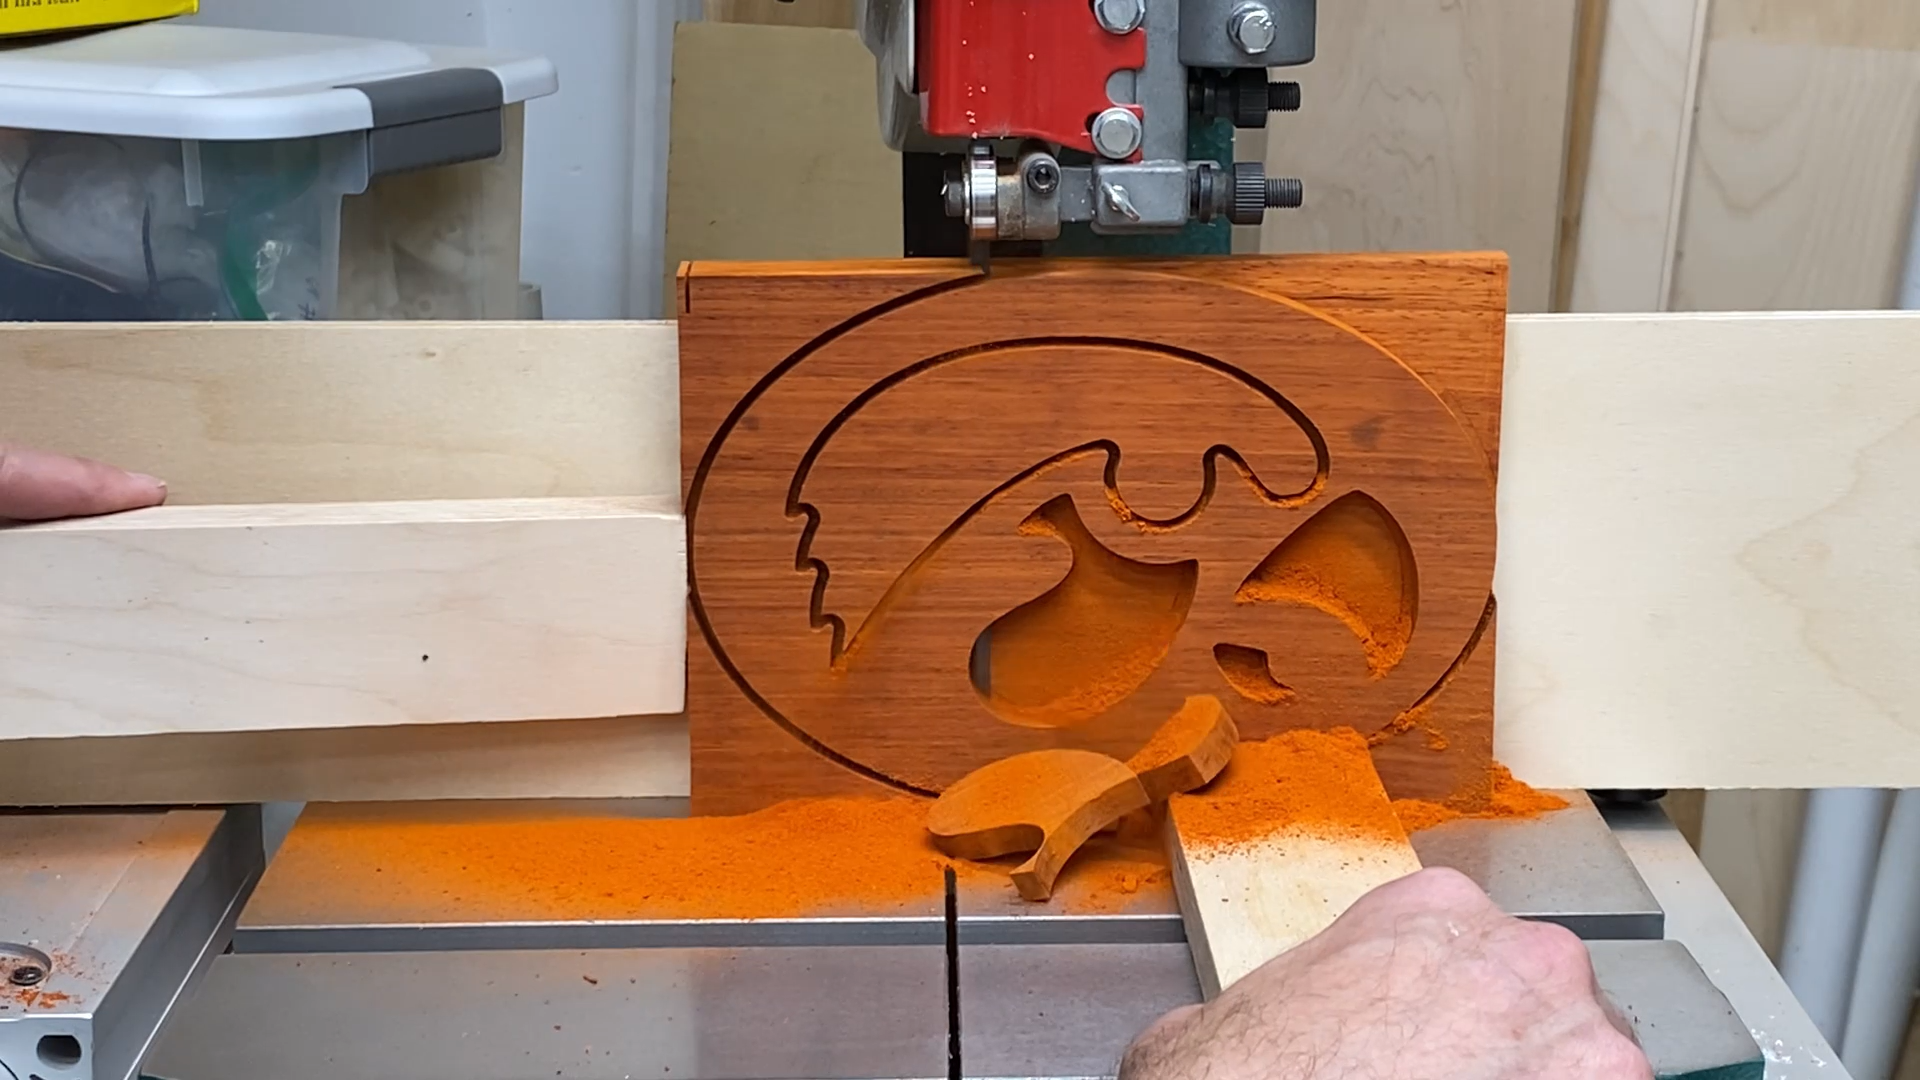
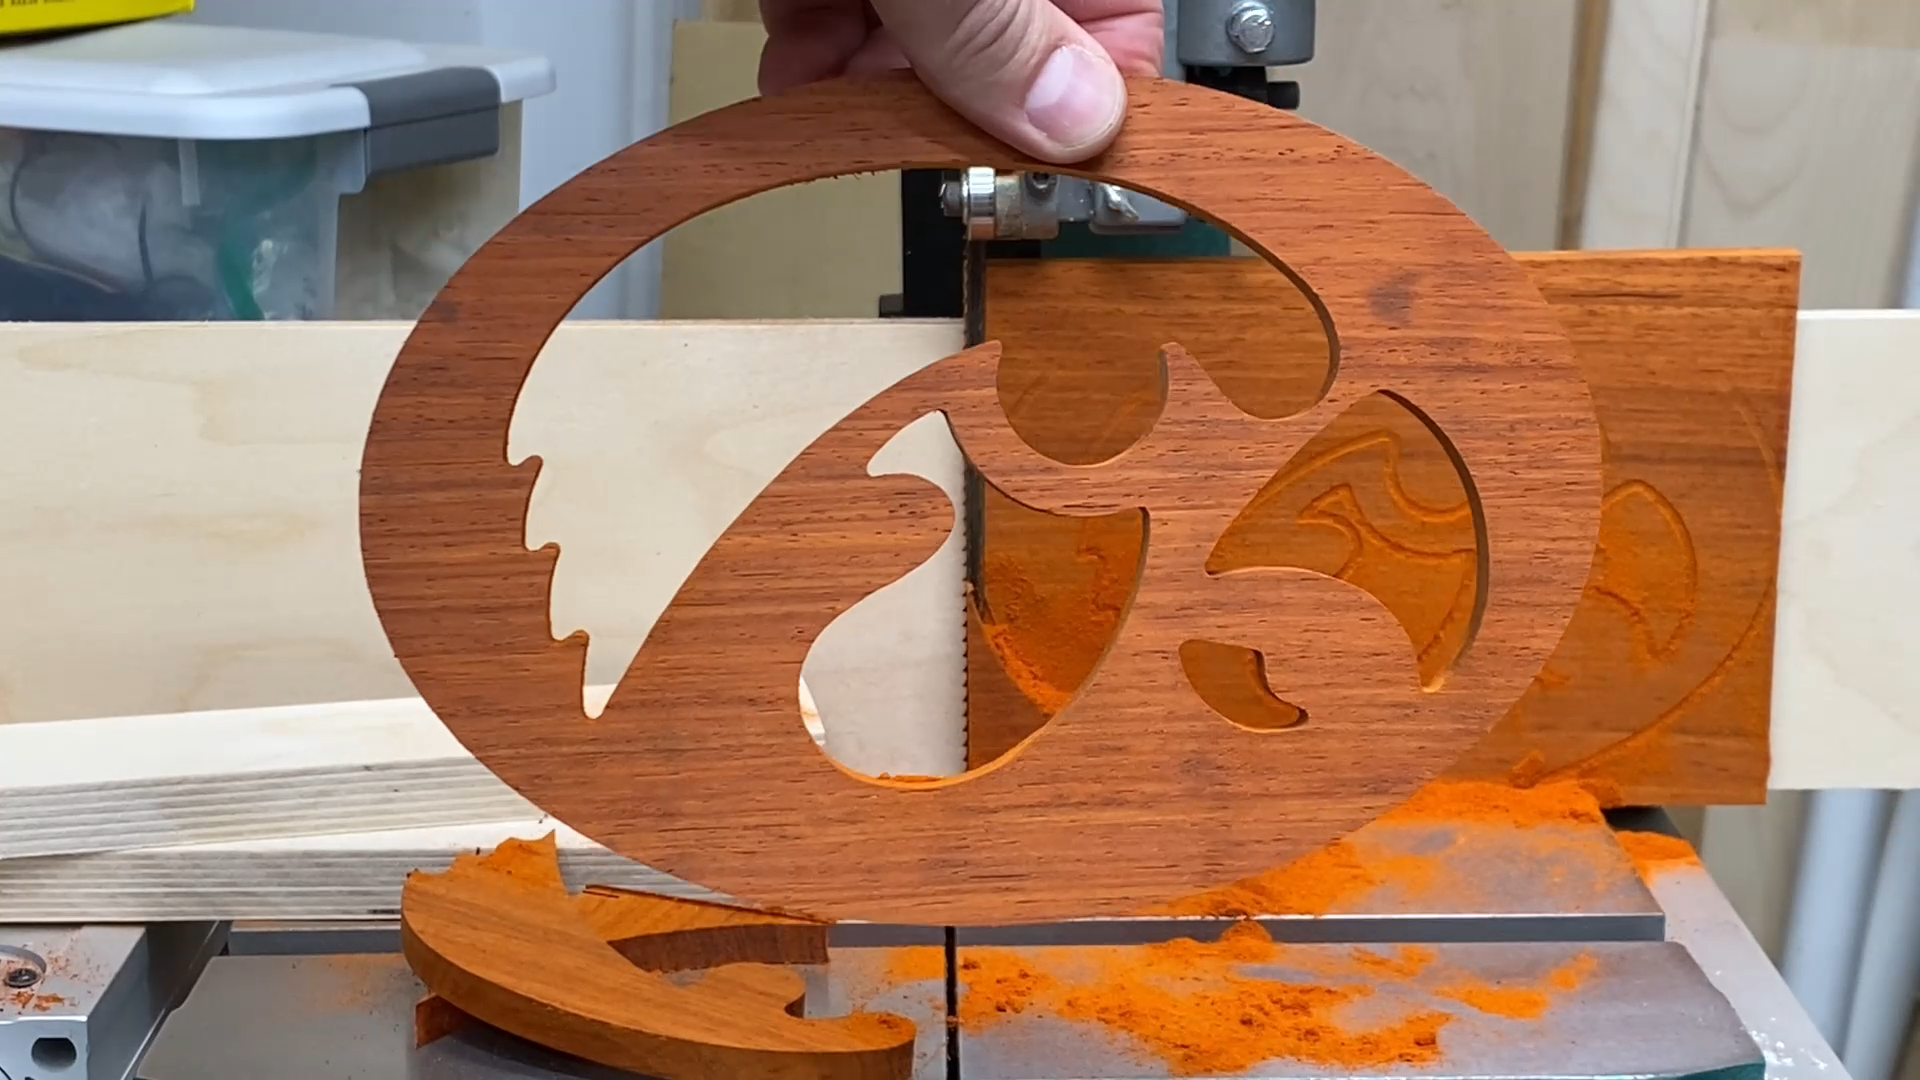
Step 11: Cut The Outline
I set the depth on the shallower trays to cut within 1/8" of cutting through the surface.
Then I took the piece to the bandsaw and cut around the outline of the bowl.
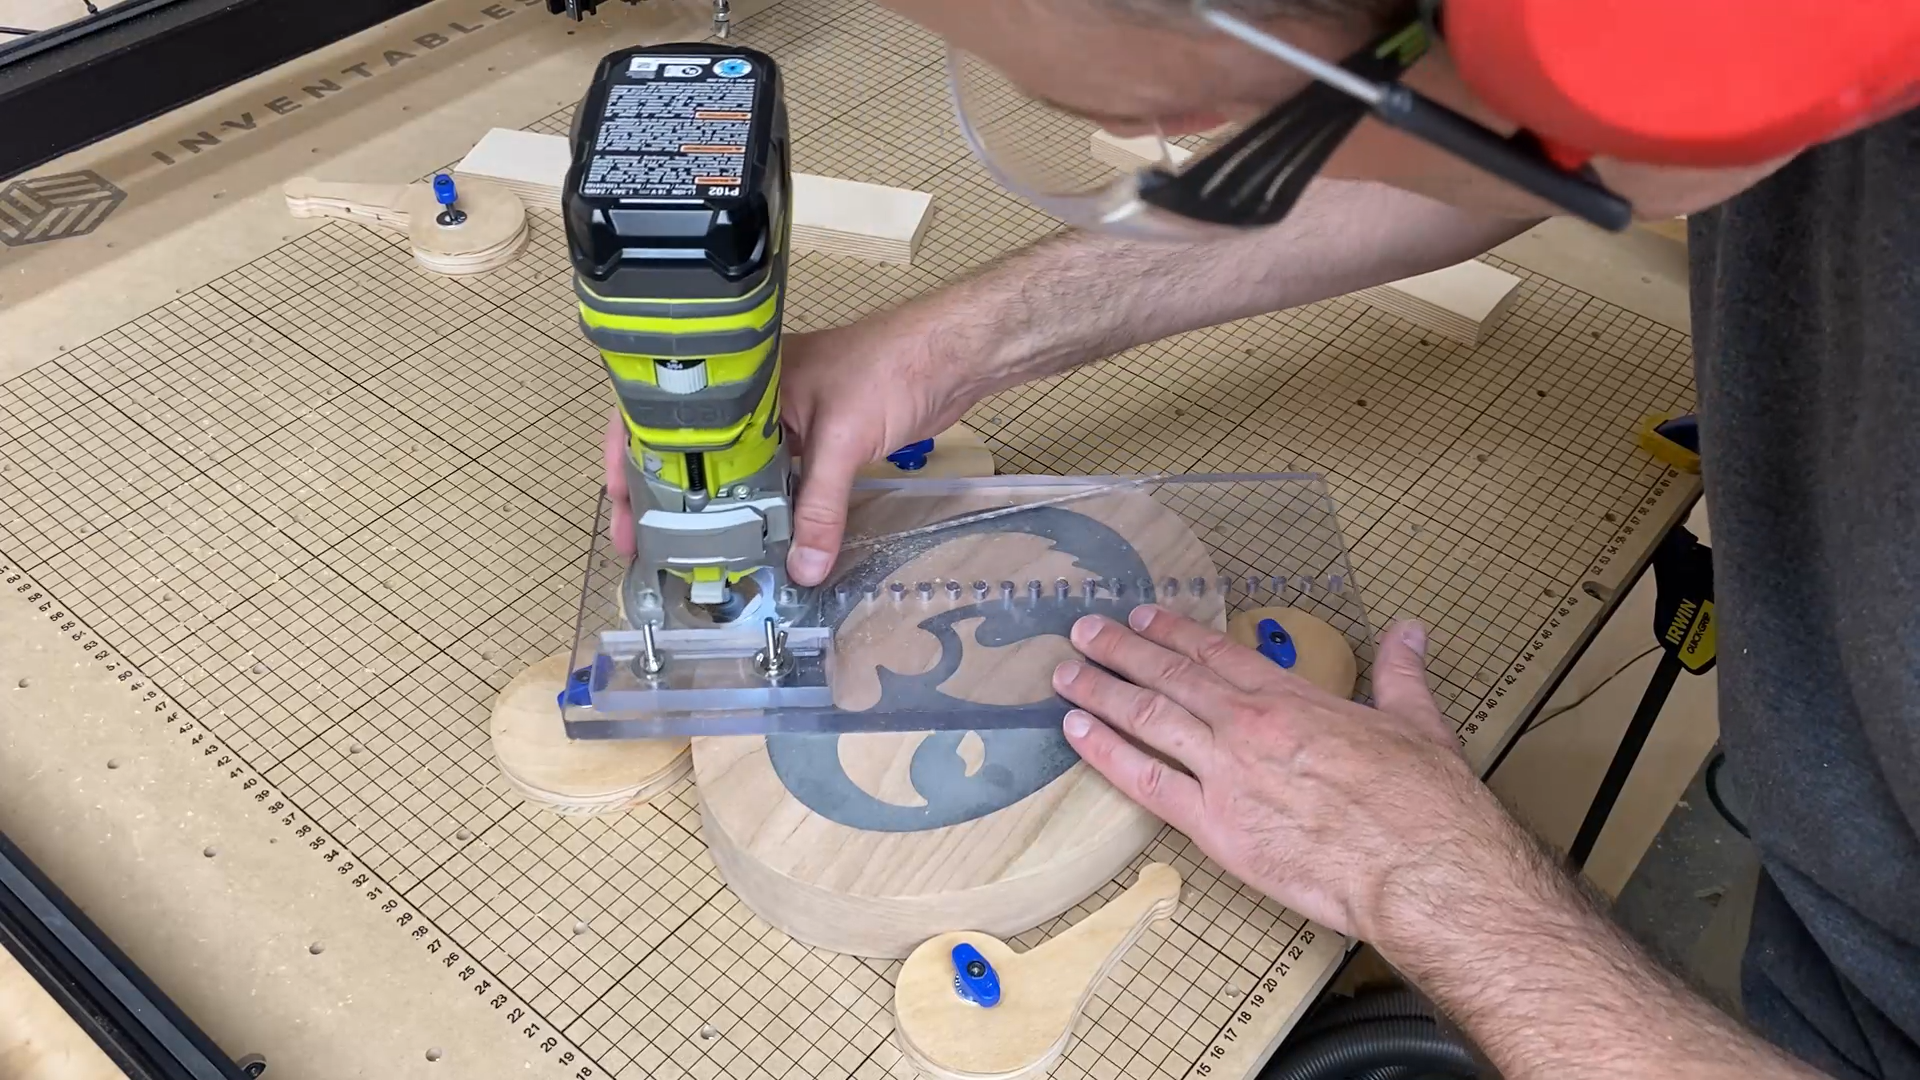
Next I used a flush trim router bit to clean up the top outside edge of the bowl. Since I will be using a 1/8" roundover bit in the next step, this flush trimmed area will be rounded over anyway.

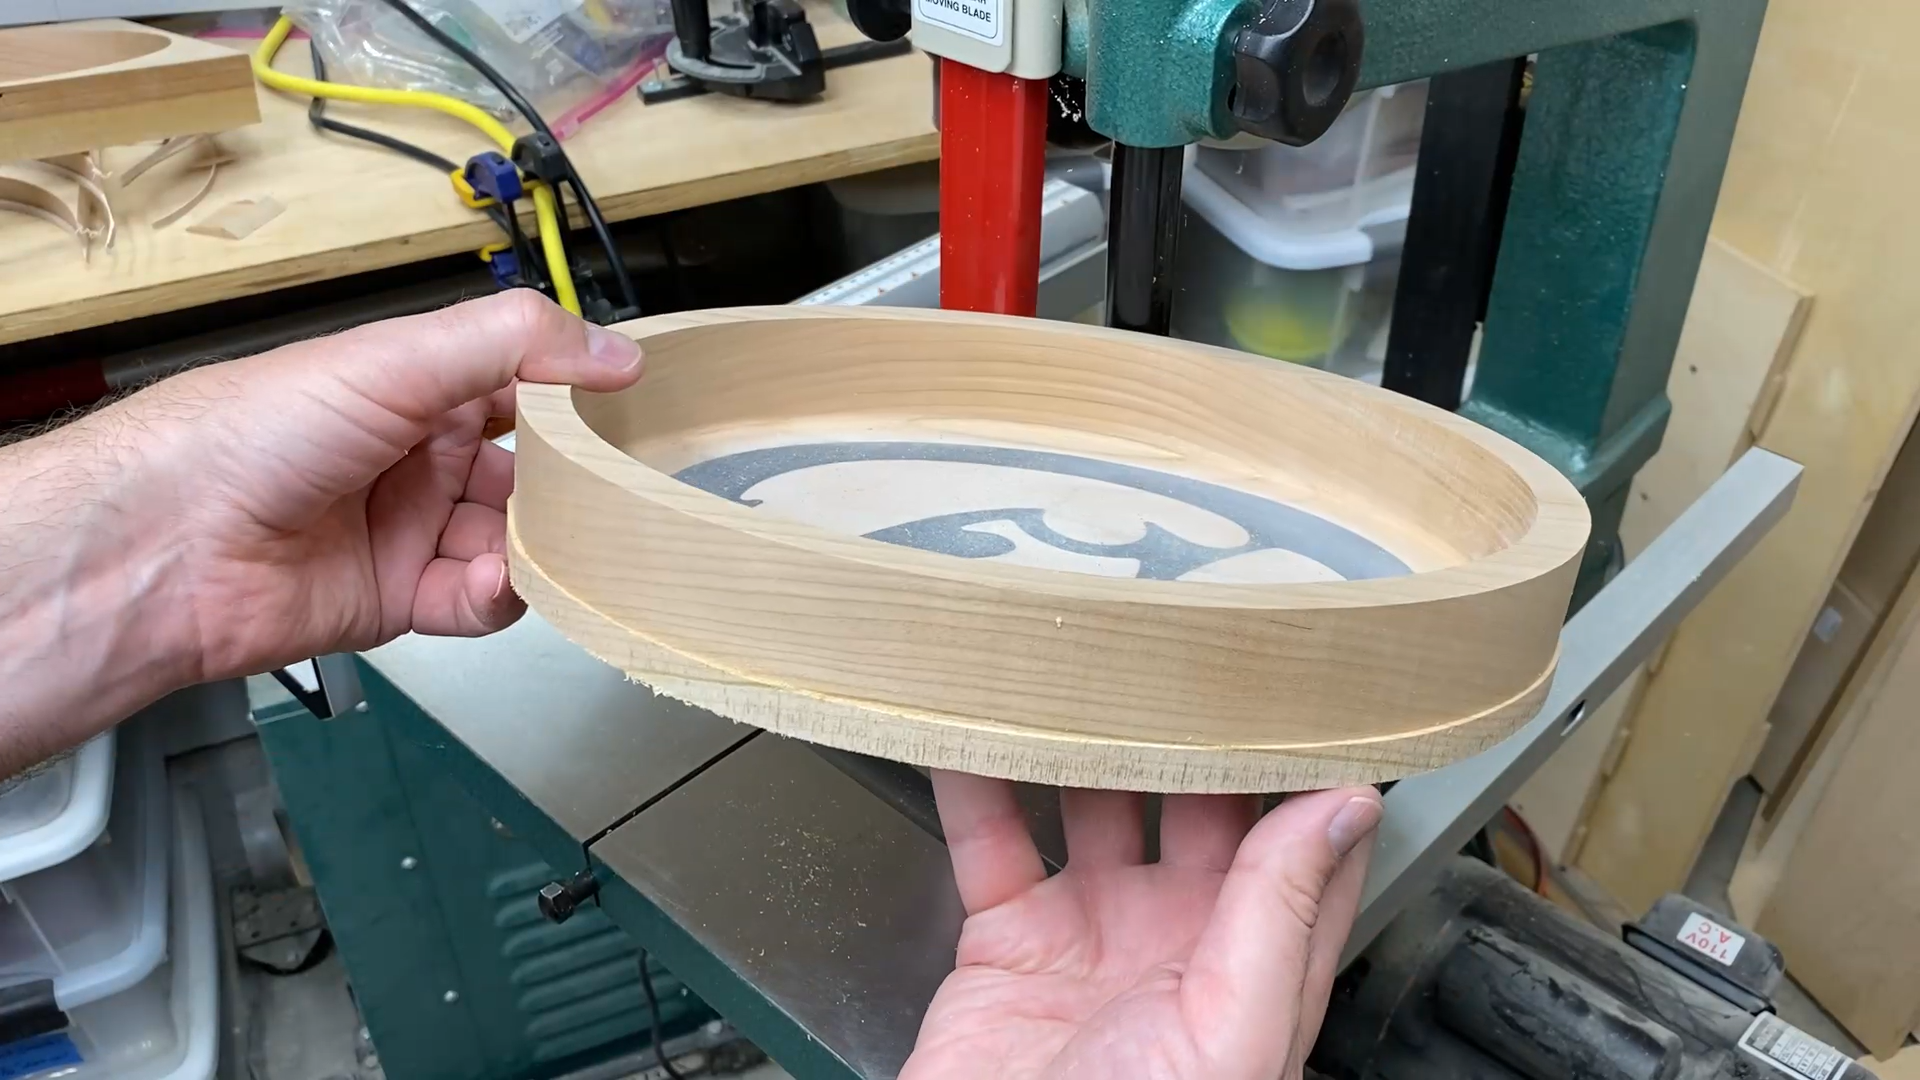
Step 12: Route Edges With a Roundover Bit
The wall thickness of the bowl was set at 3/8".
I used a trim router and rounded over the edges using a 1/8" roundover bit with a guide bearing. This left a very small flat surface around the top edge of the bowl.
I also rounded over the bottom edge of the bowl with the same router bit. I thought this was appropriate to give the edge a soft feel.
The bottom inside edge of the bowl was already rounded over with the bowl bit when I carved it on the CNC.
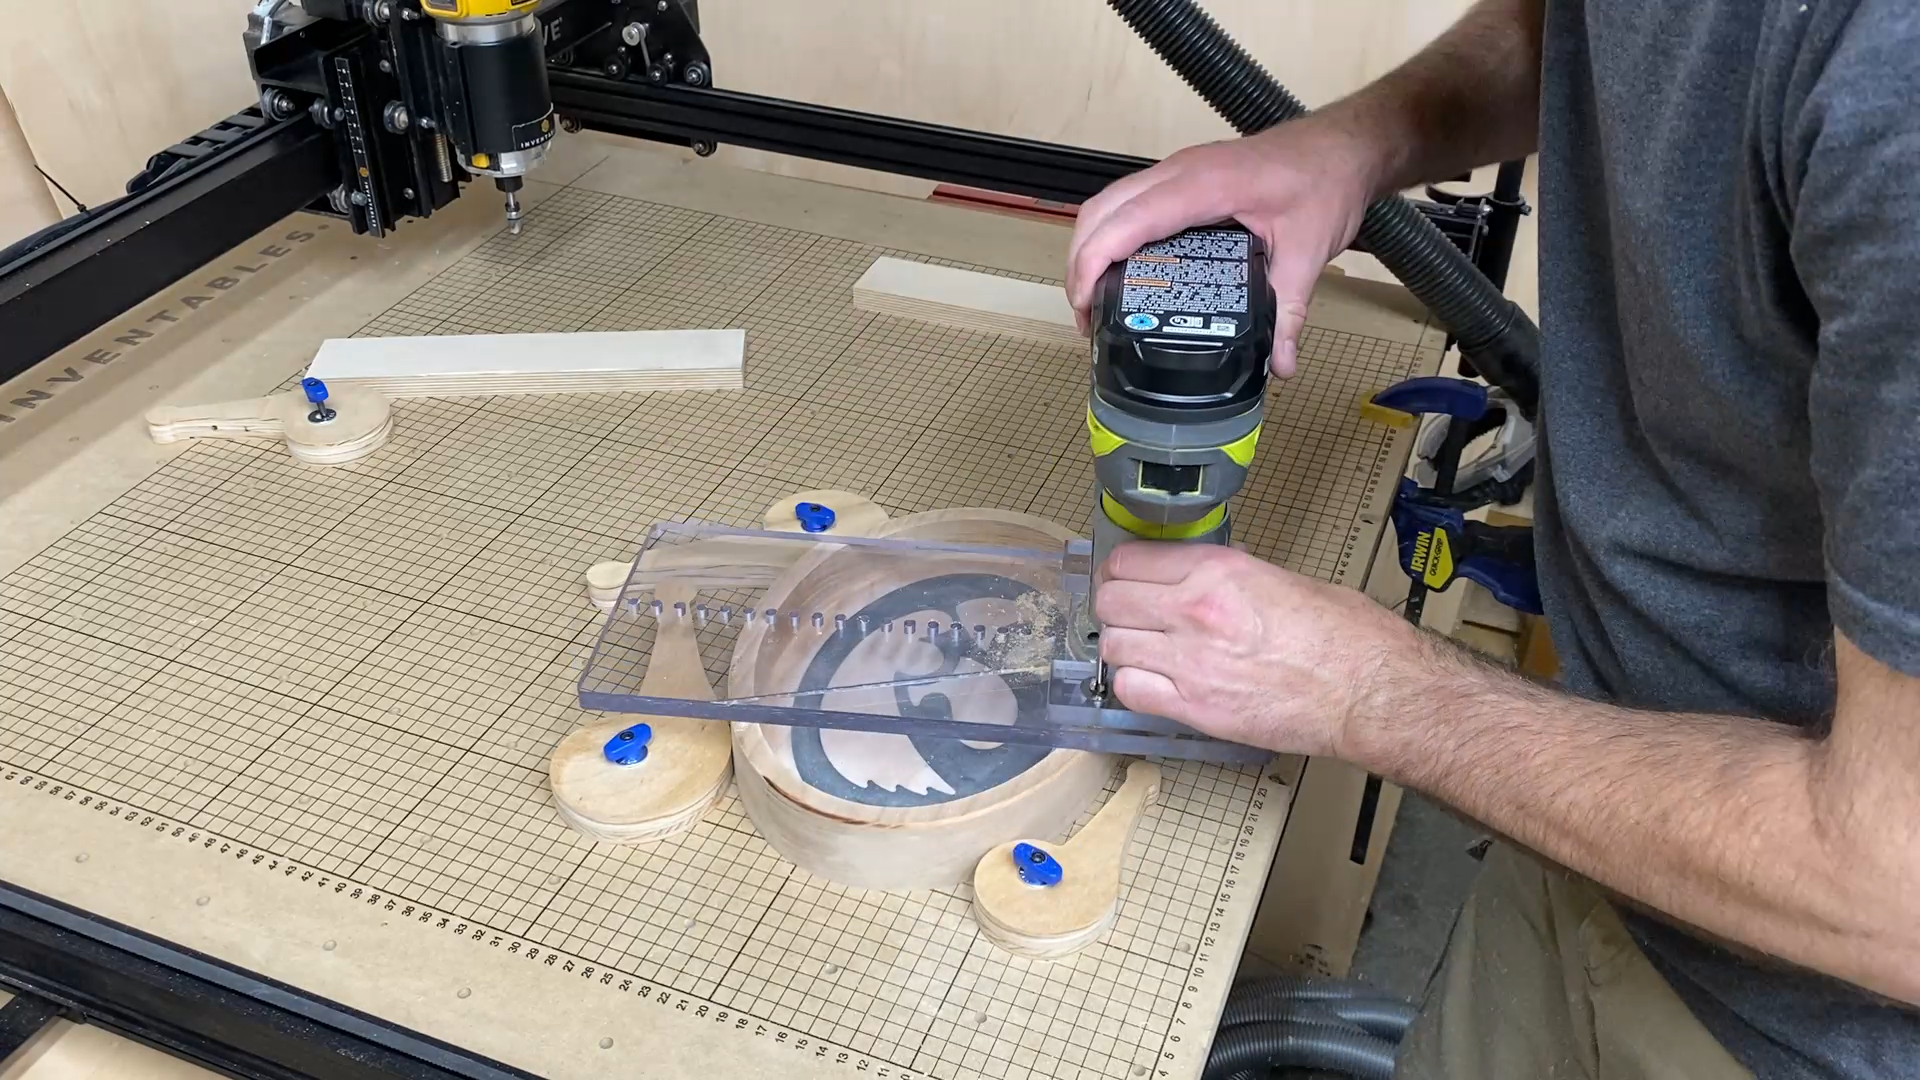
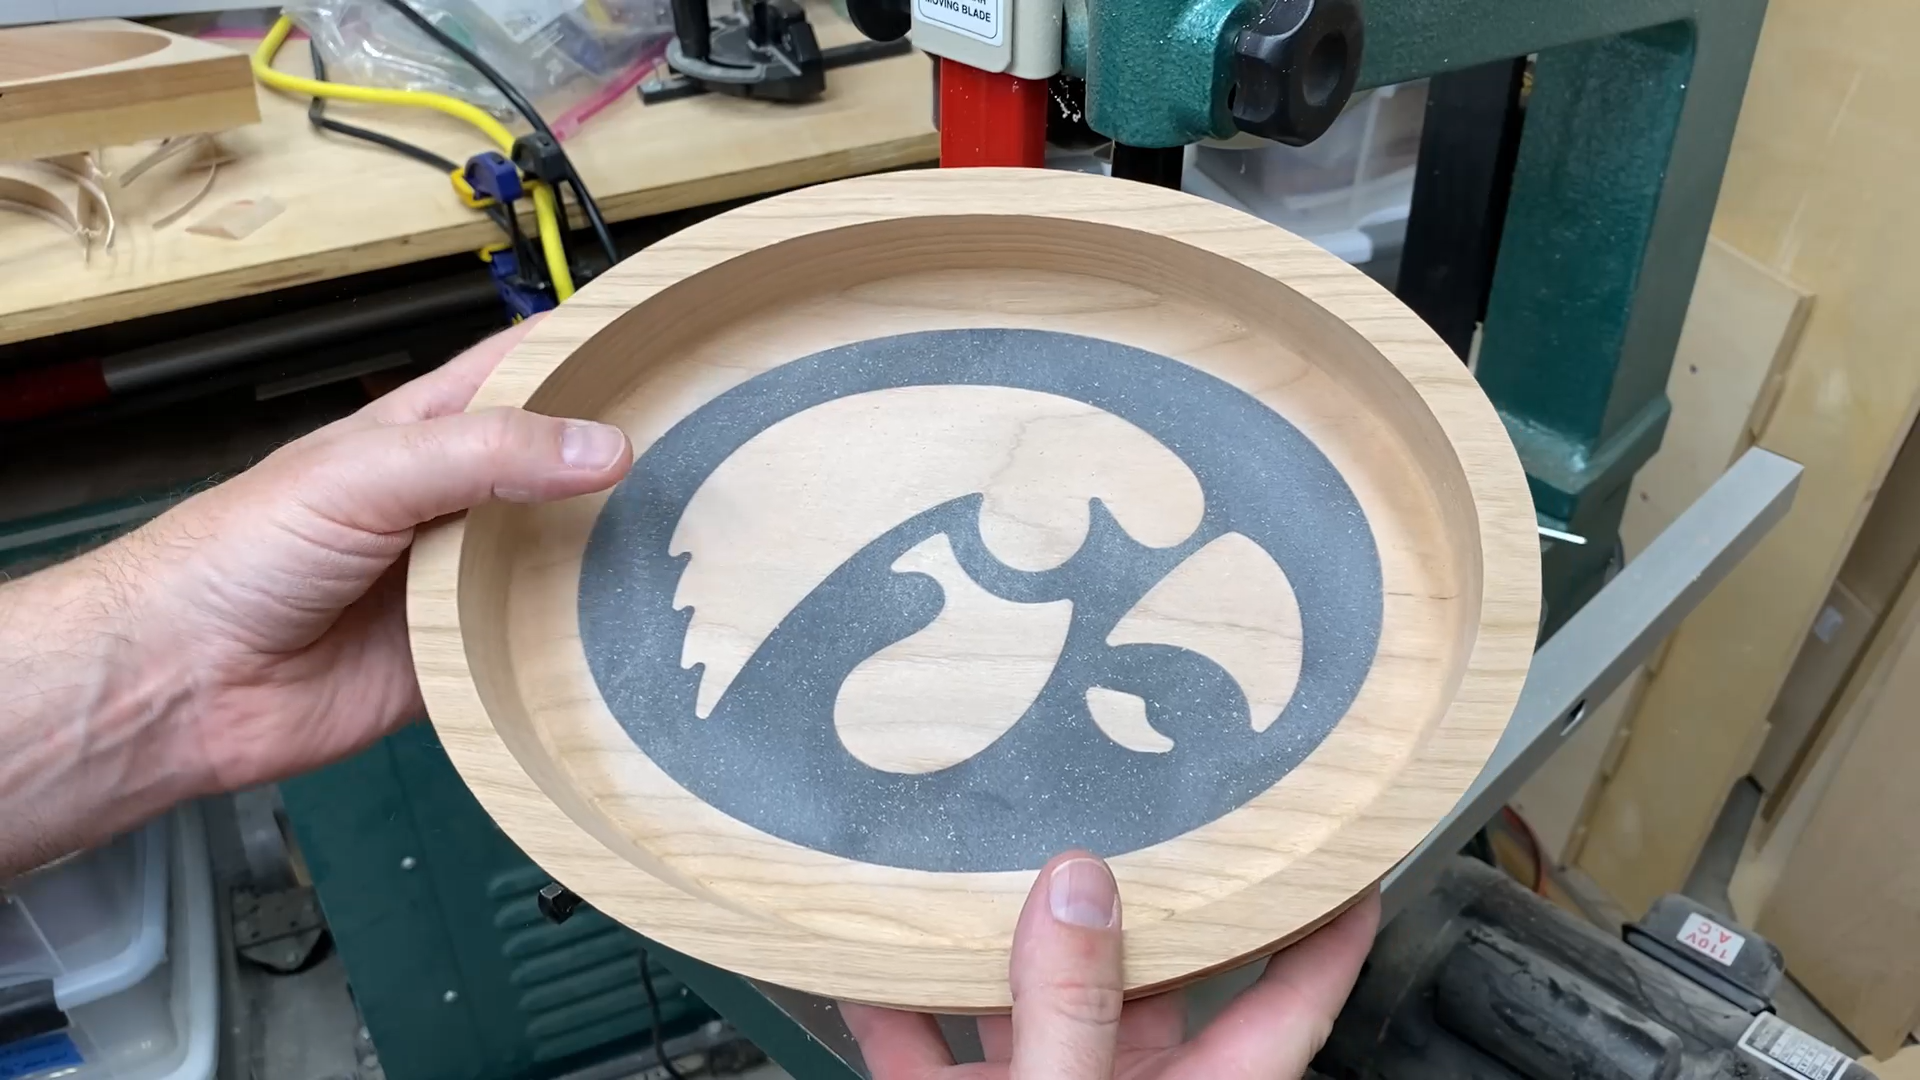
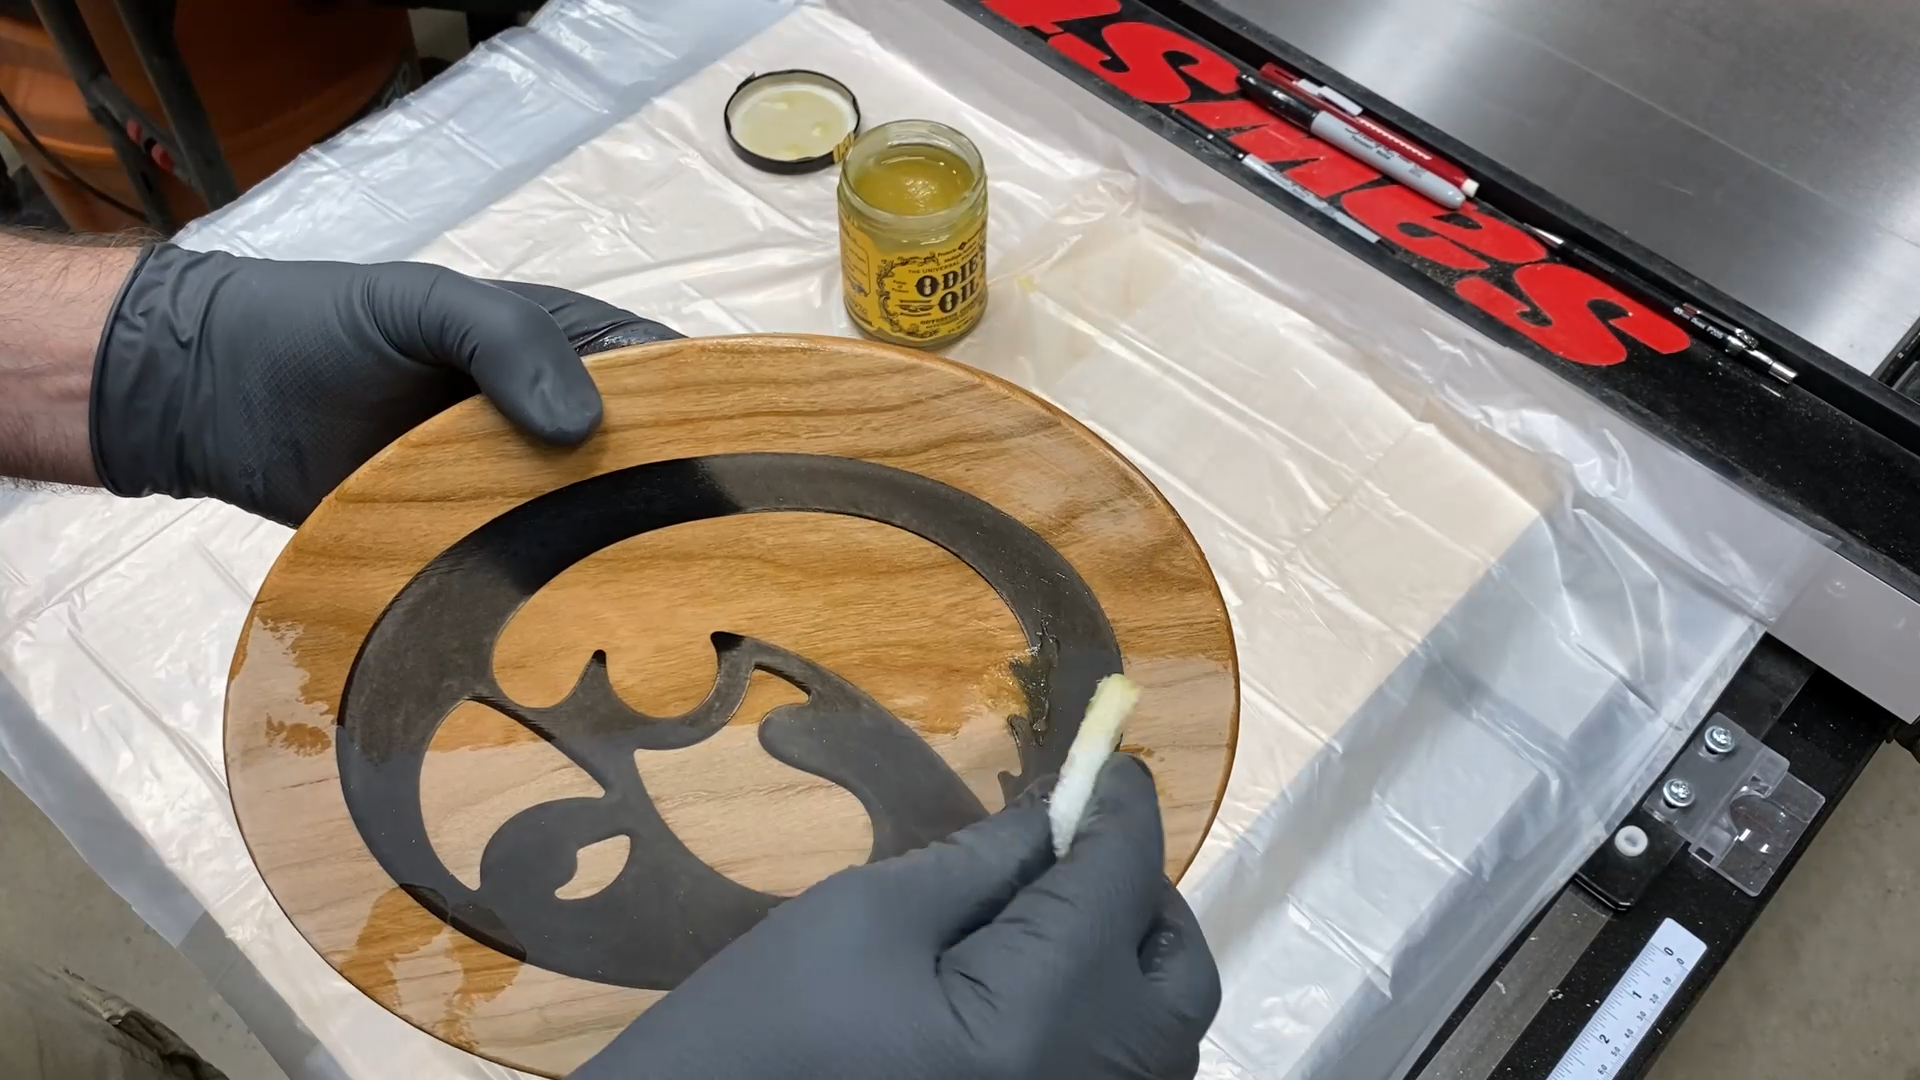
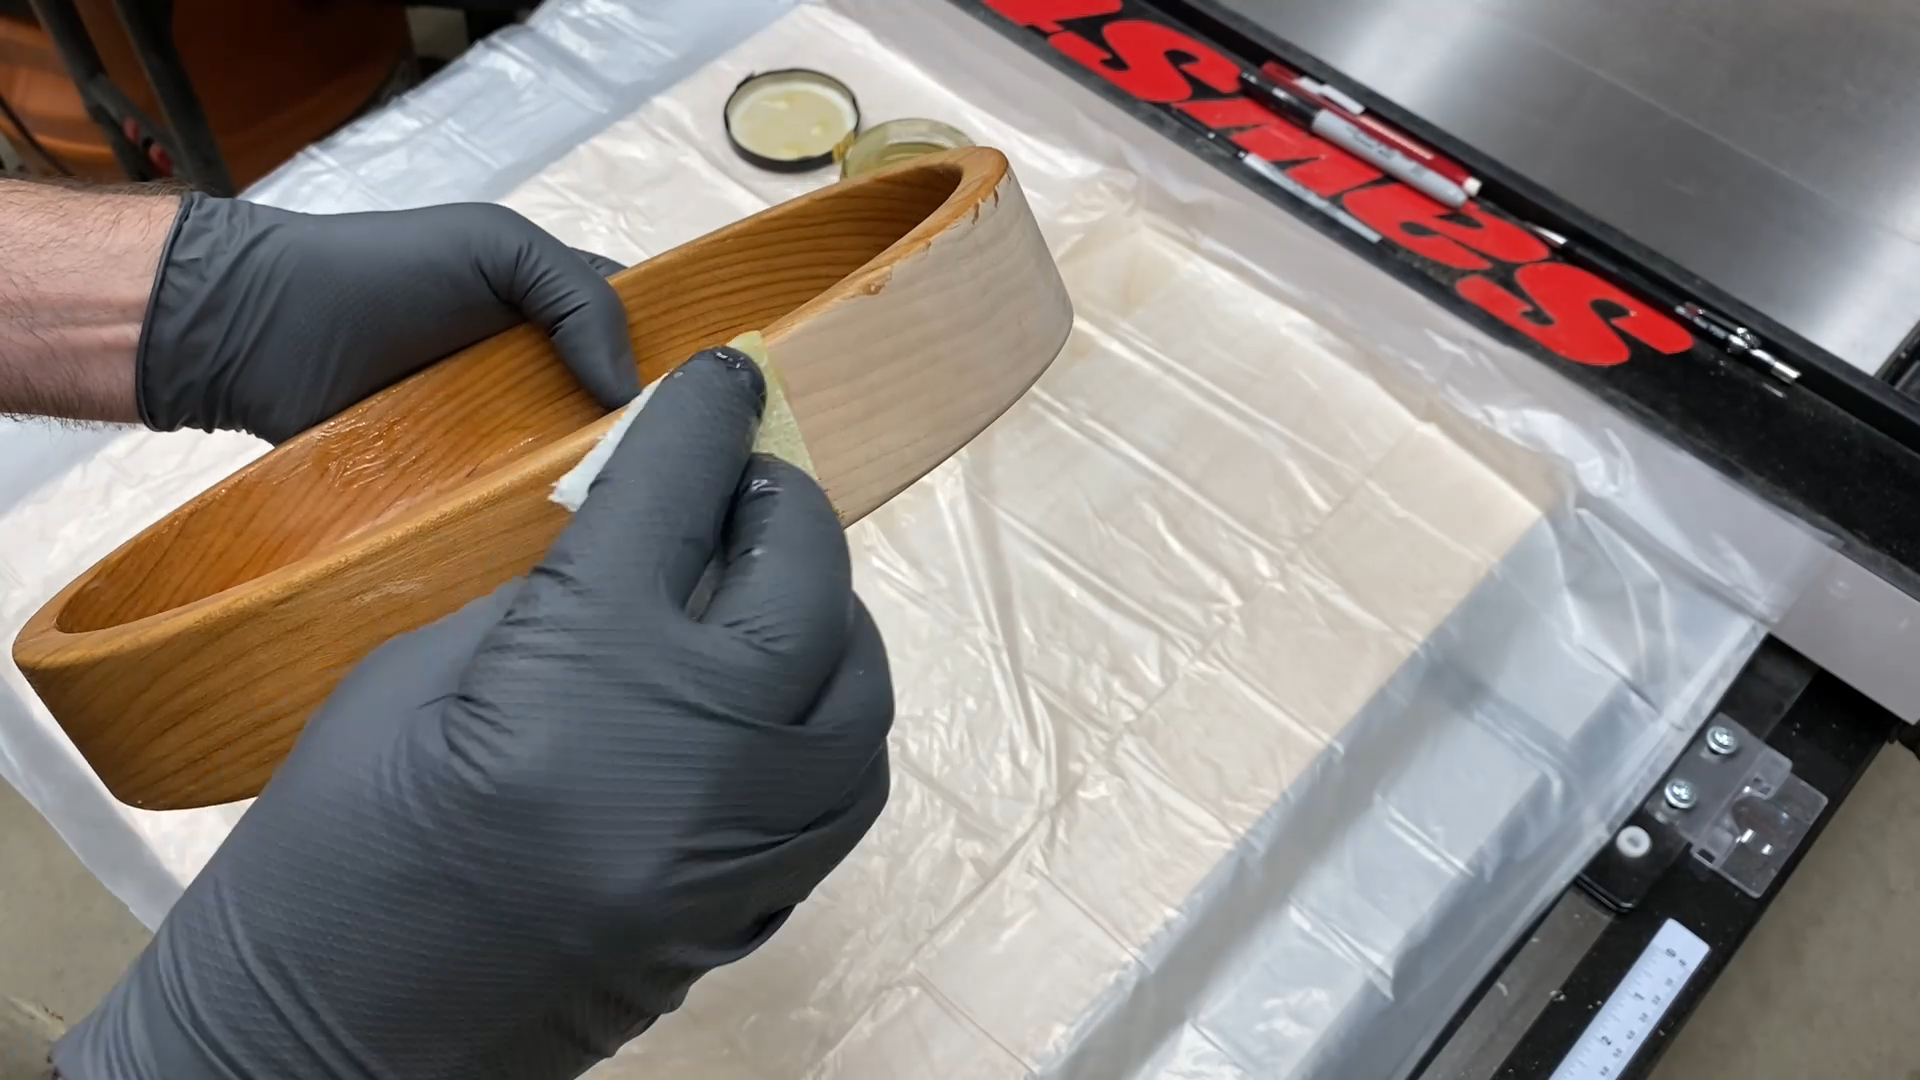
Step 12: Sand and Finish
Next it's time to sand this baby down to a nice smooth surface. You want to make sure you get rid of all router marks if for some reason you set the depth of the roundover a little too deep. I started with 120 grit sandpaper and worked my way down to 400 grit for the wood bowls/trays. For the one that had epoxy in the pocket instead of a wood inlay I continued sanding the epoxy surface down to 600, 800, and 1200 grit. Doing that left an unbelievably smooth surface. Not time I don't think I would go to this fine of grit as I think there might be issues with the fine sanding dust getting stuck in the wood grain around the sanding area. If you are going to have a clear epoxy surface then you might still want to sand to those higher grits.
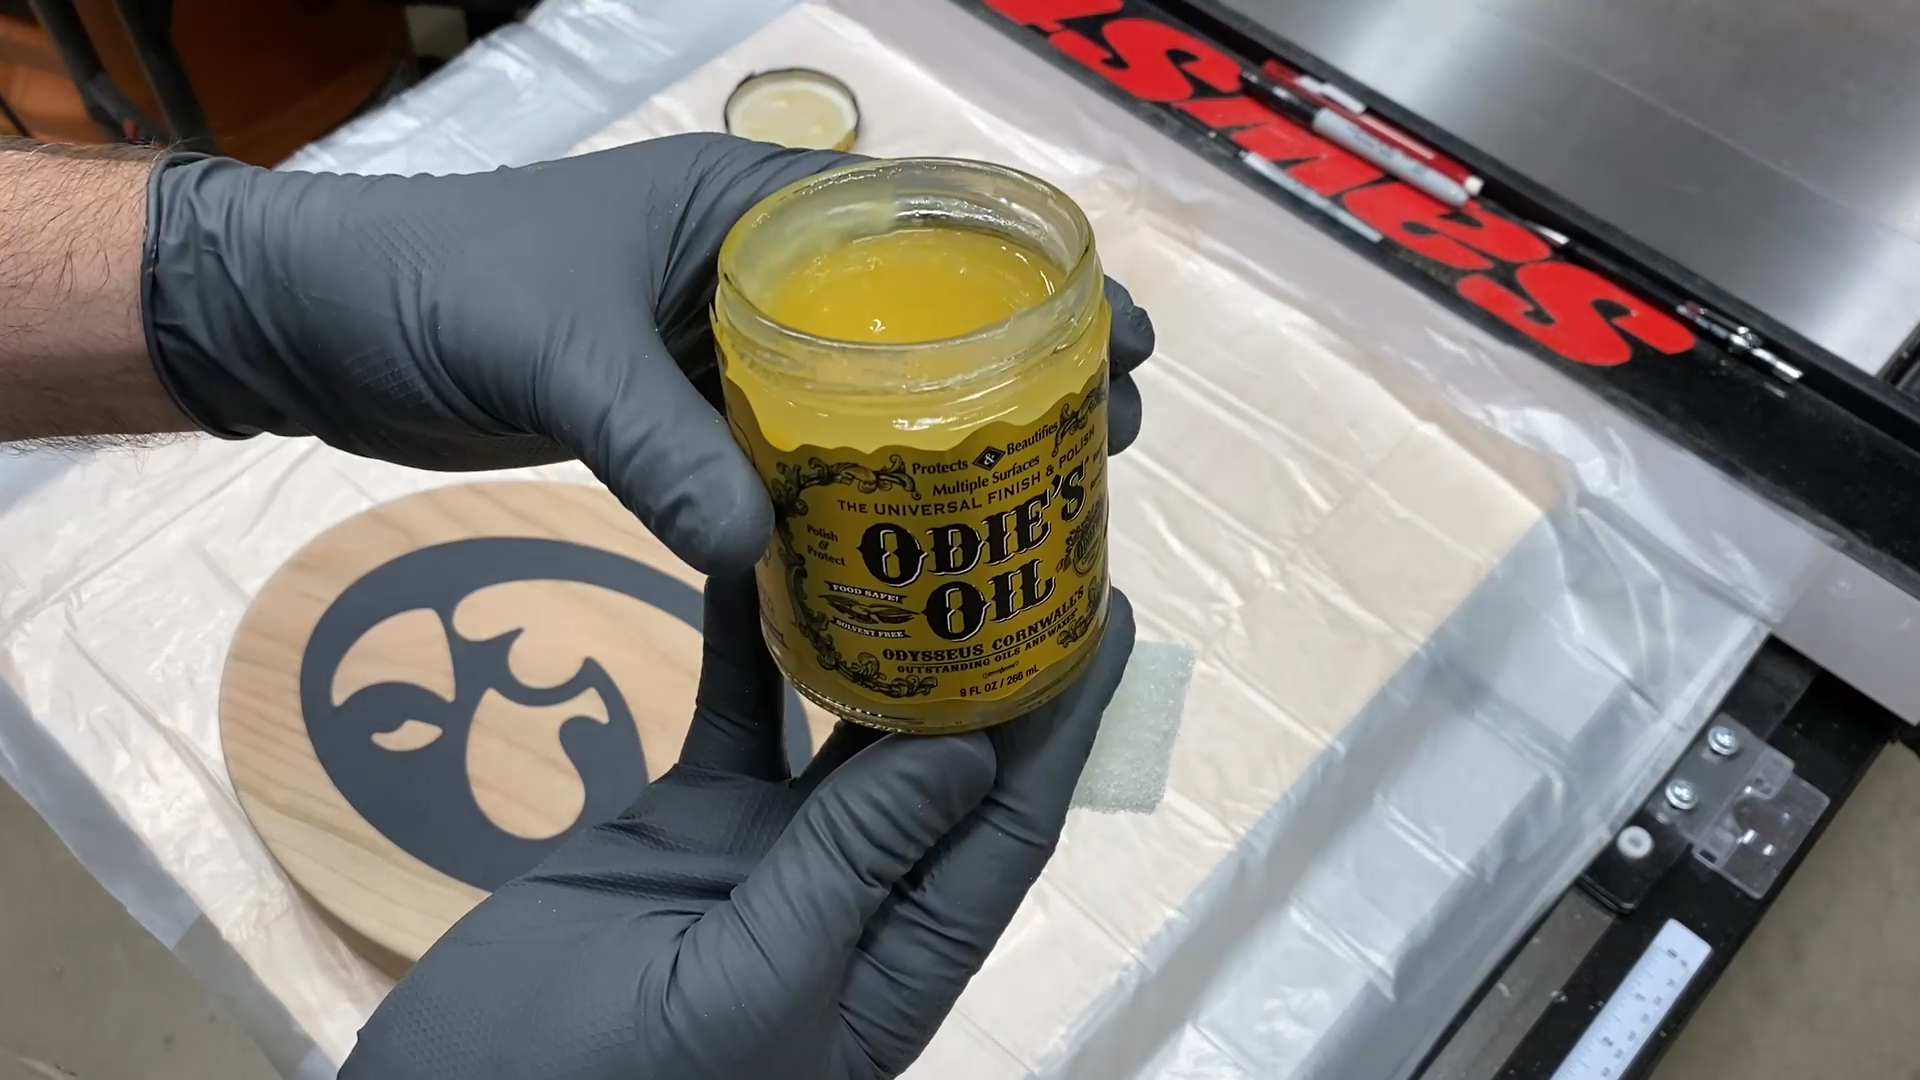
I used Odie's Oil as the finish of choice. This is the first time I used it and I am a true believer now. If you haven't used this before then you should give it a try. It smells great, doesn't have horrible fumes, and wipes on easy. The jar seems small for the price, but a little goes a long way and the feel of the wood is fantastic.
After wiping the oil on the wood, you wait 10 to 1 minutes and then wipe off the excess with a clean rag. Very simple and awesome results.


Step 12: Final Thoughts
I can't tell you how happy I am with the results of these bowls. All three look very different, but have their own unique qualities.
I was very nervous about messing these up as I had never tried carving bowls on the CNC. If you plan to make something like this then you should plan on taking your time and double checking all of the measurements and setting as you go.
These can take some time to carve since you are carving out a lot of material in the bowl portion of the carve. The size of your logo and the corresponding pocket can also add a lot of time to the carve.

I hope you get something from this information and from watching the video. If you decide to make something like this yourself then please send me a picture of the final product.