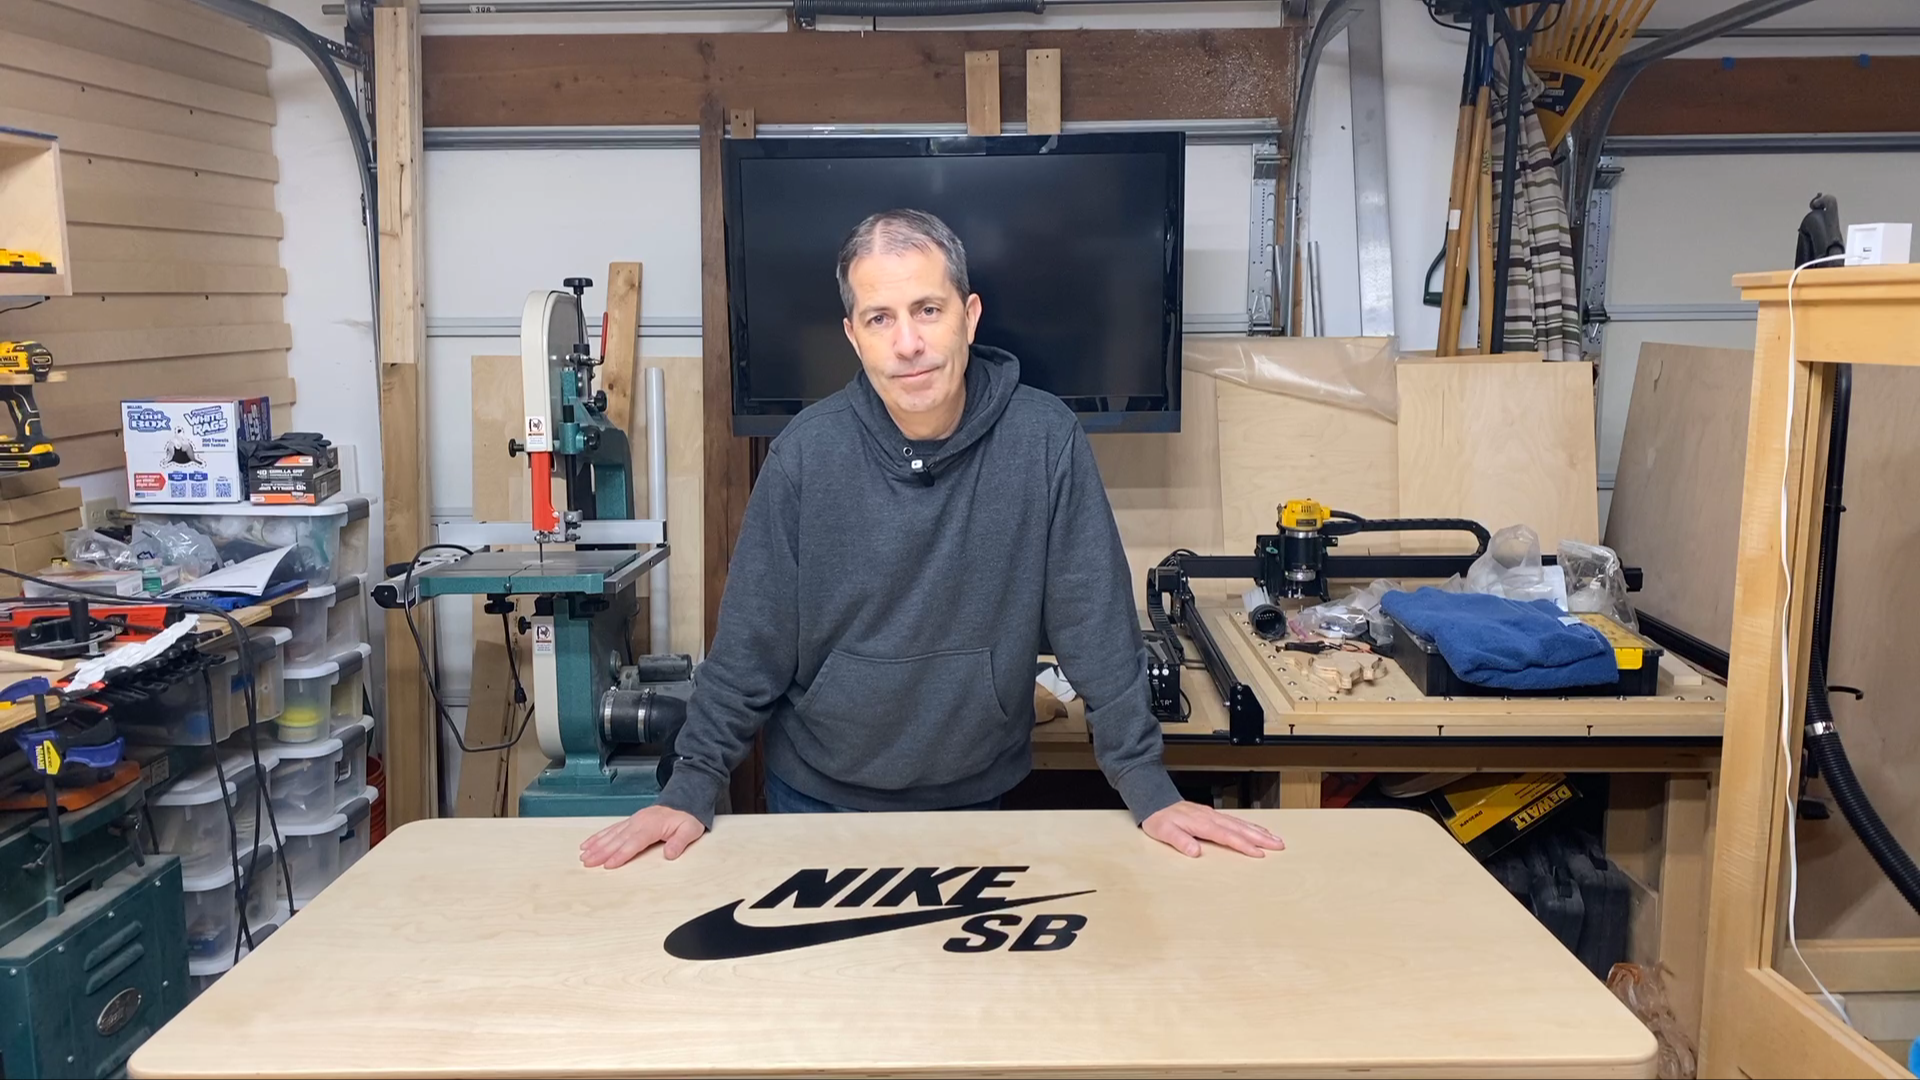
Nike SB Skateboard Bench
Click here to subscribe to my YouTube channel.
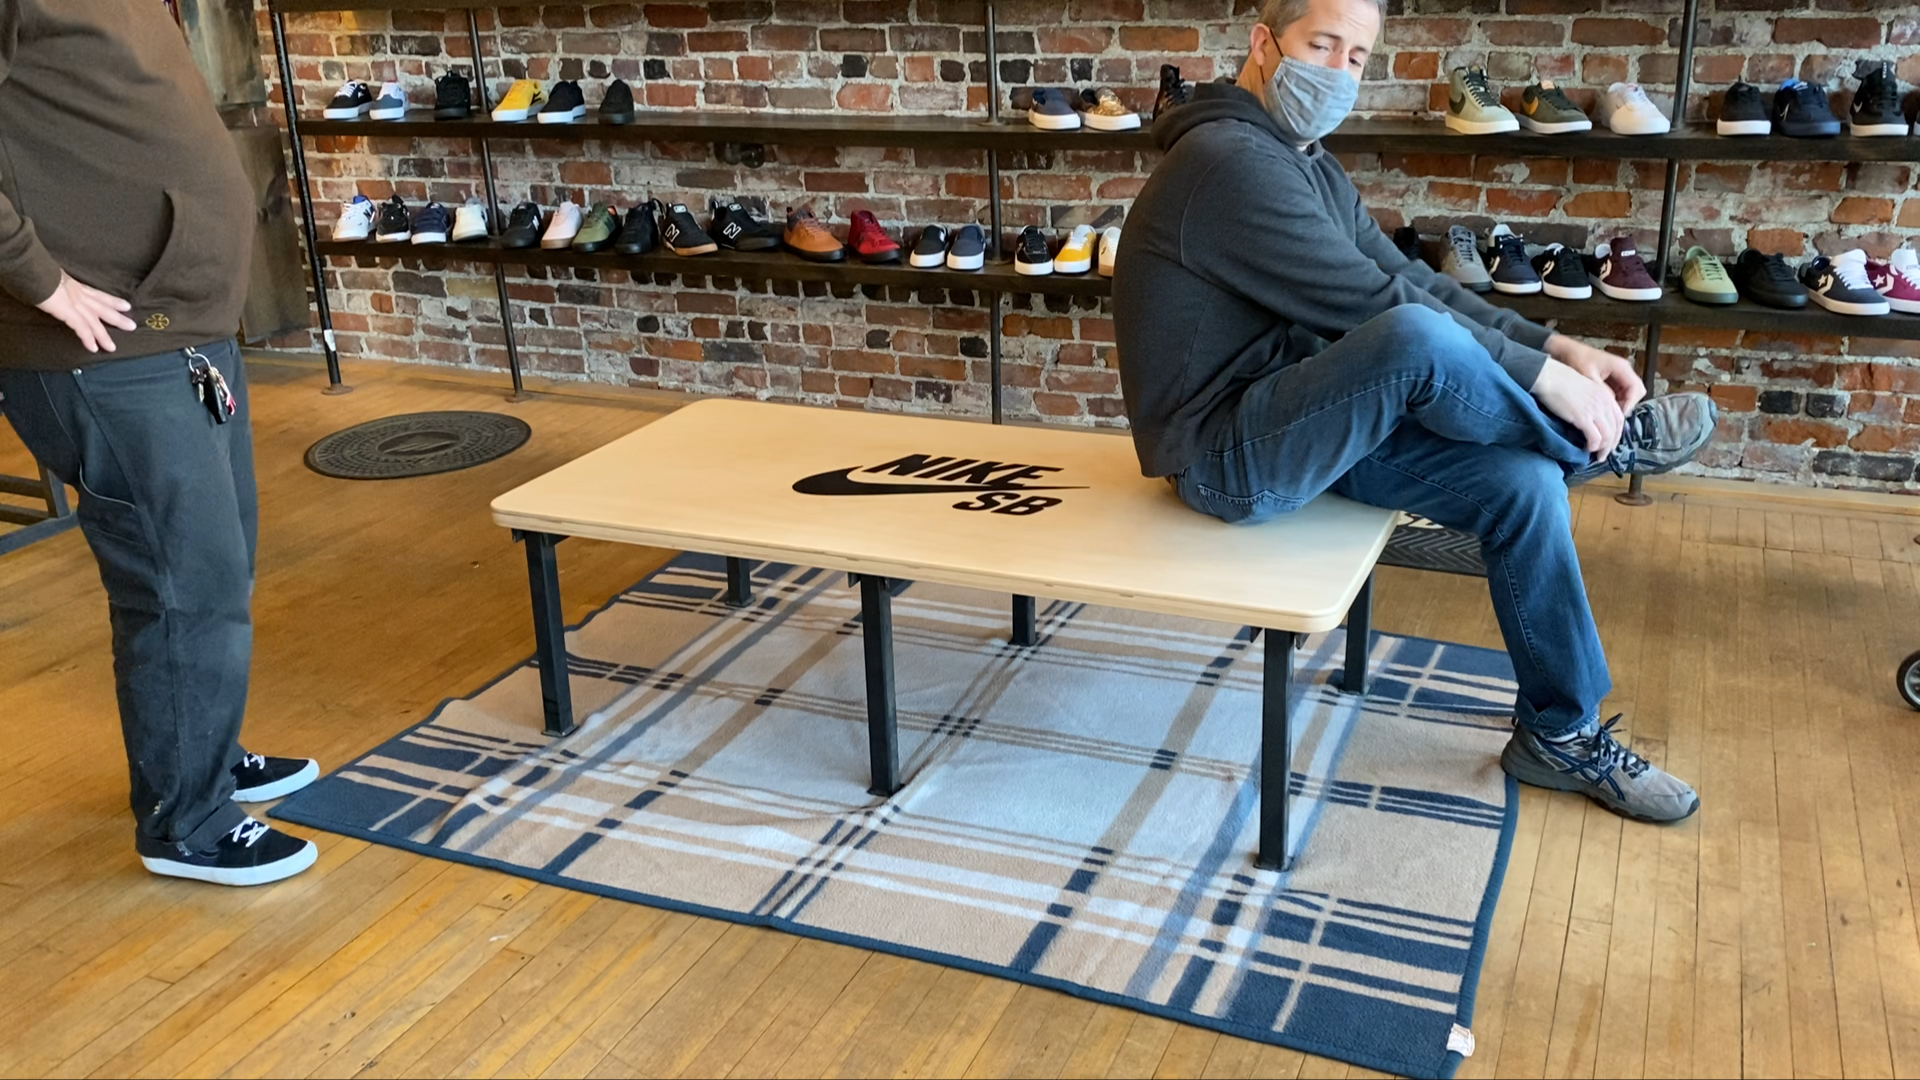
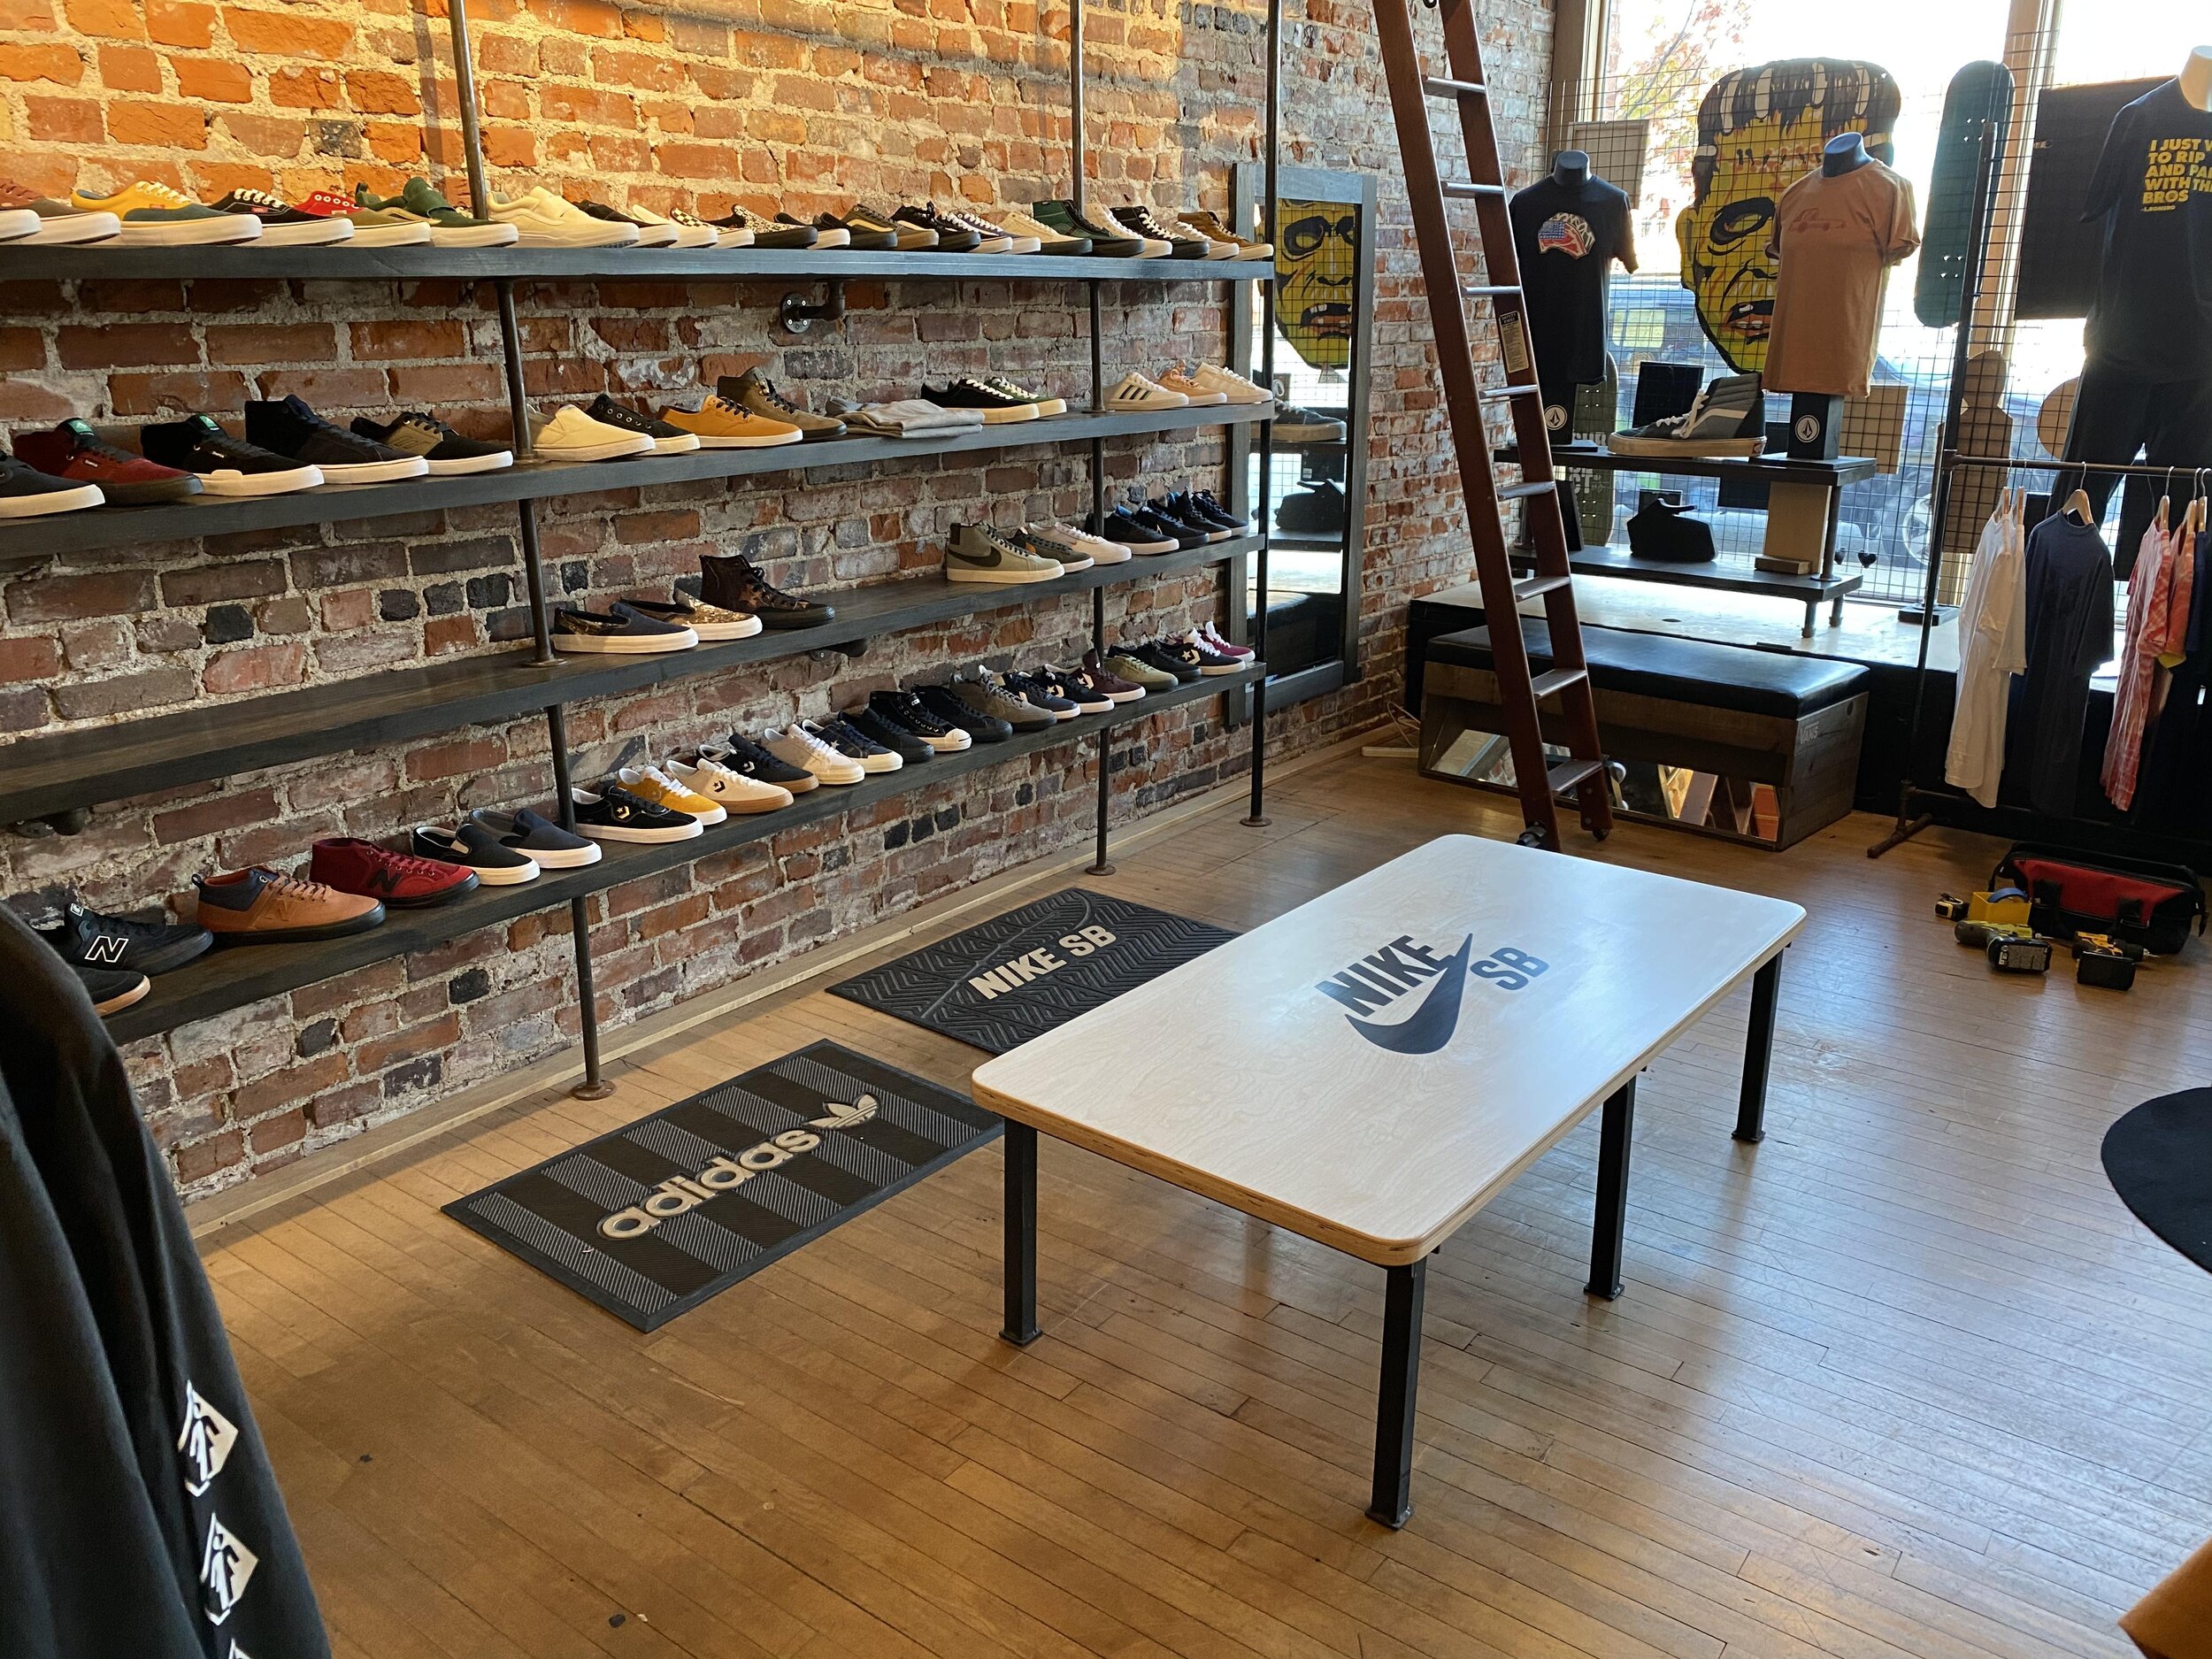
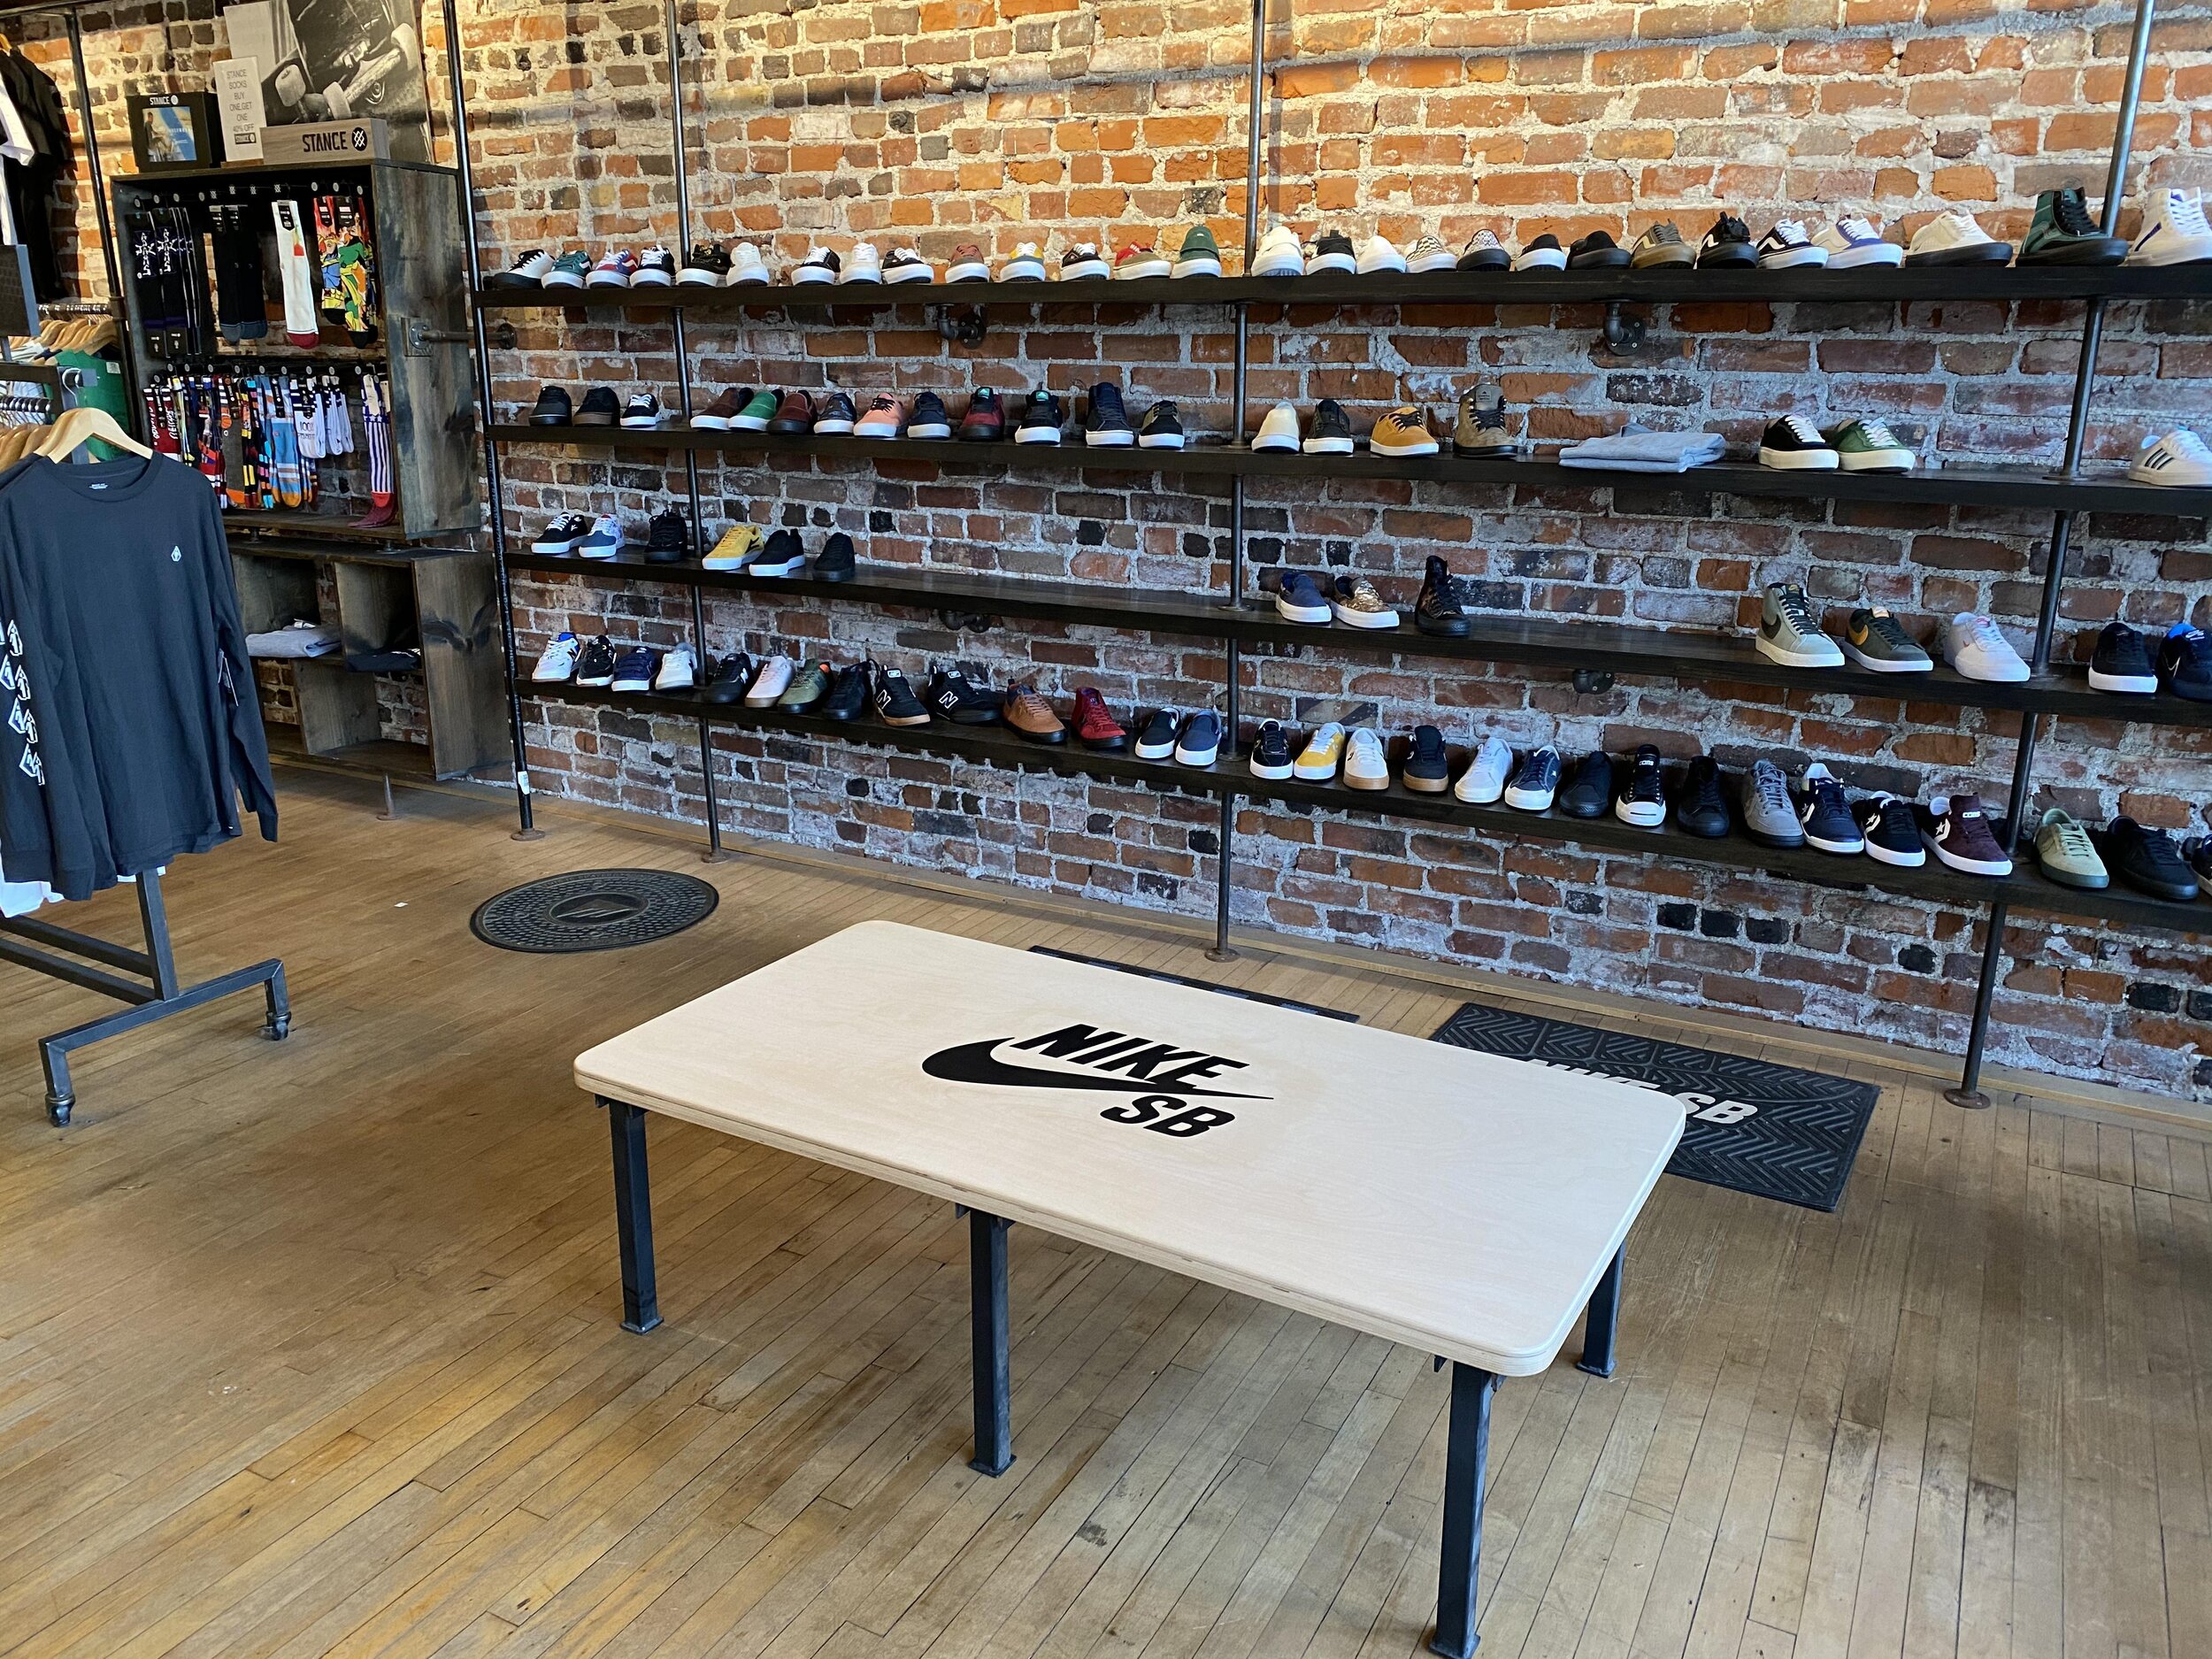
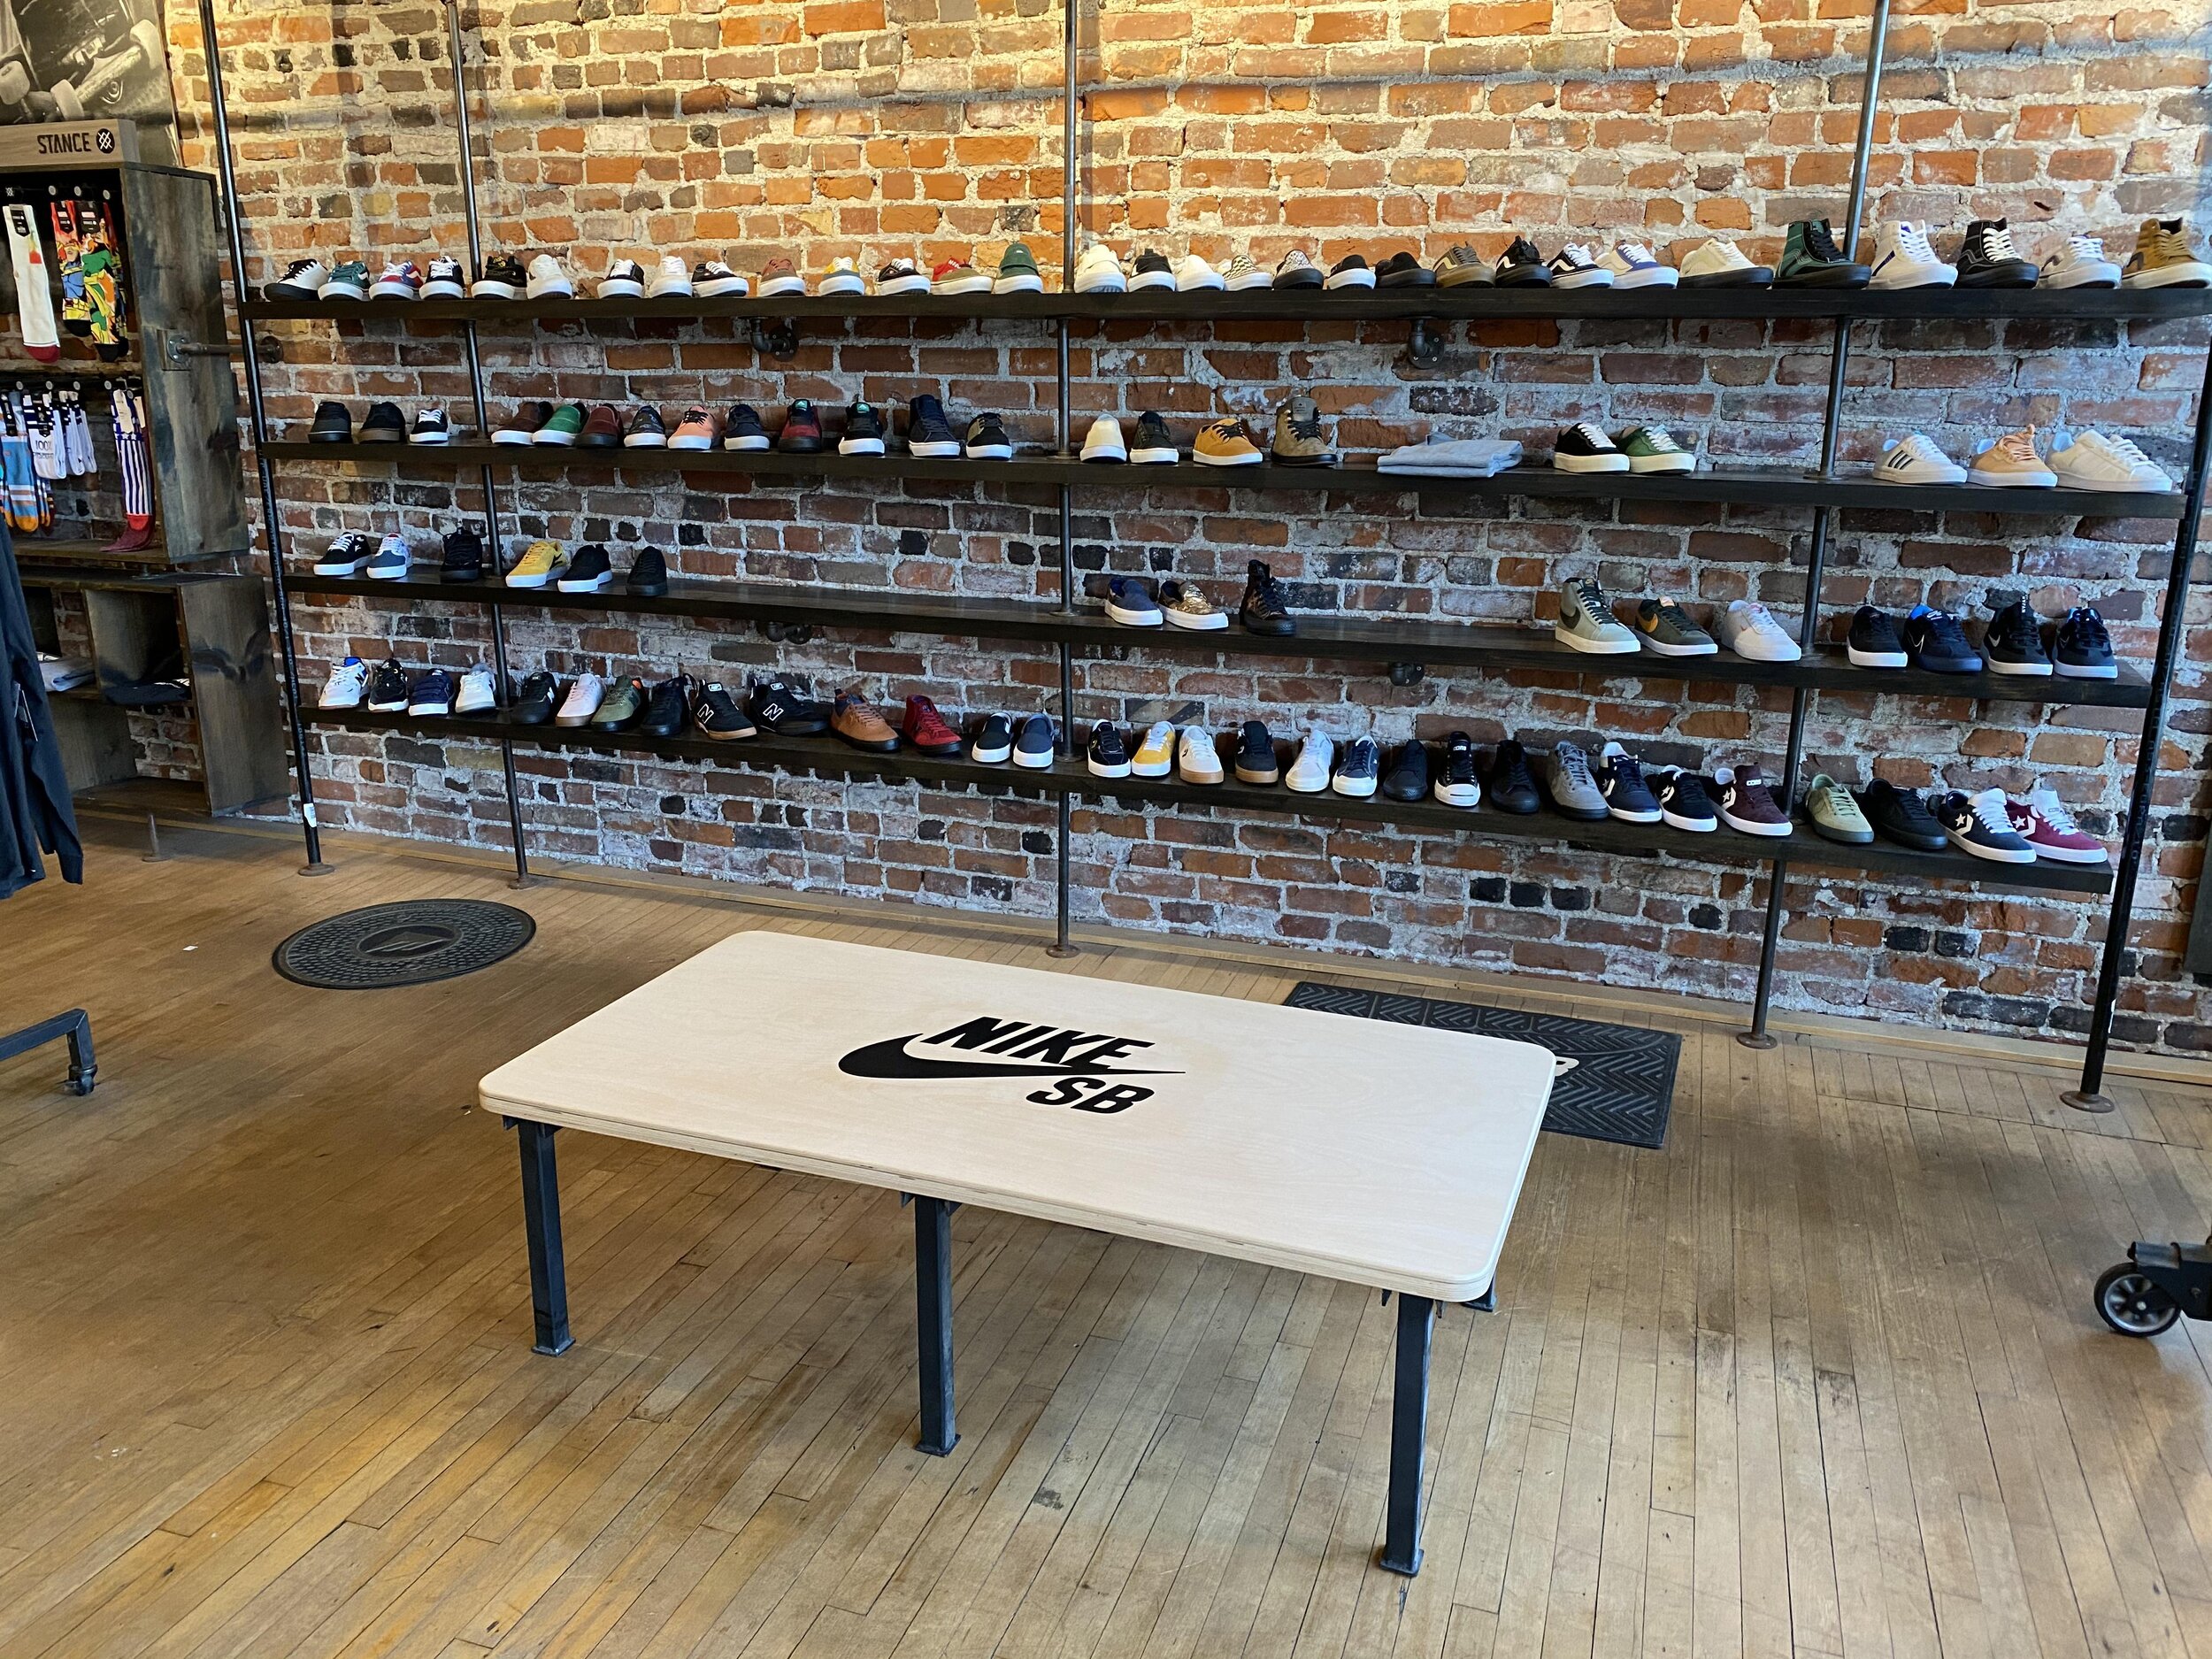
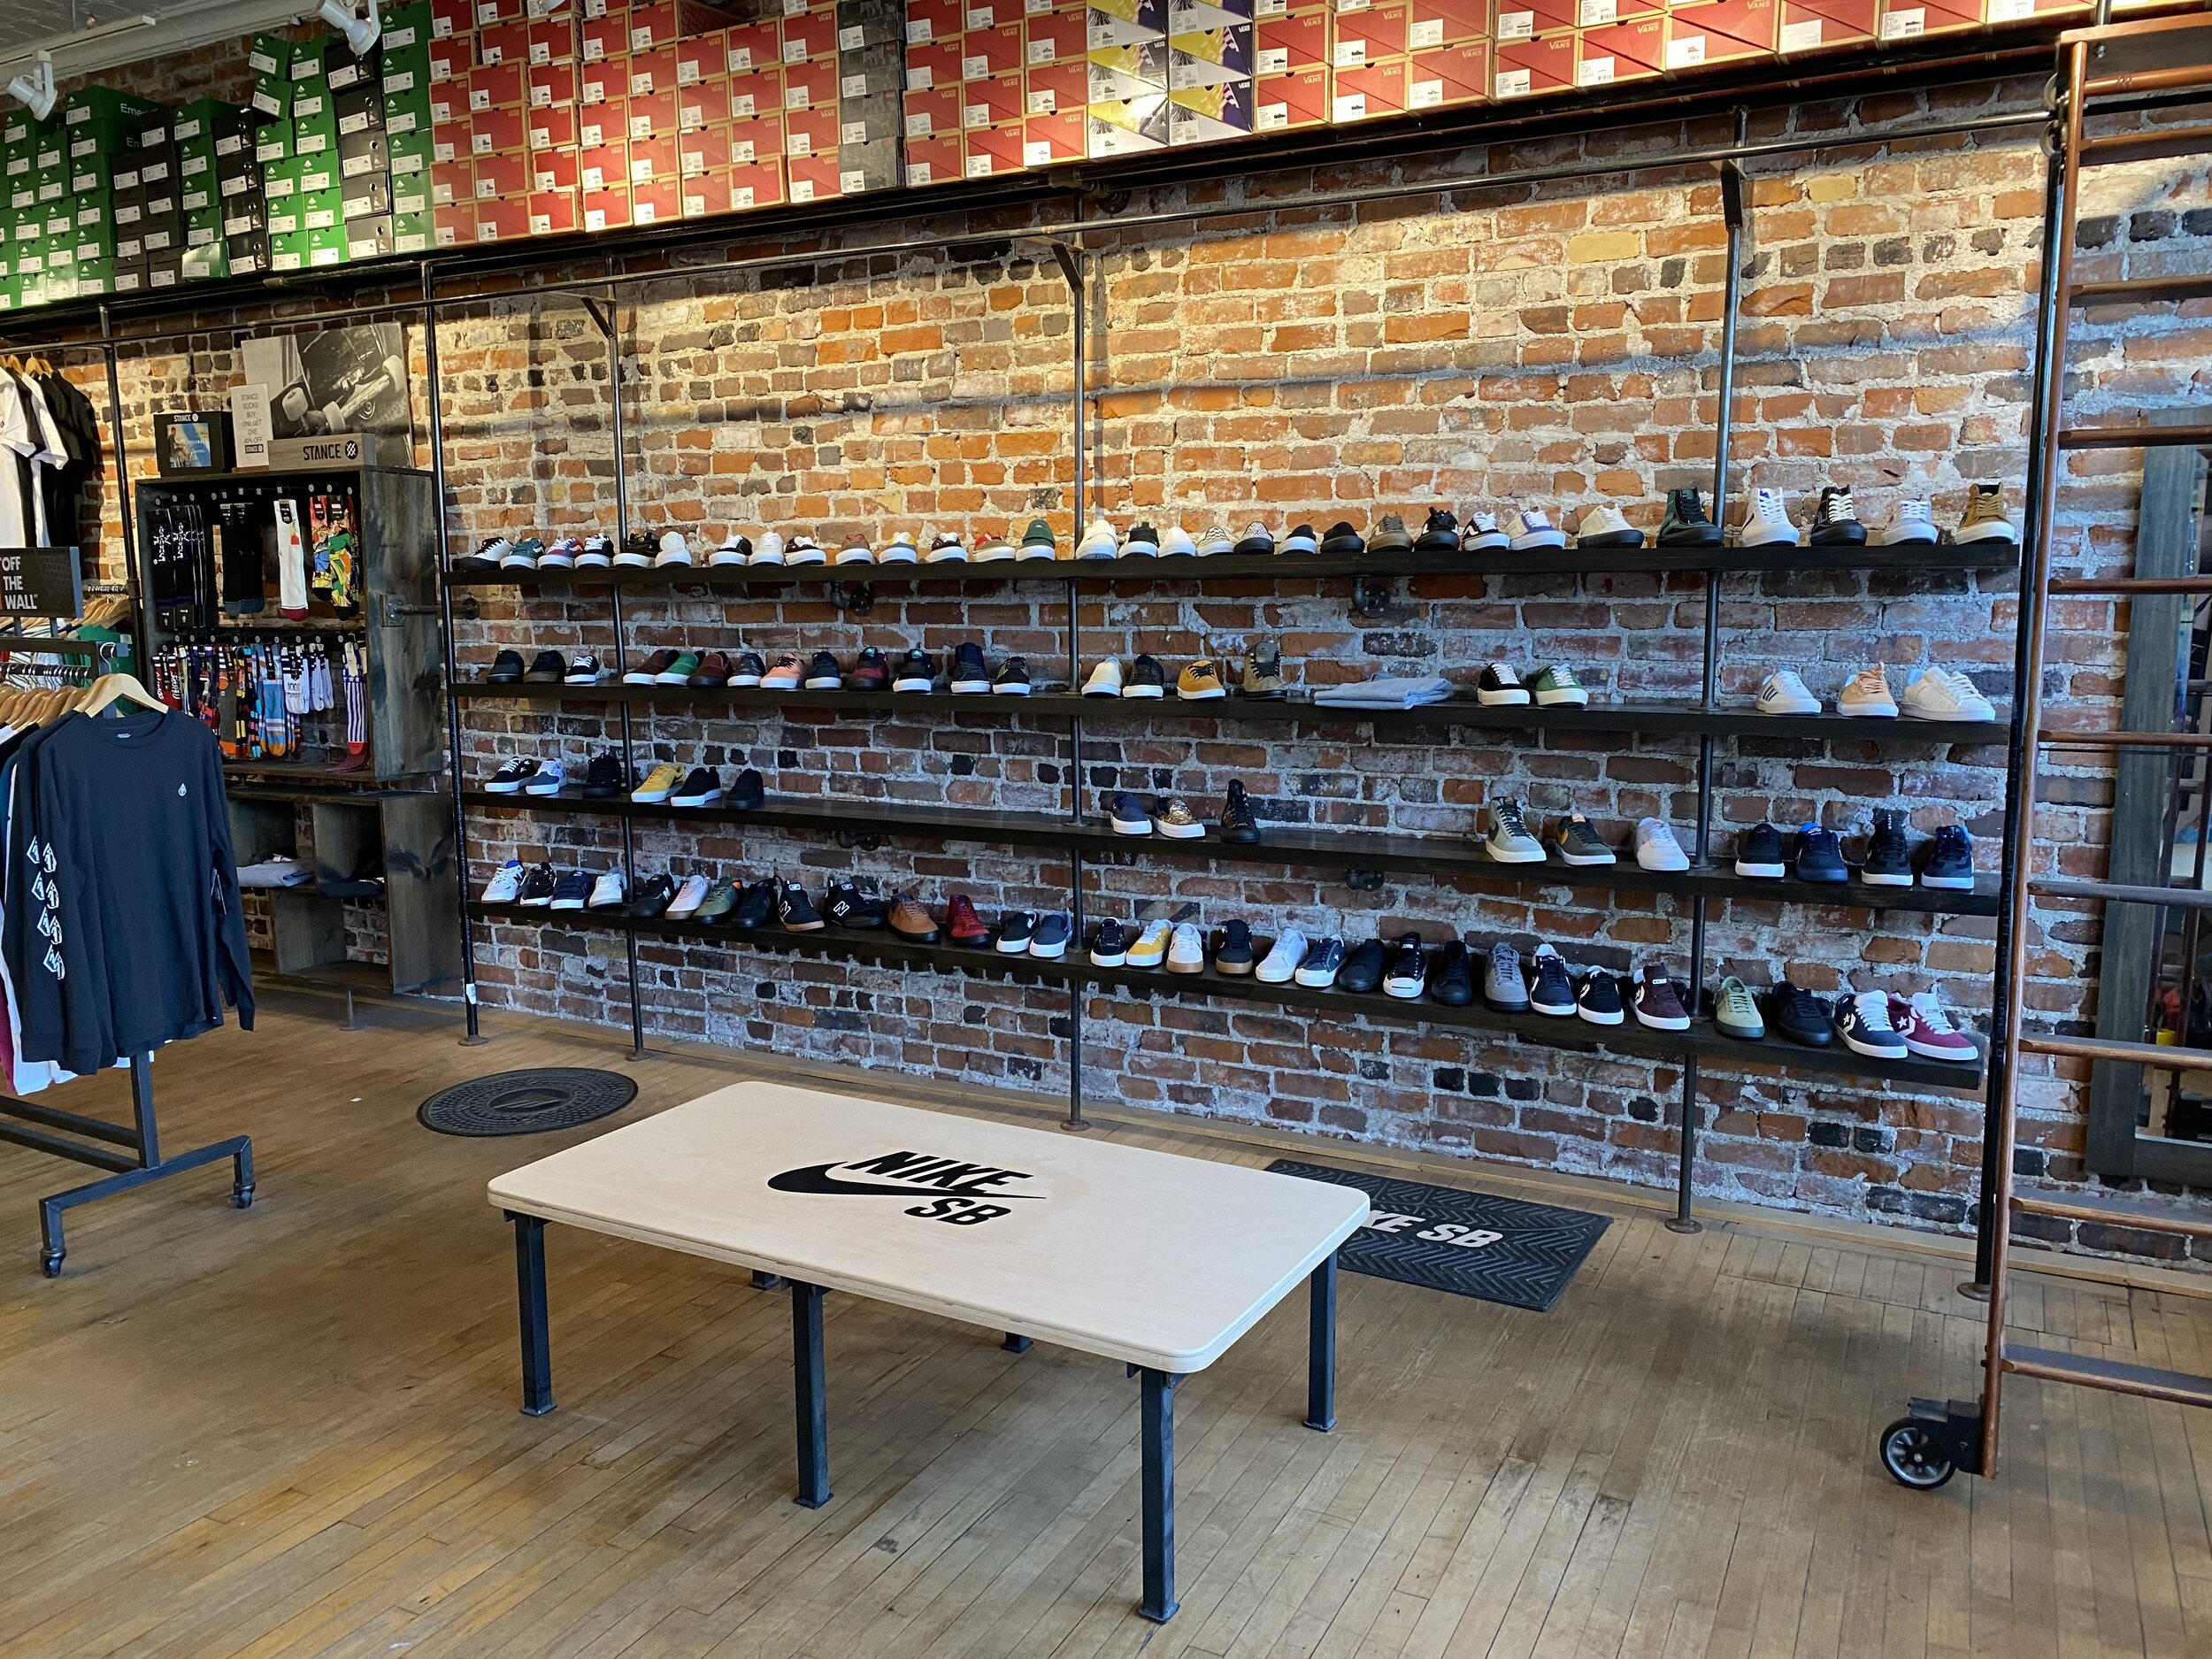
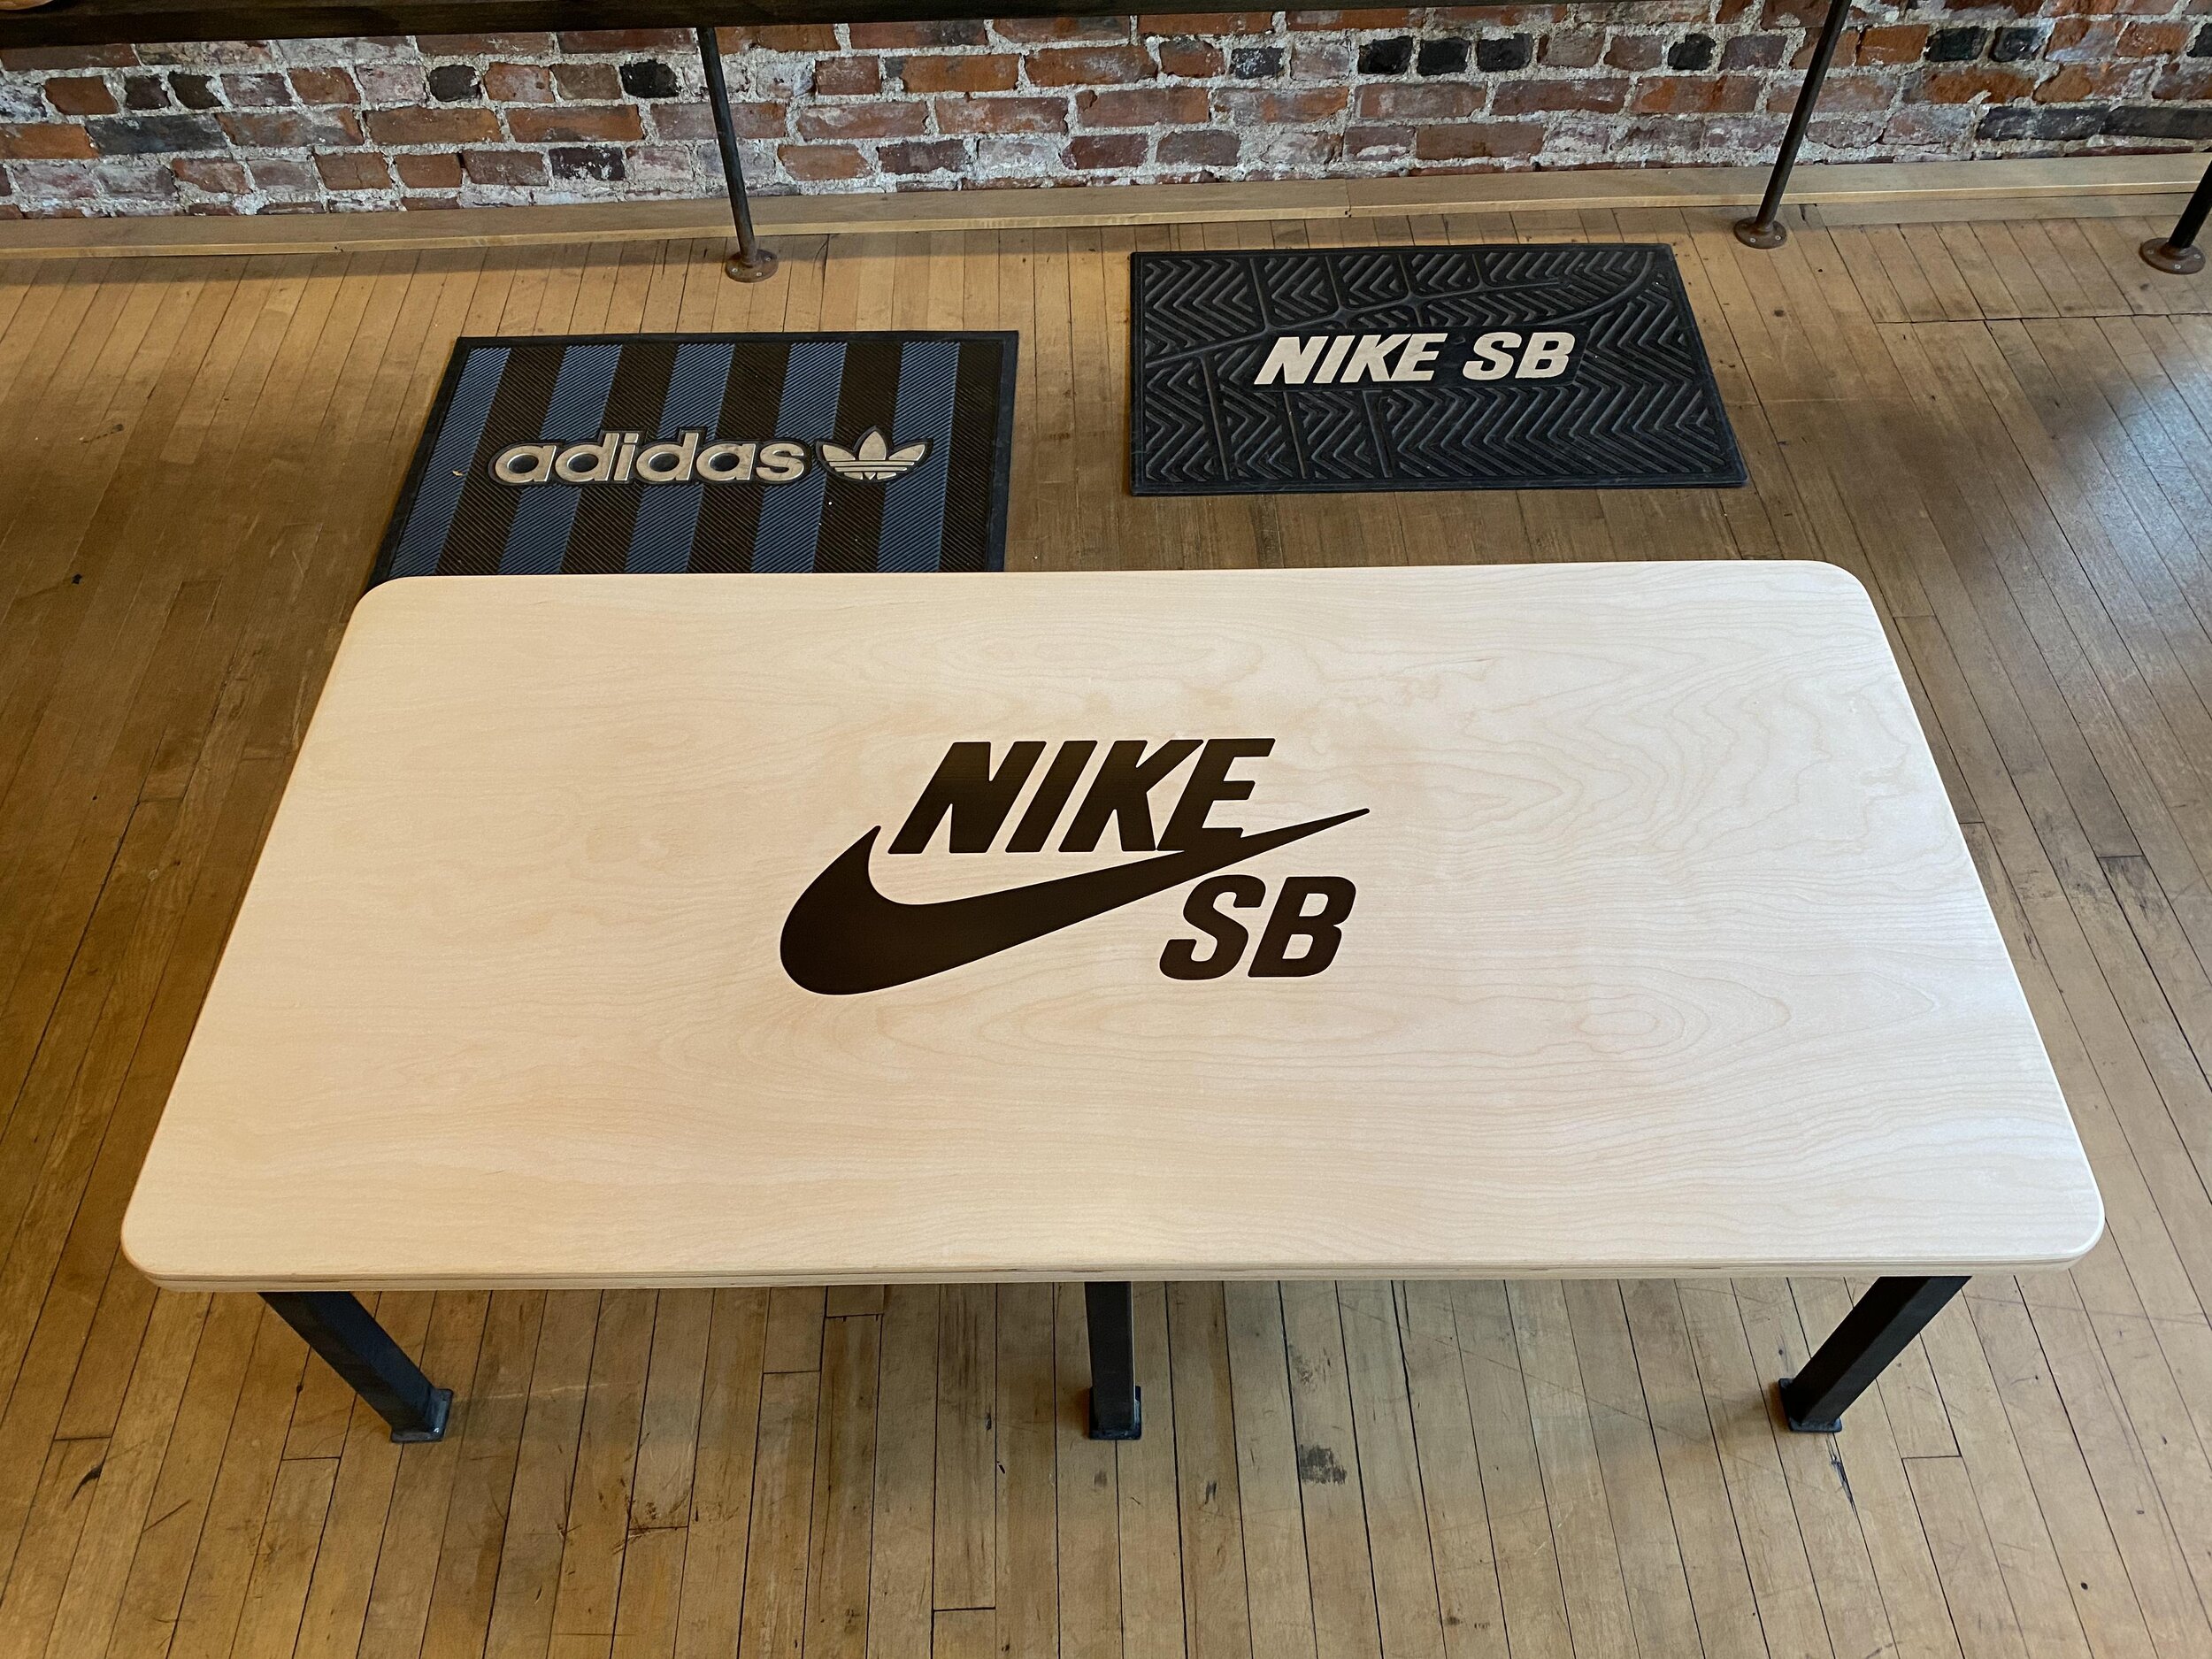
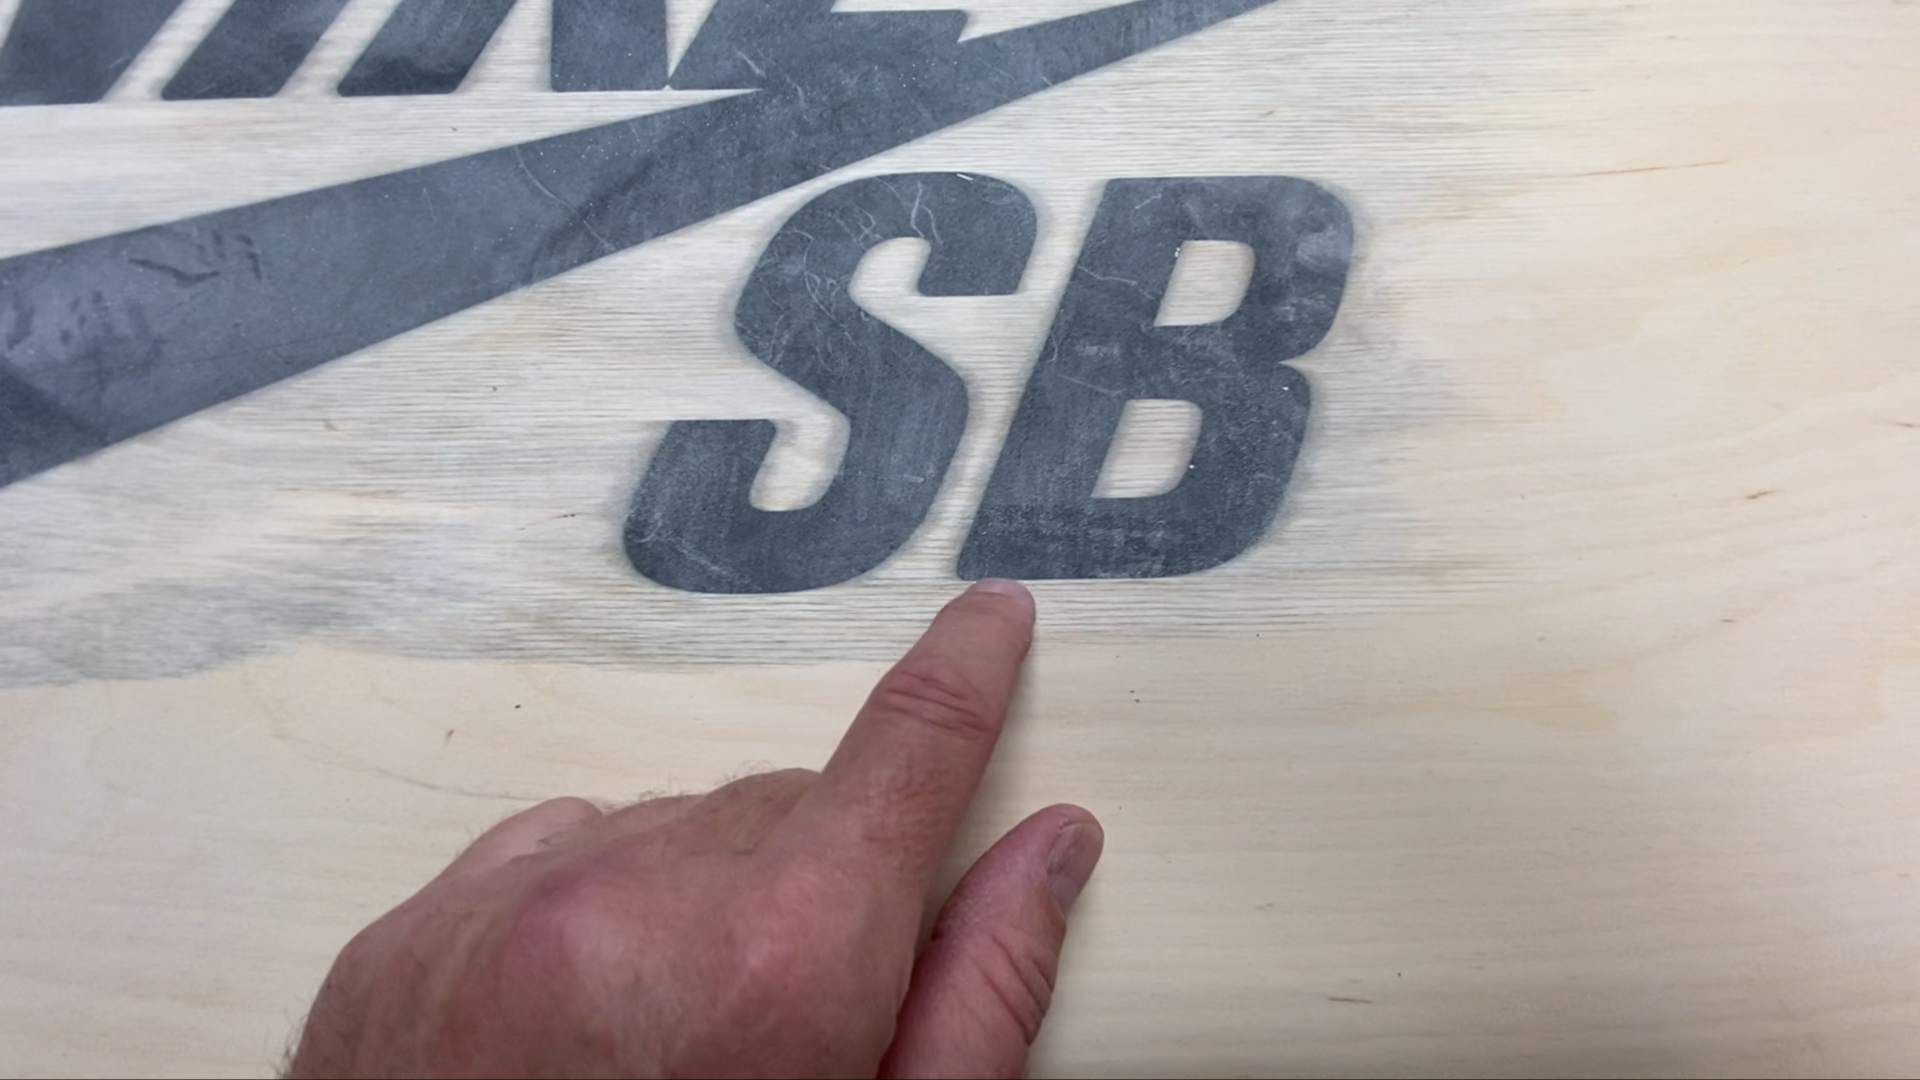
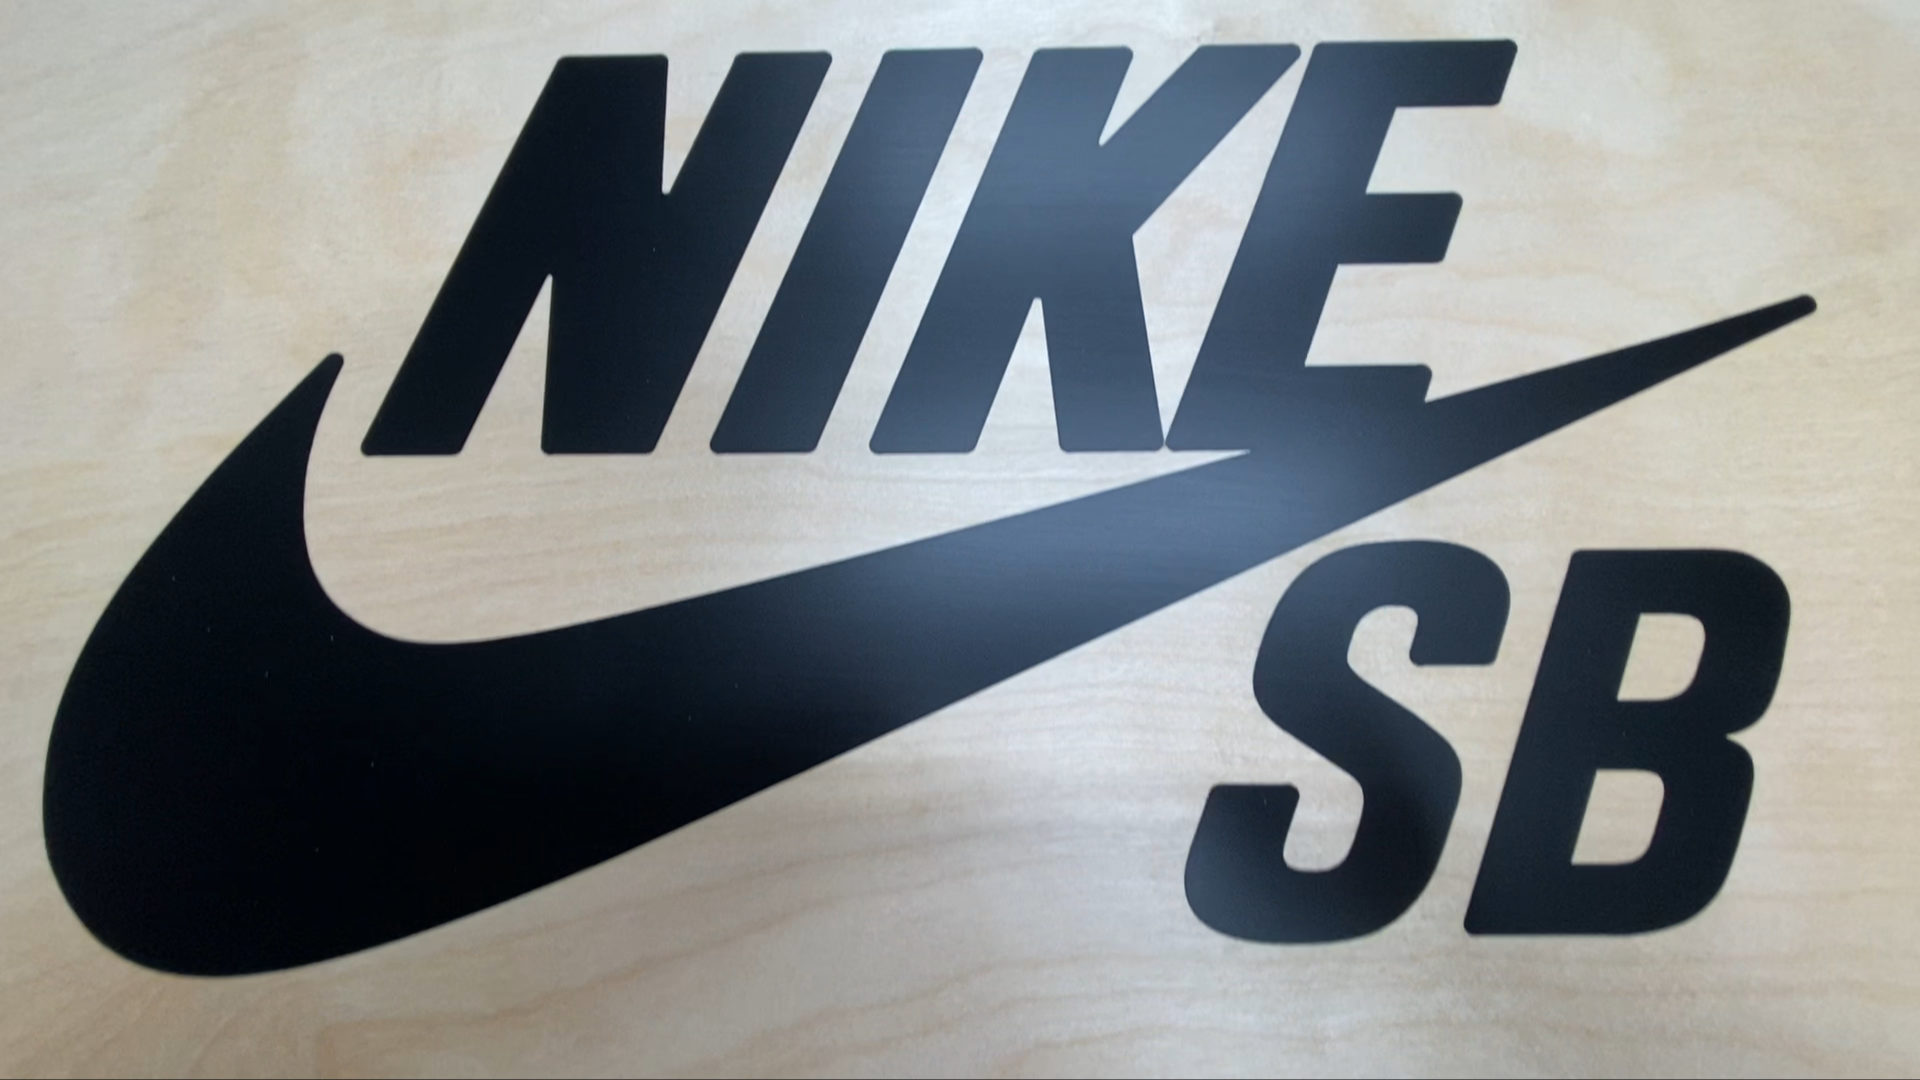
I am going to show you how I built a bench for Subsect Skateshop for people to sit on while trying on new shoes. The bench is made from baltic birch plywood and has the Nike SB logo carved into the top and then filled with black tinted epoxy.
This bench was created for the skateshop as Nike was allowing the owner to find someone local to the skateshop to build Nike SB items. The logo was supplied by the Nike representative.
This was the first larger epoxy project I have completed, but I messed up one major step in the process that I will explain in detail. I basically had to start the project over after almost completing it! Please follow along so you don't make the same mistake.

Step 1: Tools and Materials
TOOLS
The tools I used on the project were as follows:
X-Carve 1000mm CNC Machine by Inventables - https://www.inventables.com/
Easel Software for the X-Carve CNC
Saw Stop table saw - https://amzn.to/3a8znCE
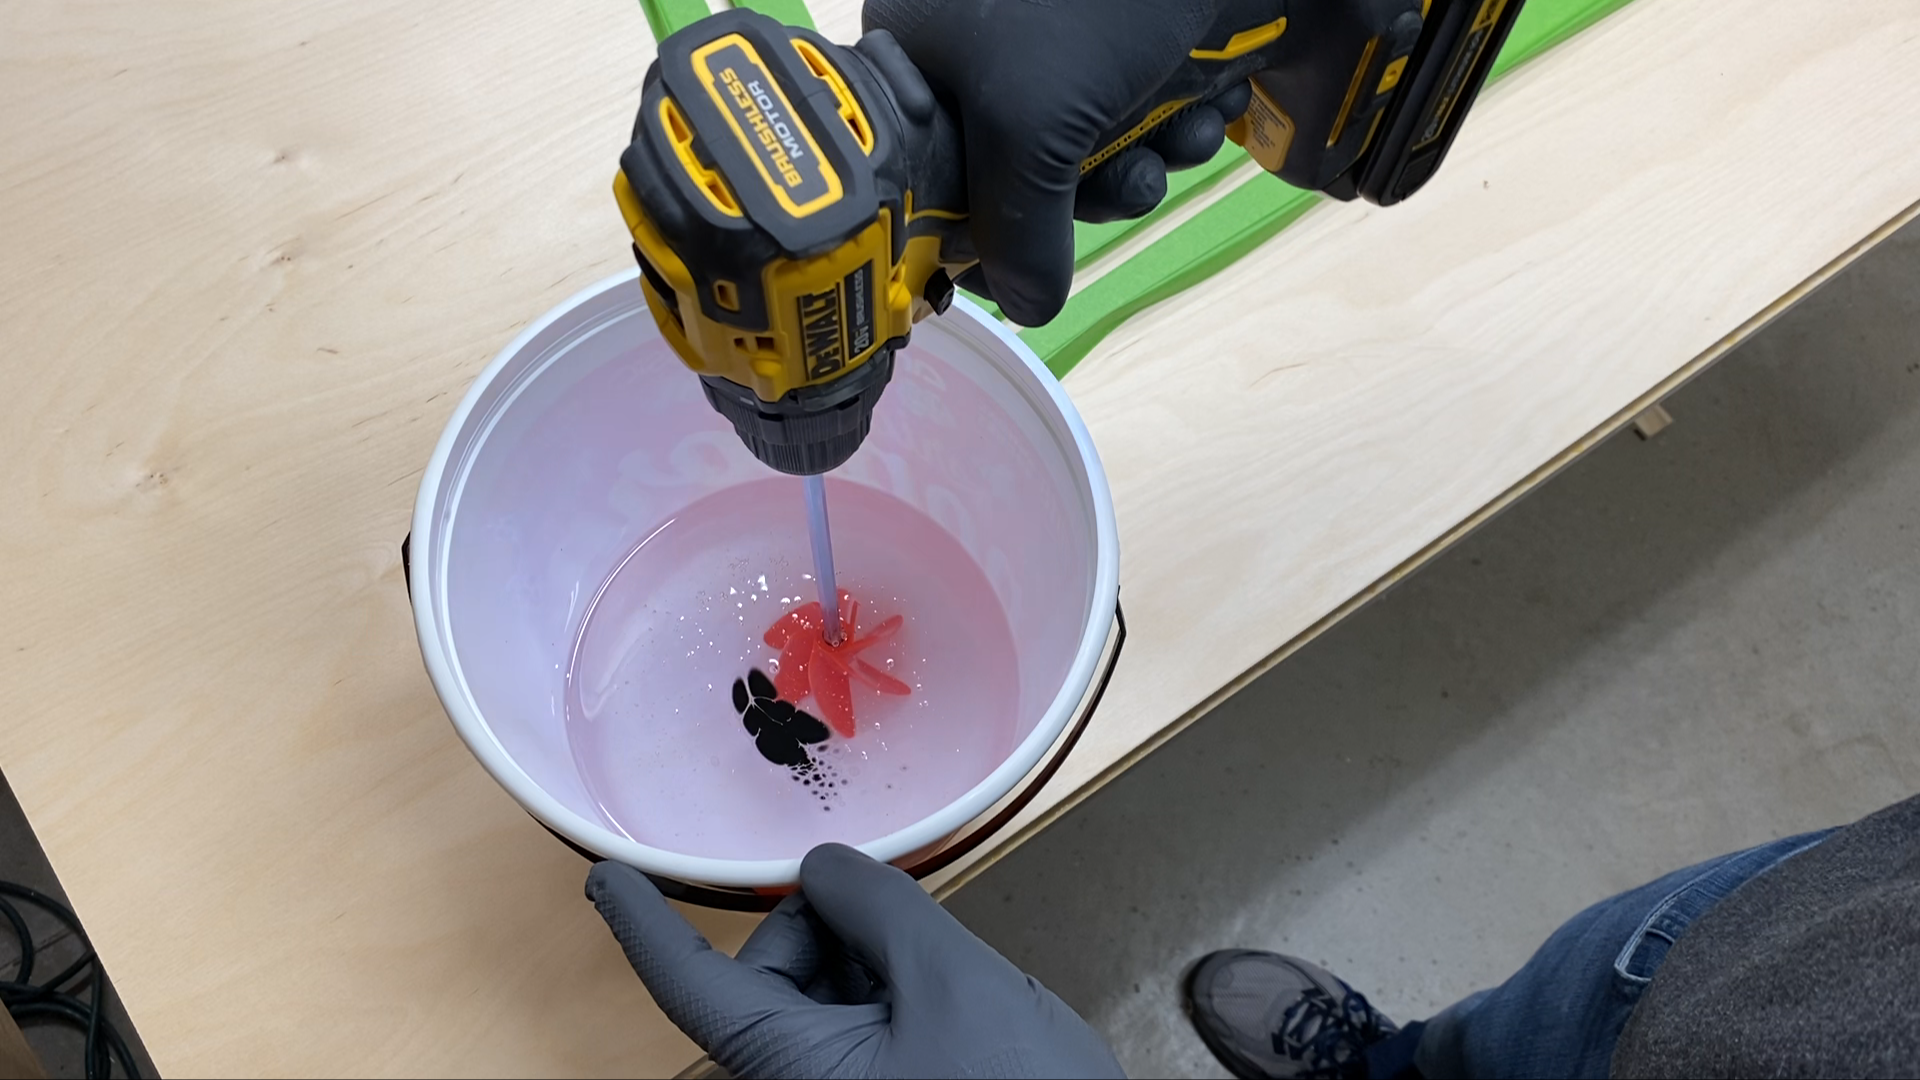
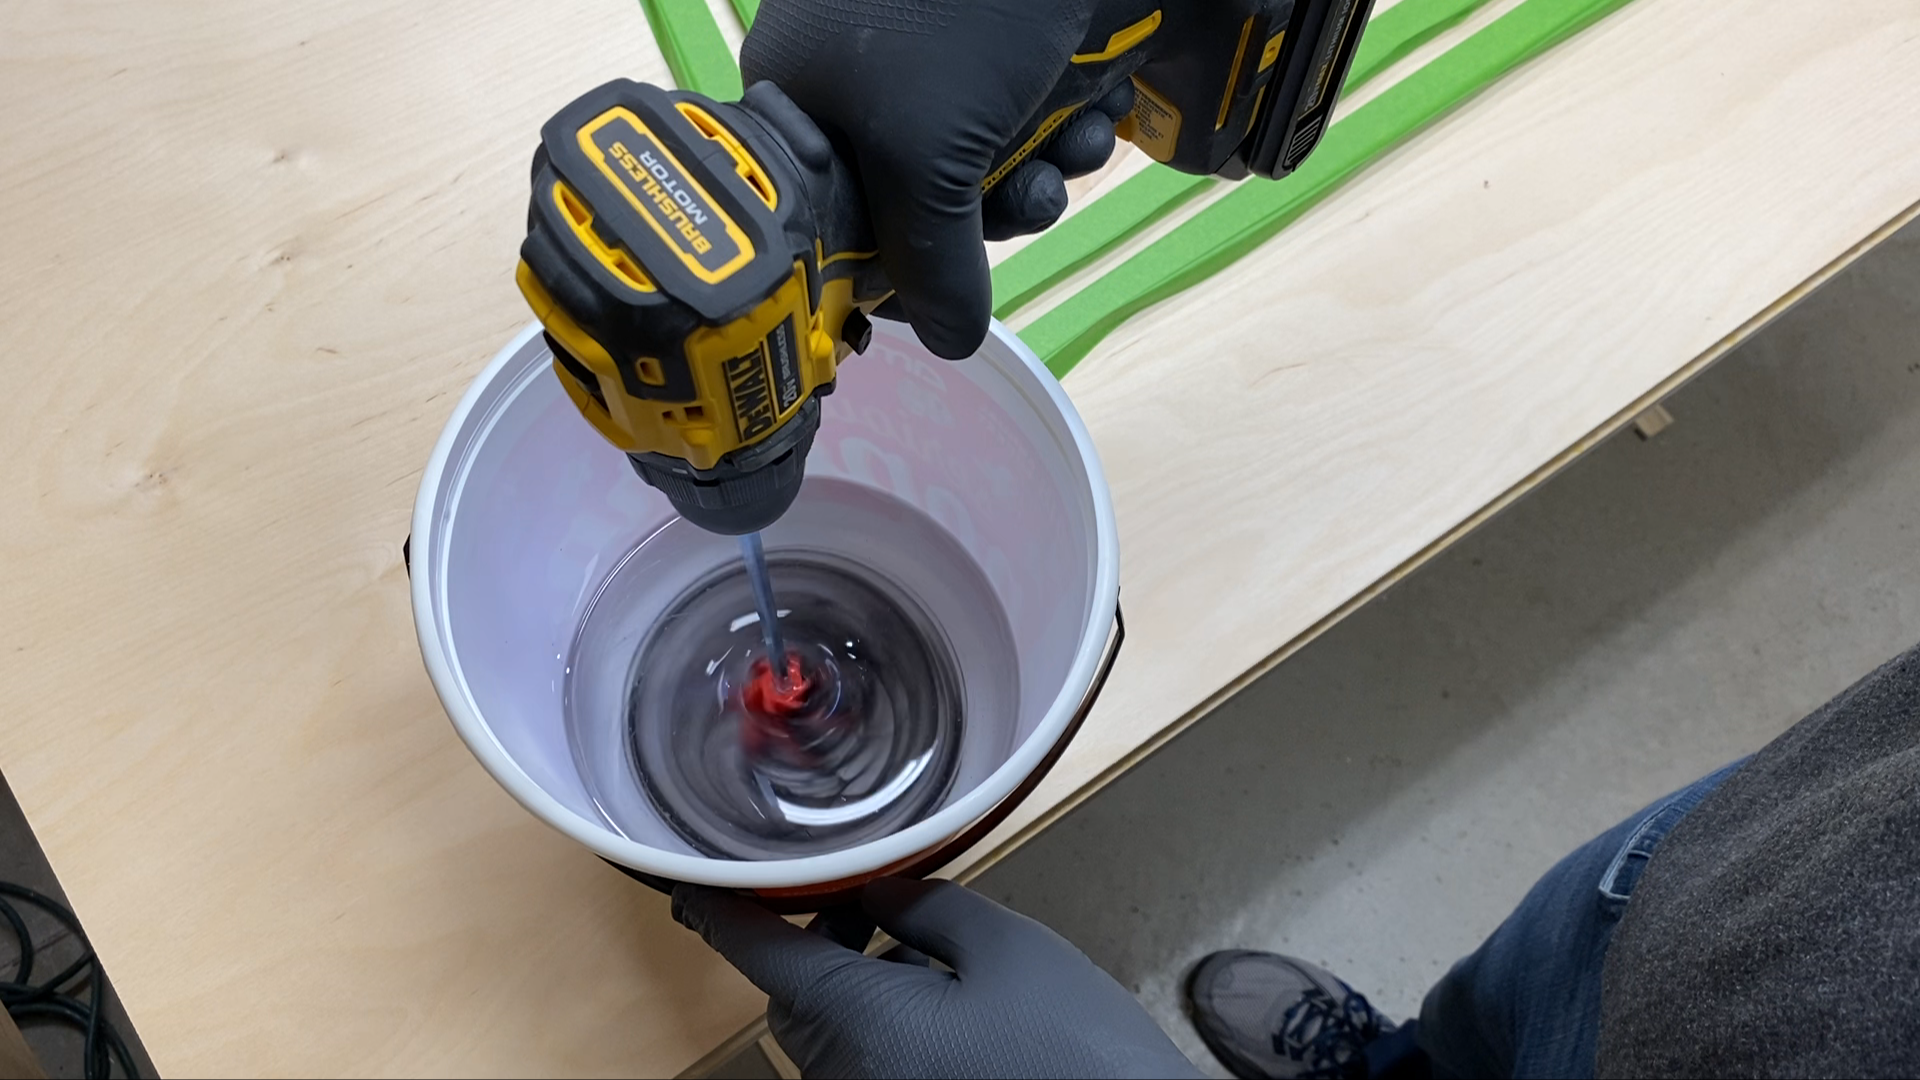
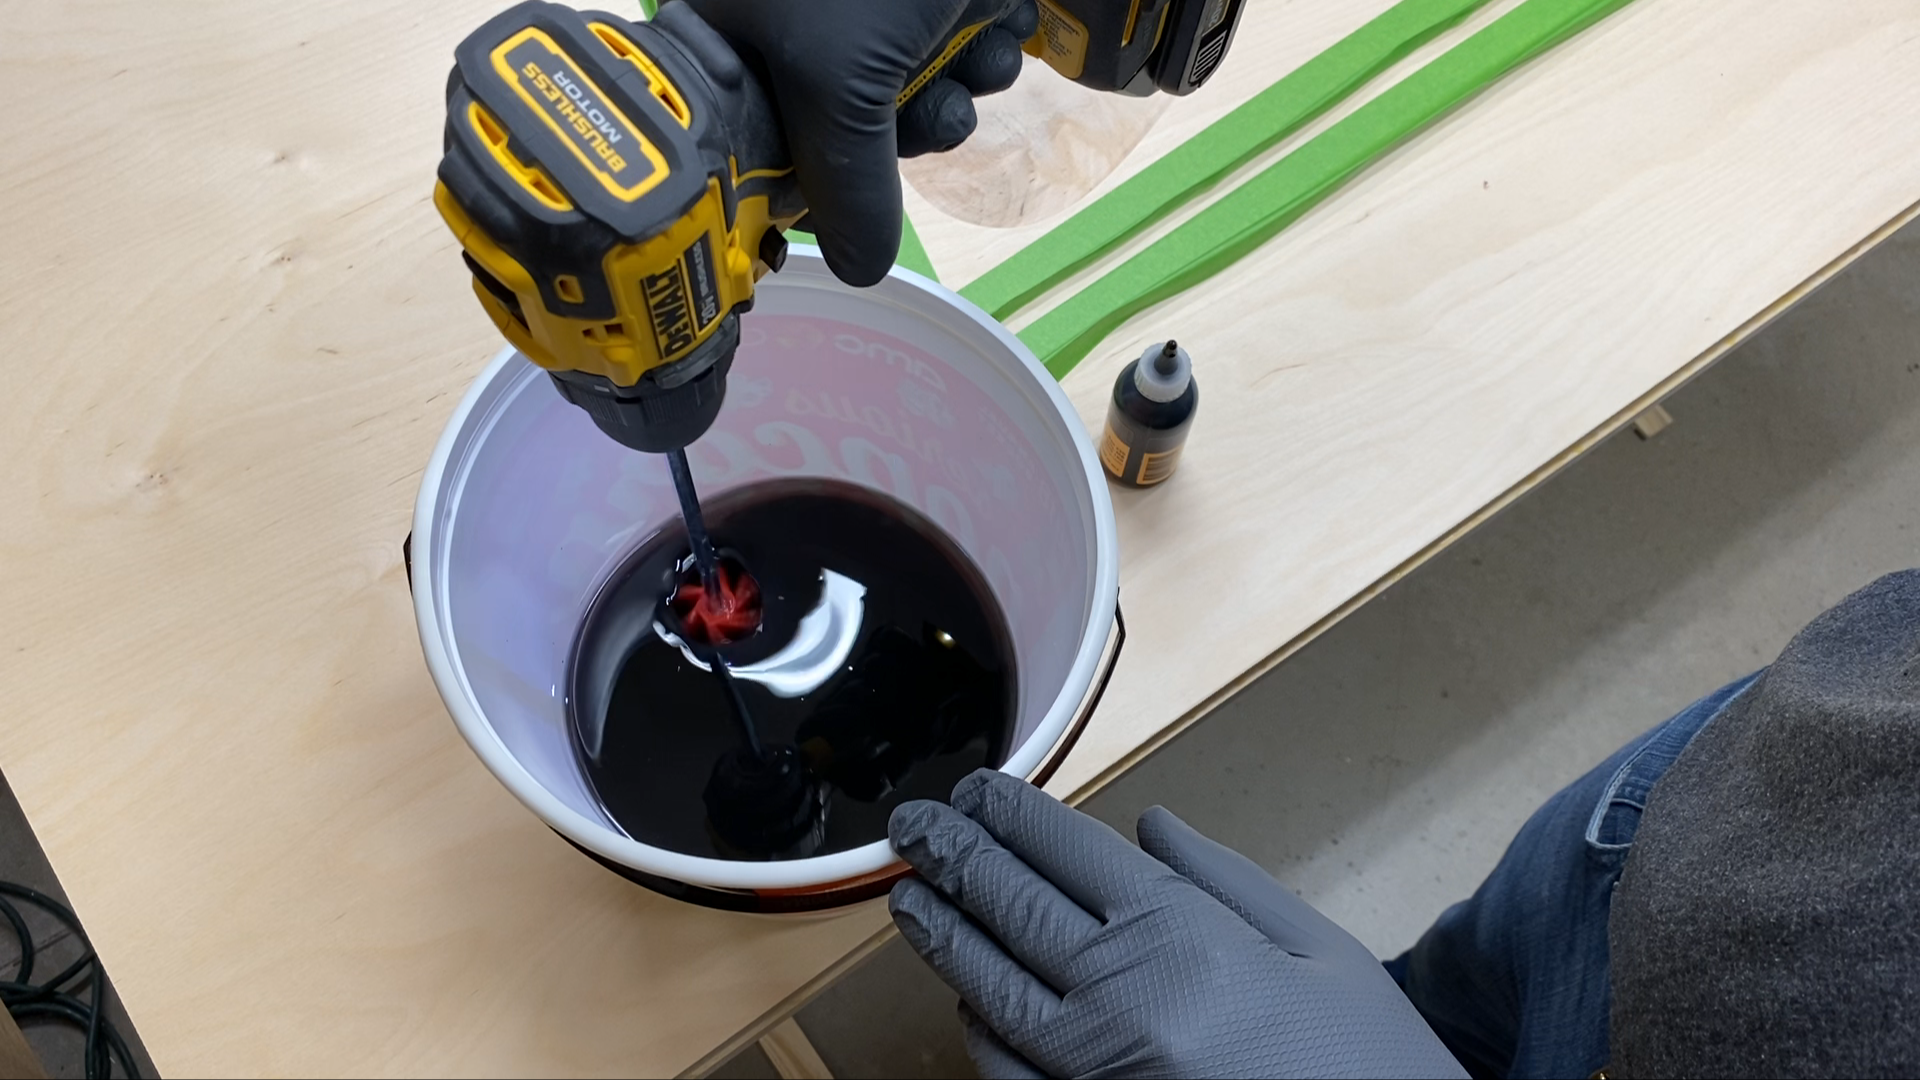
Dewalt 20 Volt Cordless drill (to mix pigment with epoxy) - https://amzn.to/3aflH9a
Porter Cable Router
Ryobi Trim Router - https://amzn.to/3i9pIyQ
Random orbit sander
Circular saw.
Shop vac
Tape Measures (my favorite two):
Fastcap PMS-16 Auto Lock ProCarpenter Tape Measure - https://amzn.to/333fTMN
or FastCap PSSR16 16 ft Standard Reverse Measuring Tape - https://amzn.to/35eQe6k
Whiteside 6210 CNC Surfacing Router Bit, 1/4" Shank - https://amzn.to/2FgoG5w
MATERIALS
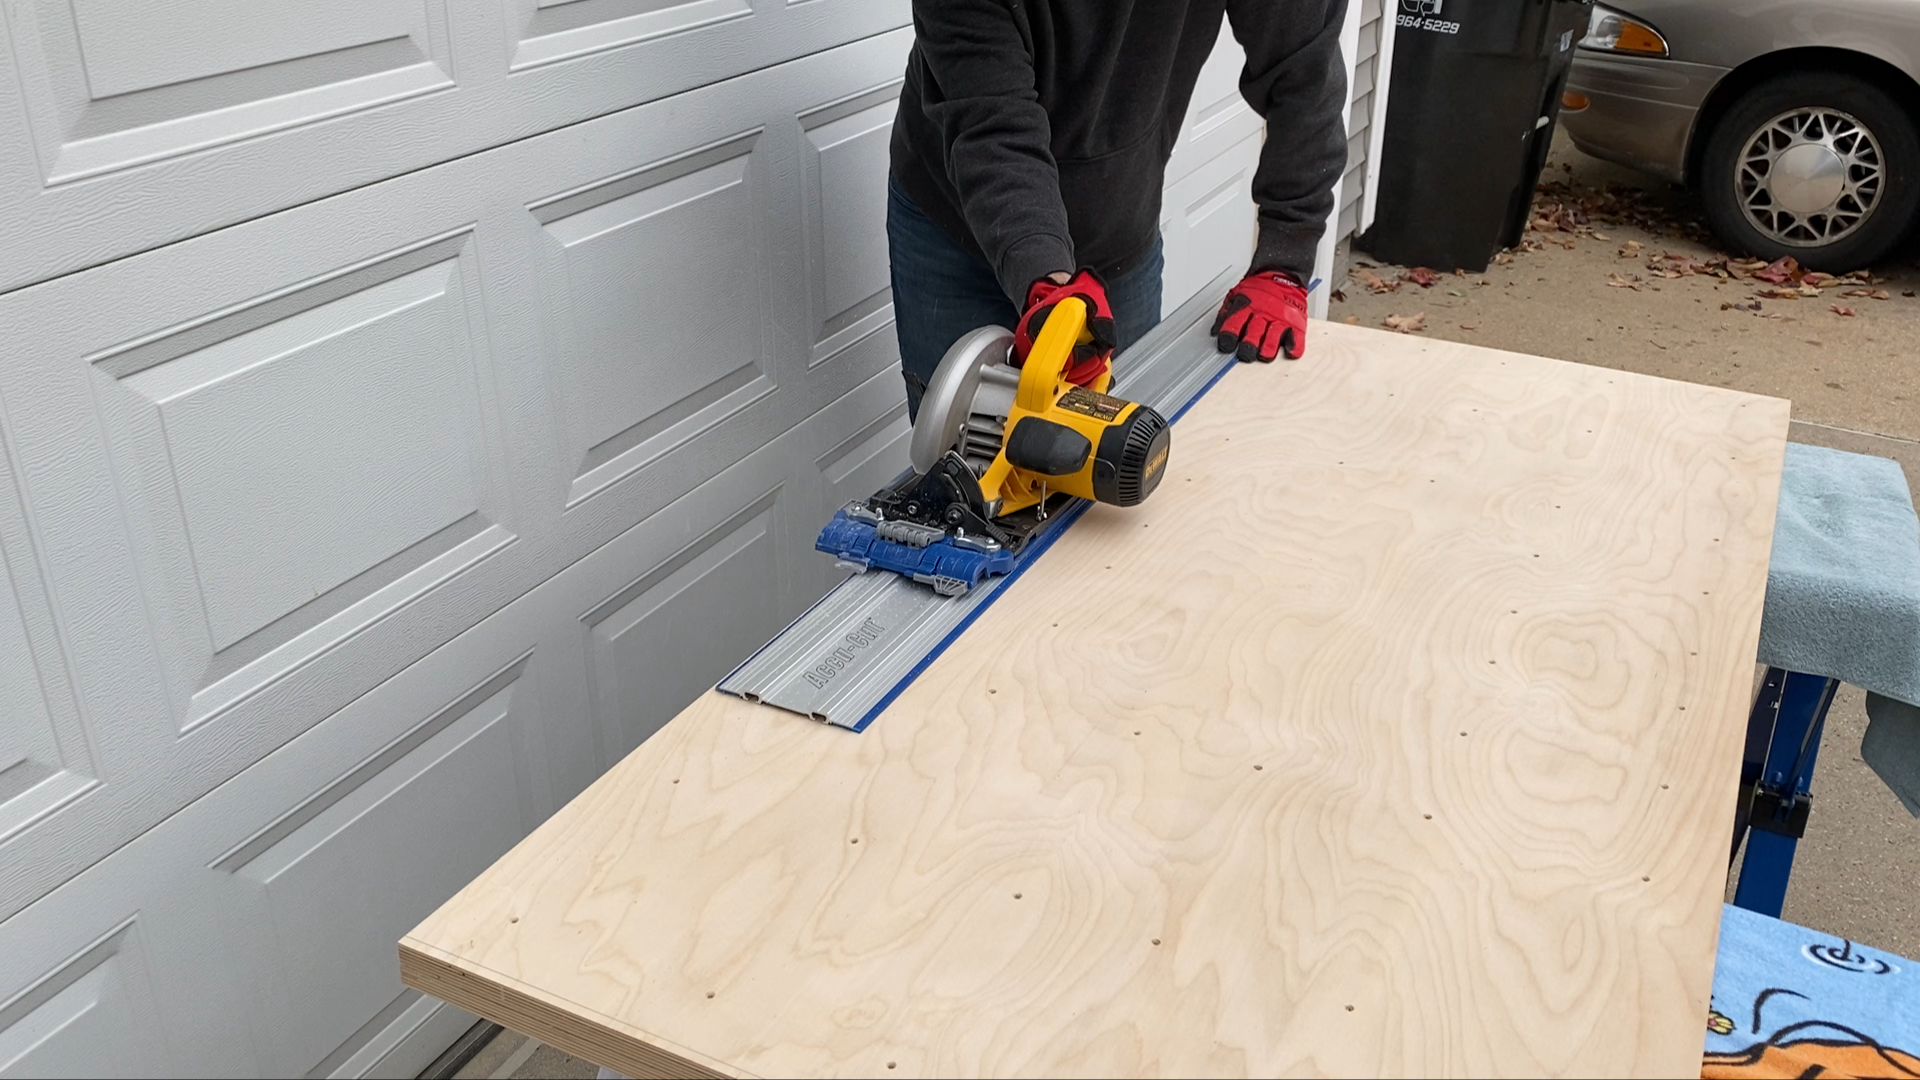
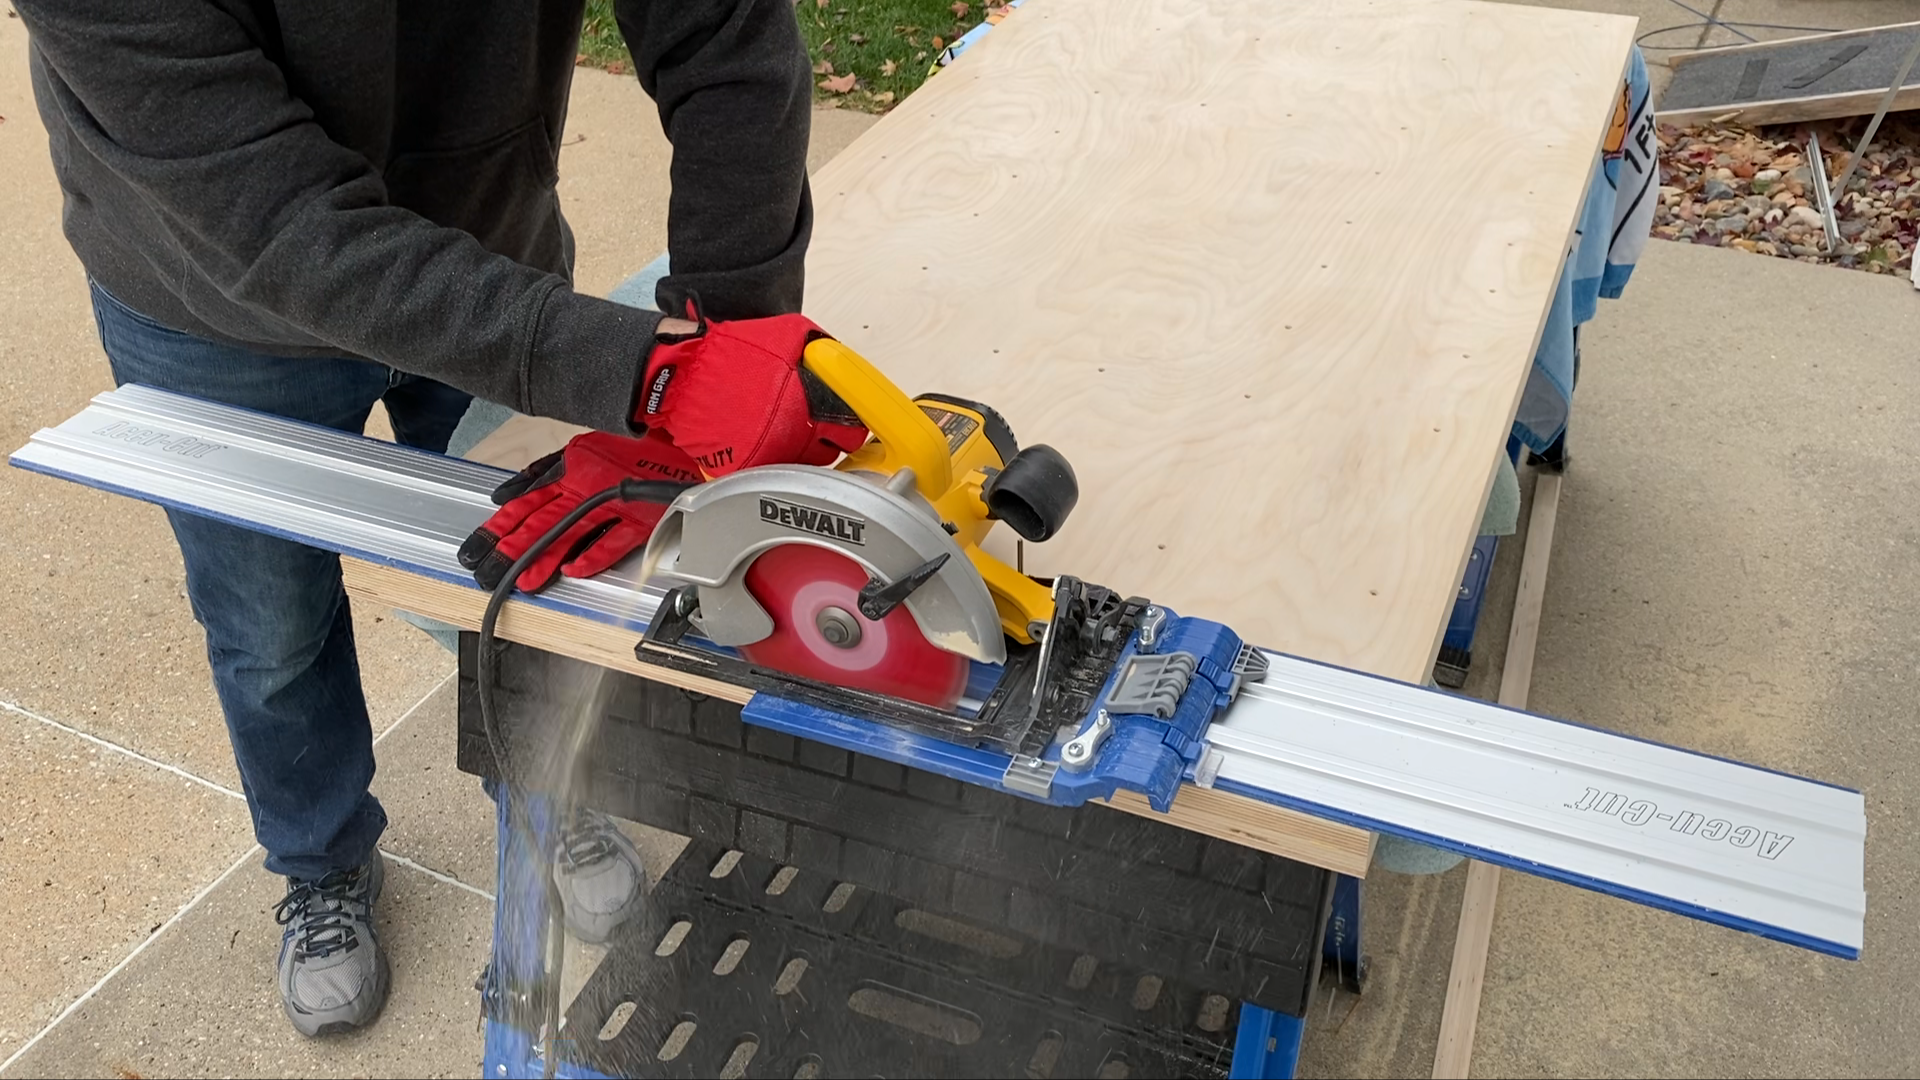
1 piece of 5' x 5' baltic birch plywood
TotalBoat Thickset Deep Pour Epoxy - 1.3 Gallon Kit - https://amzn.to/2V2HLgw
Black Liquid Pigment to color epoxy
Titebond Extend Wood Glue - https://amzn.to/379blGD
Sand paper
NOTE: As an Amazon Associate I earn from qualifying purchases.
NOTE: If you plan on using any tool for a project please make sure you are familiar with the tool and all of the dangers associated with it. If you are not familiar with a tool then you should ask someone who is to show you the proper way to use it. A lot of communities have classes at local colleges on the proper use of tools and machinery. There are also local woodworking clubs that offer classes at very reasonable rates for beginners. I highly recommend using these resources for your safety and for the most efficient use of the tool.
SAFETY FIRST
Always wear eye and hearing protection.
Always work safe with the proper safety equipment and guards on your tools.

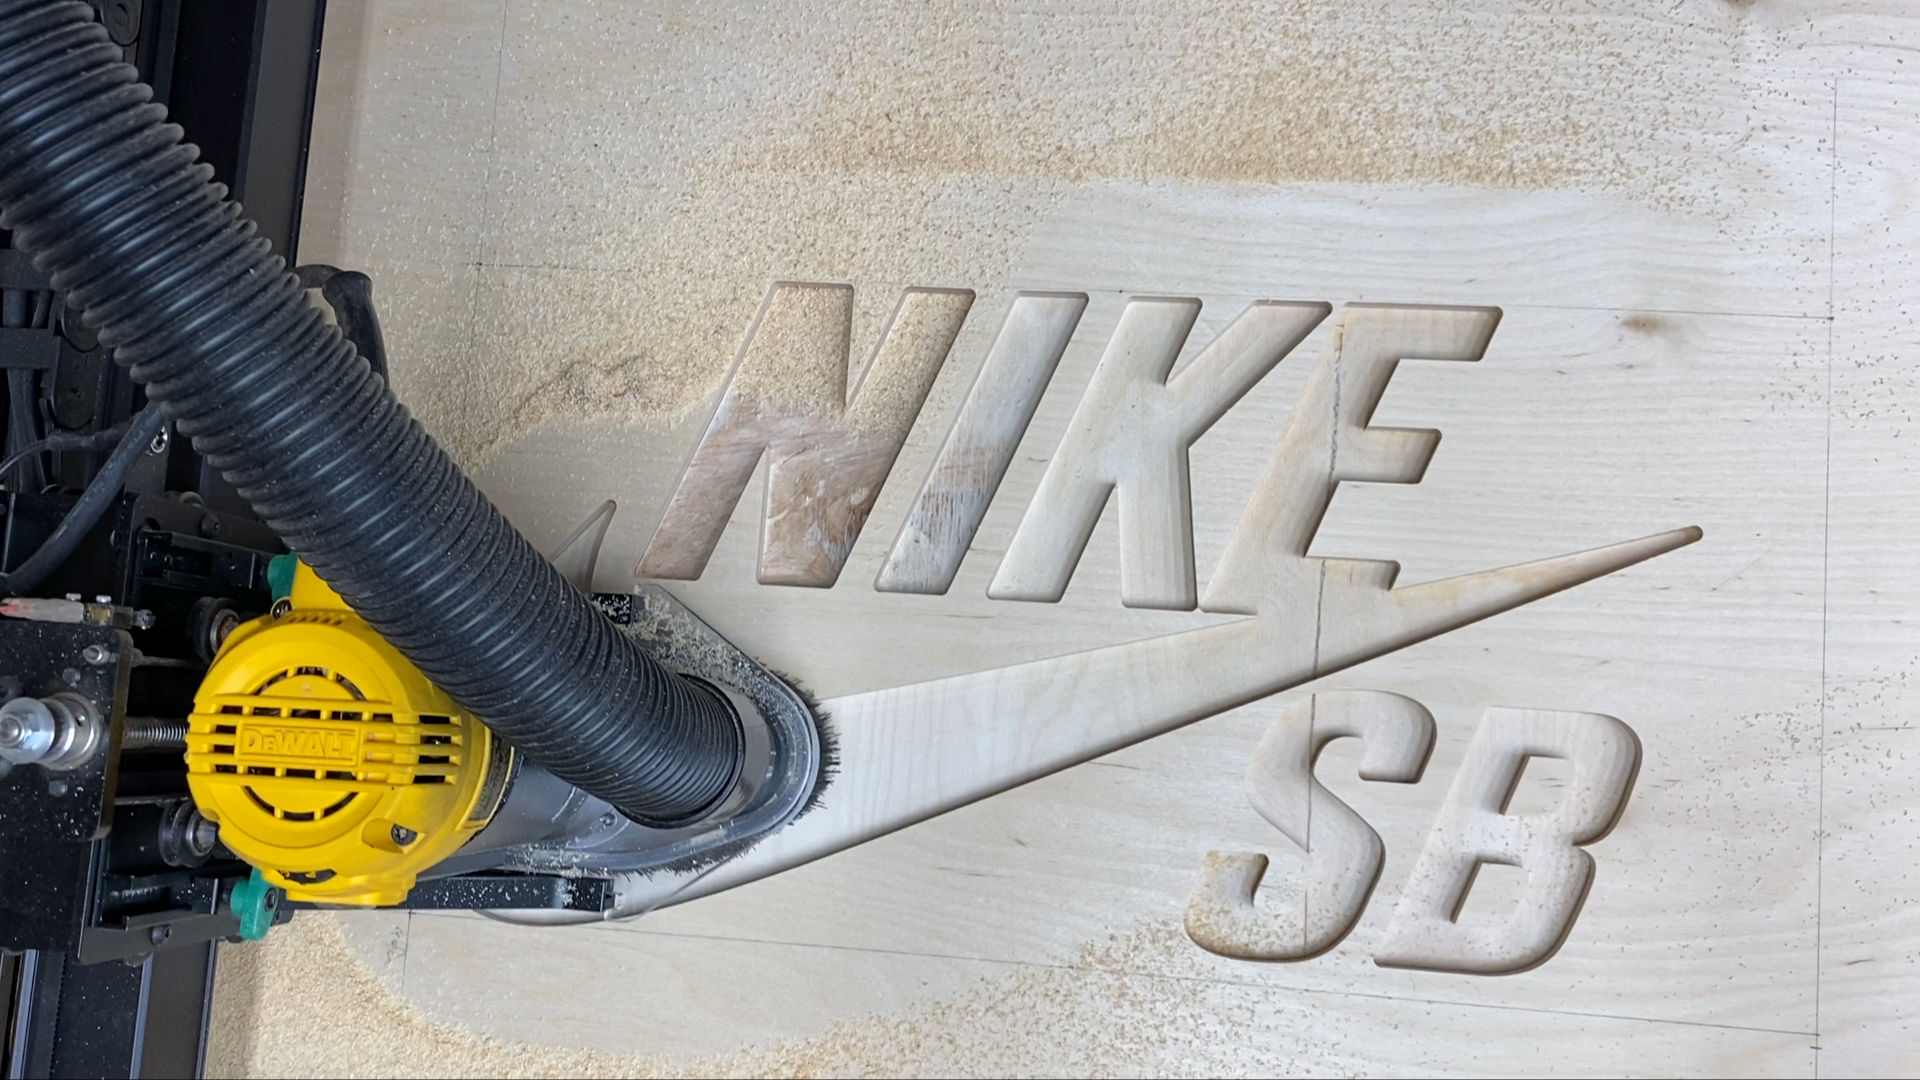
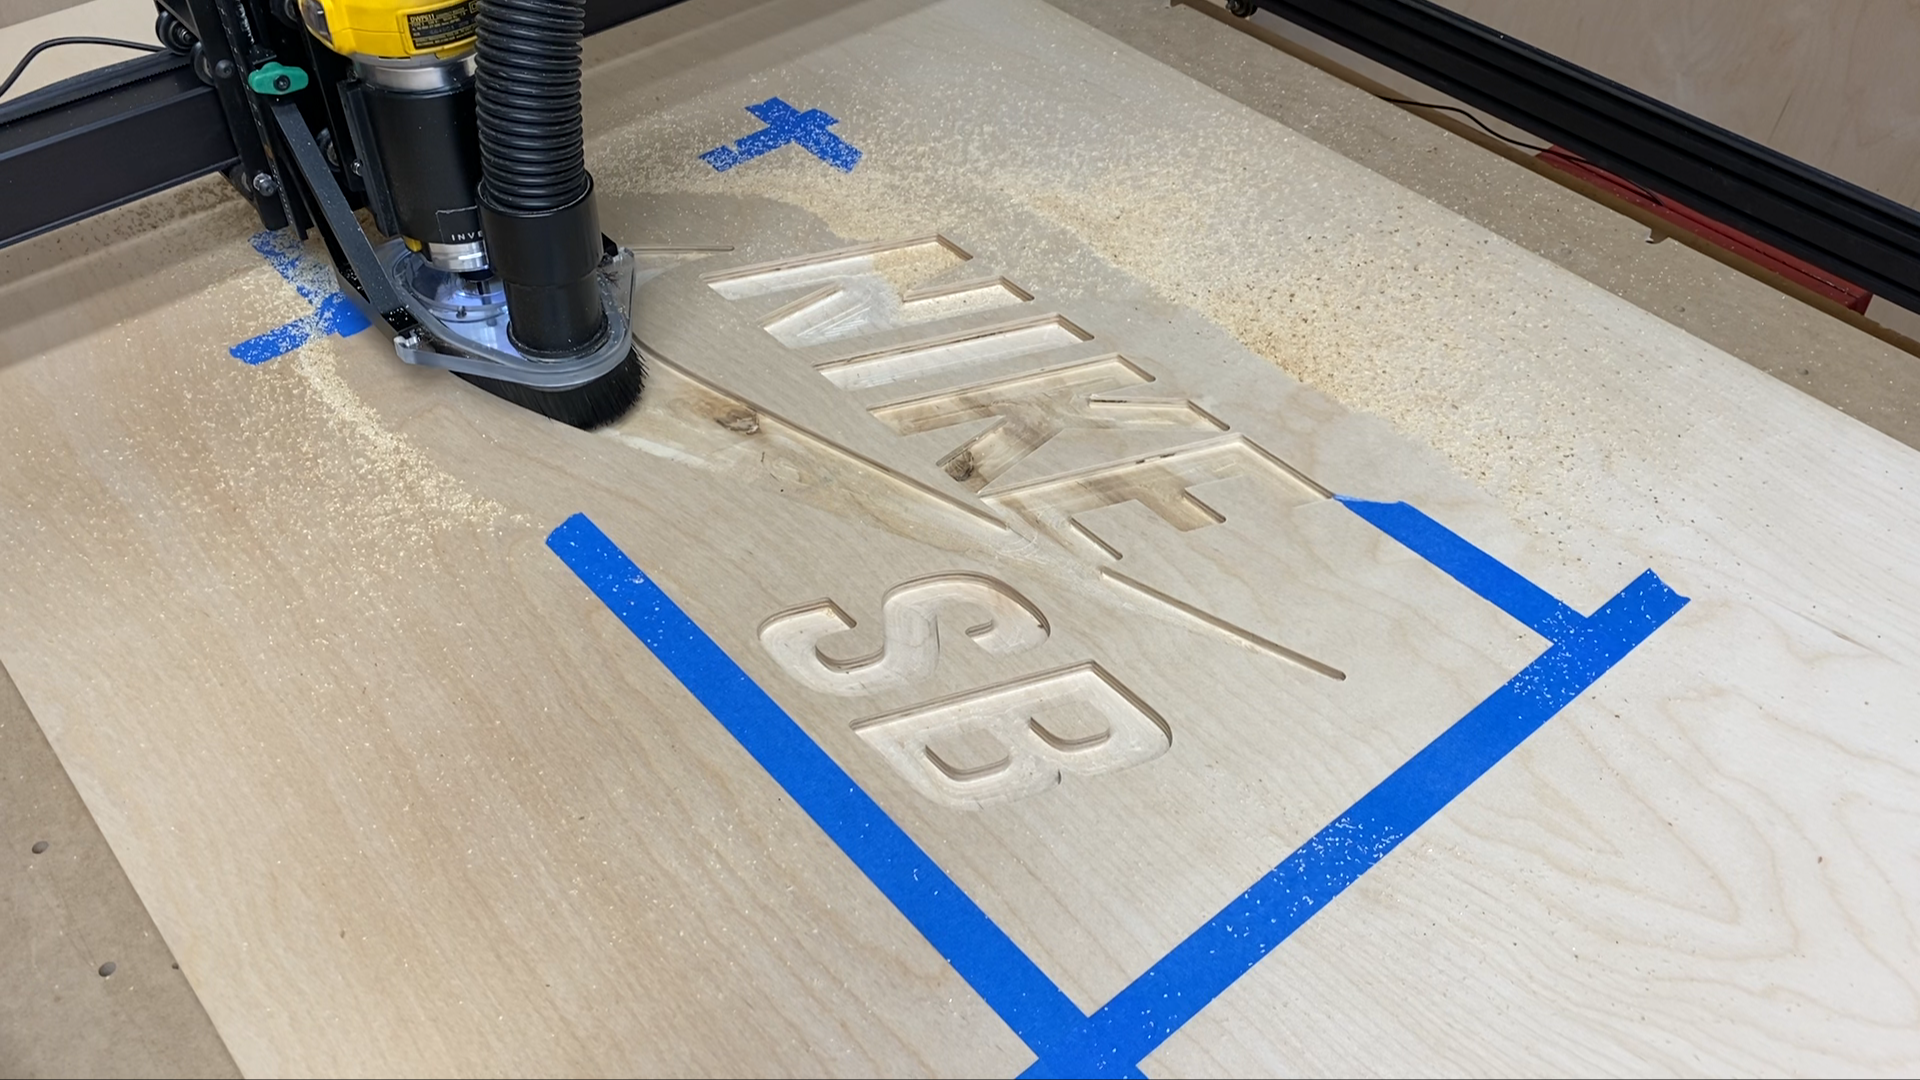
Step 2: Carve the Logo
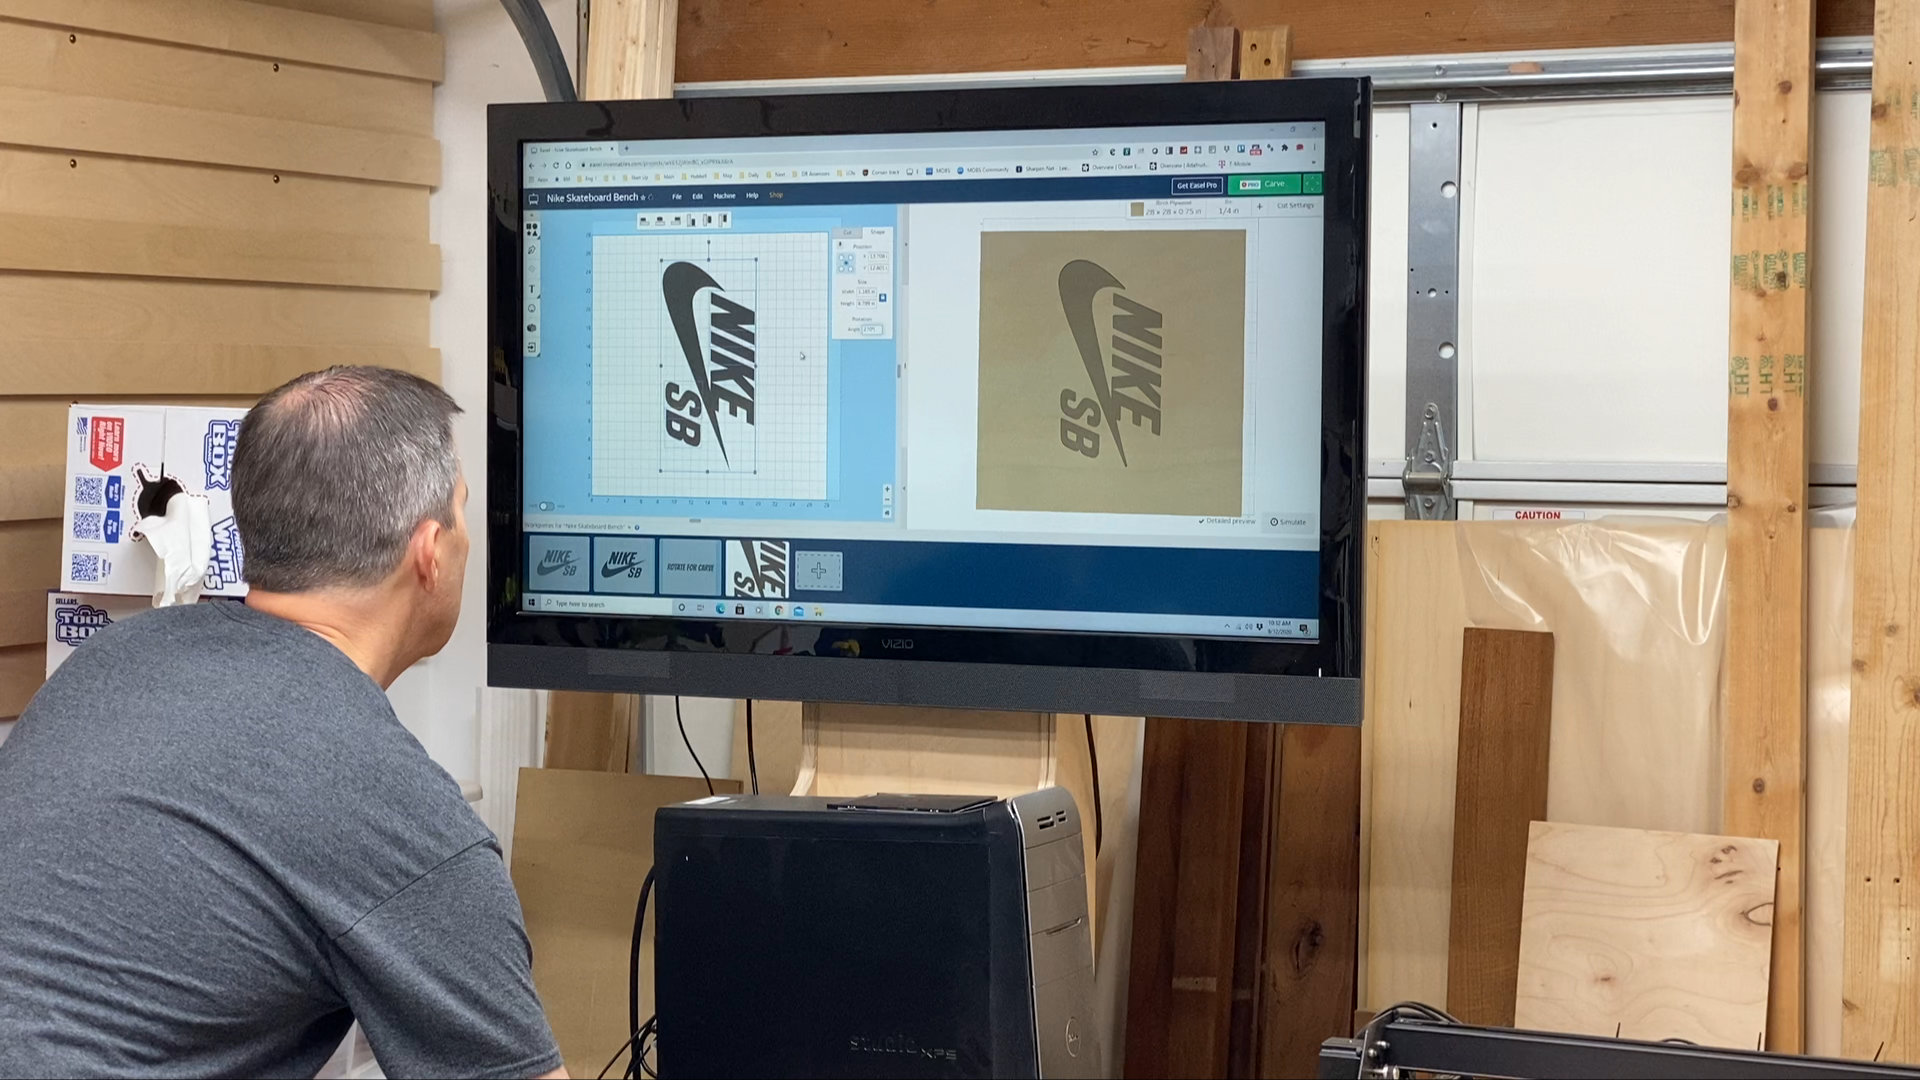
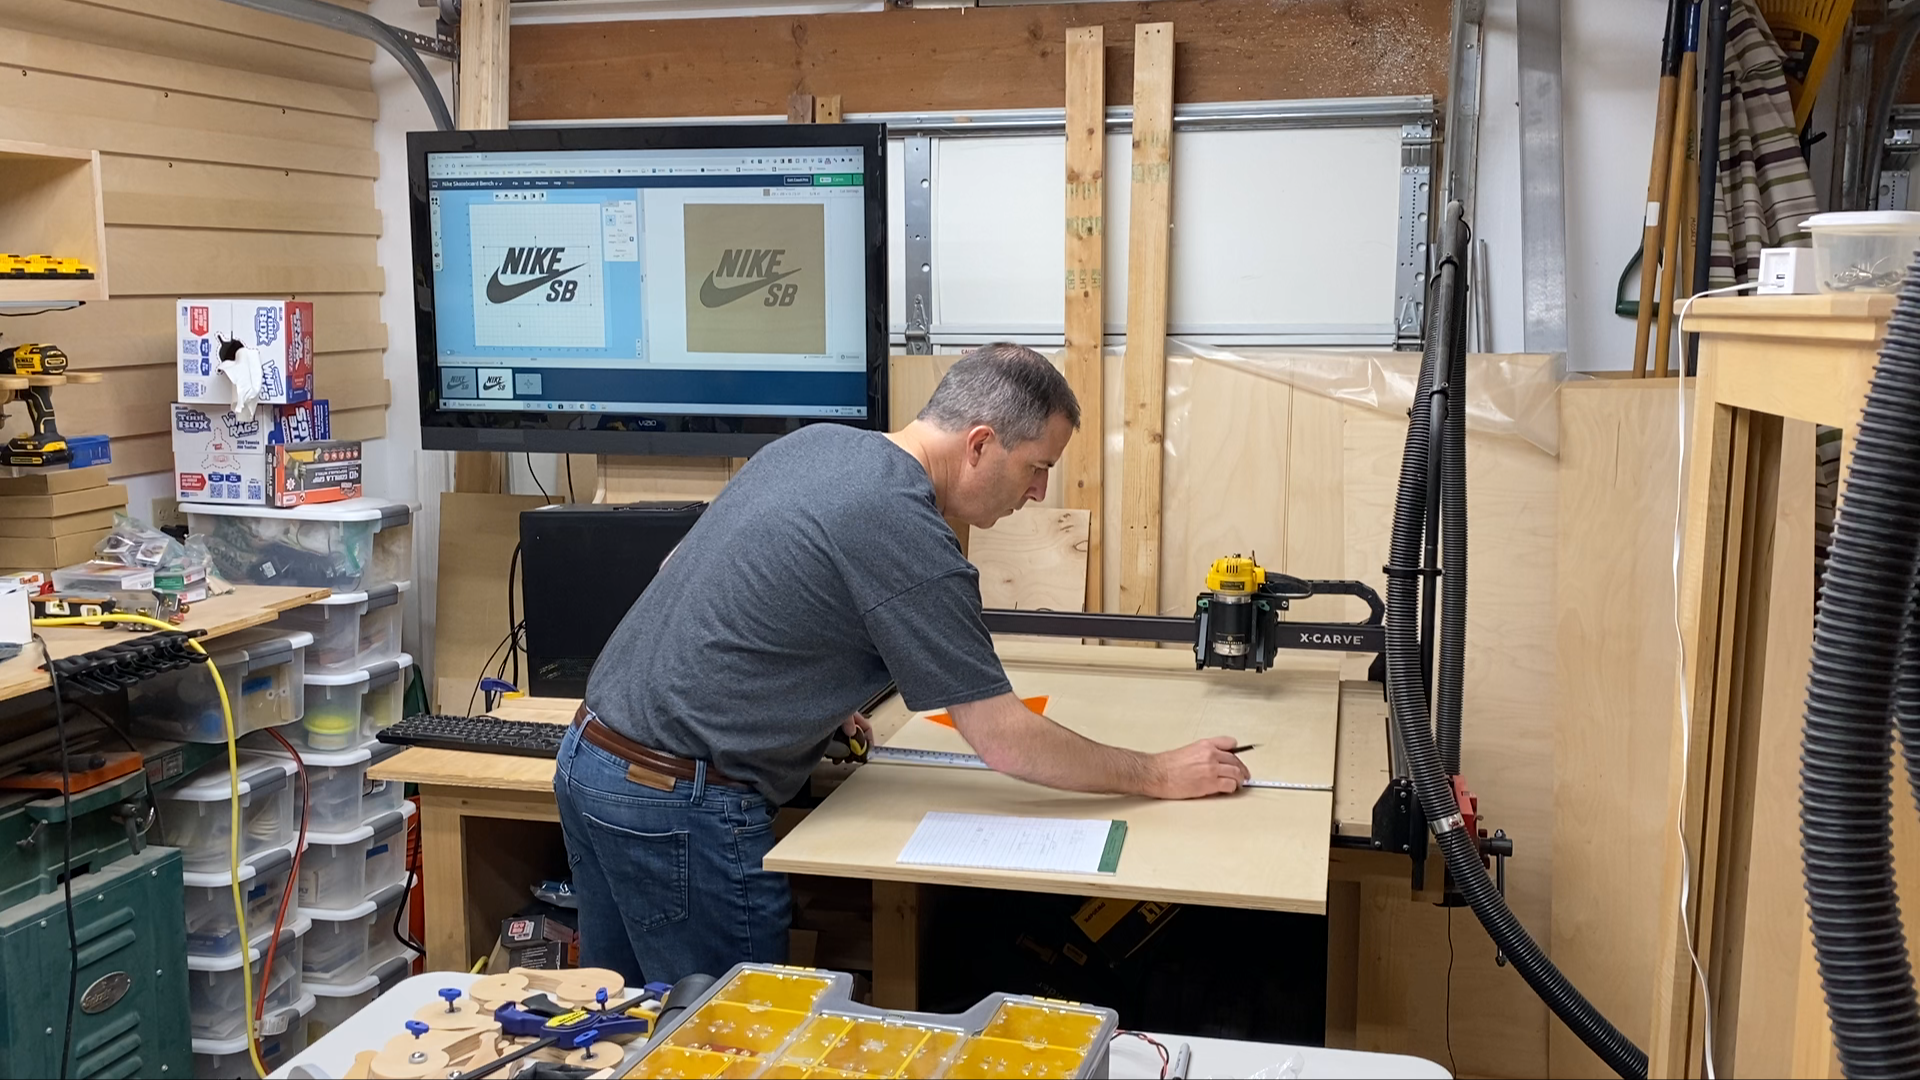
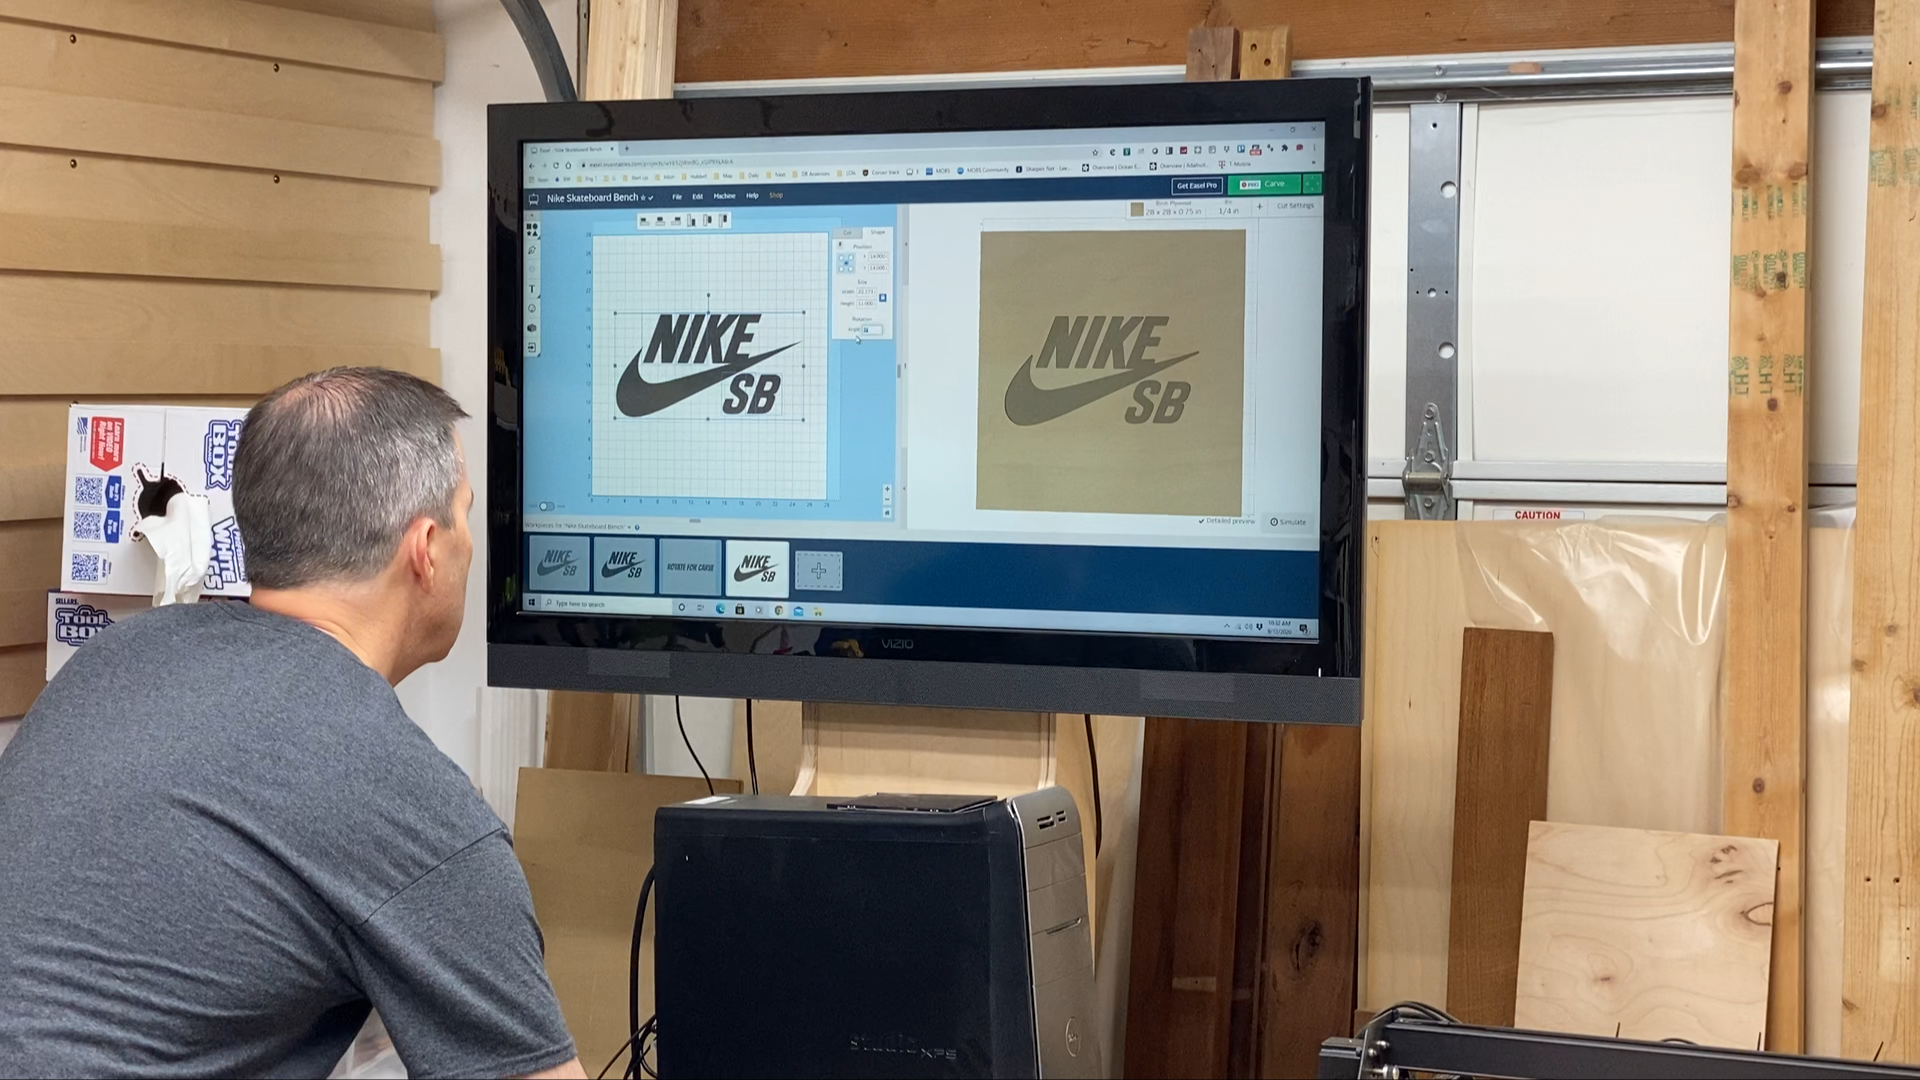
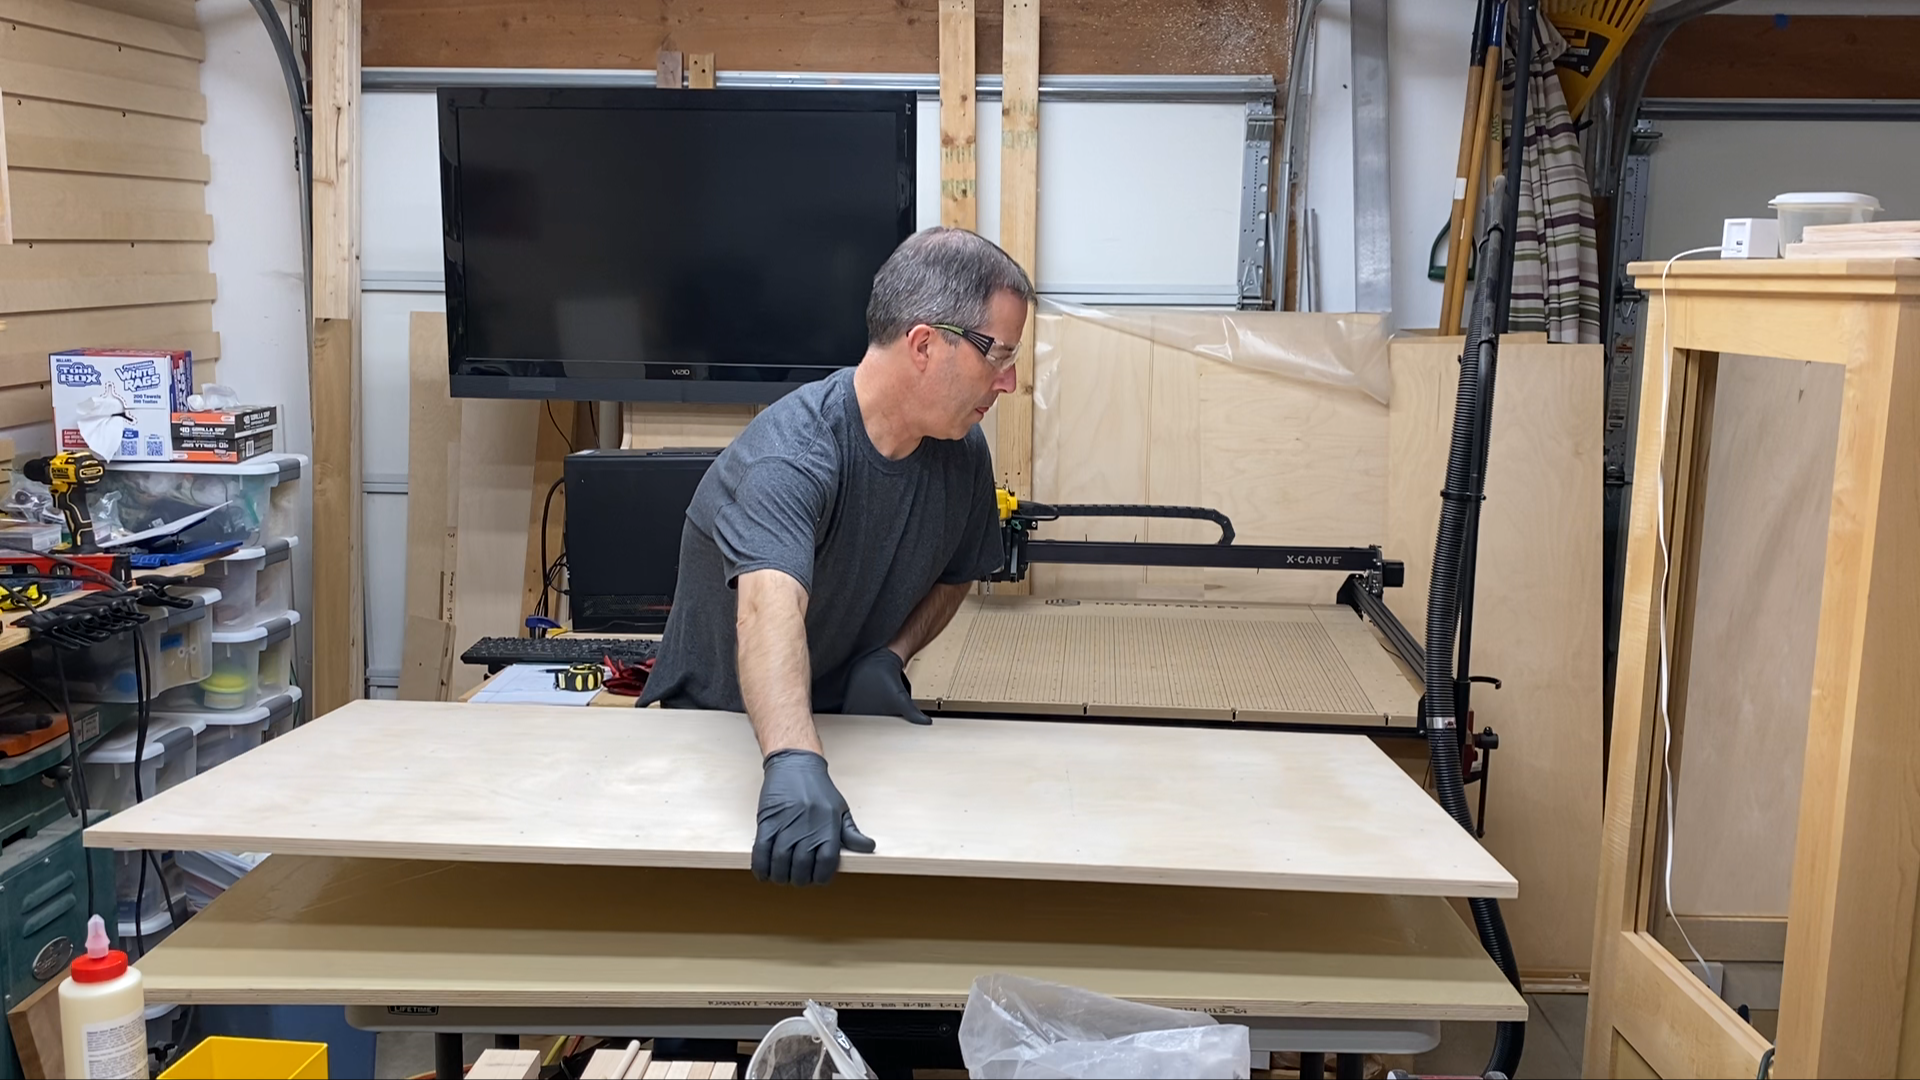
The first step in this project was to carve the Nike SB logo in the piece of plywood. The bed of my Inventables X-Carve CNC is just under 30" x 30", but the bench dimensions were going to be just under 30" x 60", which is half a sheet of baltic birch plywood where I get it. This isn't a problem as the large sheet of plywood can overhang from the bed of the X-Carve and the logo carved in the bed area. I marked the location of the outline of the logo and then set my origin point in the lower left of the outline.
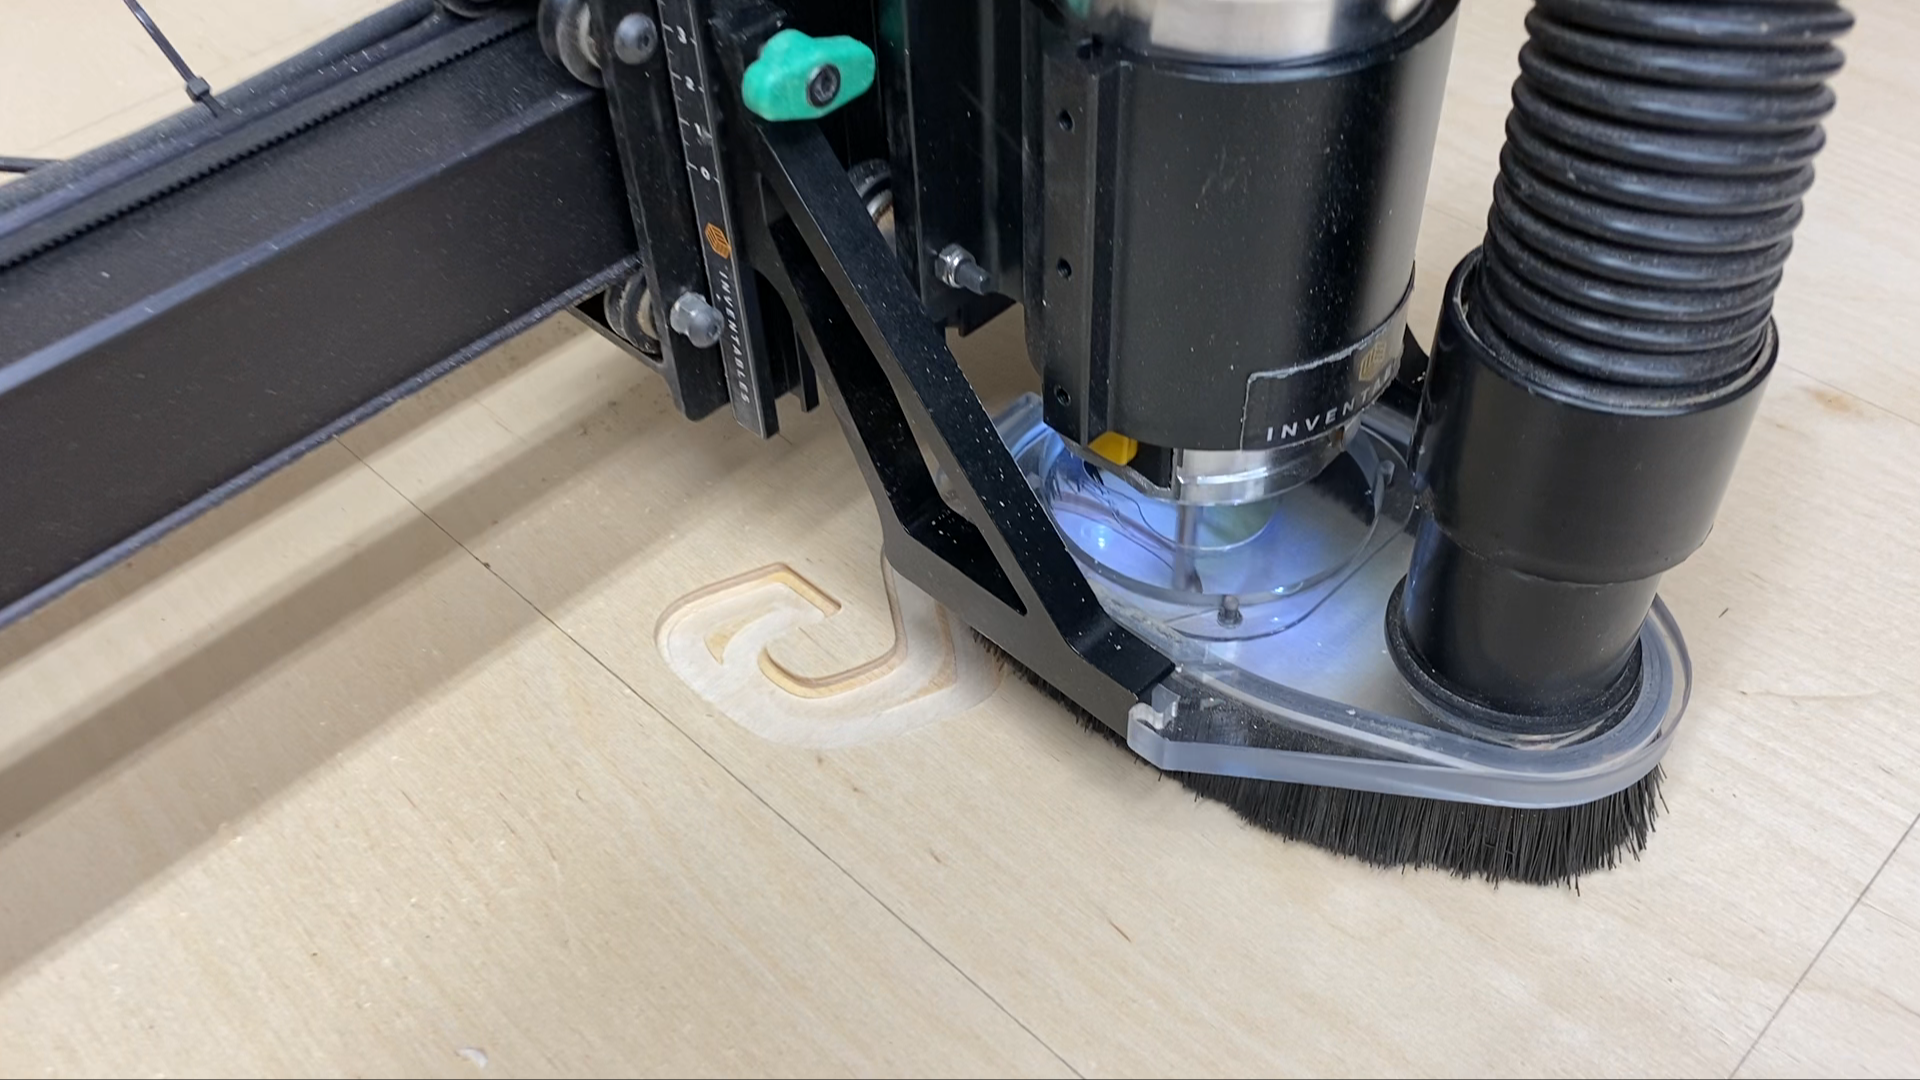
I cut the logo using a 1/4" diameter downcut bit so I wouldn't have any tearout around the edges of the logo or letters.
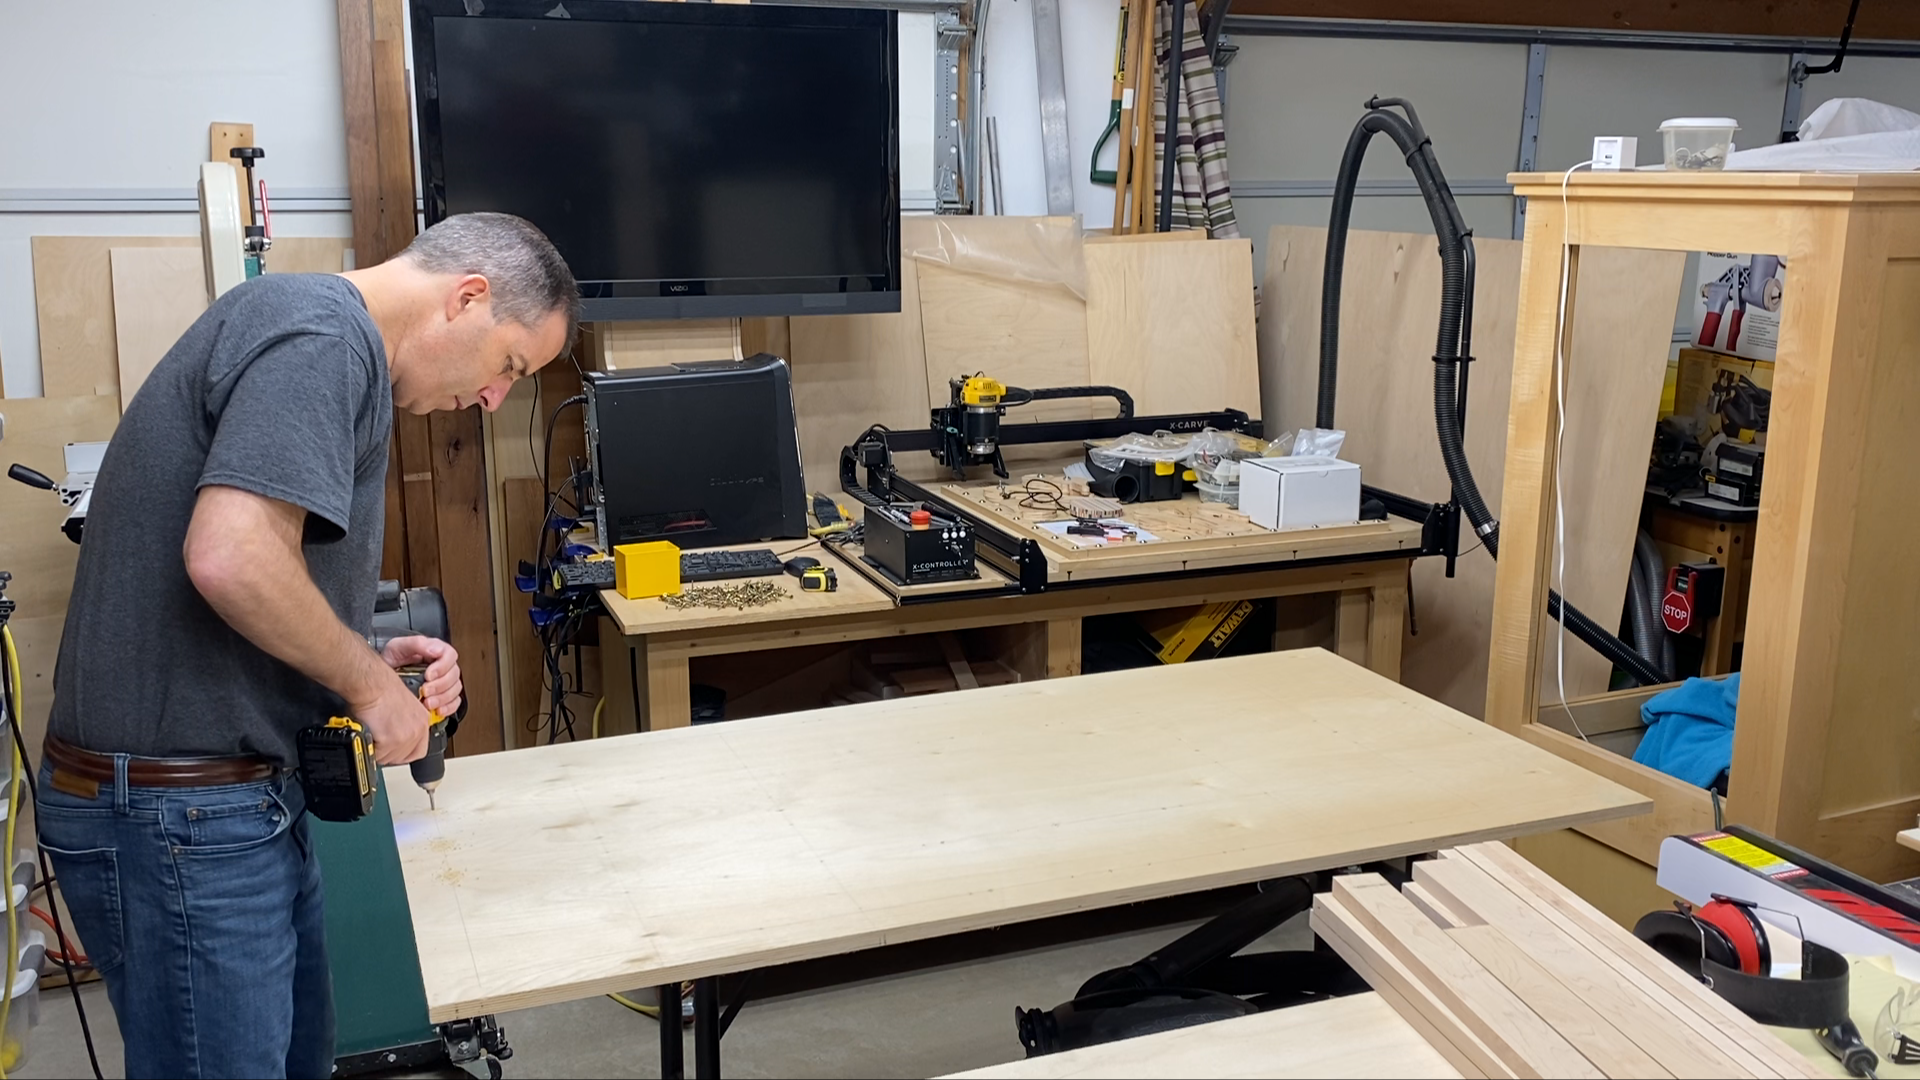
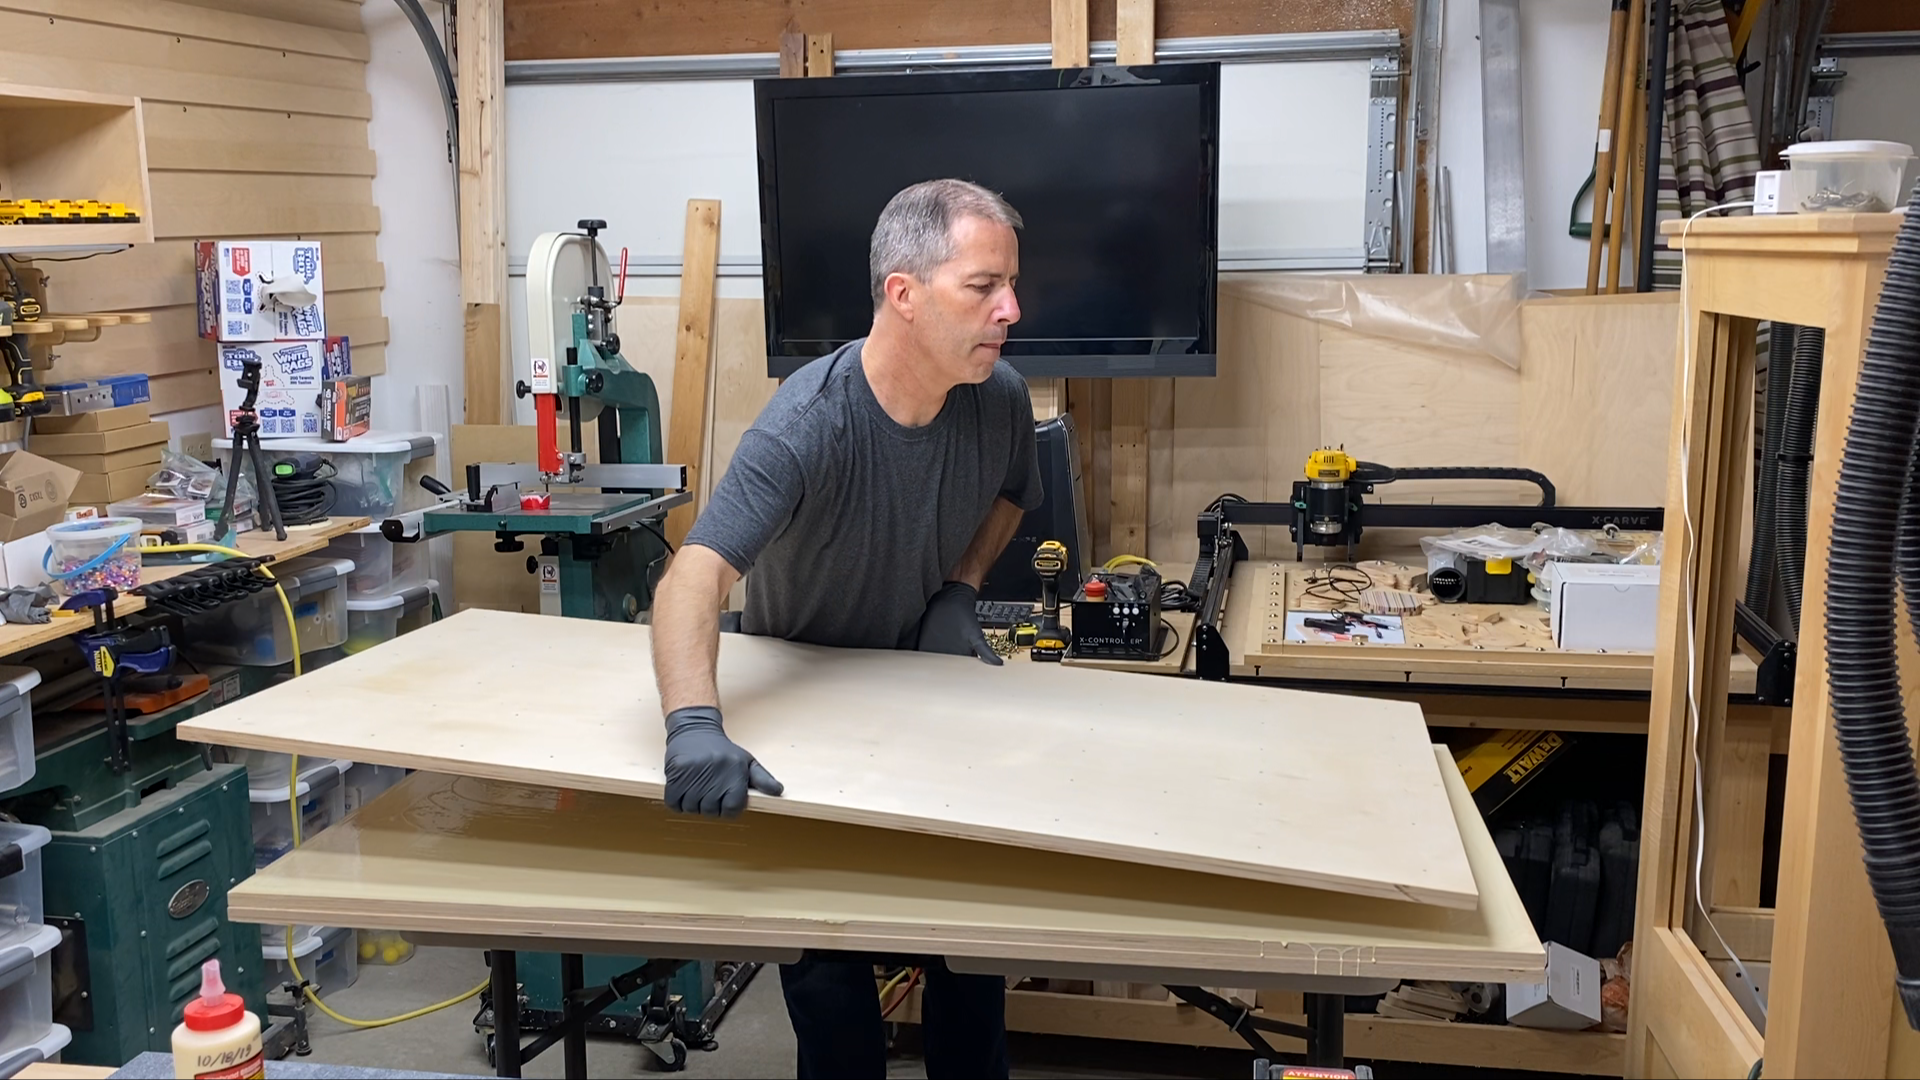
Step 3: Glue Second Layer of Plywood
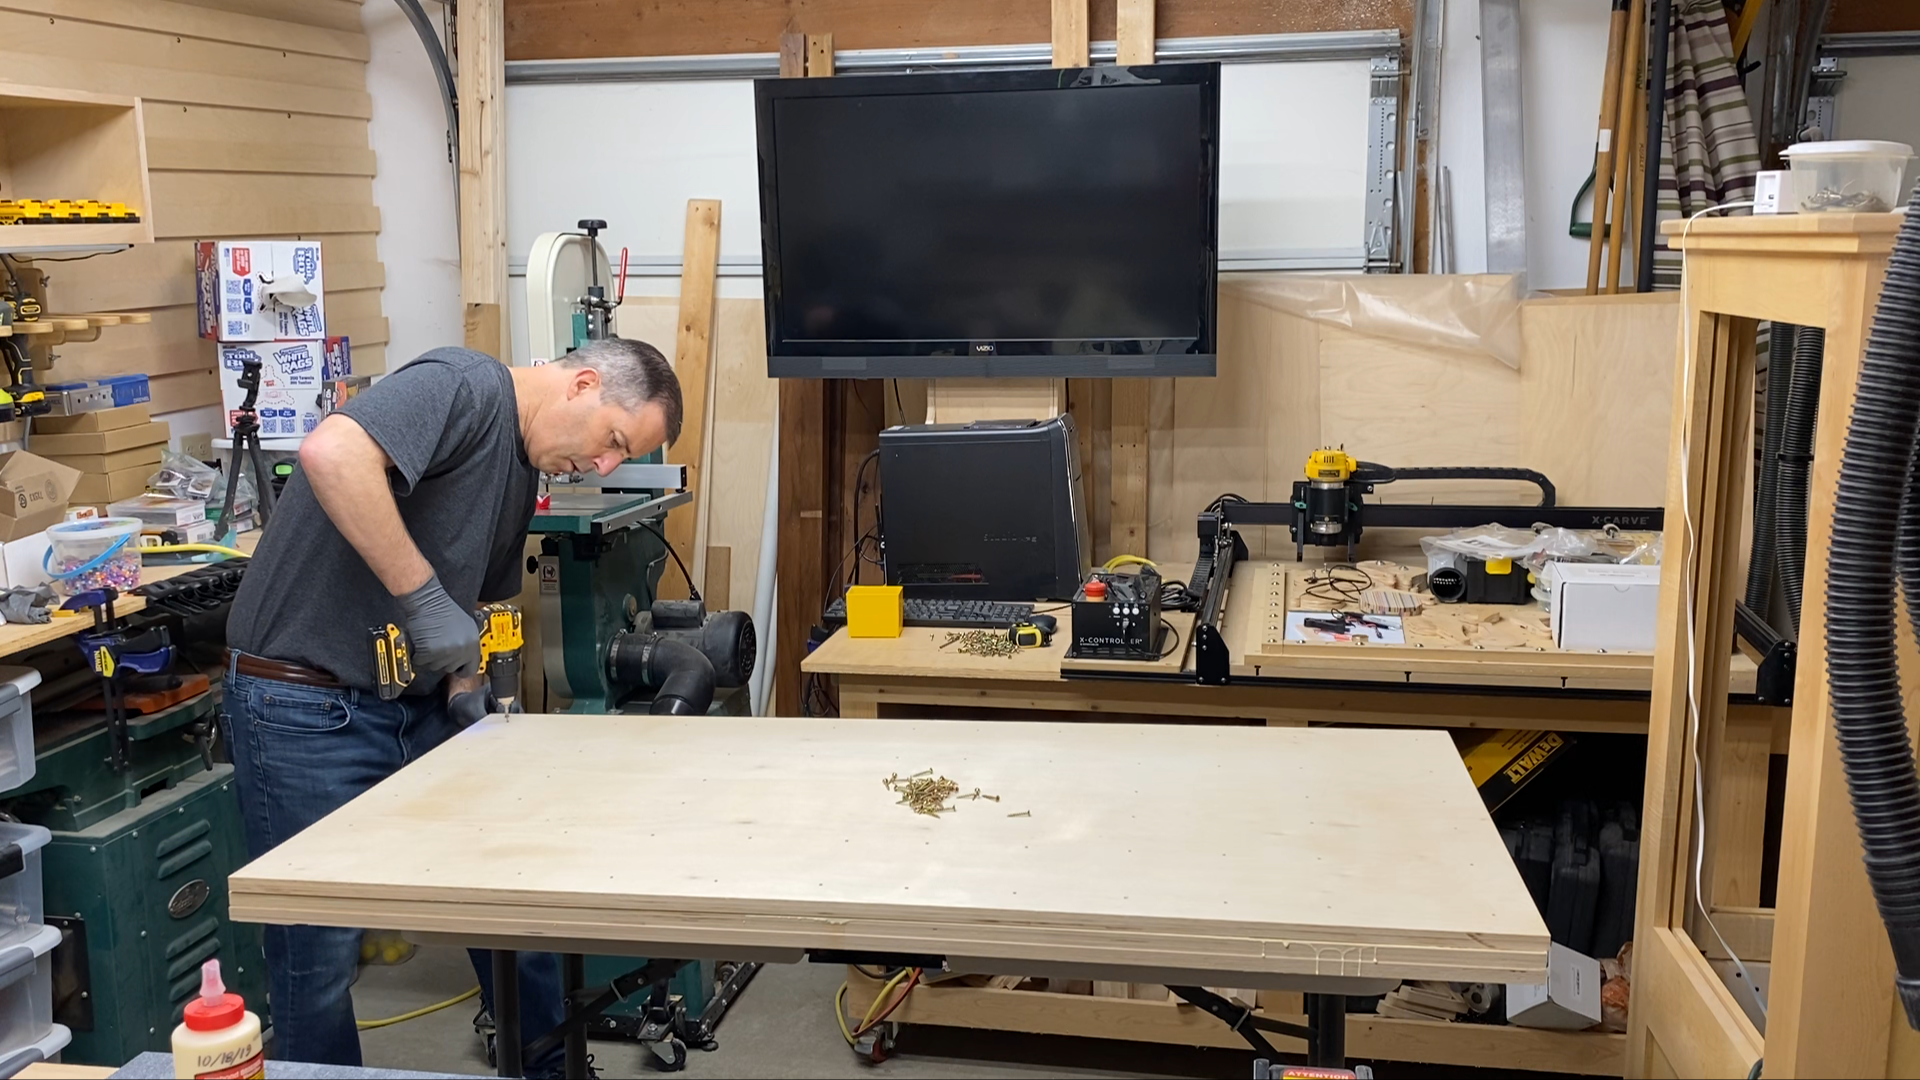
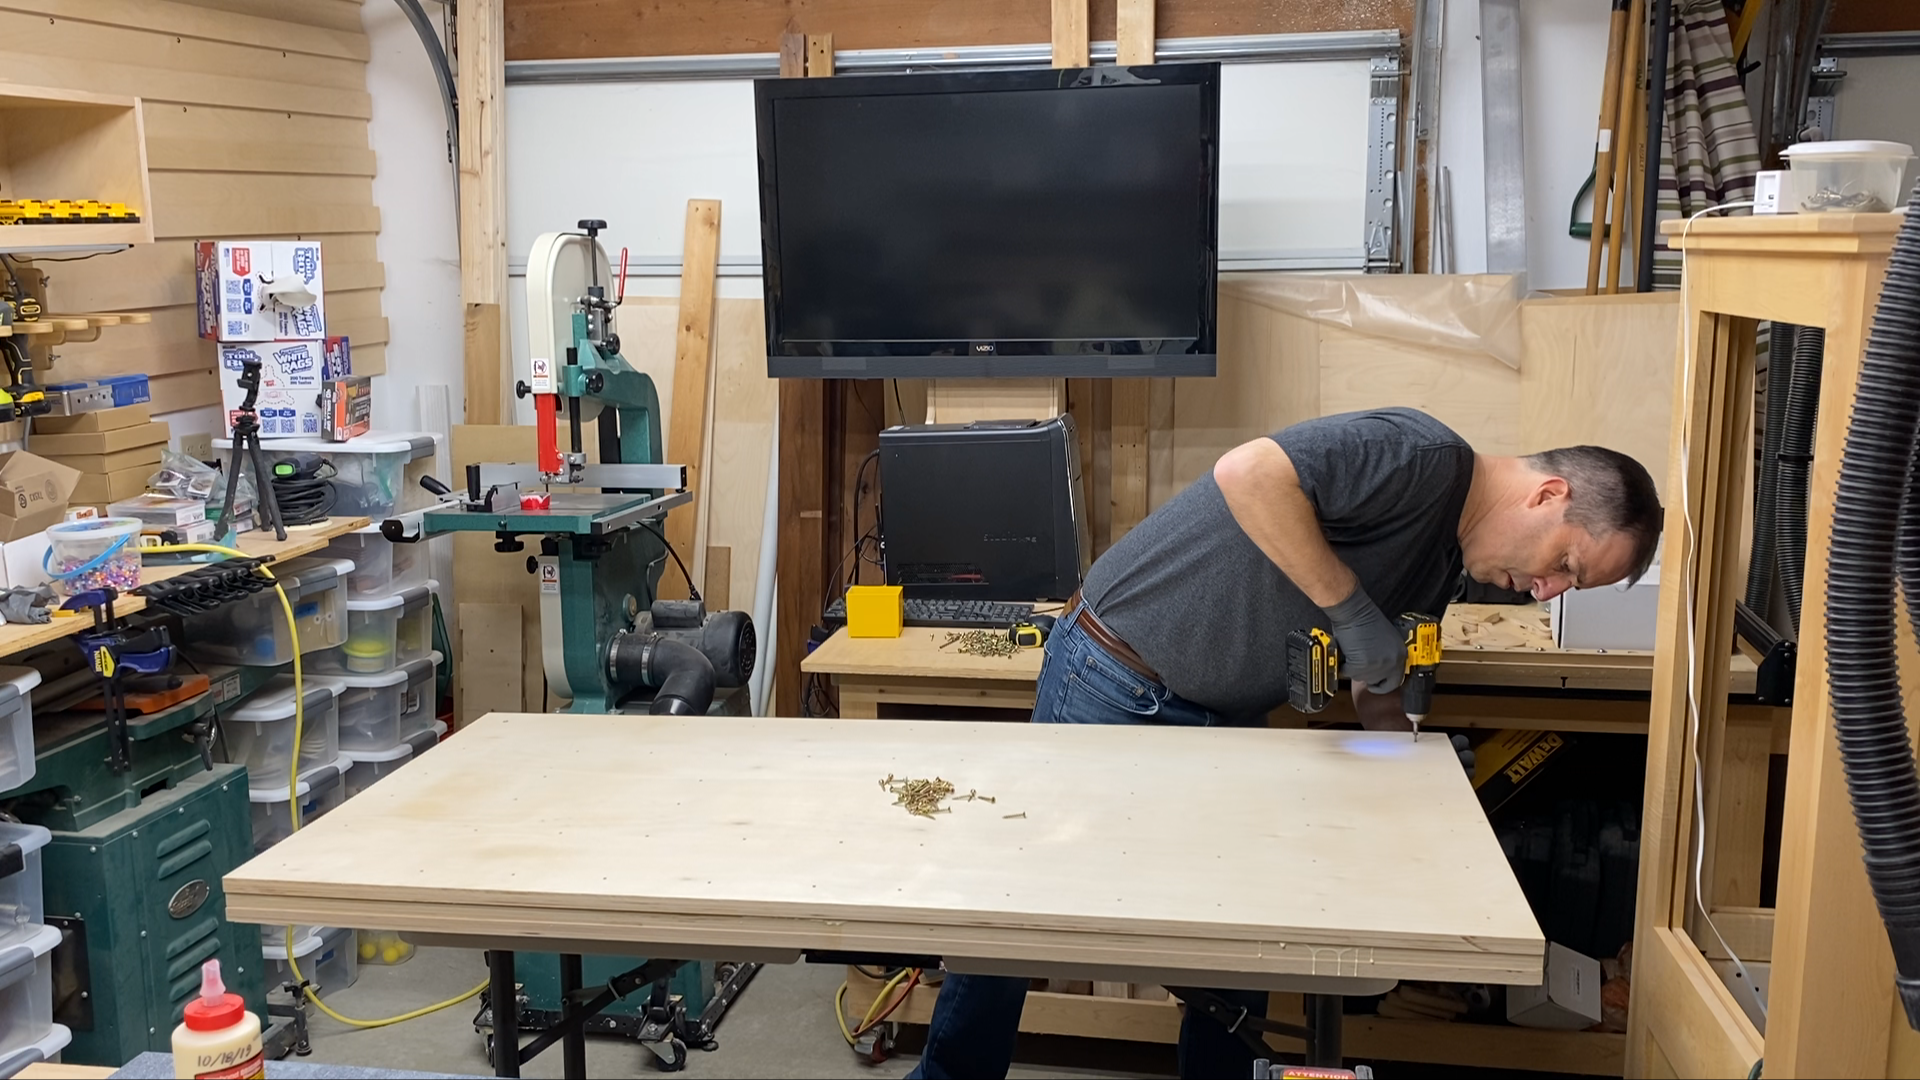
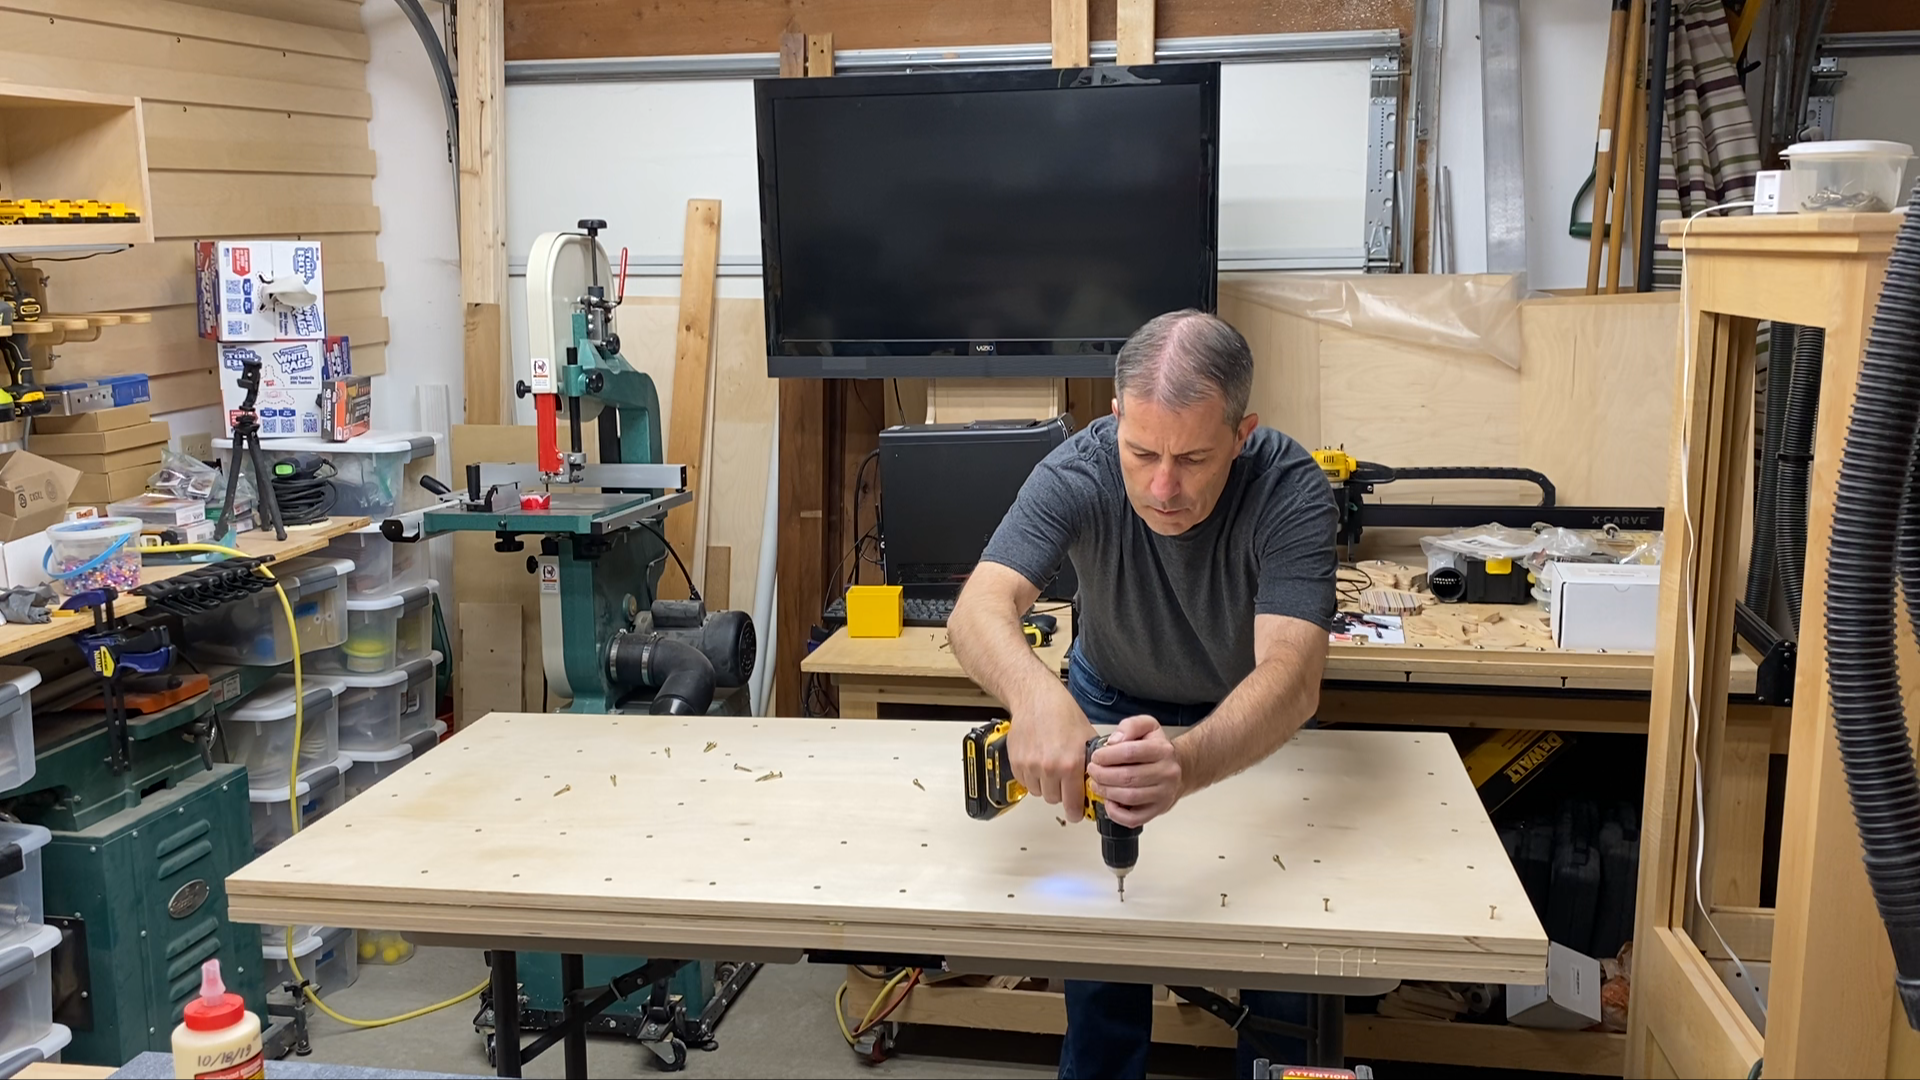
Since the 3/4" thick plywood would have been a little flexible by itself, I decided to add another layer of 3/4" thick plywood on the bottom. I did this by drilling holes through the bottom layer of plywood with holes that are slightly larger in diameter than the threads of the 1-1/4" screws that I used to pull both pieces of plywood I was gluing together. This way the screws pull the pieces tight together.
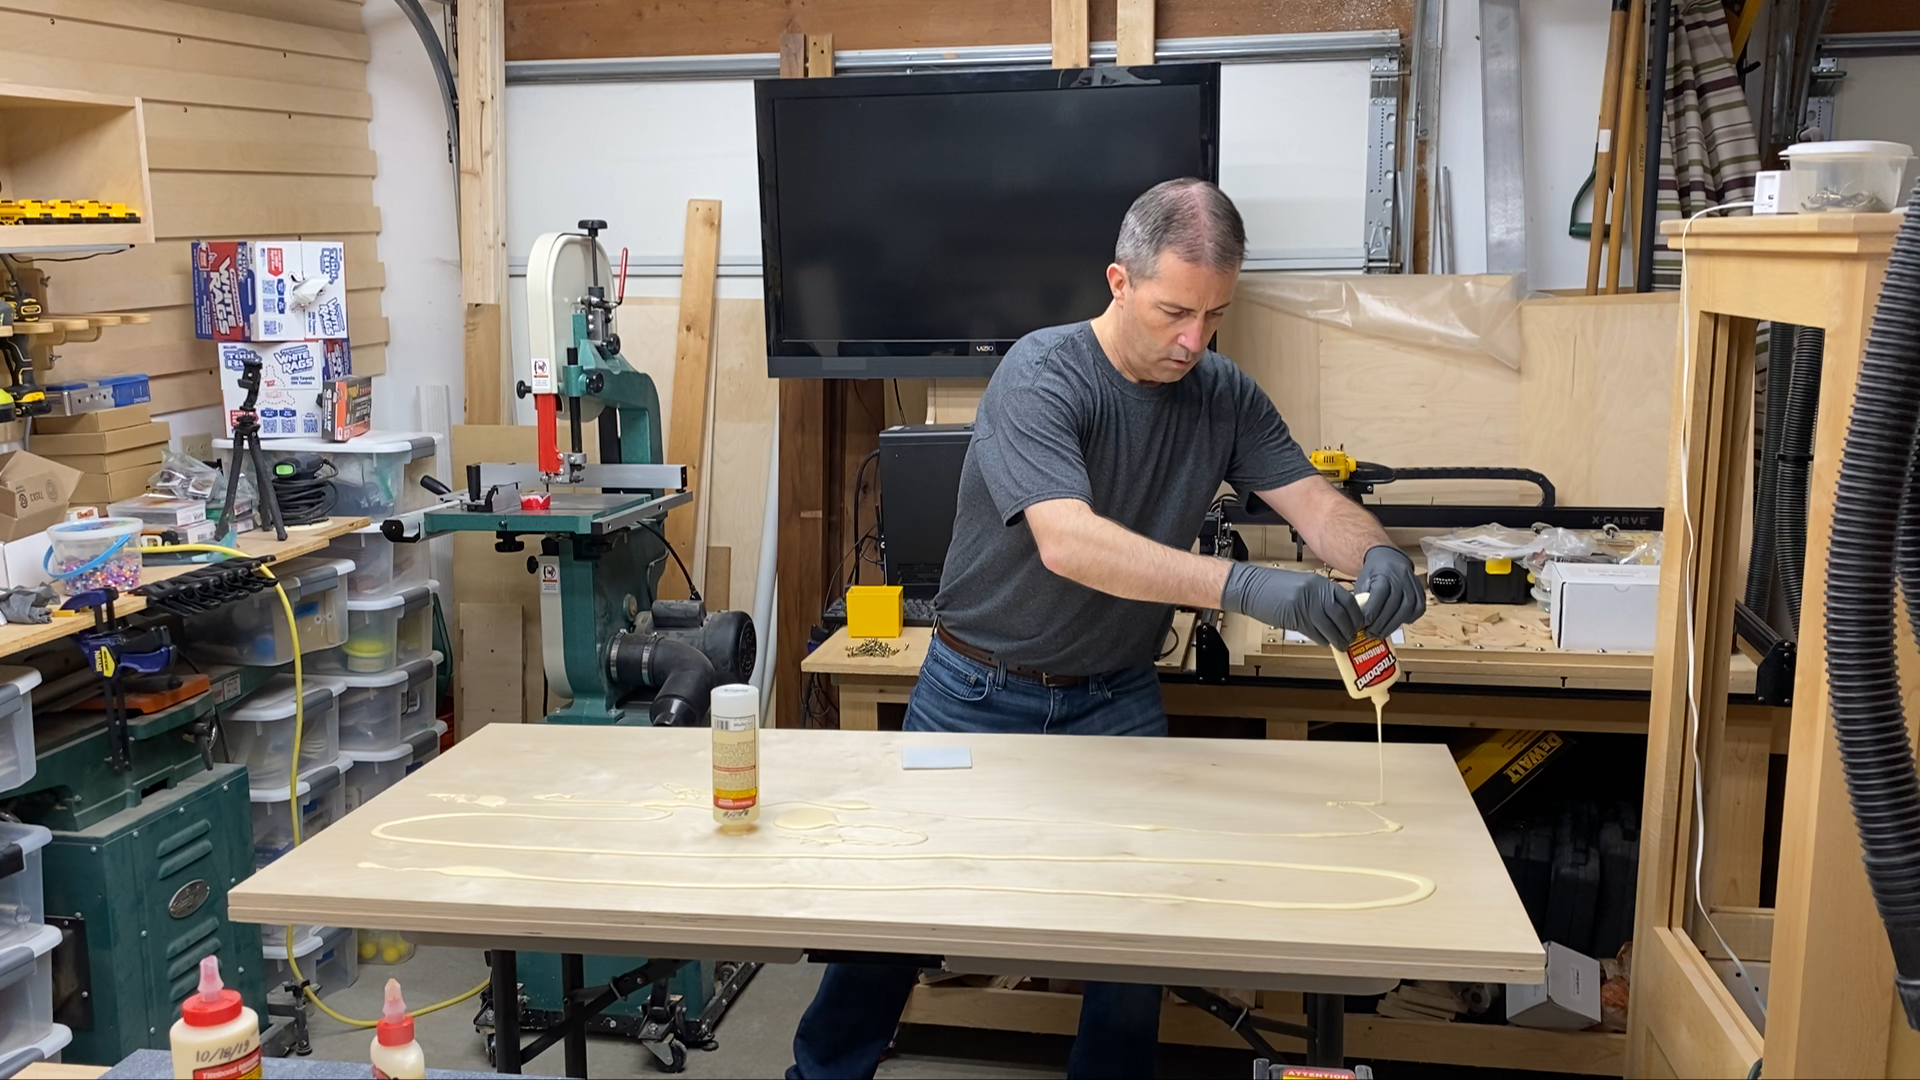
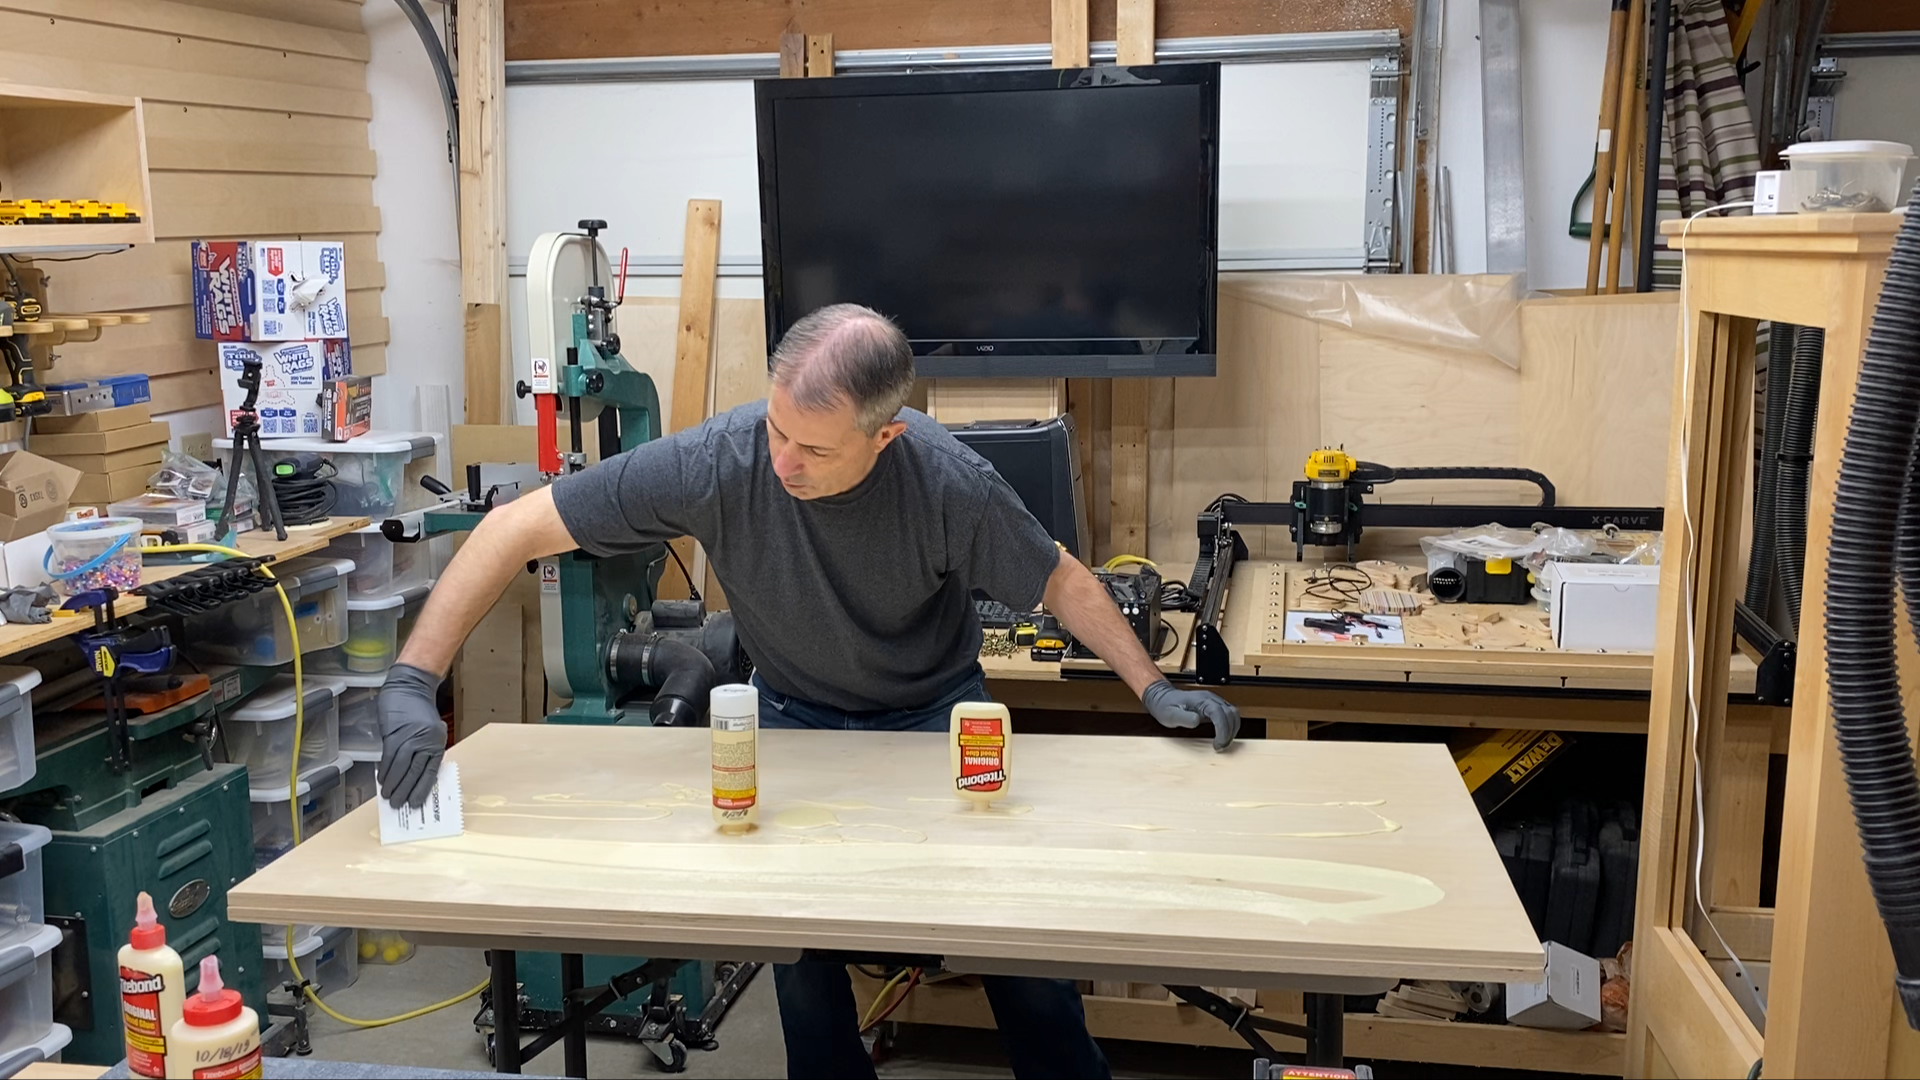
After drilling the holes, I placed the piece of plywood with the logo on a table with the log side down. Then I spread glue over the entire surface, aligned the sheets, and drove a screw into one corner of the board, Then I went to the far corner on the same side and drove another screw to lock the alignment of the sheets in place.
Next I drove all of the screws through the bottom sheet into the top sheet and let the glue set up before moving on to the next step.
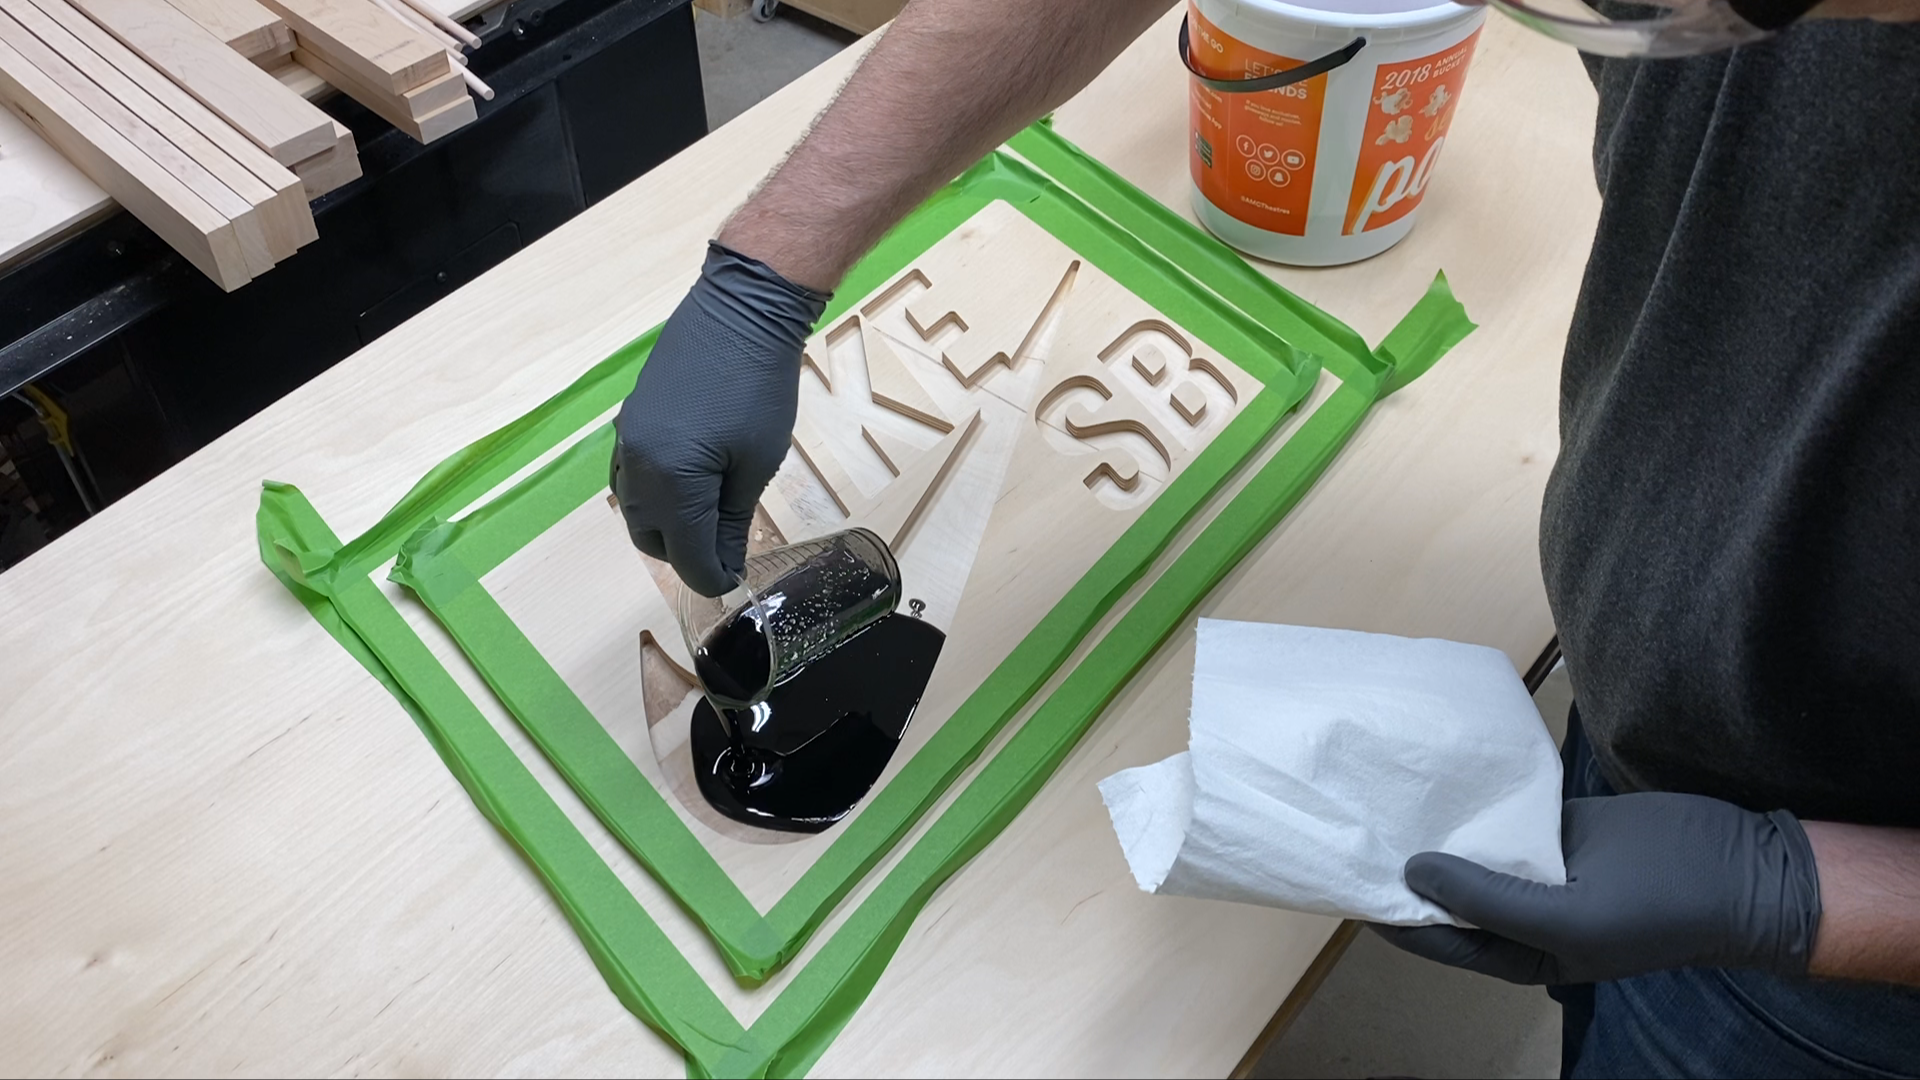
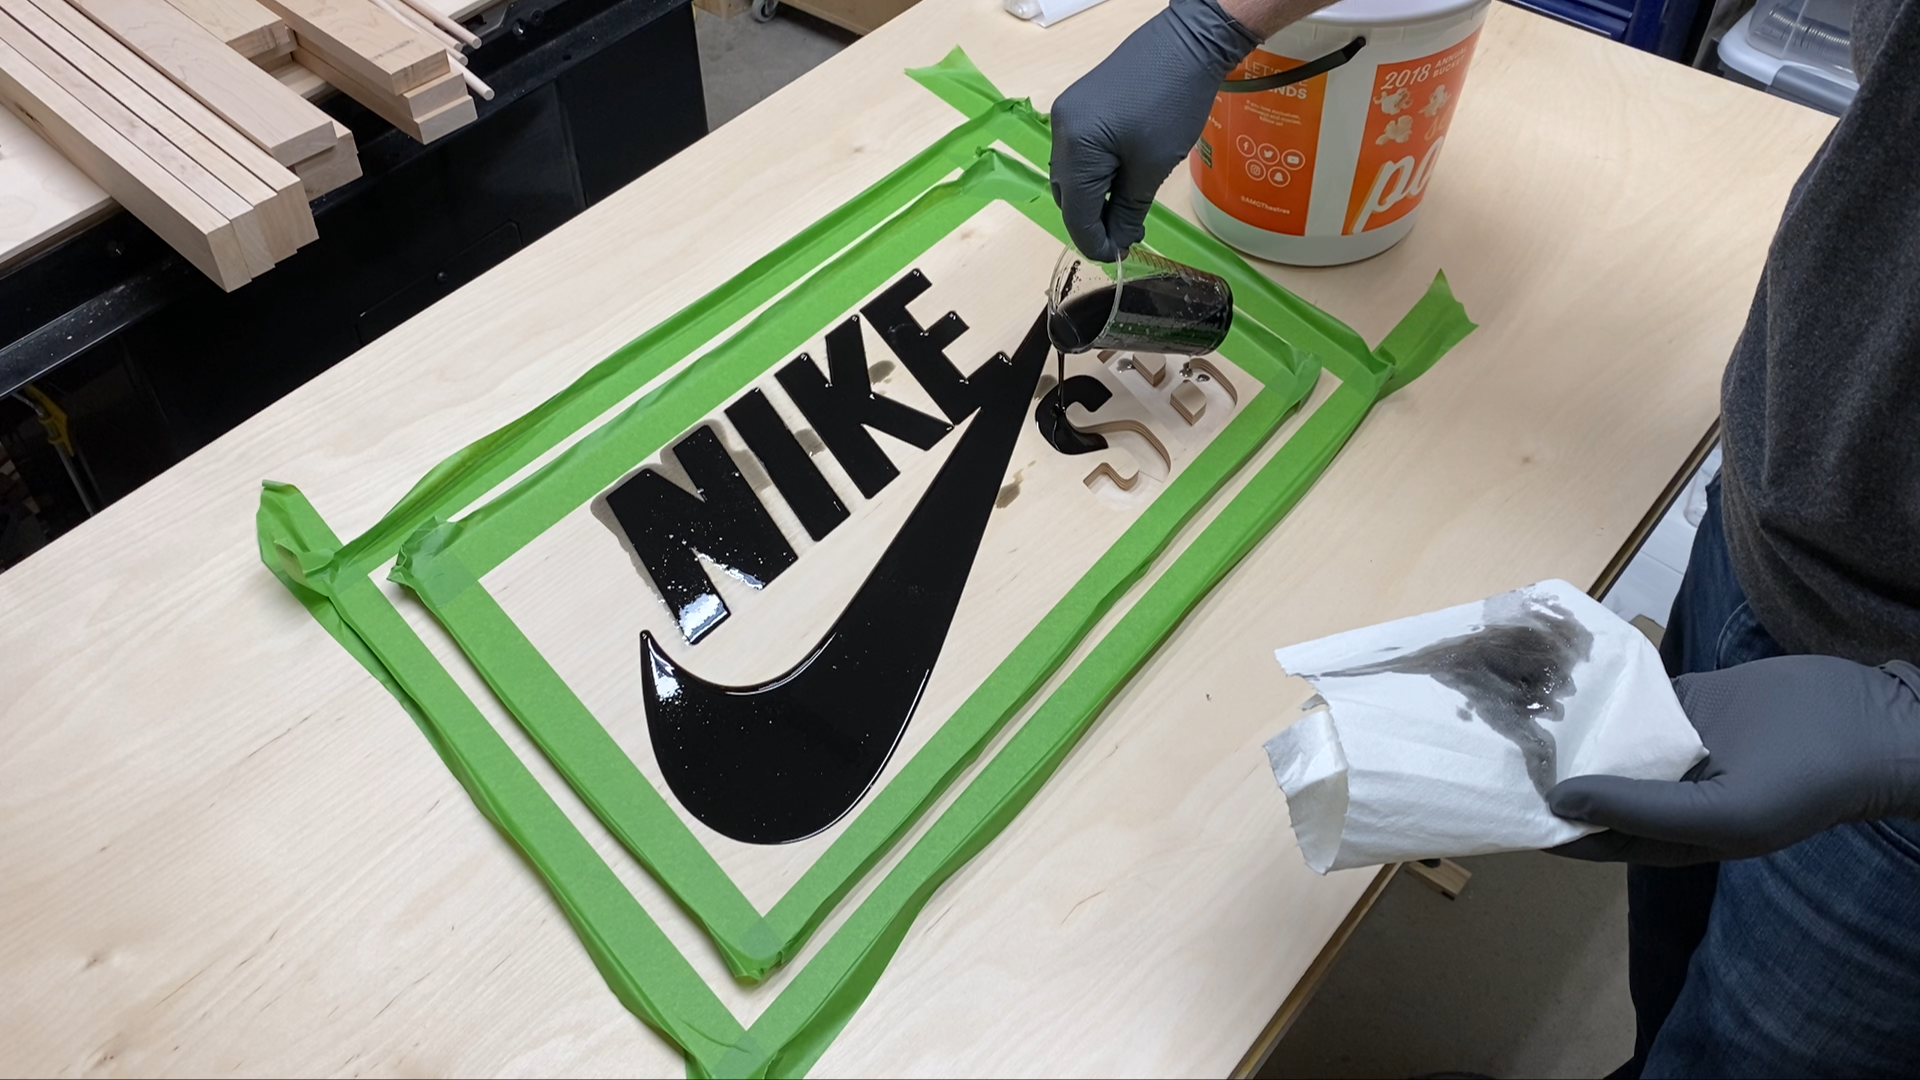
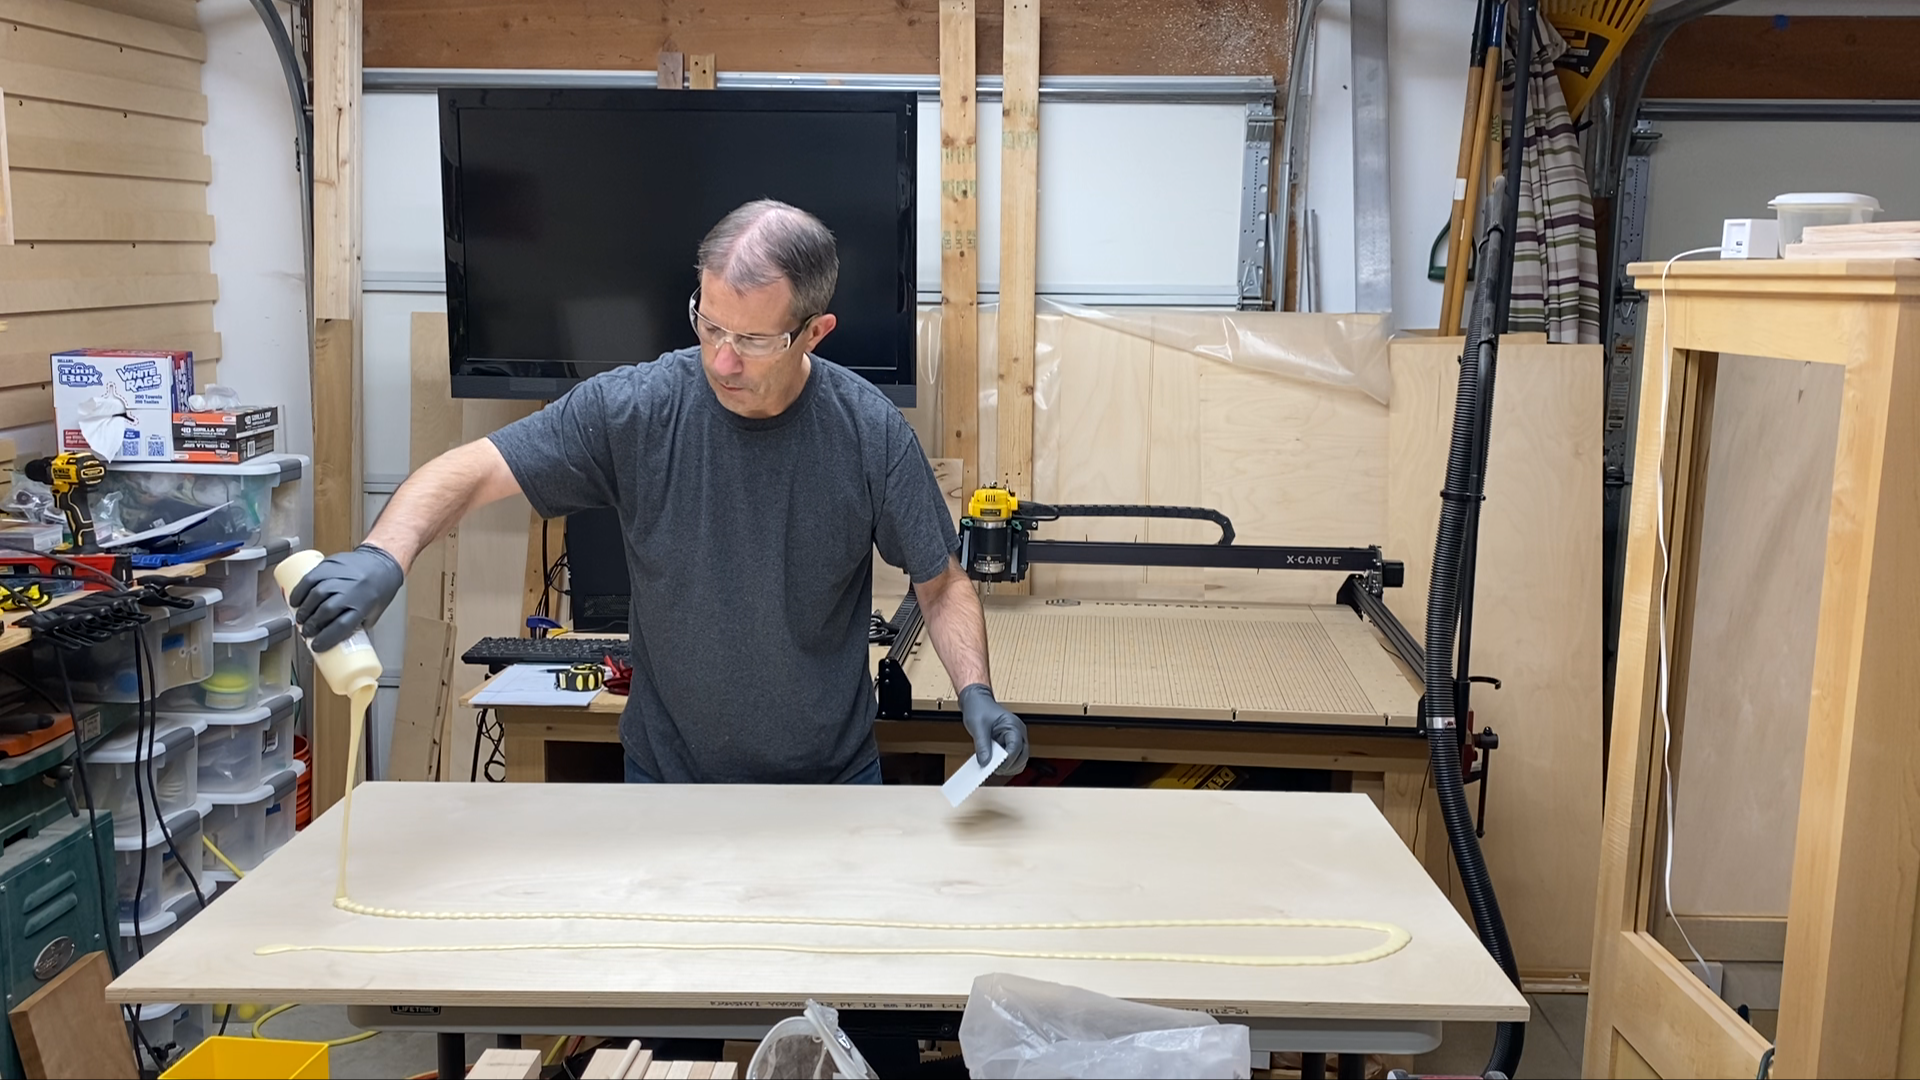
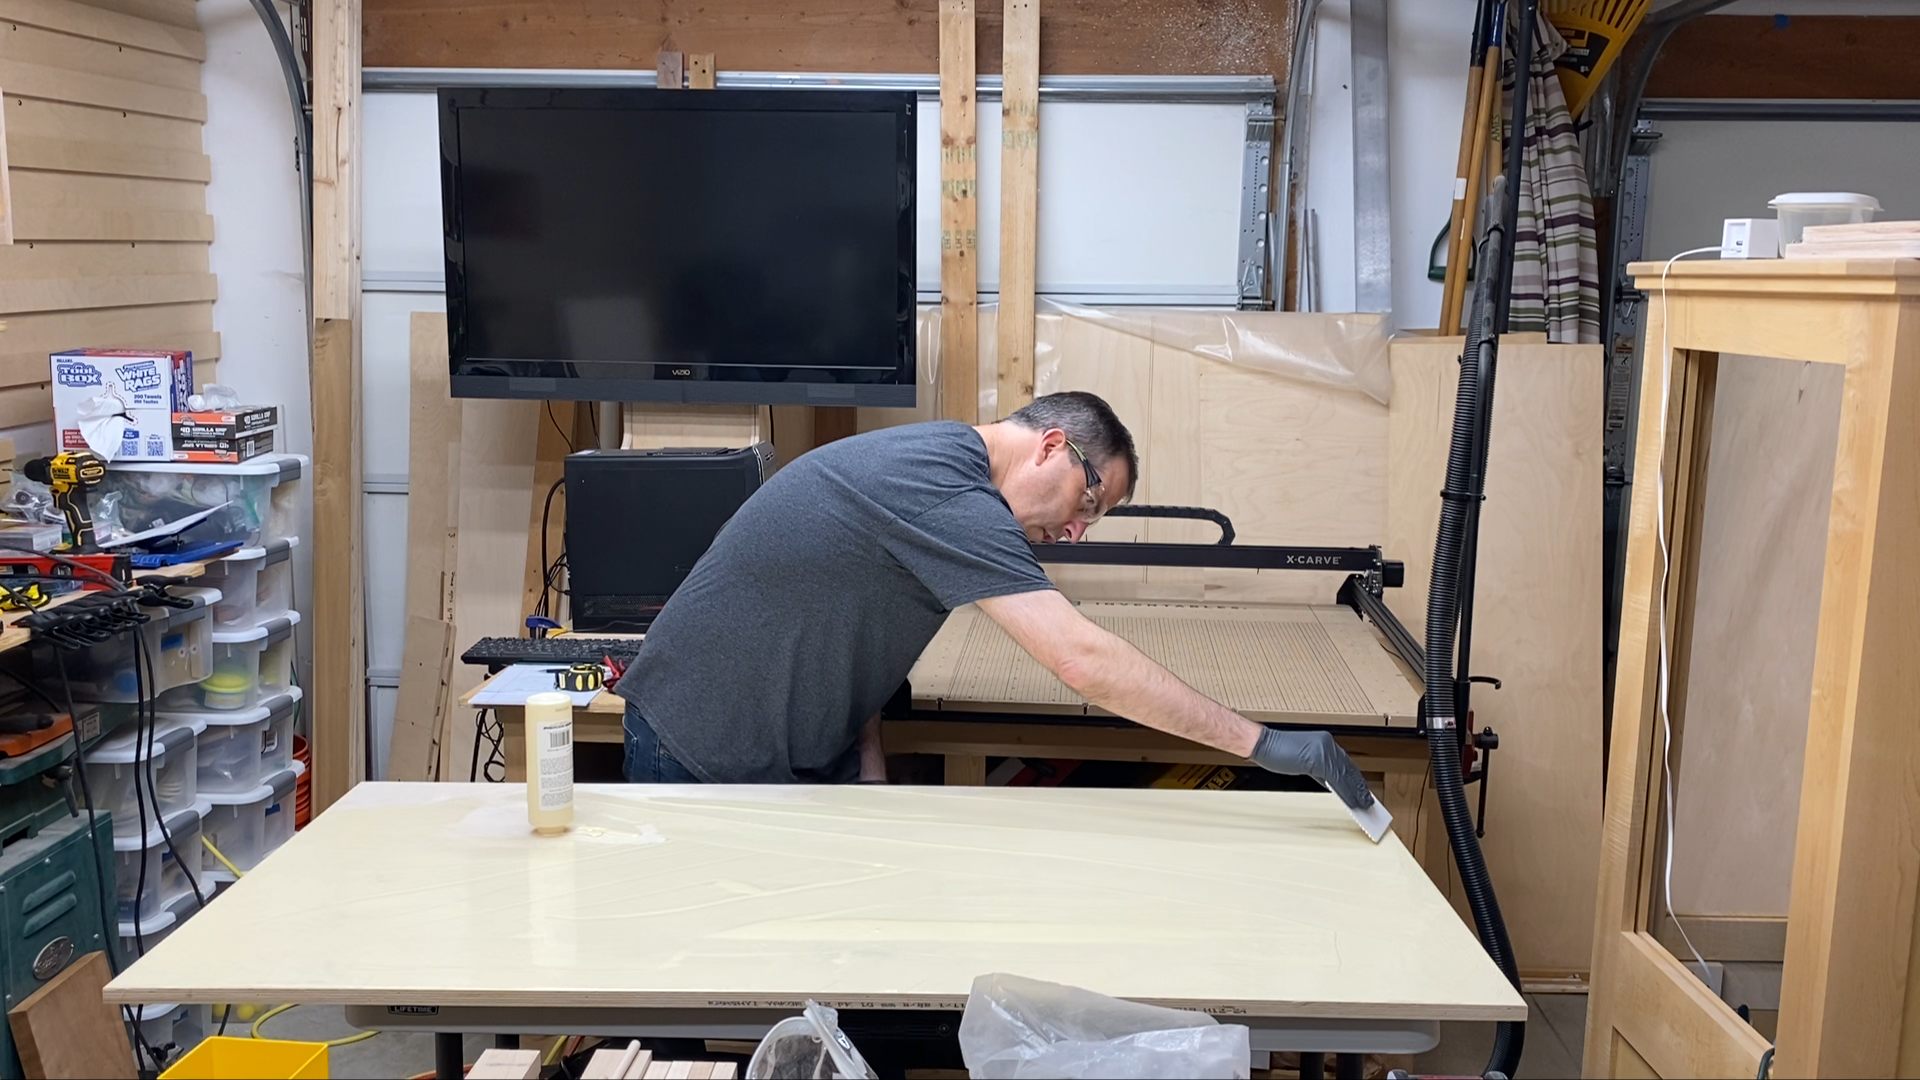
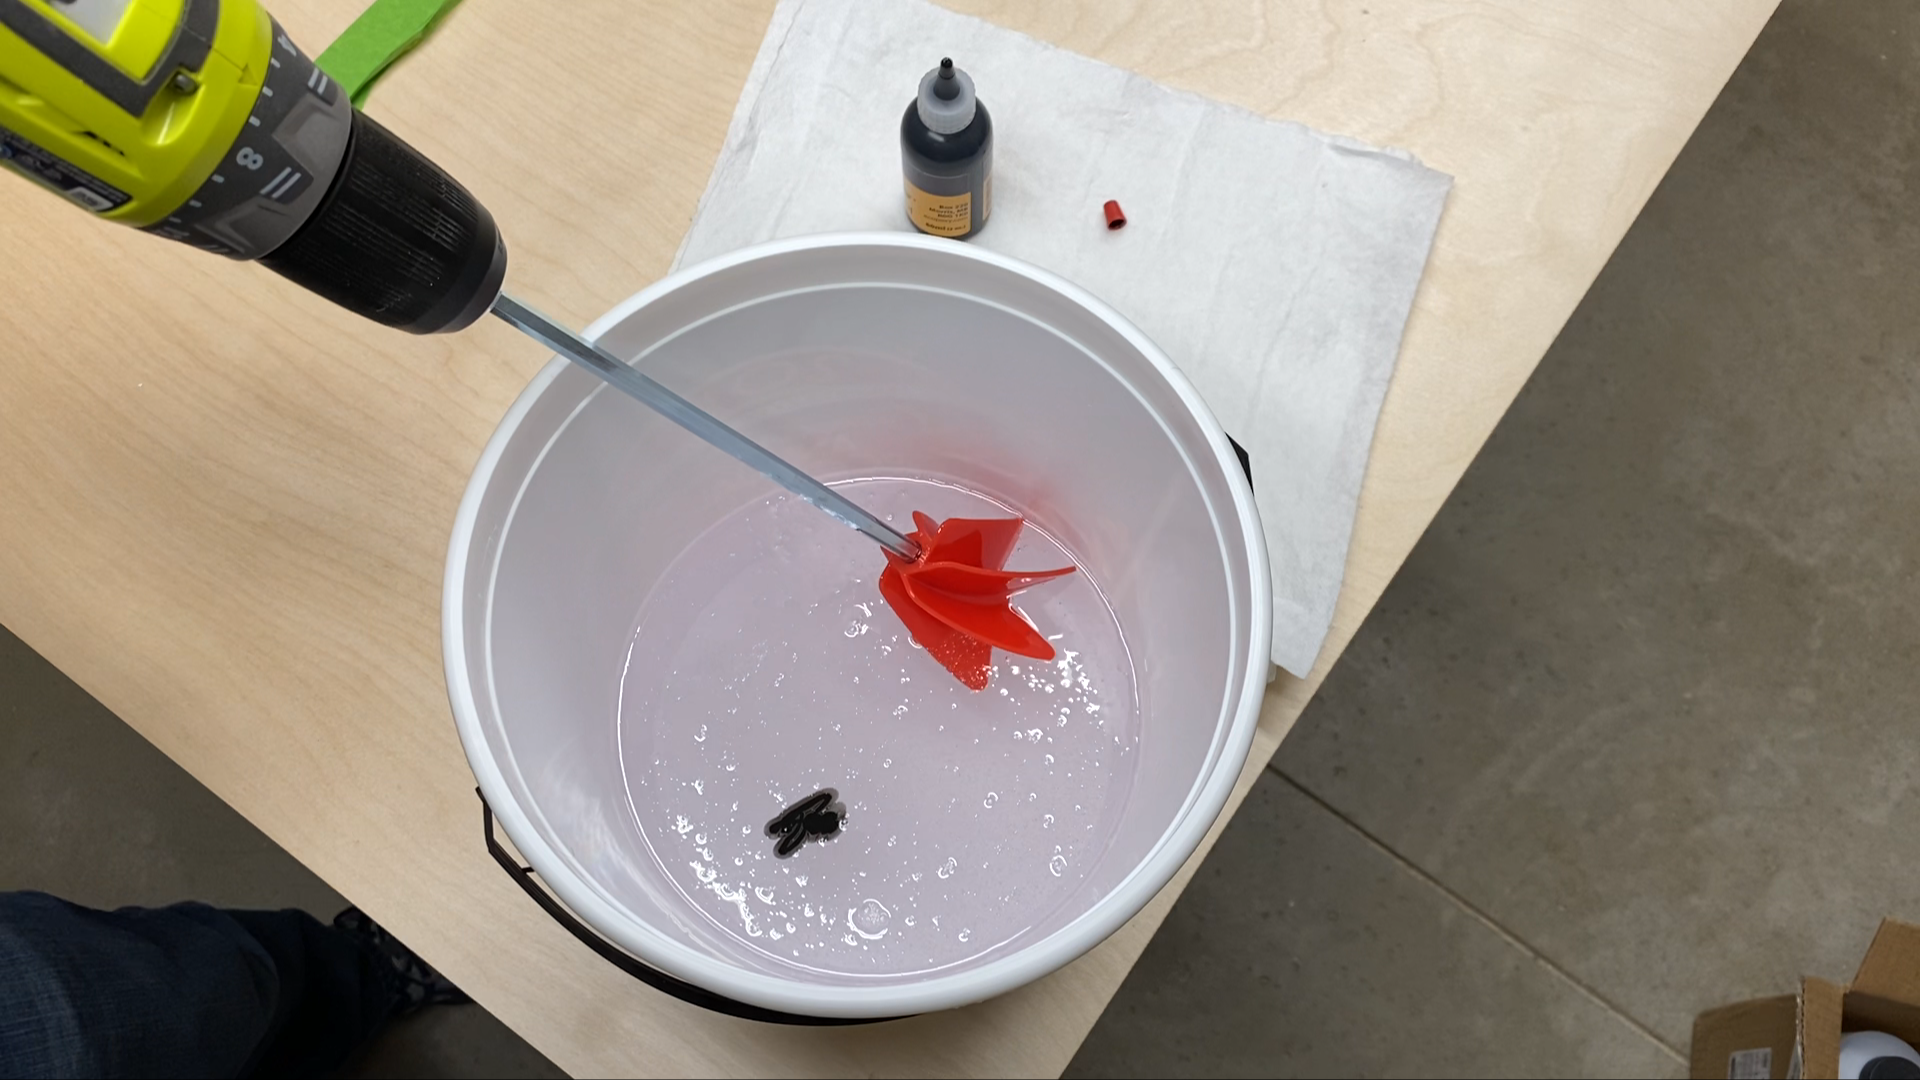
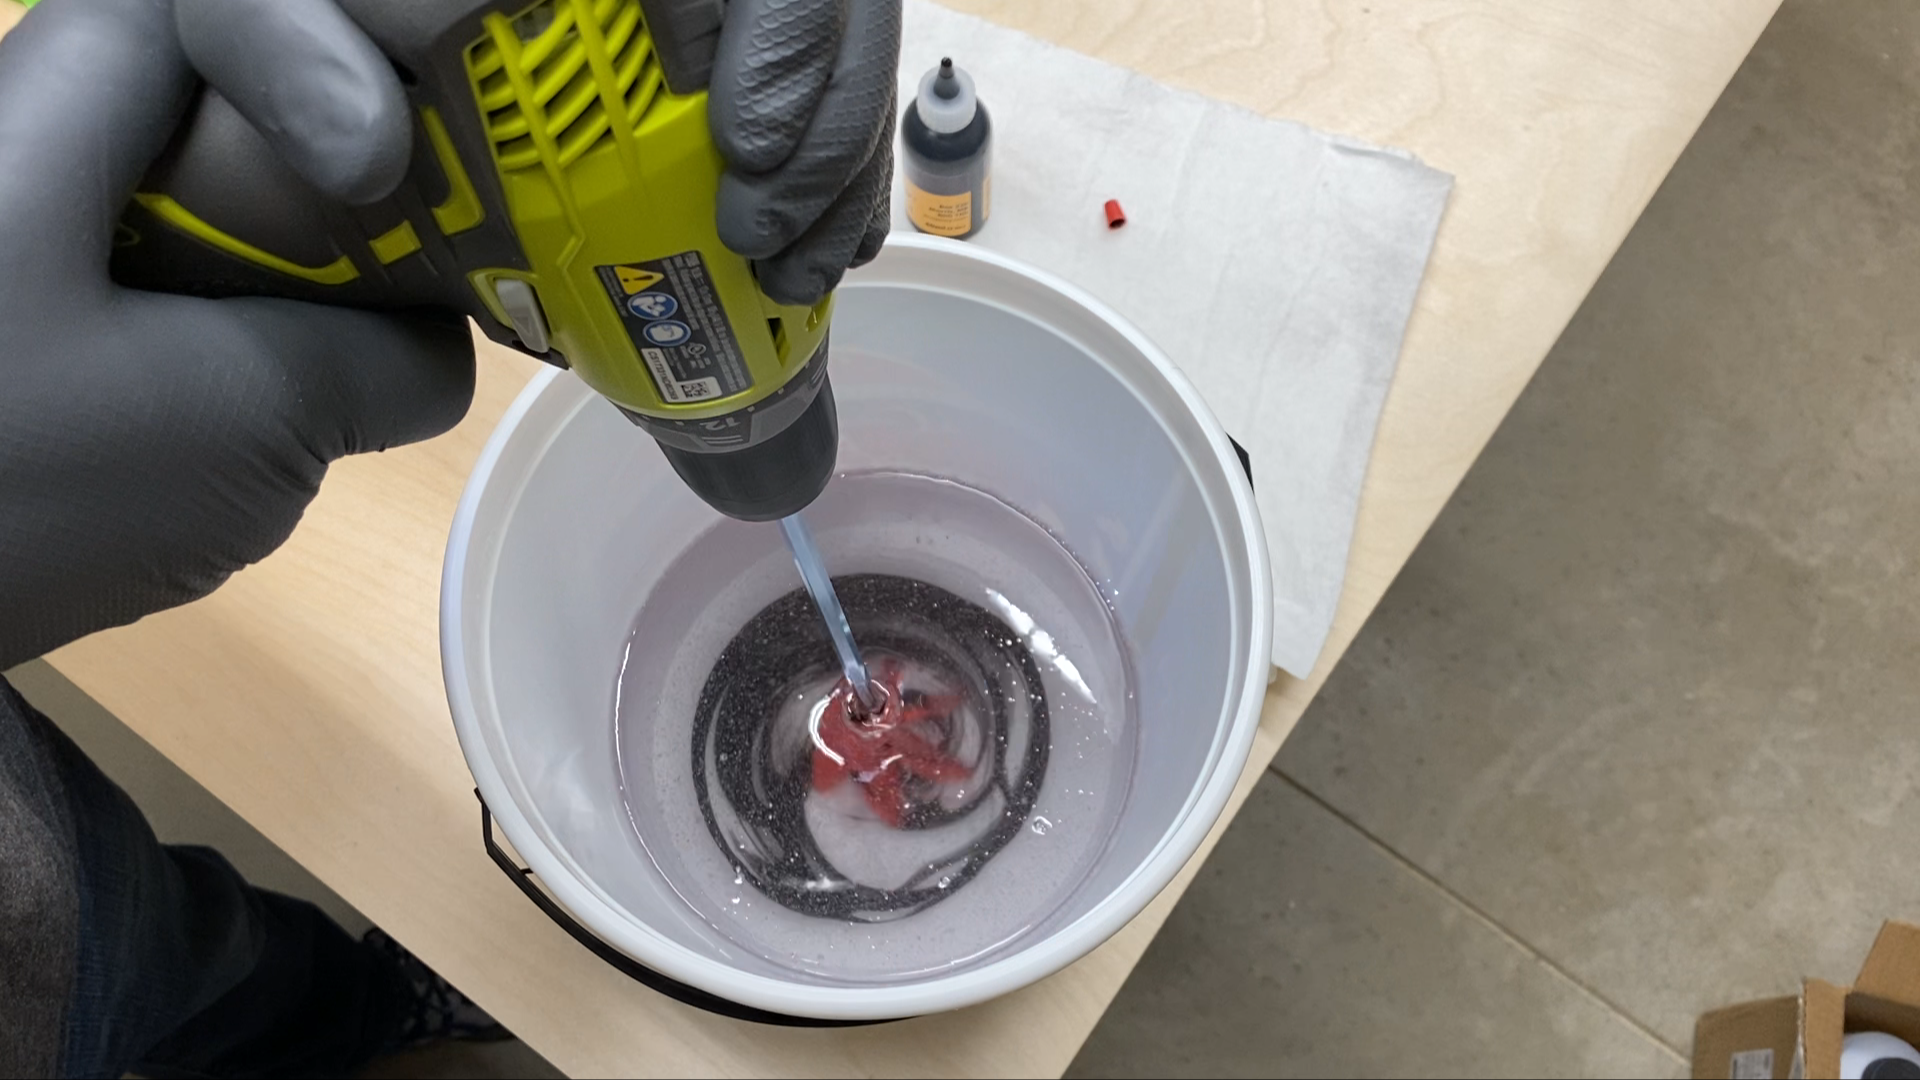
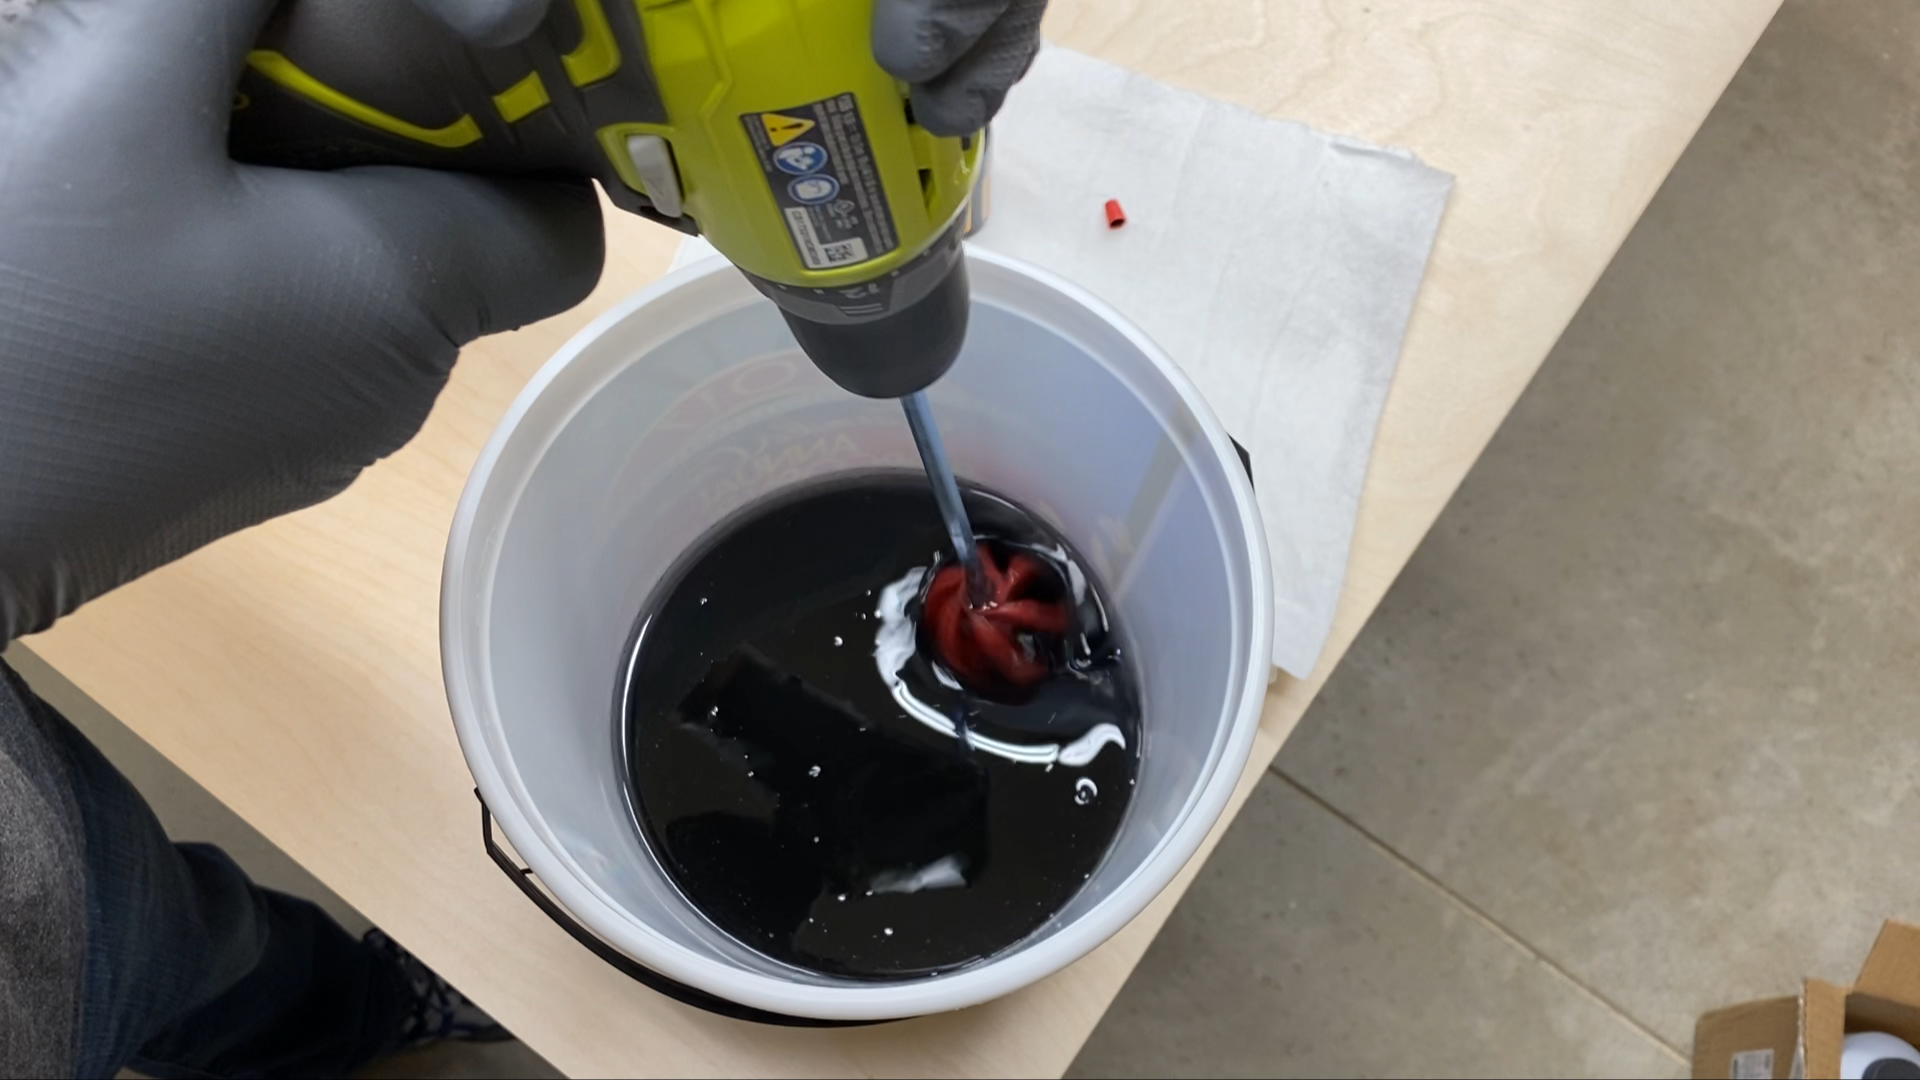
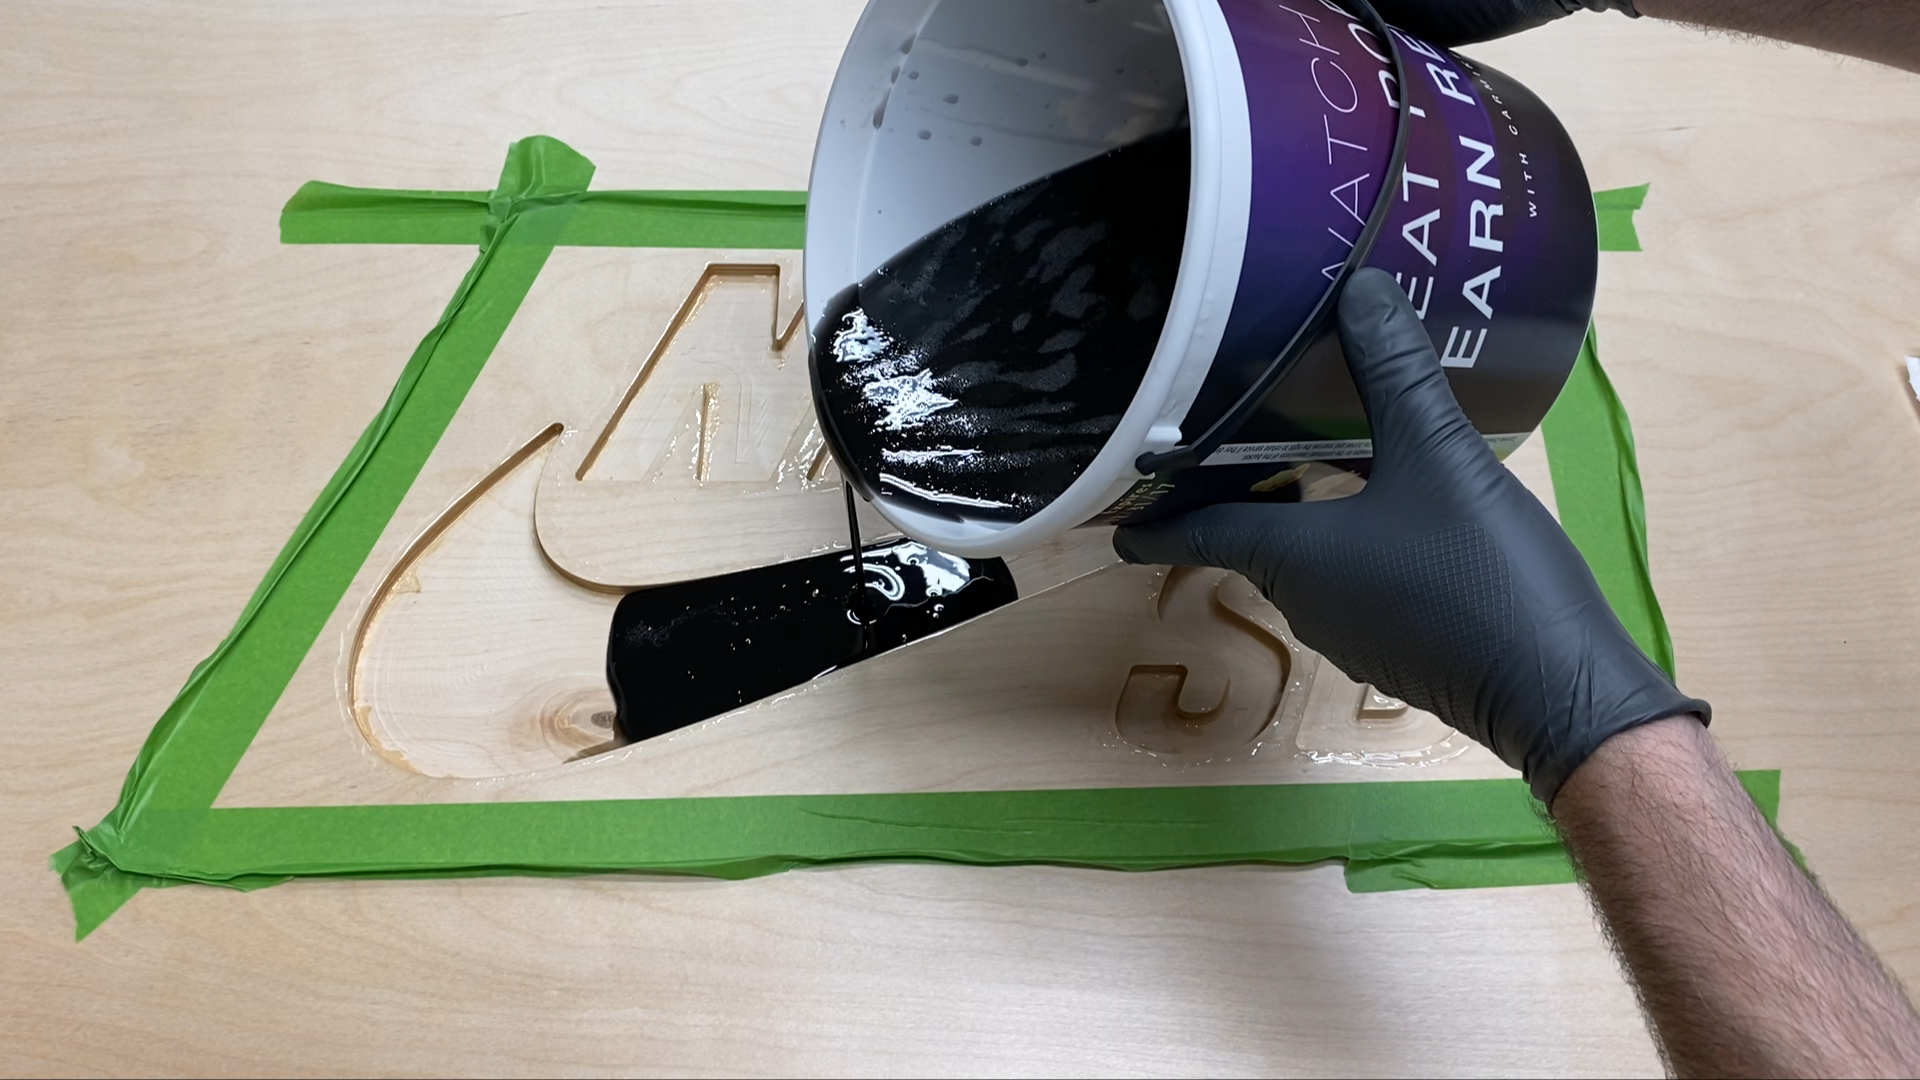
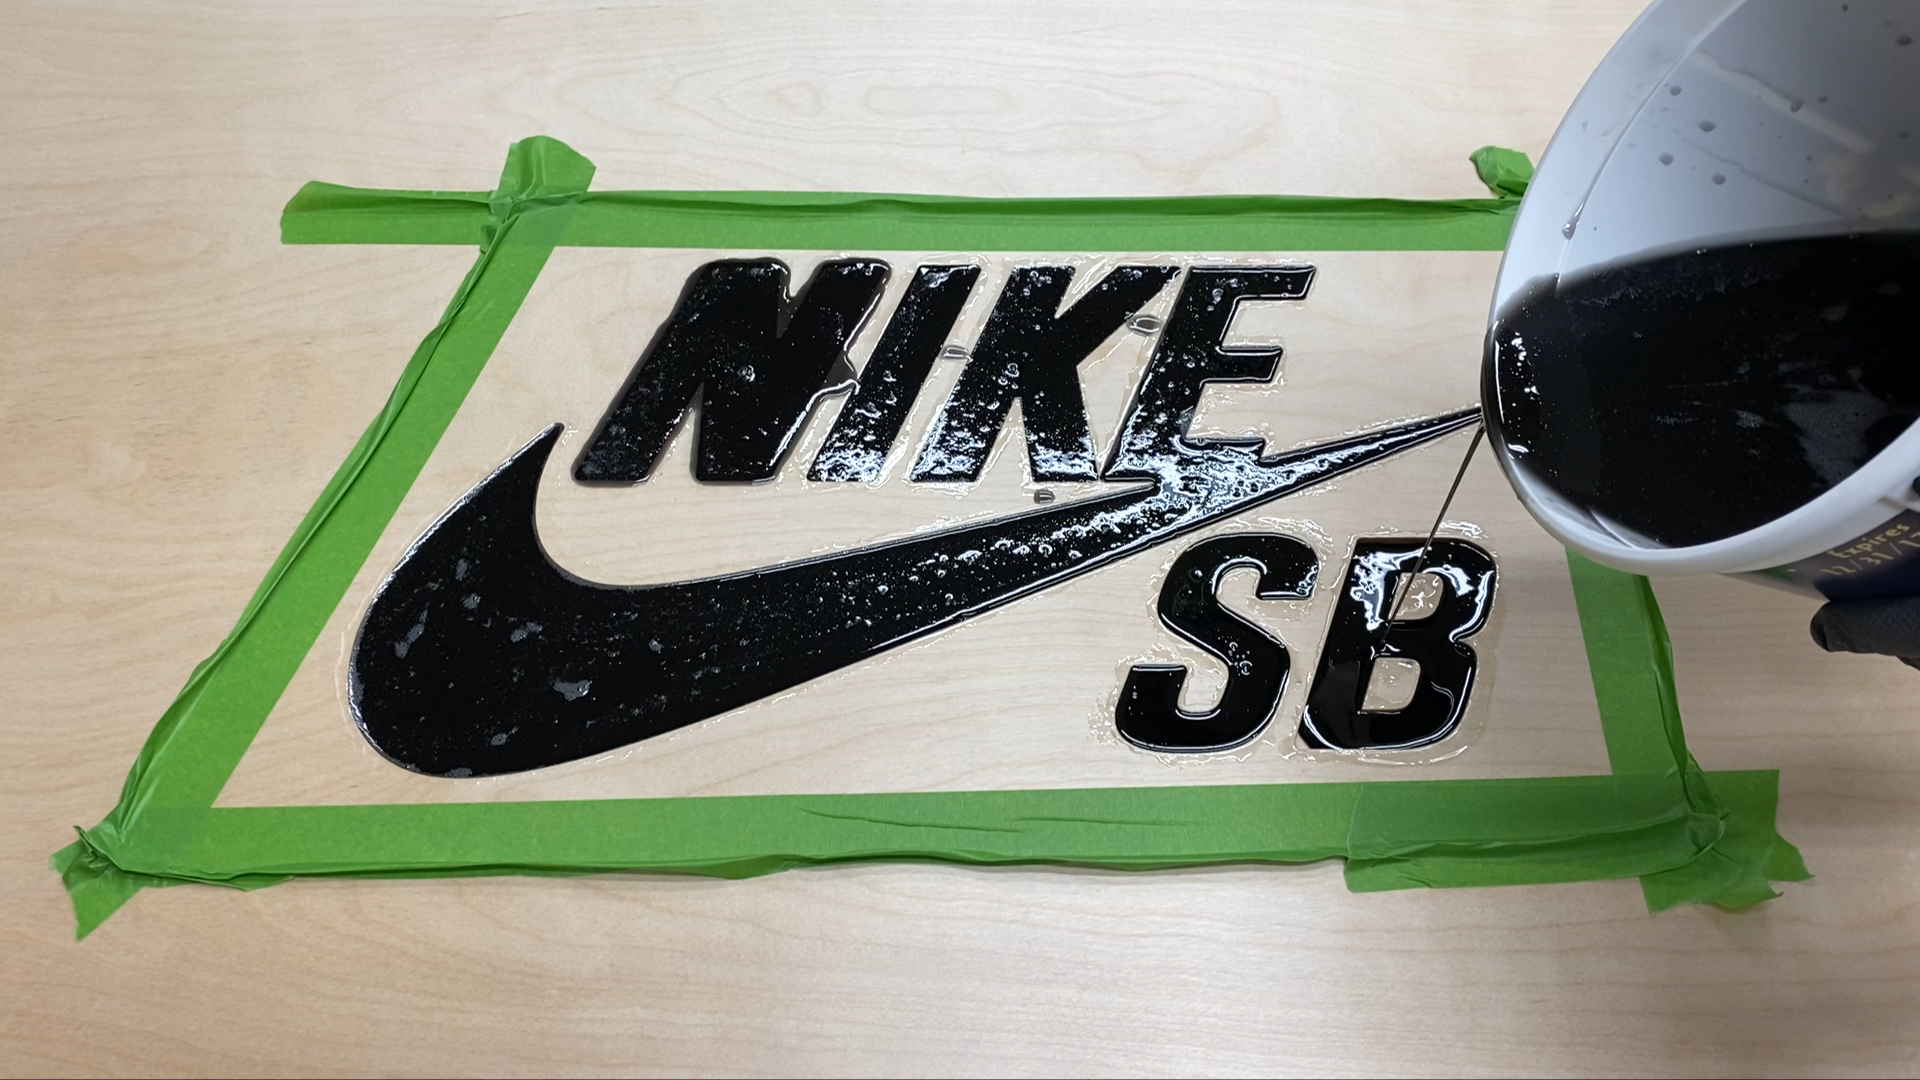
Step 4: Mix and Pour Epoxy
Next was the step I was most excited and most nervous about. It was time to pour the epoxy!
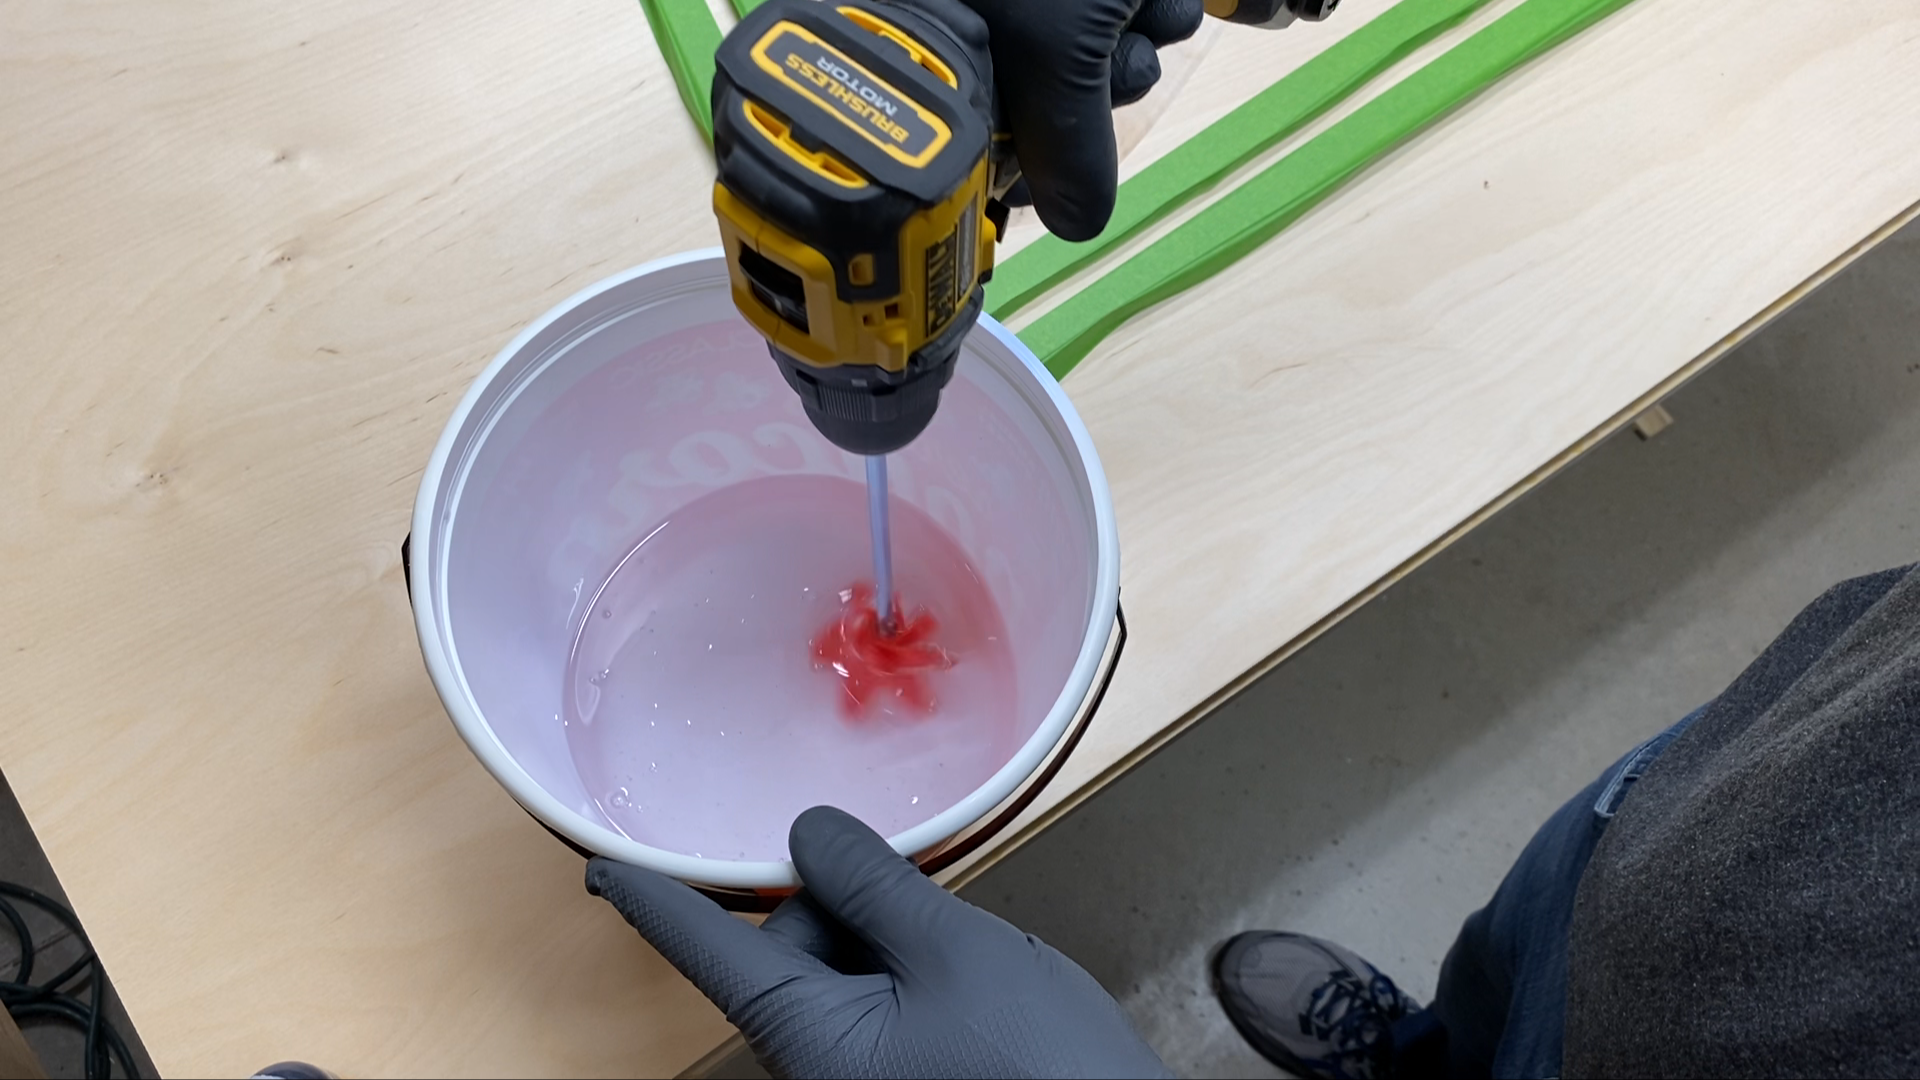
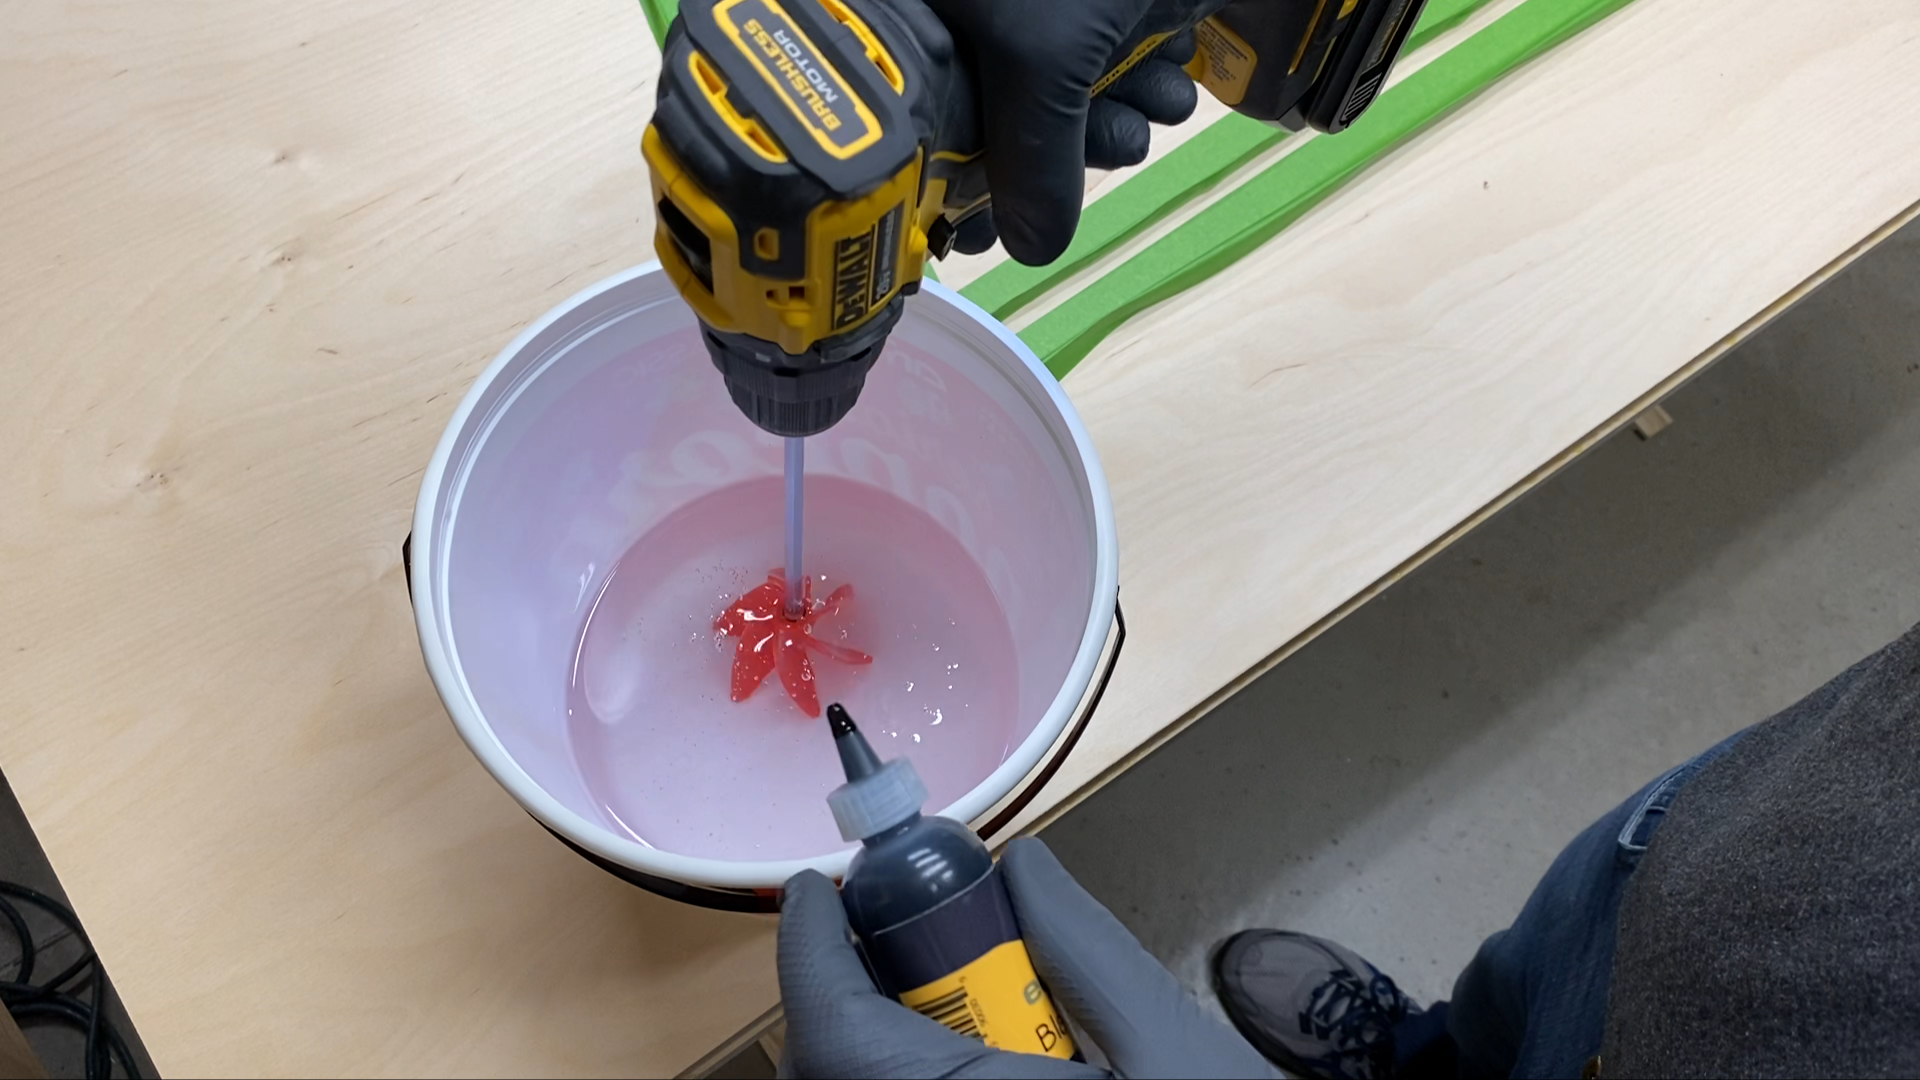
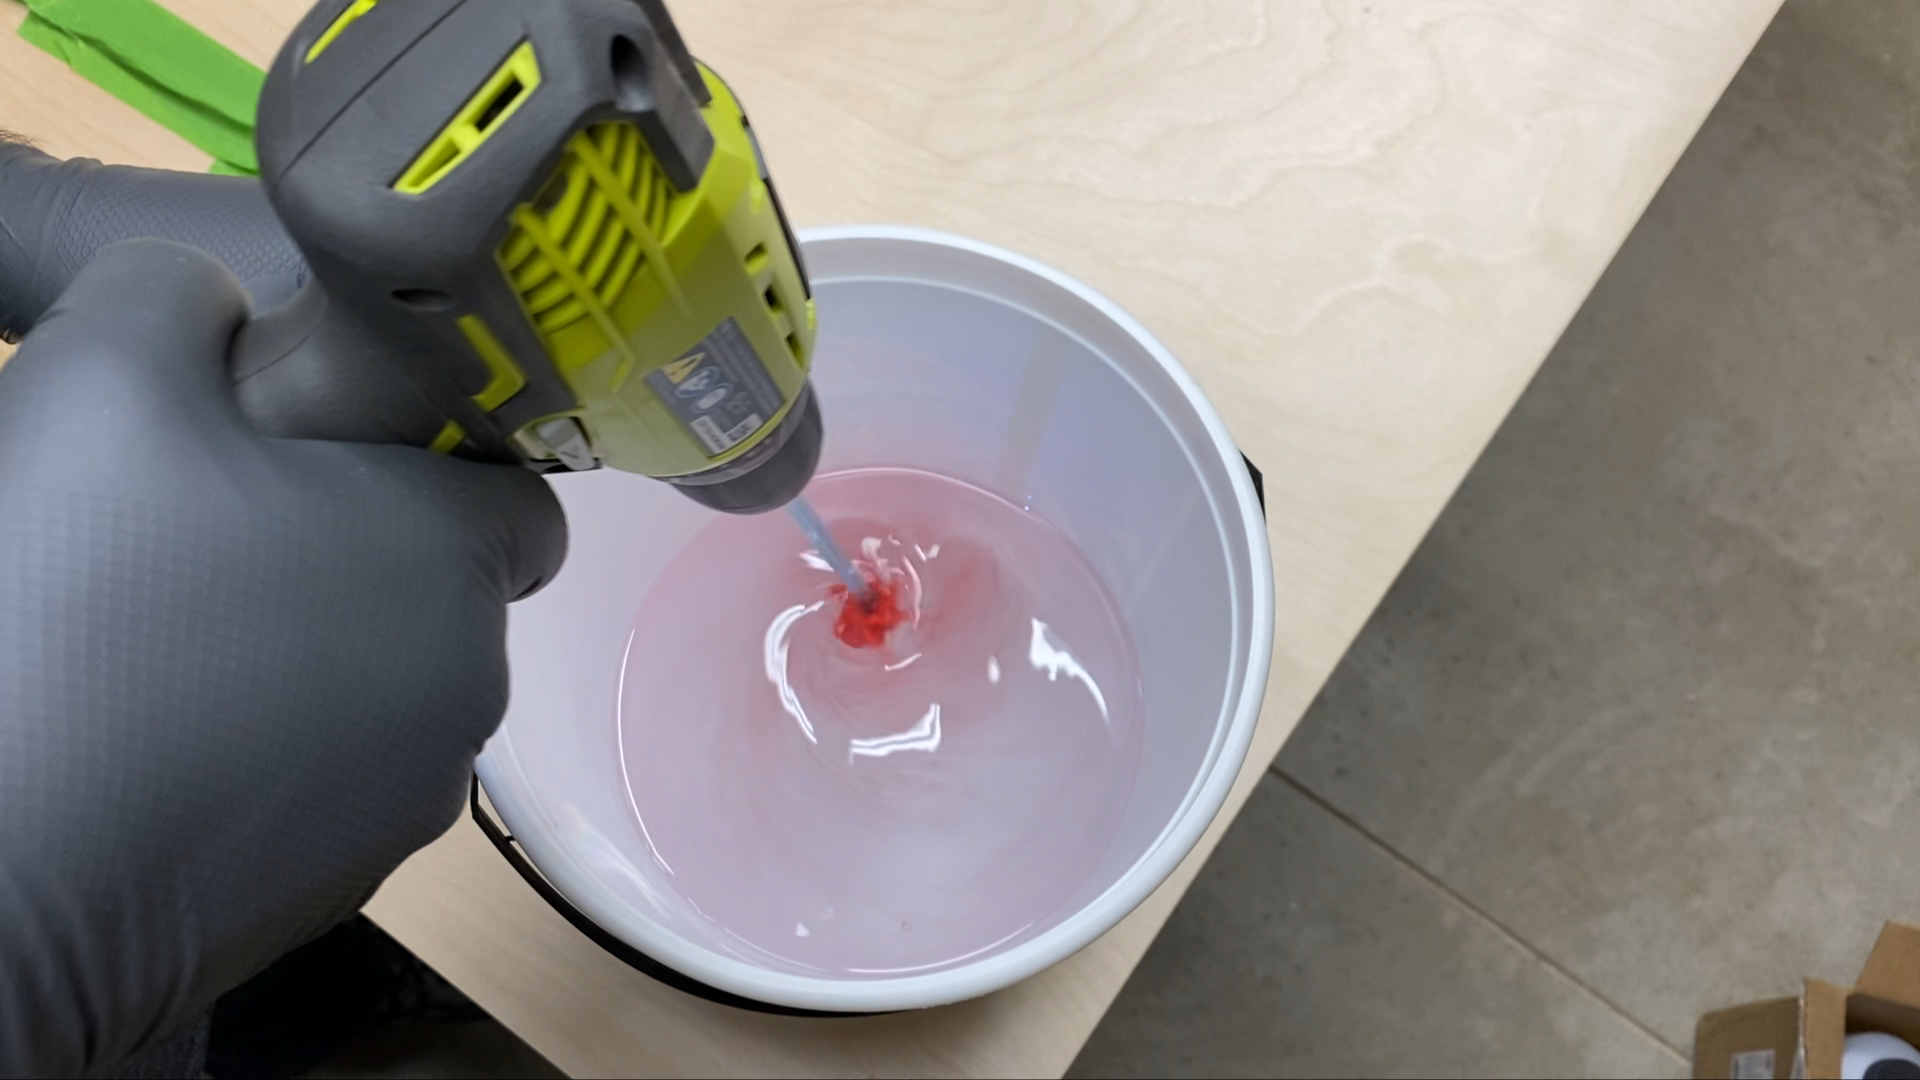
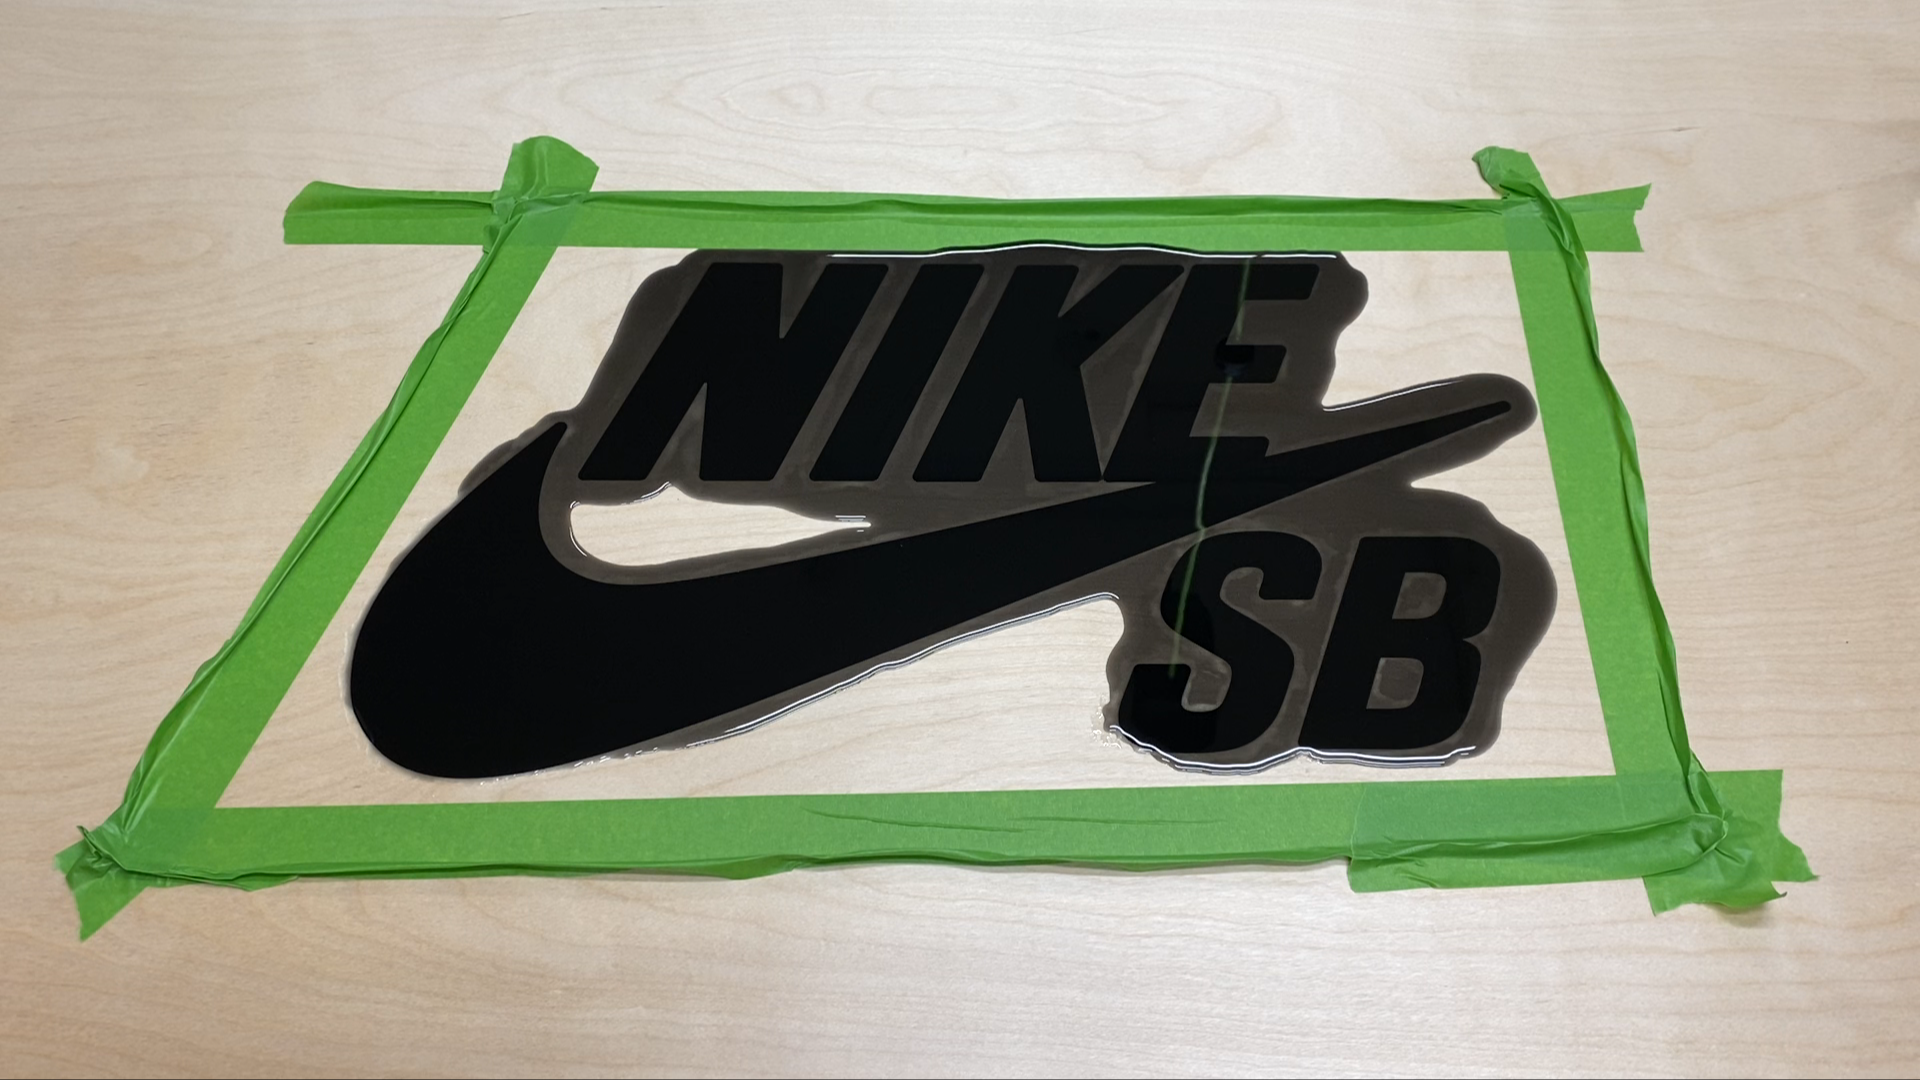
The owner of Subsect Skateshop wanted the logo to be completely black so I mixed up the Total Boat epoxy with some black liquid pigment. I used a drill with a mixer to get the two parts of the epoxy mixed well and then mixed in the pigment.
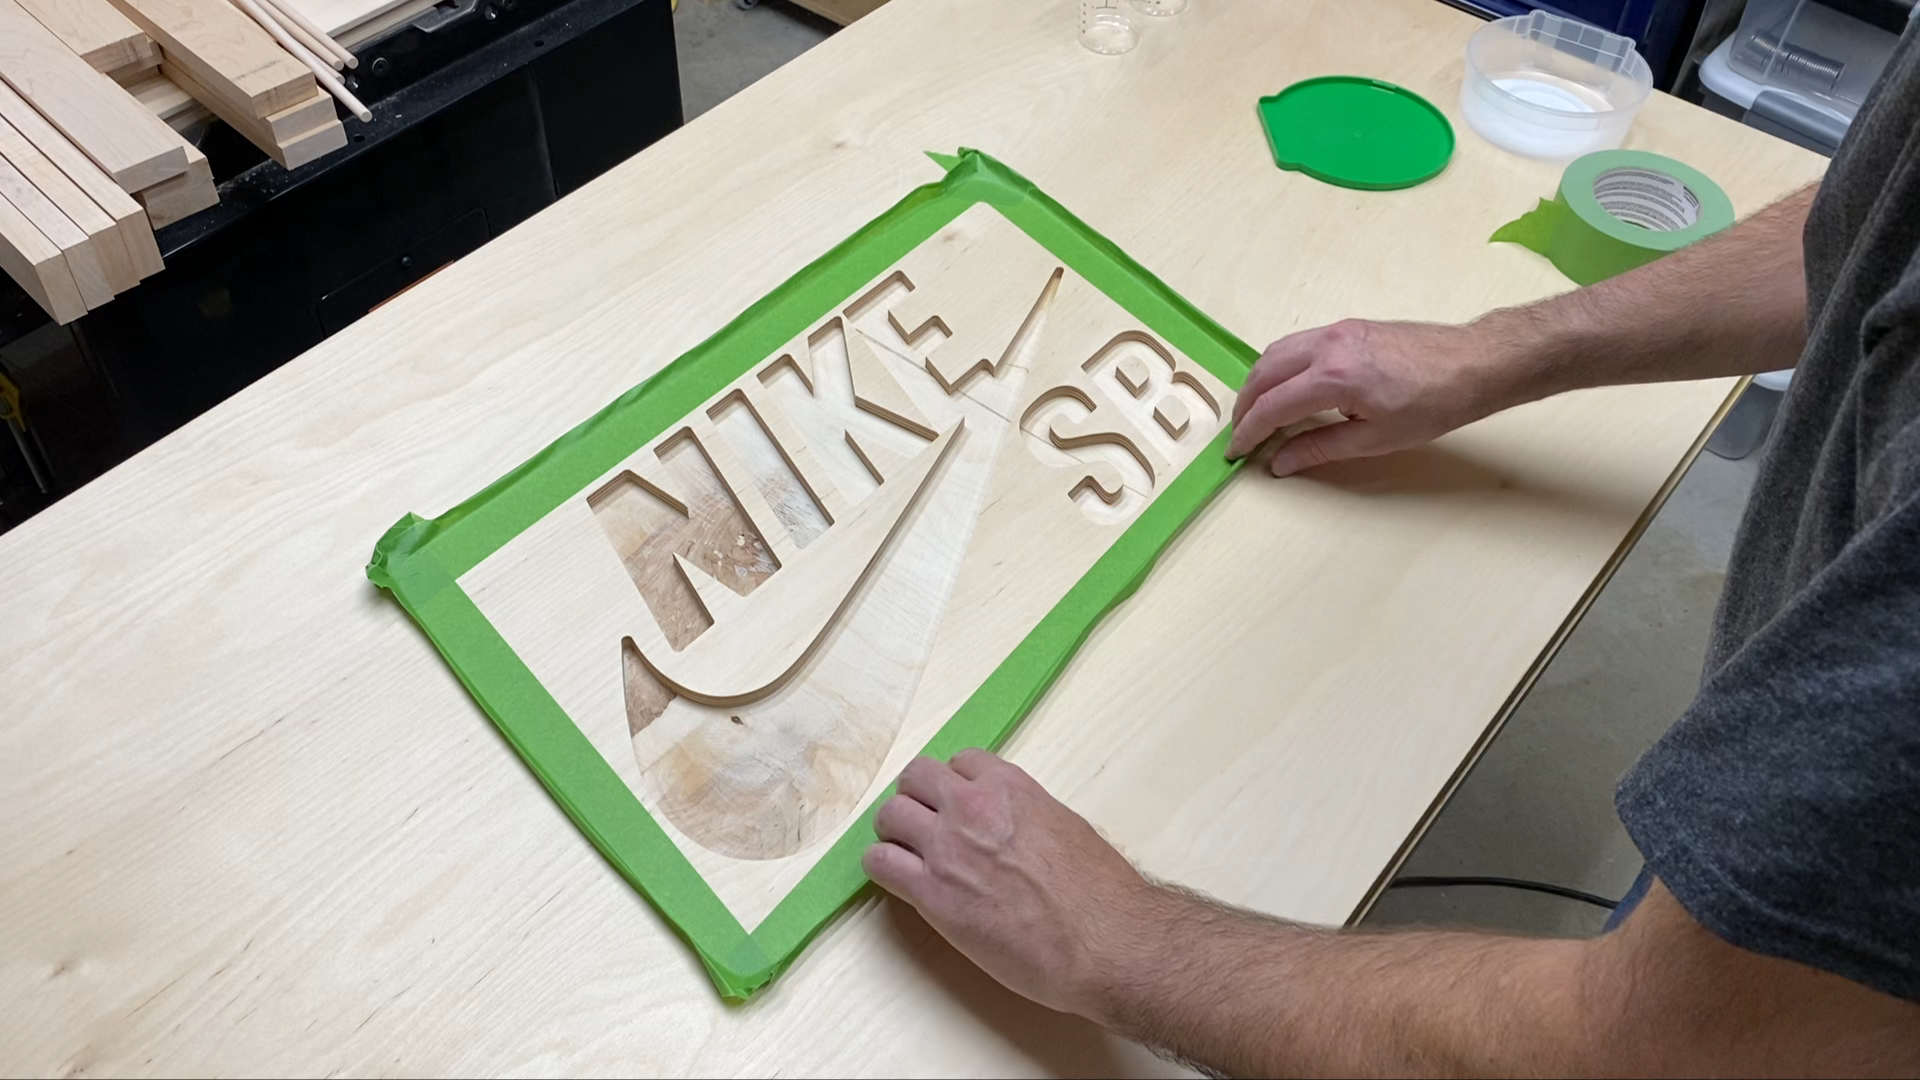
Before I mixed everything I added a couple rows of frog tape around the perimeter of the logo so the epoxy would not run out of the logo area on the plywood.
Make sure you have your material on a level surface so you don't end up with the epoxy running to one side of the logo.
Since this is slow setting epoxy I had to wait a few days before moving on to the next steps.
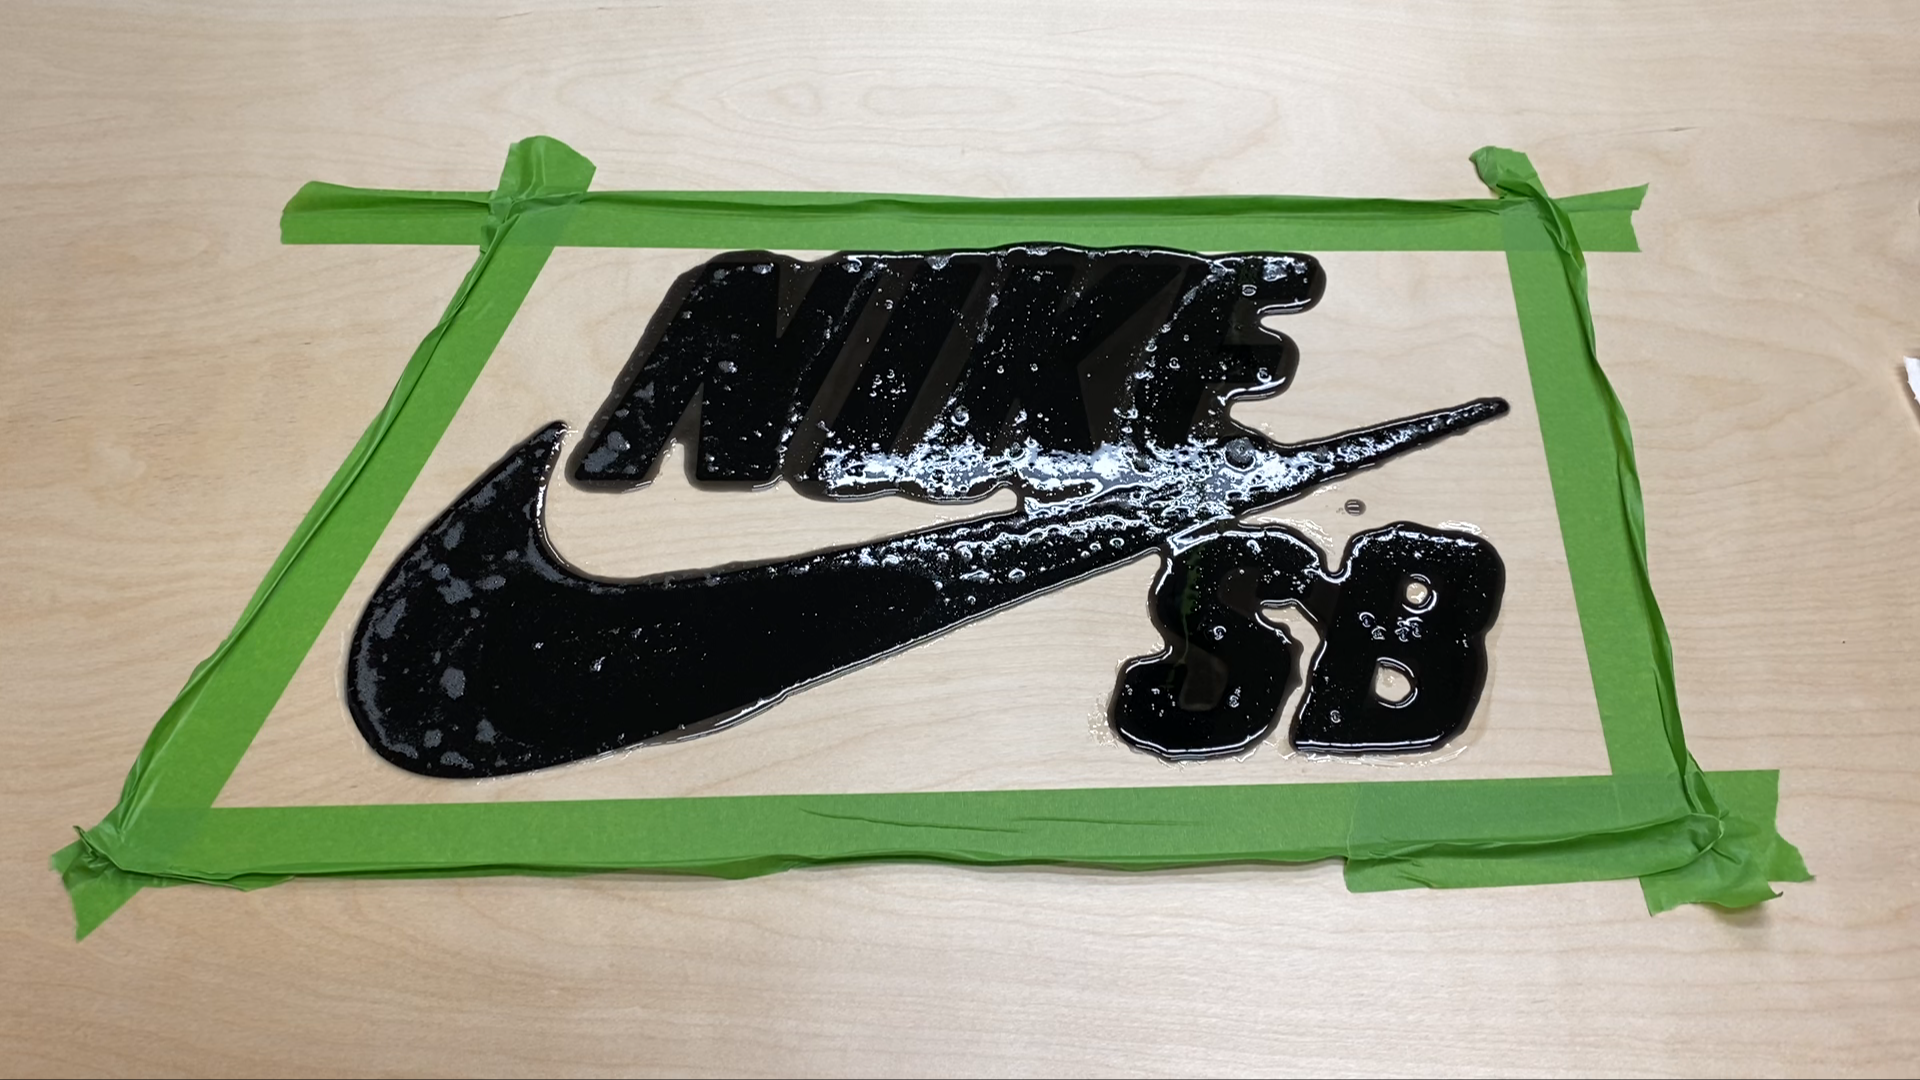
Step 5: Remove Excess Epoxy
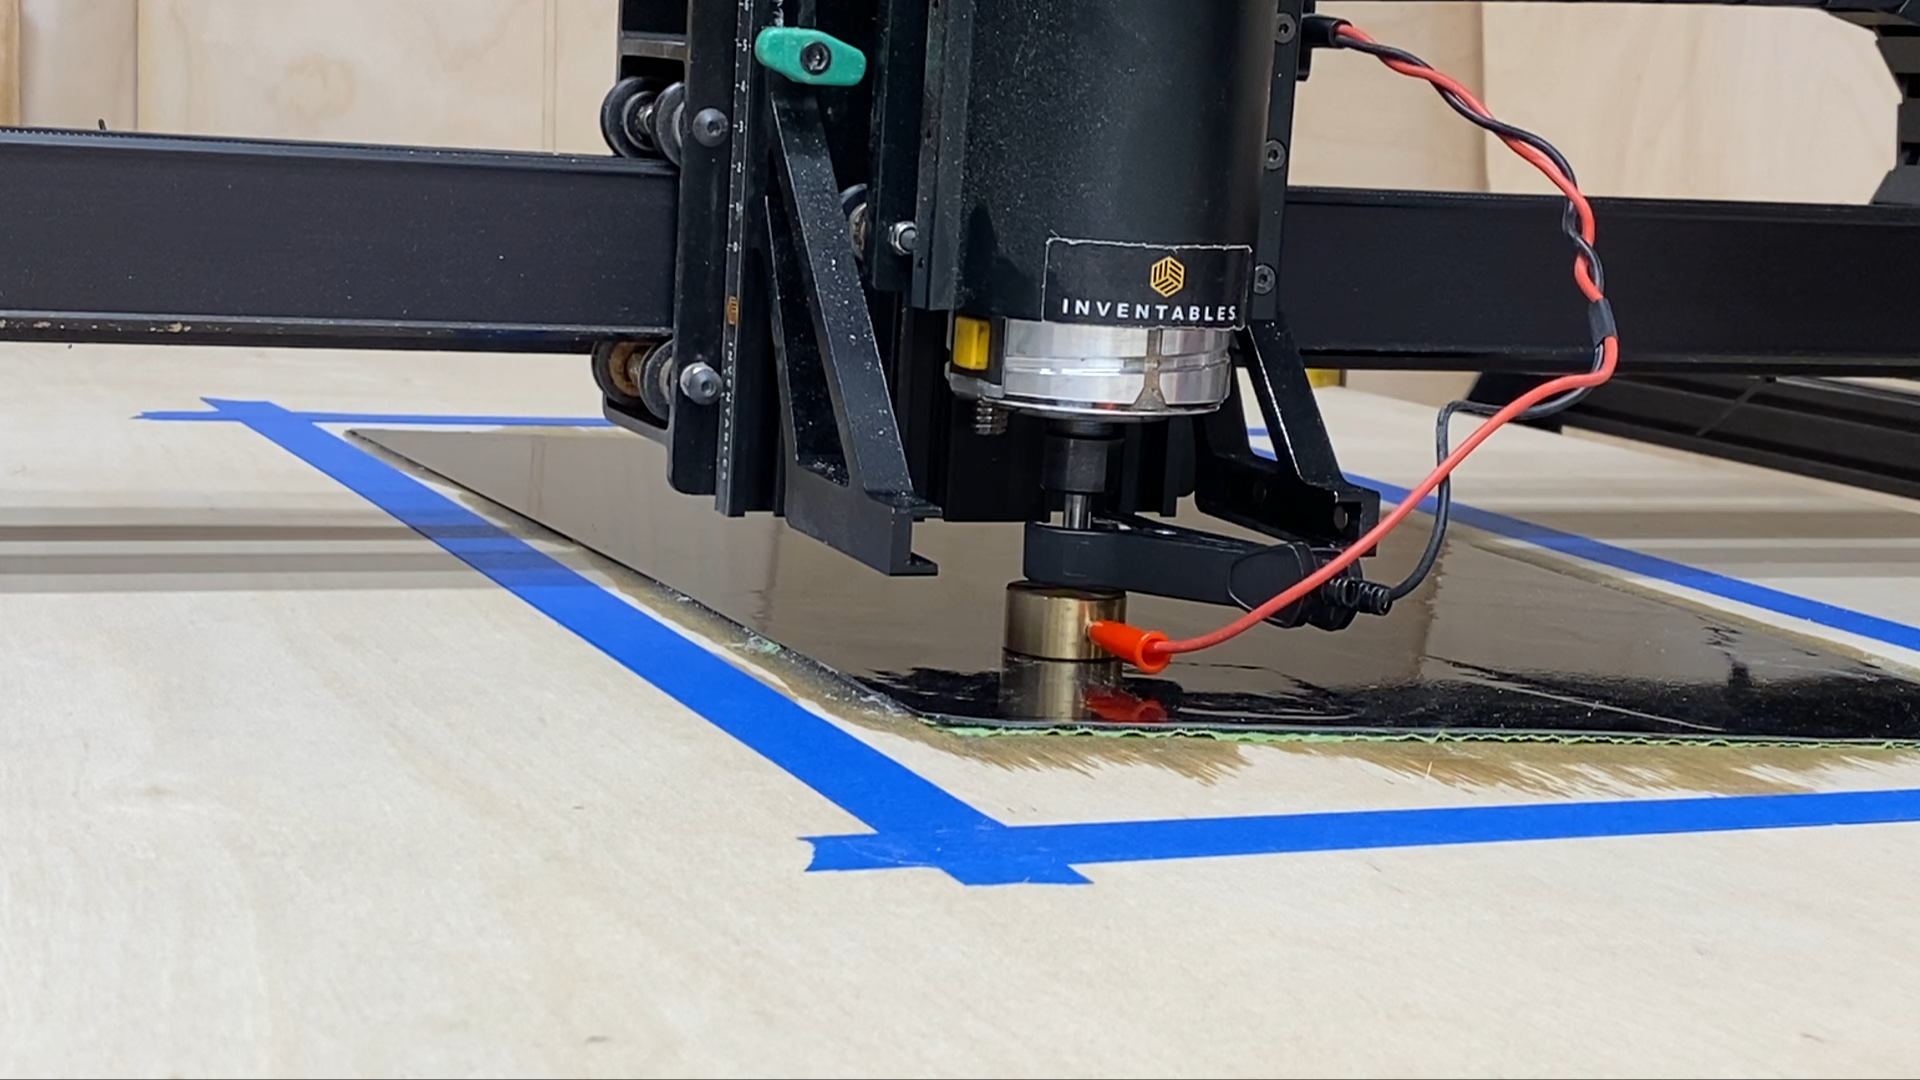
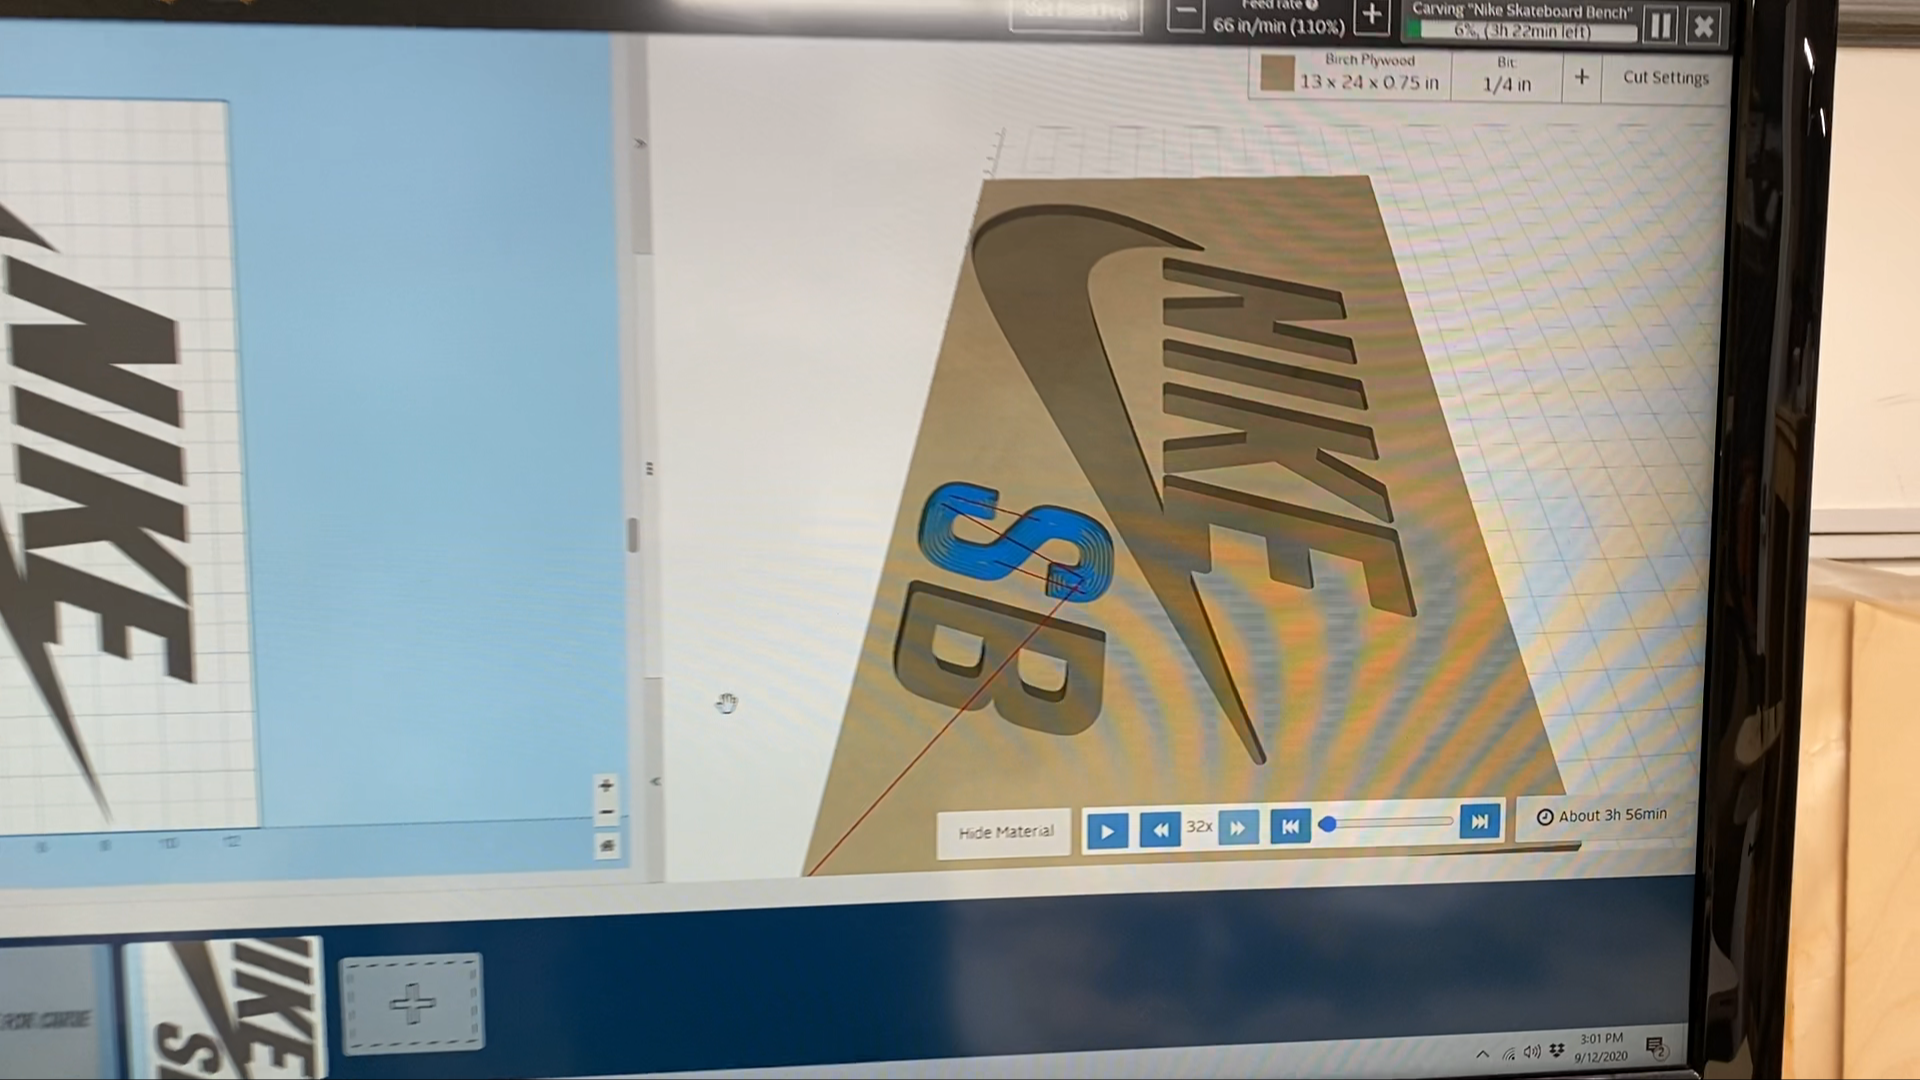
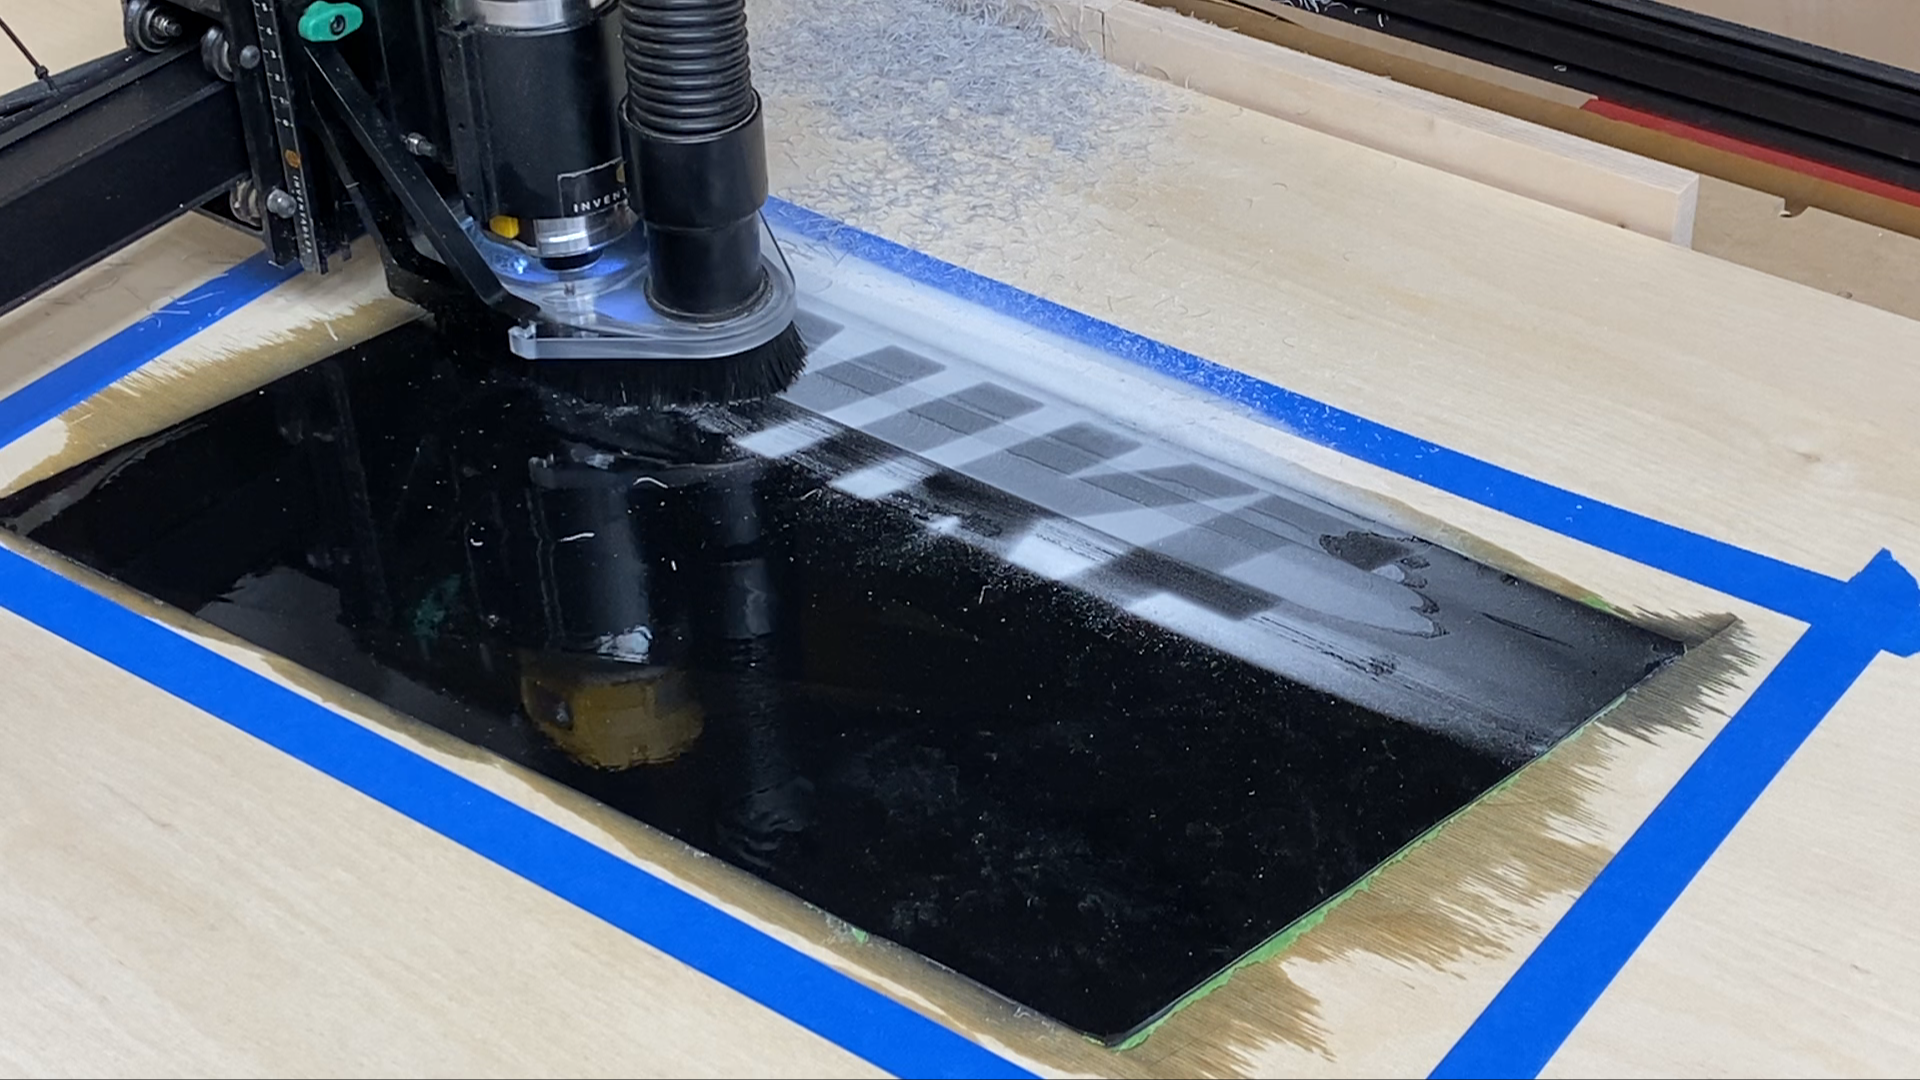
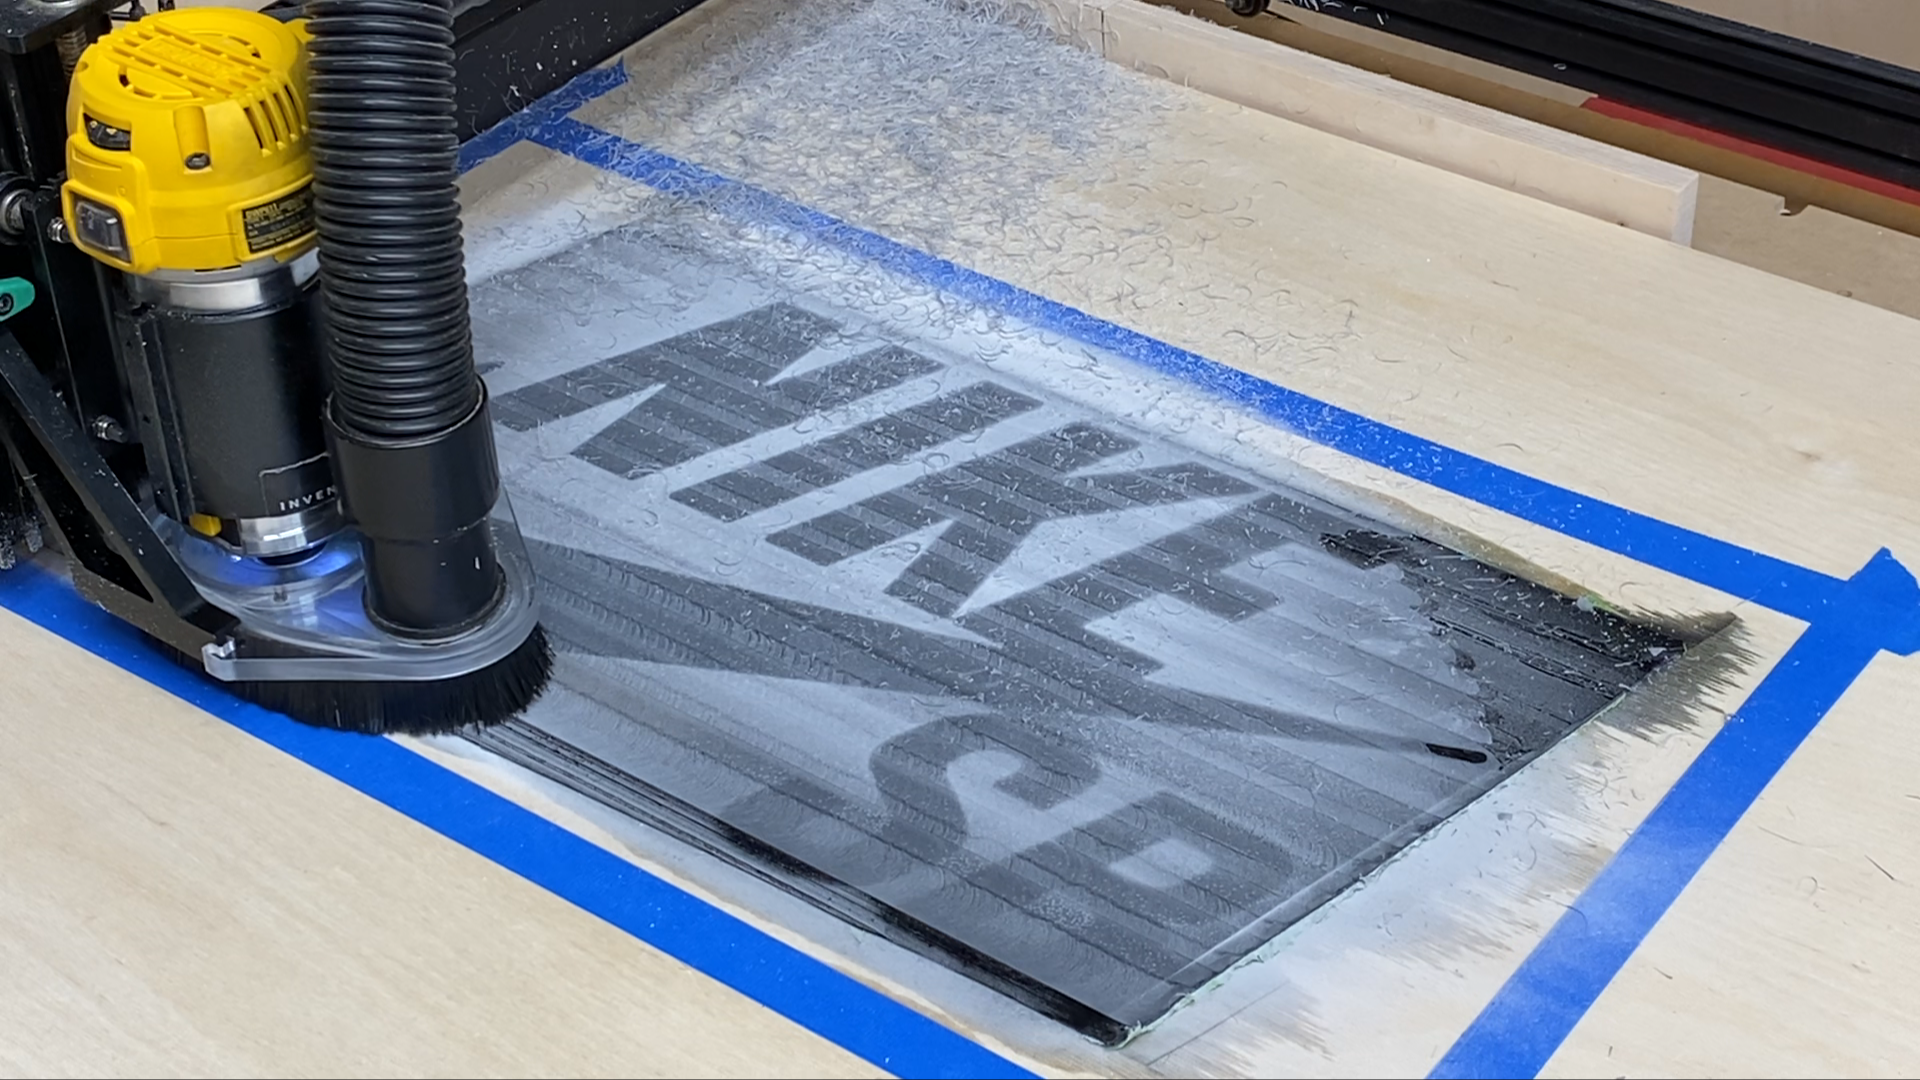
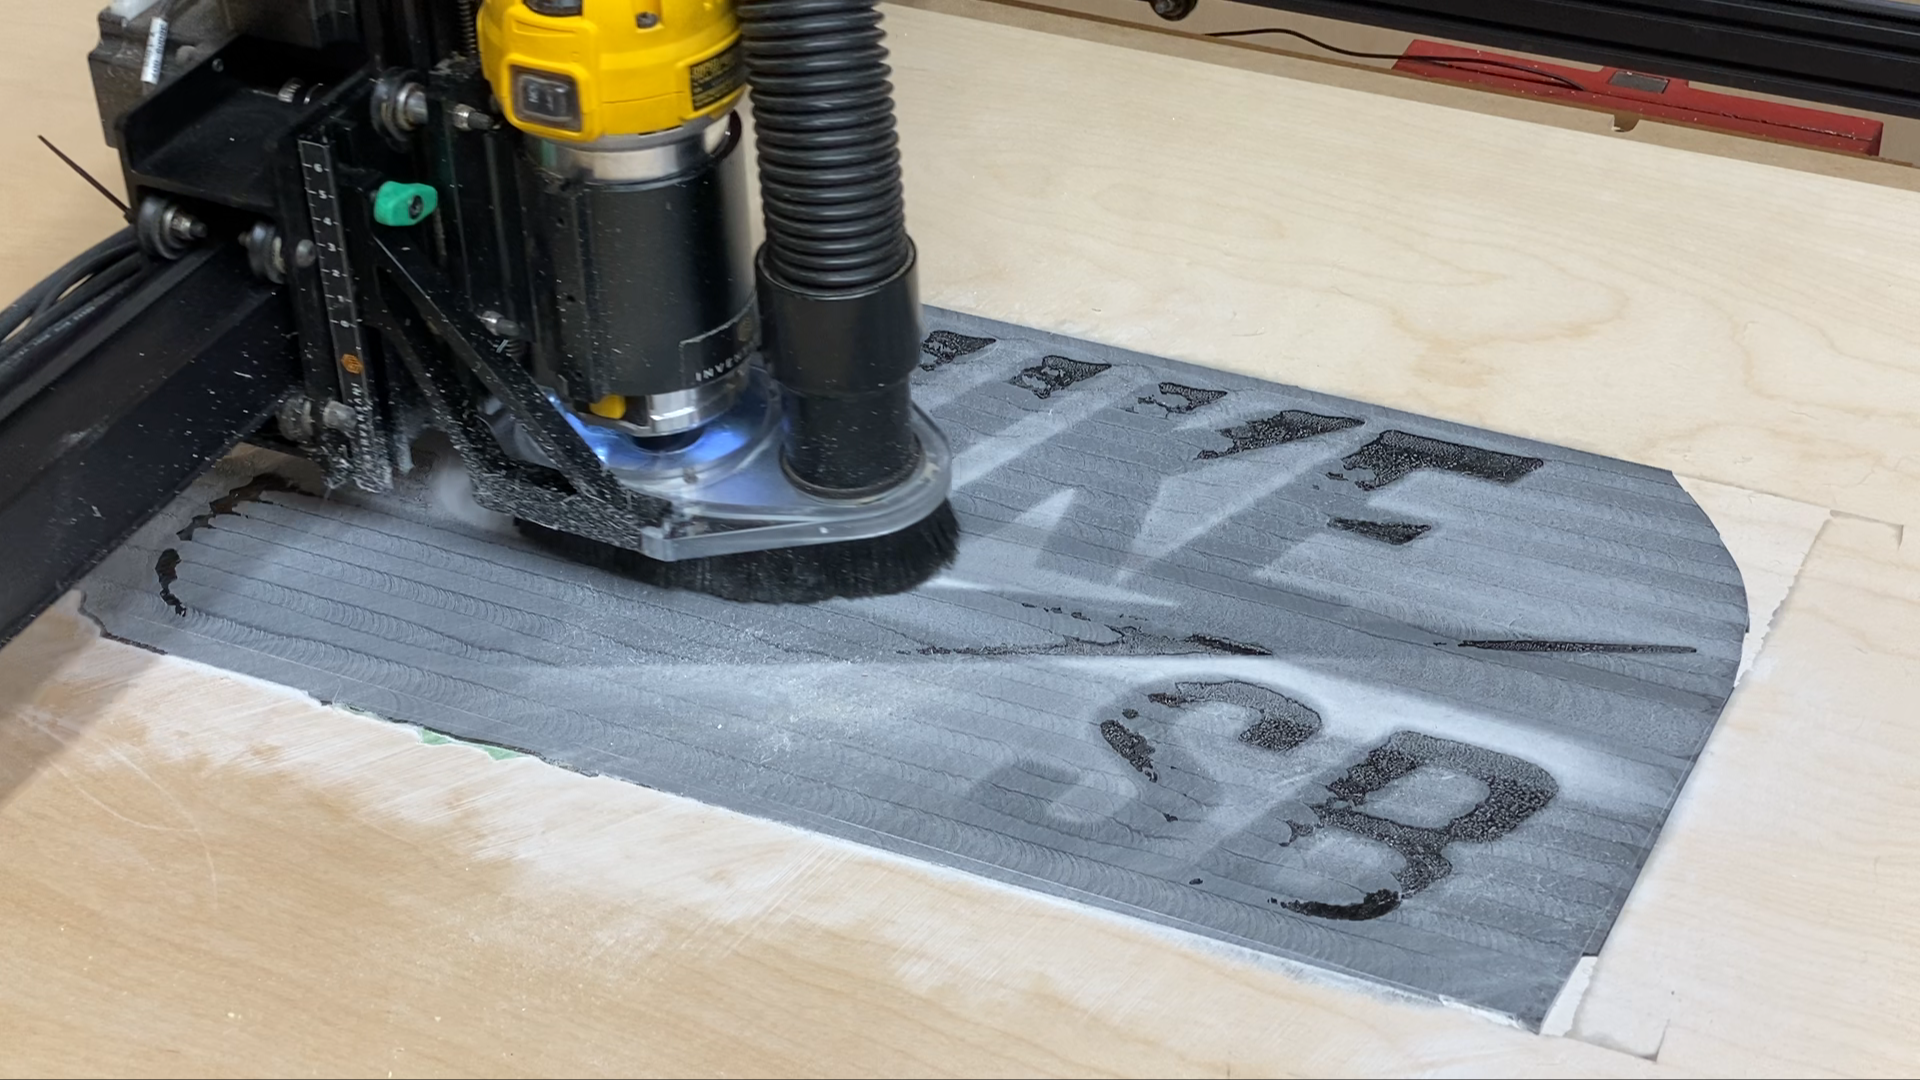
I had poured the epoxy a little above the surface of the plywood so that after it cured I could remove the excess and have a nice, flush surface. In order to remove the excess epoxy I put the bench top back in the CNCand used a 1" diameter flattening bit to remove most of the extra material. I removed the epoxy 0.01" per pass to make sure I didn't go through the surface of the plywood. I watched the thickness on the edges of the epoxy and stopped the CNC when it got close.
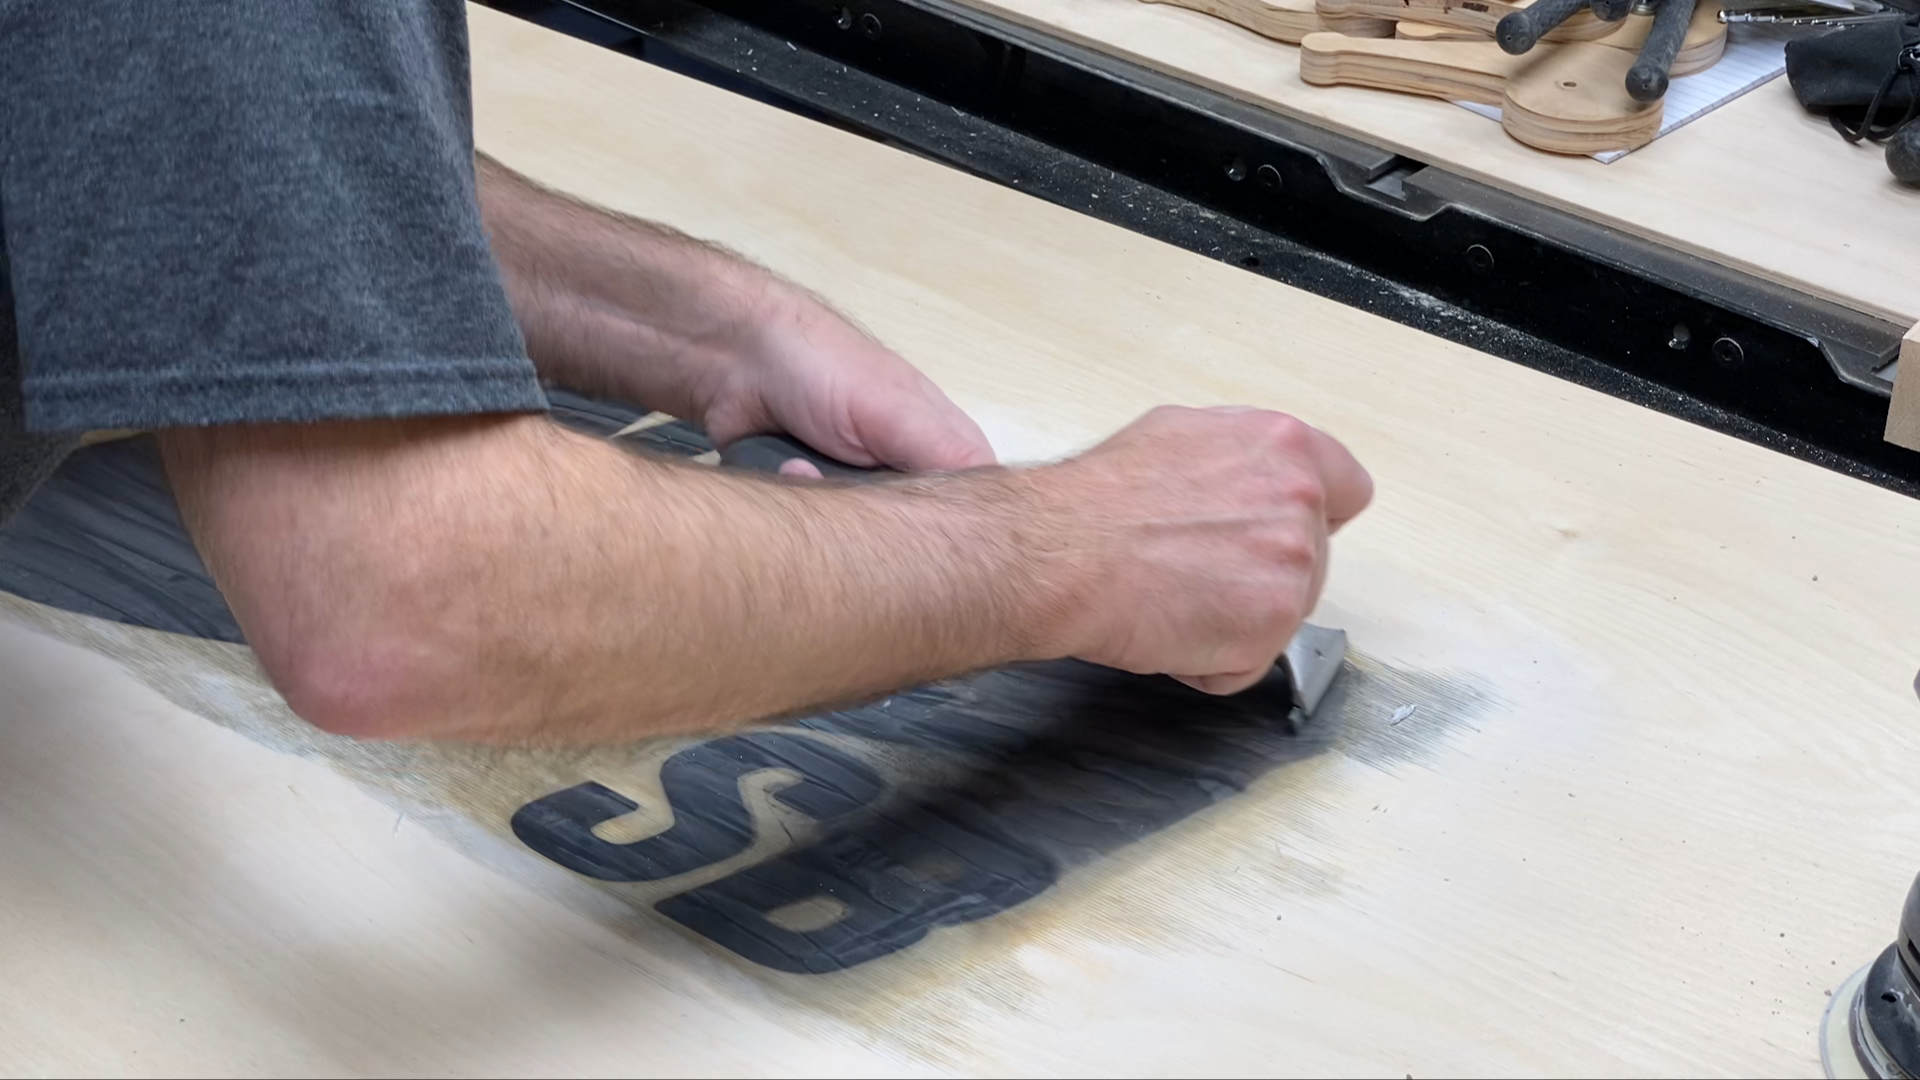
Next I removed the remaining epoxy with a random orbit sander and also a scraper.
Unfortunately I determined that the liquid tint in the epoxy actually penetrated into the surface of the plywood and stained the entire logo area. This was completely my fault for not reading the directions and recommendations from Totalboat. The epoxy did exactly what it was supposed to do. I just didn't use it correctly.
I decided it was time to start over and modify how I did things to seal up the surface of the bench and the sides of the logo and letters.
It was time for a test before starting over.

Step 6: Test Piece to Seal Letters
I decided to run a test on a sample letter before I carved the logo in another 30' x 60" piece of plywood. This time I decided to seal the surface of the plywood and also the inside edges of the letters.
I put three coats of water based polycrylic on the surface of the plywood before cutting the test letter on the CNC.
After carving the test letter I put a thick coat of 5-minute epoxy on the inside edge of the letter making sure to overlap with the top surface polycrylic coat so no epoxy would seep through that edge. I did this from the top left of the letter to the bottom right.
I poured what I thought was the same density of black liquid pigment in the epoxy and overfilled the letter so the epoxy was above the surface of the plywood. I gave this several days to cure and then ran this through my sander to remove the excess epoxy back to the surface of the plywood.
The test was a success!!! The area where I added the 5-minute epoxy to the inside edge of the test letter had no bleeding from the pigment. The area where I did not seal the inside edge of the letter had major bleeding and at one location it went up to two inches under the surface layer of polycrylic. I was shocked at how far it penetrated, but that is a testament to how great the Totalboat epoxy product is.
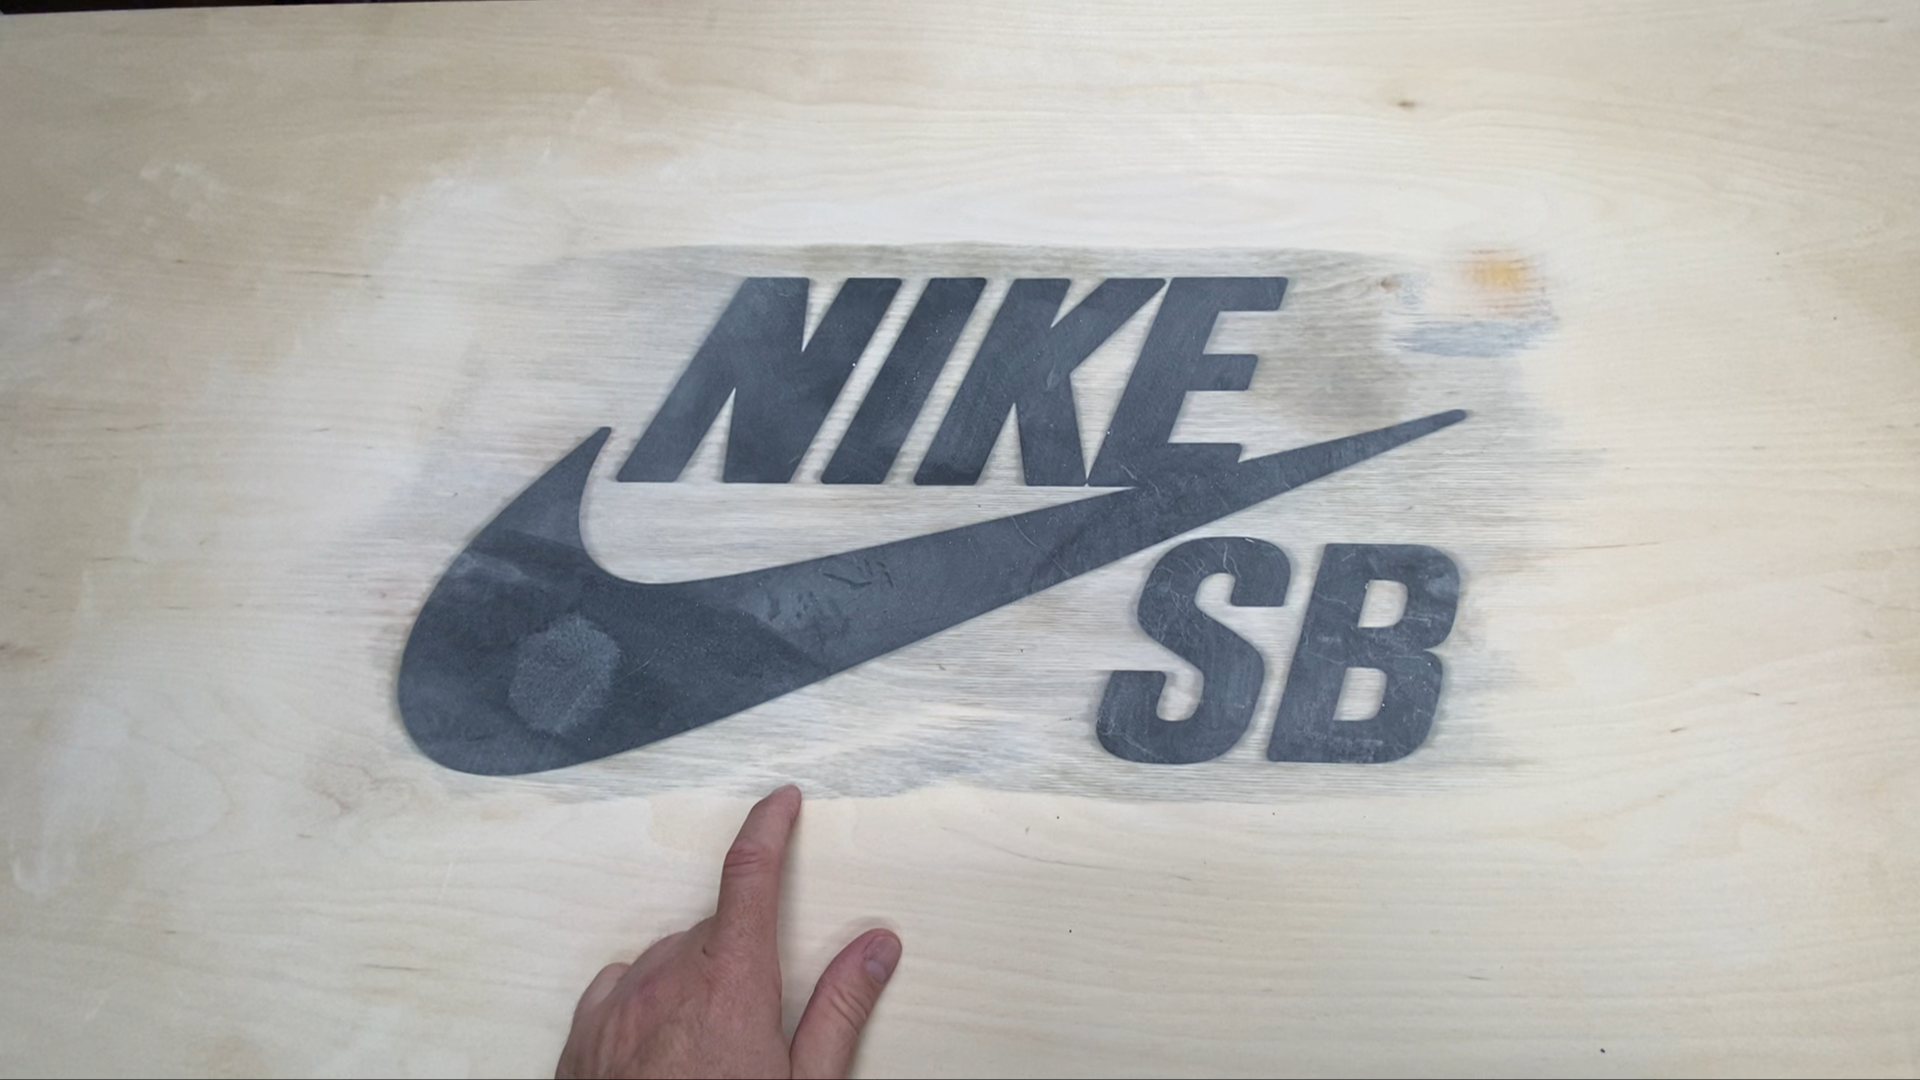

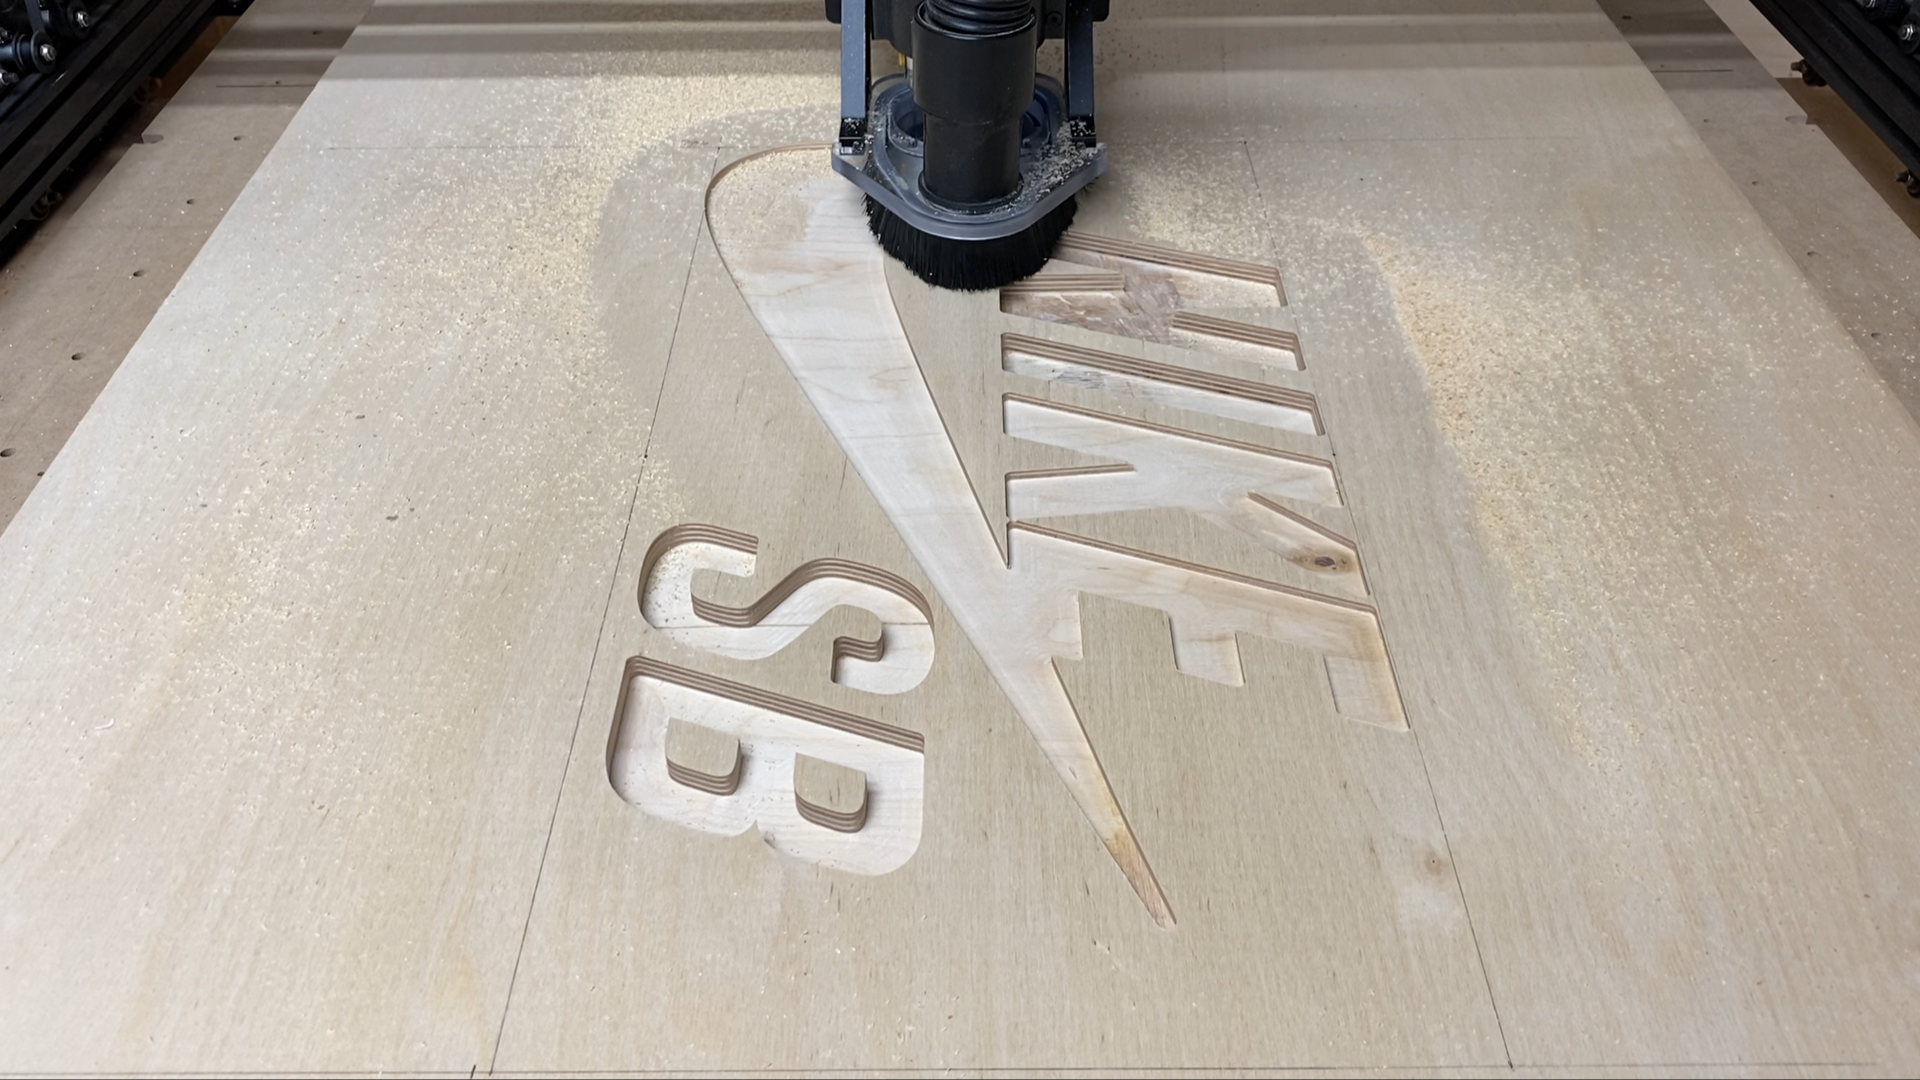
Step 7: Make a New Piece and Repeat Previous Steps
I won't repeat the previous steps for getting the logo cut in the plywood. This time I did start by adding three coats of water based polycrylic to the surface of the plywood before cutting the logo.
After cutting the logo and gluing the second piece of plywood to the bottom of the logo piece I moved on to the next step to seal the letters and the logo.
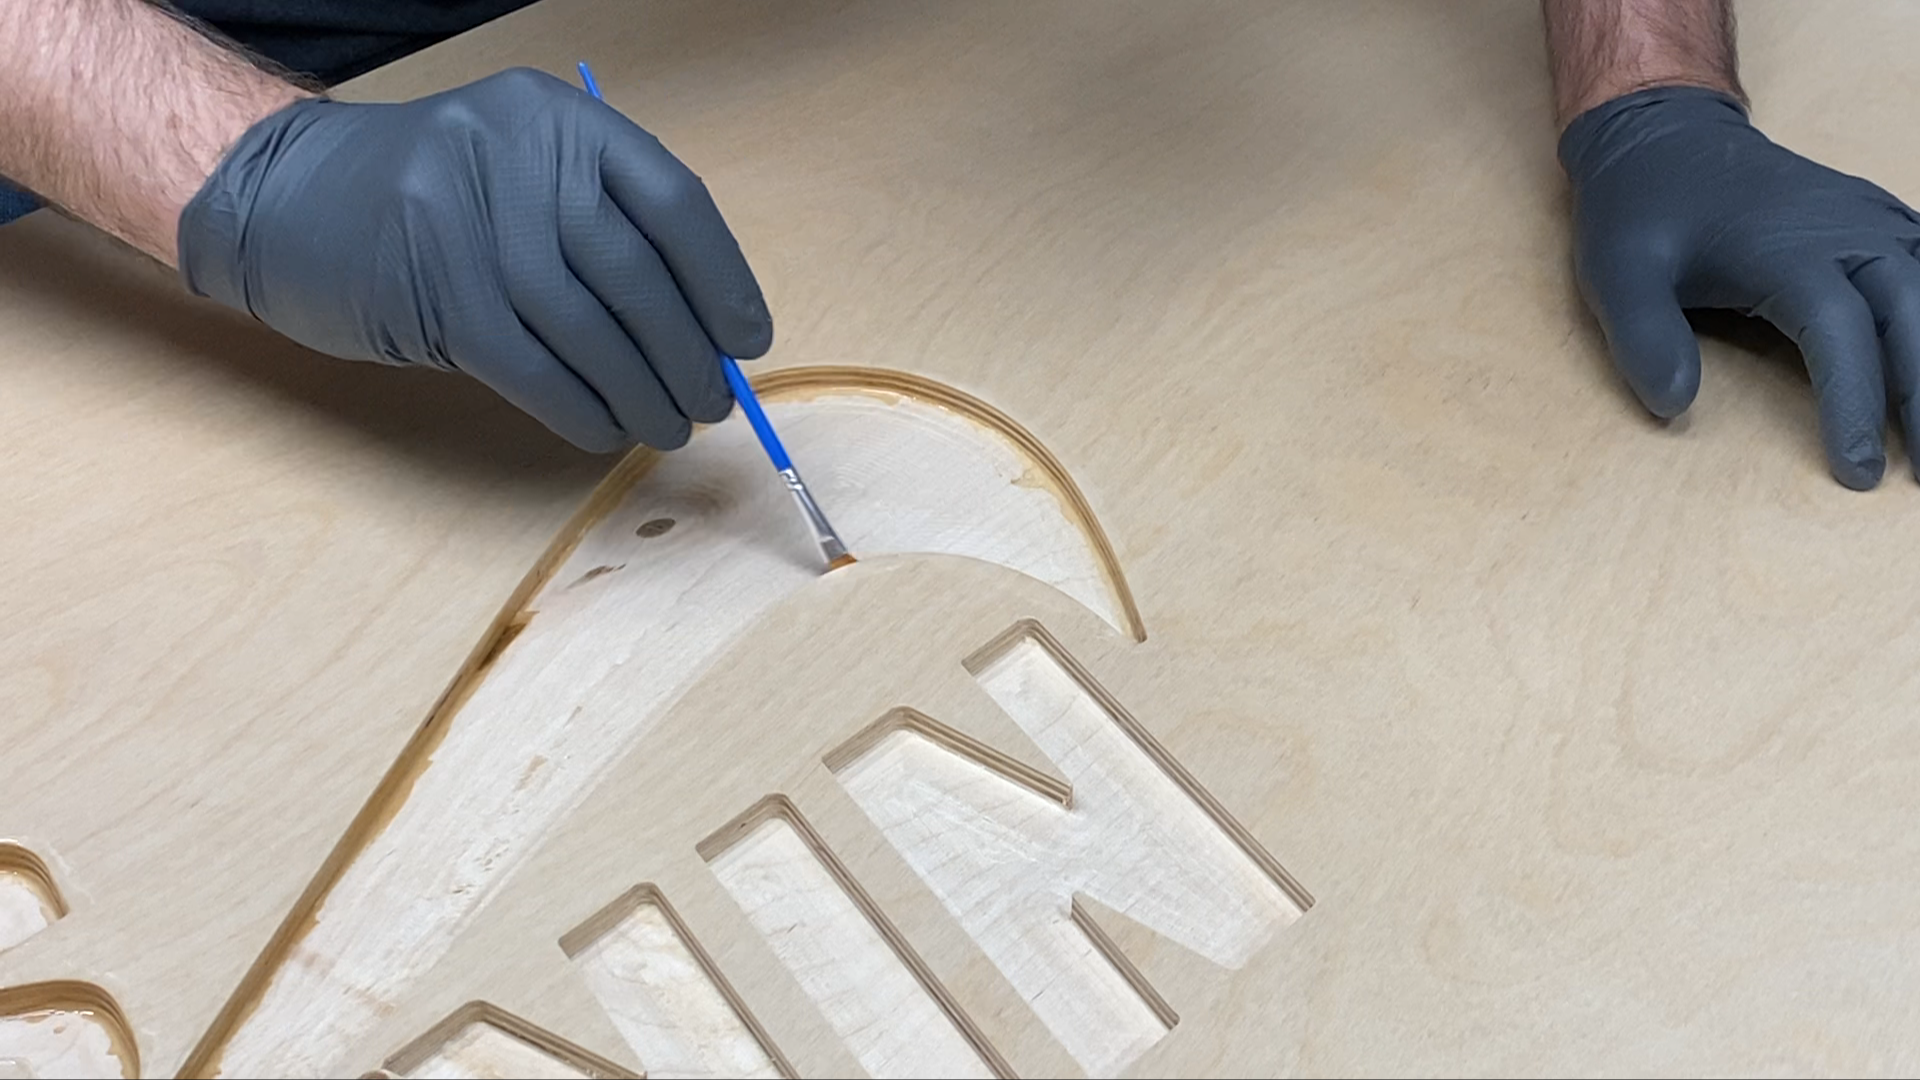
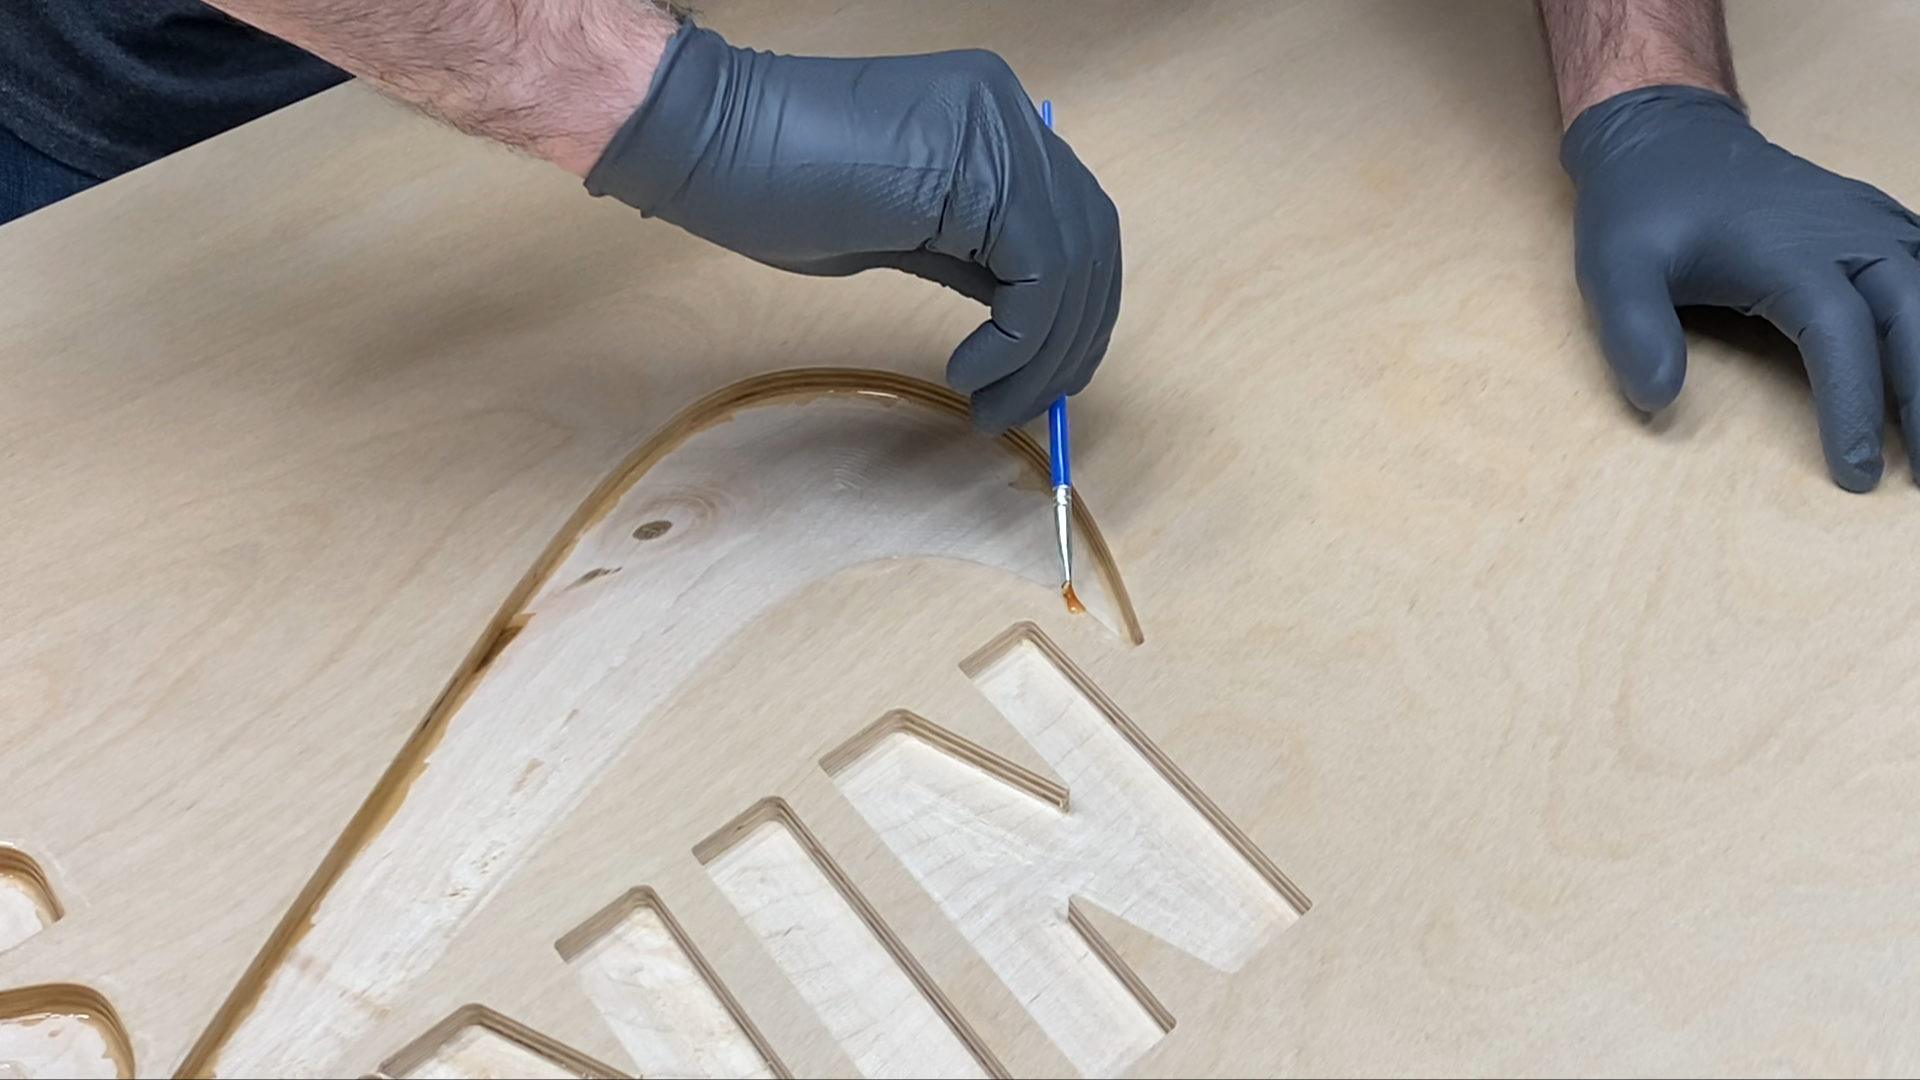
Step 8: Seal Sides of Logo and Letters
This is the critical step in making this project a success. I used a 5-minute epoxy on the inside edges of the letters and the logo and made sure I got the top edge covers so it overlapped with the three layers of polycrylic on the surface of the plywood.
I made sure not to put the epoxy on too thick on the inside edges of the logo and letters since that might make it noticeable from the surface of the plywood.

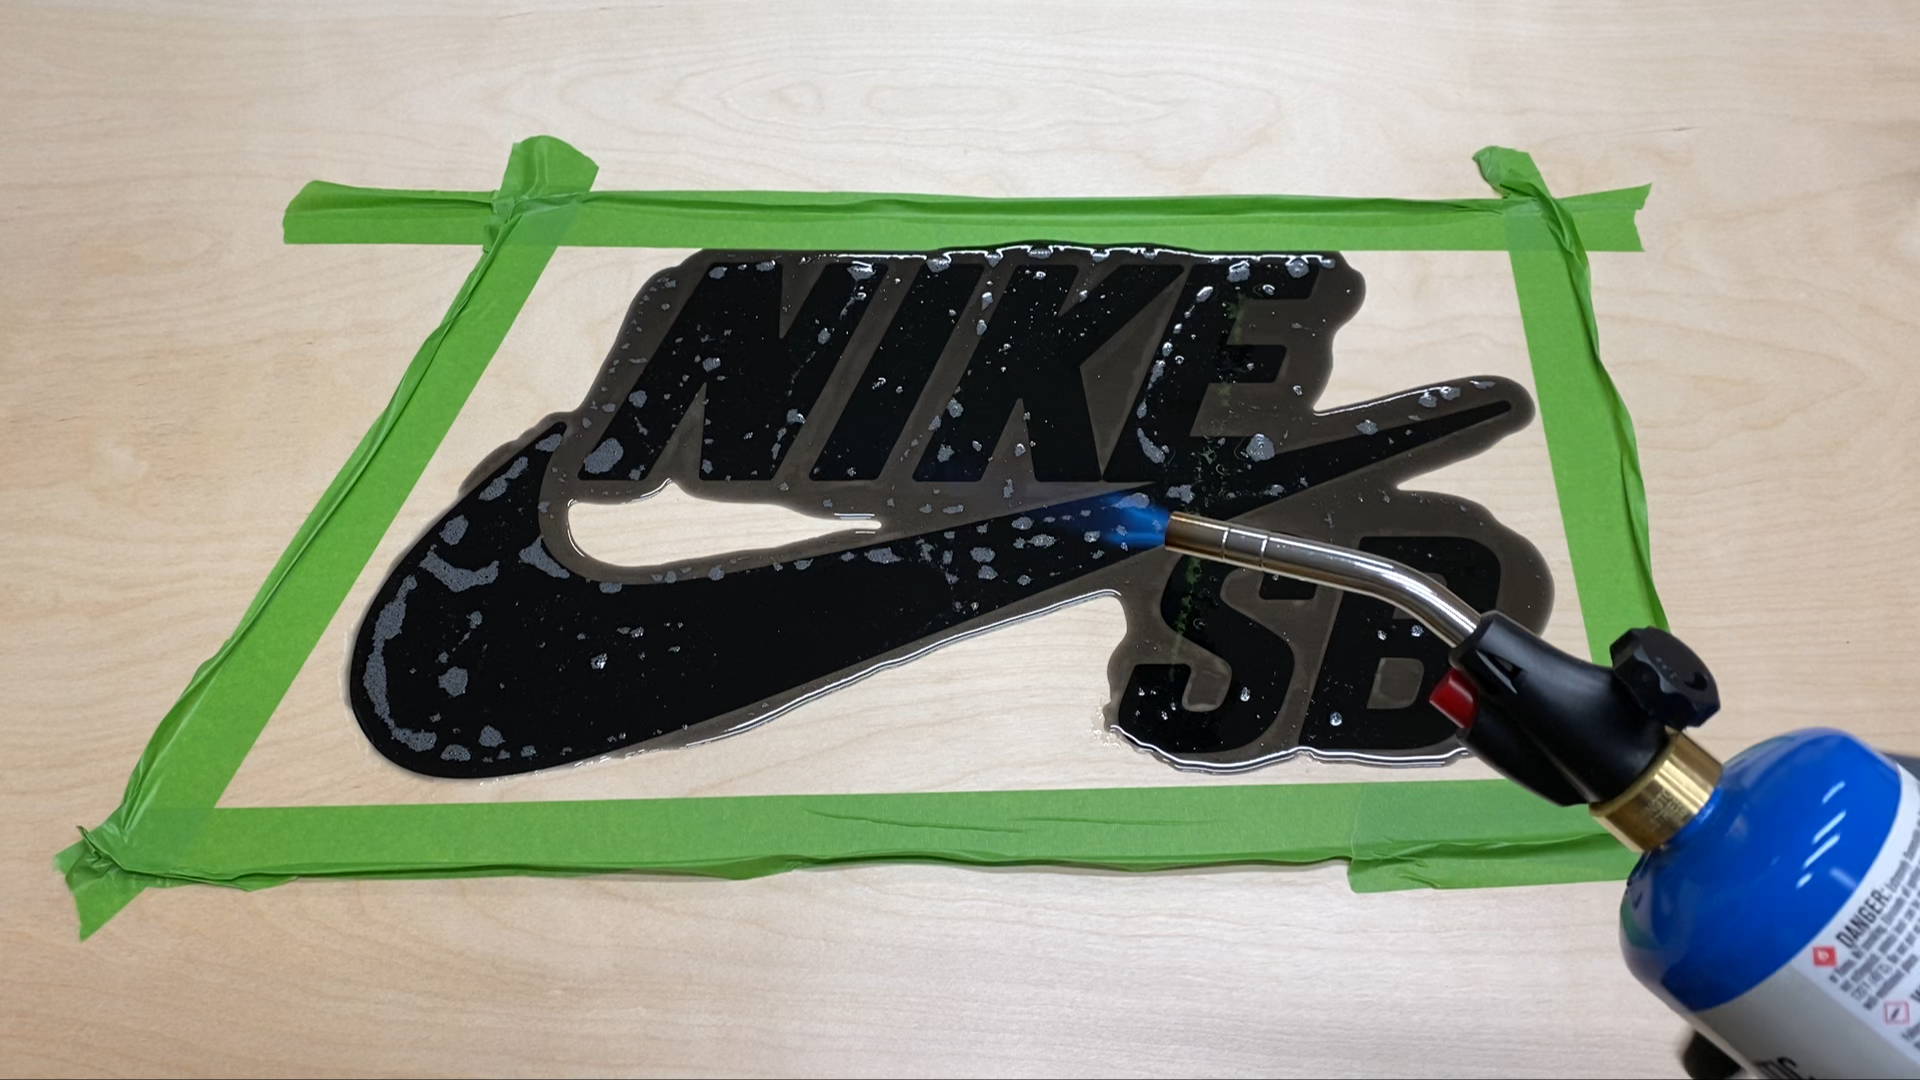
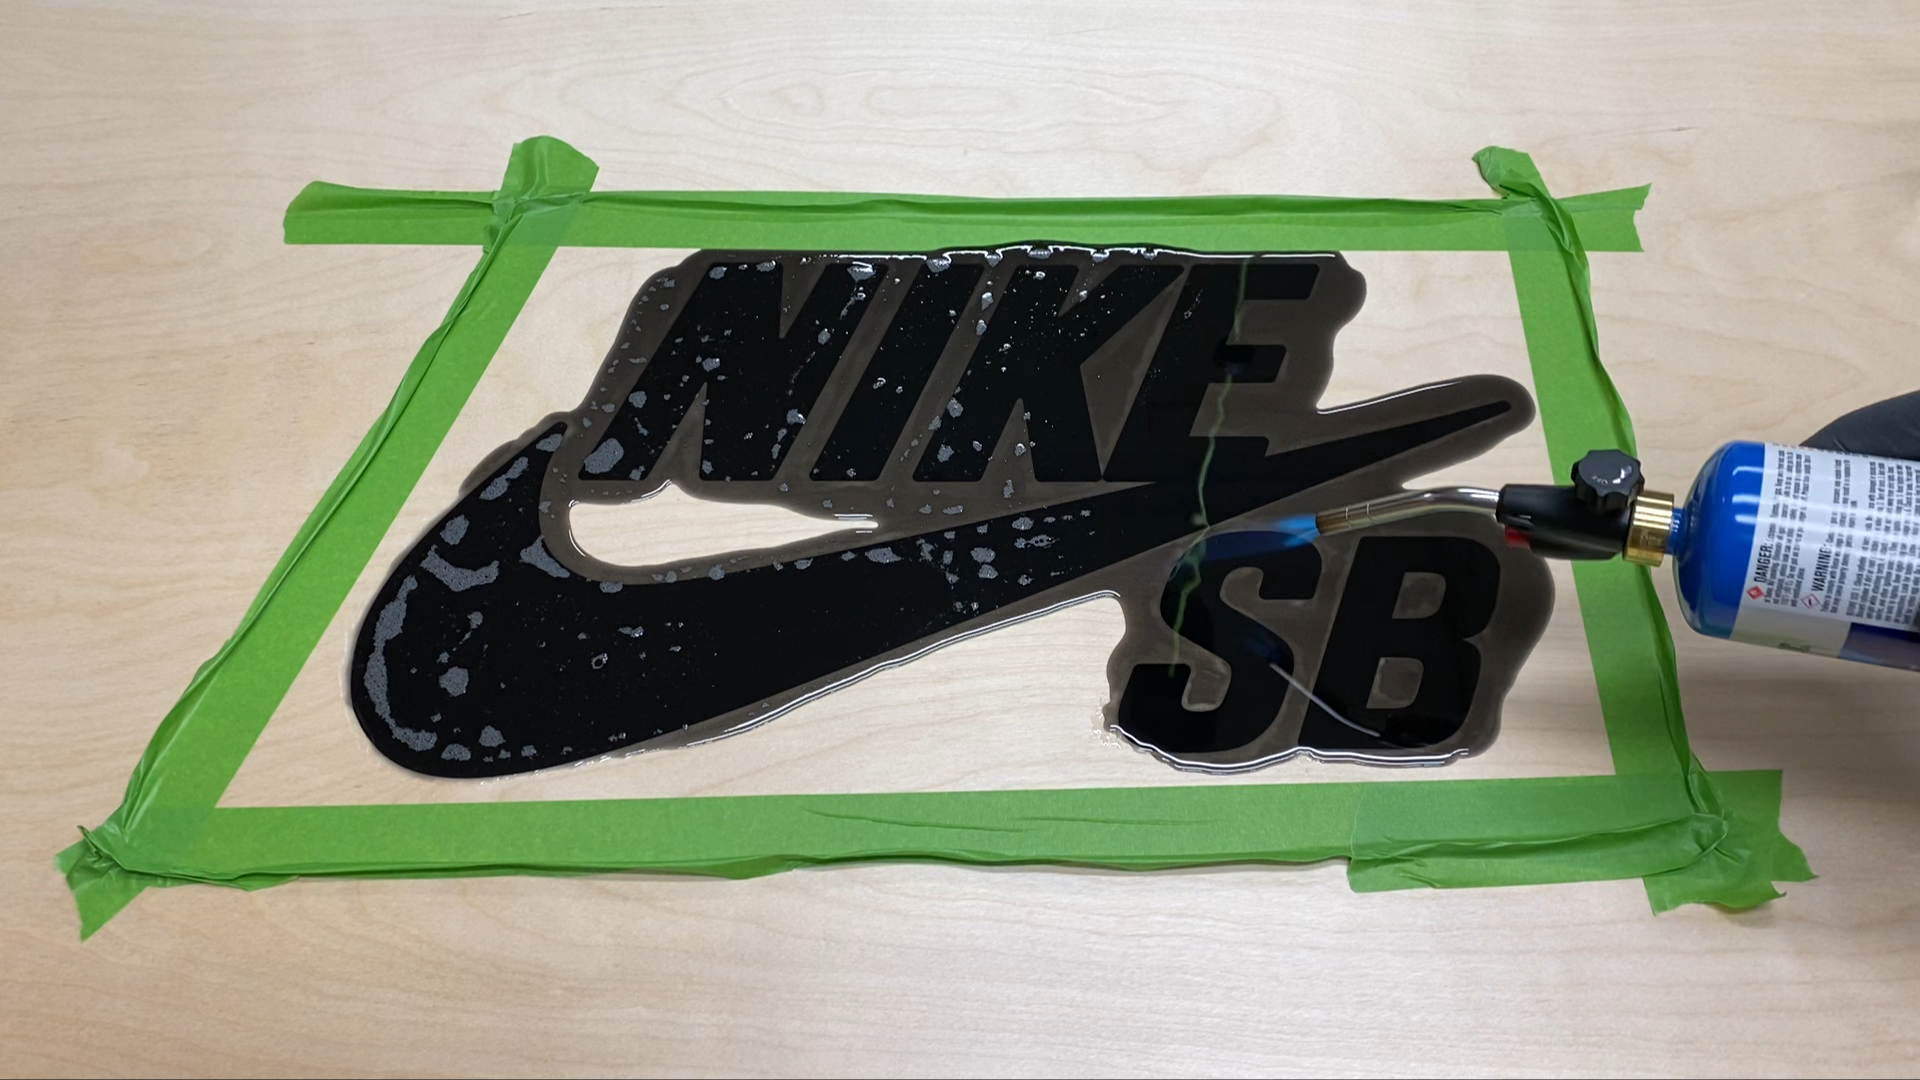
Step 9: Pour Epoxy
The second round of pouring the epoxy was not nearly as stressful as the first. Having done the exact same pour before I was able to go through this fairly quickly.
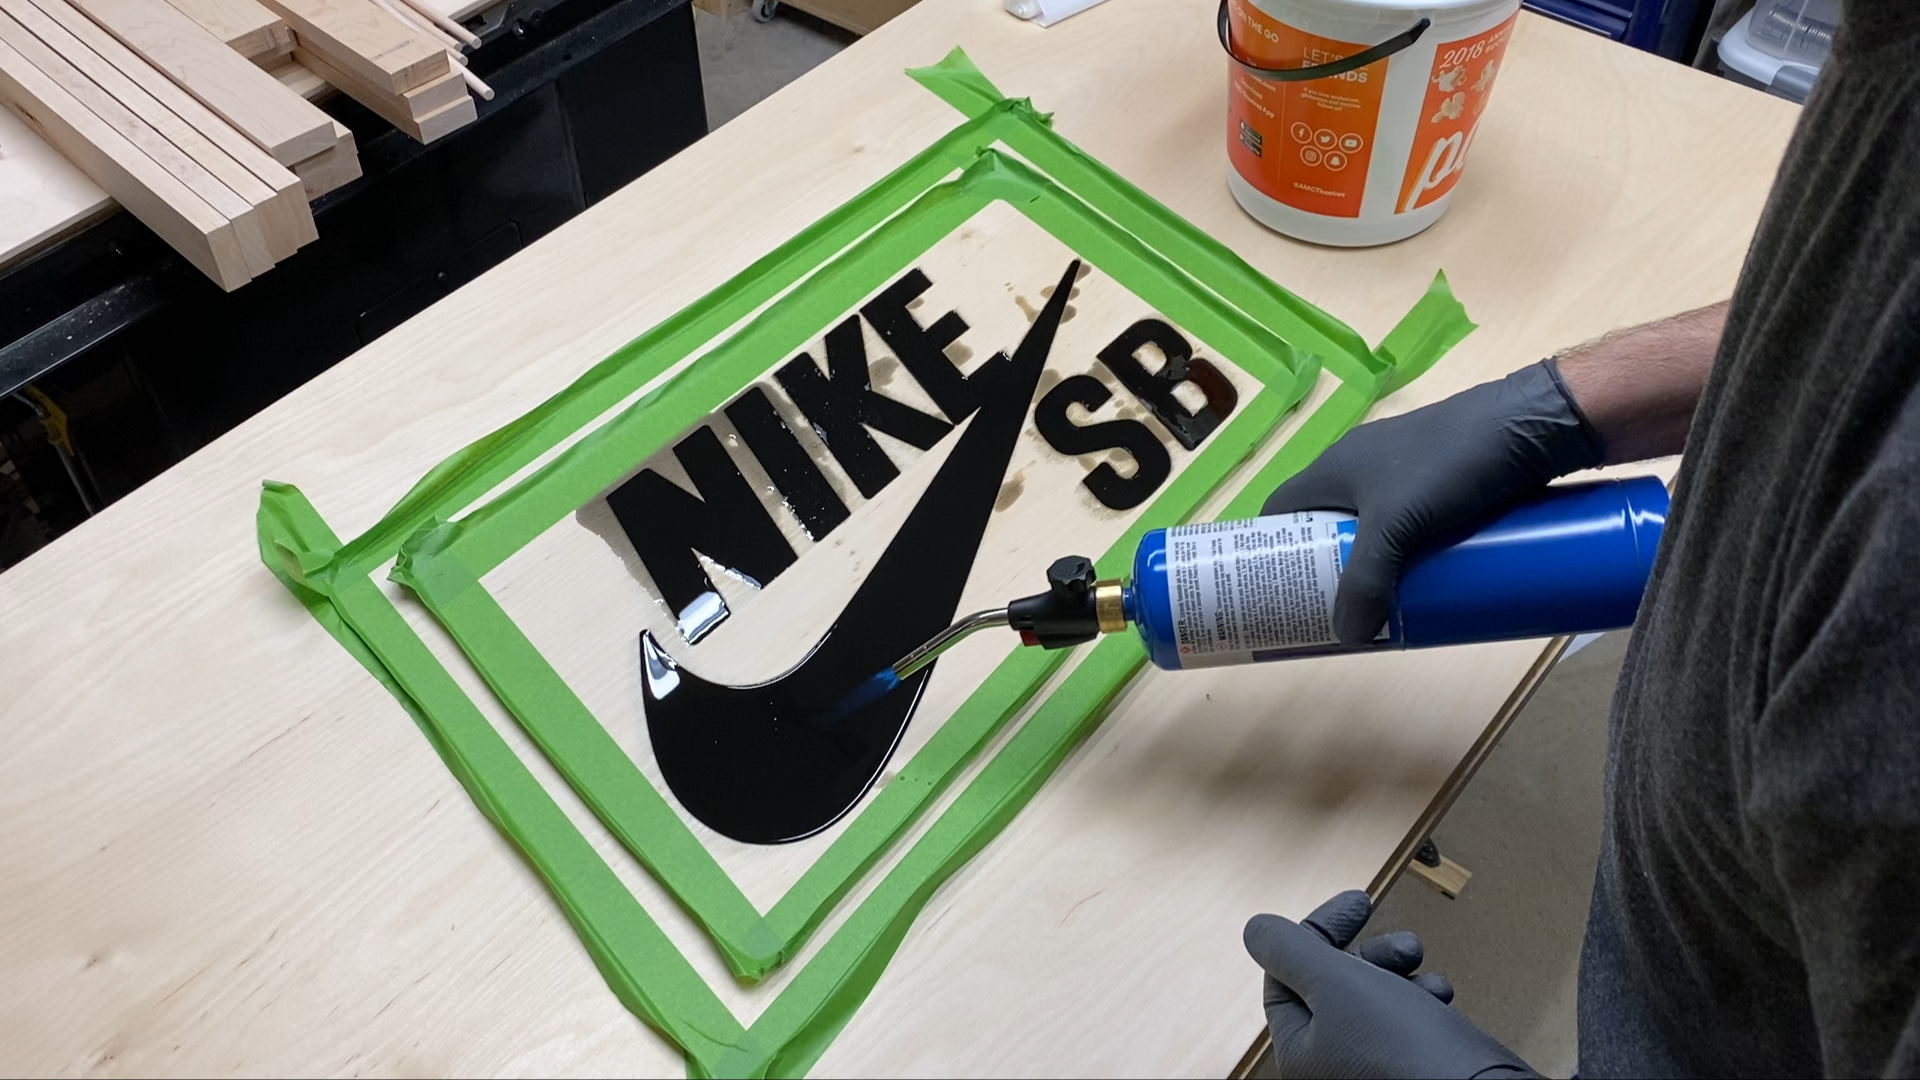
Just like before, I put down a perimeter of frog tape to keep the epoxy from flowing away from the logo area.
I also used a torch to pop the bubbles in the surface of the epoxy. I don't think there were as many bubbles with this pour since I I had sealed the sides of the letters and the logo.
I gave this several days to cure before moving to the next step.
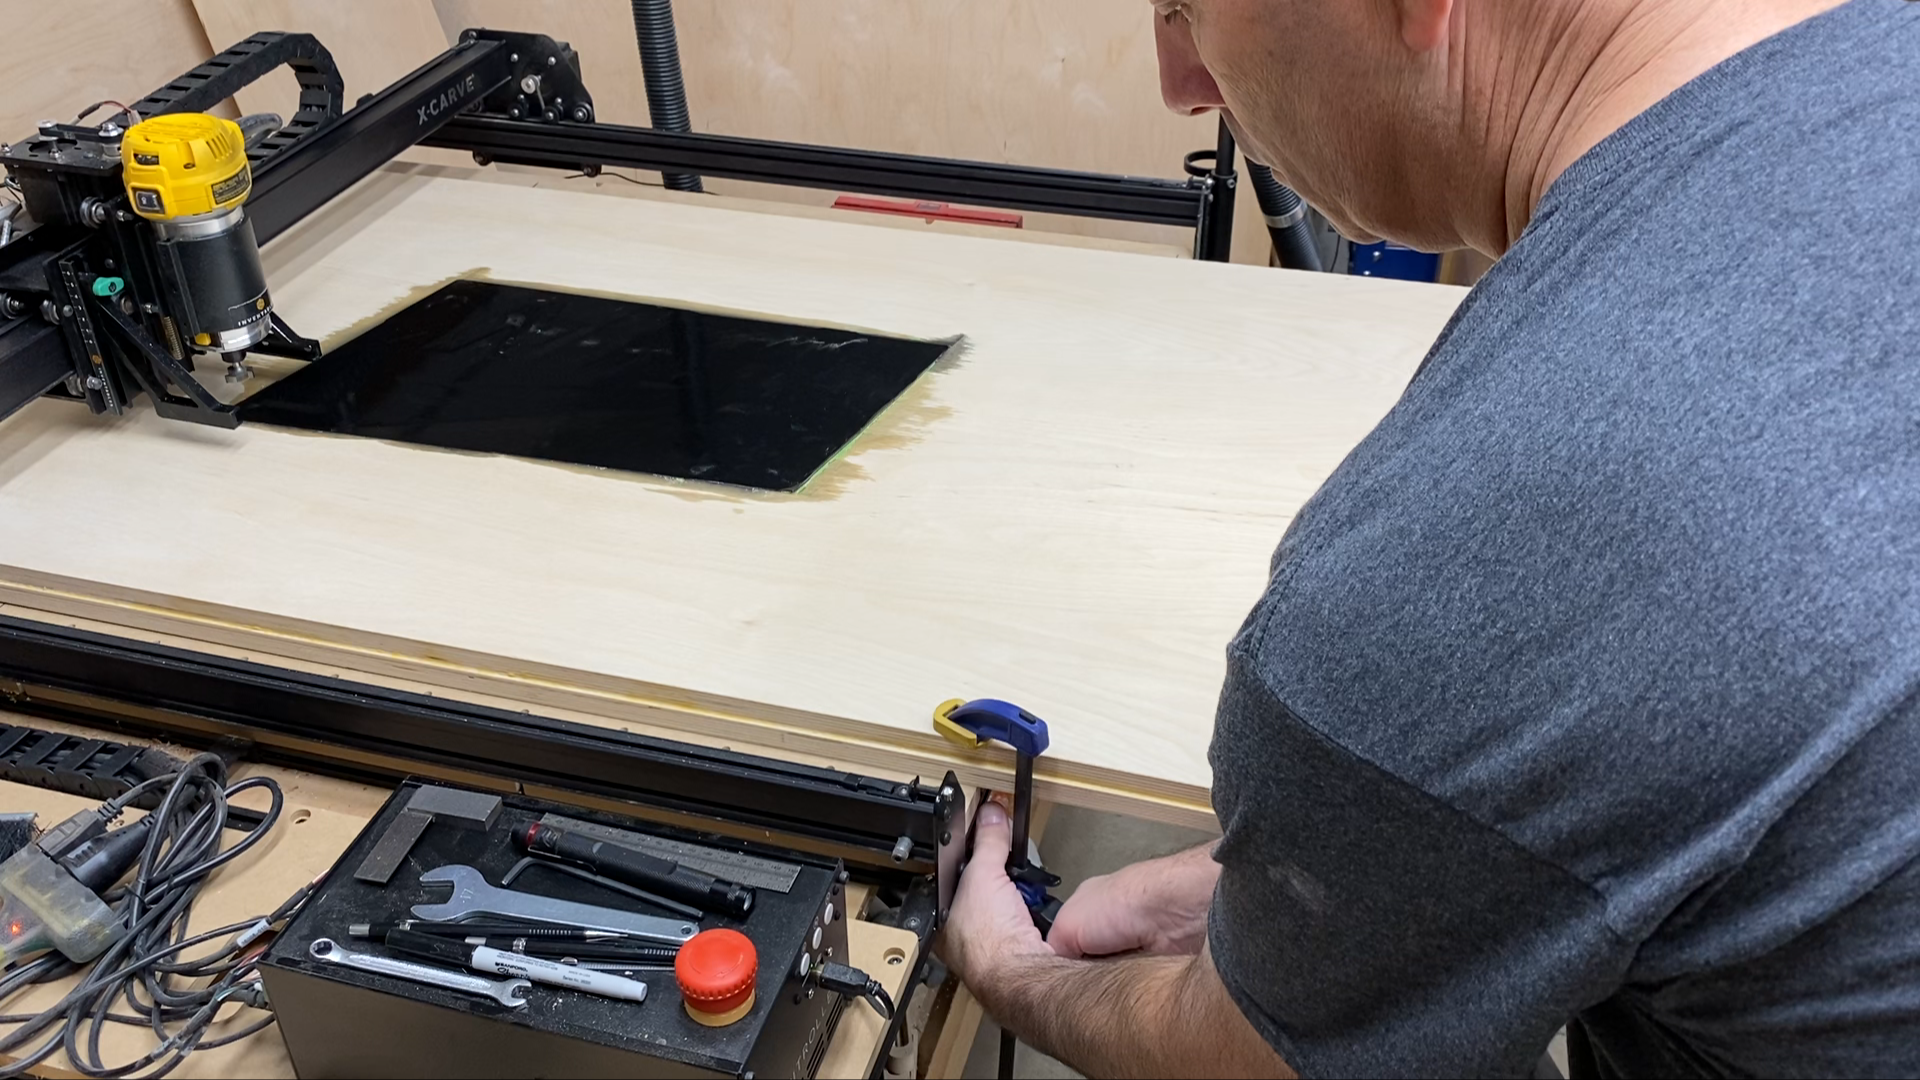
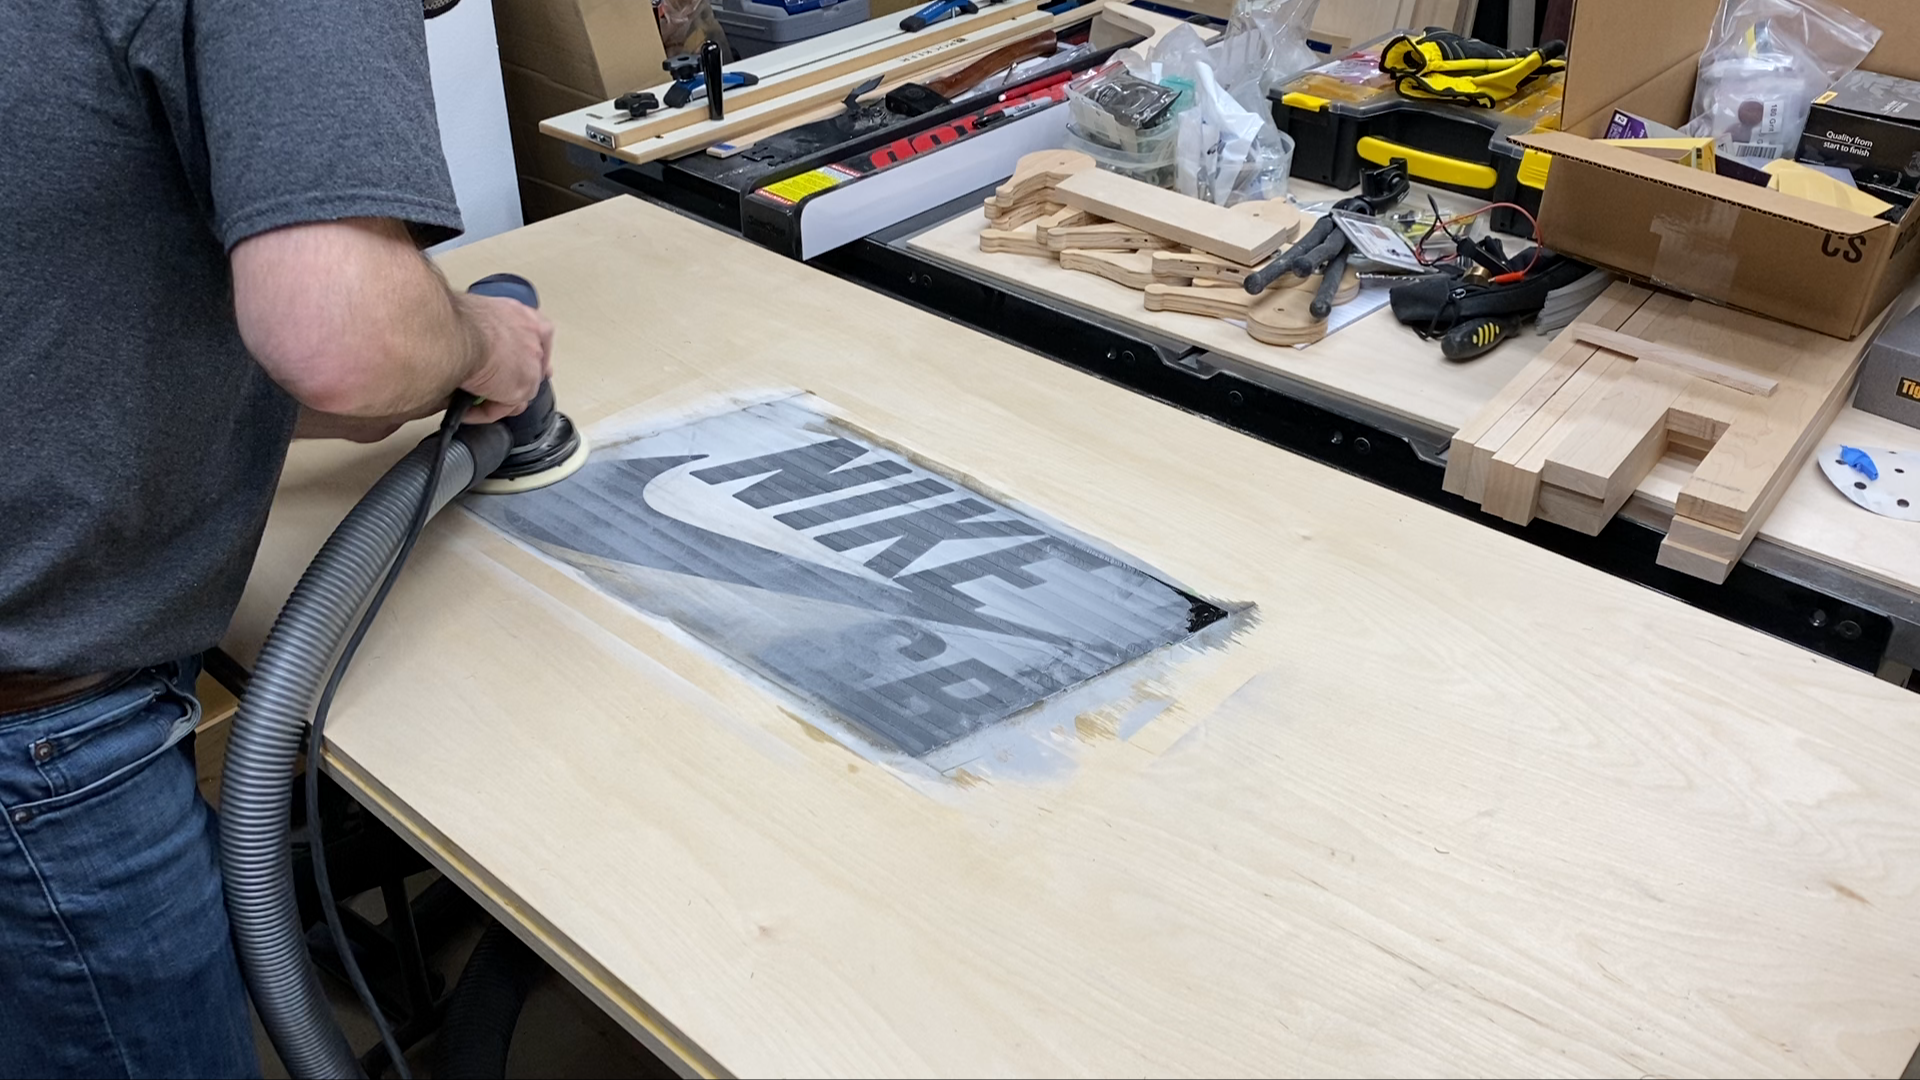
Step 10: Remove Excess Epoxy and Sand Flush With Bench Top
Just like when I flattened the first epoxy pour, I took off the excess epoxy using a 1" diameter flattening bit on the X-Carve CNC. I found the tallest location of the epoxy pour and used that for setting the zero point for the Easel software.
As the machine carved down 0.01" per pass I checked the edges of the excess epoxy to make sure I wasn't getting too close to the surface of the plywood.
Once I was within 0.02" of the surface of the plywood I cancelled the process in the Easel software and finished removing the excess epoxy with a sander.


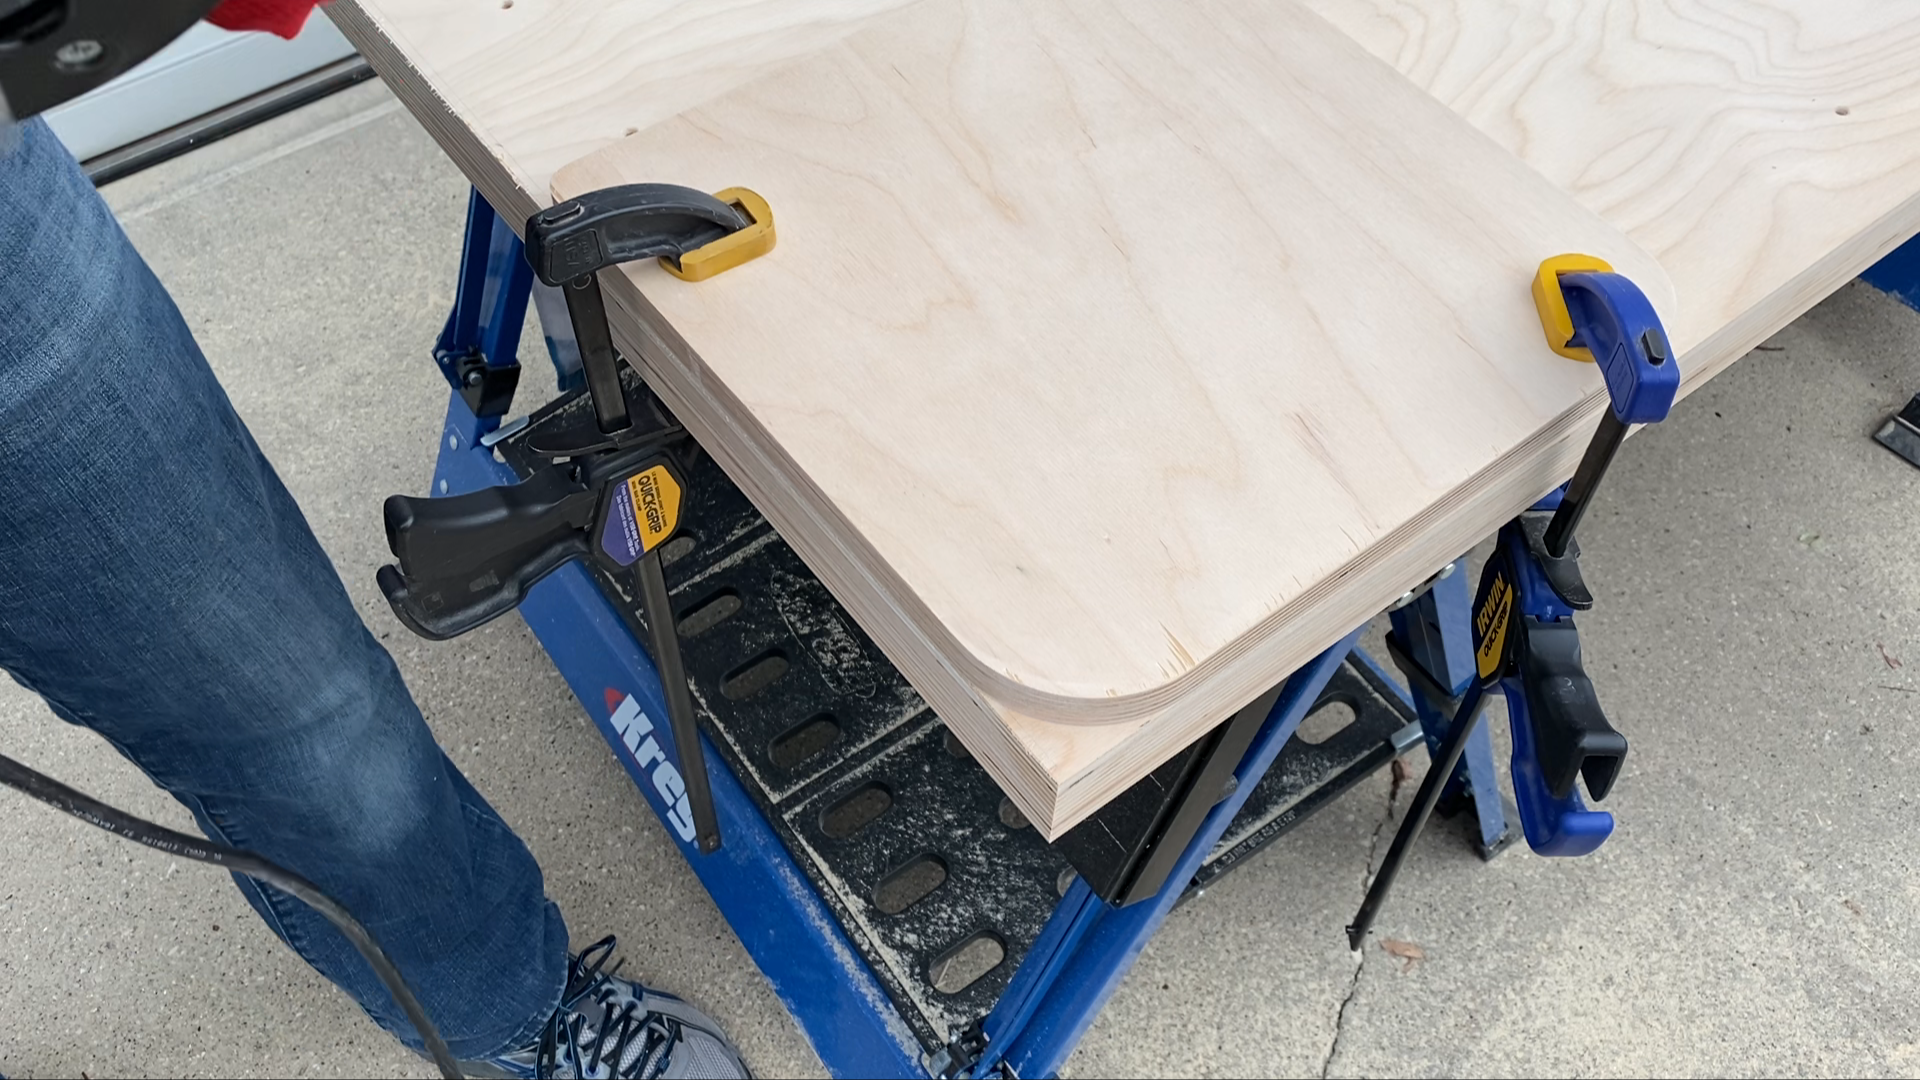
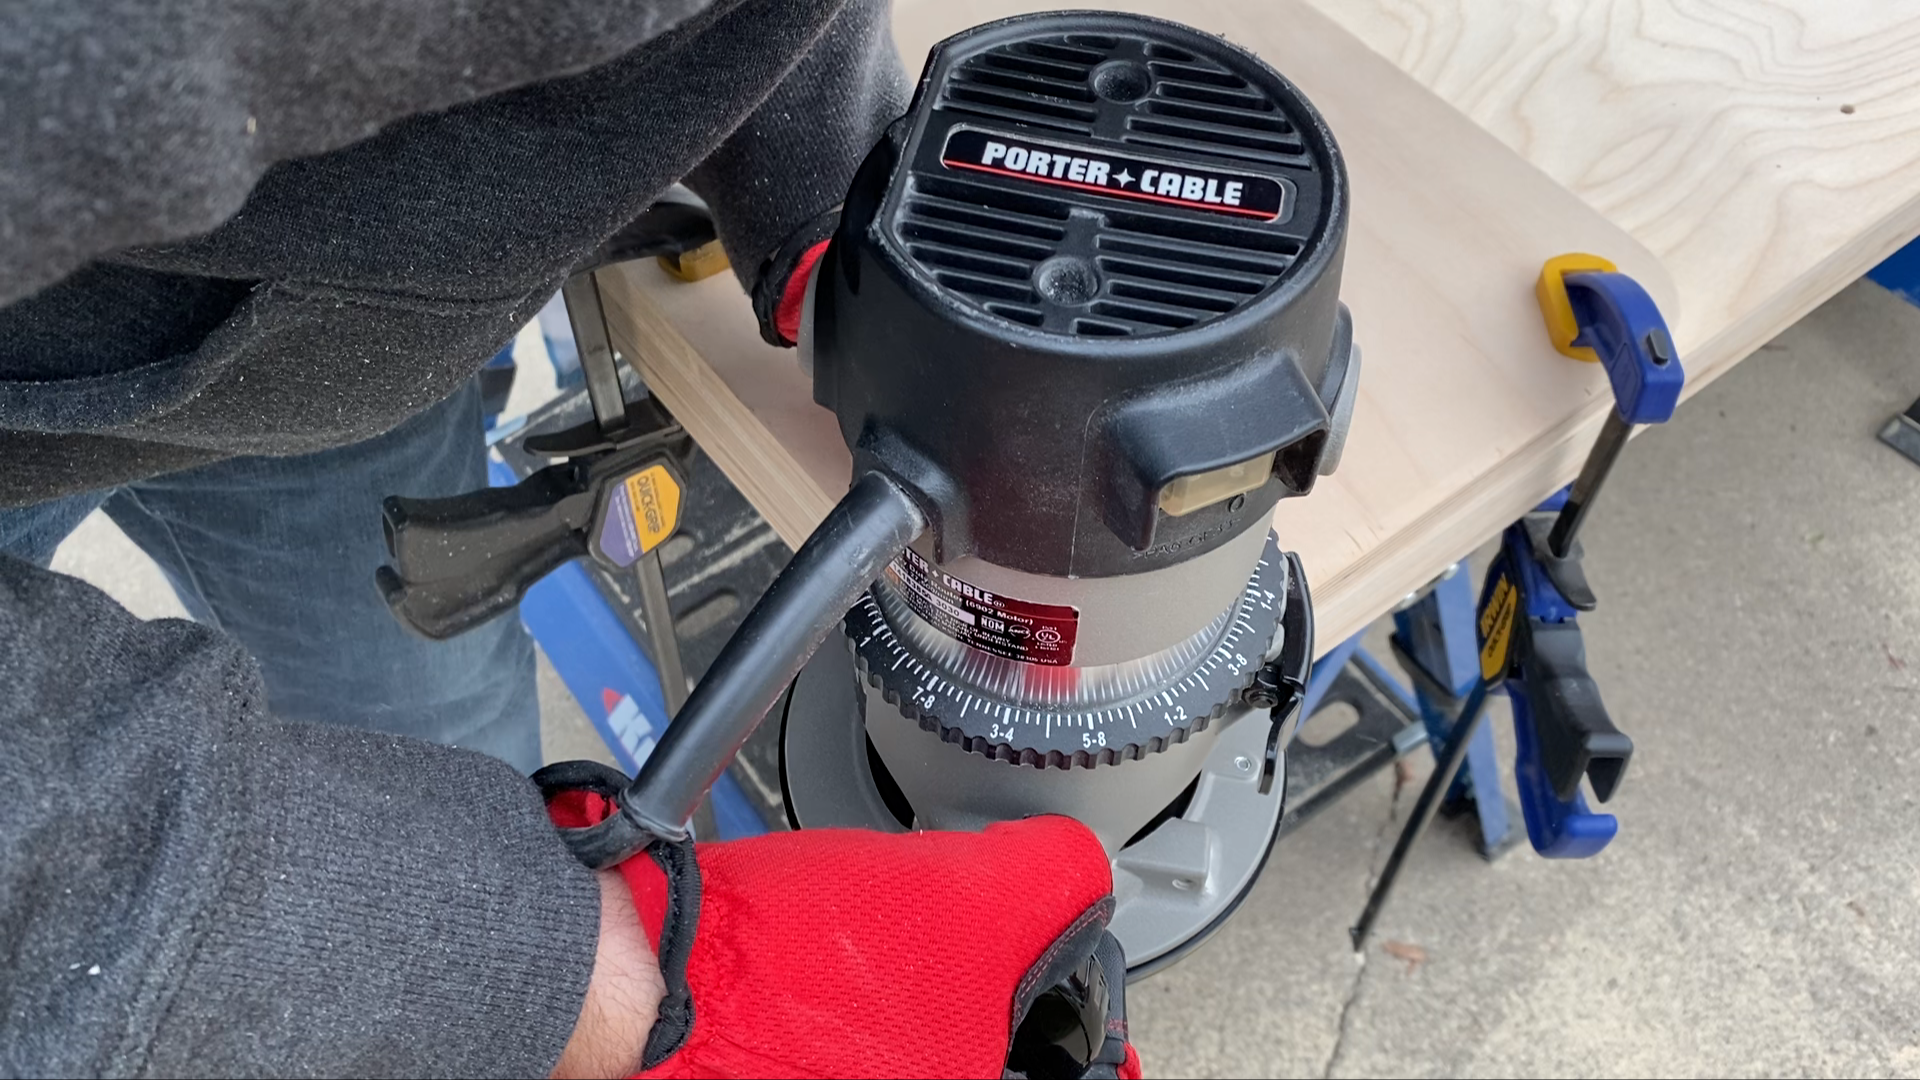
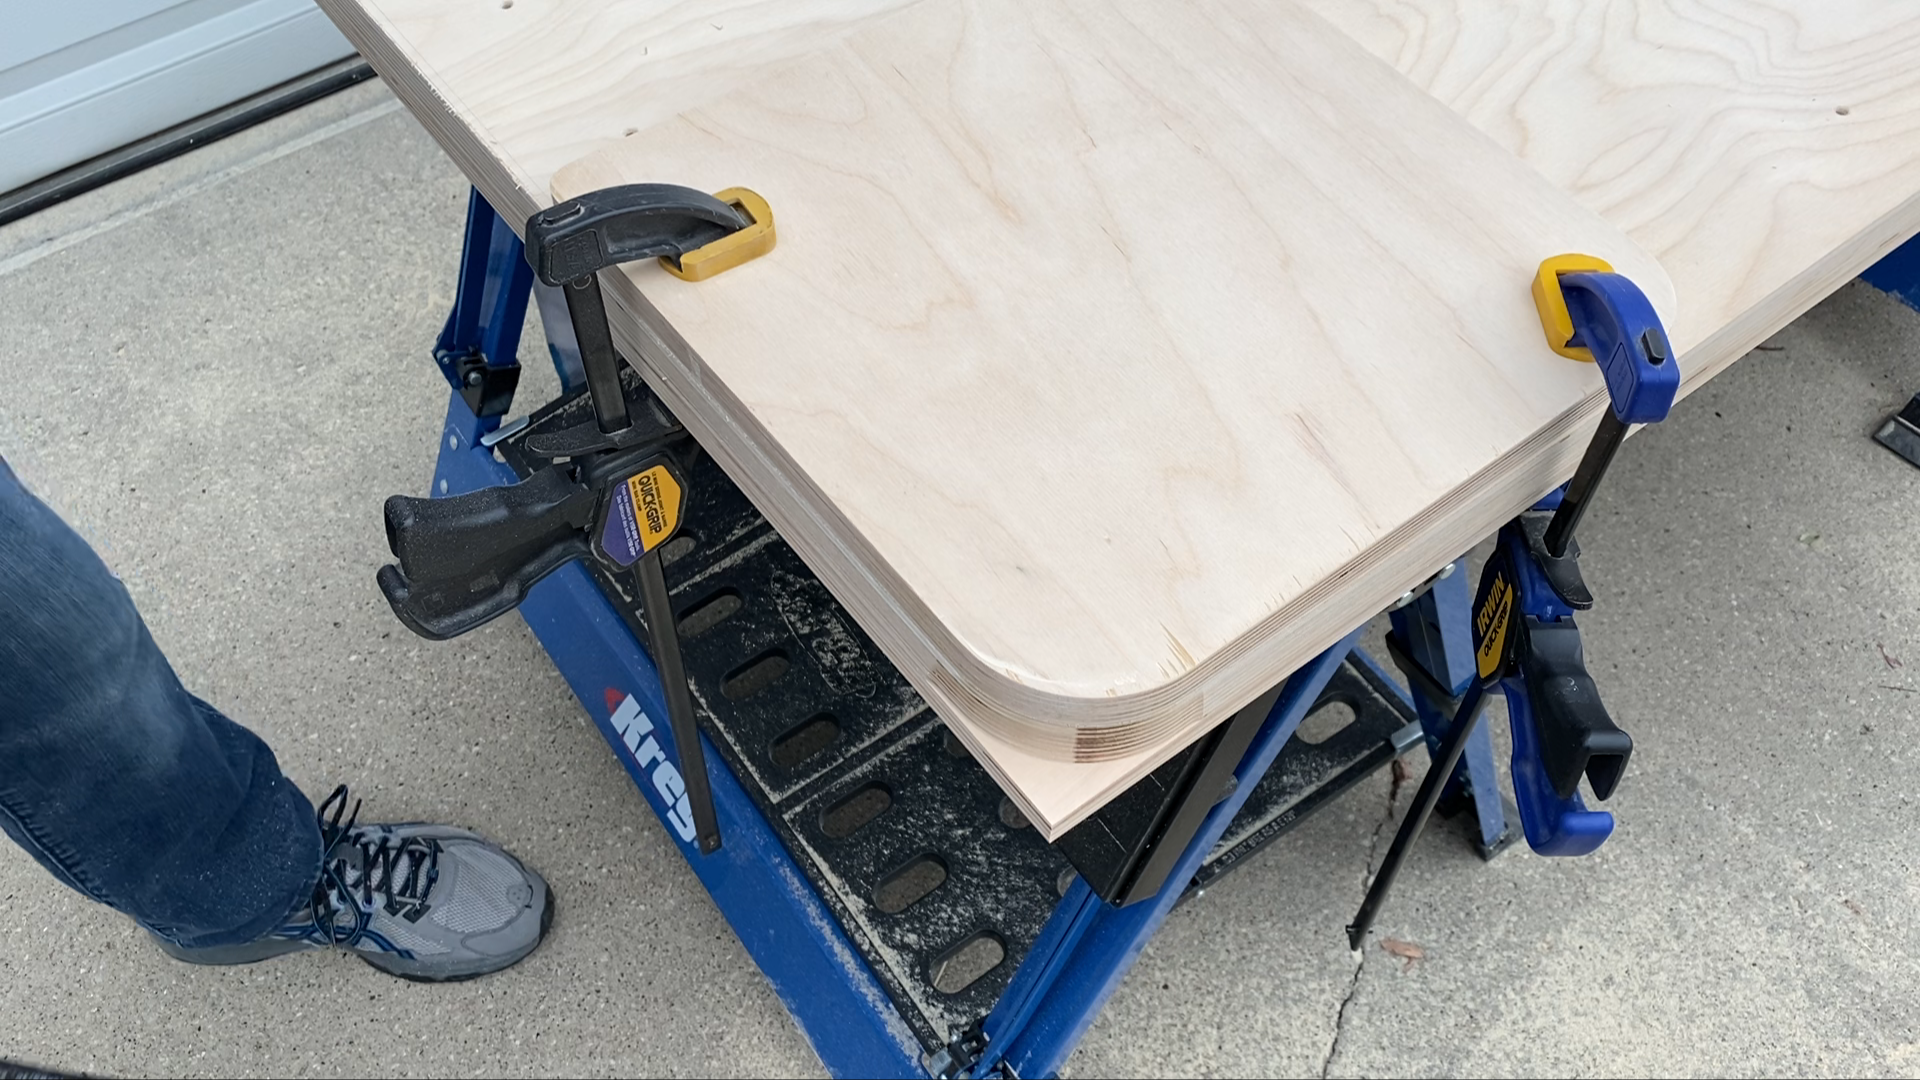
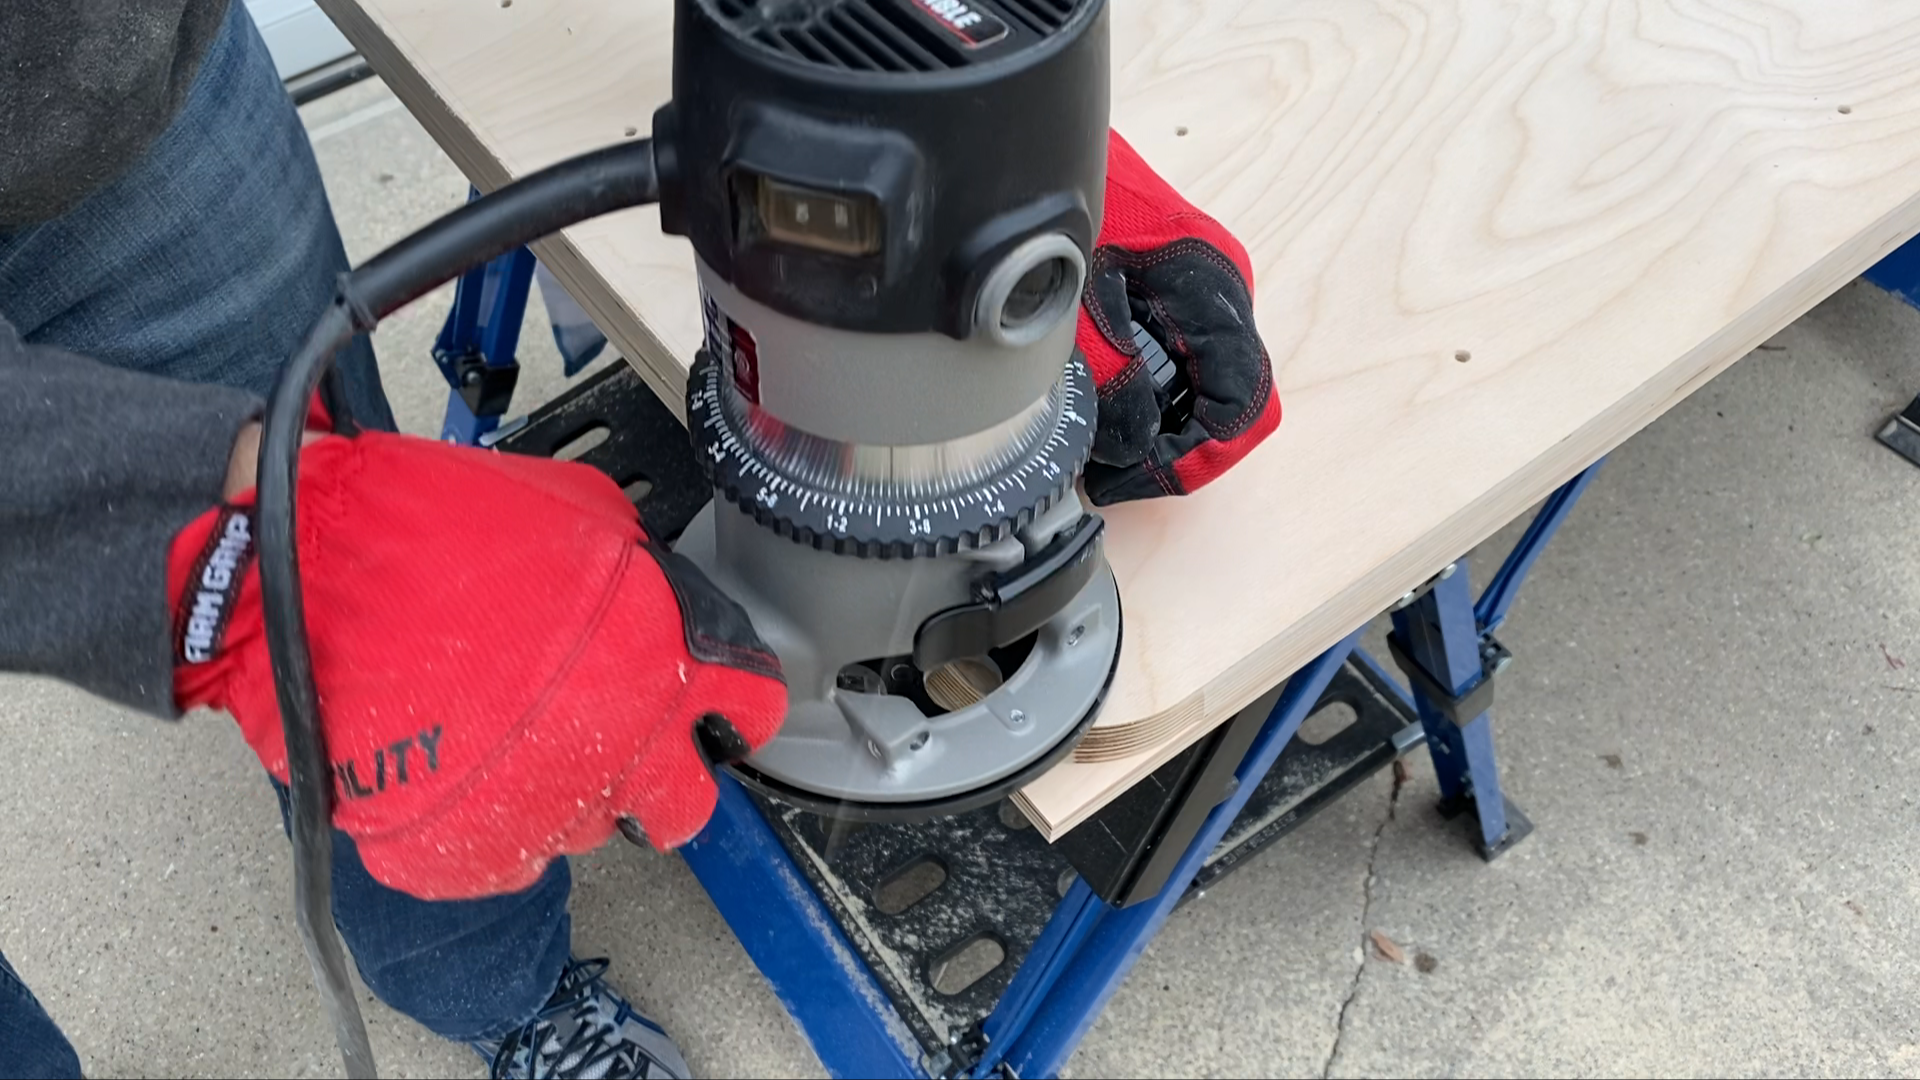
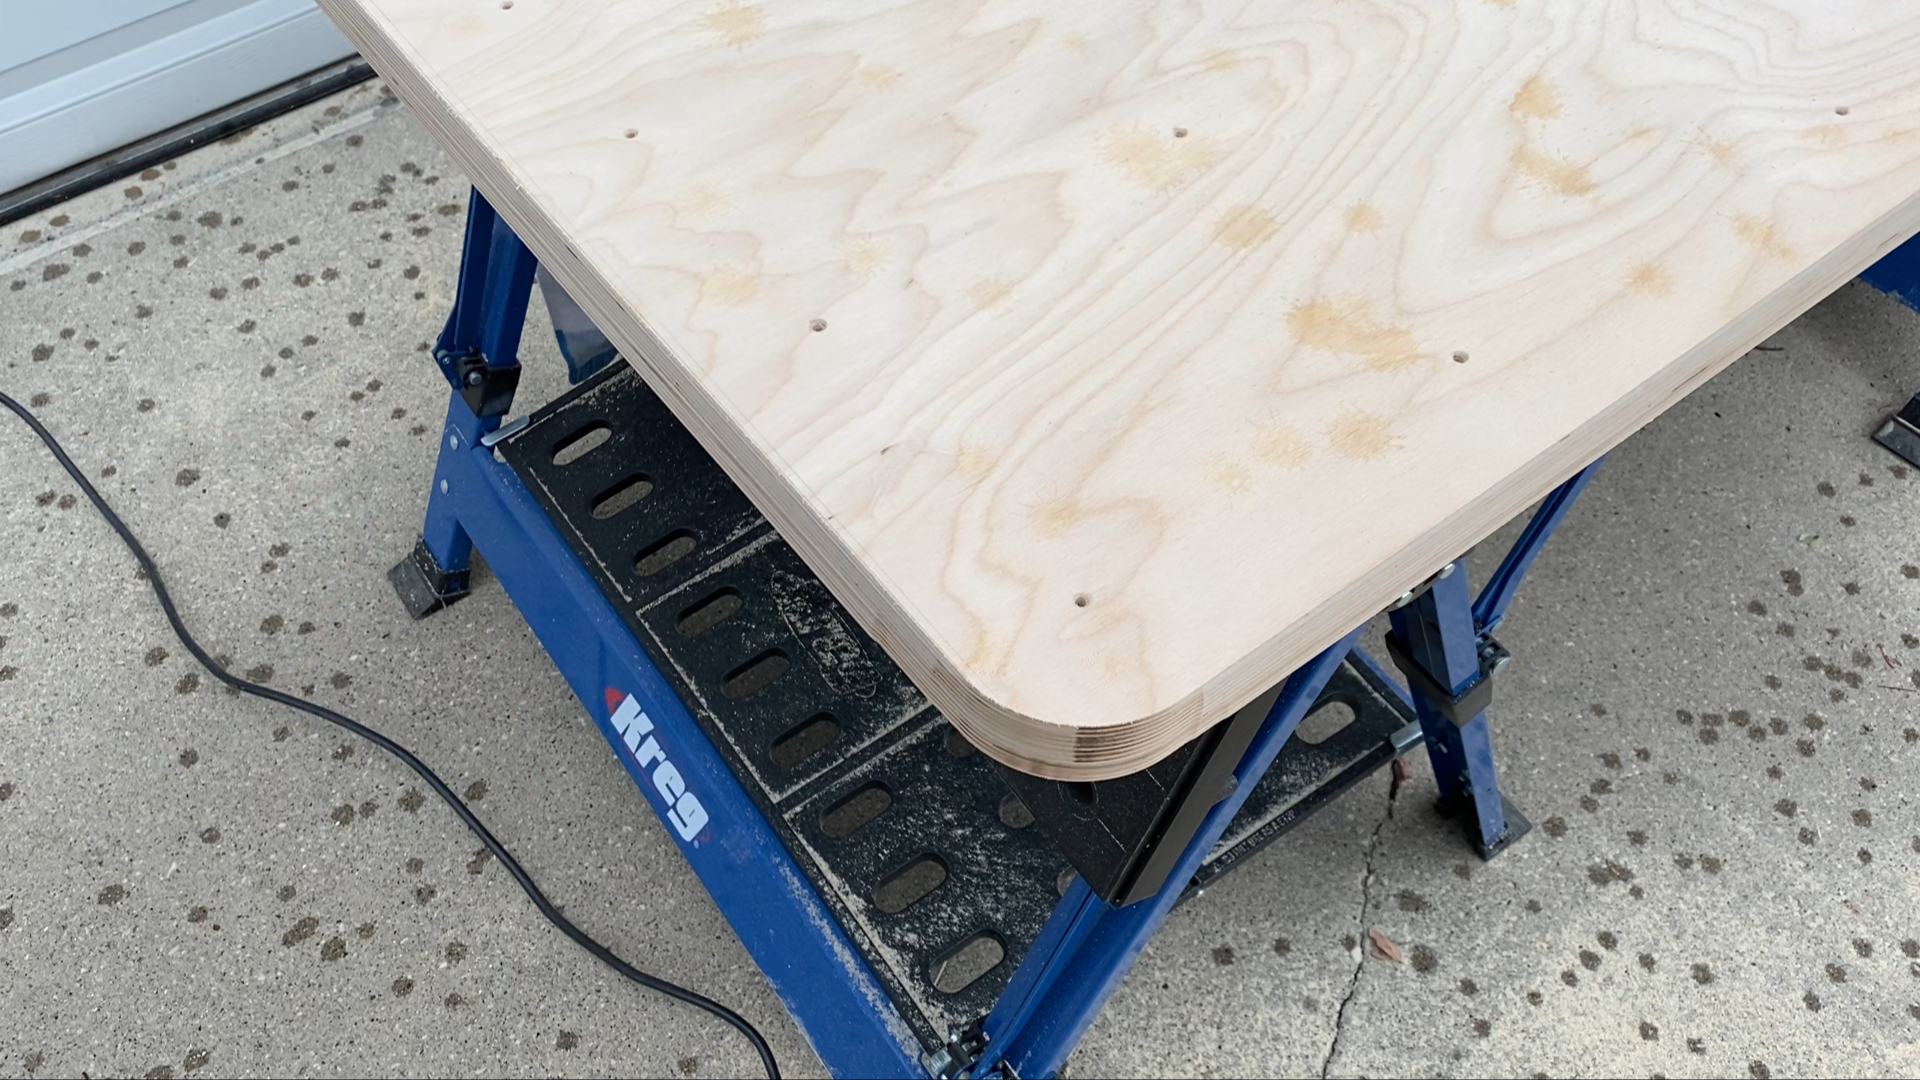
Step 11: Flush Trim Edges, Round Corners and Edges
I decided to round all of the edges on the bench since this would be in a retail area where people would be walking around it. I would hate for someone to hit a knee or leg into a sharp corner.
I used a radius jig and a flush trim router bit to make a 2" radius on all of the corners.
I then used a 1/4" radius roundover bit around the top and bottom edges.

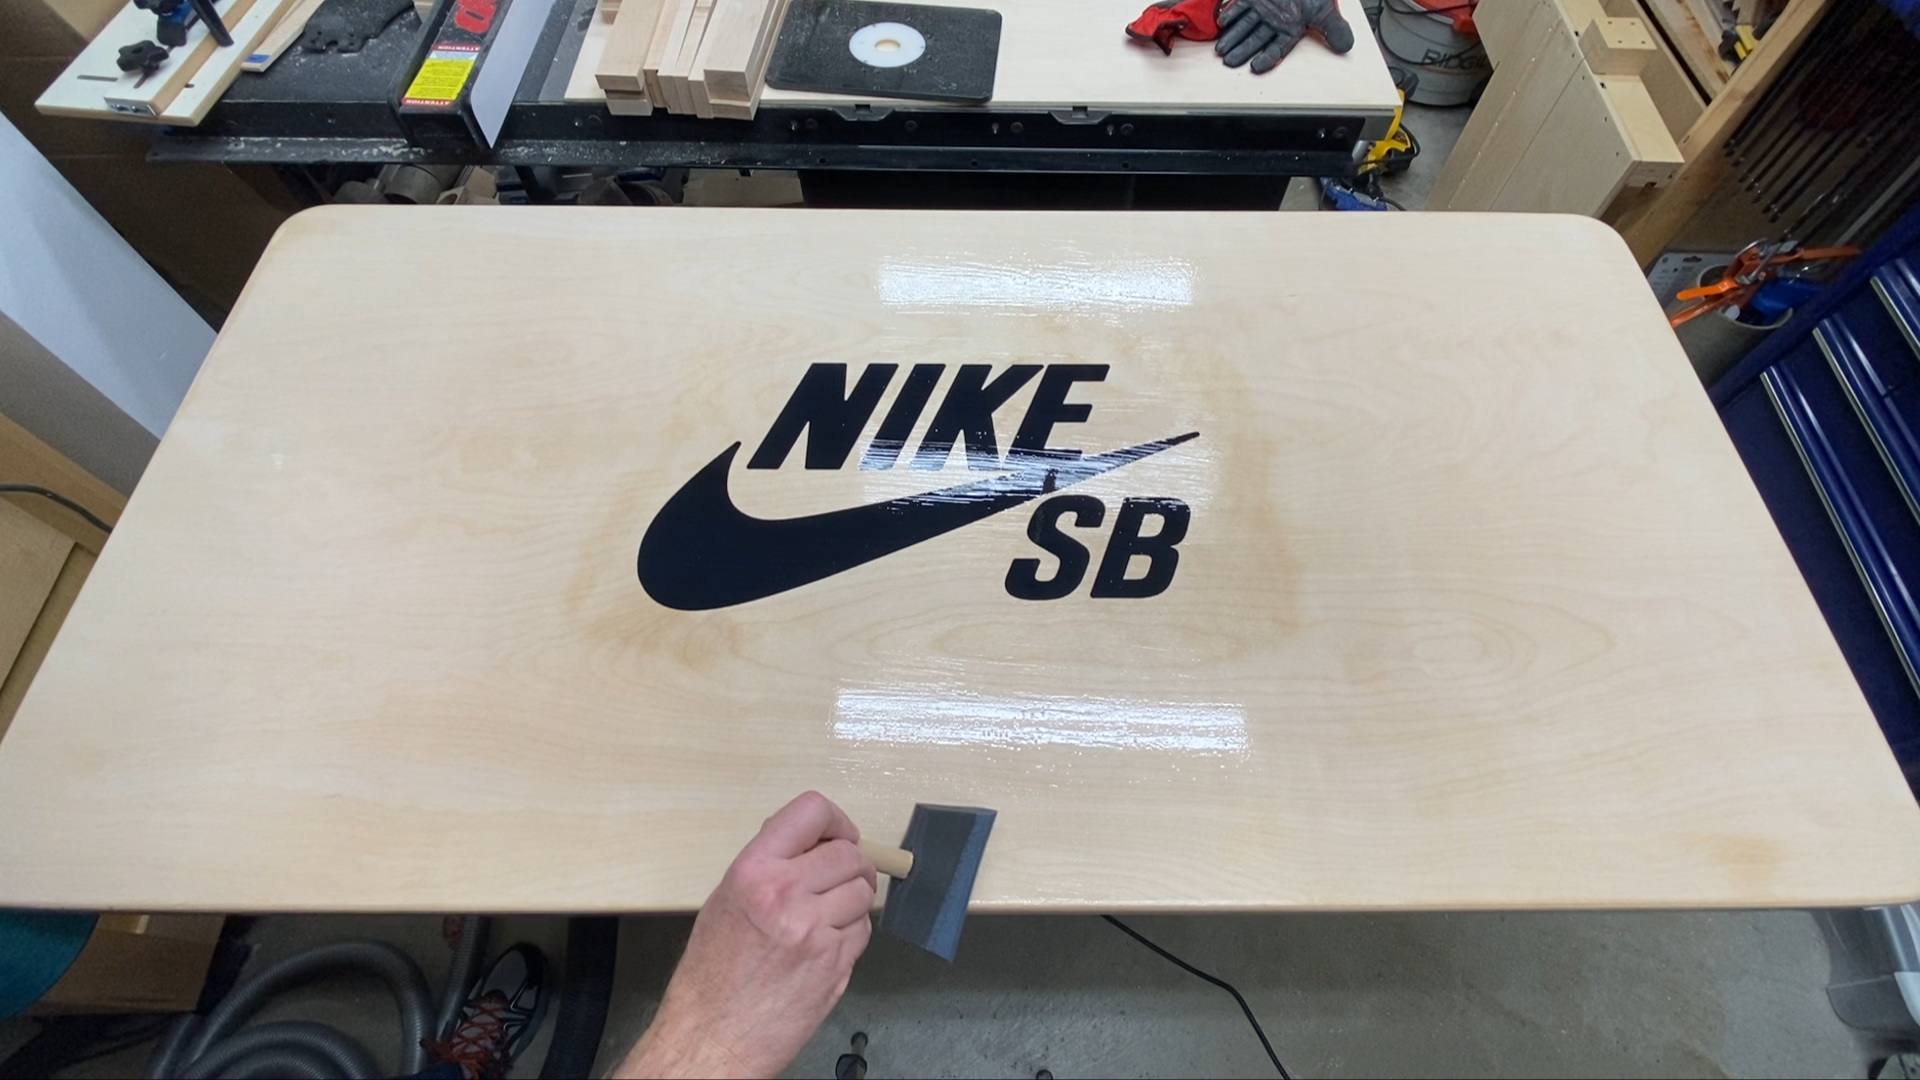
Step 12: Add Finish
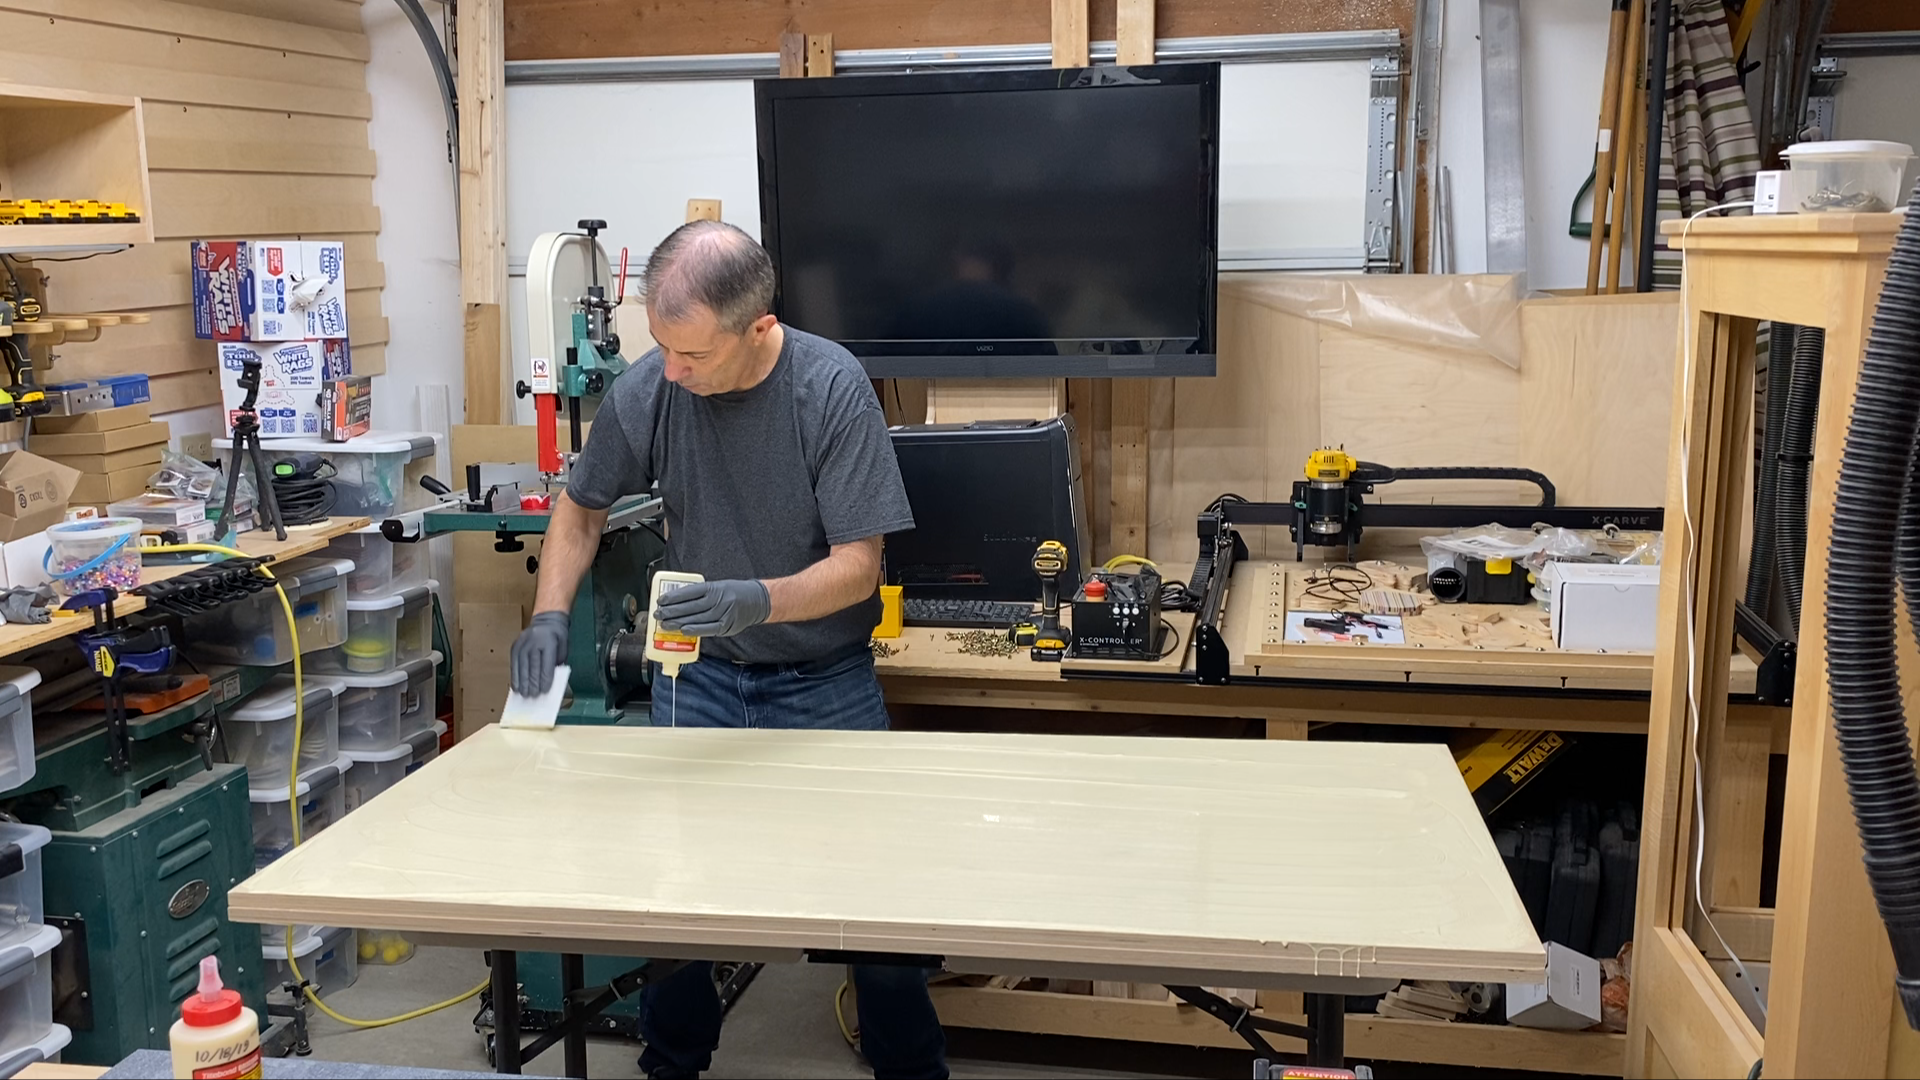
I decided to go with a water based polycrylic for the finish of the bench since it is easy to apply and would make it easy for touchups in the future.
I had applied three coats before I carved the logo and then added two more coats after everything else was complete.
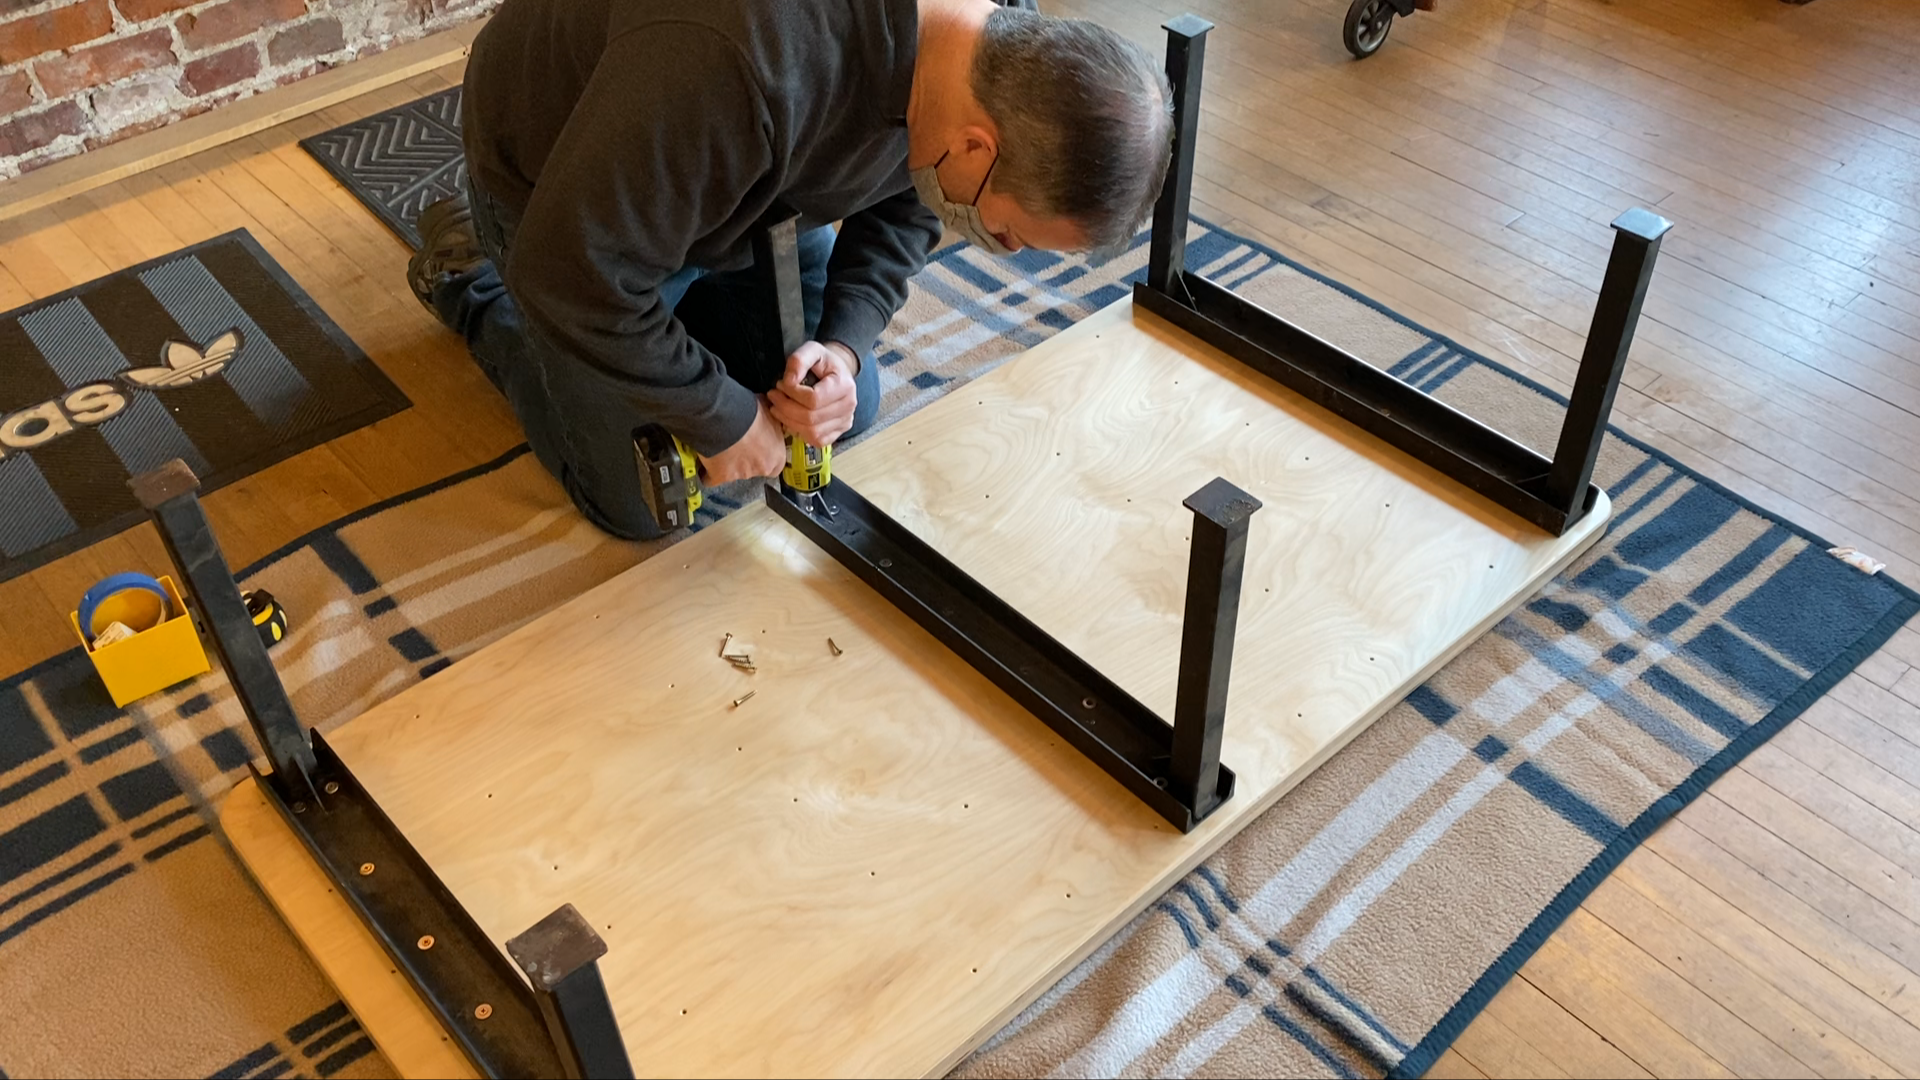
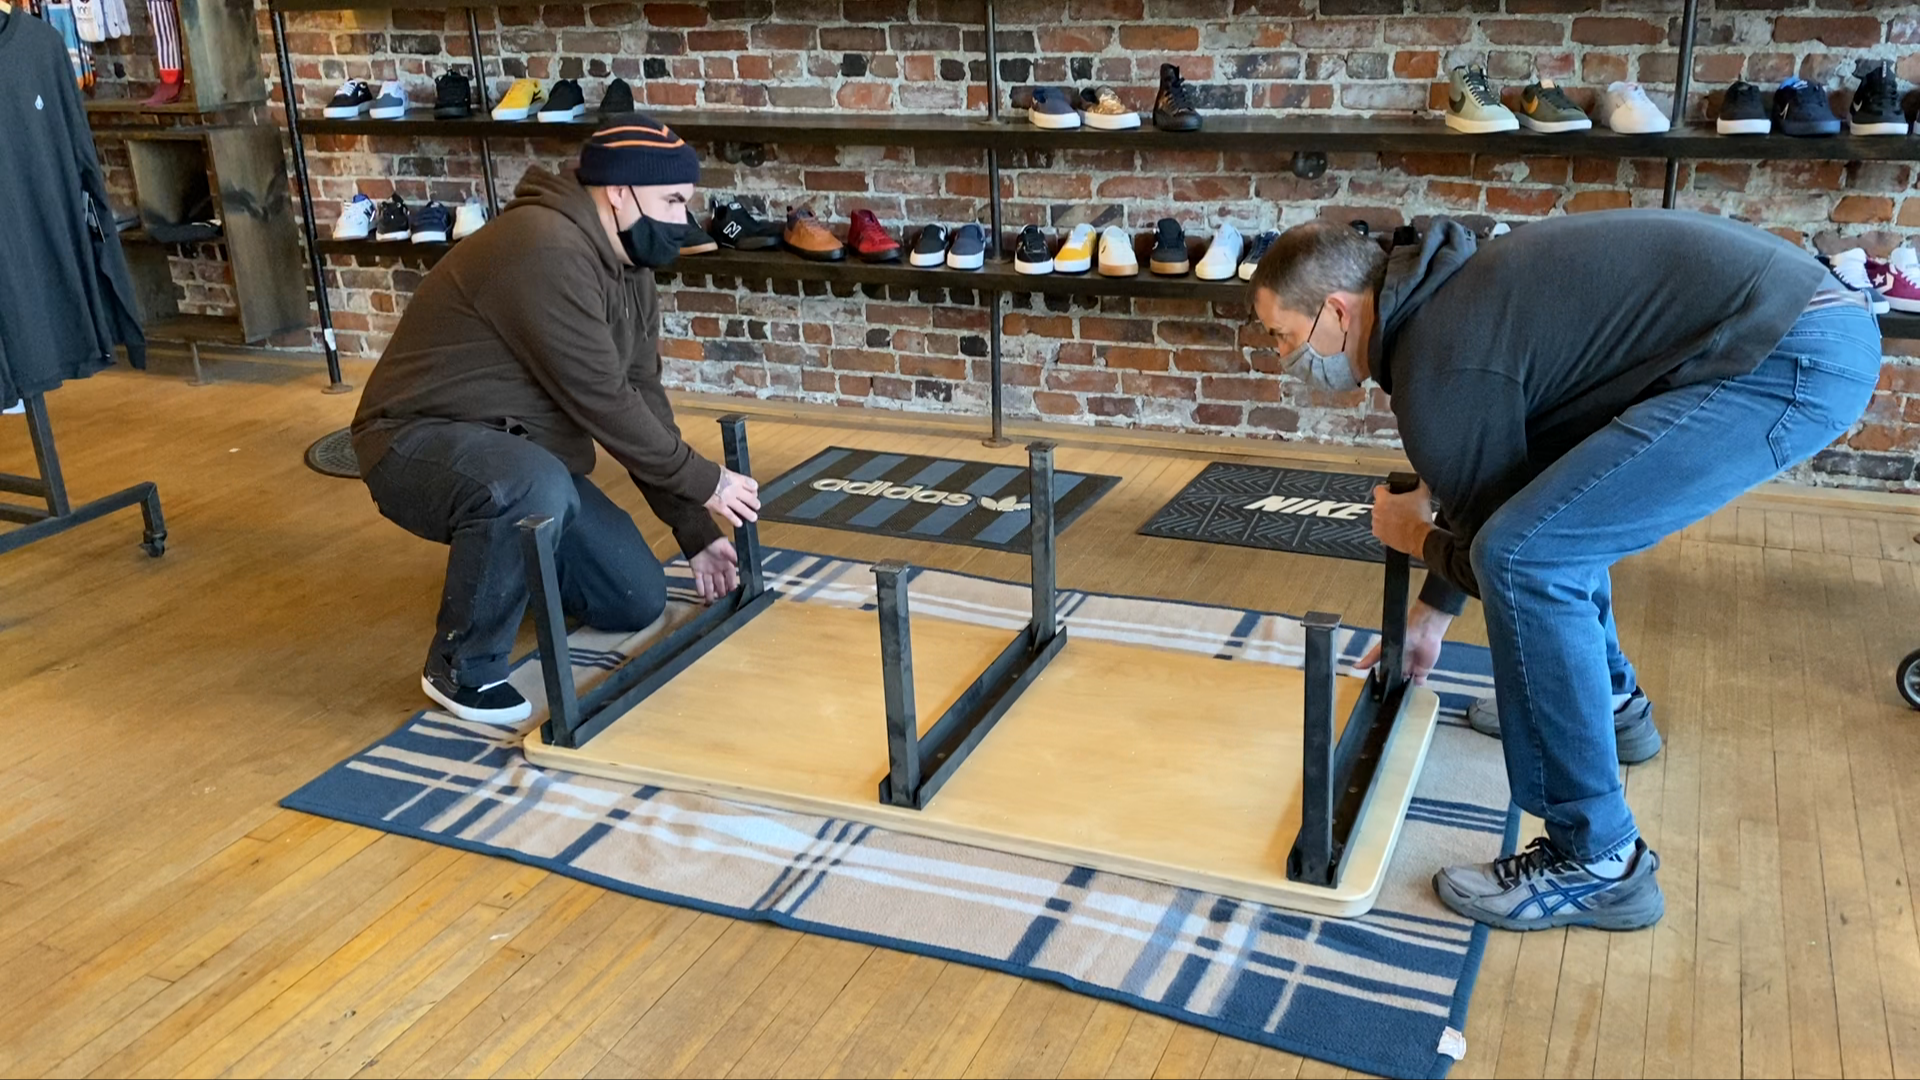
Step 13: Deliver and Attach Legs
The legs for this bench were already made so all I had to do was to screw them on to the bottom of the plywood with some 1-1/4" long #8 general purpose screws.
The bench legs were made from square tubing welded to the inside of some some C channel.
The holes in the C channel were a little bigger than the heads of the screws I was using so I just added a washer to each screw so they would not slip through the holes. The legs went on easy and were very rigid once installed.
The Nike SB skateboard bench really fits in with the atmosphere of Subsect Skateshop as you can see from the pictures.