Clamping Dorm Room Shelves
My son started his freshman year at Iowa State University and there is never enough storage in a dorm room so I decided to make some shelves that would clamp on to the loft beds in his room. The dorm room came with one shelf per bed, but there was hardly enough room on one of these shelves for more than a couple small items and a phone.
I decided to make a few more shelves to give my son more storage. While I was at it I decided to give them a little college flair and used my X-Carve CNC to carve some school spirit into the front of the shelves.
Step 1: Tools and Materials
Materials
3/4" baltic birch plywood
1/2" baltic birch plywood
Wood Glue
Wood Sealer - Minwax Polycrylic Clear Satin
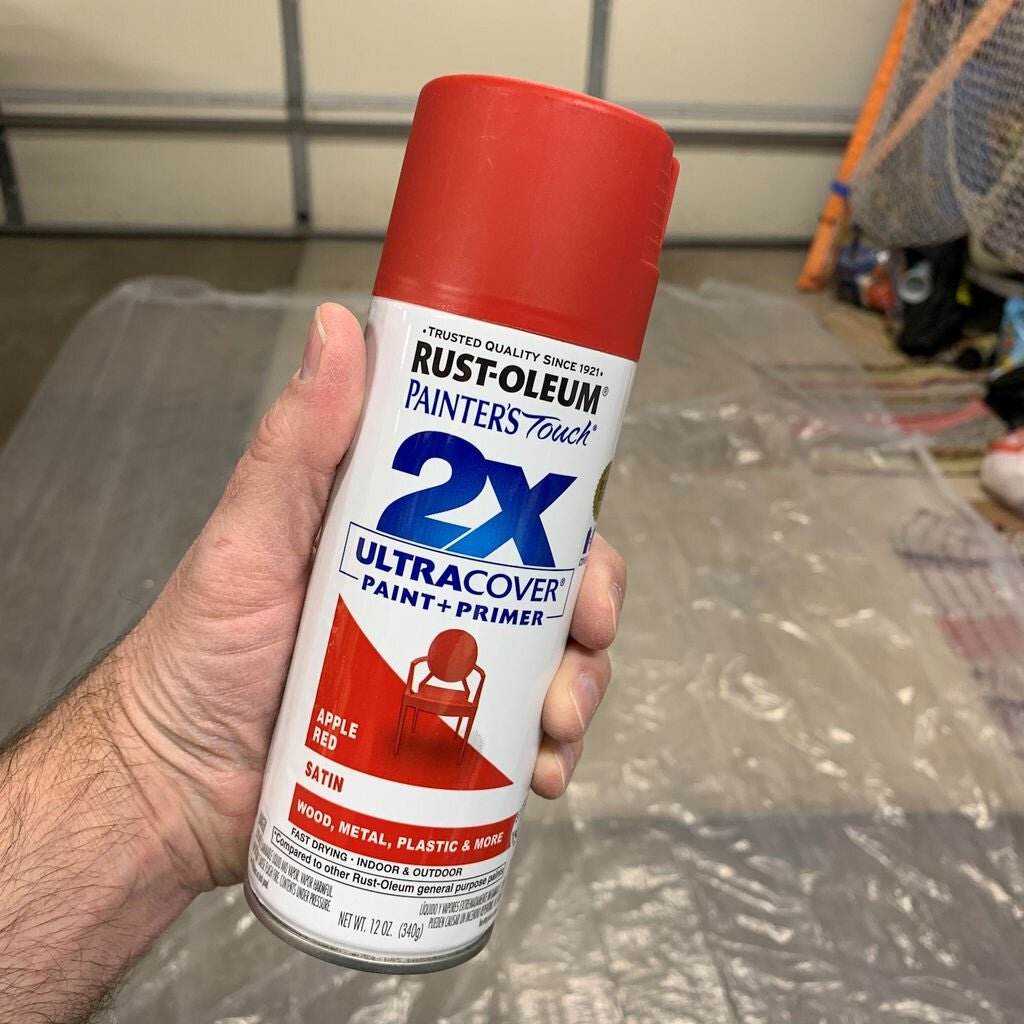
Spray Paint
Hardware
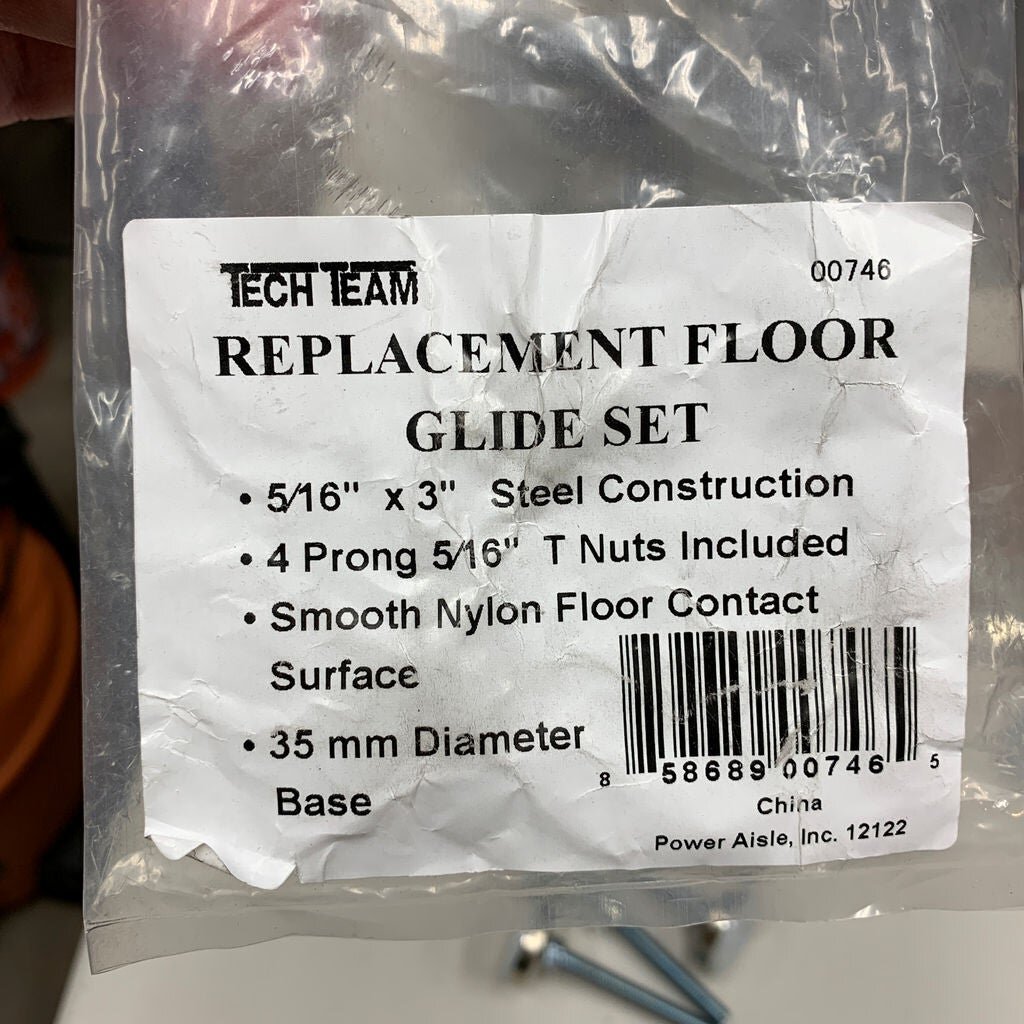
5/16" - 18 Floor Glides Leveling Feet - Amazon
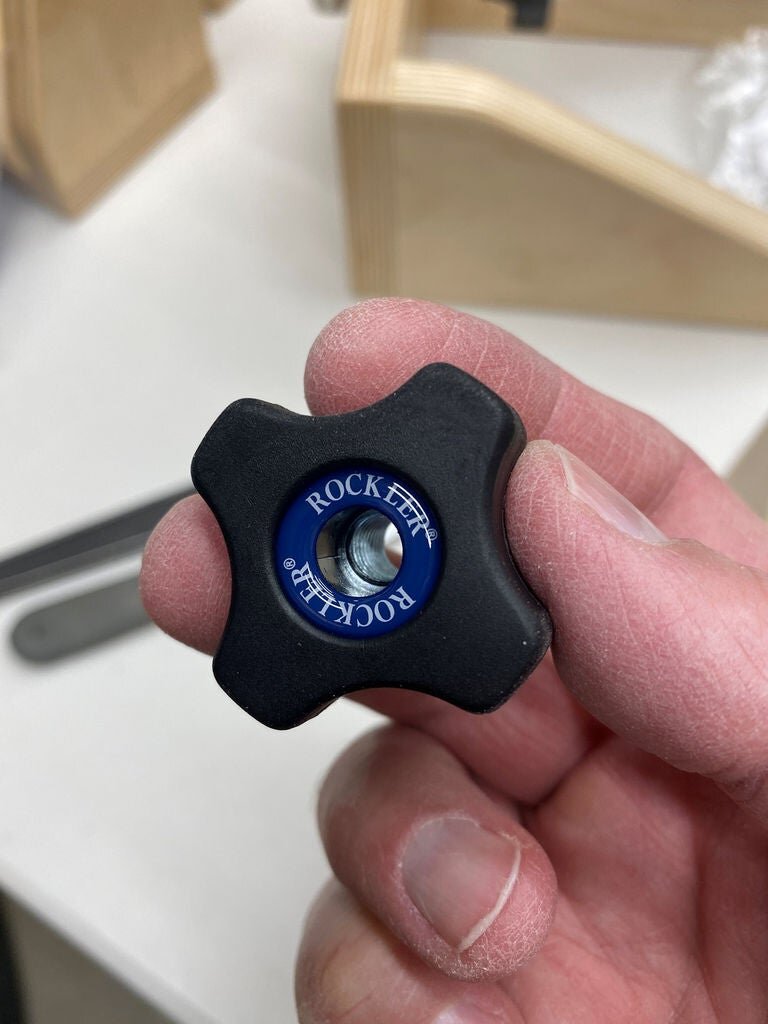
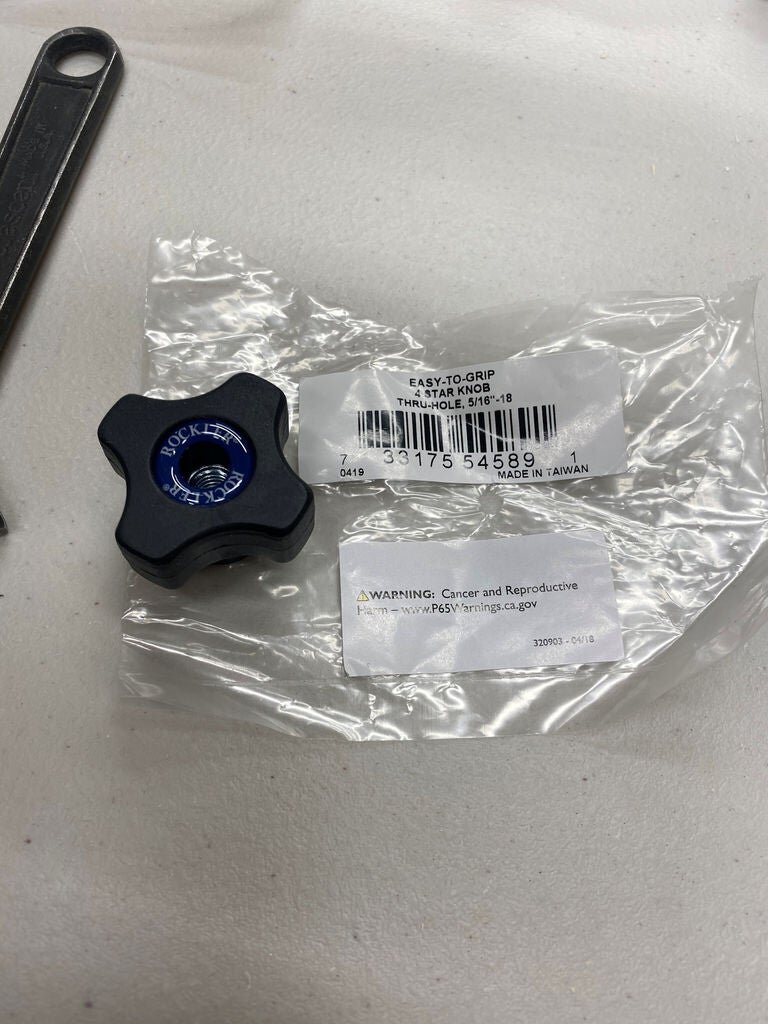
5/16" - 18 - 4-Star Easy Grip Knobs - Rockler
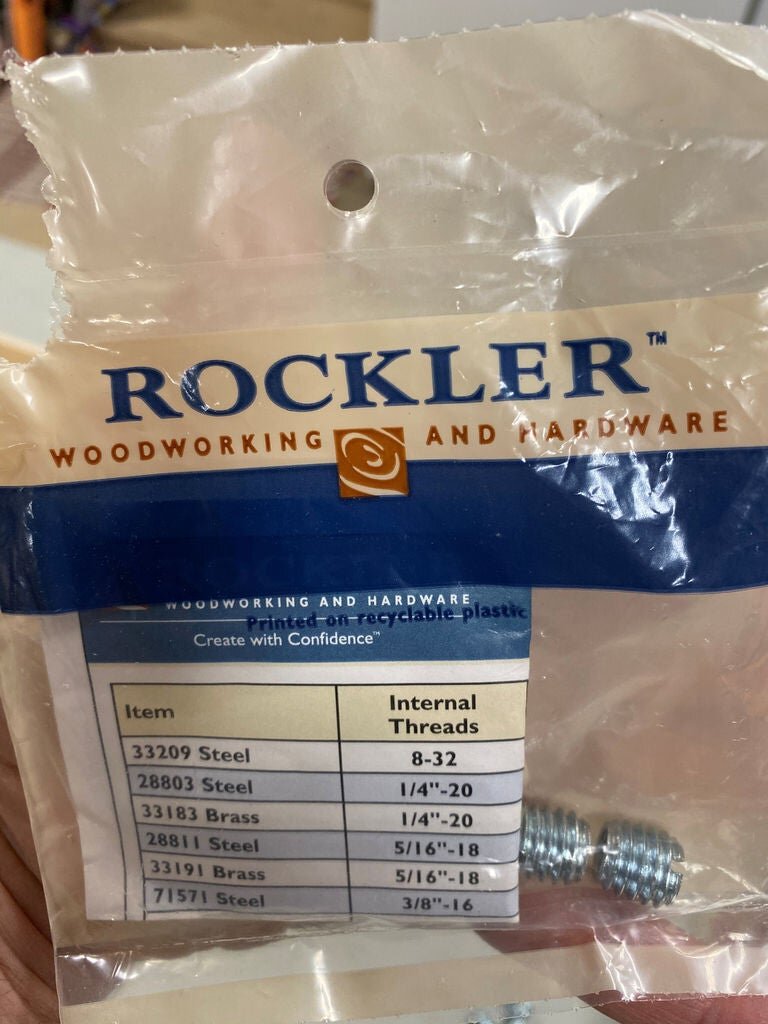
5/16" - 18 Steel Threaded Inserts - Rockler
5/16" nylon locking nuts
Screws of various lengths and types
Kreg pockethole screws - hardwood and softwood types
Tools
The tools I used on the project were as follows:
Kreg K4 Pockethole Jig - http://www.kregtool.com
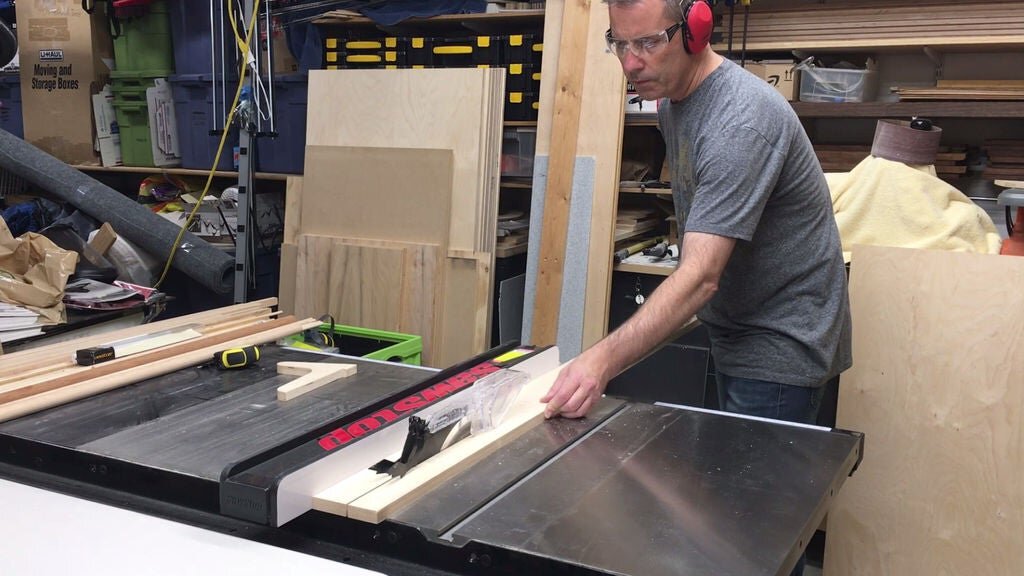
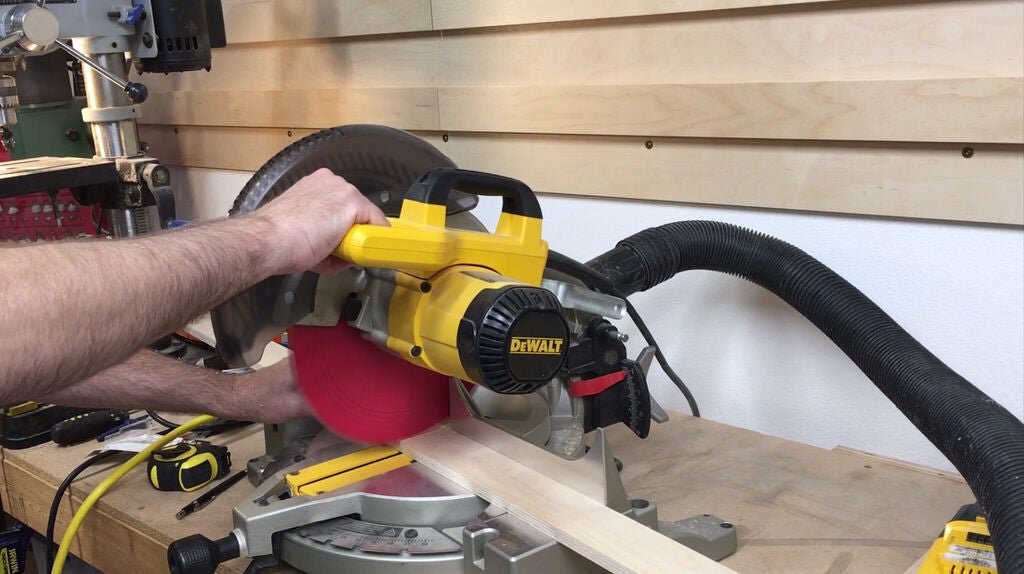
Table saw
Band Saw
Oscillating spindle and belt sander
Cordless drill
Drill press
Random orbit sander
Screwdrivers and wrenches
Shop vac
Sand paper and sanding blocks
Clamps
CNC Machine (Very Optional)
Not all of the tools in this list are required, but will make the construction much easier. Your build may need more or less than what I show. This may also vary based on the material that you construct your marble track and cabinet with.
NOTE: If you plan on using any tool for a project please make sure you are familiar with the tool and all of the dangers associated with it. If you are not familiar with a tool then you should ask someone who is to show you the proper way to use it. A lot of communities have classes at local colleges on the proper use of tools and machinery. There are also local woodworking clubs that offer classes at very reasonable rates for beginners. I highly recommend using these resources for your safety and for the most efficient use of the tool.
SAFETY FIRST
Always wear eye and hearing protection. Always work safe with the proper safety equipment and guards on your tools.
Step 2: Design Your Shelves
The design of these shelves was really a function of the loft beds they were going to clamp to.
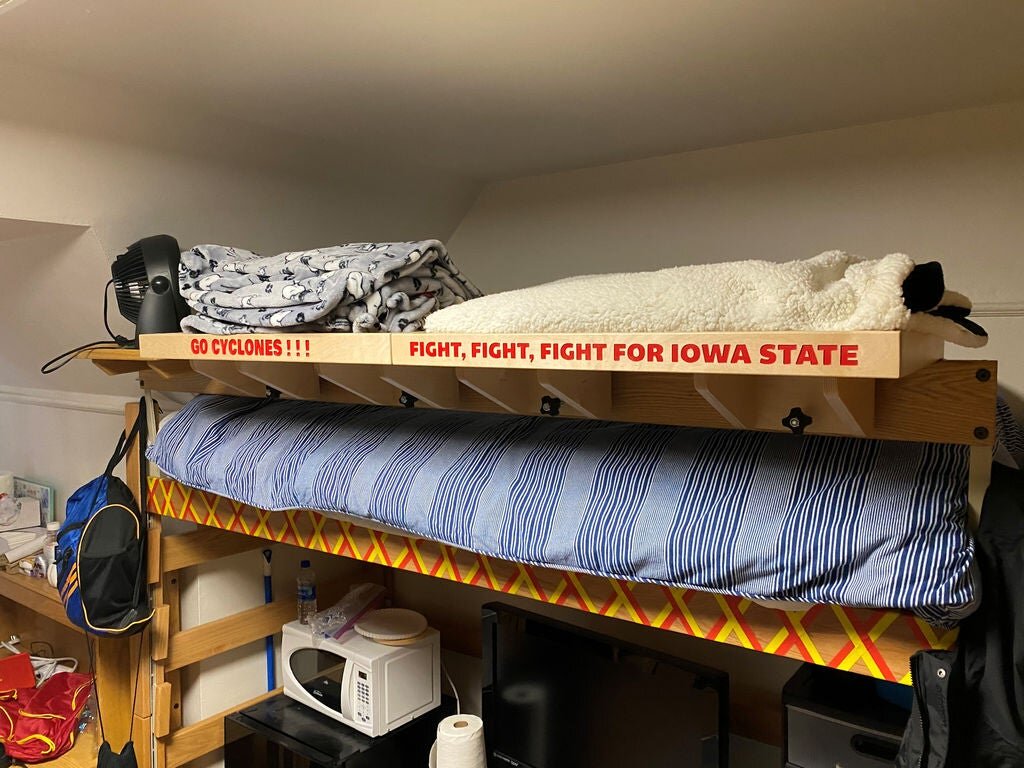
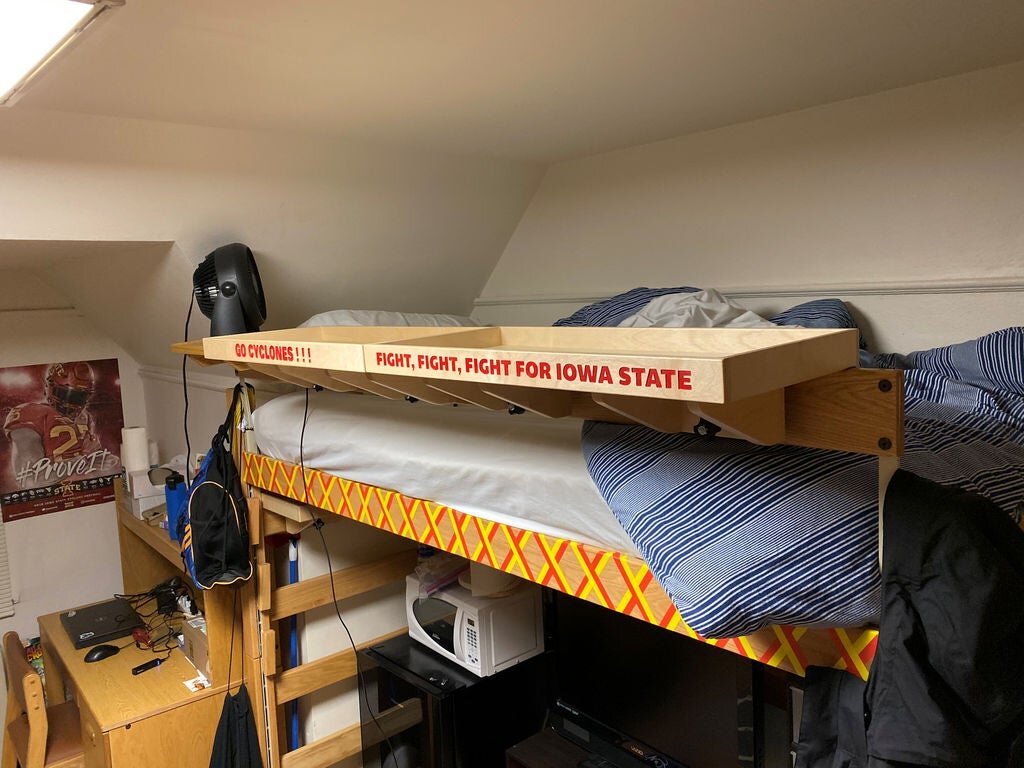
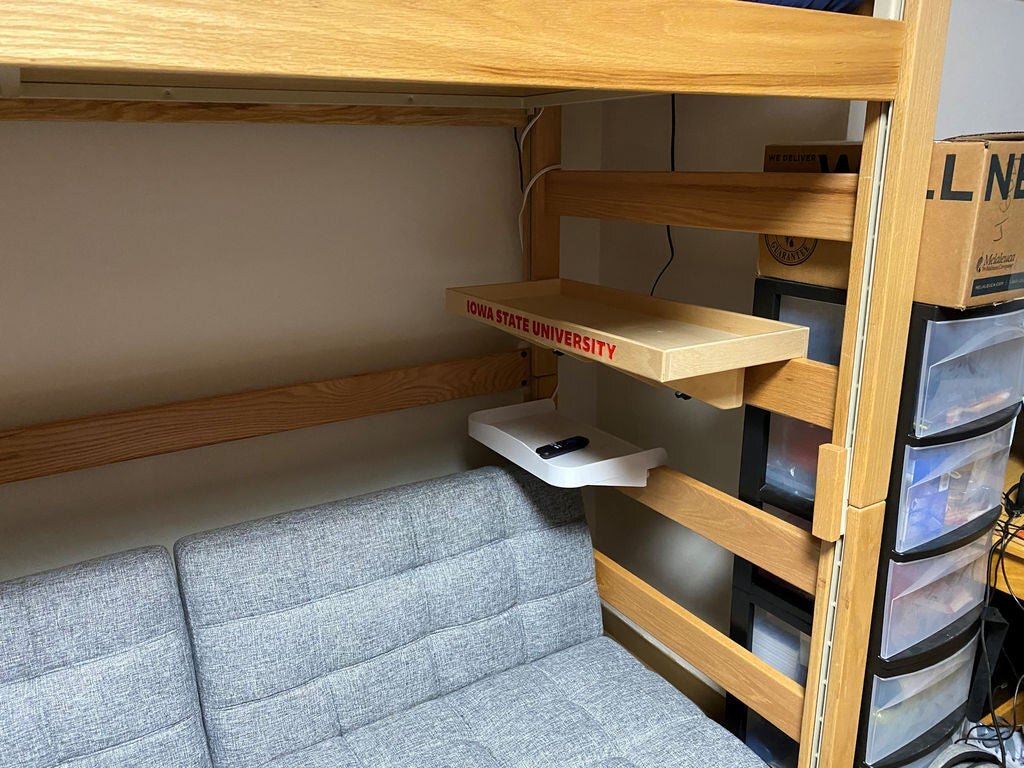
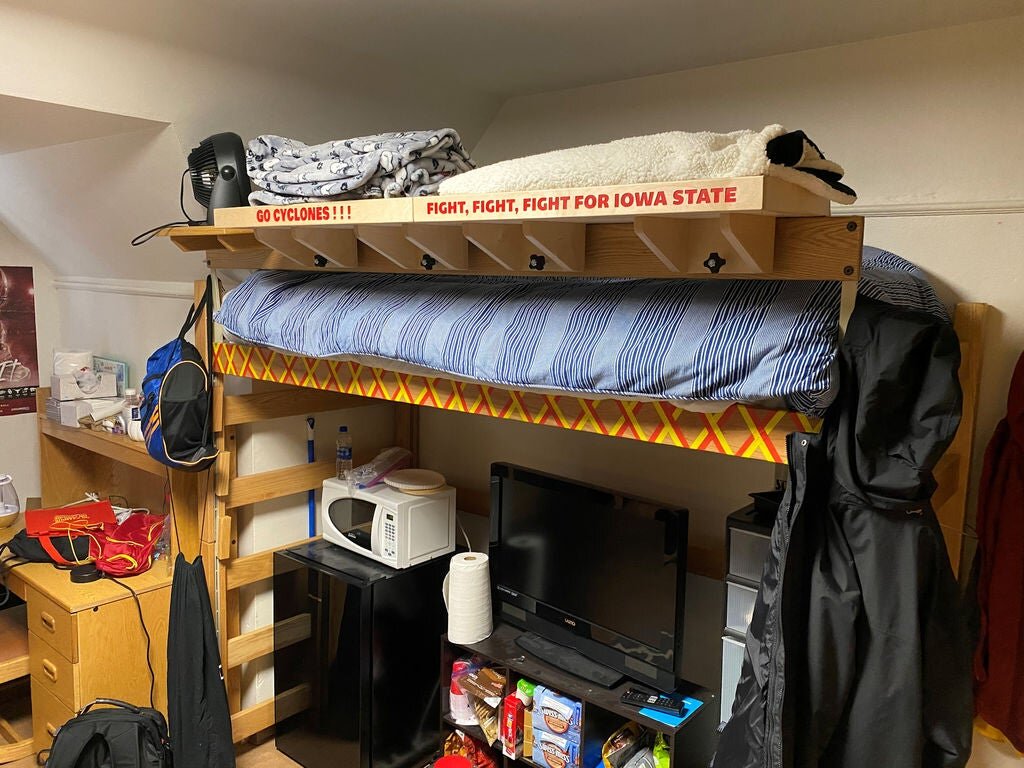
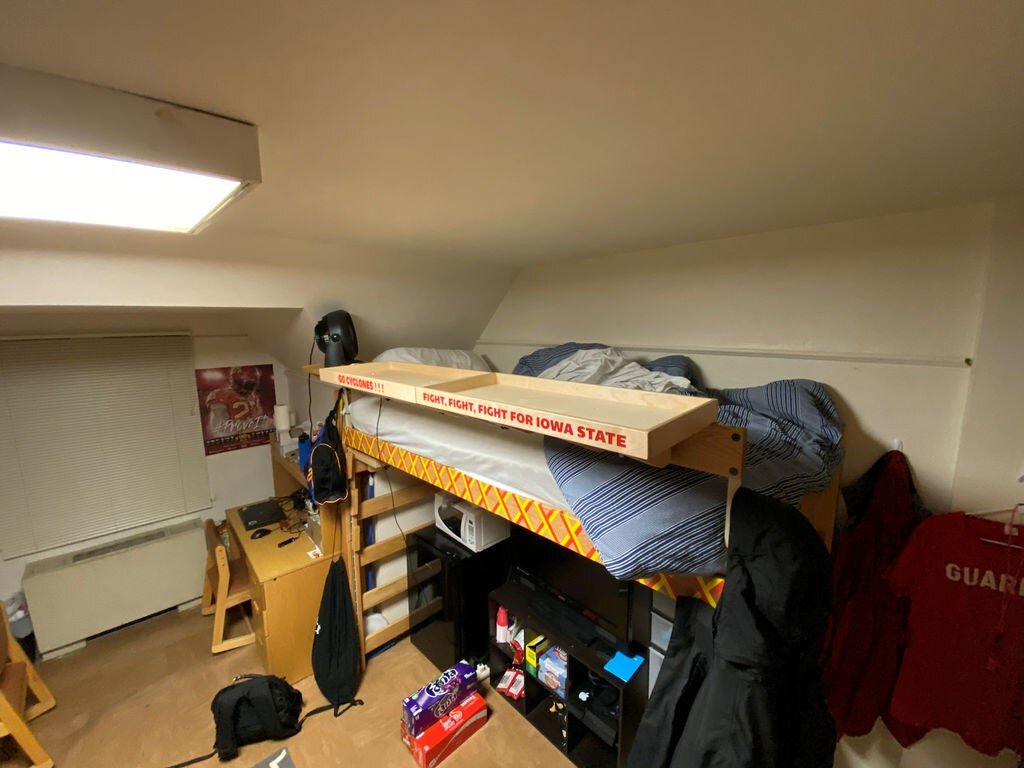
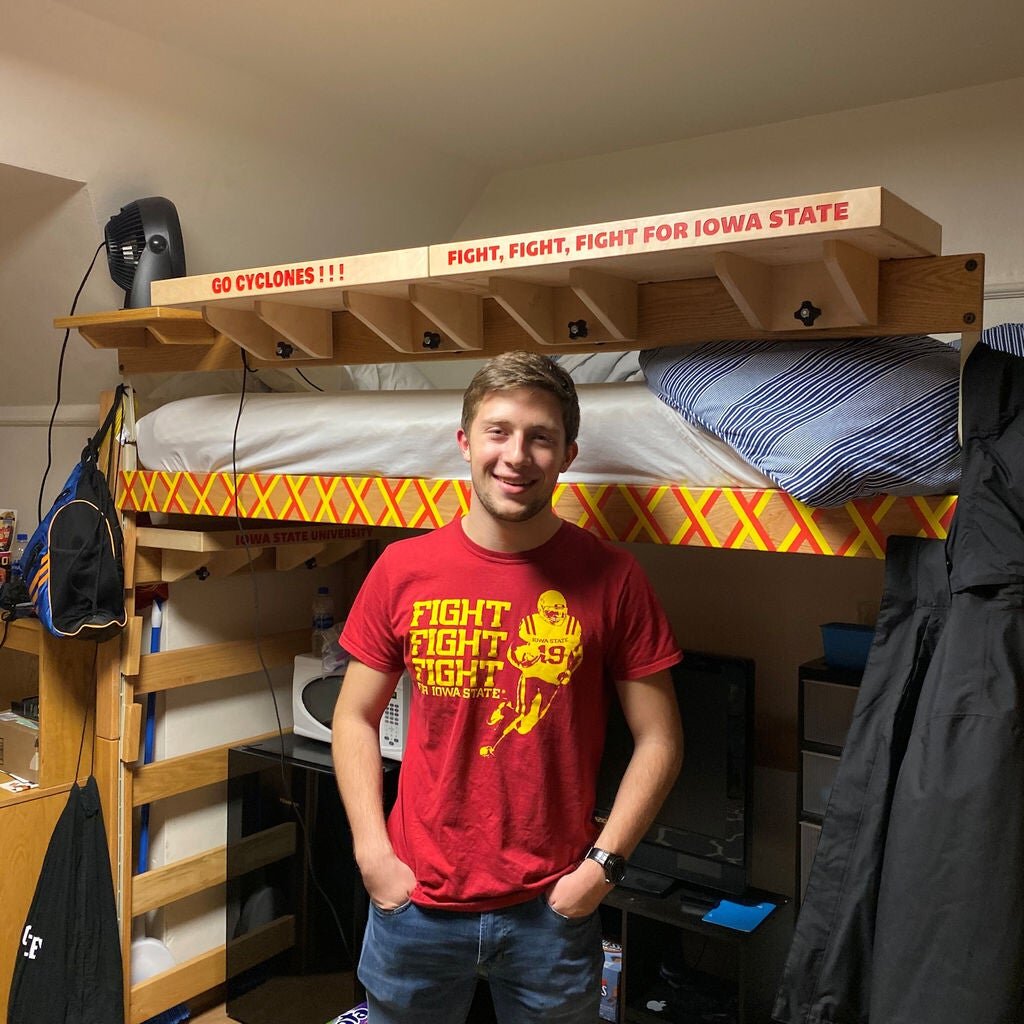
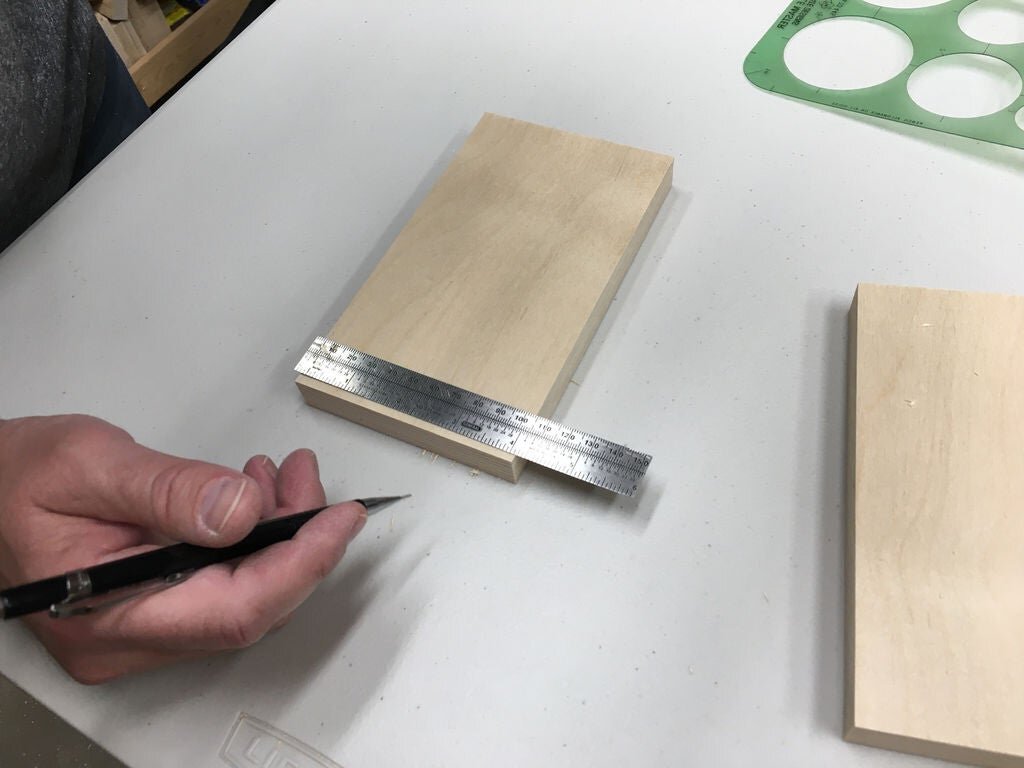
The width of the shelves was designed to fit on the end rails of the left between the two corner supports. I made the shelves 28" wide to fit between the posts and knew the two shelves could go end to end on the side rail of the bed and the combined length of the two shelves would not be too long for the bed.
The depth of shelves I limited to 13.5" since it looked like that would be deep enough for just about anything my son would want to put on them. I also knew that the deeper the shelf was would impact the stresses on the clamping system. I didn't want anything to break and come crashing down on someone below. The shelf itself is 12" deep, but the 3/4" thick front and back of the shelf make if a total of 13.5" deep.
The height of the shelves I wanted to keep as small as possible, but I needed some height on the sides in order to take some of the clamping pressure. I went with 2" tall sides in order to provide some strength for the clamping side.
All of the rails of the bed were 1" thick so I designed the clamping system opening to fit over this rail.

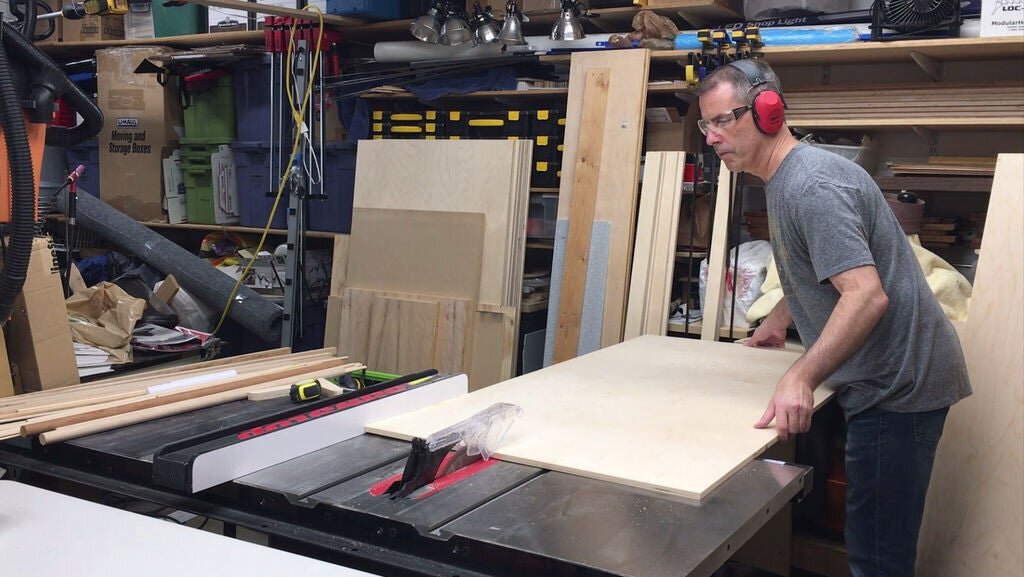
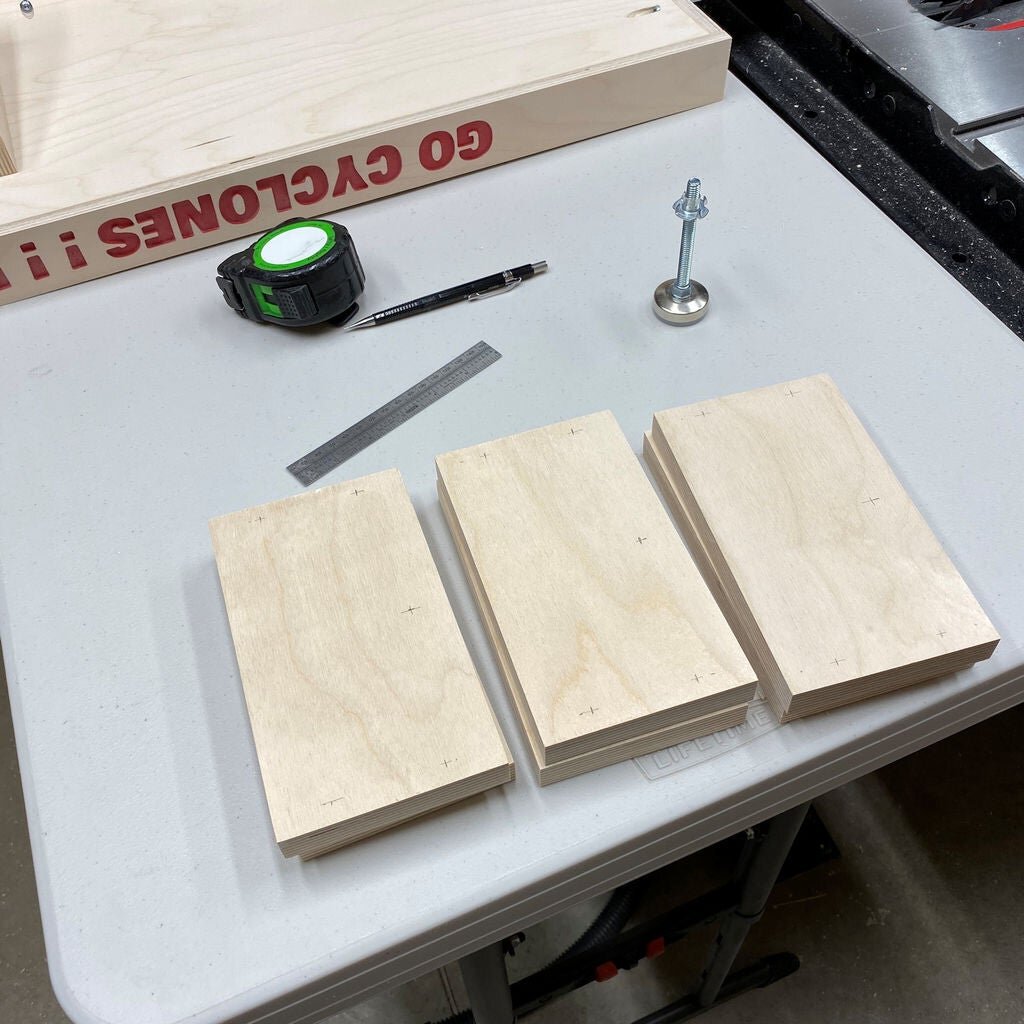
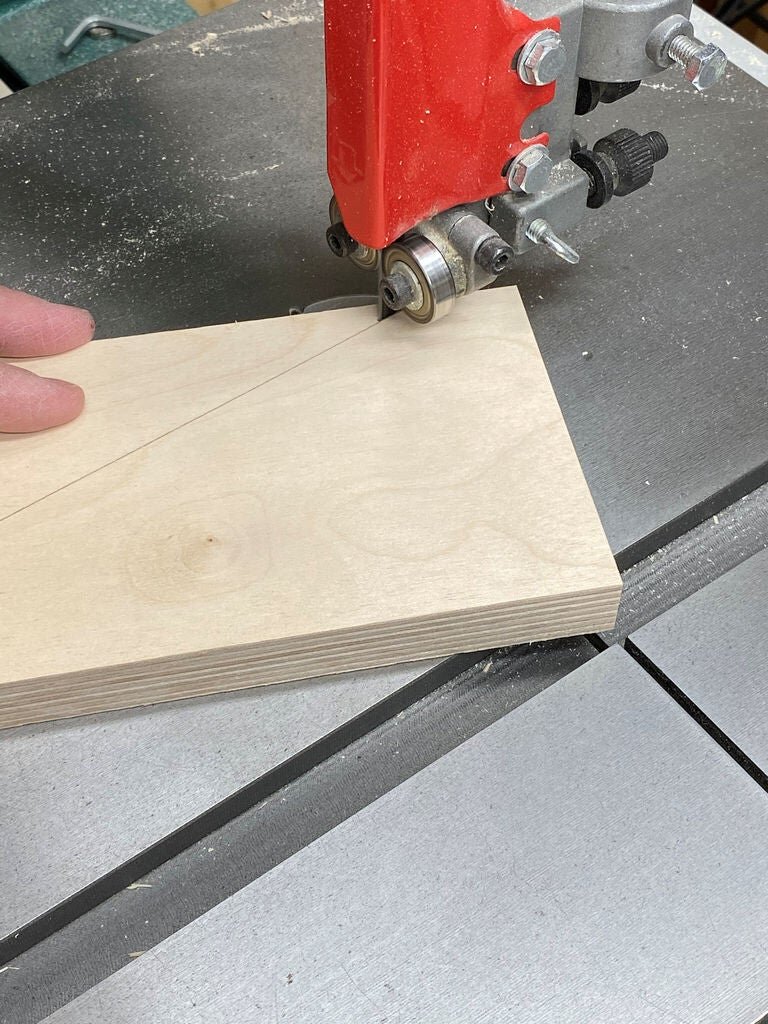
Step 3: Rough Cut the Wood Parts
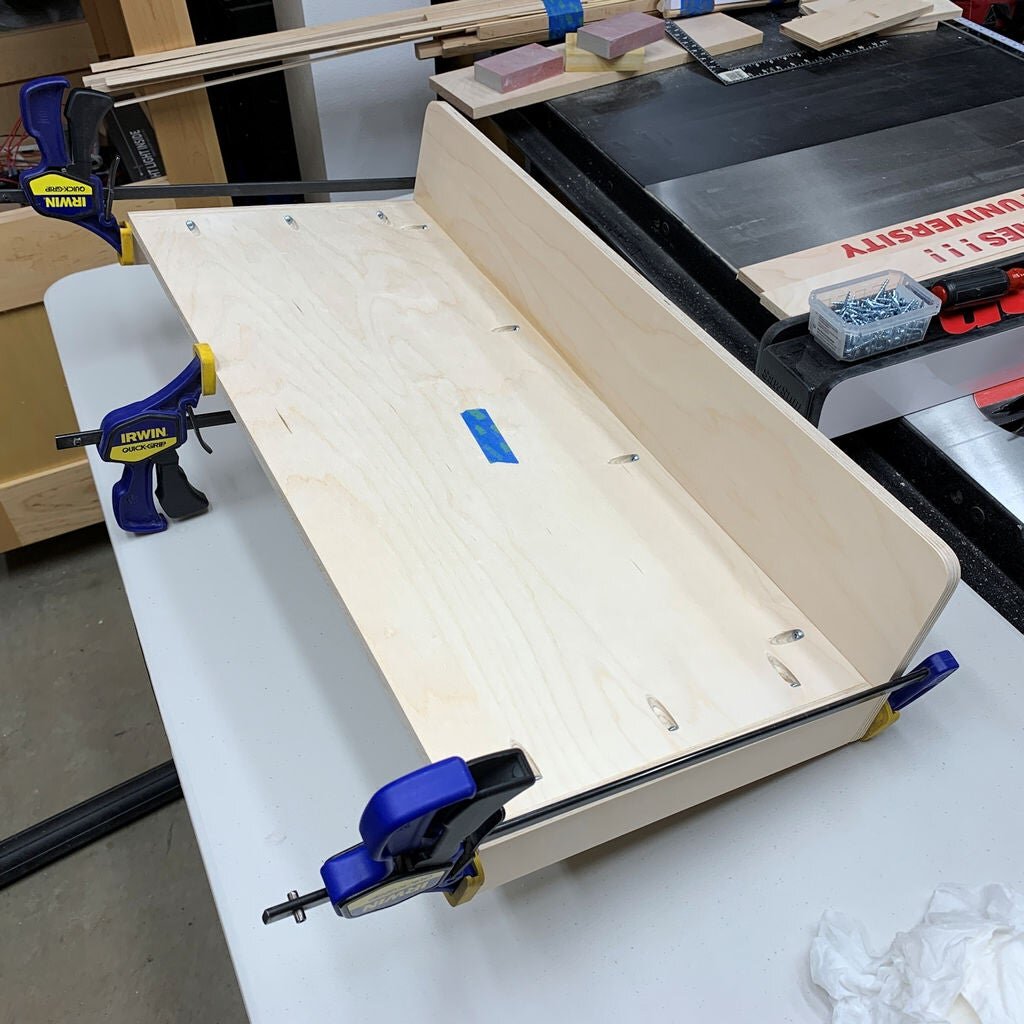
I cut all of the wood parts for the main part of the shelf at the same time so the dimensions were consistent. The front, back, and sides of the shelves were cut a little long so I could cut them to the exact length needed later when I assembled the shelves.
Bulk cutting like this can save you a lot of setup time and also give you more consistent results.
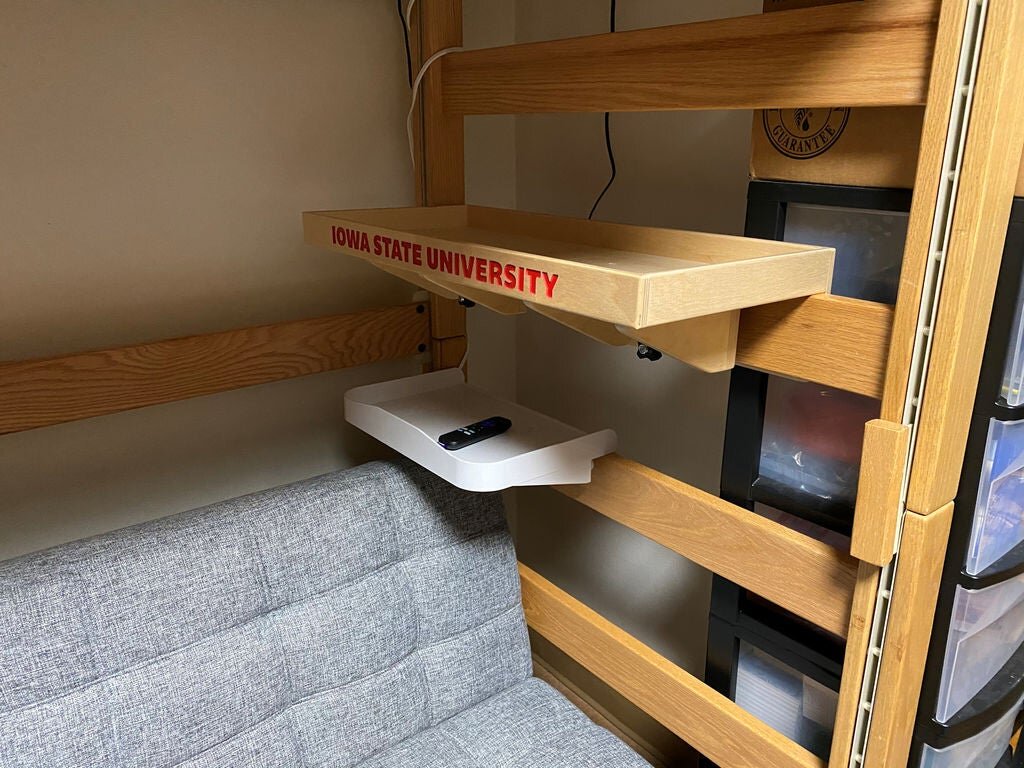
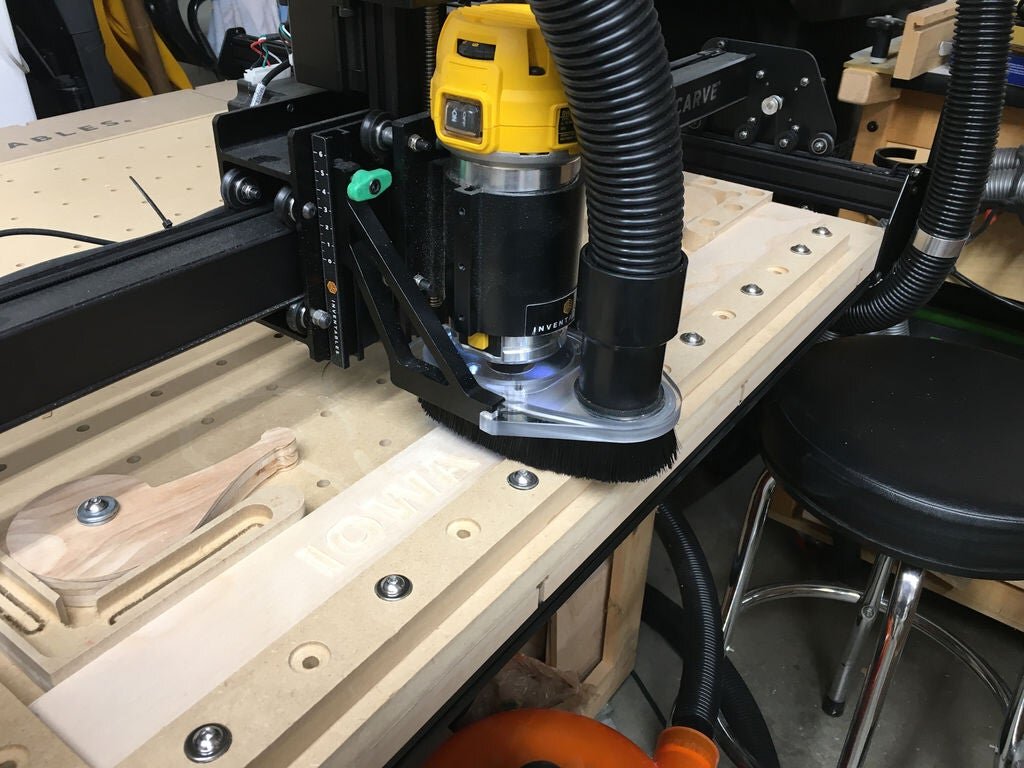
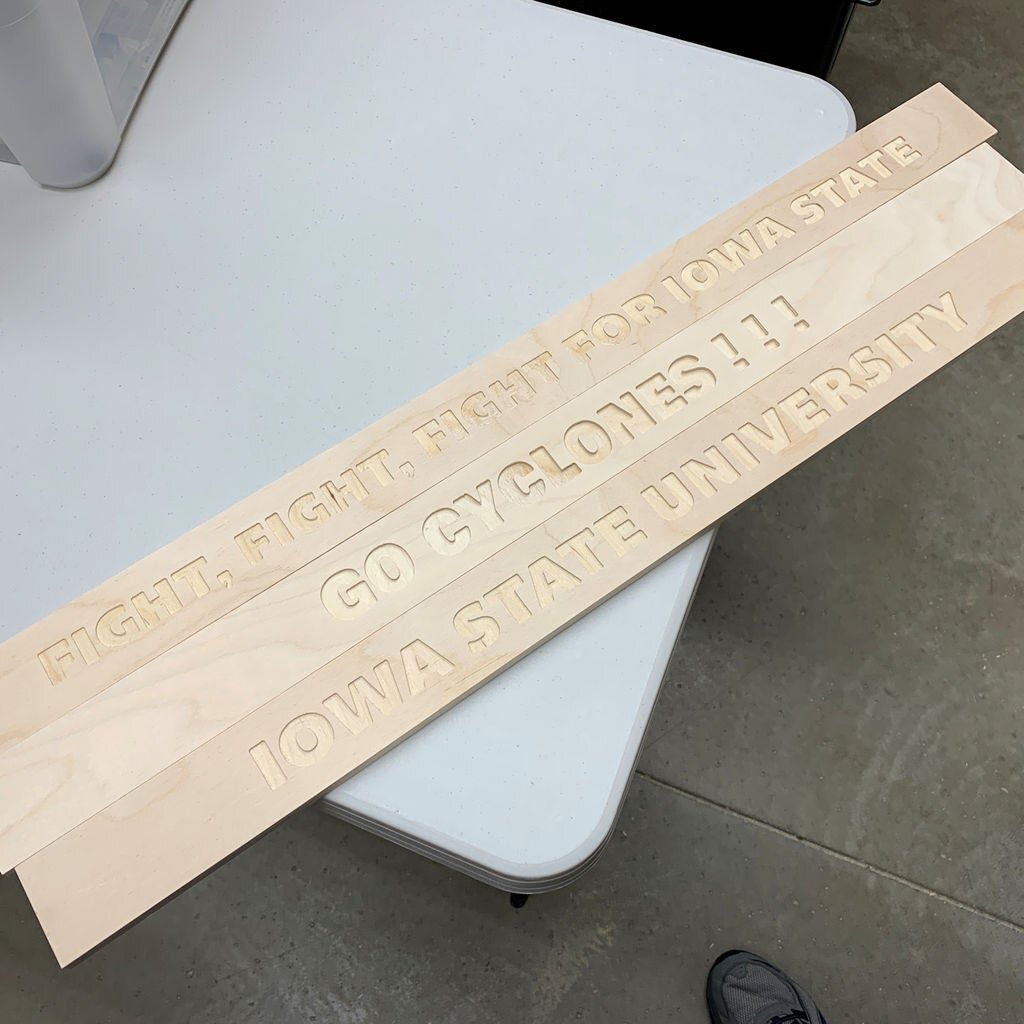
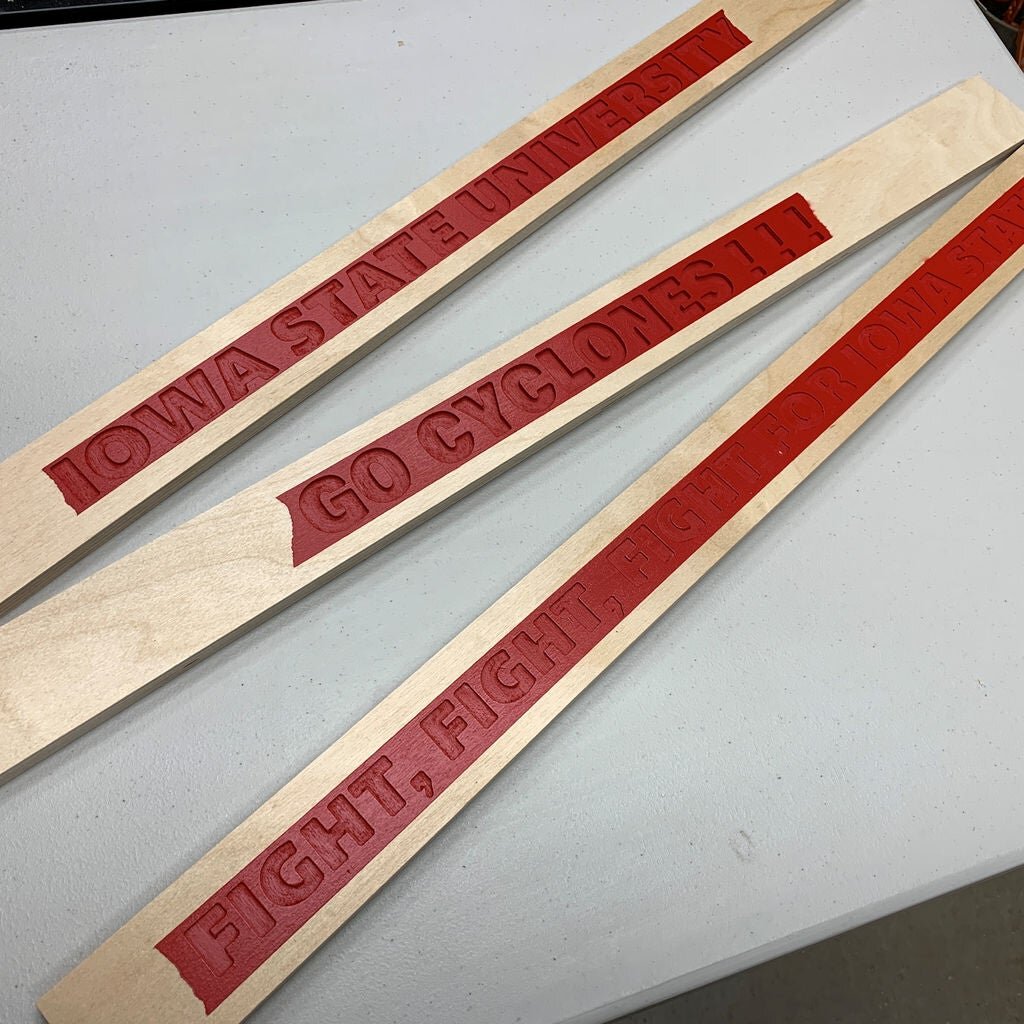
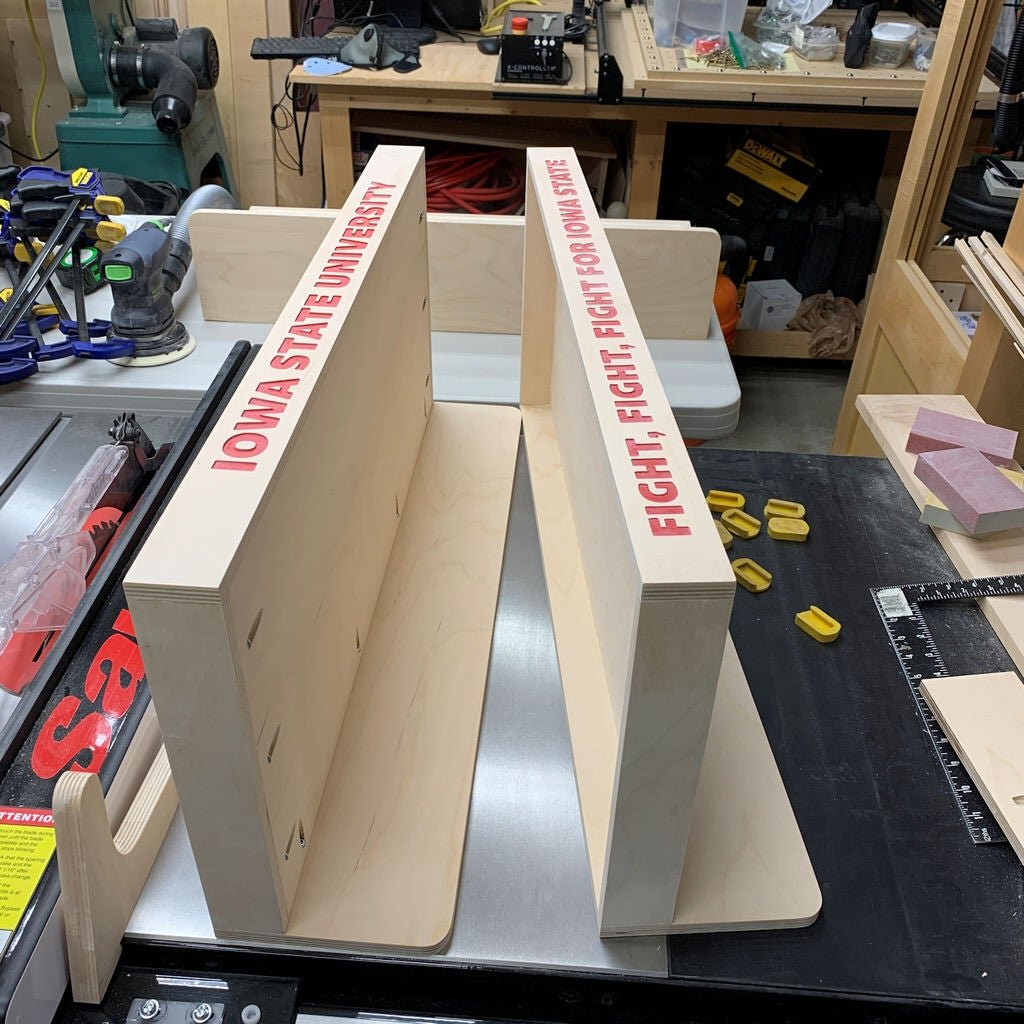
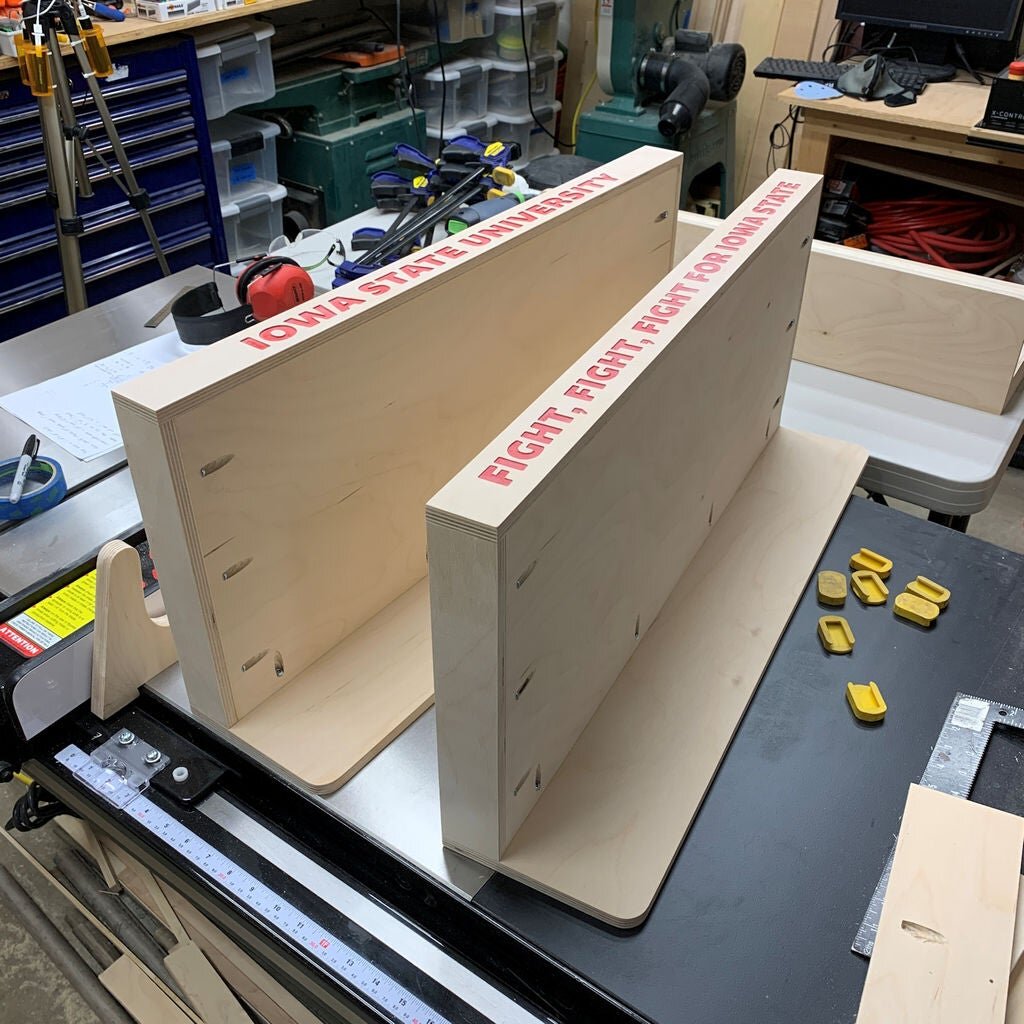
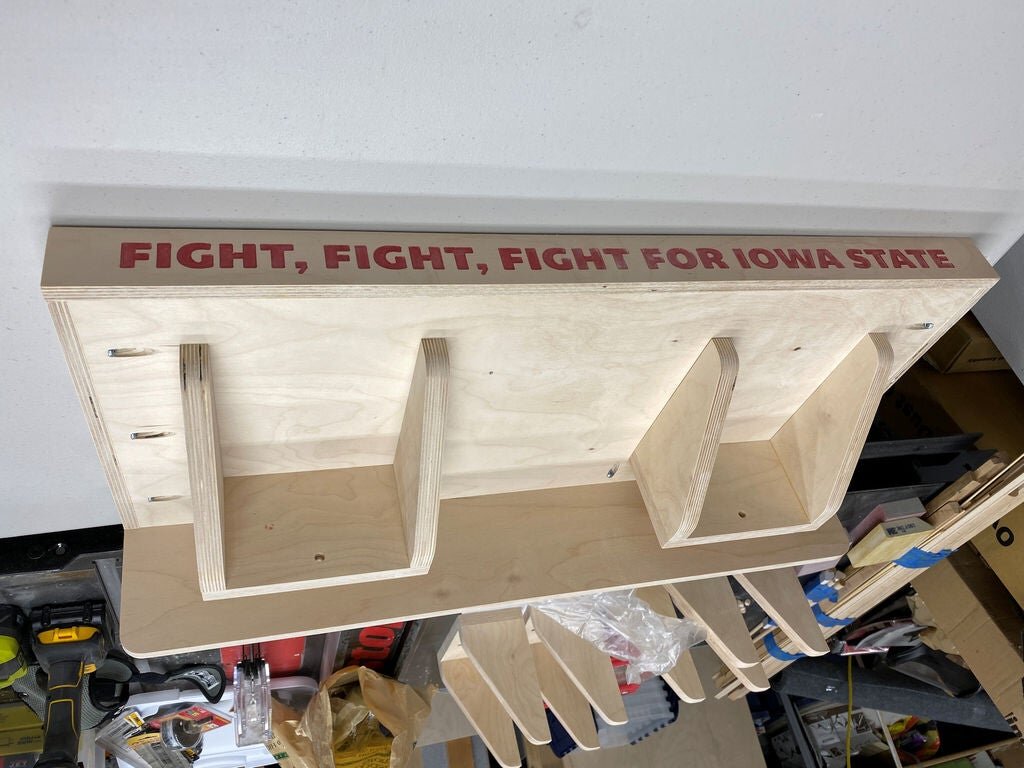
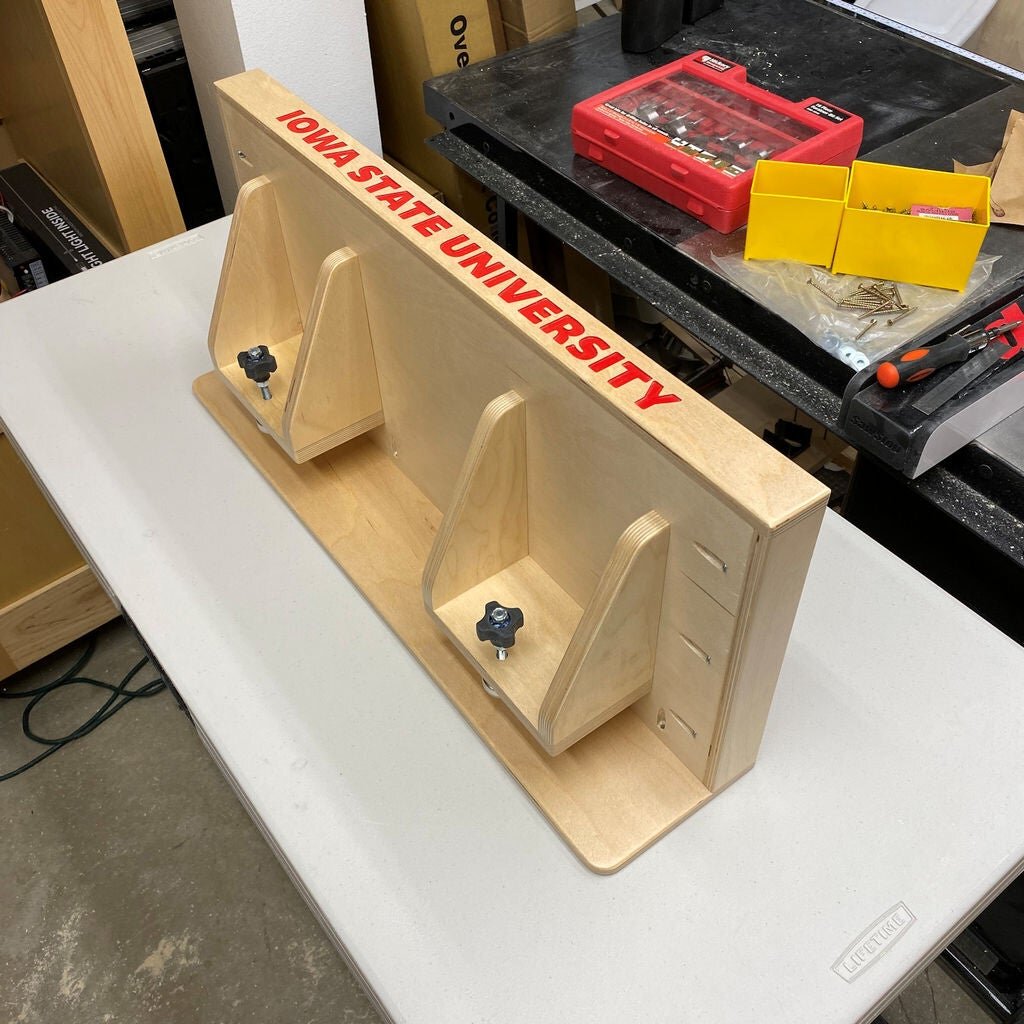
Step 4: Add Some School Spirit
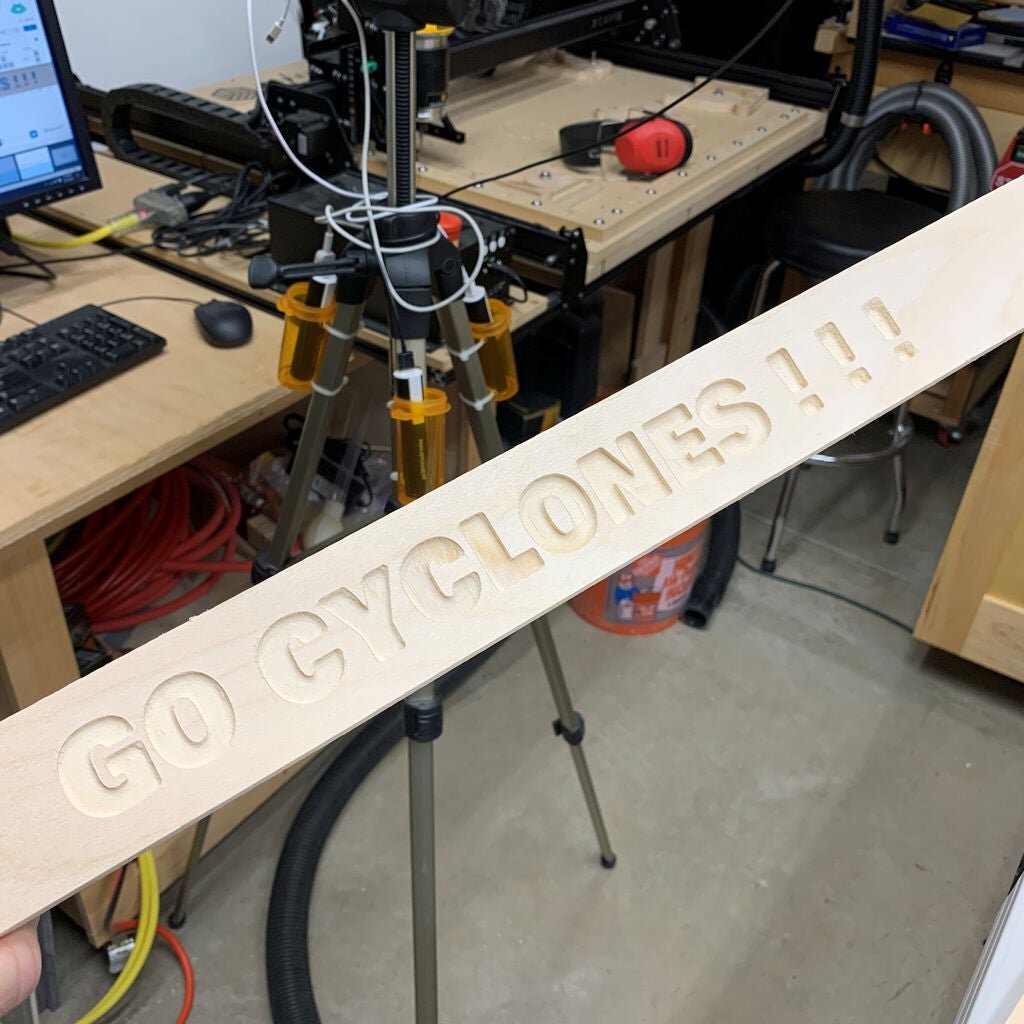
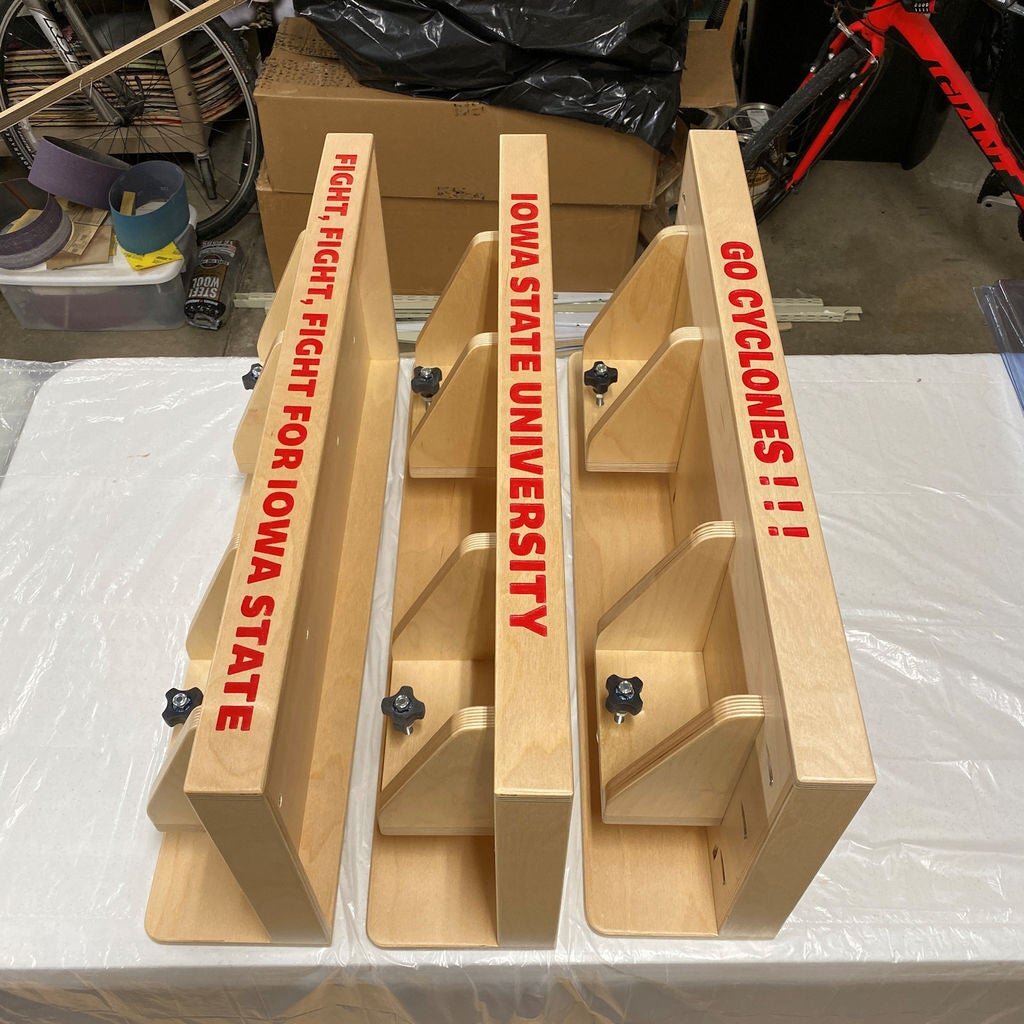
I decided to add a little school spirit for the Iowa State Cyclones by carving three different fronts for the shelves. They were:
Iowa State University
Fight,Fight,Fight for Iowa State, and
Go Cyclones ! ! !
You could do the same type of thing with stickers if you don't have access to a CNC or have the time to add this feature.
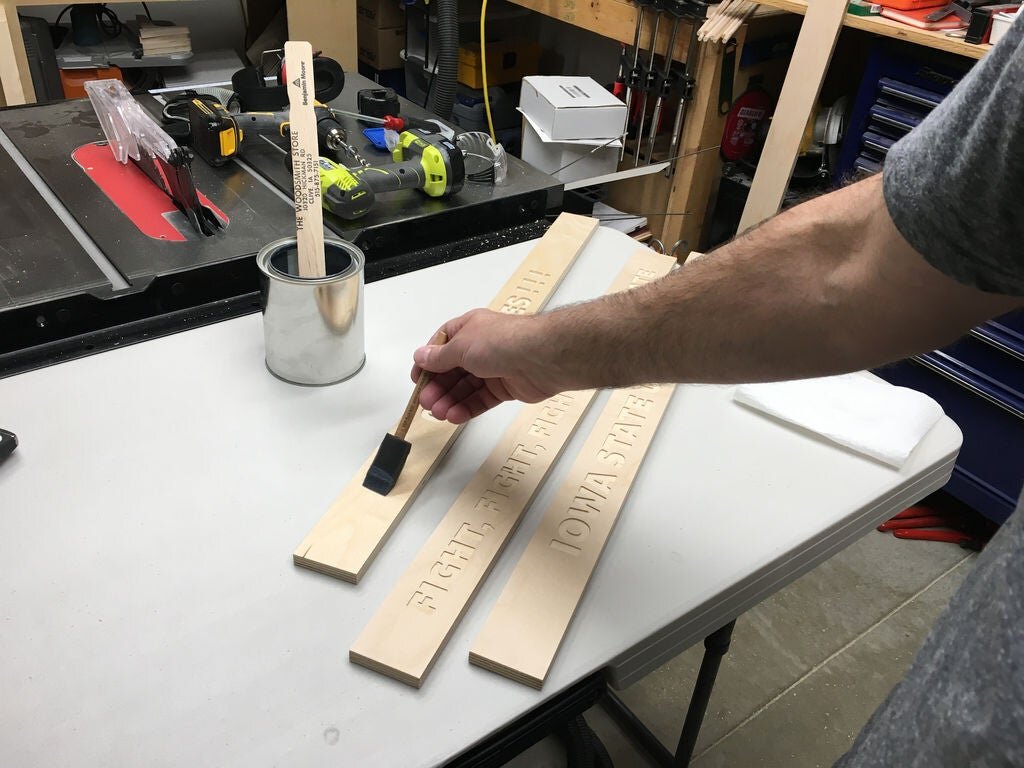
I carved the lettering into the front pieces of the shelves with an X-Carve CNC machine. I was glad I kept the width of the shelves to 28" so the pieces would fit in the CNC.
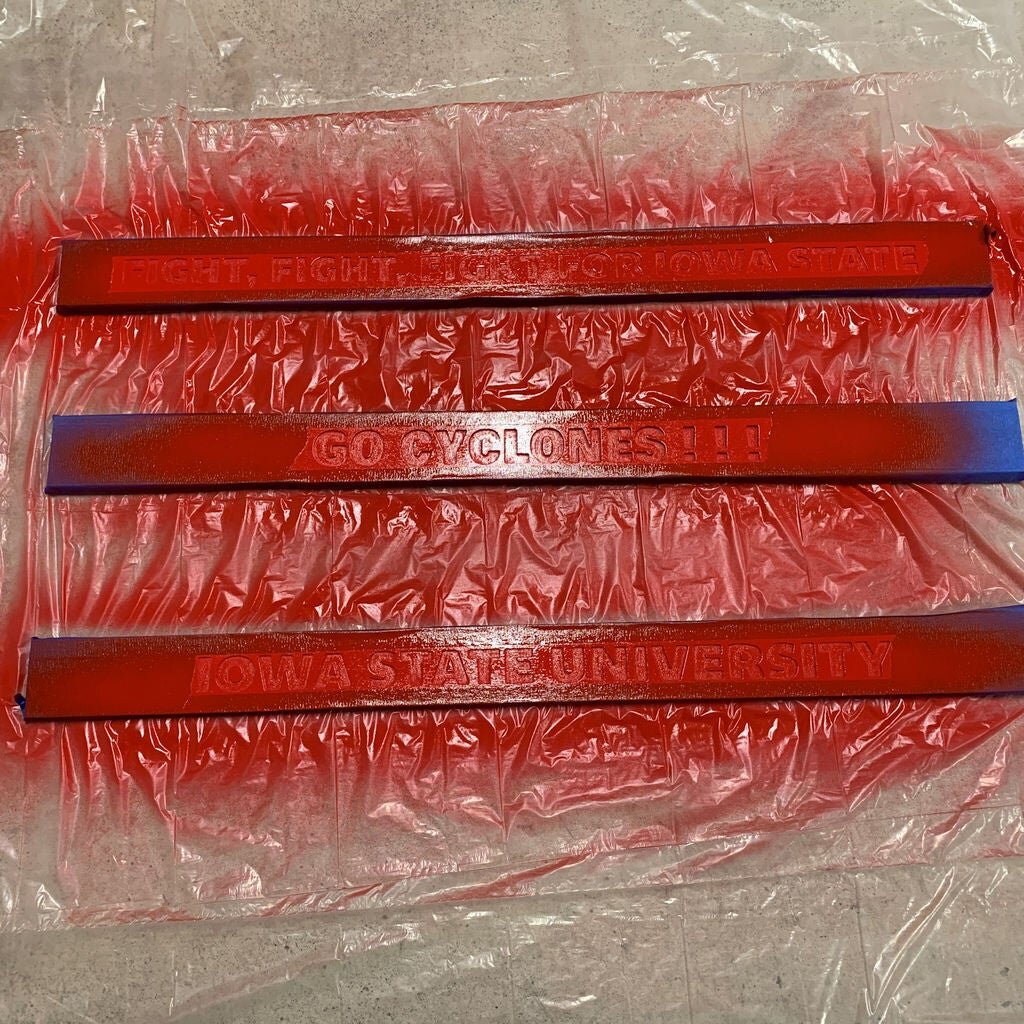
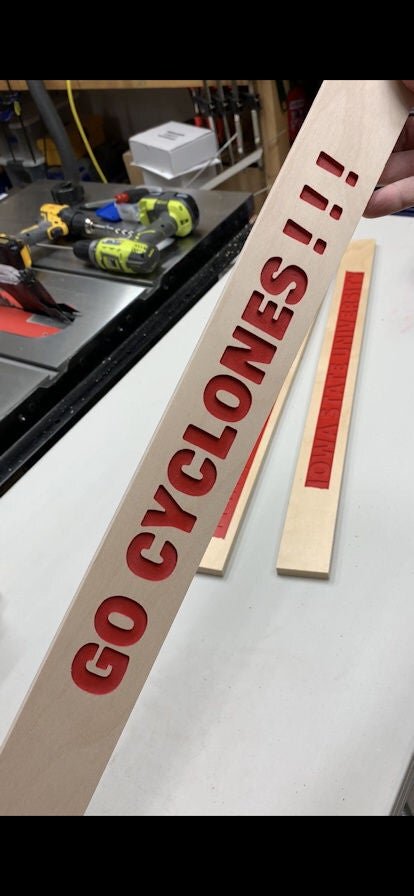
After carving the letters for all three shelves I masked most of the pieces off with 2" wide blue painters tape. This kept sanding to a minimum after I spray painted the letters.
I put down a sheet of thin plastic to keep the over-spray from painting from making a mess on the garage floor. It also keeps the dust on the garage floor from being kicked up from the spray can and possibly ruining the the carved pieces.
I gave the pieces several coats of red spray paint making sure the spray into the sides of the lettering and cover all surfaces.
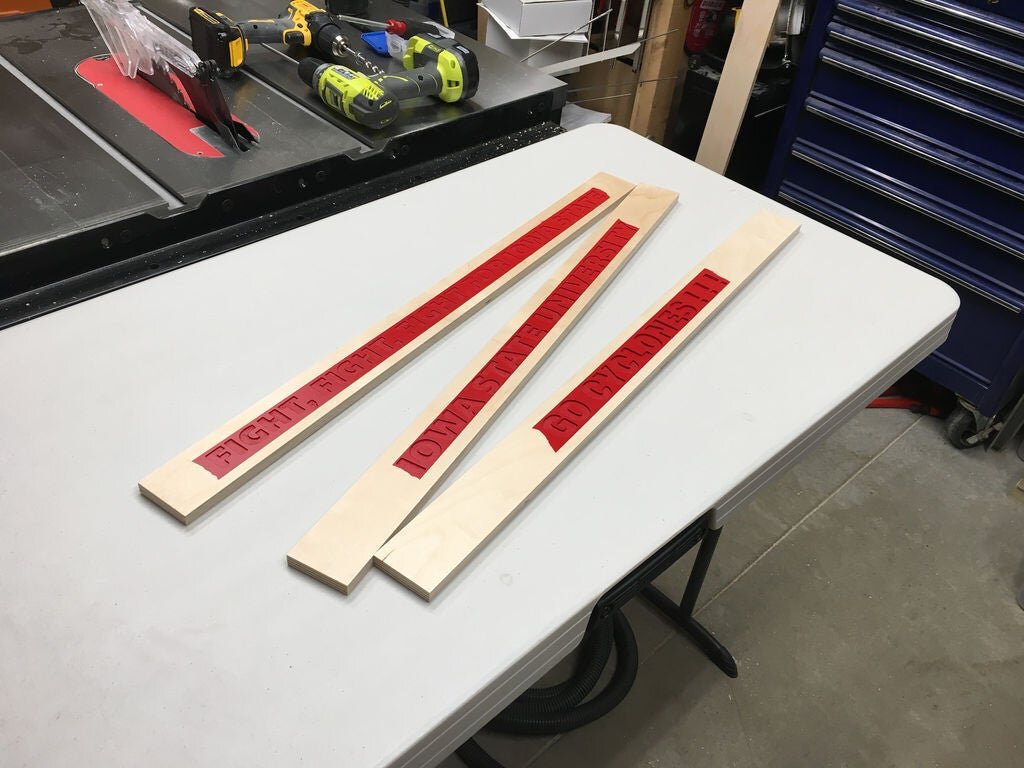
After the paint dried, I used a random orbit sander to remove the spray paint from the surface of the shelf fronts. This took a little time made quite a mess with red sanding dust. I used a shop vac to suck most of the sanding dust out of the carved letters and then I took an air compressor and blew the rest of the dust out of the letters.
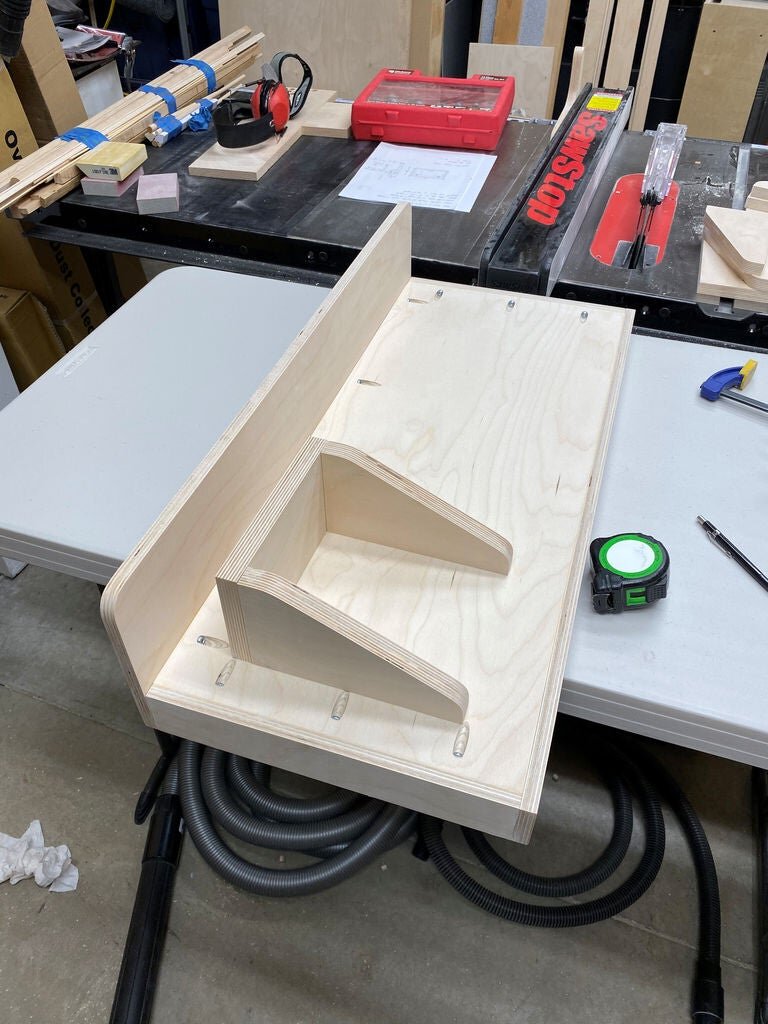
Step 5: Assemble the Shelves
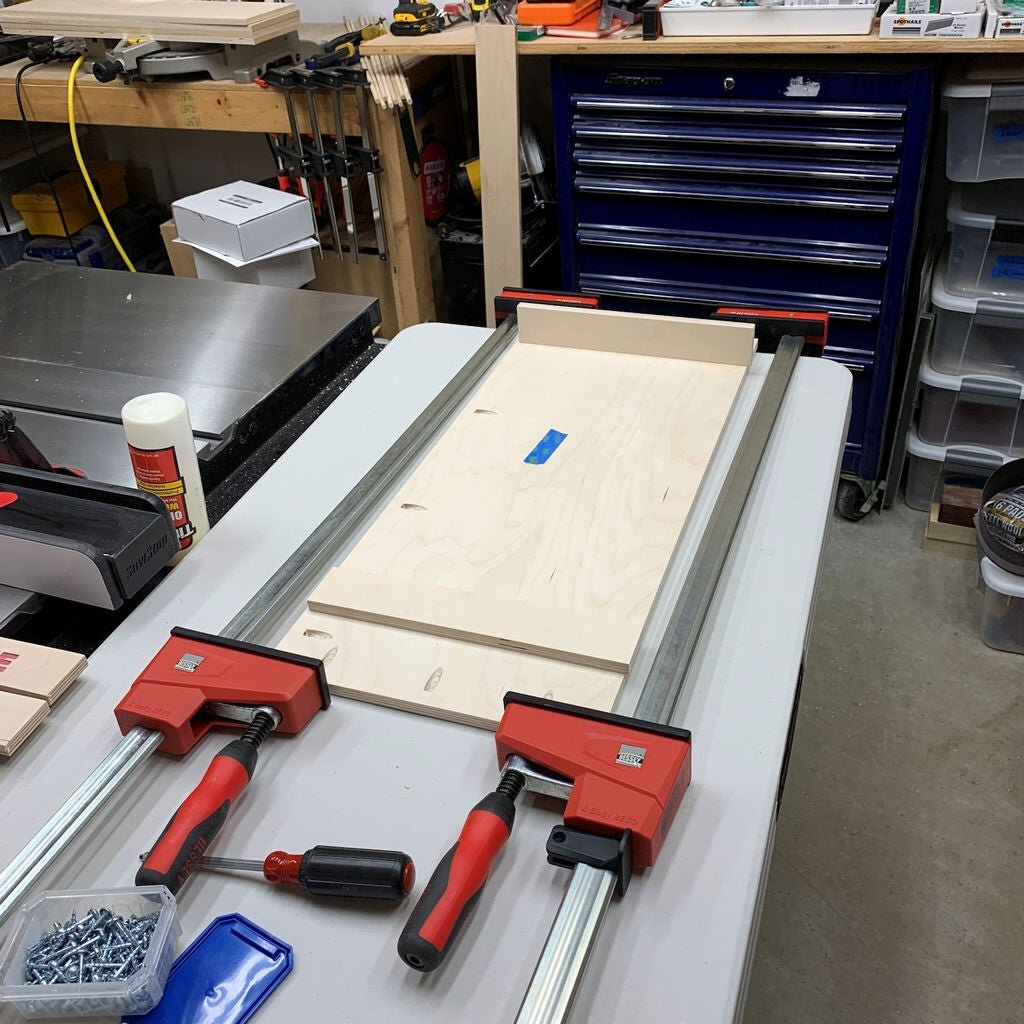
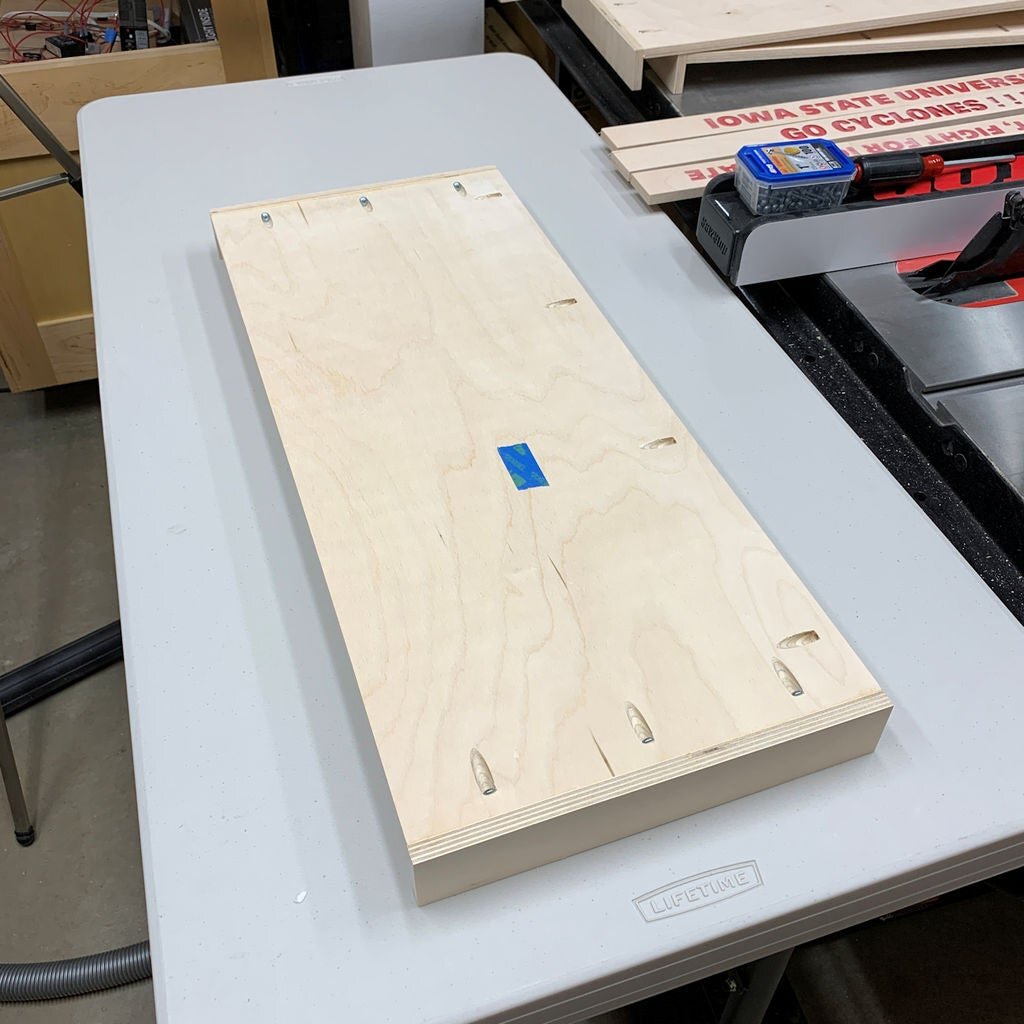
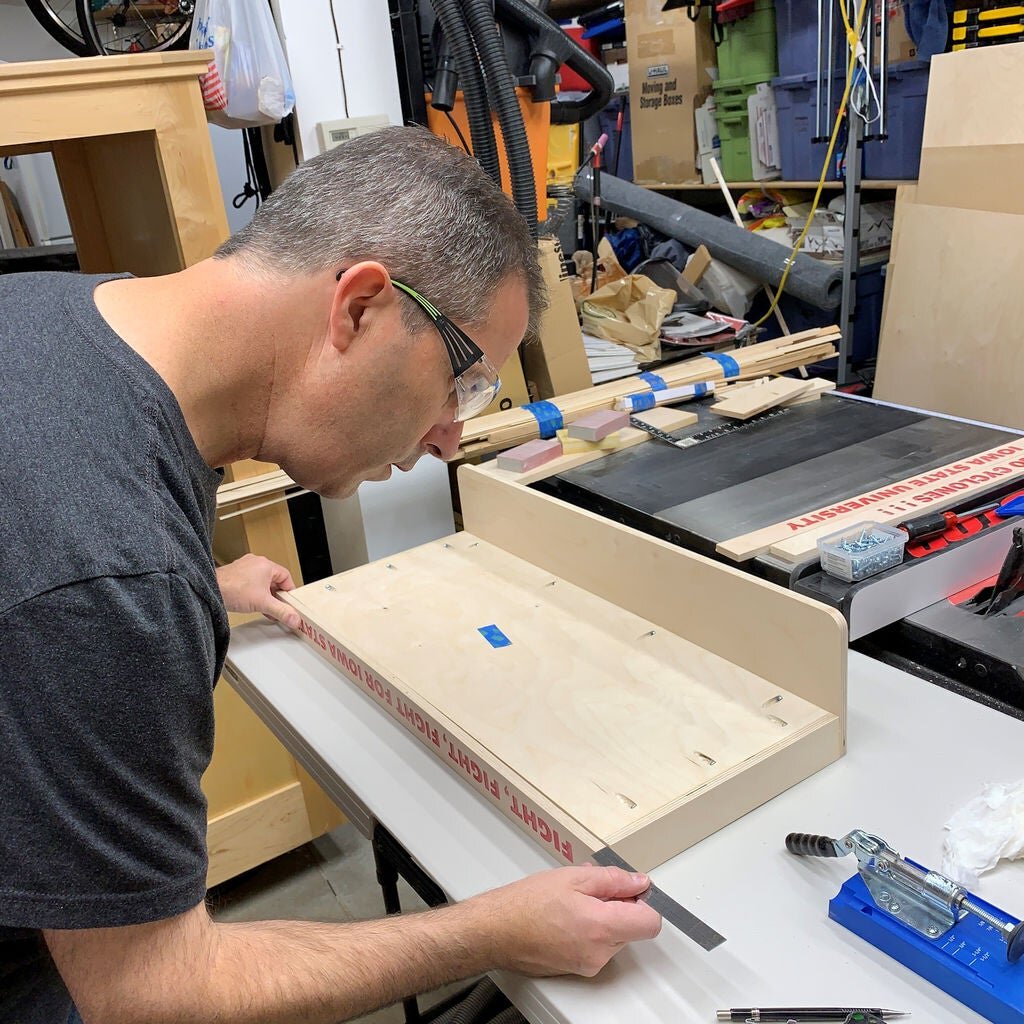
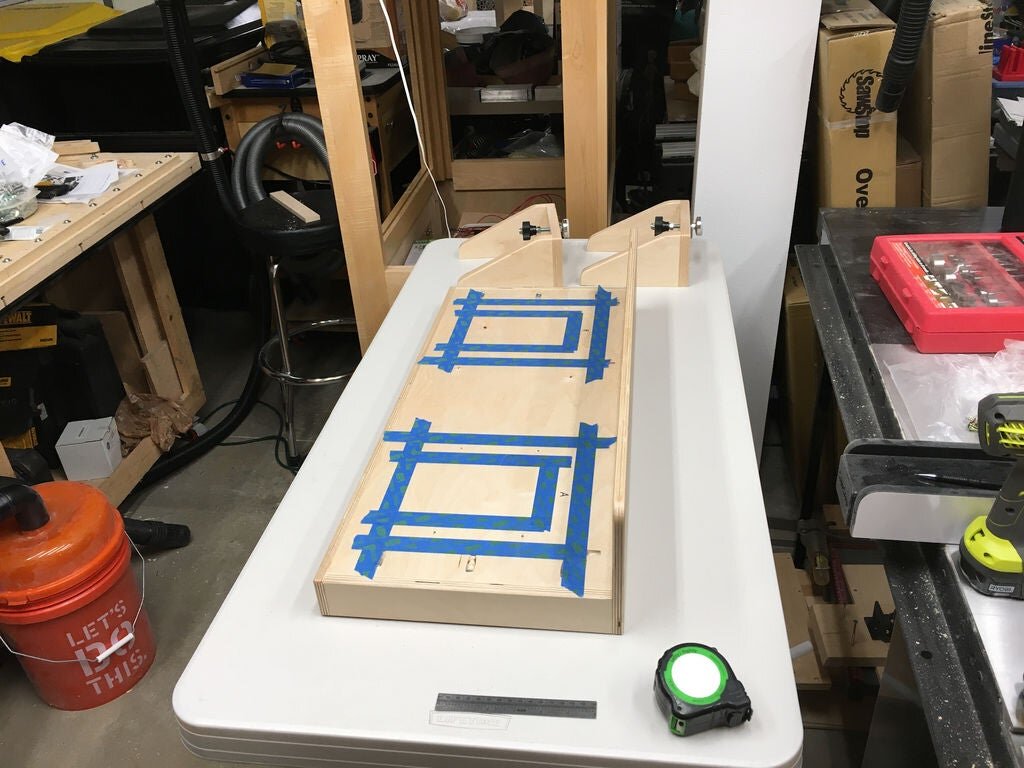
The main part of the shelves went together fairly easily. I used pocket hole screws to hold the parts together while the glue dried.
I started by gluing and screwing the sides onto the shelf bottom.
Next I glued and screwed the back on the shelf. This is the part that the clamping assembly will press against.
Then I added the CNC'ed letters onto the front of the shelf.


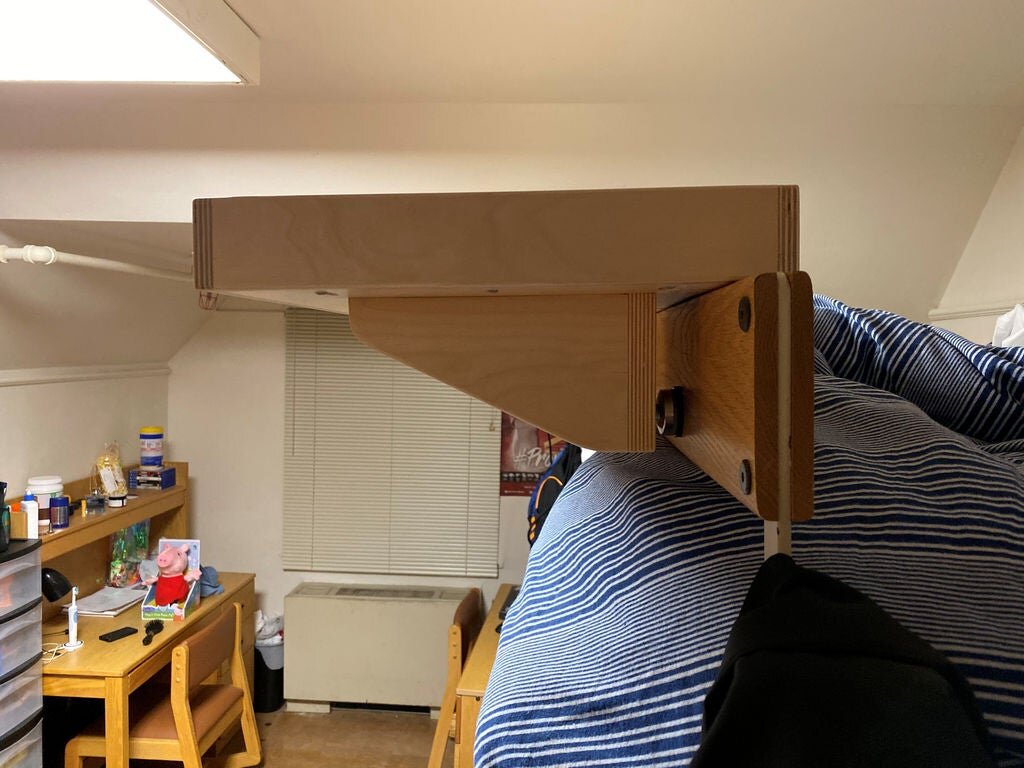
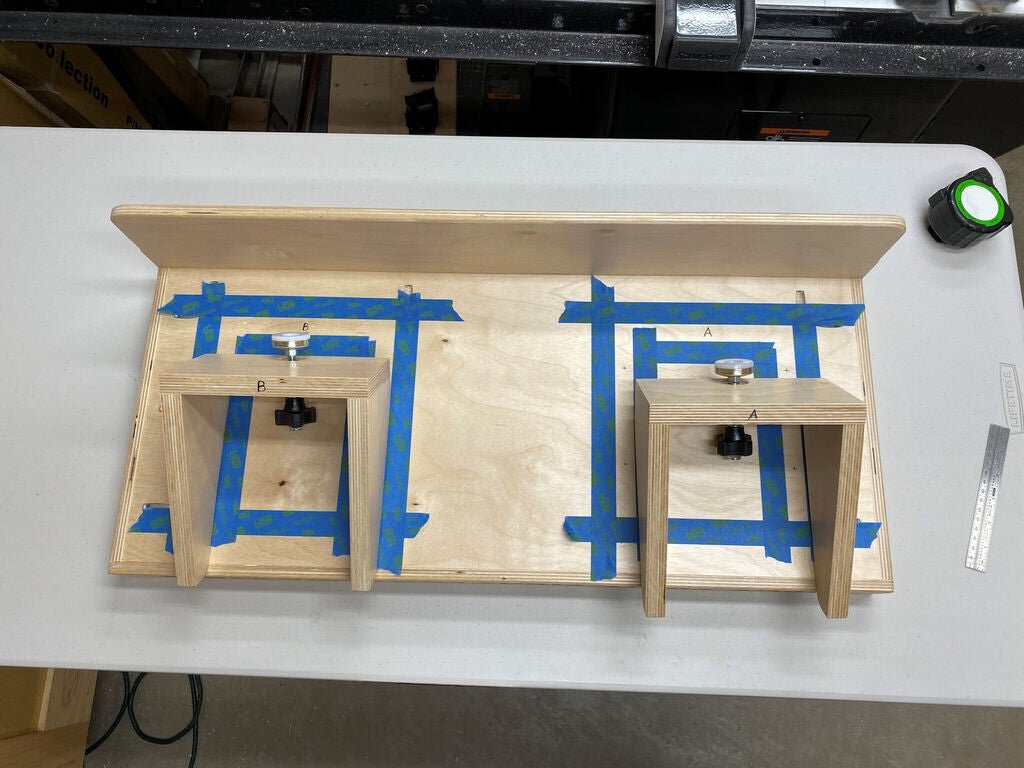
Step 6: Create the Shelf Clamps
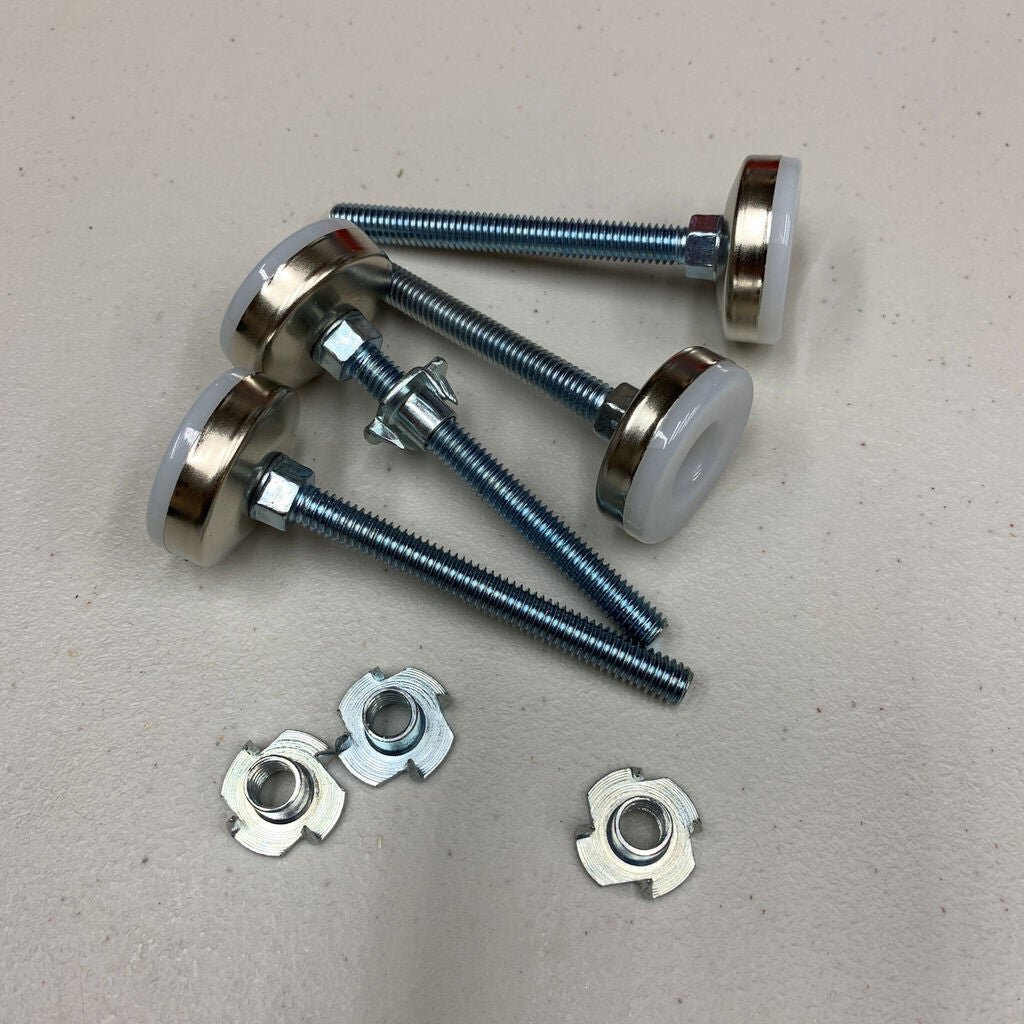
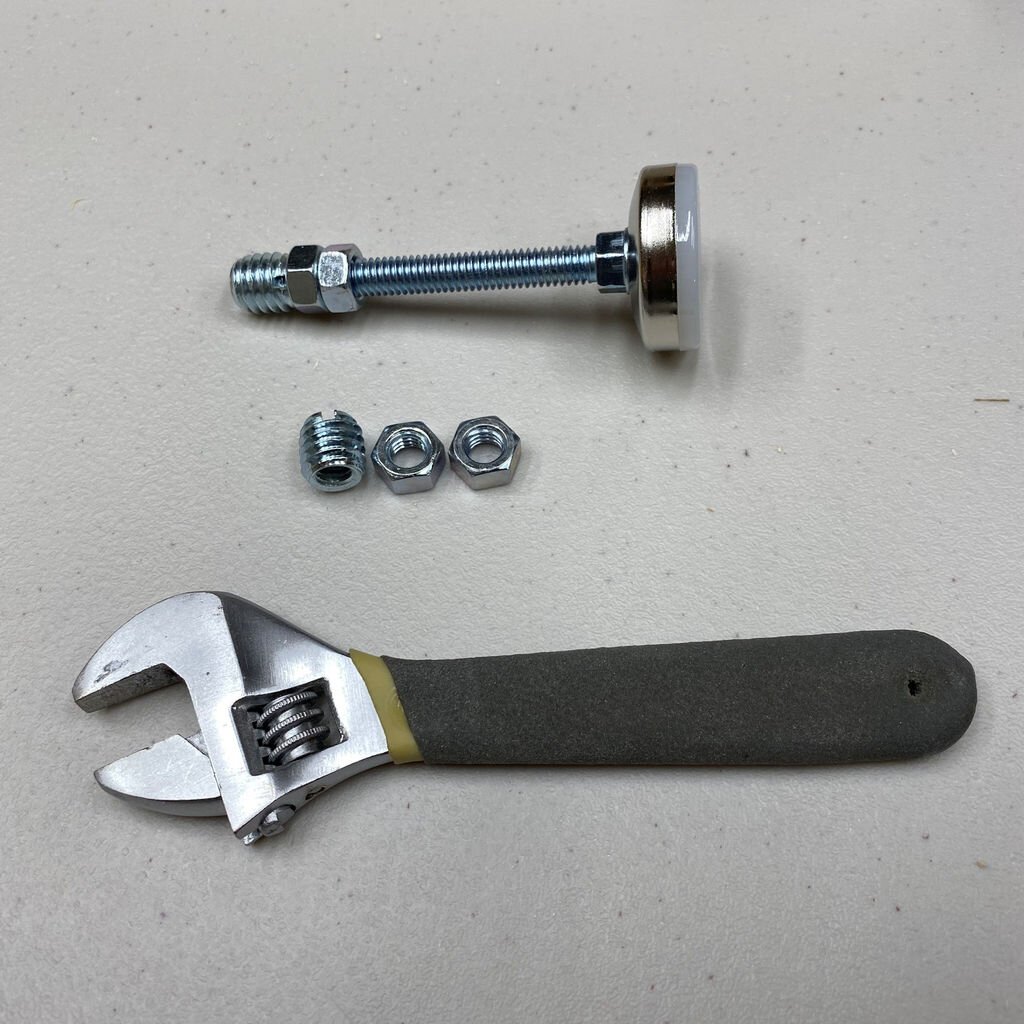
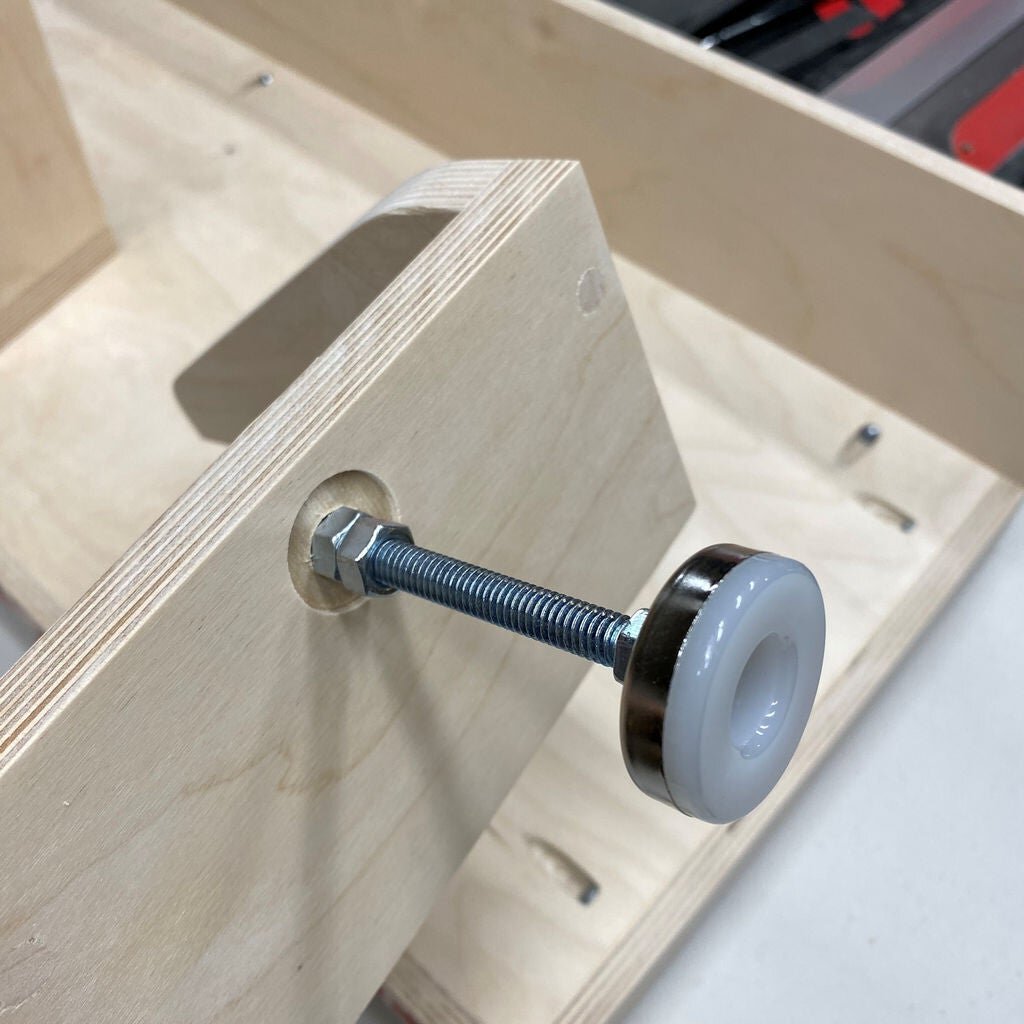
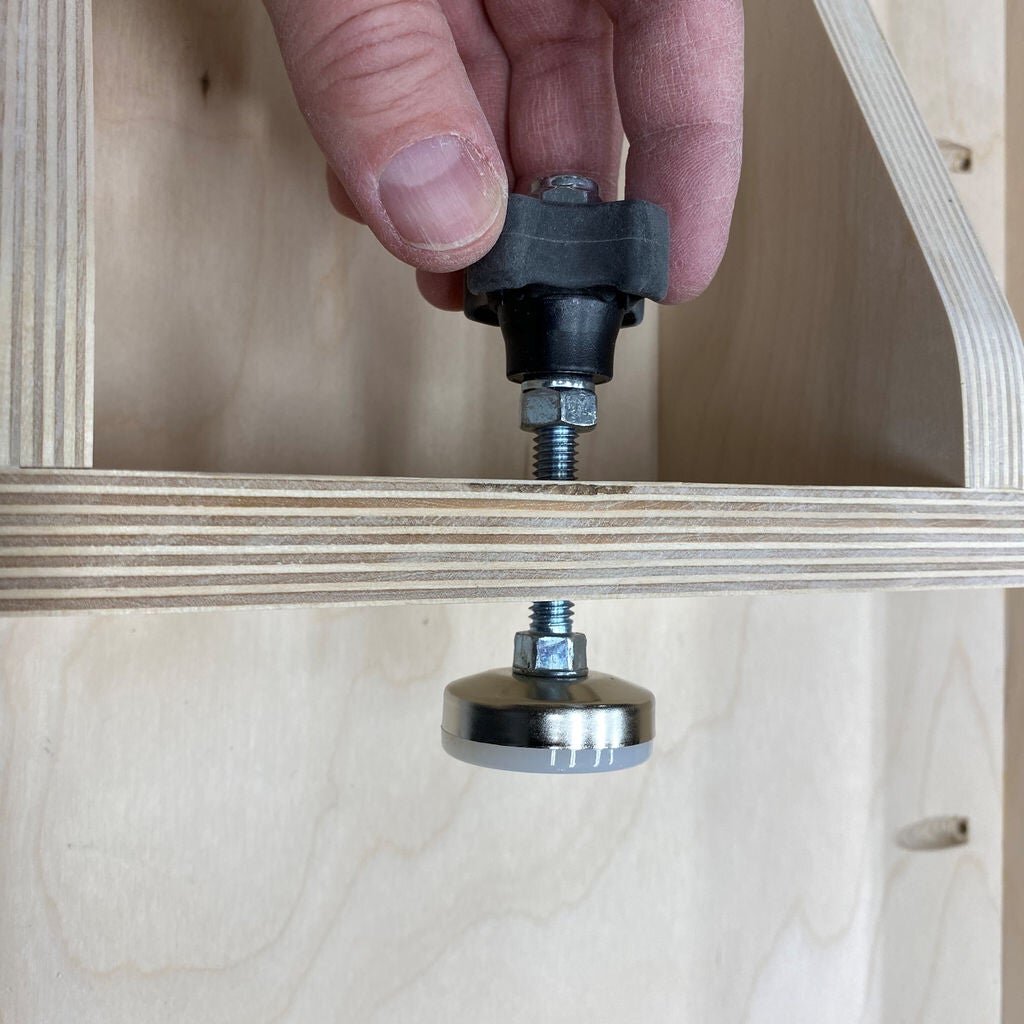
The main parts of the shelf clamping system were 5/16" diameter threaded leveling feet with Rockler threaded knobs for tightening the leveling feet against the bed rail. Since the threaded knobs spin, I had to come up with a way to hold them in place. The way these are held in place is to add a nylon locking nut before and after the knob.
I added a 5/16" threaded insert to the rail side of the clamping bracket, This allows for smooth clamping without trying to put the leveling foot through a tight hole in the wood bracket.
The brackets were just roughed out to size with what looked appropriate.
Step 7: Put Finish on the Pieces
Before I attached the clamping brackets to the shelves I decided to add finish to the shelves. This means I would not be gluing the brackets to the shelves. This way if I ever need to adjust the brackets for a wider shelf rail then I can just unscrew the brackets, move them the the new desired clamping opening, and drill new holes into the top of the shelf brackets.
I added the finish onto the shelves. I used Minwax Polycrylic Clear Satin finish since it is quick drying and easy to get at the local home store if I needed to add more finish later.

Step 8: Attach the Shelf Clamps
In order to hold the clamping brackets in place I used blue painters tape to outline the location of the shelf brackets. I then decided where I wanted the screw holes that would go through the shelf to be located.
Since it would be incredibly hard to locate these holes from the top side of the shelves I just drilled through from the bottom side of the shelf. Then I changed to the countersink bit I wanted to use for the top and drilled the countersinks into the top side of the holes.
Next I had to drill the holes into the top of the clamping brackets. To hold the clamping brackets in place I used some double sided carpet tape on the bottom side of the shelves, using the blue painters tape outlines for placement, and then I pushed the clamping brackets into place. I flipped the whole assembly over and then drilled down through the top of the shelves, in the holes I already drilled, into the clamping brackets. Then I just removed the double sided tape and screwed the clamping brackets to the shelves.

Step 9: Install the Shelves
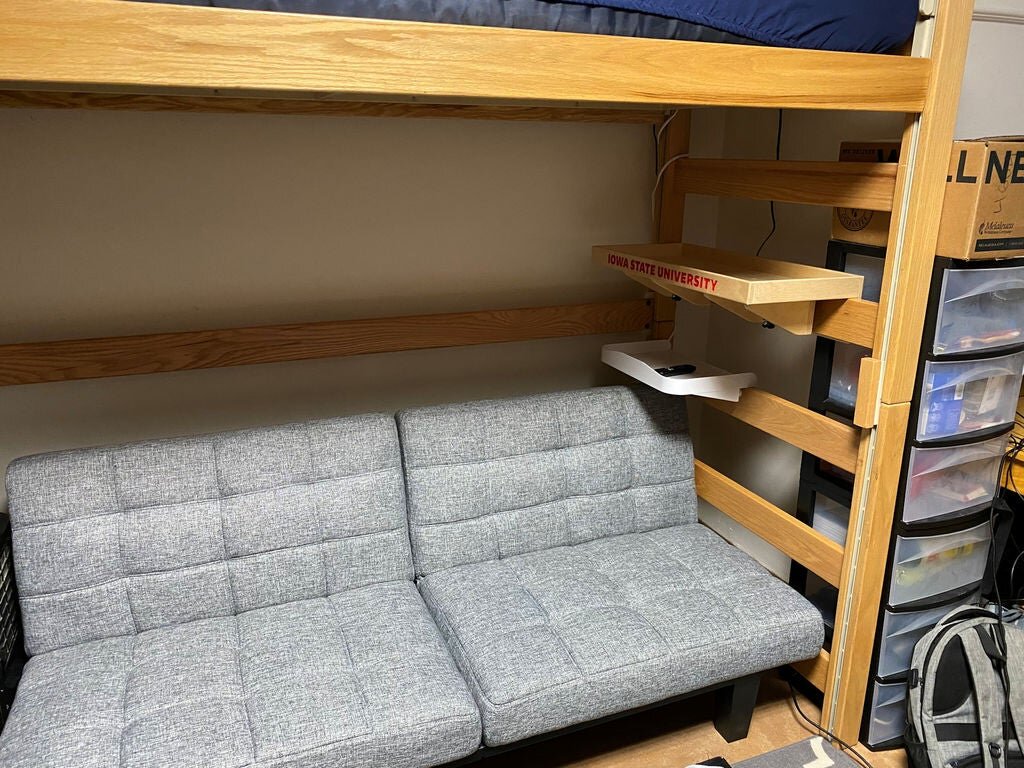
The last, and easiest step, was to install the shelves. I delivered these to my son at college and they easily went into place. Now he and his roommate just need to decide the best place to keep them. Should they all go up by the beds, one by the couch, extra storage by the fridge??? It's so hard to decide.
One thing I should mention if you decide to build some shelves like this. The Rockler fixture knobs give you phenomenal tightening power with their shape and rubbery texture. That is great for fixtures and such, but the combination of the Rockler knobs and the 5/16" threaded leveling feet make it very easy to over tighten the shelf clamps. The clamping knobs just need to be tightened to a point where the shelves don't move. Gravity takes care of the rest.
I did add some felt pads to the bottom of the leveling feet to keep the tightening action from scratching the woodwork on the loft beds. I don't think they would have damaged the wood without them, but I didn't want to take a chance.