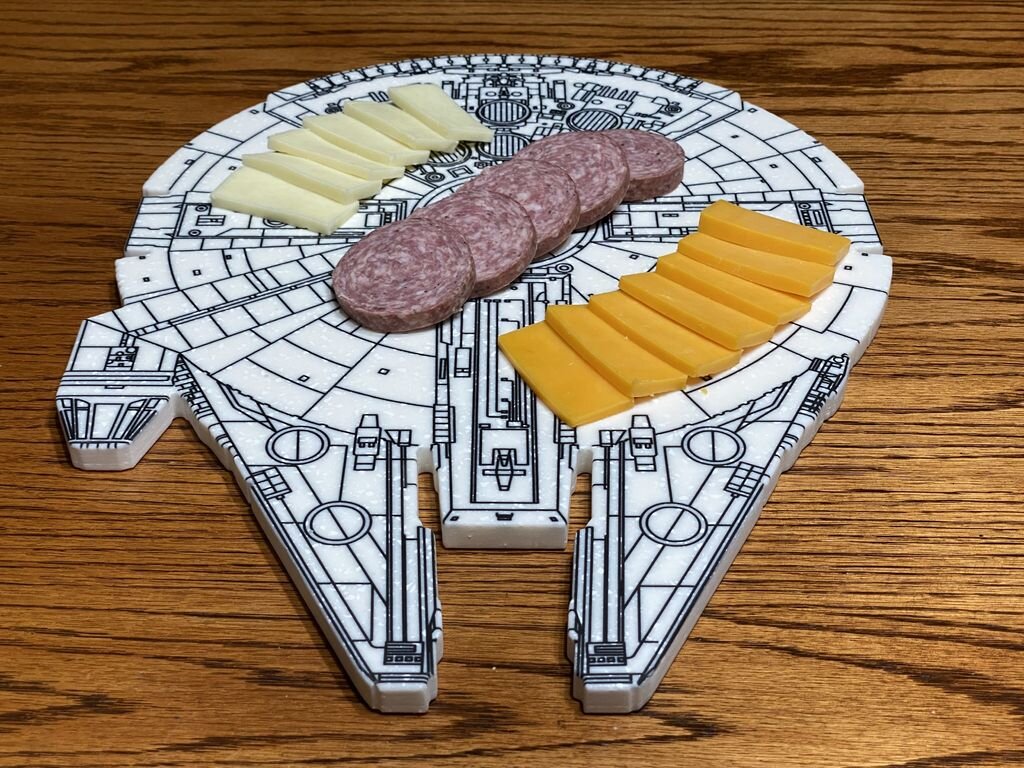
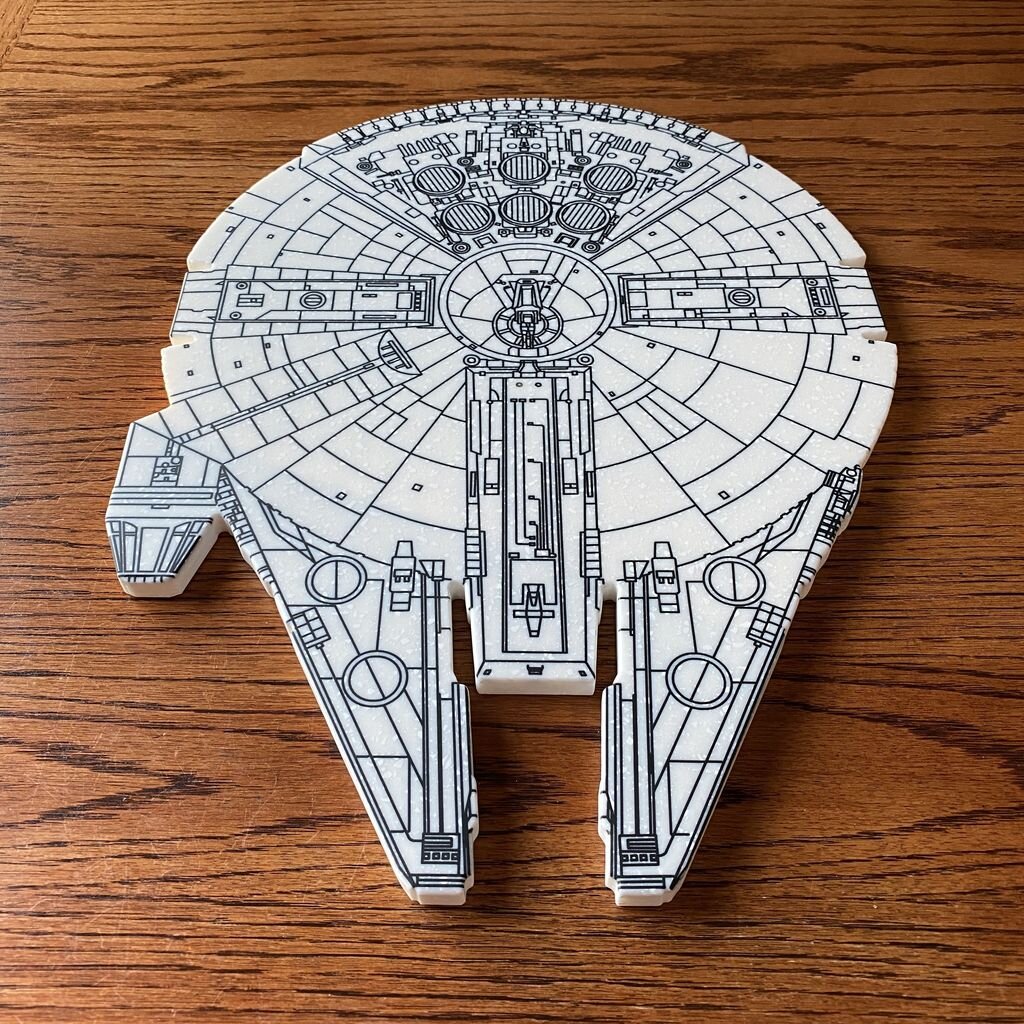
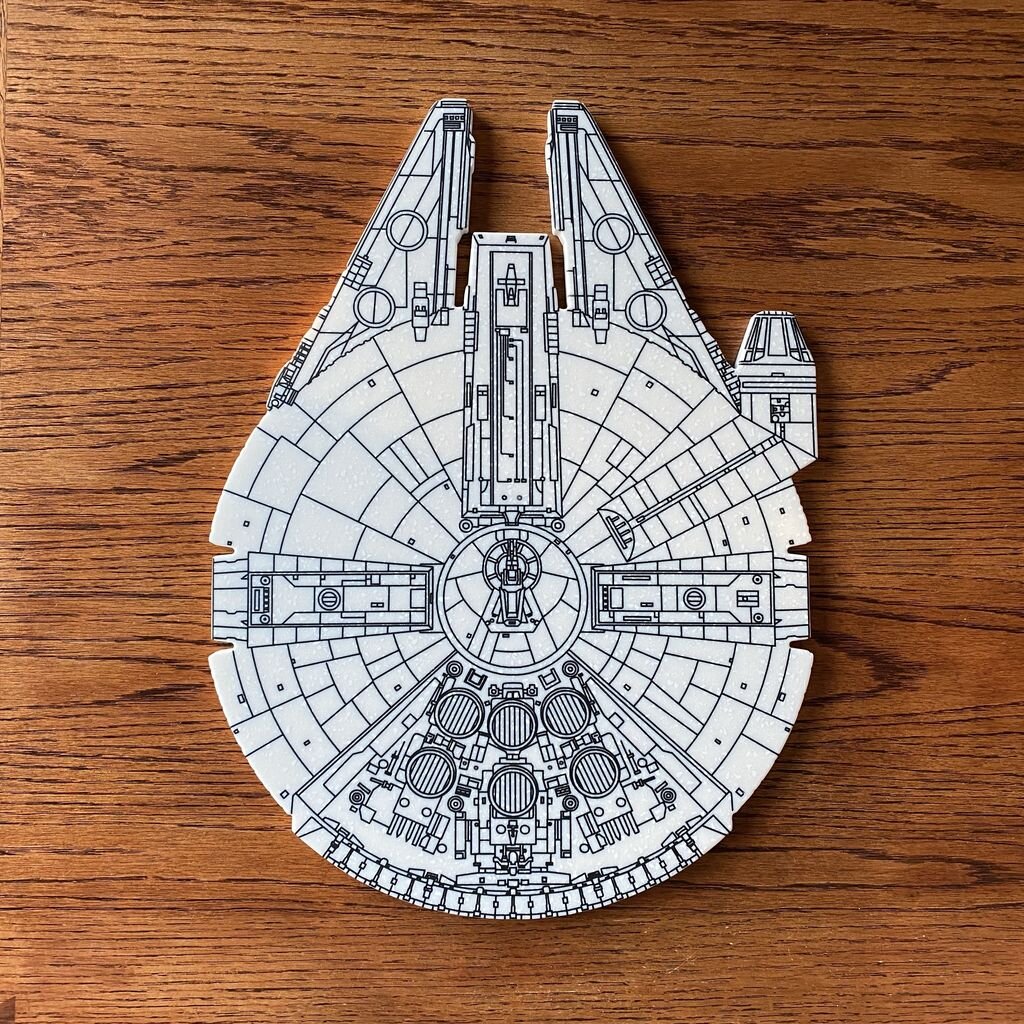
Millennium Falcon Serving Board
One of the big pieces of waste from a new counter top installation is from the sink cut out. A lot of times this material just gets thrown away. I thought it would be great to give a piece of this sink cut out material a new life as a serving board. What could be better than making the fastest ship in the galaxy from a piece of material headed for the trash heap? That's right. I’m talking about a YT-1300f Corellian Light Freighter known as the Millennium Falcon.
I'm going to show you how I took a piece of scrap solid surface material and made an awesome serving board.


Step 1: Tools and Materials
Tools
CNC Machine
Sander
Photo Editing Software - Used to trace your design. You can use whatever flavor of image editing software you like. Just make sure the software is able to export the file type your CNC software uses.
Materials
Only a couple materials were used.
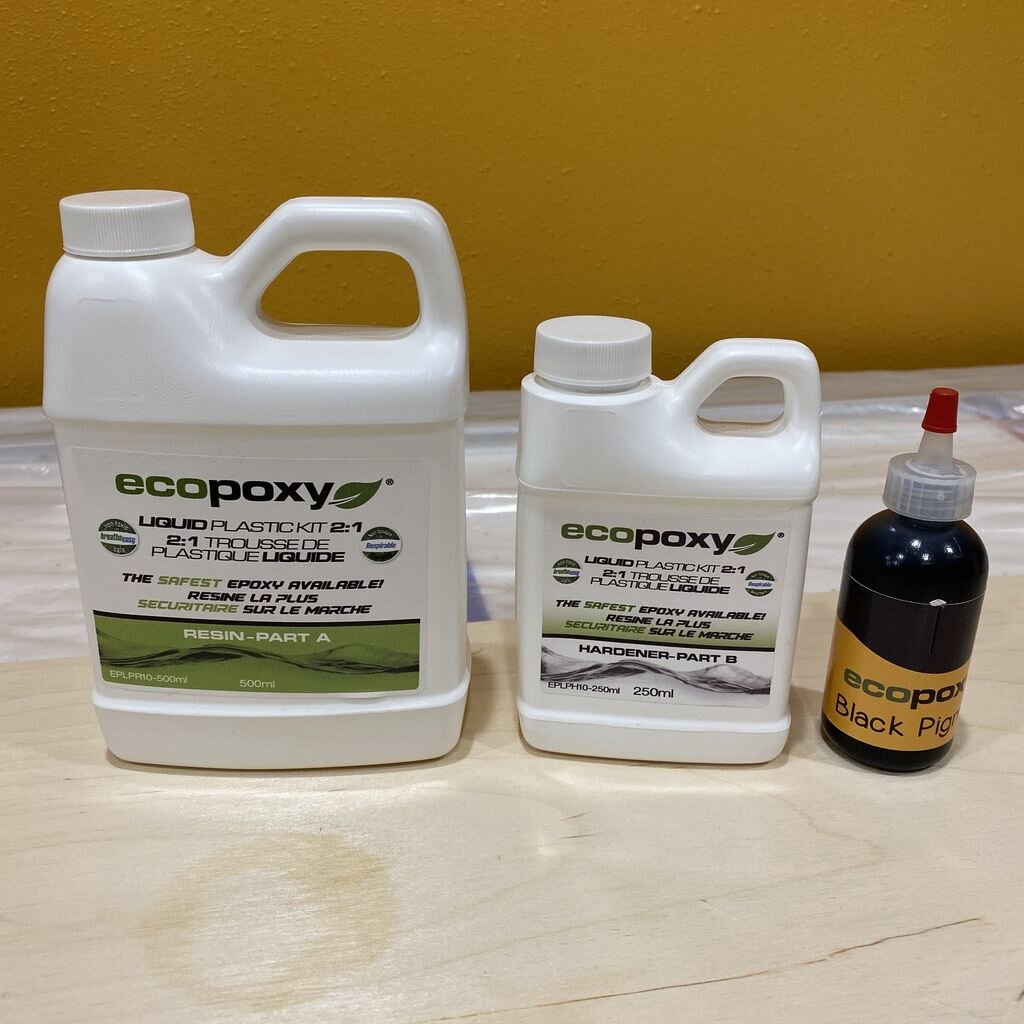
Solid Surface Material - One brand of solid surface counter top material is Corian, but there are other manufacturers.
EcoPoxy Brand Epoxy - This was used to fill in the grooves that were routed out of the solid surface material.
Black Tint (for the clear epoxy)
Cups - for mixing epoxy
Frog Tape
Clamps
Wax Based cutting board sealant
Not all of the tools in this list are required, but will make the construction much easier. Your build may need more or less than what I show.
NOTE: If you plan on using any tool for a project please make sure you are familiar with the tool and all of the dangers associated with it. If you are not familiar with a tool then you should ask someone who is to show you the proper way to use it. A lot of communities have classes at local colleges on the proper use of tools and machinery. There are also local woodworking clubs that offer classes at very reasonable rates for beginners. I highly recommend using these resources for your safety and for the most efficient use of the tool.
SAFETY FIRST: Always wear eye and hearing protection. Always work safe with the proper safety equipment and guards on your tools.

Step 2: Trace Your Design
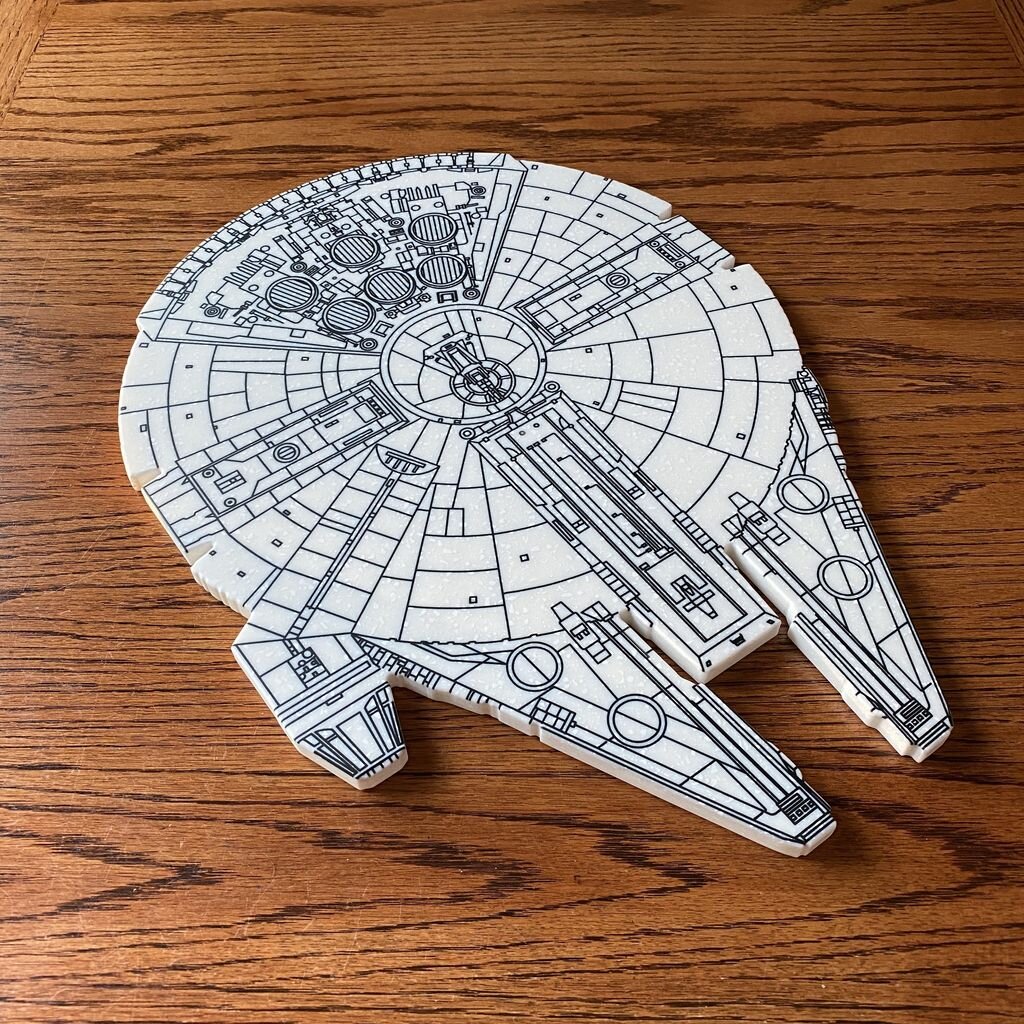
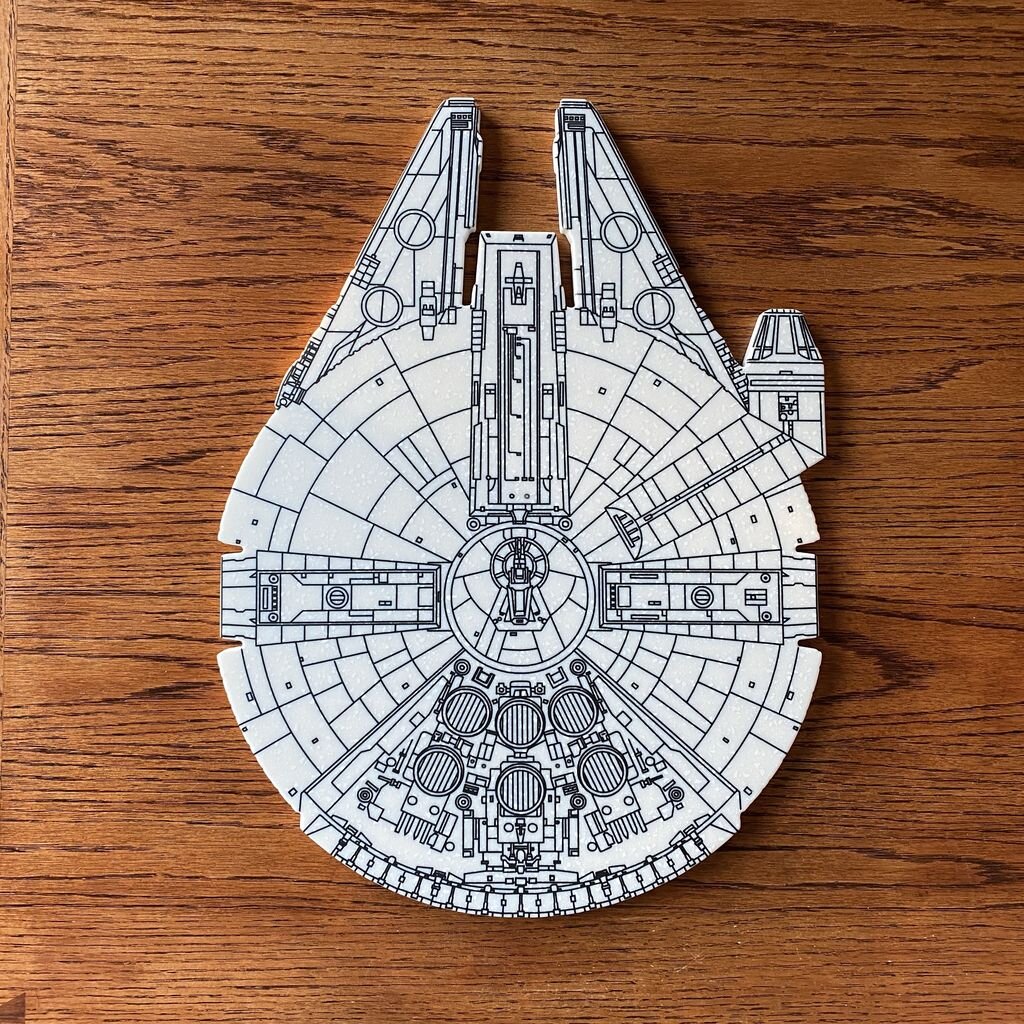
I found a top down view of the Millennium Falcon that I liked in a book. I took a photo of this picture and then imported the picture into a program called Infinity Designer. I then traced the image with vector lines so the CNC would have something to follow. This was a somewhat time consuming process as I wanted to make sure that the lines looked great so I took my time.

Tracing the photo in the image software.
Step 3: Import Your Design Into CNC Software
Next you will need to export your design from your image editing software to the CNC program you are using to control your CNC.
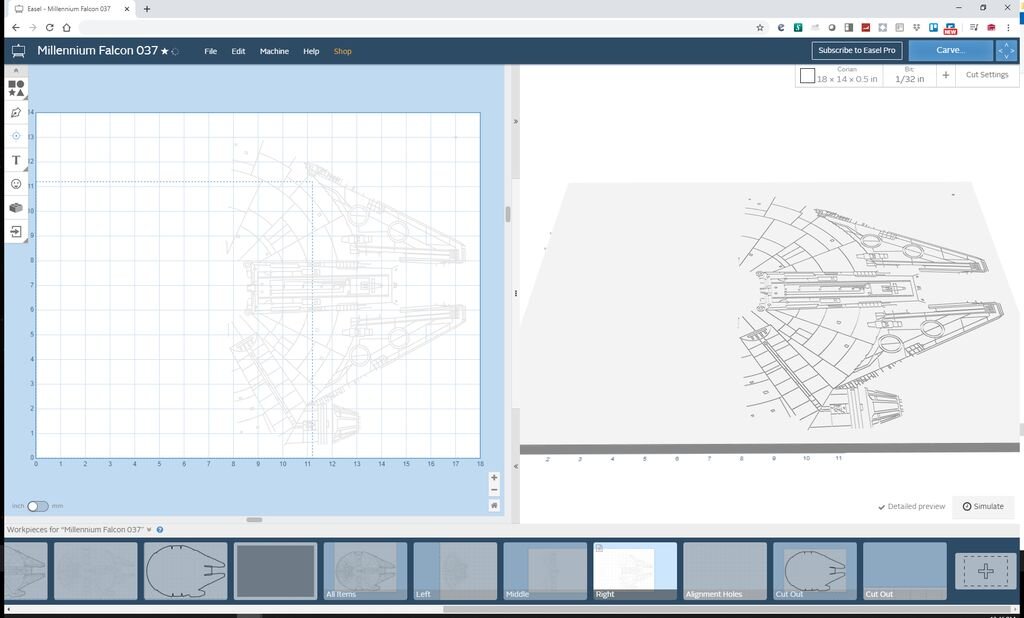
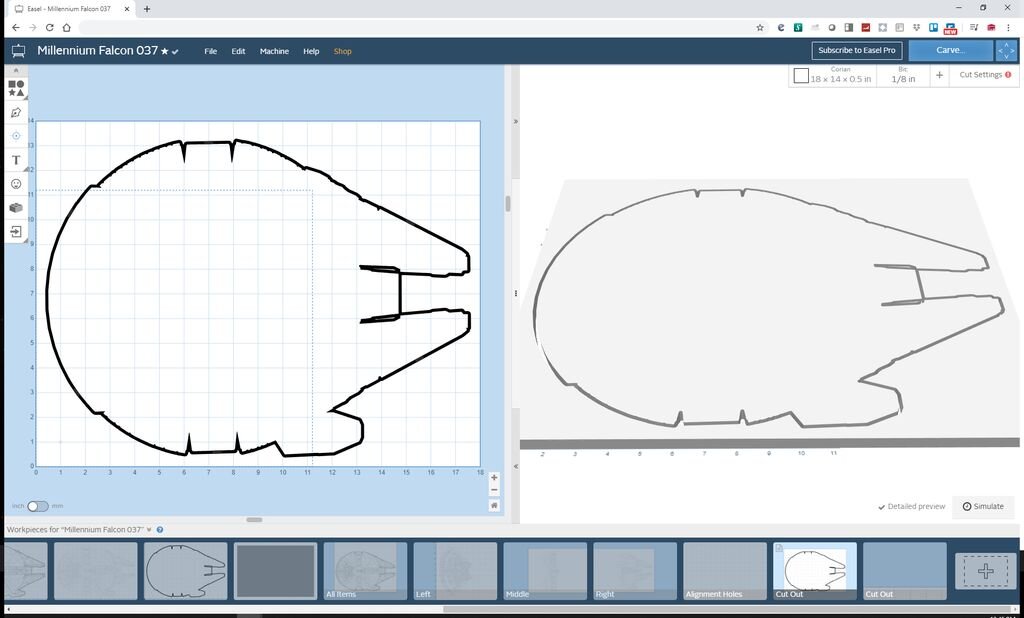
I am using Easel software for the Inventables X-Carve CNC machine so I exported the file as an SVG file and then used the SVG import option to pull the image into the program.
Once I imported the file I started playing with the size and shape of the image for the size of the piece of solid surface material I wanted to cut out. The piece of solid surface material I had was 18” by 18” square. I sized the falcon to be 17 inches long. That dimension made the ship around 13 inches wide. I wanted to have a little extra space around the ship since this was the first time I had cut out this type of material.
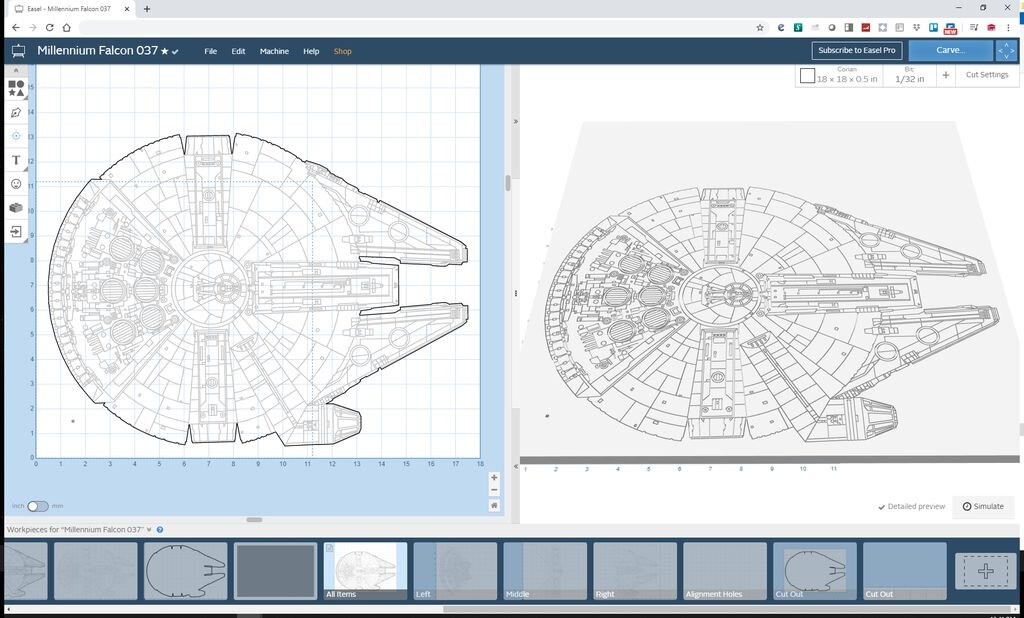
Import the image into Easel software.
Step 4: CNC Router Bit Selection
I was limited by the bit selection due to the thin lines I was trying to recreate from the original line drawing image.
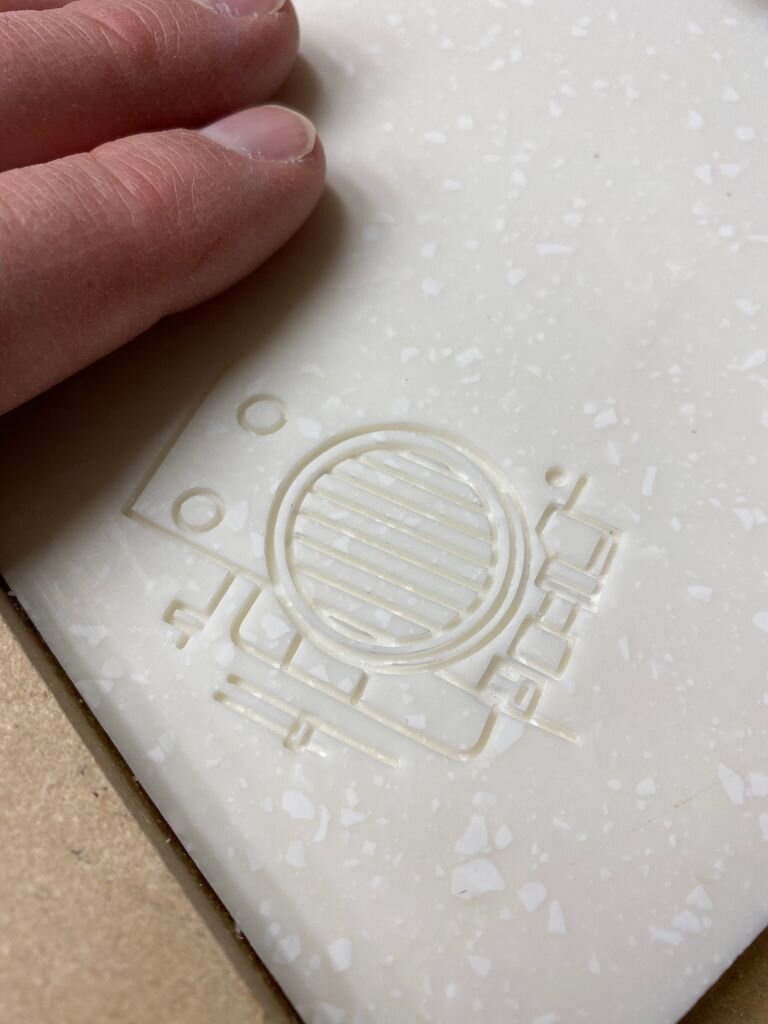
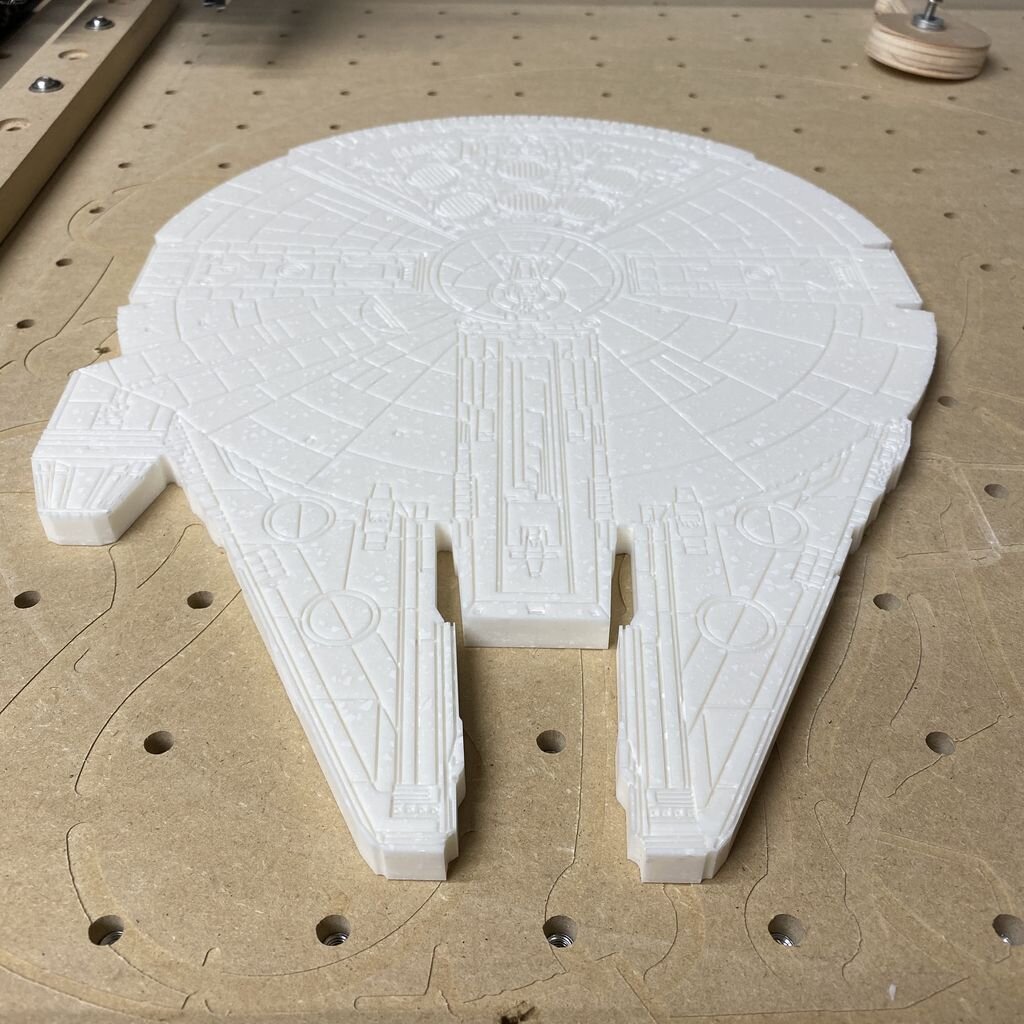
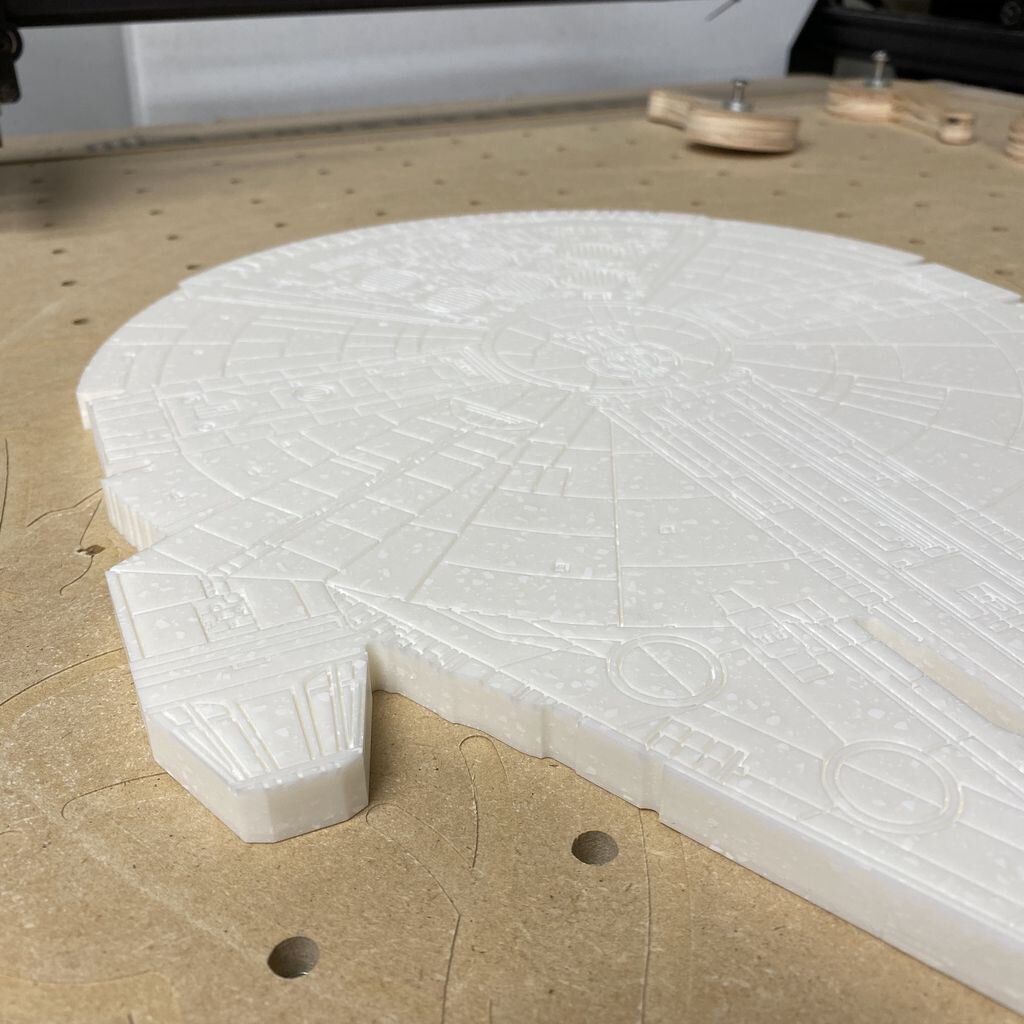
Based on trying progressively smaller diameter router bits I finally ended up using a 1/32” diameter bit in order to get the detail and desired look. I also wanted to make sure the lines I was carving into the material was deeper than it was wide for some extra holding power. I set the cutting depth for this detail bit to 0.05 inches.
The shallow depth of pass meant this was a very slow carving process. Overall it took nearly 10 hours to carve the detail to a depth of 0.05”. The width of 1/32" give you a cut width of 0.03125".
In order to cut out the outline of the falcon I used a 1/8” diameter upcut bit. This bit had enough depth of cut to cut through the 1/2 inch of material.

1/32” and 1/8” router bits
Step 5: Breaking Into Multiple Carves
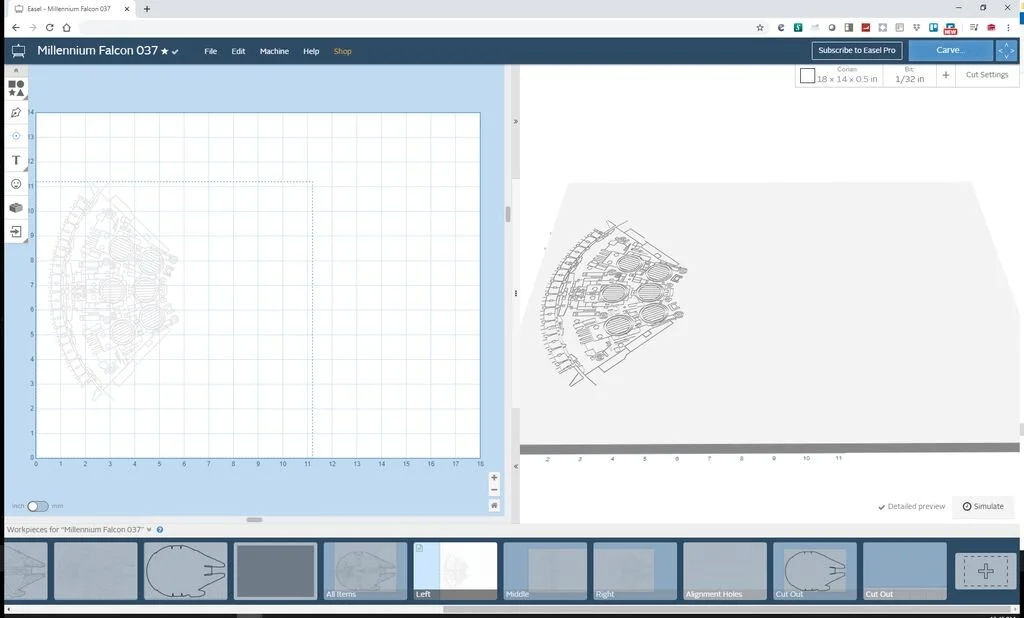
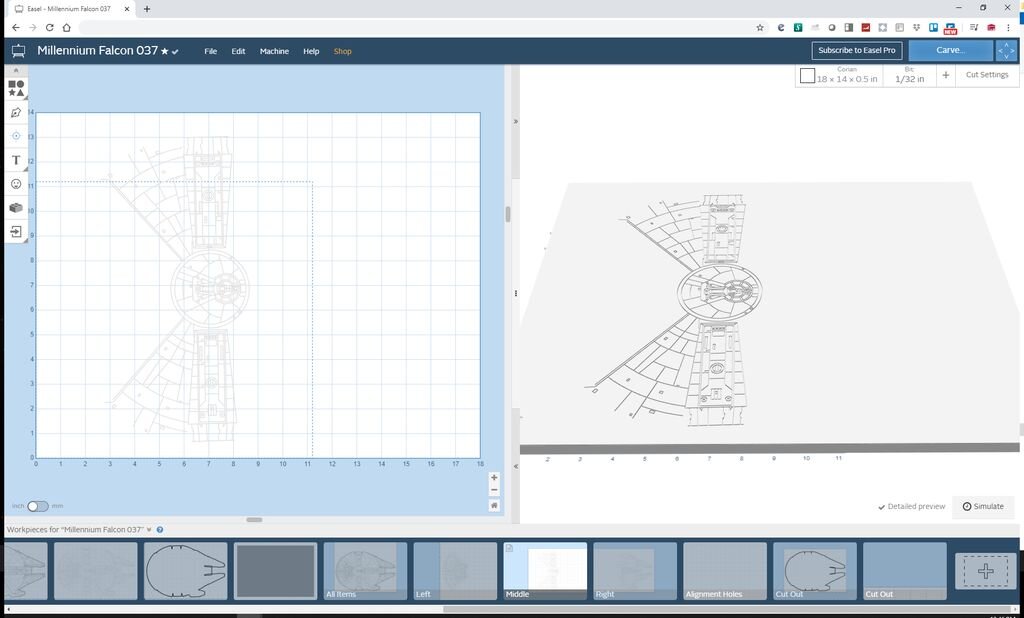
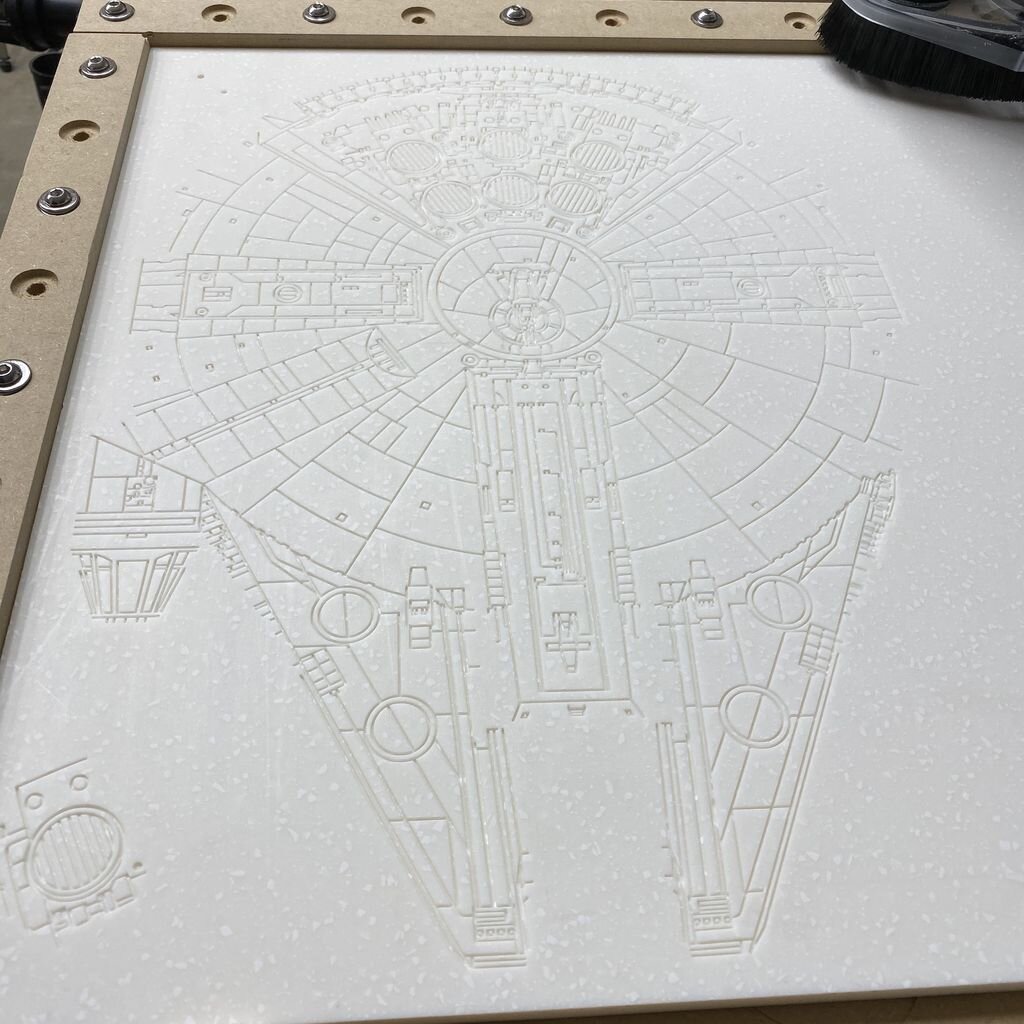
As I mentioned in the previous step, it took a long time to carve all of the detail for the top of the falcon. I decided it might be best to break up the carving process into multiple jobs in case I broke one of the bits, there was a power outage, etc.
In order to do this I took the overall carving design and duplicated into three more pages in the Easel software. I used a few of the existing detail lines on the ship as boundaries and then deleted all of the other line work.
One thing I made sure I had on each of the sheets was a reference point. I set this in the original design sheet as a point at X and Y equal to 1" and 1". This way I can always check the origin in reference to this offset point when starting the next portion to be carved or after changing or replacing a bit.
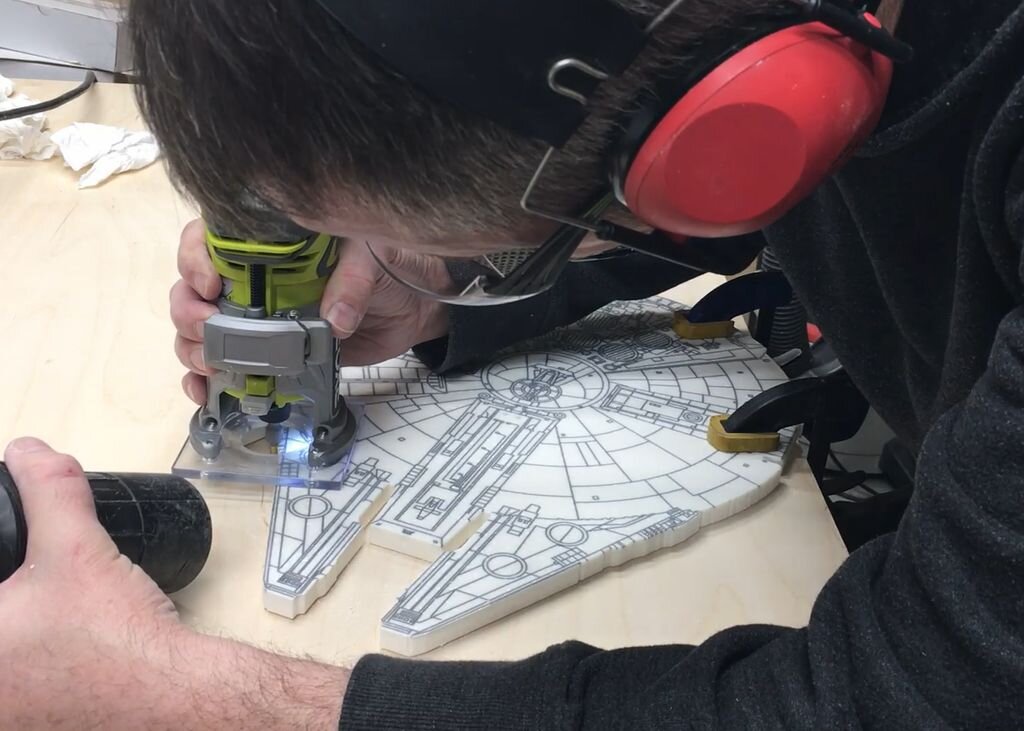
Step 6: Running the Carves
Next You can start carving your design. Make sure you follow your CNC machines safety procedures and use good dust collection since the fine dust created from carving the solid surface material can be very bad for you. Not only that, the dust tends to stick to everything. It almost seems statically charged.
I did run a test cut on a small area of the solid surface material that was not in the overall footprint of the carve to make sure things would work as expected.
I ran all three stages of the design carve with a 1/32” up cutting bit making sure that I checked the bit location was set to the reference point I set in the first carving stage.
Carve 1 - 0.05 cut depth = 3 hr 19 min
Carve 2 - 0.05 cut depth = 2 hr 8 min
Carve 3 - 0.05 cut depth = 3 hr 48 min
The cut settings I used were recommended settings as follows:
Feed Rate = 20 inches/minute
Plunge Rate = 6 inches/minute
Depth Per Pass = 0.01 inch (solid surface material is hard!)

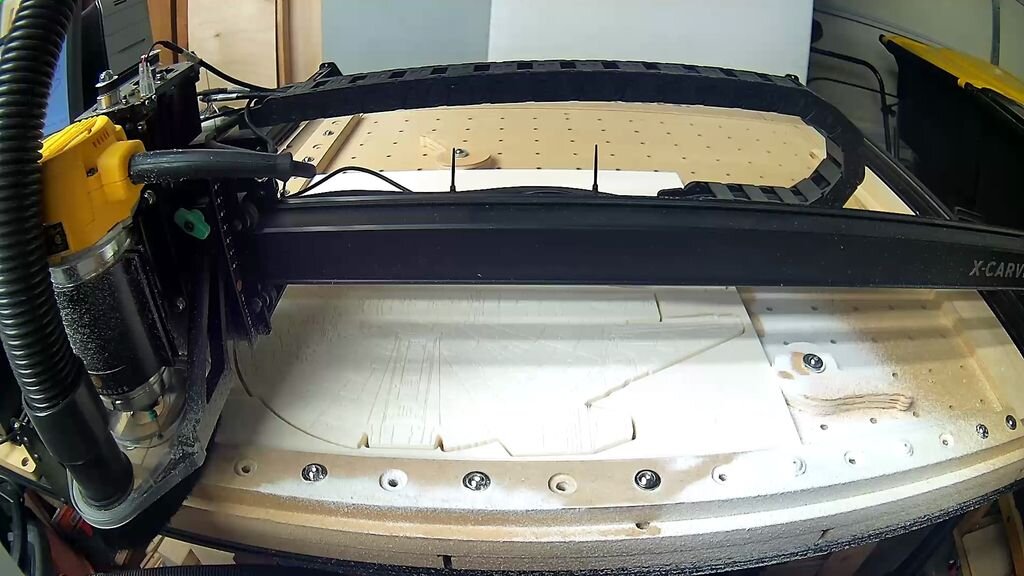
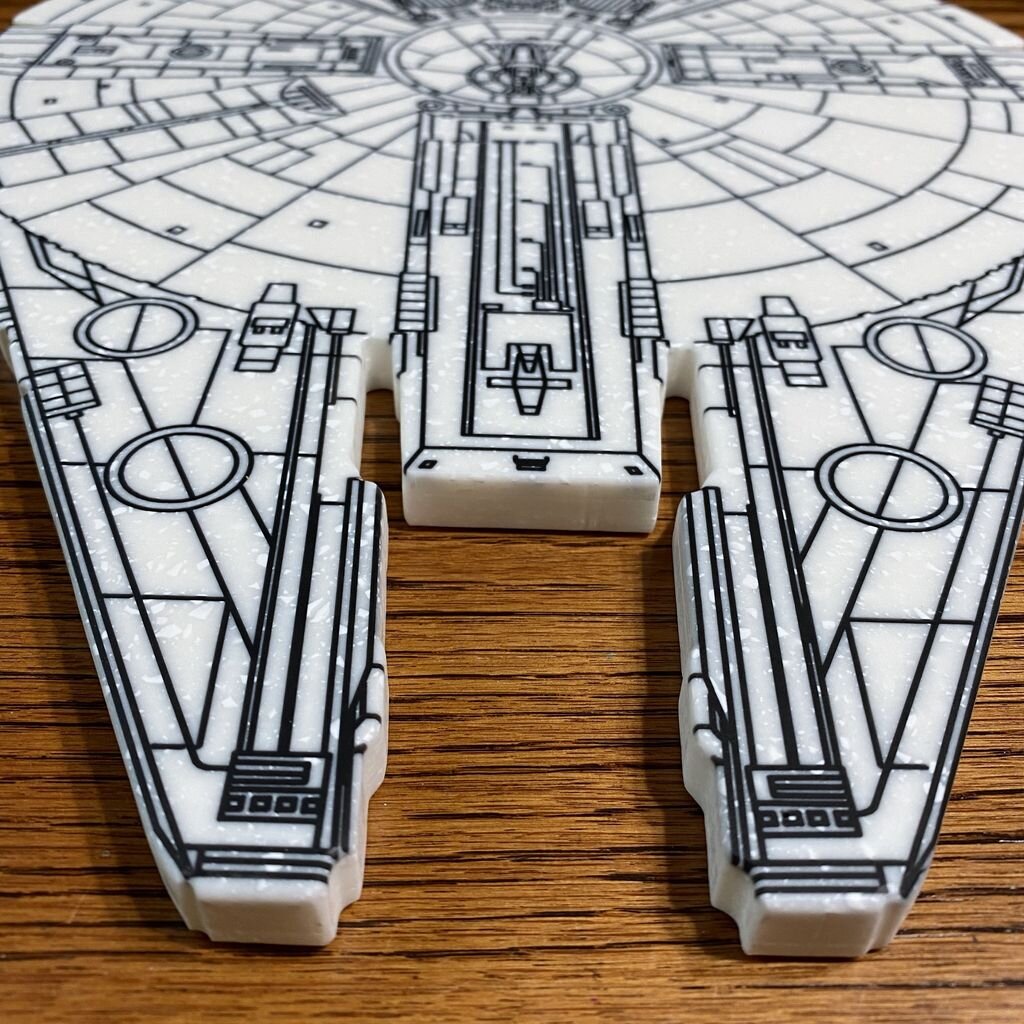
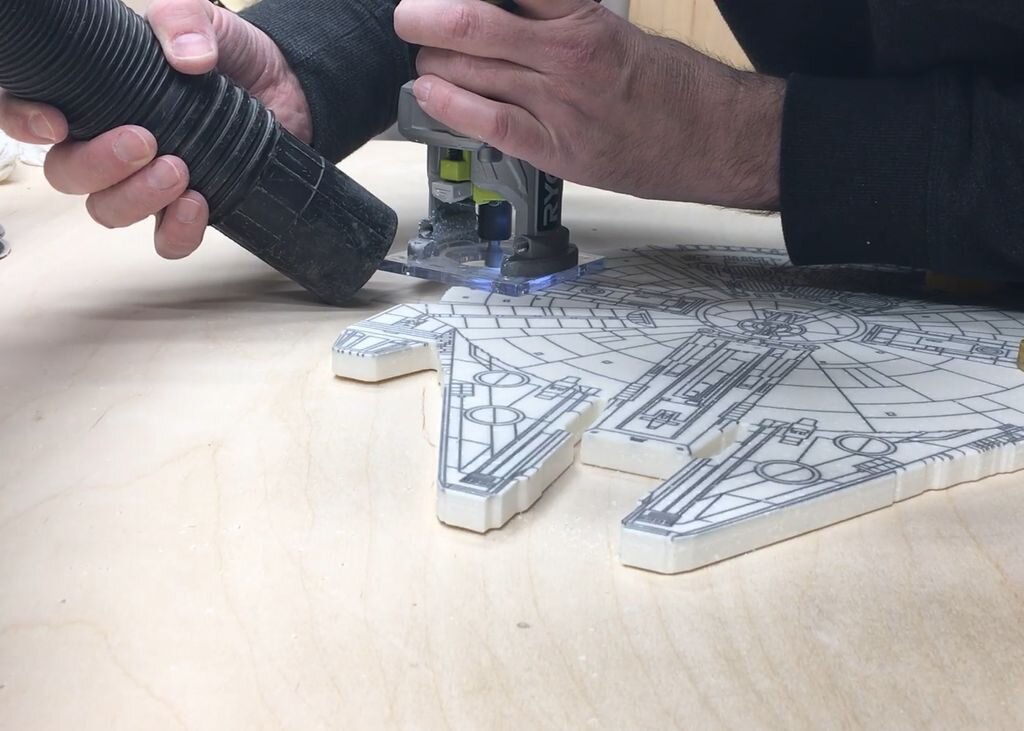
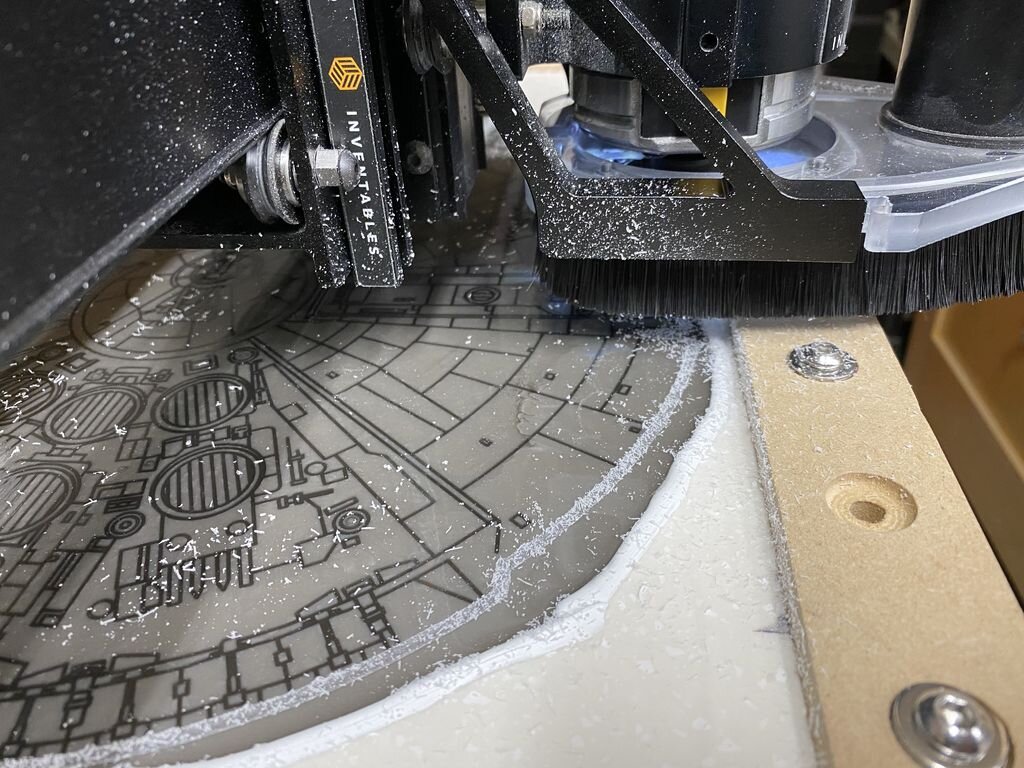
Step 7: Cutting the Outline of the Falcon
I used a 1/8” diameter up-cutting bit to cut out the shape of the Millennium Falcon. This had more cutting depth than the 1/32” bit and also allowed for the easier use of tabs on the cut out to hold the piece in place at the end of the cutting process.
Cutting the outline with a 1/8" diameter bit was estimated to take 2 hr 29 minutes.
The cut settings I used were recommended settings as follows:
Feed Rate = 24 inches/minute
Plunge Rate = 9 inches/minute
Depth Per Pass = 0.01 inch (solid surface material is hard!)
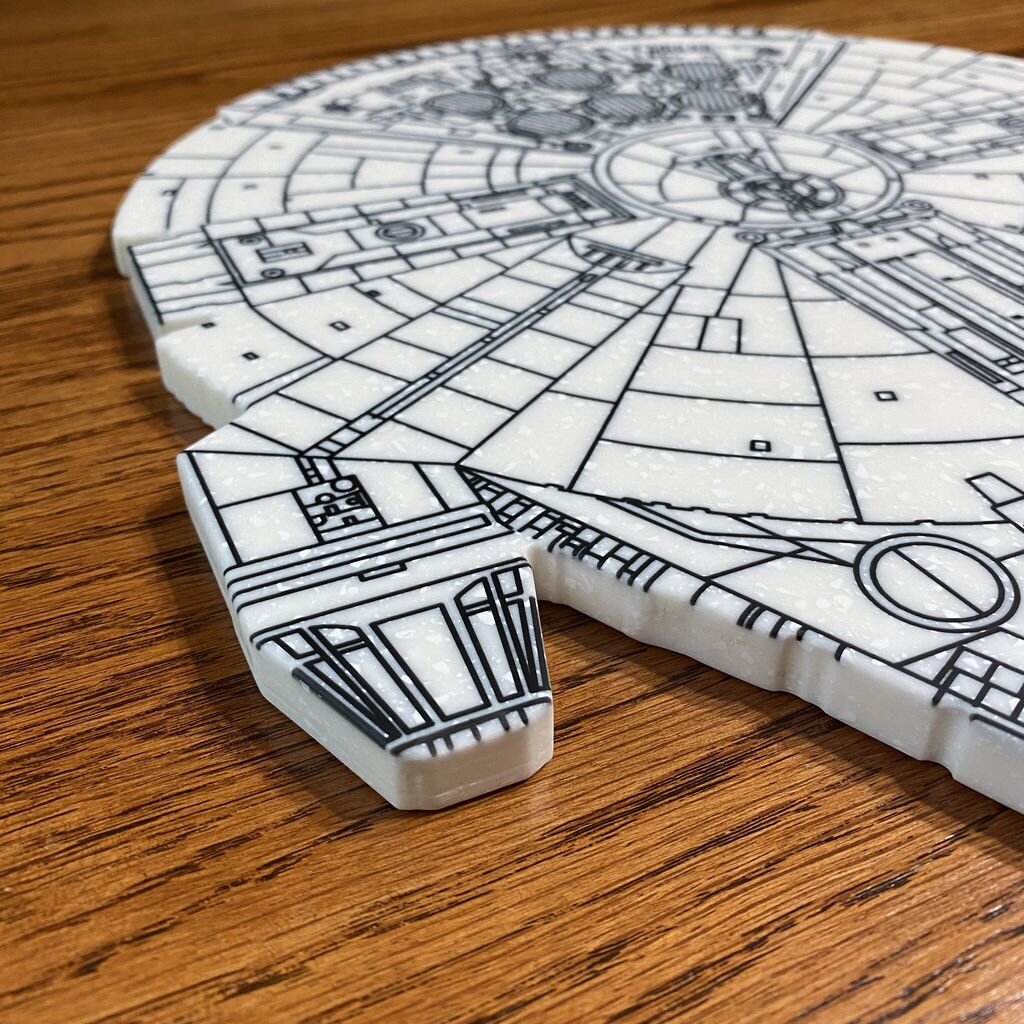
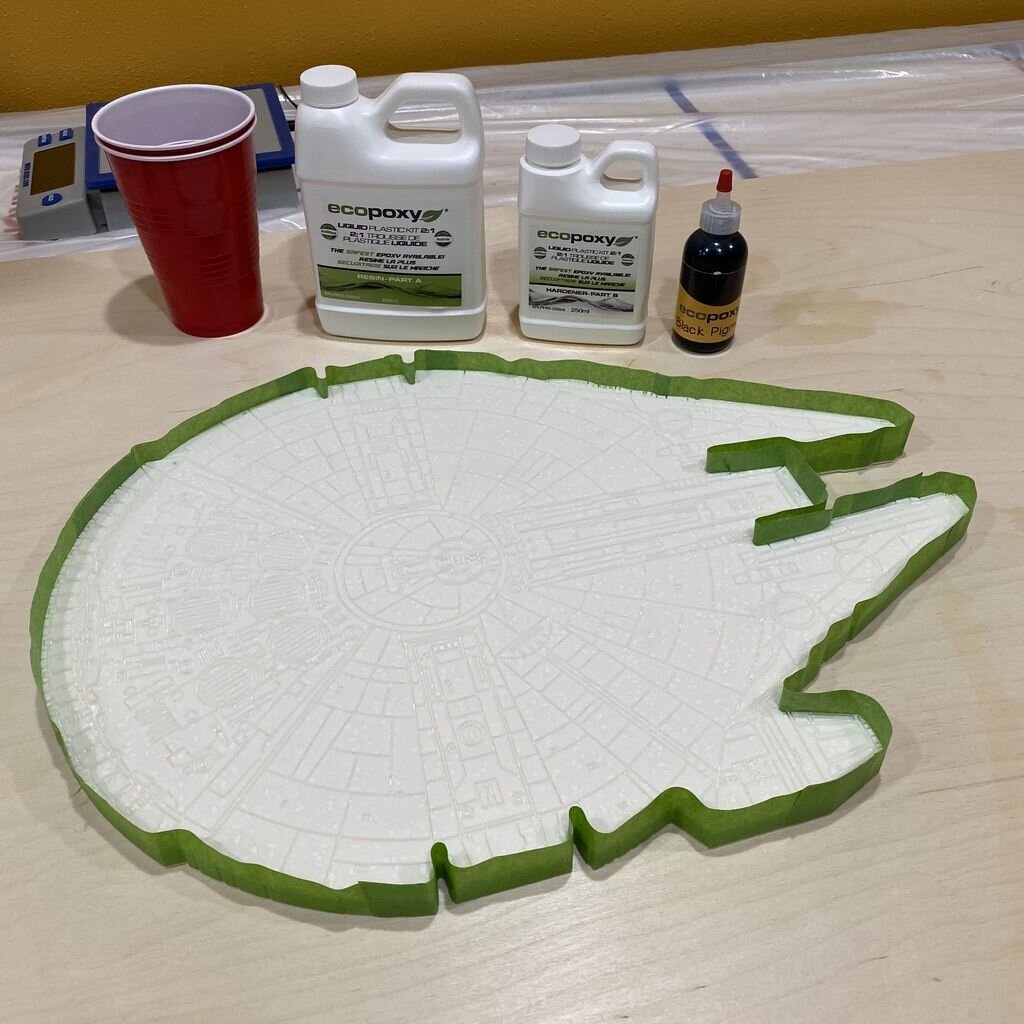
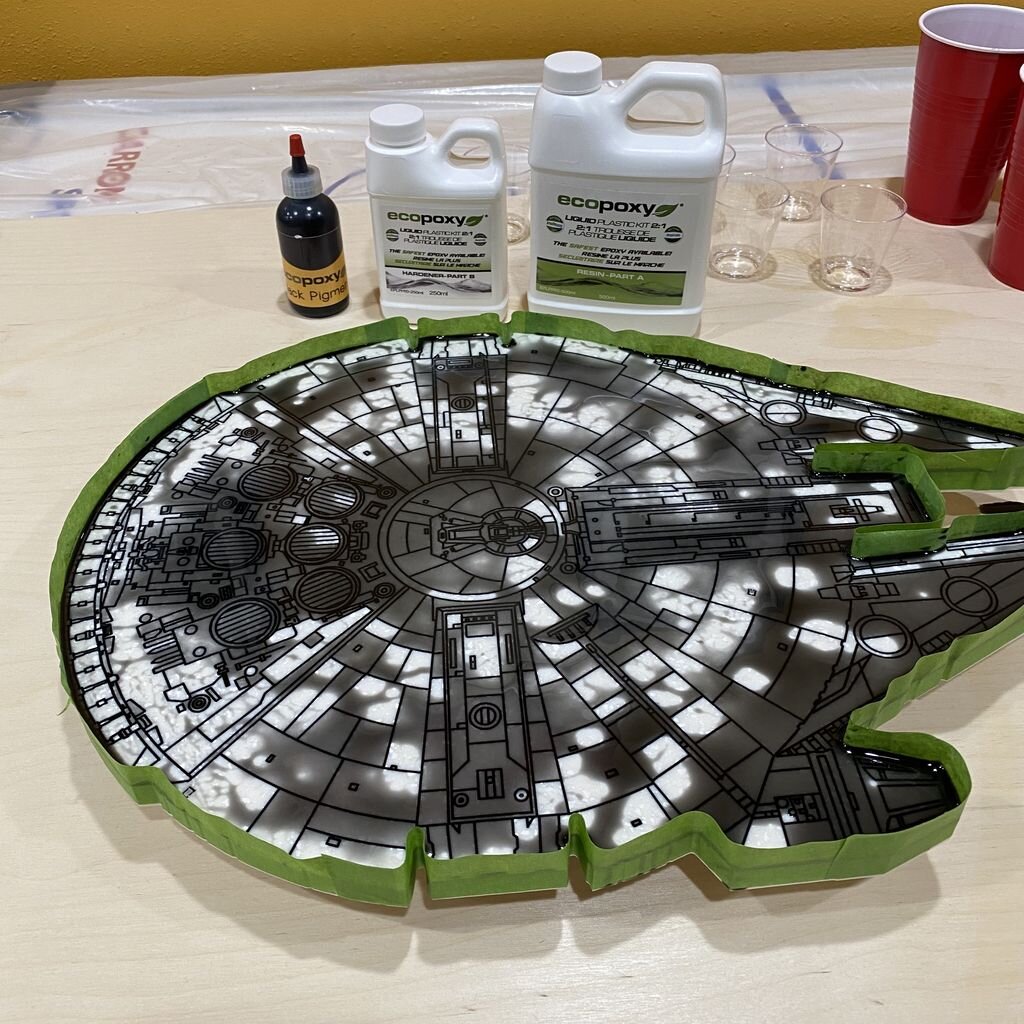
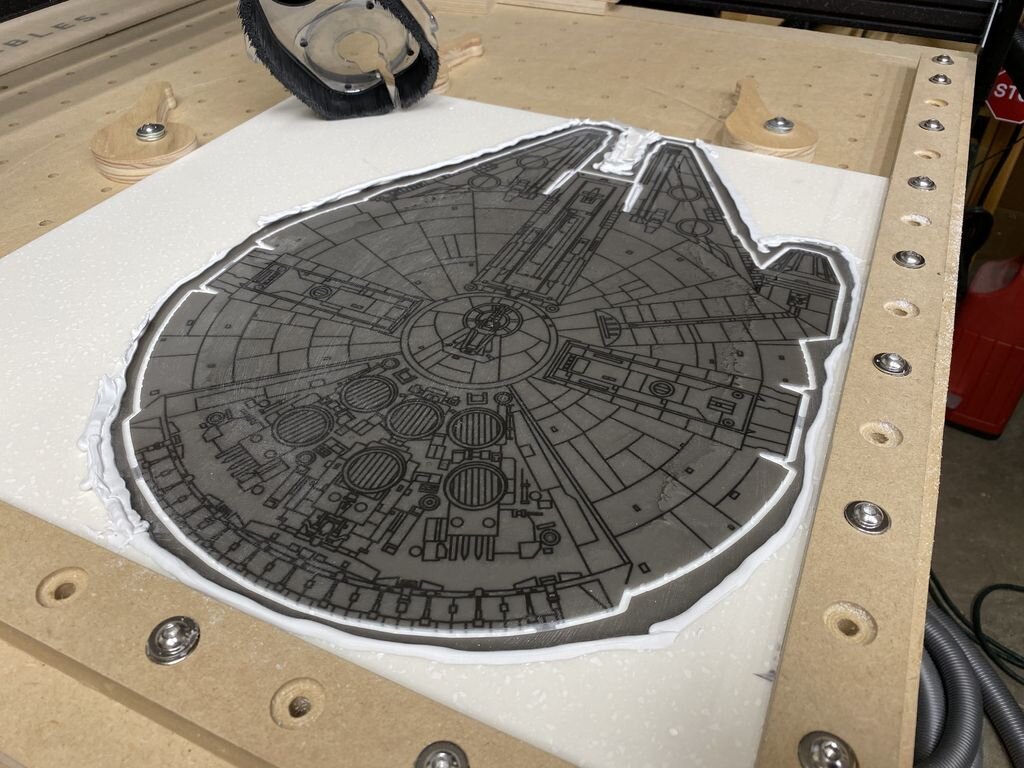
Step 8: Prepping and Adding the Epoxy
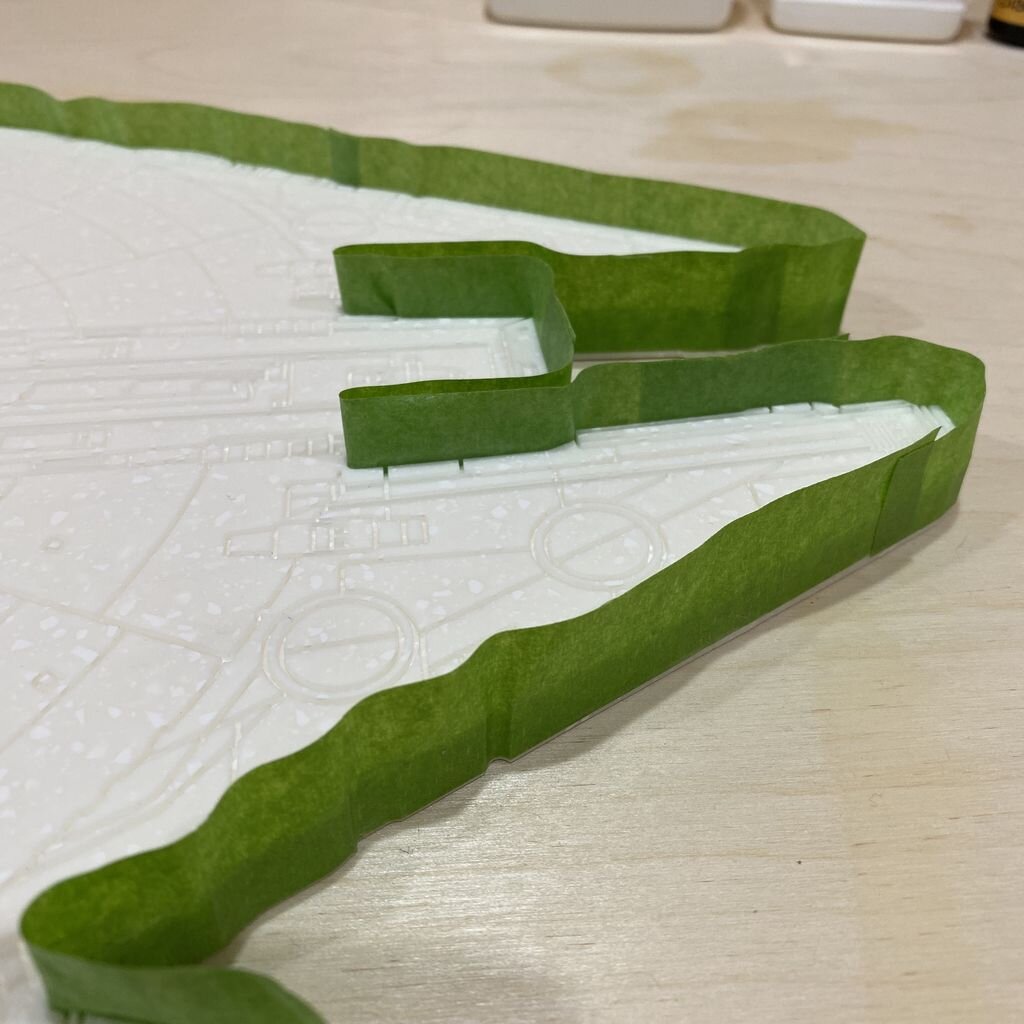
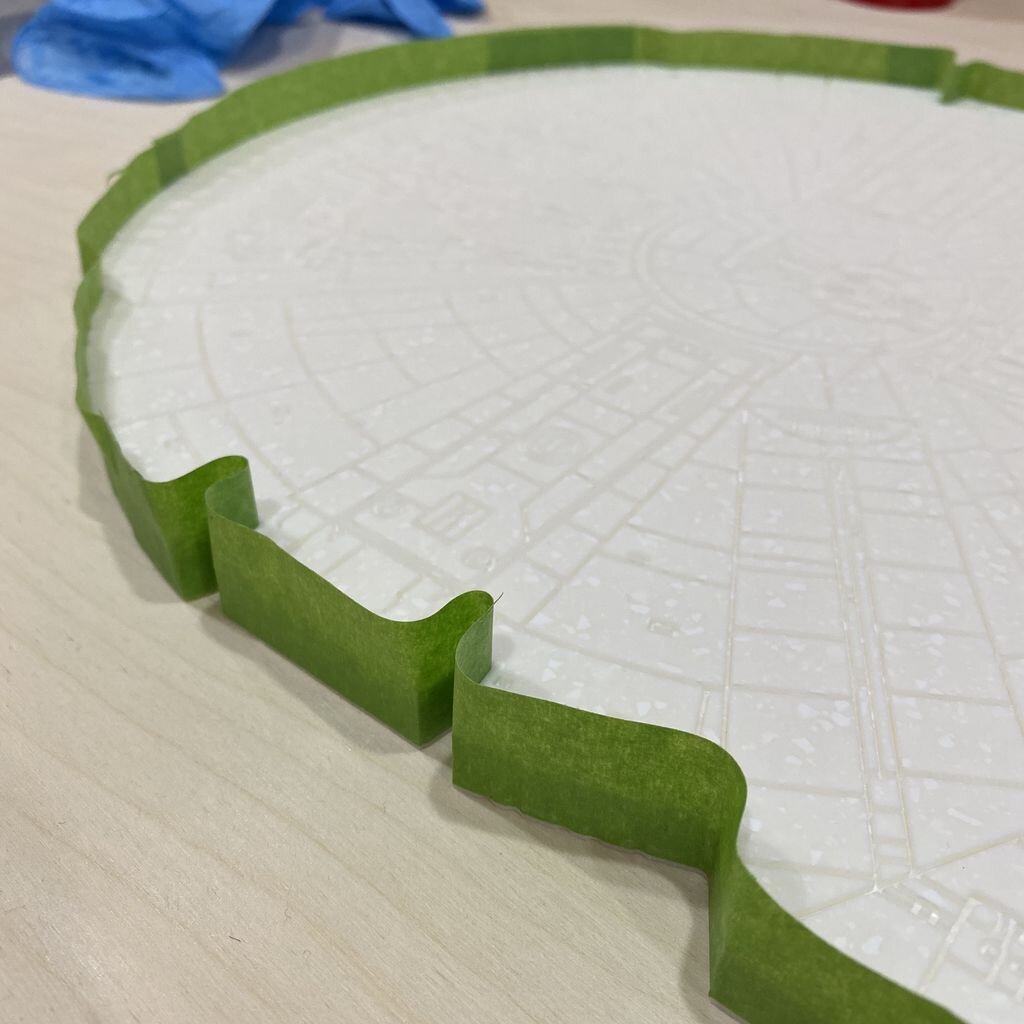
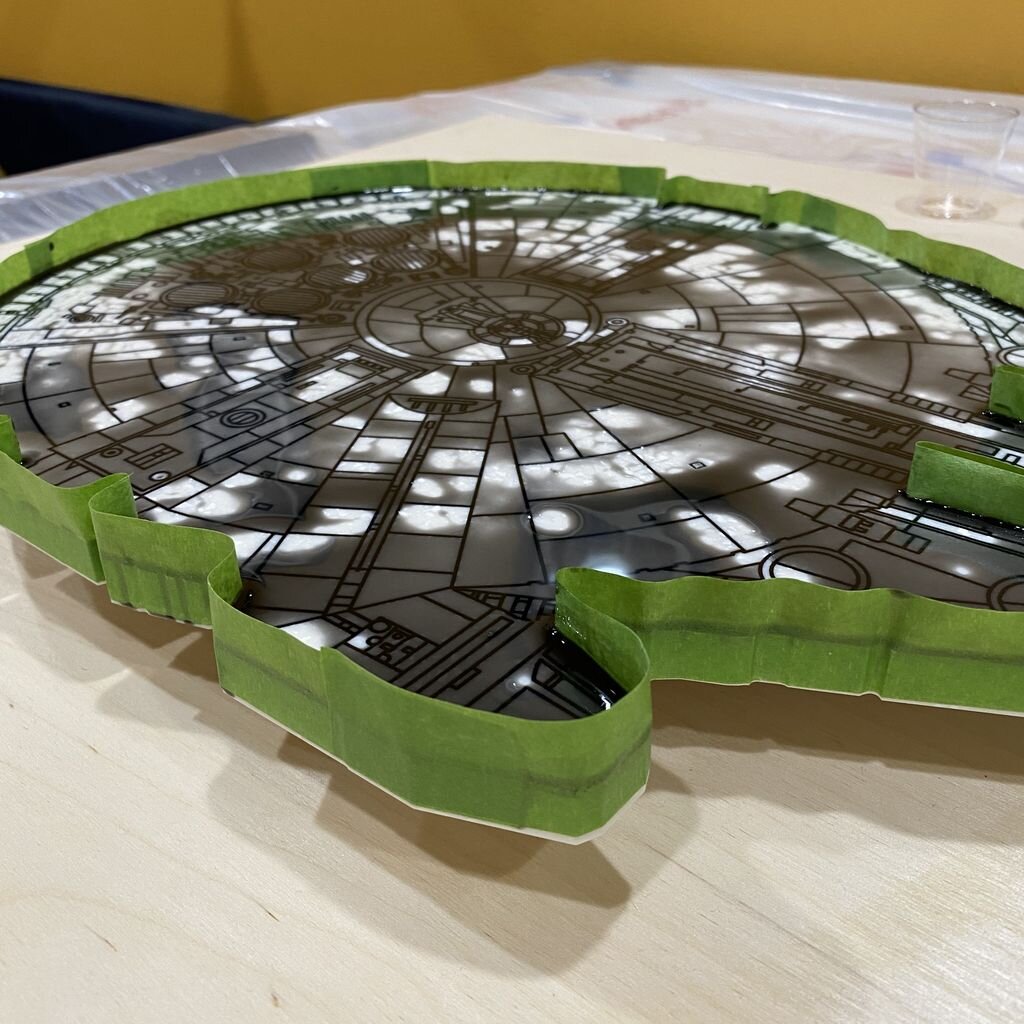
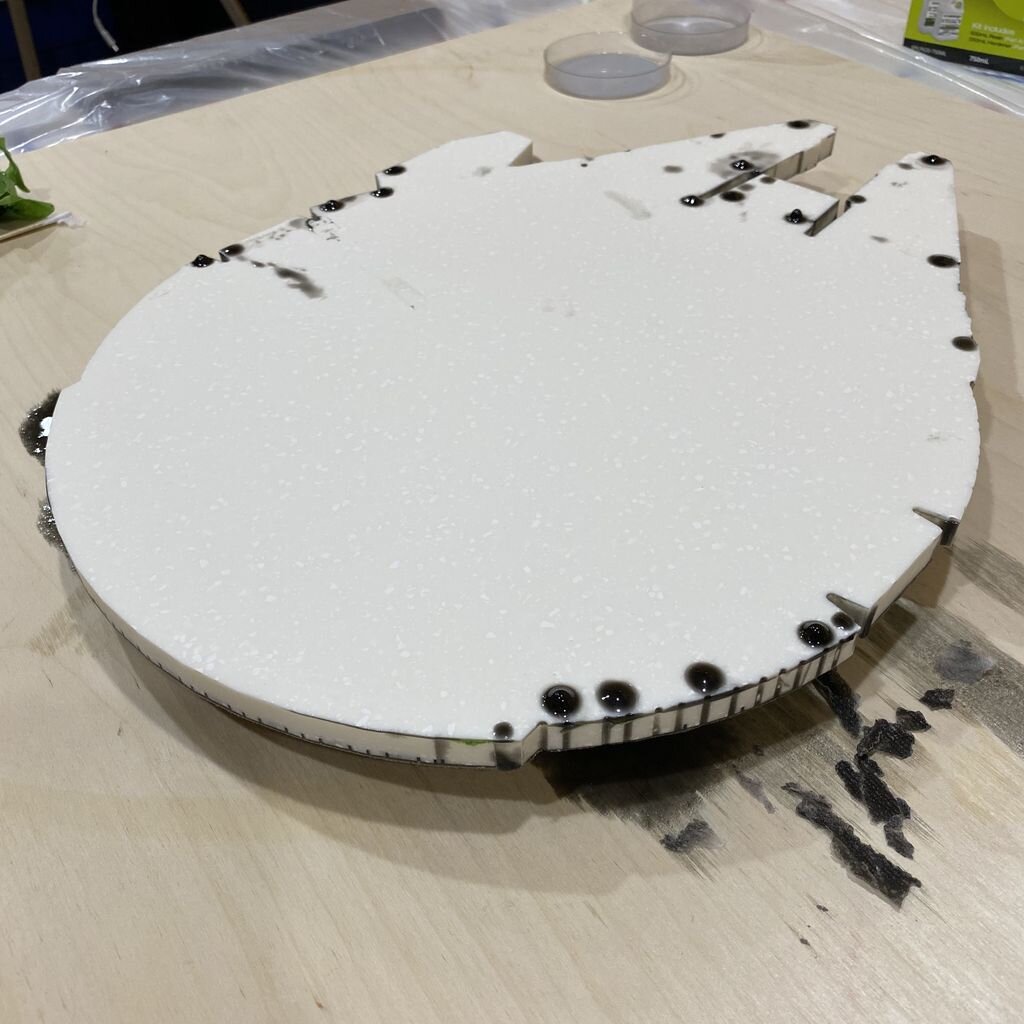
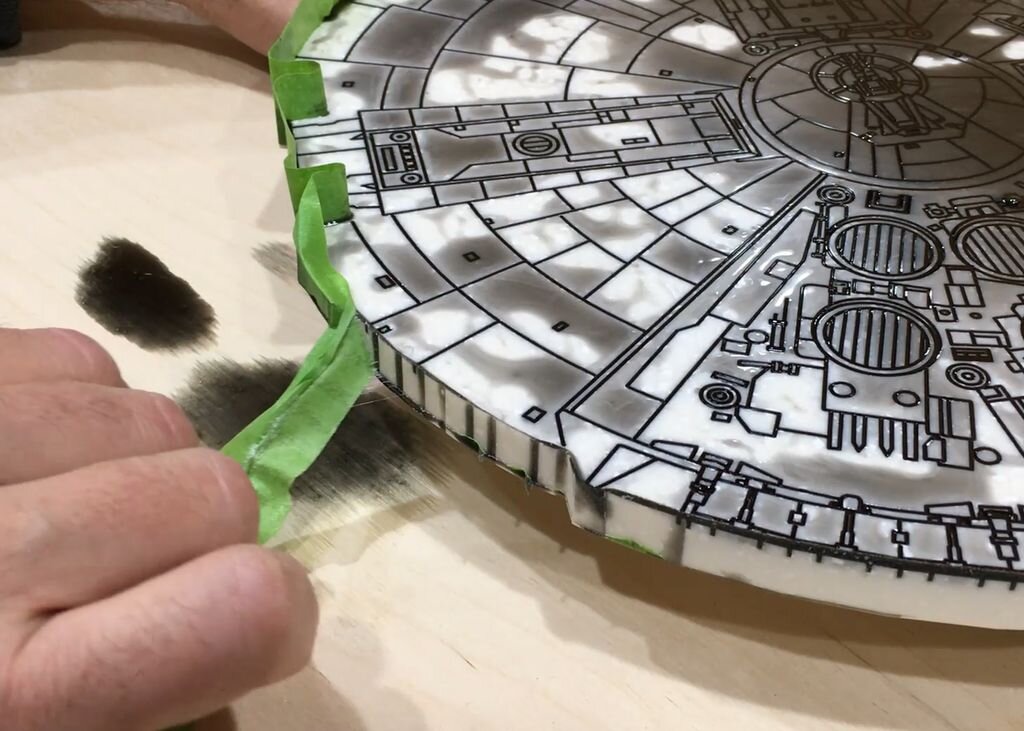
After blowing all of the excess dust out of the grooves I used green frog tape to seal the edges of the ship to keep the epoxy from running off the top of the solid surface material. Believe me, if you have any kind of opening around the edge of the board when you pour the epoxy, it will find the opening and run out of that opening. Gravity will win!
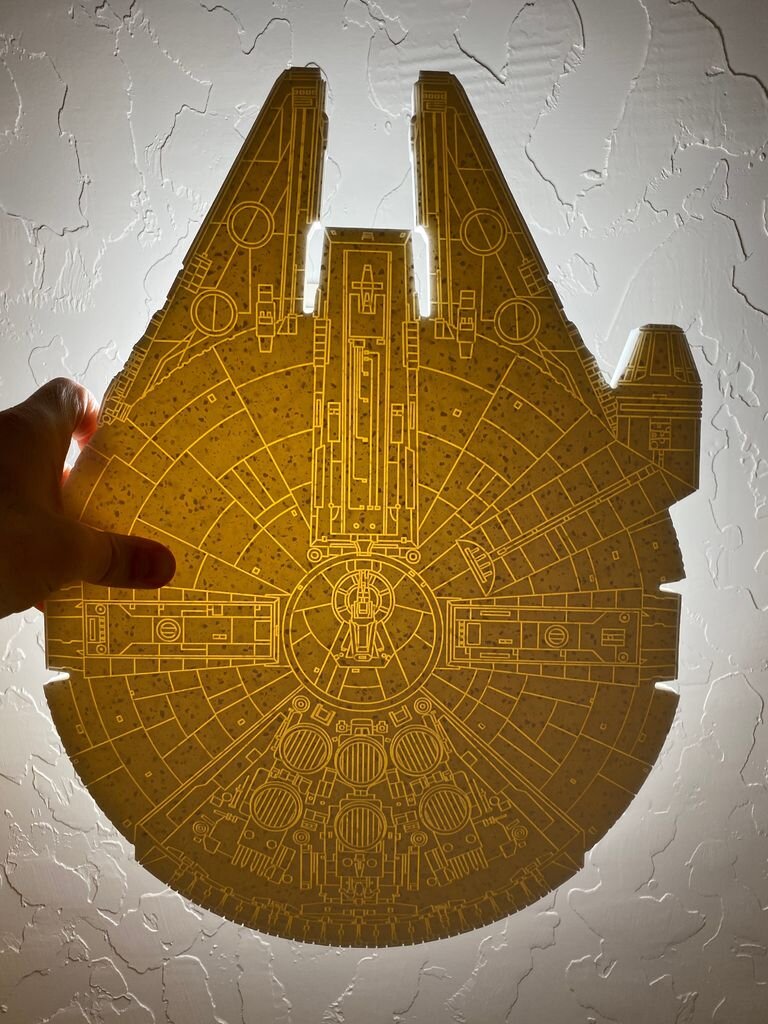
This was was my first time using epoxy and the Ecopoxy Liquid Plastic will definitely find all of the voids. It did an amazing job of filling in all of the grooves in the material. This stuff is amazing.

Step 9: Waiting for the Epoxy to Cure
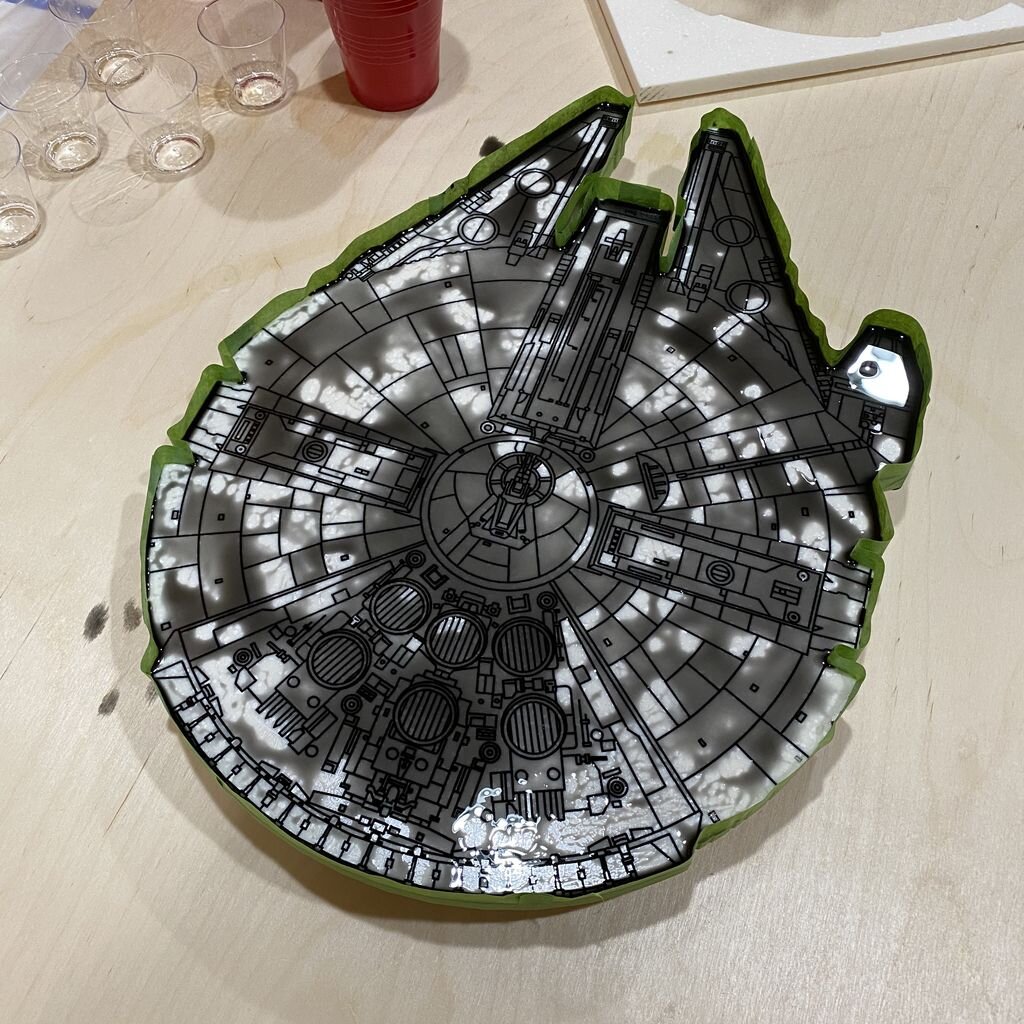
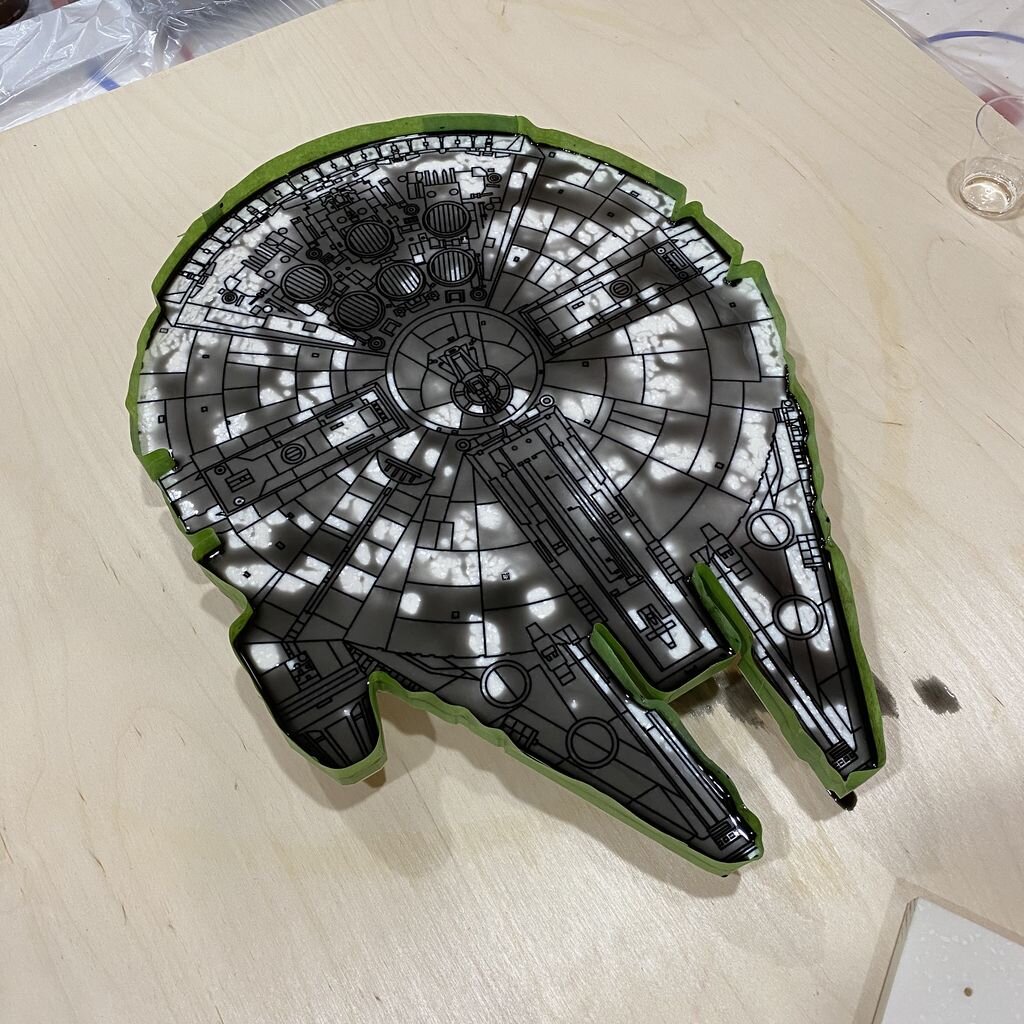
The epoxy I used was Liquid Plastic from EcoPoxy with black tint to darken the epoxy so the grooves would really stand out. It takes several days to cure so you will need to pour the epoxy in a place where it can site for some time. It was hard to wait for the epoxy to cure. I really wanted to sand it down as soon as possible to see how it turned out.
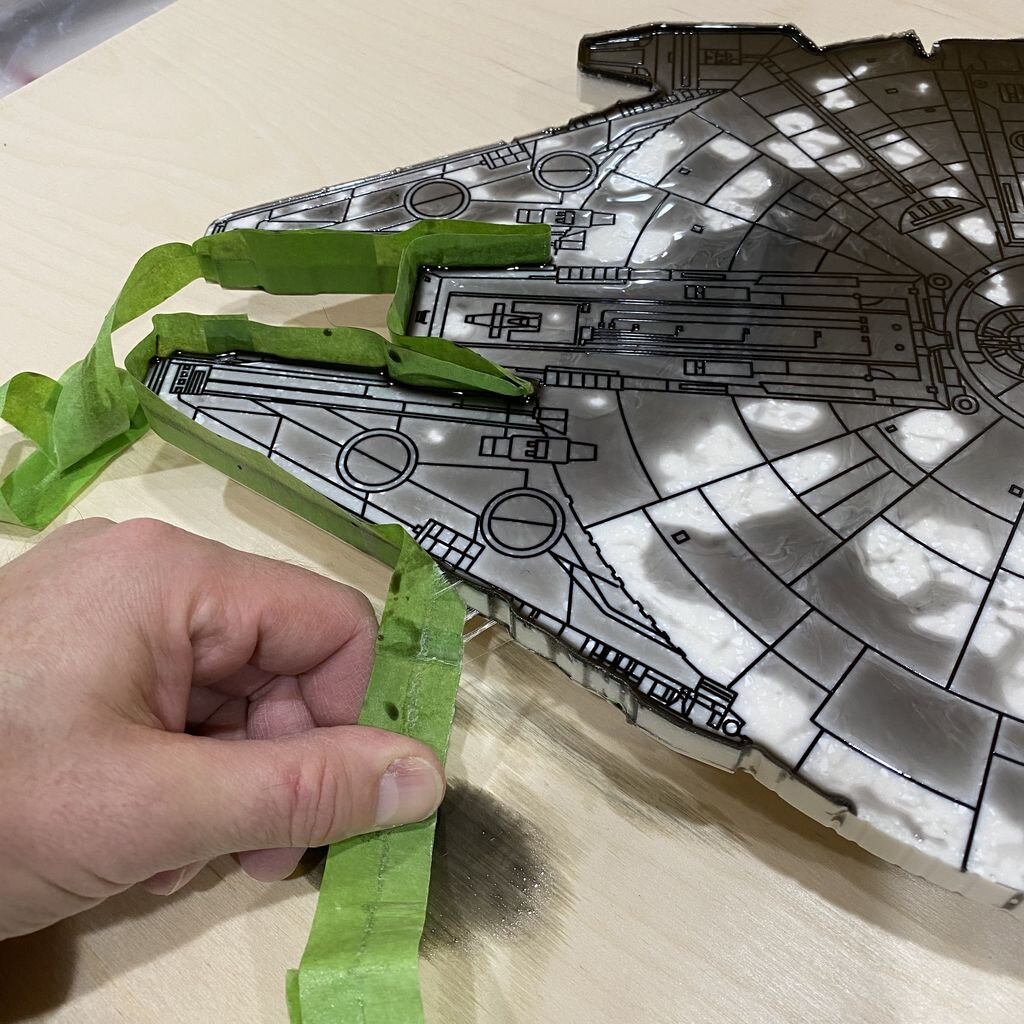
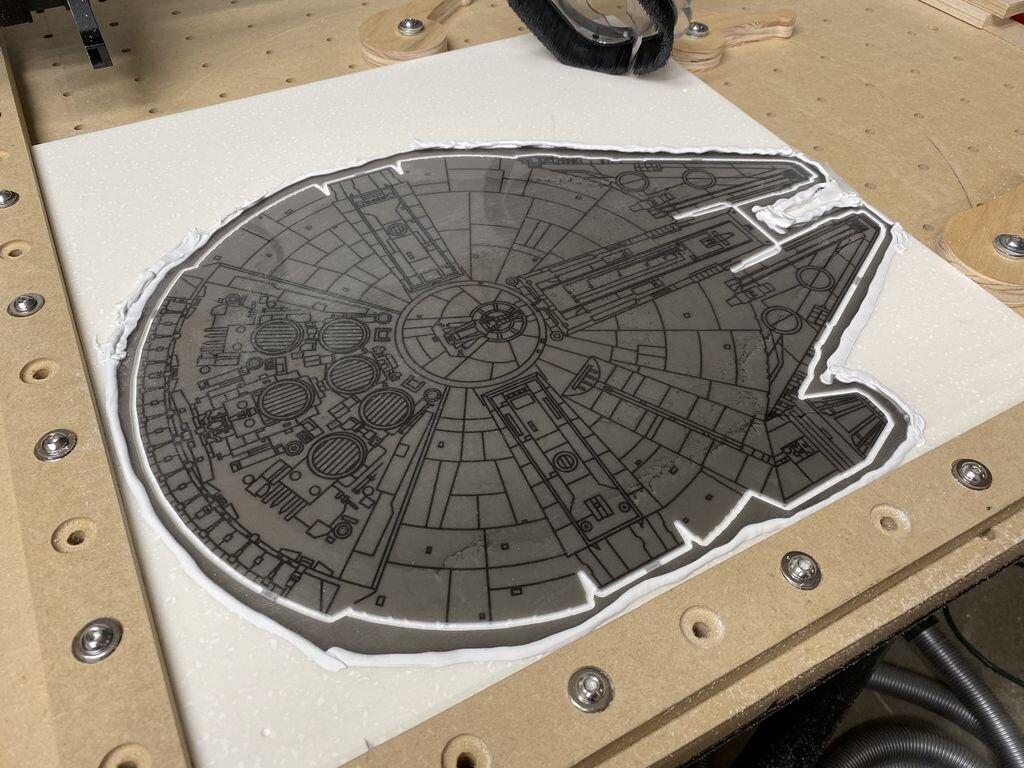
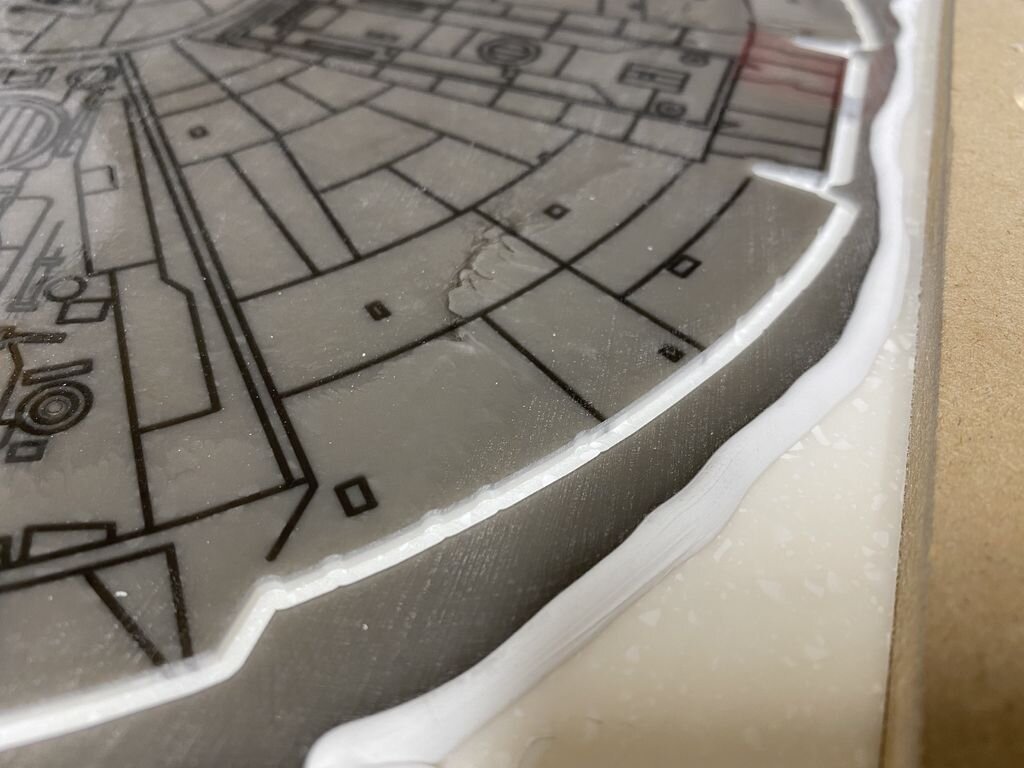
You can see that when I took the Frog Tape off the edges of the board that there was quite a bit of the epoxy that worked its way down through the tape.
The drips on the bottom were formed from the epoxy that leaked through the tape and then dripped off the bottom of the board.
Make sure you have the board sitting on a level surface or you will end up with most of the extra epoxy on one side of the board.
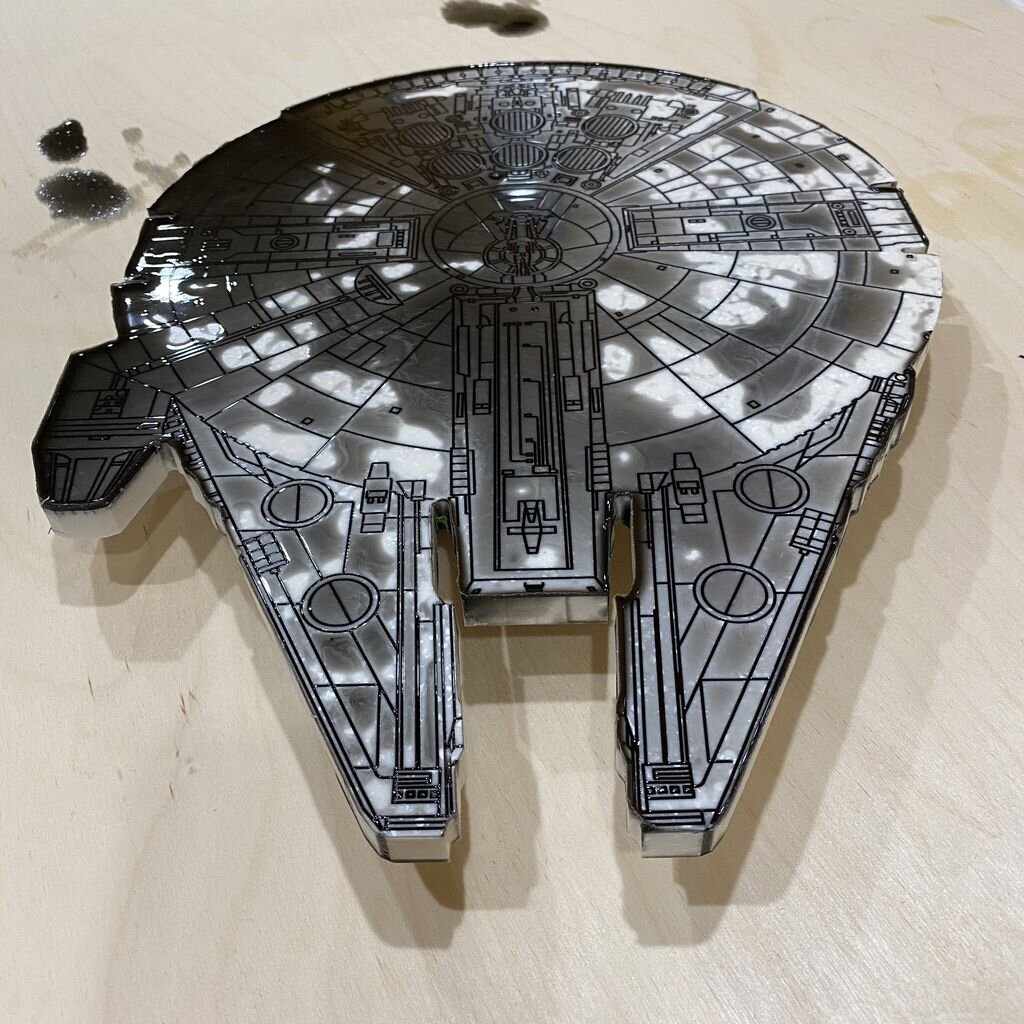
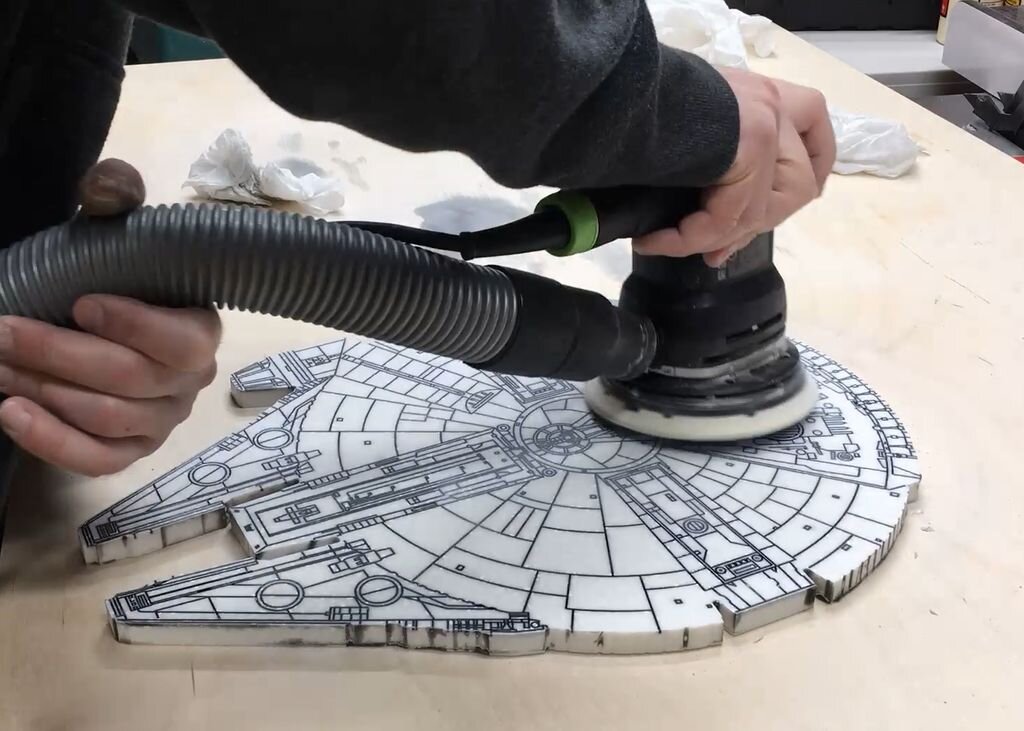
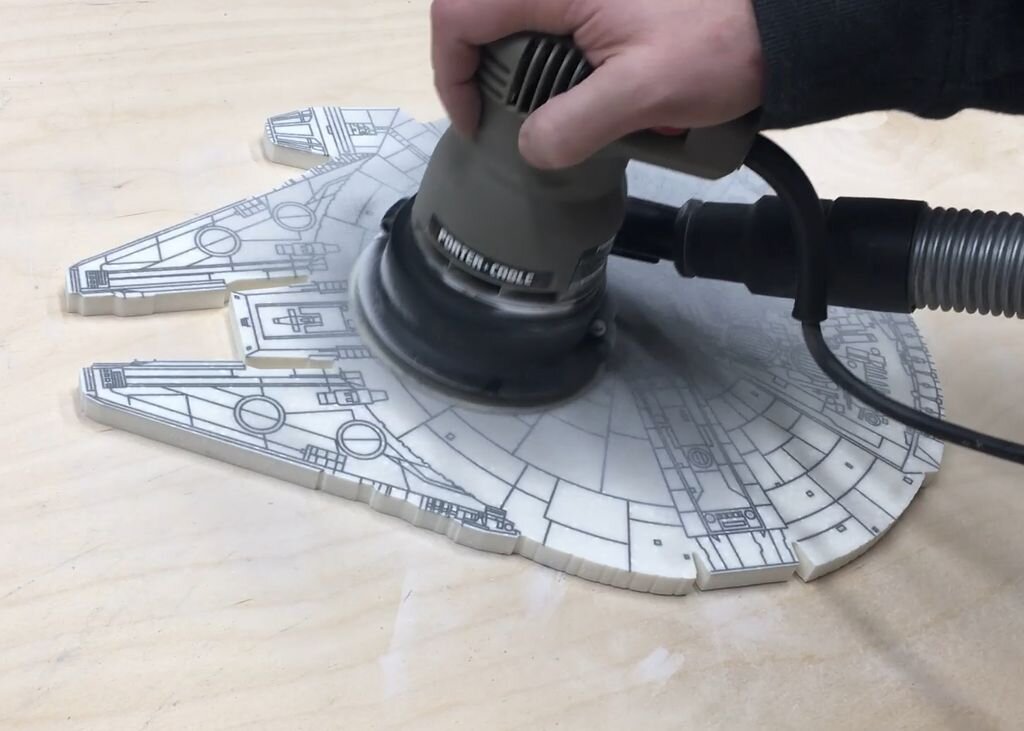
Step 10: Sanding the Top of the Serving Board
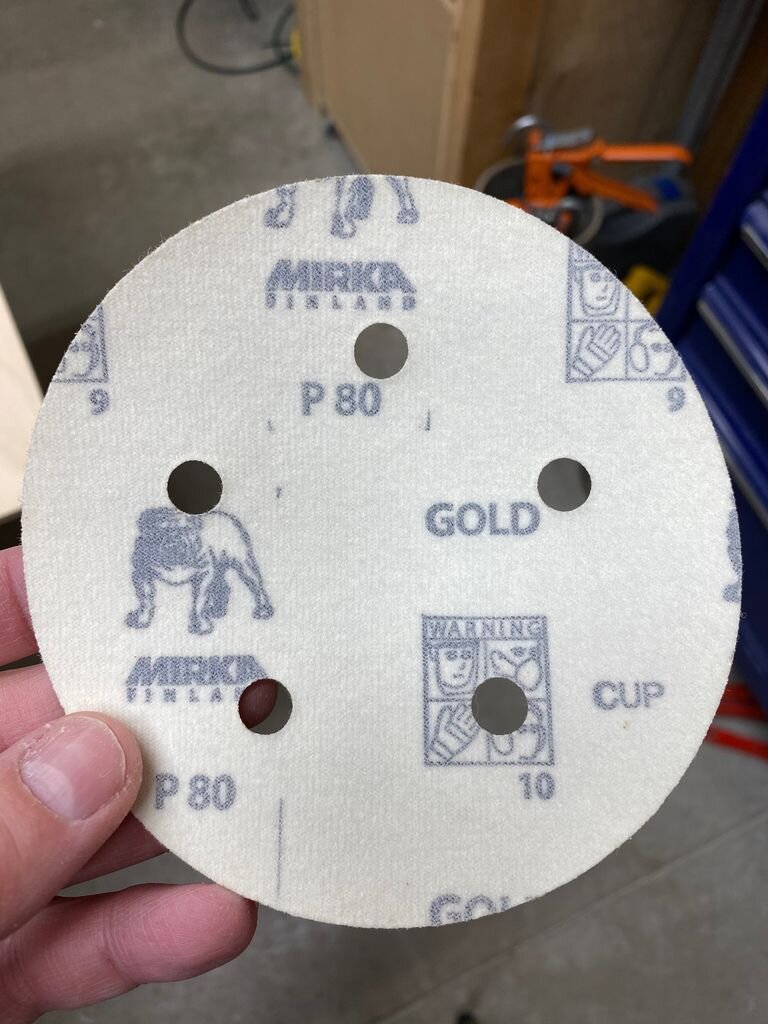
I sanded the board with a random orbit sander starting with 80 grit to remove all of the excess epoxy. I decided to sand down through finer grits of sandpaper in a later step after rounding over the edges of the board. I decided to go through 120 grit, then 180, 220, and finally 400 grit.

Step 11: Cleaning Up the Epoxy That Leaked Under the Tape
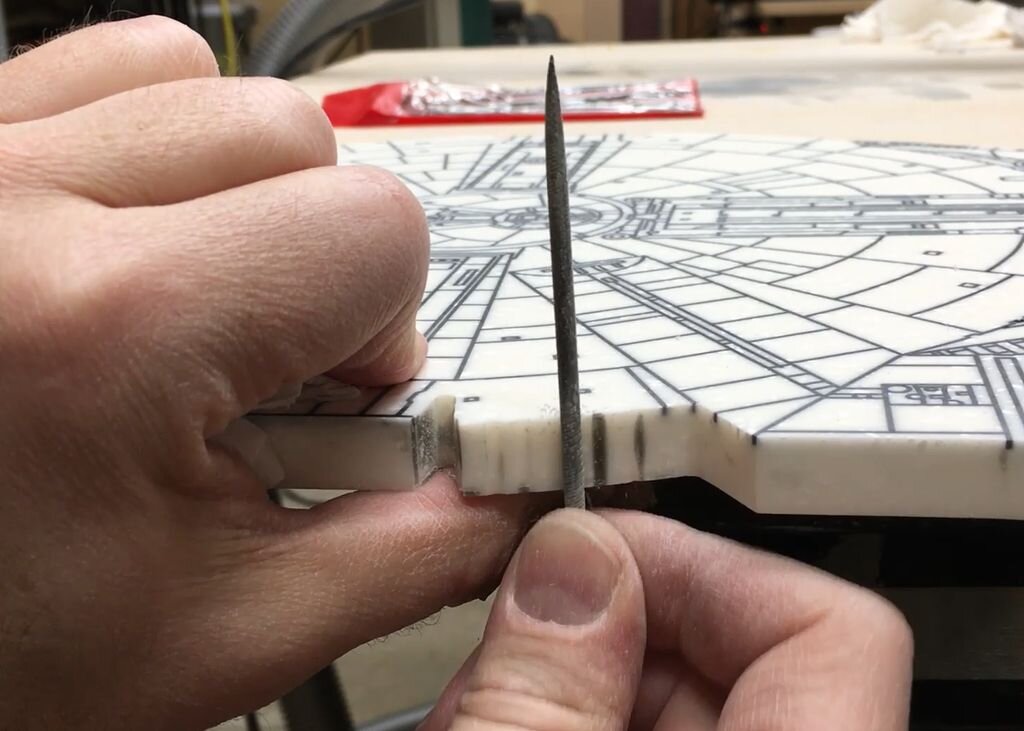
After I sanded the edges of the board I had to use some small needle files to remove some of the epoxy that leaked through the tape I put around the edge. Since I cut out the outline of the ship with a 1/8” diameter bit I used a 1/8” diameter file to match the radius. That worked really well in the narrow areas.
The epoxy that leaked under the tape in the easy to reach areas was taken care of by sanding with a sanding block and a random orbit sander. These areas went really fast as the thickness of that epoxy was very thin.
Where the epoxy leaked through the tape all the way to the underside of the of the solid surface material I had some drips that were up to 1/8" tall. These areas were all quickly taken care of with the random orbit sander.
Step 12: Route the Edges
After the initial carving and filling all of the thin grooves with epoxy it was very clear that the edges needed to be rounded over to get rid of the sharp 90 degree edge around the outside. This is just a square edge, but it is deceptively sharp.
I looked for the smallest radius round over bit I could find and luckily I found the Whiteside 1978 Round Over Bit with Small Pilot 1/16-Inch radius. This bit was a small enough radius that I did not lose any of the detail of the thin lines that were around the outside of the board. On top of that, the small diameter guide bushing allowed the bit to get far into the inside corners.
The areas that the bit could not fully reach were taken care of with some small round files.
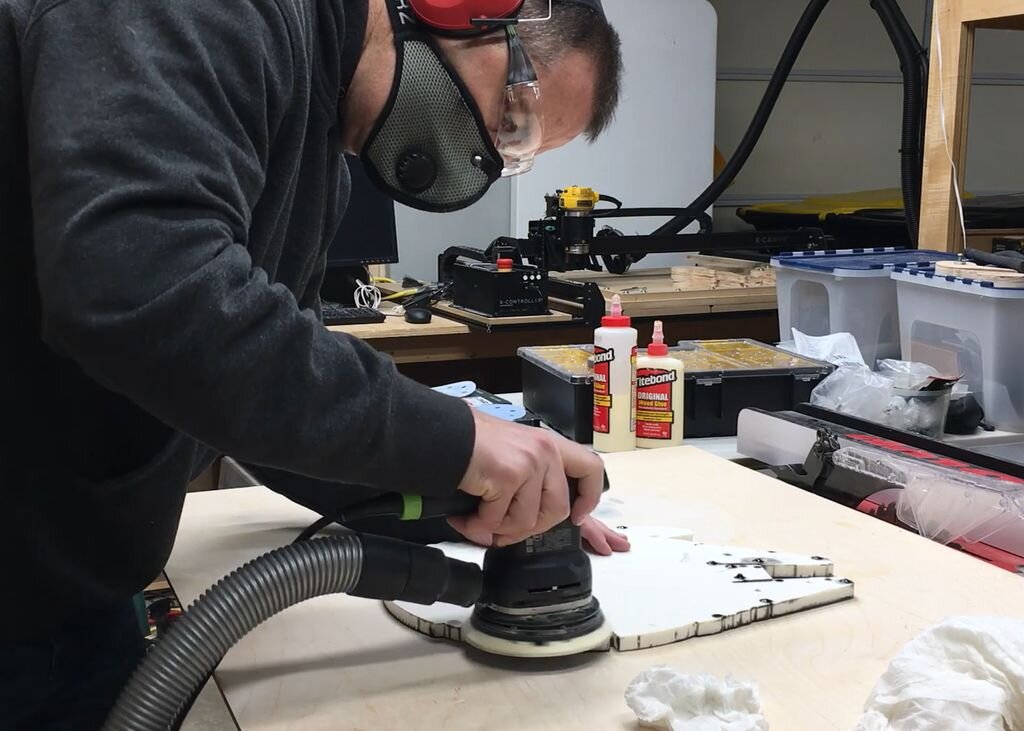
Step 13: Sanding and Sealing the Board
I finished sanded the board with a random orbit sander starting with 120 grit, then 180, 220, and finally 400 grit. I used 80 grit in the initial sanding to remove the excess epoxy from the tops of the board.
There just wasn't a reason to go any higher in grit since at 400 grit the surface was remarkably smooth. I hand sanded the edges of the board using sanding sponges that could conform to the rounded edges and irregular shapes.
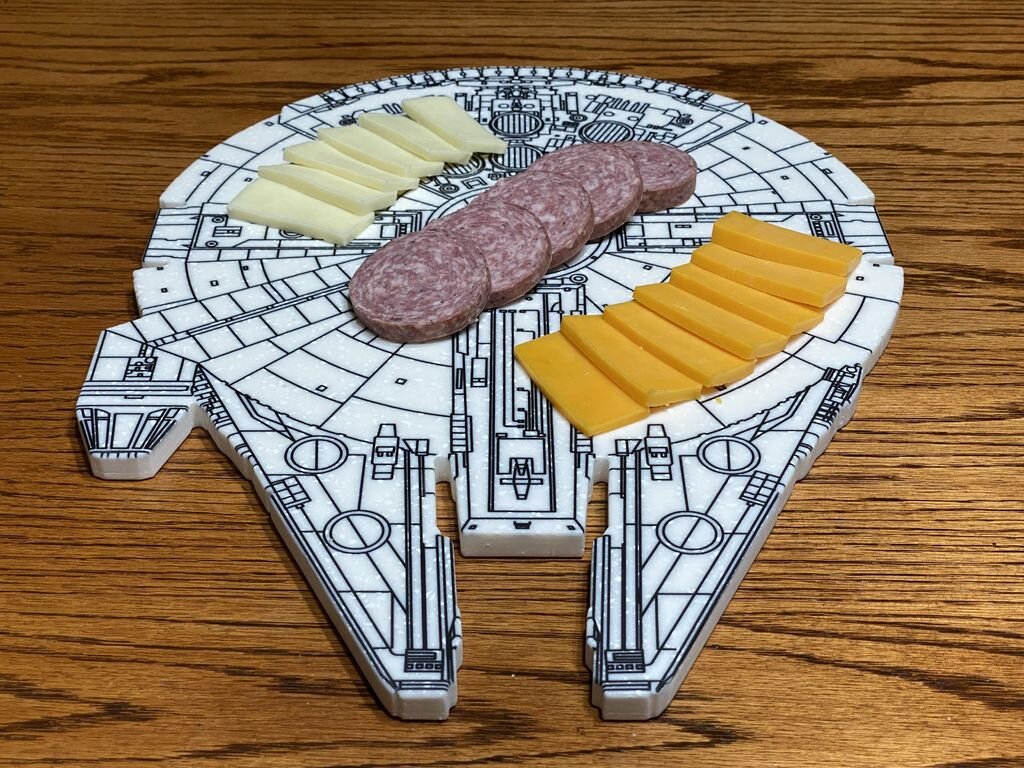
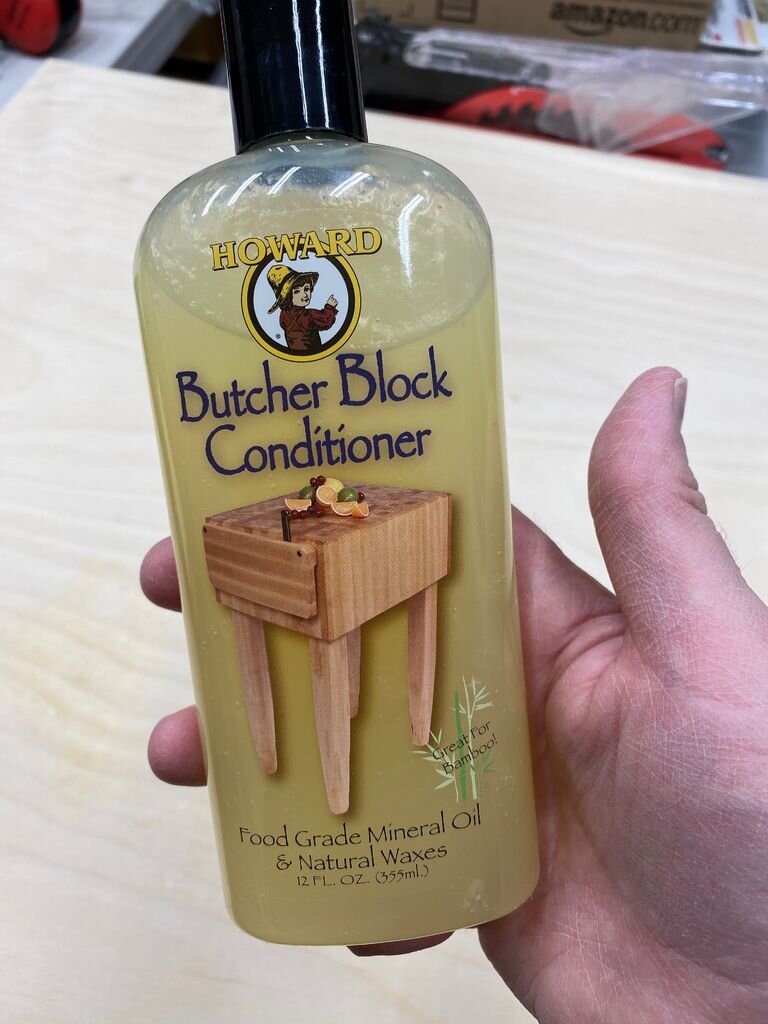
I decided to seal up the serving board with Butcher Block Conditioner. This is a wax based sealant that adds a layer of protection to the serving platter. Once the epoxy fully cures it is safe for food contact. Since I added black tint to the epoxy I wanted to seal it up just to be safe.
I should mention that I really don’t plan to use this Corellian ship for any cutting activities as I don’t want to damage it in any way. Solid surface material, also knows as Corian (brand name), is very hard on knives and dulls them very fast so you probably don't want to cut on it.
I also don’t plan to run this through a dishwasher. The surface is incredibly smooth so I don't think it will be that hard to clean by hand in the kitchen sink.
There just isn’t a good enough reason to take a chance on damaging the fastest ship in the galaxy!

Step 14: Alternate Order of Operations
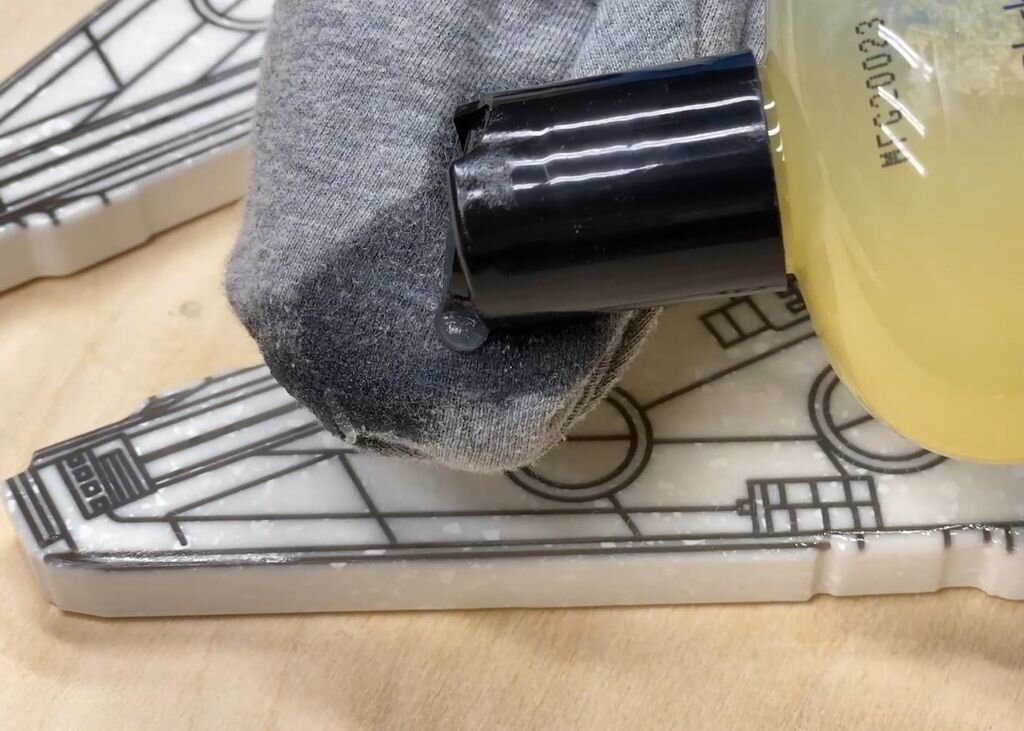
After making the first Millenium Falcon I decided to make a second one with the other piece of scrap solid surface material I had. I decided to change the order of operations so I didn't have to spend so much time with cleaning up the epoxy that seeped through the tape.
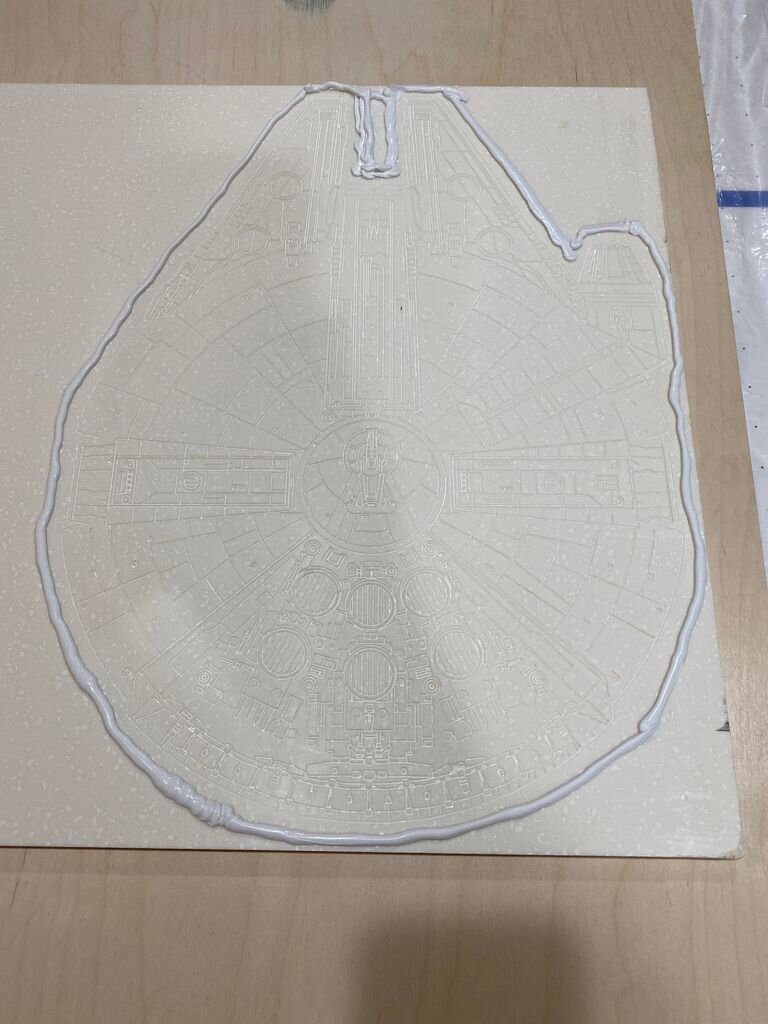
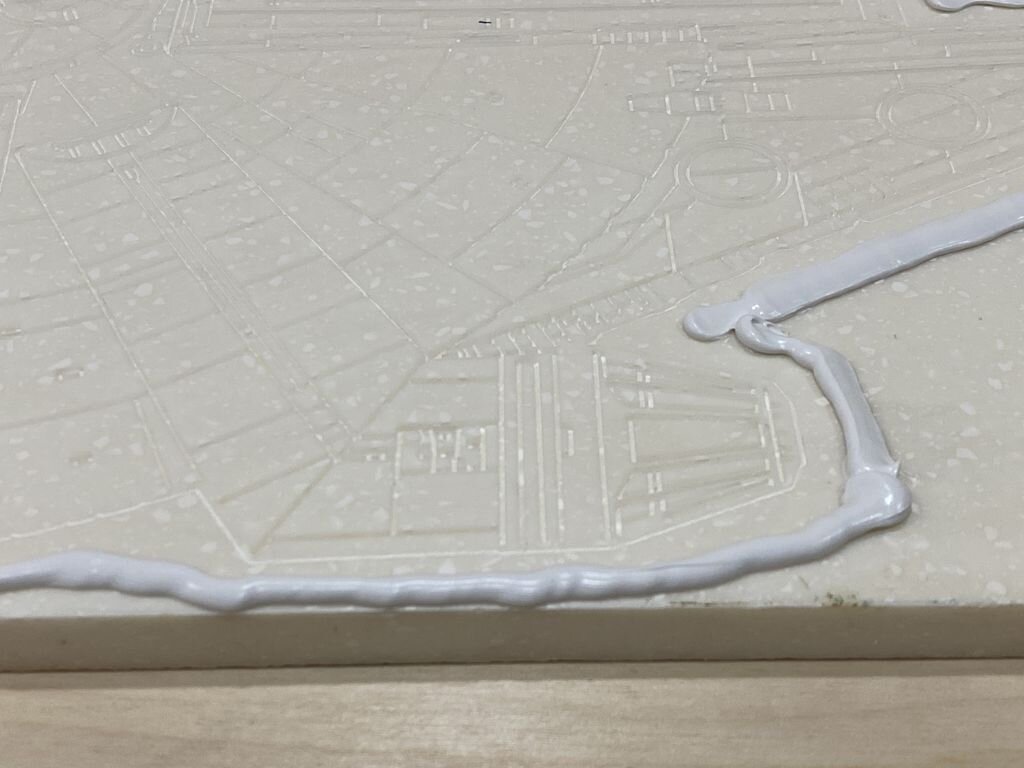
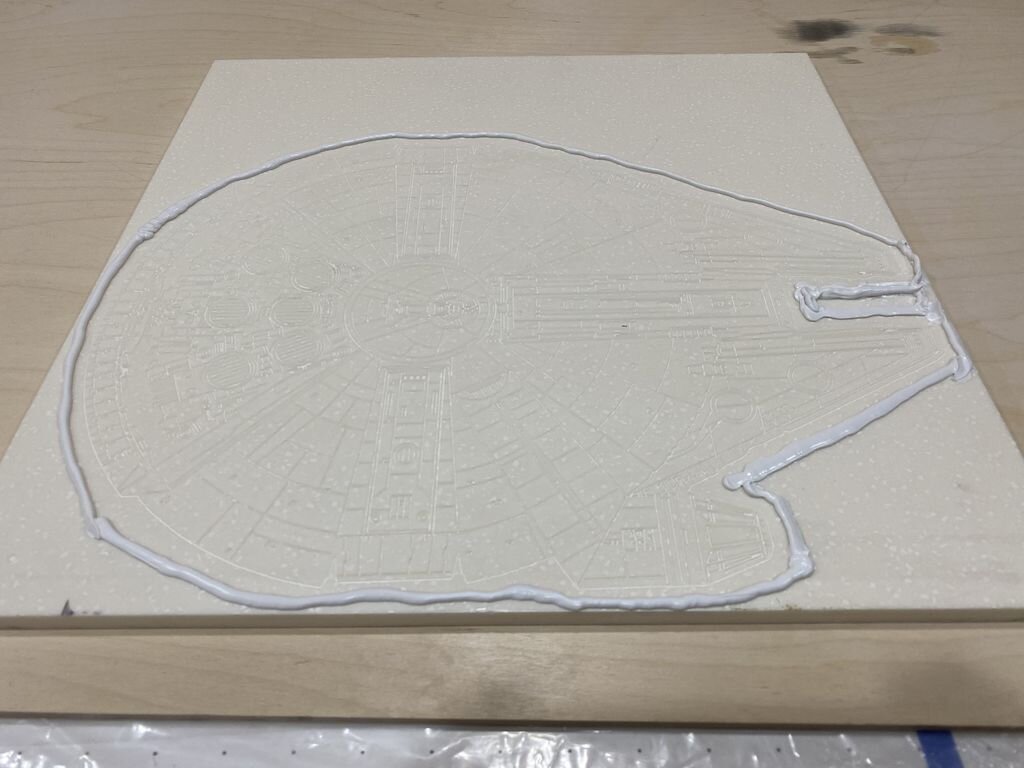
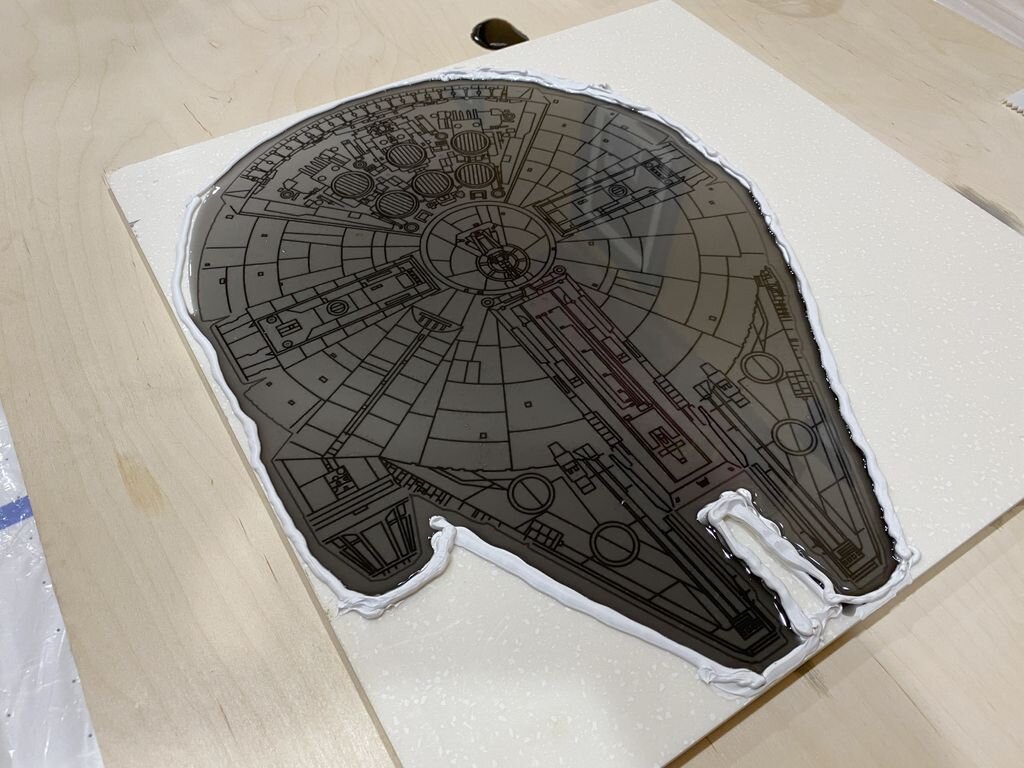
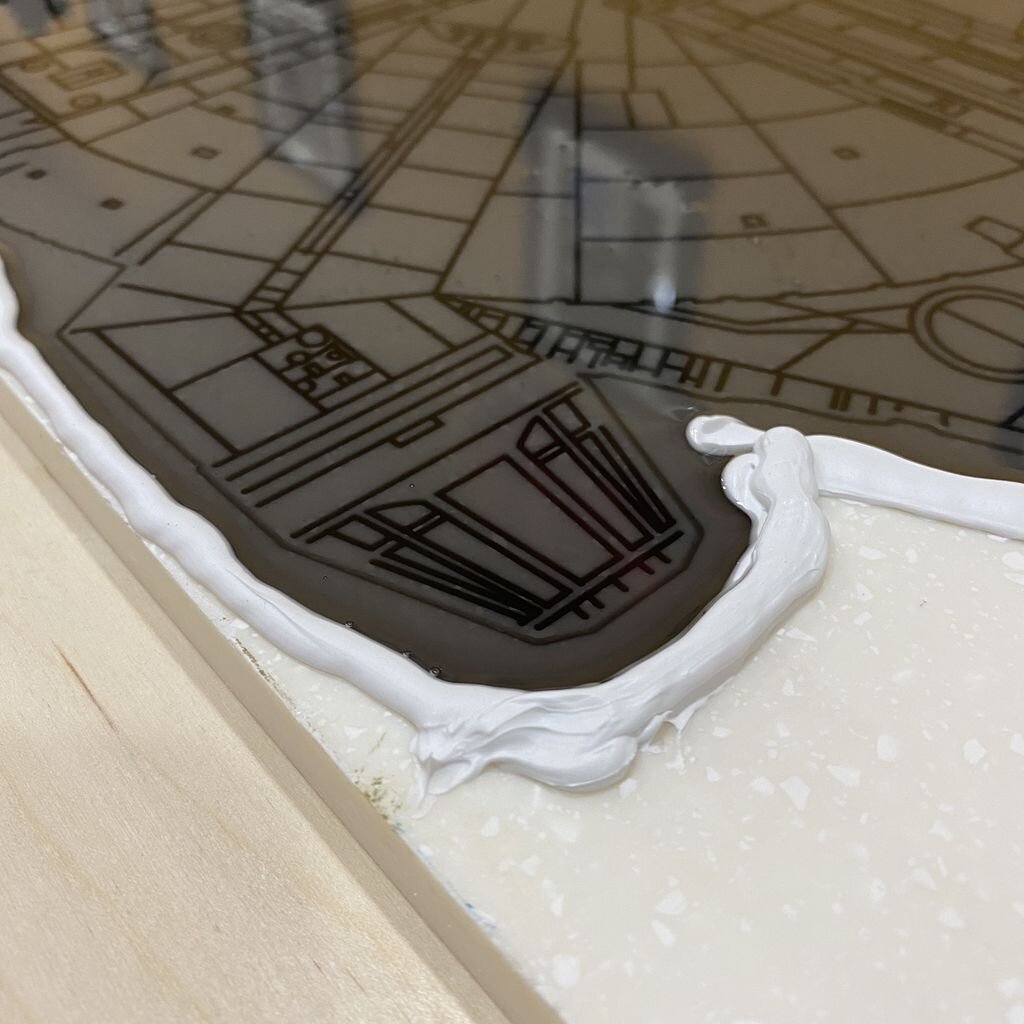
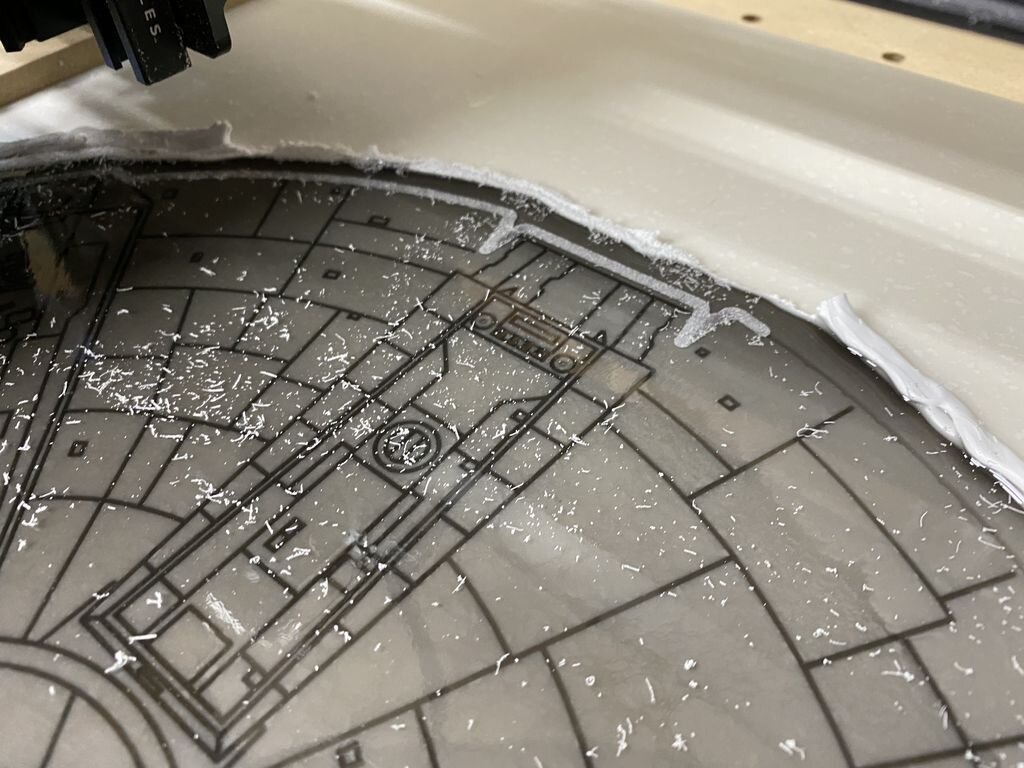
For the second one I went through the same process of cutting the detail in the face of the solid surface material with the 1/32" diameter bit. Instead of switching to the 1/8" diameter bit to cut out the outline of the ship, I left the 1/32" diameter bit in the CNC and cut the outline of the ship to a 0.02" depth. This put an extremely light outline of the ship on the surface. I then removed the piece and put it on a level table. Then I outlined the ship with a bead of caulking and let that cure. Then I mixed up some epoxy with black tint and poured it on the surface making sure it filled in all of the grooves.
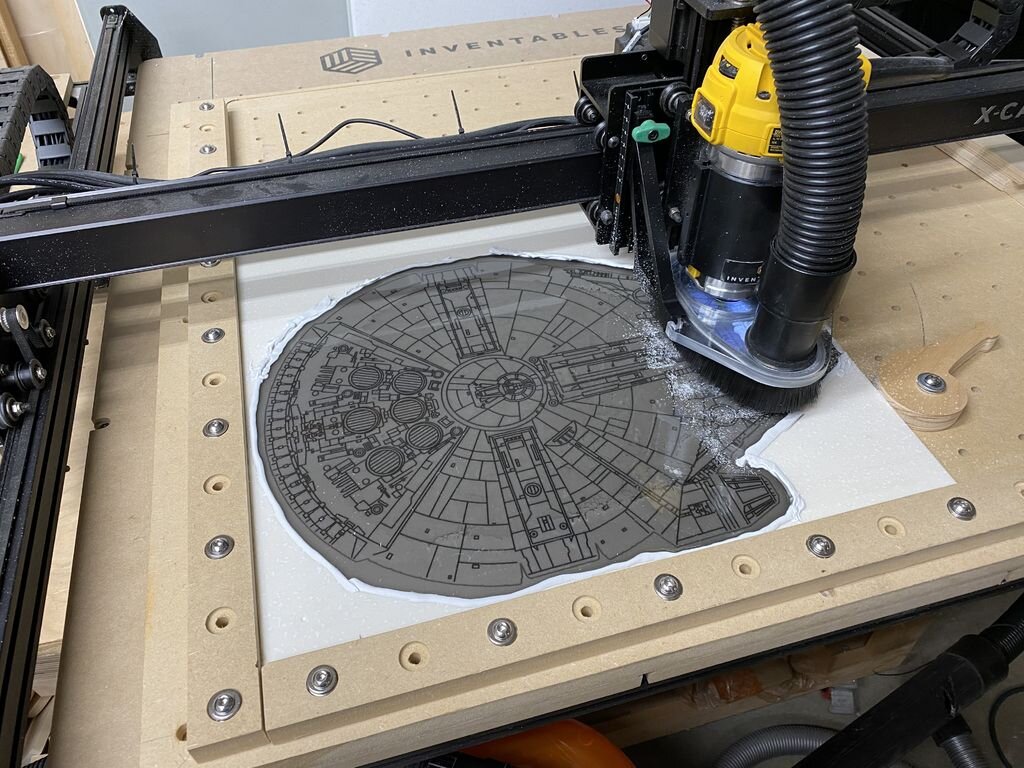
After the epoxy cured I put the piece back in the X-Carve CNC and checked that the piece was placed squarely with the machine by checking it against the reference points I carved in the initial steps. Carving it out with the epoxy already poured saved a lot of clean up time. I did need to spend a little time sanding the epoxy off the surface, but that was a lot easier than filing and sanding the edges of the outline of the ship.
Finishing from this point matched the first one as I rounded the edges, did a finish sanding, and then sealed the board.
Step 15: Final Thoughts . . . .
I hope you enjoyed this Instructable. I have been thinking about this project for a long time so I am really happy to see it come together and put into use.
The CNC routing file was a little inefficient in the cutting process so I am hoping that if I make more of these that I can streamline the steps and decrease the cutting time down to nearly half of what these took.
It was definitely easier to pour the epoxy before totally cutting out the ship. The extra top sanding was much easier than getting all of the epoxy off of the sides and the underside of the board. Maybe there is a better tape that someone could recommend for this type of sealing operation.
Next time I will try using the CNC to remove most of the extra surface epoxy before I cut out the entire shape and begin sanding.
Another option would be to use a wide drum sander to remove the extra epoxy. I thought about doing this, but with so much time invested in the boards to get to this point that I was nervous running it through a machine that could do a little damage. The epoxy grooves on the board are only 0.05 inches deep
Please let me know if you have any suggestions for other ways I could have done this project as I am always looking for ideas.