Clear Router Sleds and Radius Jigs
Click here to subscribe to my YouTube channel.
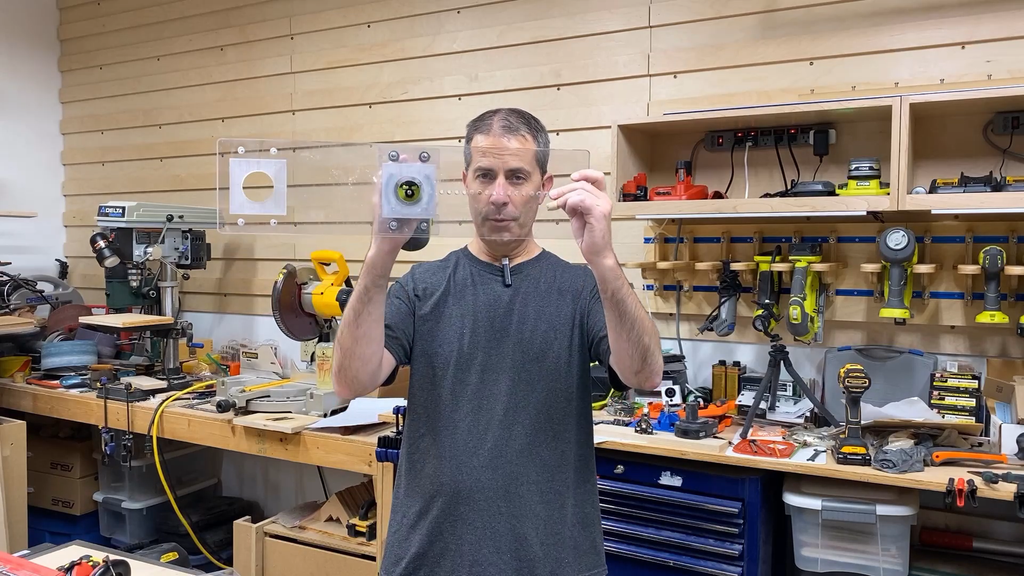
In this project I am going to show you how I made two different clear router sleds and radius jigs for my trim router.
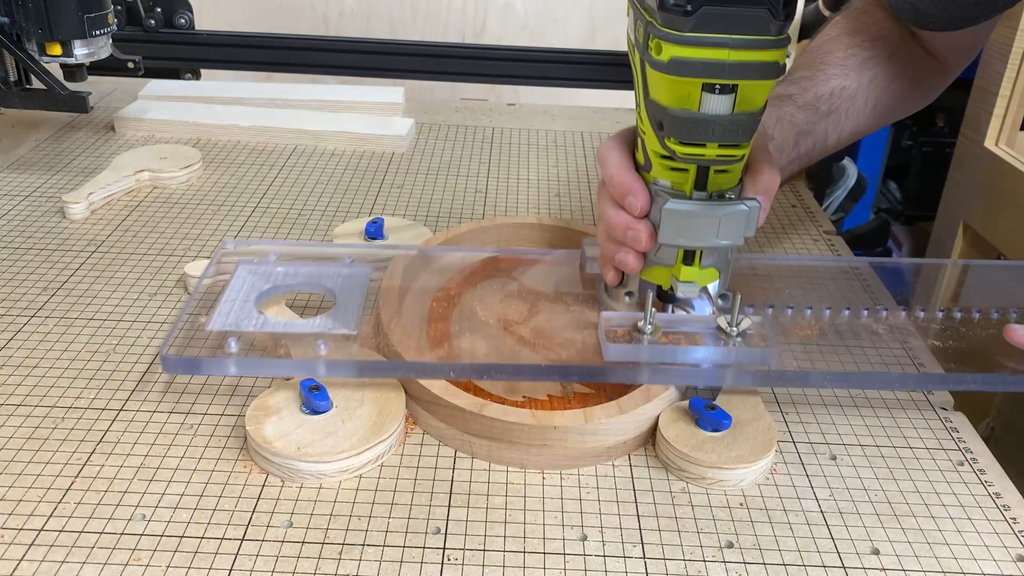
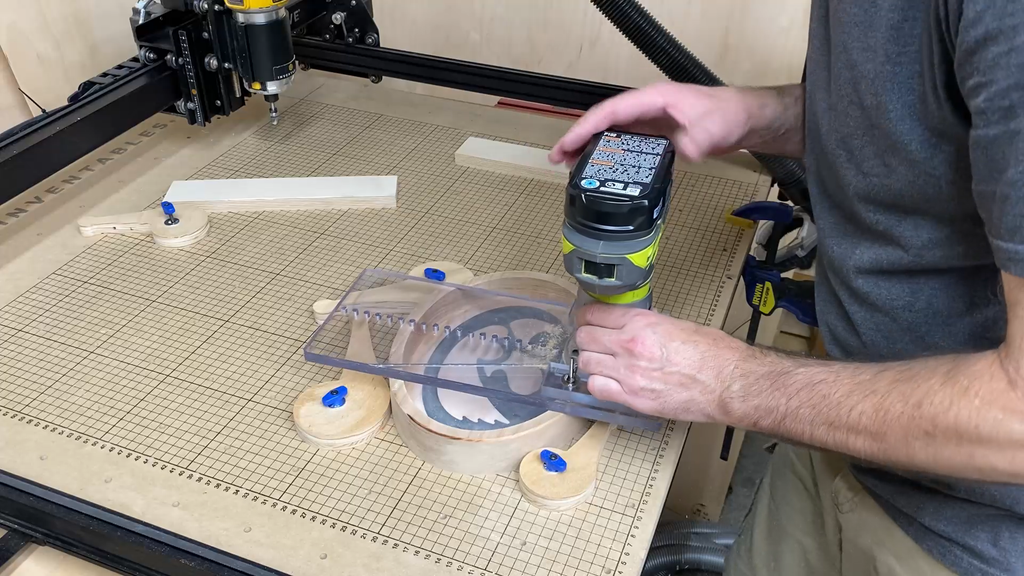
The main reason I wanted to make this was so I could have something to mount my trim router to in order to keep it perfectly vertical while using a round-over bit on small bowls or trays for things like every day carry (EDC) items or for routing edges on larger items so I could keep the router perpendicular to the surface. Trying to use a round-over bit on a thin edge can be nearly impossible in some situations without something like this.
It can also work as a traditional router sled for leveling smaller items between two runners.
I also created a shorter sled to use for round-overs and chamfers and also for creating smaller circles.

Step 1: Materials and Tools
TOOLS
The tools I used on the project were as follows:
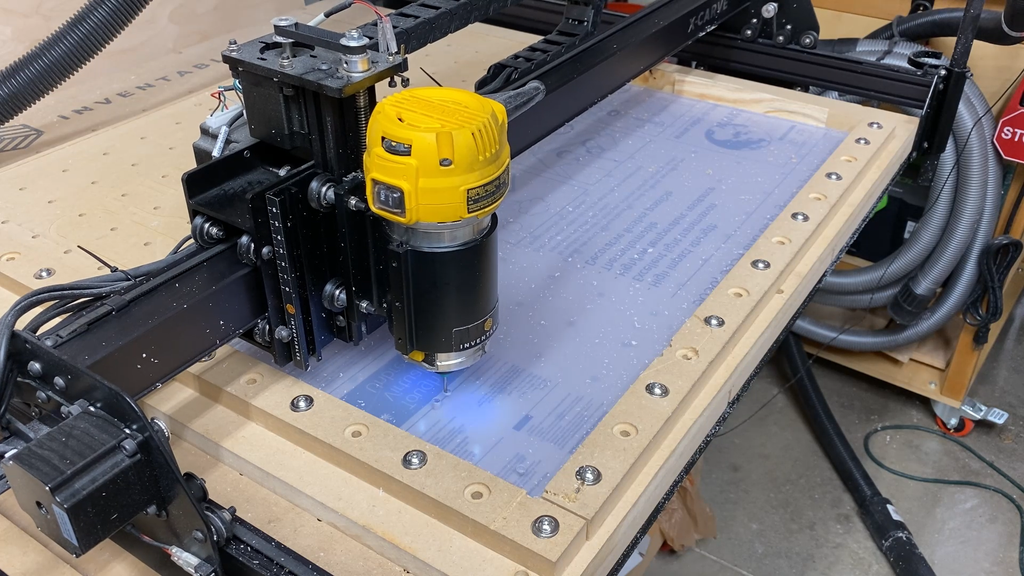
X-Carve 1000mm CNC Machine by Inventables - https://www.inventables.com/
Ryobi Trim Router - https://amzn.to/3i9pIyQ
1/4" Diameter downcutting bit - https://amzn.to/33md8pX
1/2" Diameter bowl and tray bit - https://amzn.to/3lDSNnv
Saw Stop table saw - https://amzn.to/3a8znCE
Grizzly 14" Band Saw - https://amzn.to/2S9RiRf
Dewalt 20 Volt Cordless drill - https://amzn.to/3aflH9a
Random orbit sander
Shop Vac
Drill press
Tape Measures (my favorite two):
Fastcap PMS-16 16' Auto Lock ProCarpenter Tape Measure - https://amzn.to/333fTMN
or FastCap PSSR16 16' Standard Reverse Measuring Tape - https://amzn.to/35eQe6k
Utility Knife - https://amzn.to/33cO8T0
MATERIALS
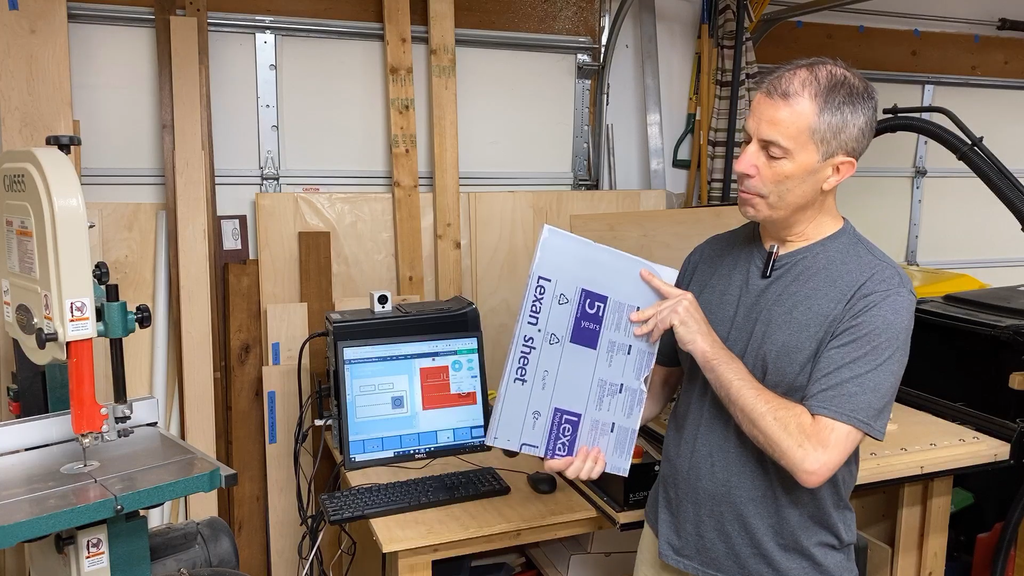
1/2" thick clear polycarbonate
Hardware and Fasteners Used:
You will need 4 of each of the following for each router sled you make:
- #8 x 32 x 2" long machine screws
- #8 x 3/4" diameter flat fender washers or #8 flat washers
- #8 lock washers
- #8 wing nutsSand paper
NOTE: As an Amazon Associate I earn from qualifying purchases.
NOTE: If you plan on using any tool for a project please make sure you are familiar with the tool and all of the dangers associated with it. If you are not familiar with a tool then you should ask someone who is to show you the proper way to use it. A lot of communities have classes at local colleges on the proper use of tools and machinery. There are also local woodworking clubs that offer classes at very reasonable rates for beginners. I highly recommend using these resources for your safety and for the most efficient use of the tool.
SAFETY FIRST:
Always wear eye and hearing protection.
Always work safe with the proper safety equipment and guards on your tools.
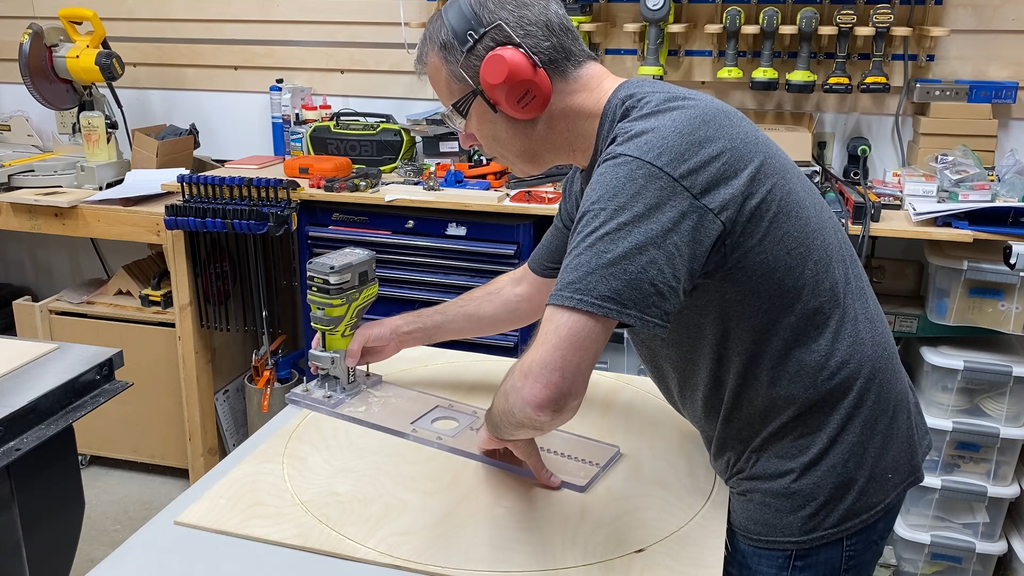
Step 2: Design the Sleds
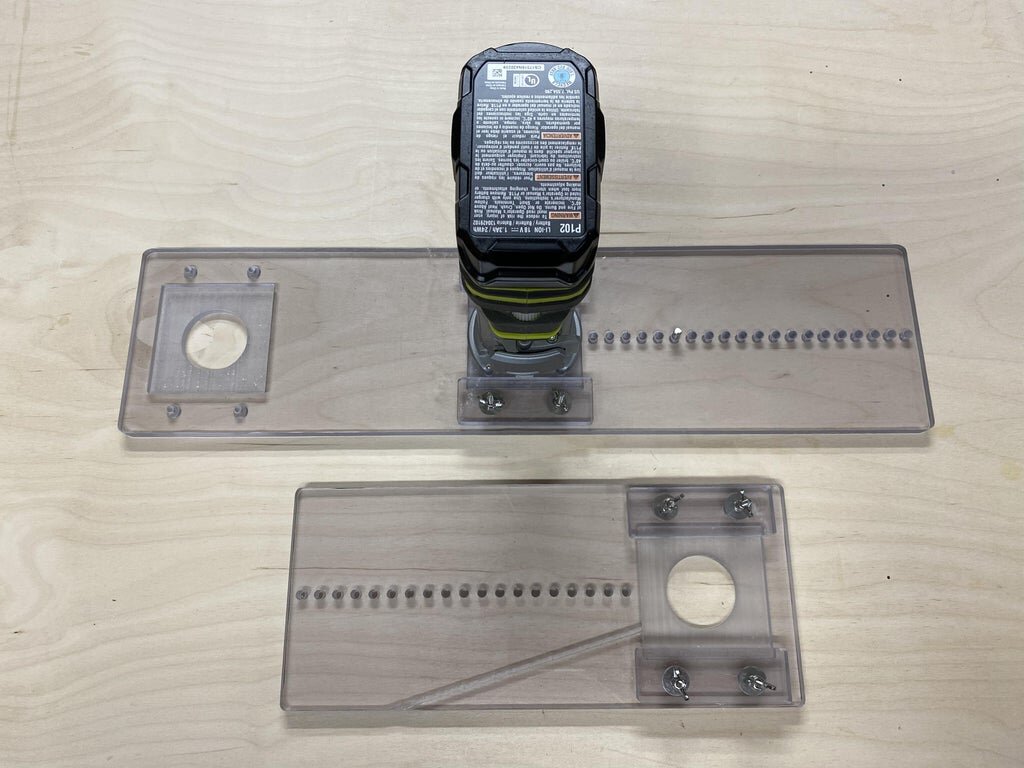
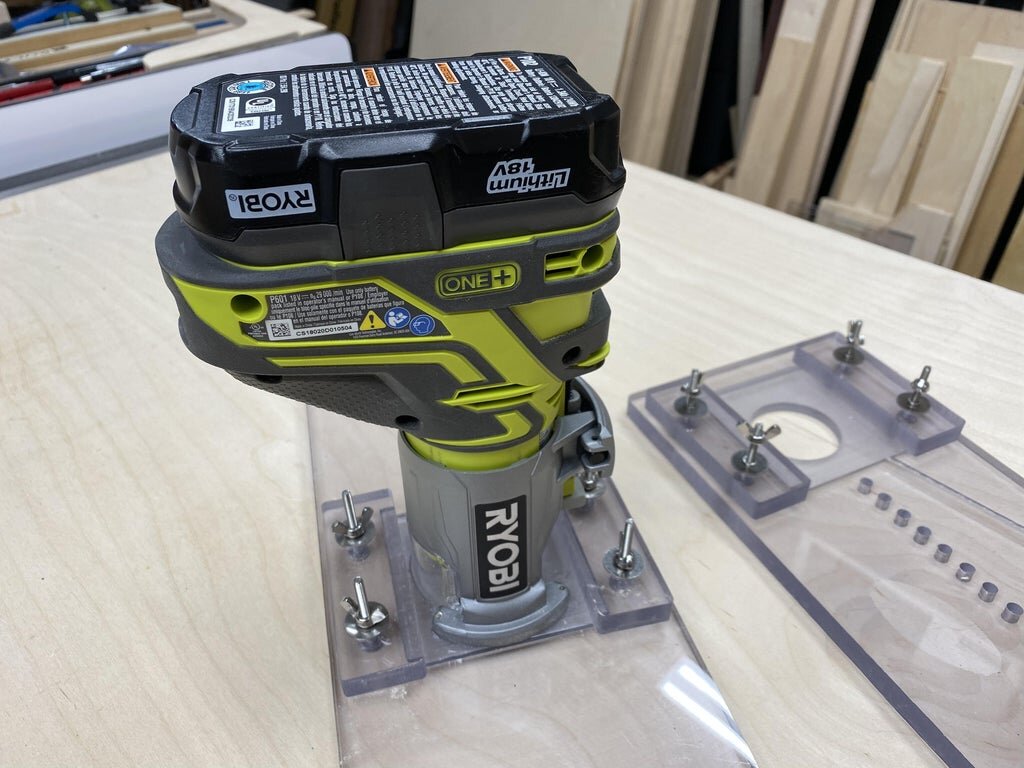
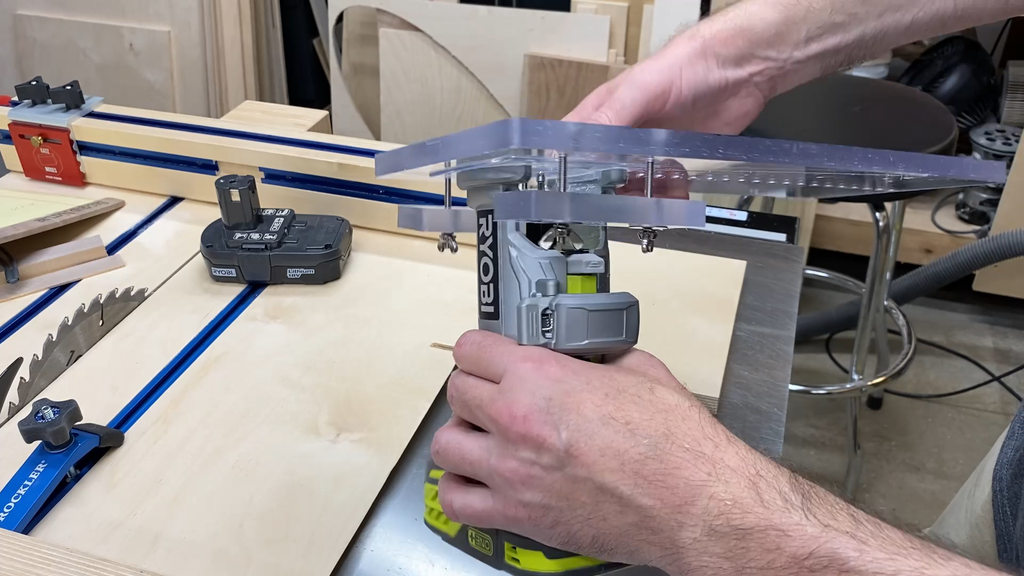
I took the measurements of the base plate on my Ryobi trim router and then created the model of the smaller plate in Fusion 360. I created the pocket for the base plate just slightly larger than the base plate and a little less deep than the thickness of the plate. With the plate being slightly proud of the top of the polycarbonate sheet I am able to keep positive pressure on the router base plate when it is attached to the sled.
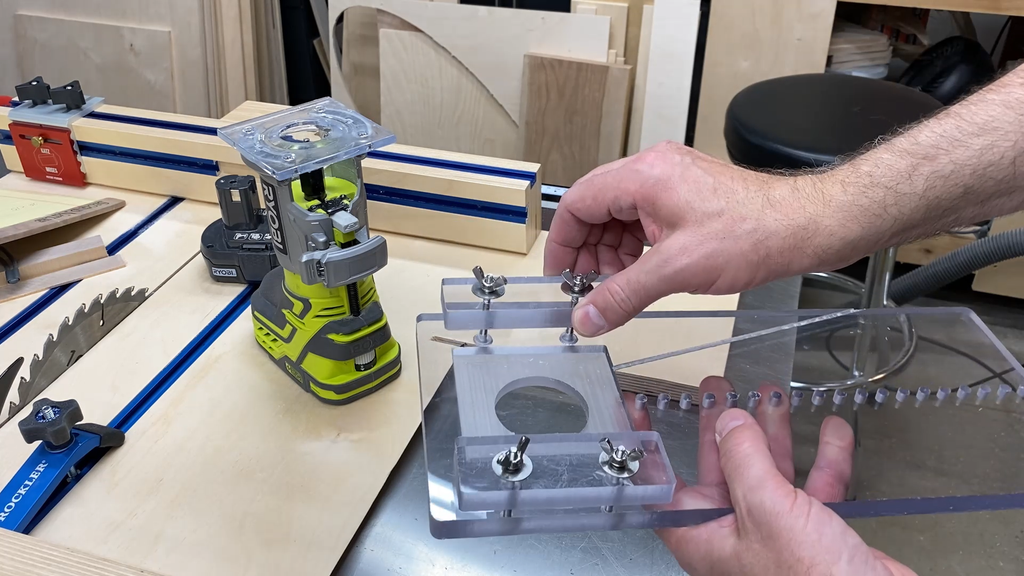
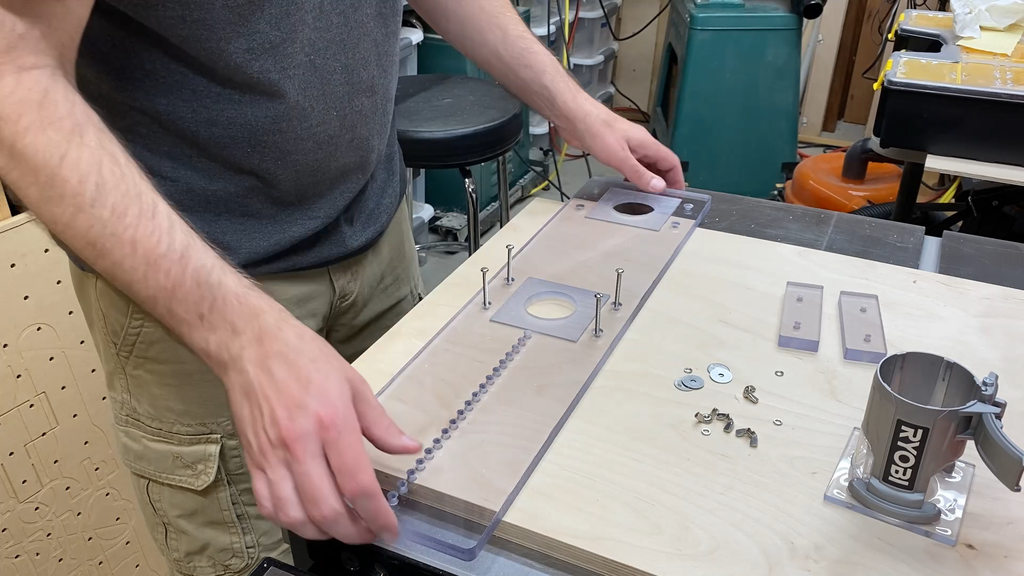
There are really only three pieces in each of the sleds. One piece is the main sled and the other two pieces are what homes the router to the sled with 4 machine screws.
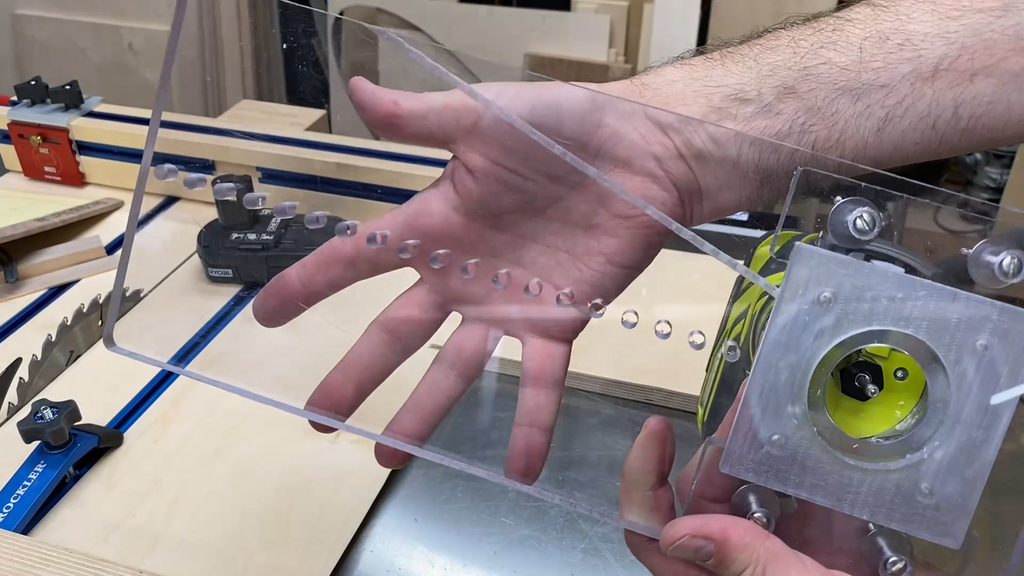
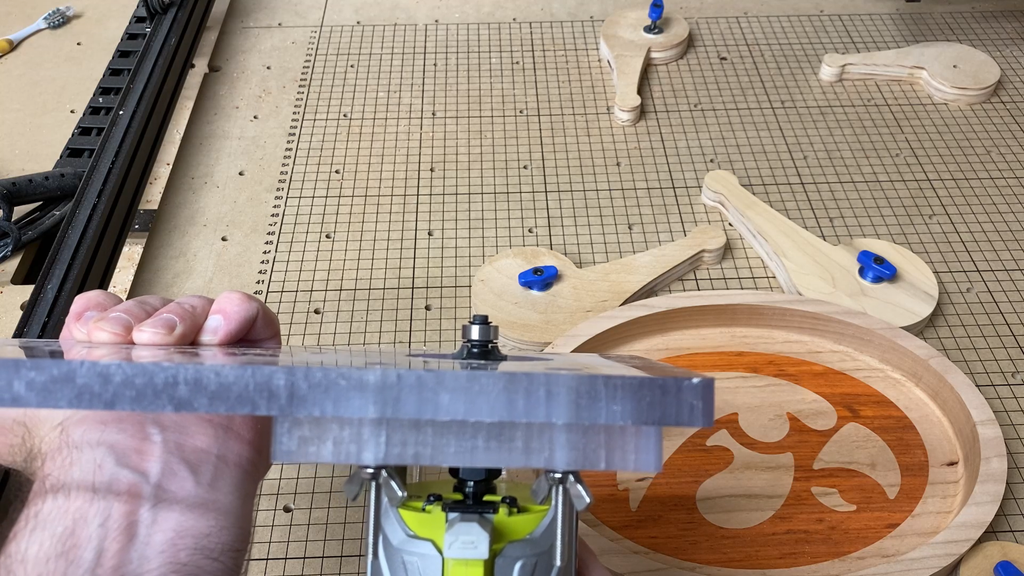
Once I had the pocket created I added holes down the centerline of the jig that can be used when you want to cut router radii or full circles. These holes are 1/4" in diameter. You can use a piece of 1/4" diameter metal rod or even a 1/4" diameter drill bit inserted into the hole upside down if you don't have anything else. Just plan on drilling a short 1/4" diameter hole in the piece of material where you want your center of your radius or circle.
I also designed two rectangular pieces of the base material with the same hole spacing that are used to hold the router
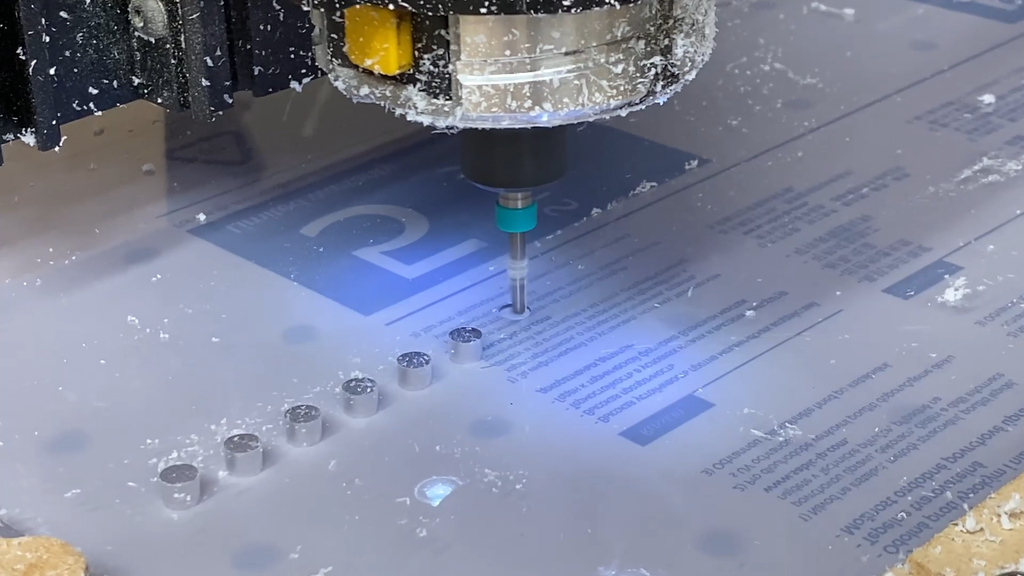
All parts are cut out on the CNC. You just need to countersink the four holes that hold the two extra pieces of base material to the sled which hold the router in place.
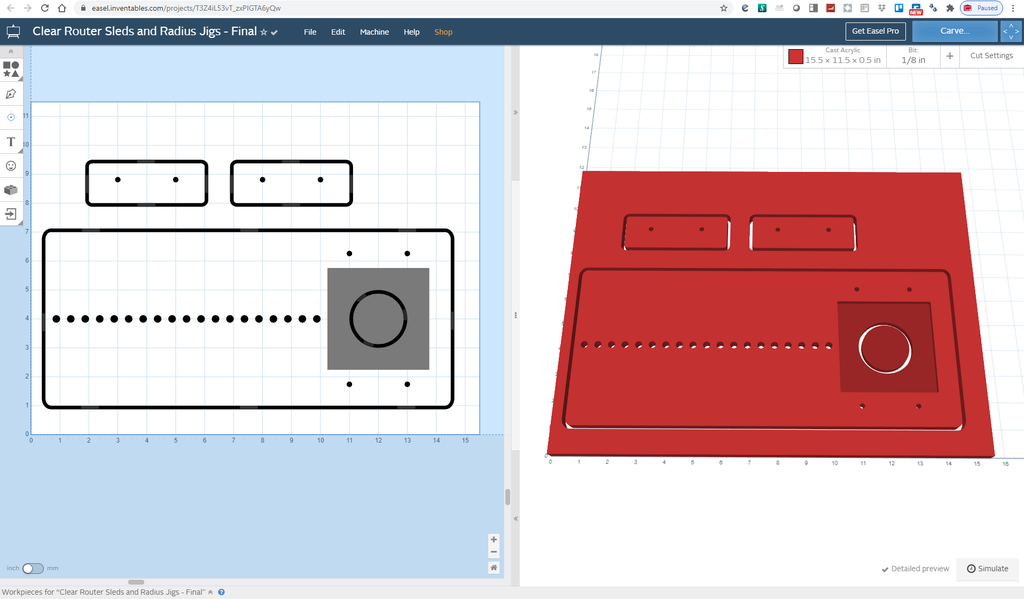
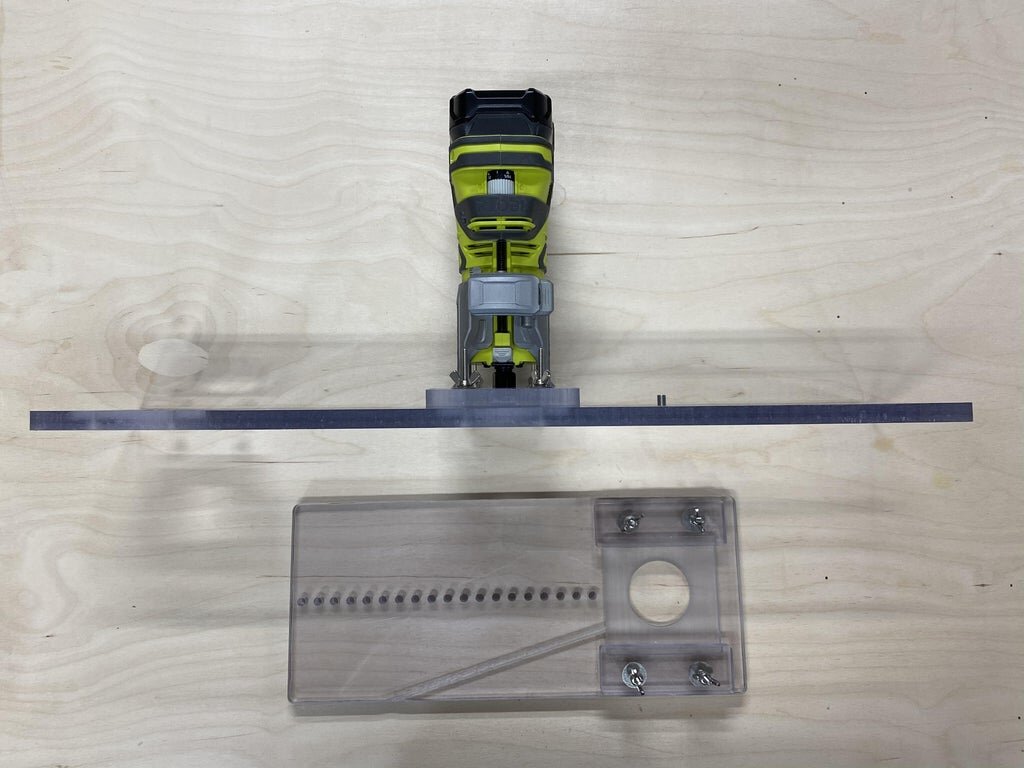
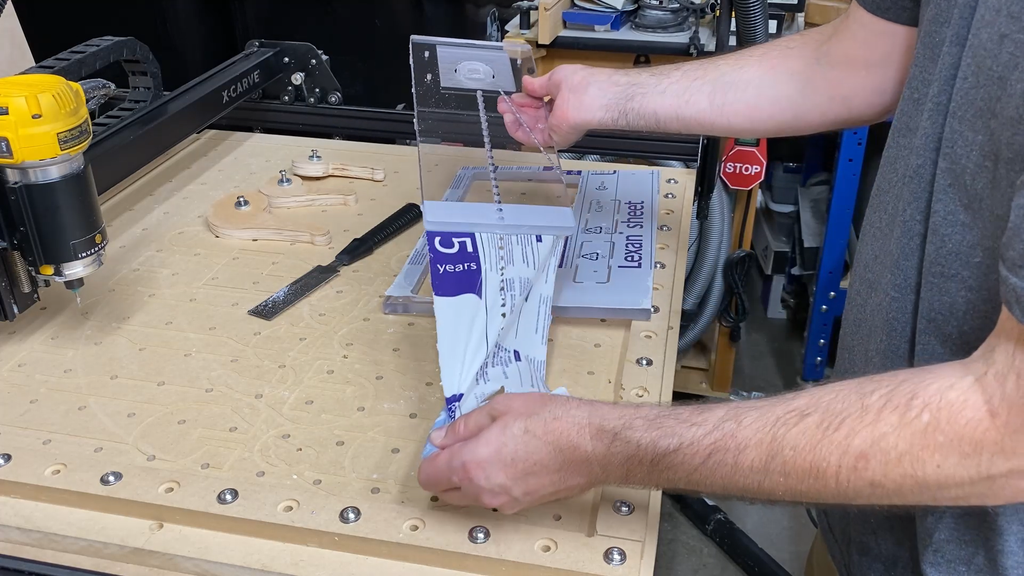
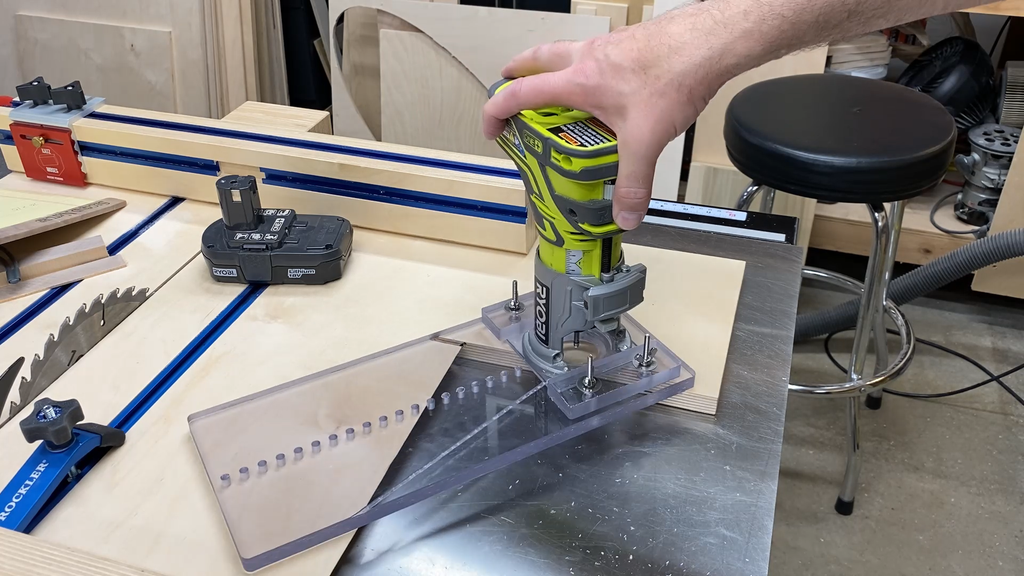
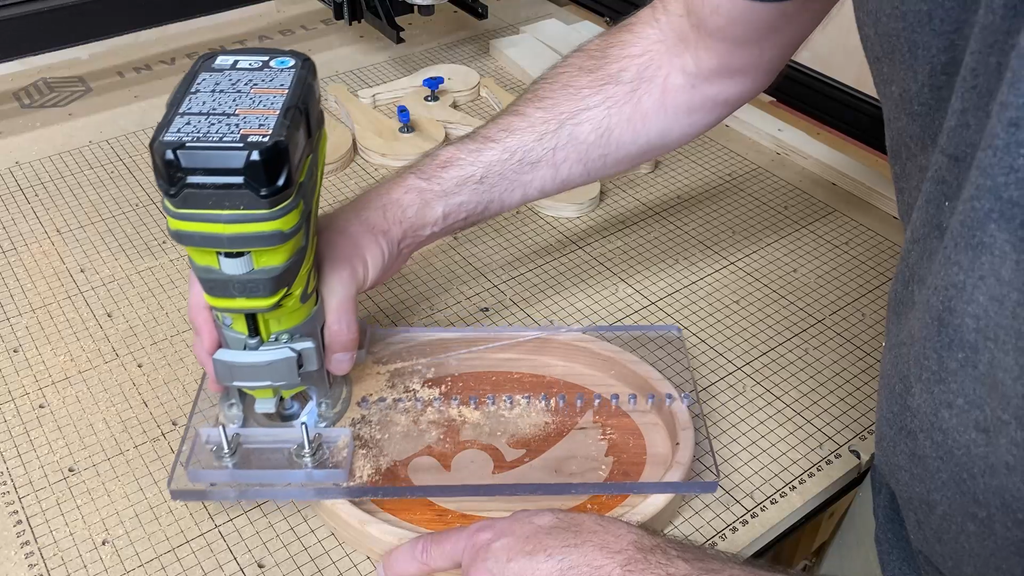
Step 3: Cut the Smaller Sled
Cutting the smaller sled was relatively easy. There are only three parts and all cuts go completely through the material. I did use tabs on this so the parts would not move around once the cuts were completed.
After cutting the parts I countersunk the 4 holes around the are where the router mounts to the sled so the machine screw heads would not be protruding from the bottom of the sled.
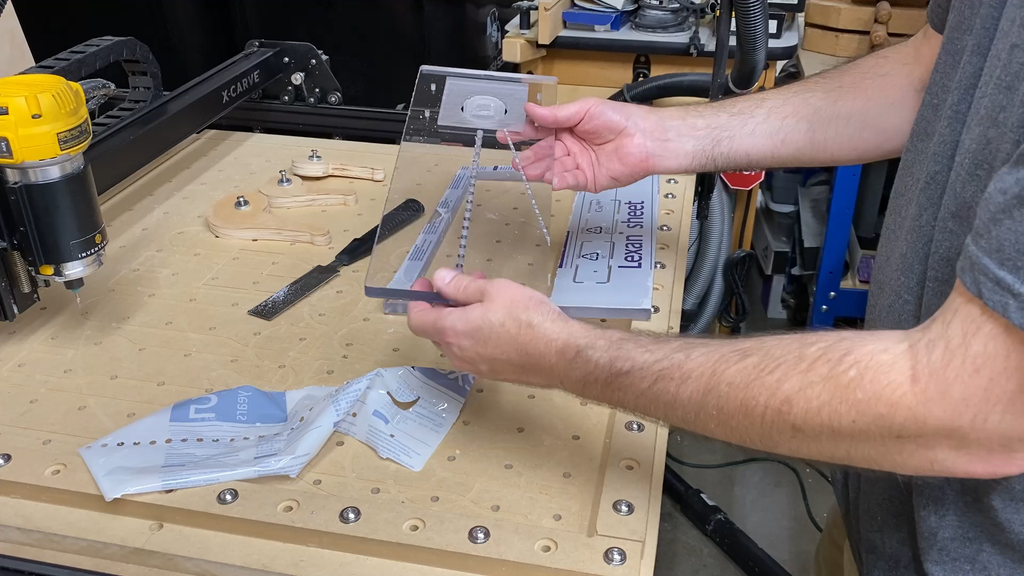
Next I inserted the machine screws from the bottom and flipped the piece over. Then I added the two small rectangular pieces of polycarbonate to these 4 machine screws followed by a flat washer, lock washer, and wing nut on each of the screws.
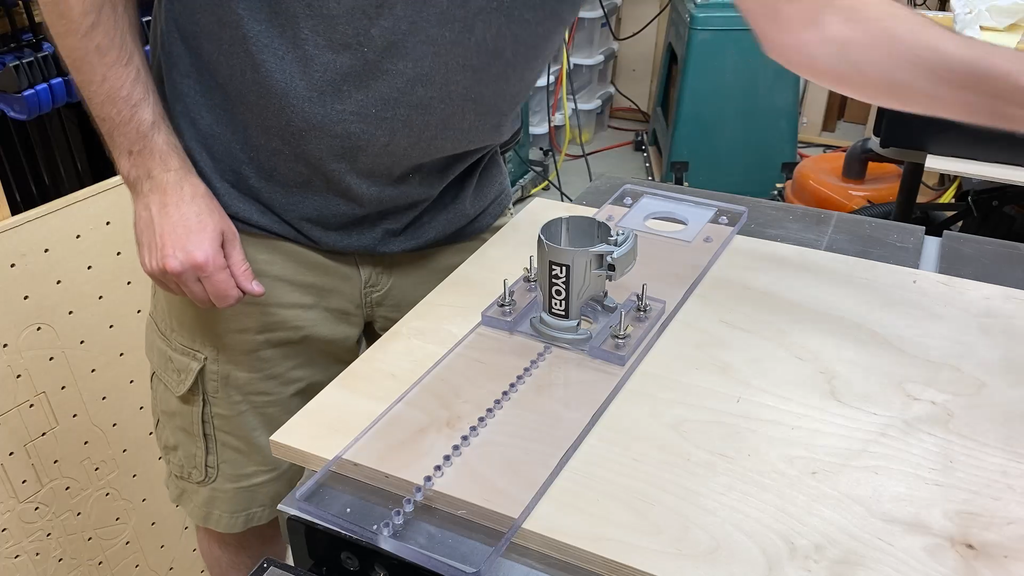
All you have to do now is loosen the wing nuts so the router will fit into the opened and then tighten them back up.
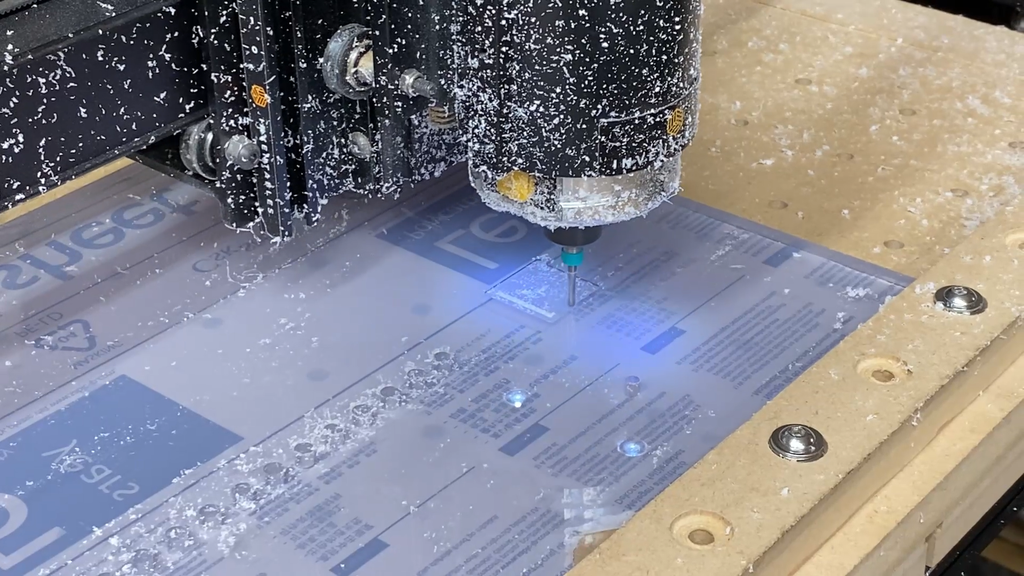

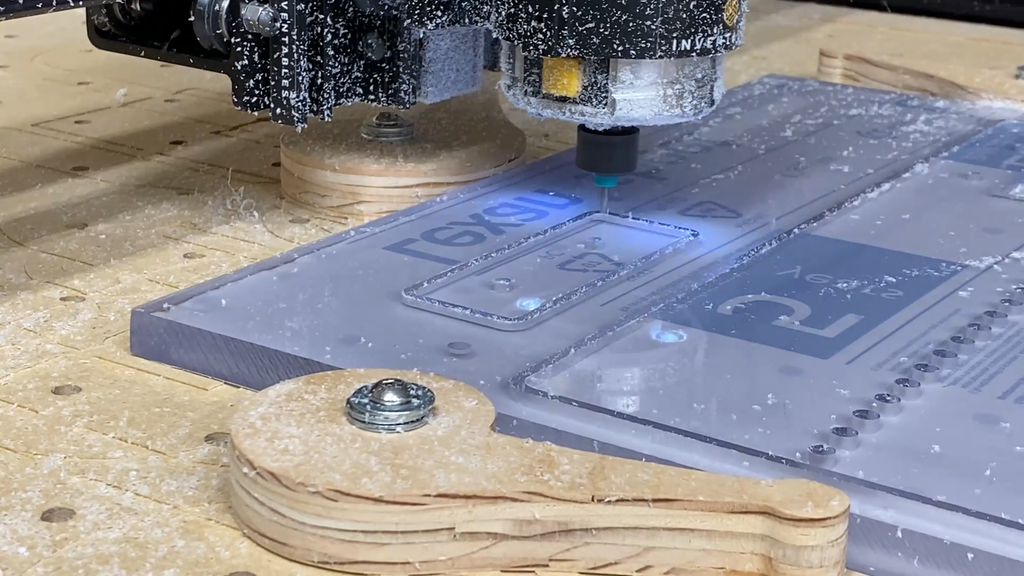

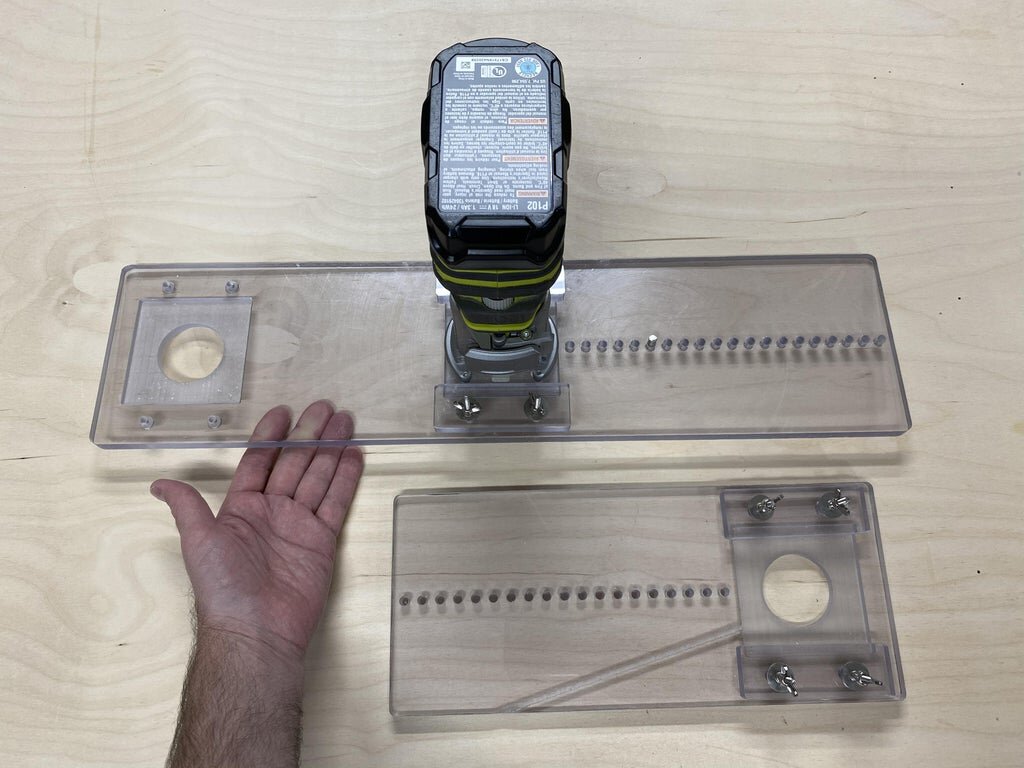
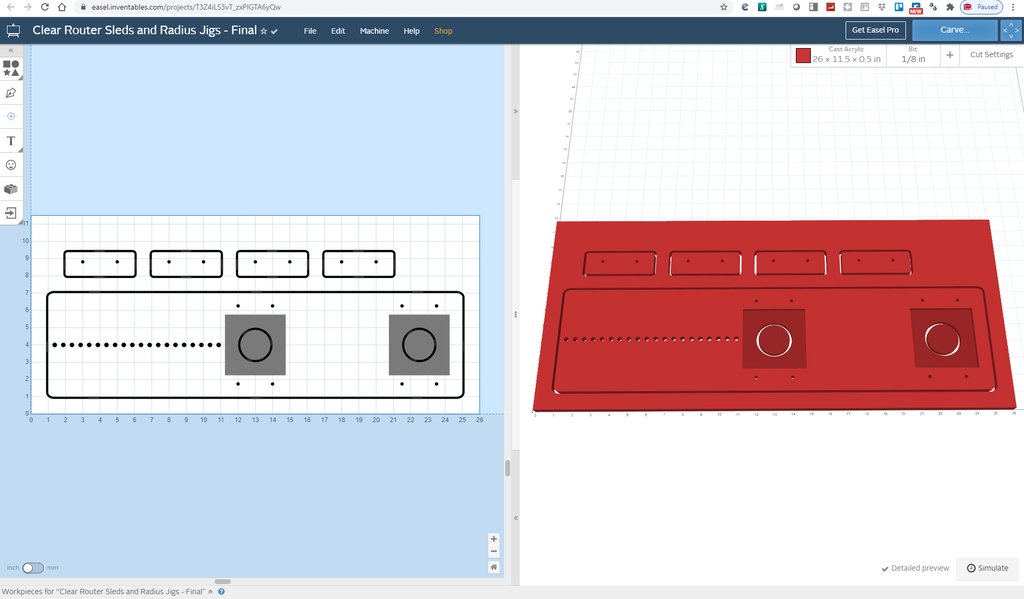
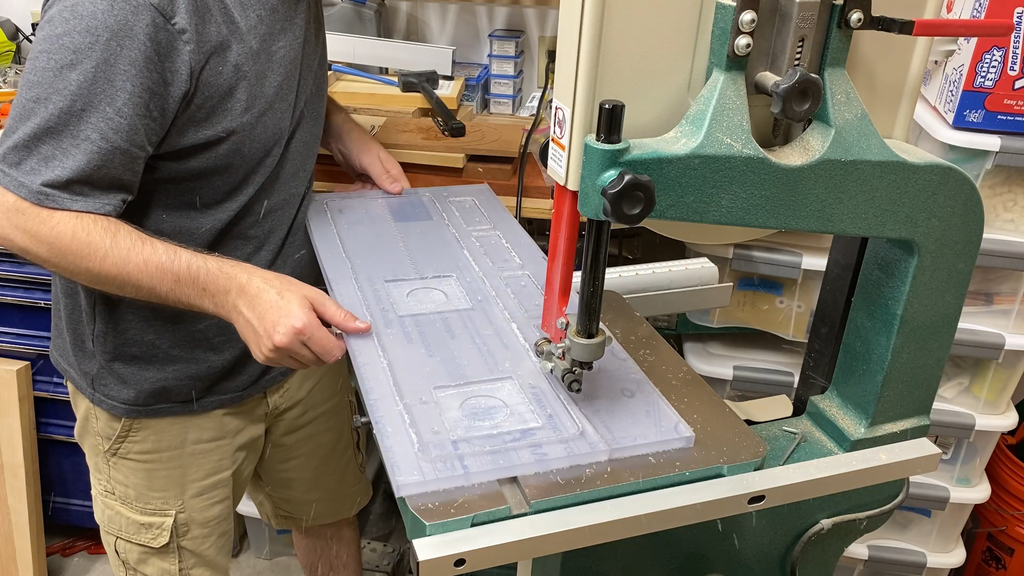
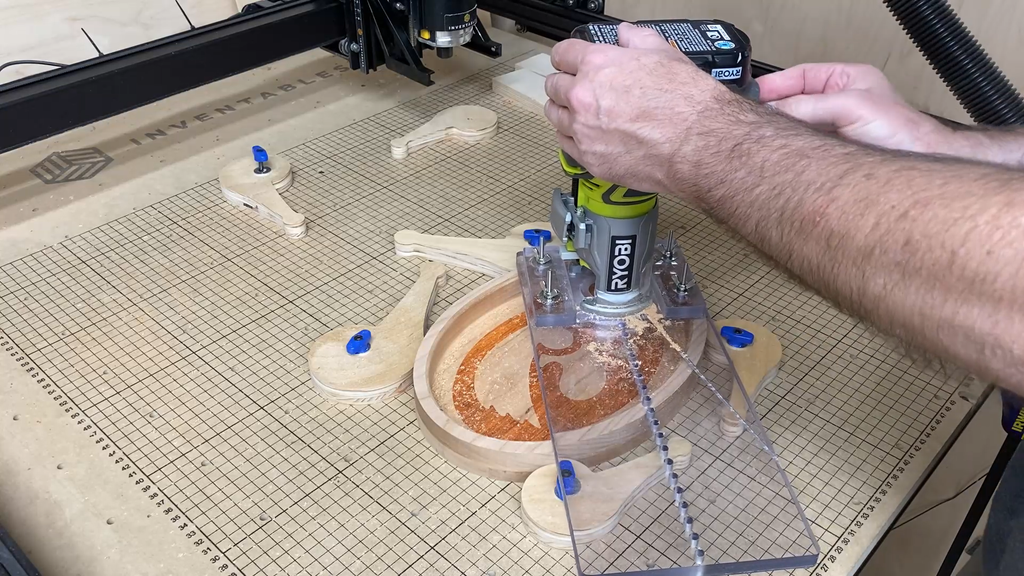
Step 4: Cut the Larger Sled
Cutting the larger sled was very similar to the smaller sled. It just took additional time and has 5 parts. I included 2 extra hold down pieces in case I wanted to leave them attached to the sled for even faster changes between having the router in the middle or end of the sled.


Step 5: Test Cuts
I did several test cuts using both sleds. Those cuts were as follows:
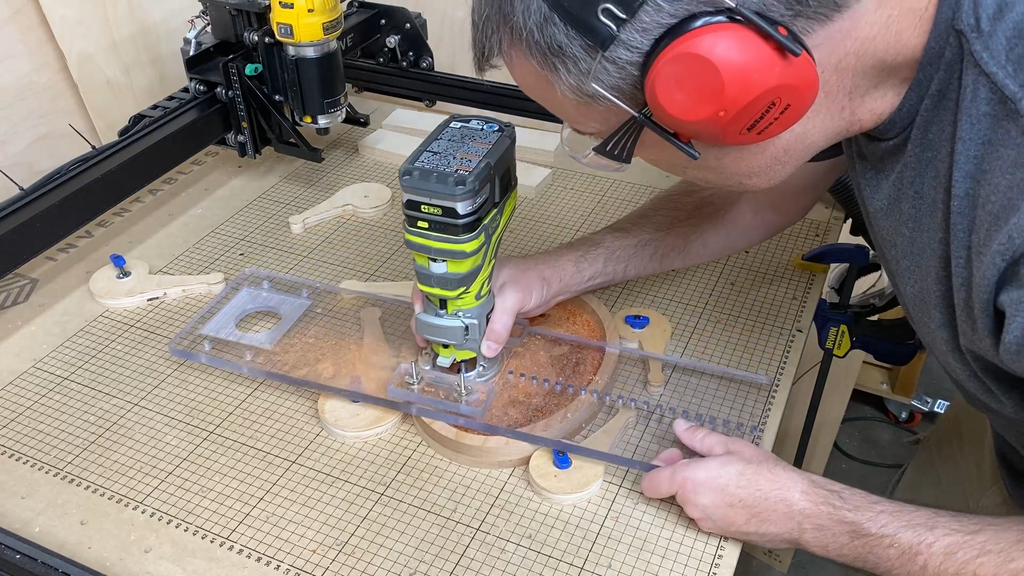
Flattening the bottom of a bowl
This works great with a bowl bit that has a small flat portion on the bottom of the bit as well as a guide bearing.
You could also use this over short distances to flatten a piece of wood like a traditional router sled.
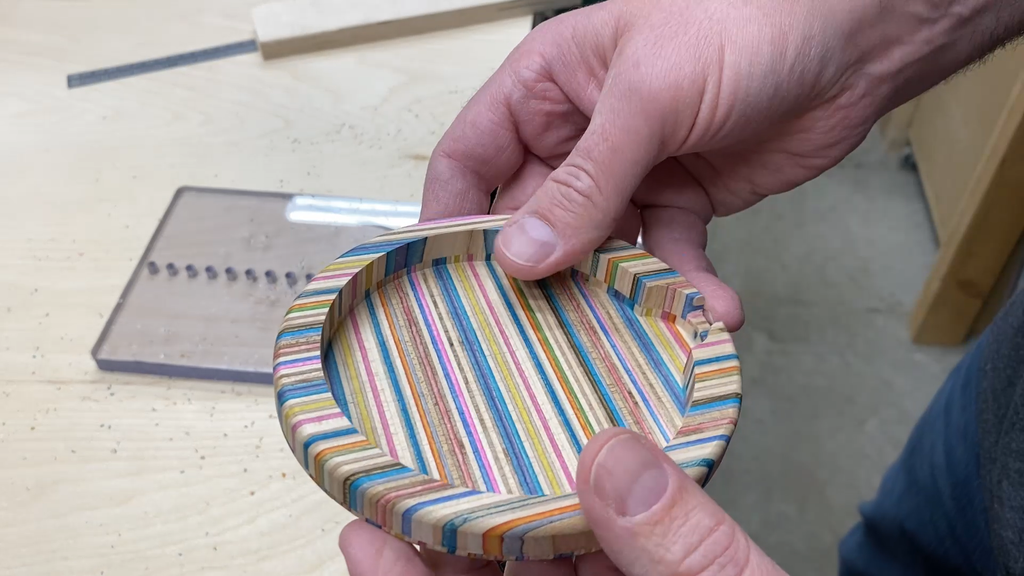
Routing the top edges of a small bowl or tray to create a round-over or chamfer
Both sleds can function to hold the router perpendicular to the work for rounding over the edges of a piece of wood or creating a chamfer on an edge. These should have a guide bearing on the bit as well.
Clamping upside down as a small router table
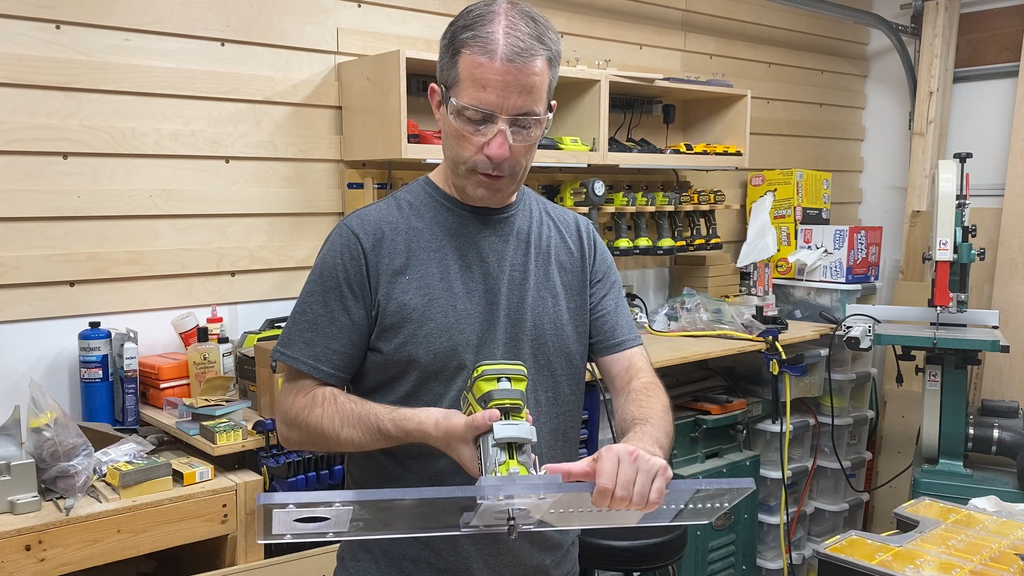
I clamped the smaller router sled to a work table upside down to create a small router table for small parts. It works great for round-overs and chamfers.
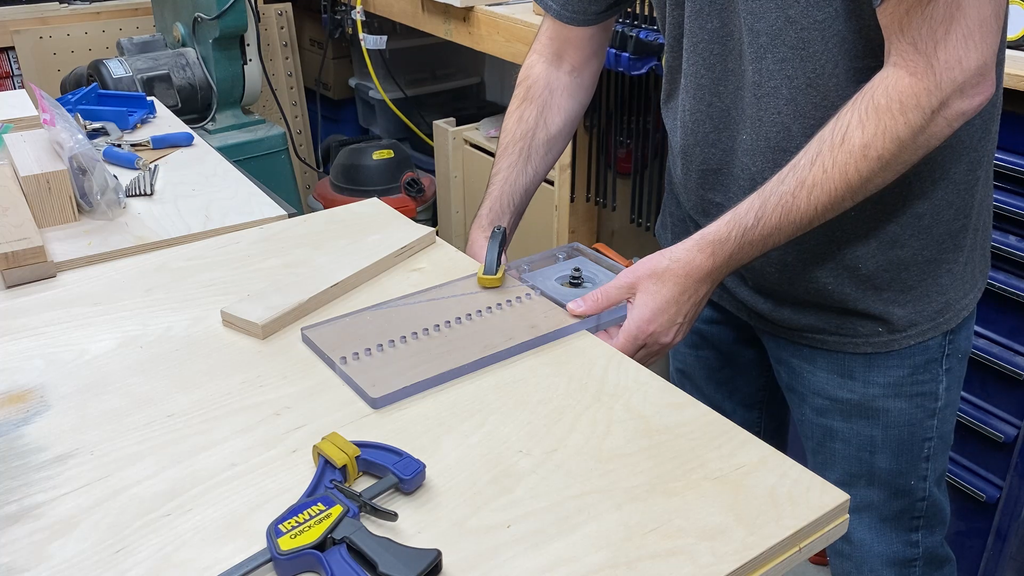
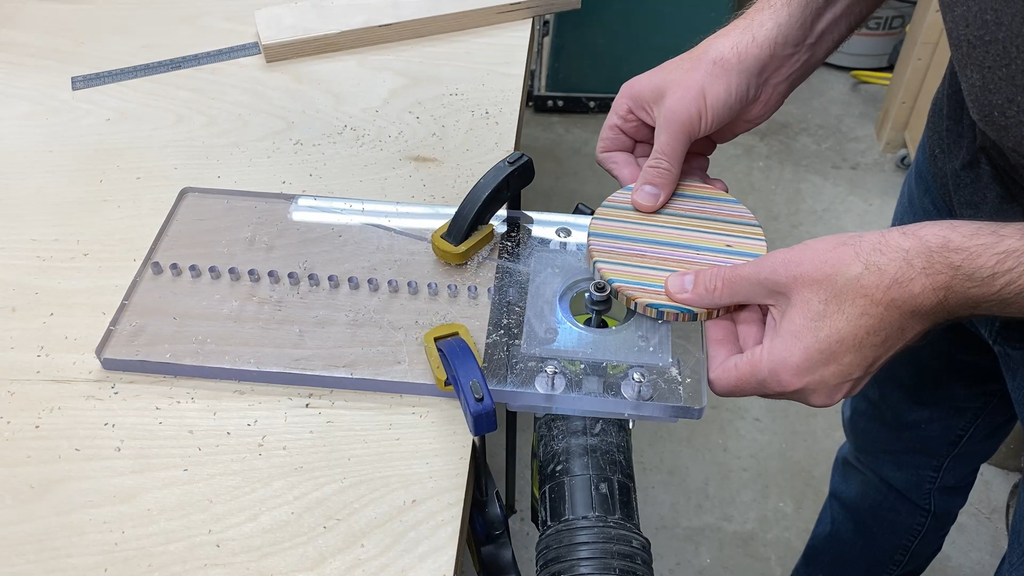
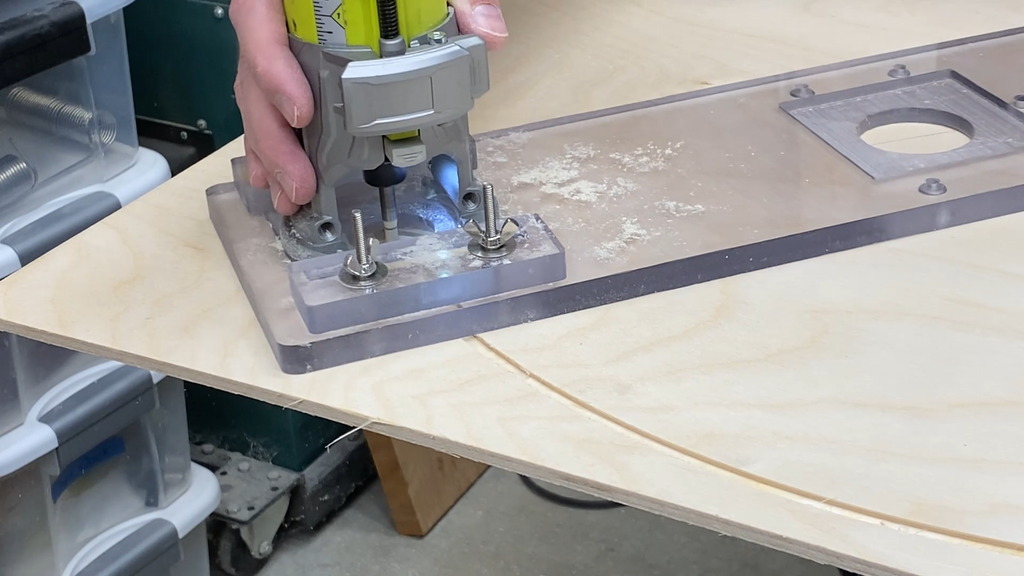
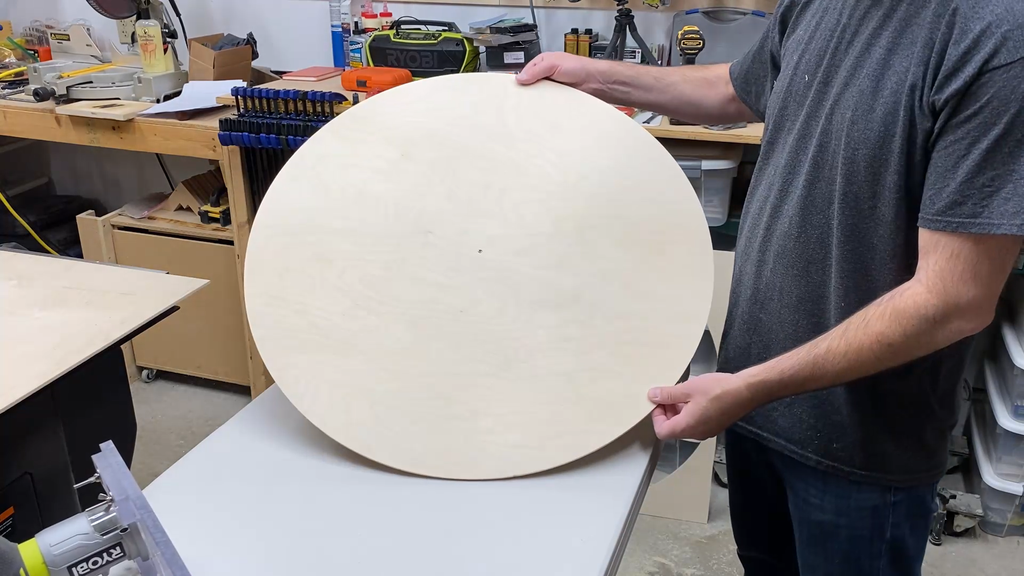
Cutting circles
You can use either sled to cur circles of various radii. The holes are spaced every 1/2" to give you some options.
I would recommend starting with a shallow depth pass and then increasing the depth little by little to cut the circle.
I used a small piece of 1/4" stainless steel rod for the pivot point, but you could even use a drill bit with the bit pointing up.
The largest radius you can cut is 21-inch. which creates a 42" diameter circle.
Carving the pocket is the second part of using the Easel Inlay App.
I centered the logo in the field of the wood I was carving into. I used my typical setting for the carve with the bowl bit.
As you can imagine, the deeper the bowl, the longer the carve for the additional material that needs to be removed.

Step 6: Final Thoughts
I have to say that I really think these turned out better than I expected. I think I will end up using the smaller sled a lot more often than the larger one as it will be very useful to use when adding round-overs or chamfers to edges or when trying to add a round-over to a thin edge like on a bowl or tray.
You can also carve one of these out of other material and with different thicknesses, depending how much flex there is in the material you are using.
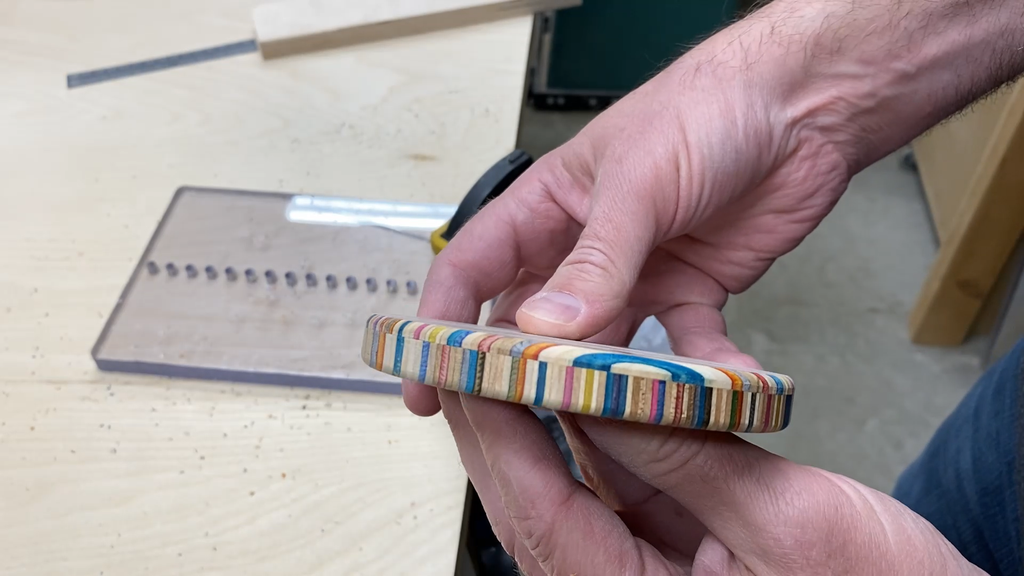
I started with making one of these with a 1/2" thick piece of baltic birch plywood and then realized how great it would be to make these out of something I could see through.
As you can see, all uses work for these sleds work extremely well. I highly recommend making one if you this if will be helpful in your projects. They don't take up much room and the router can be attached or removed in less than a minute with no tools.
Let me know if you have any questions.
If you would like to get a copy of the cut files in Easel you can find it here for free:
https://gumroad.com/makingathome
Subscribe to my YouTube channel:
https://bit.ly/3aG8juG