Largest US Skatepark Map Made in Skateboard Wood
Click here to subscribe to my YouTube channel.
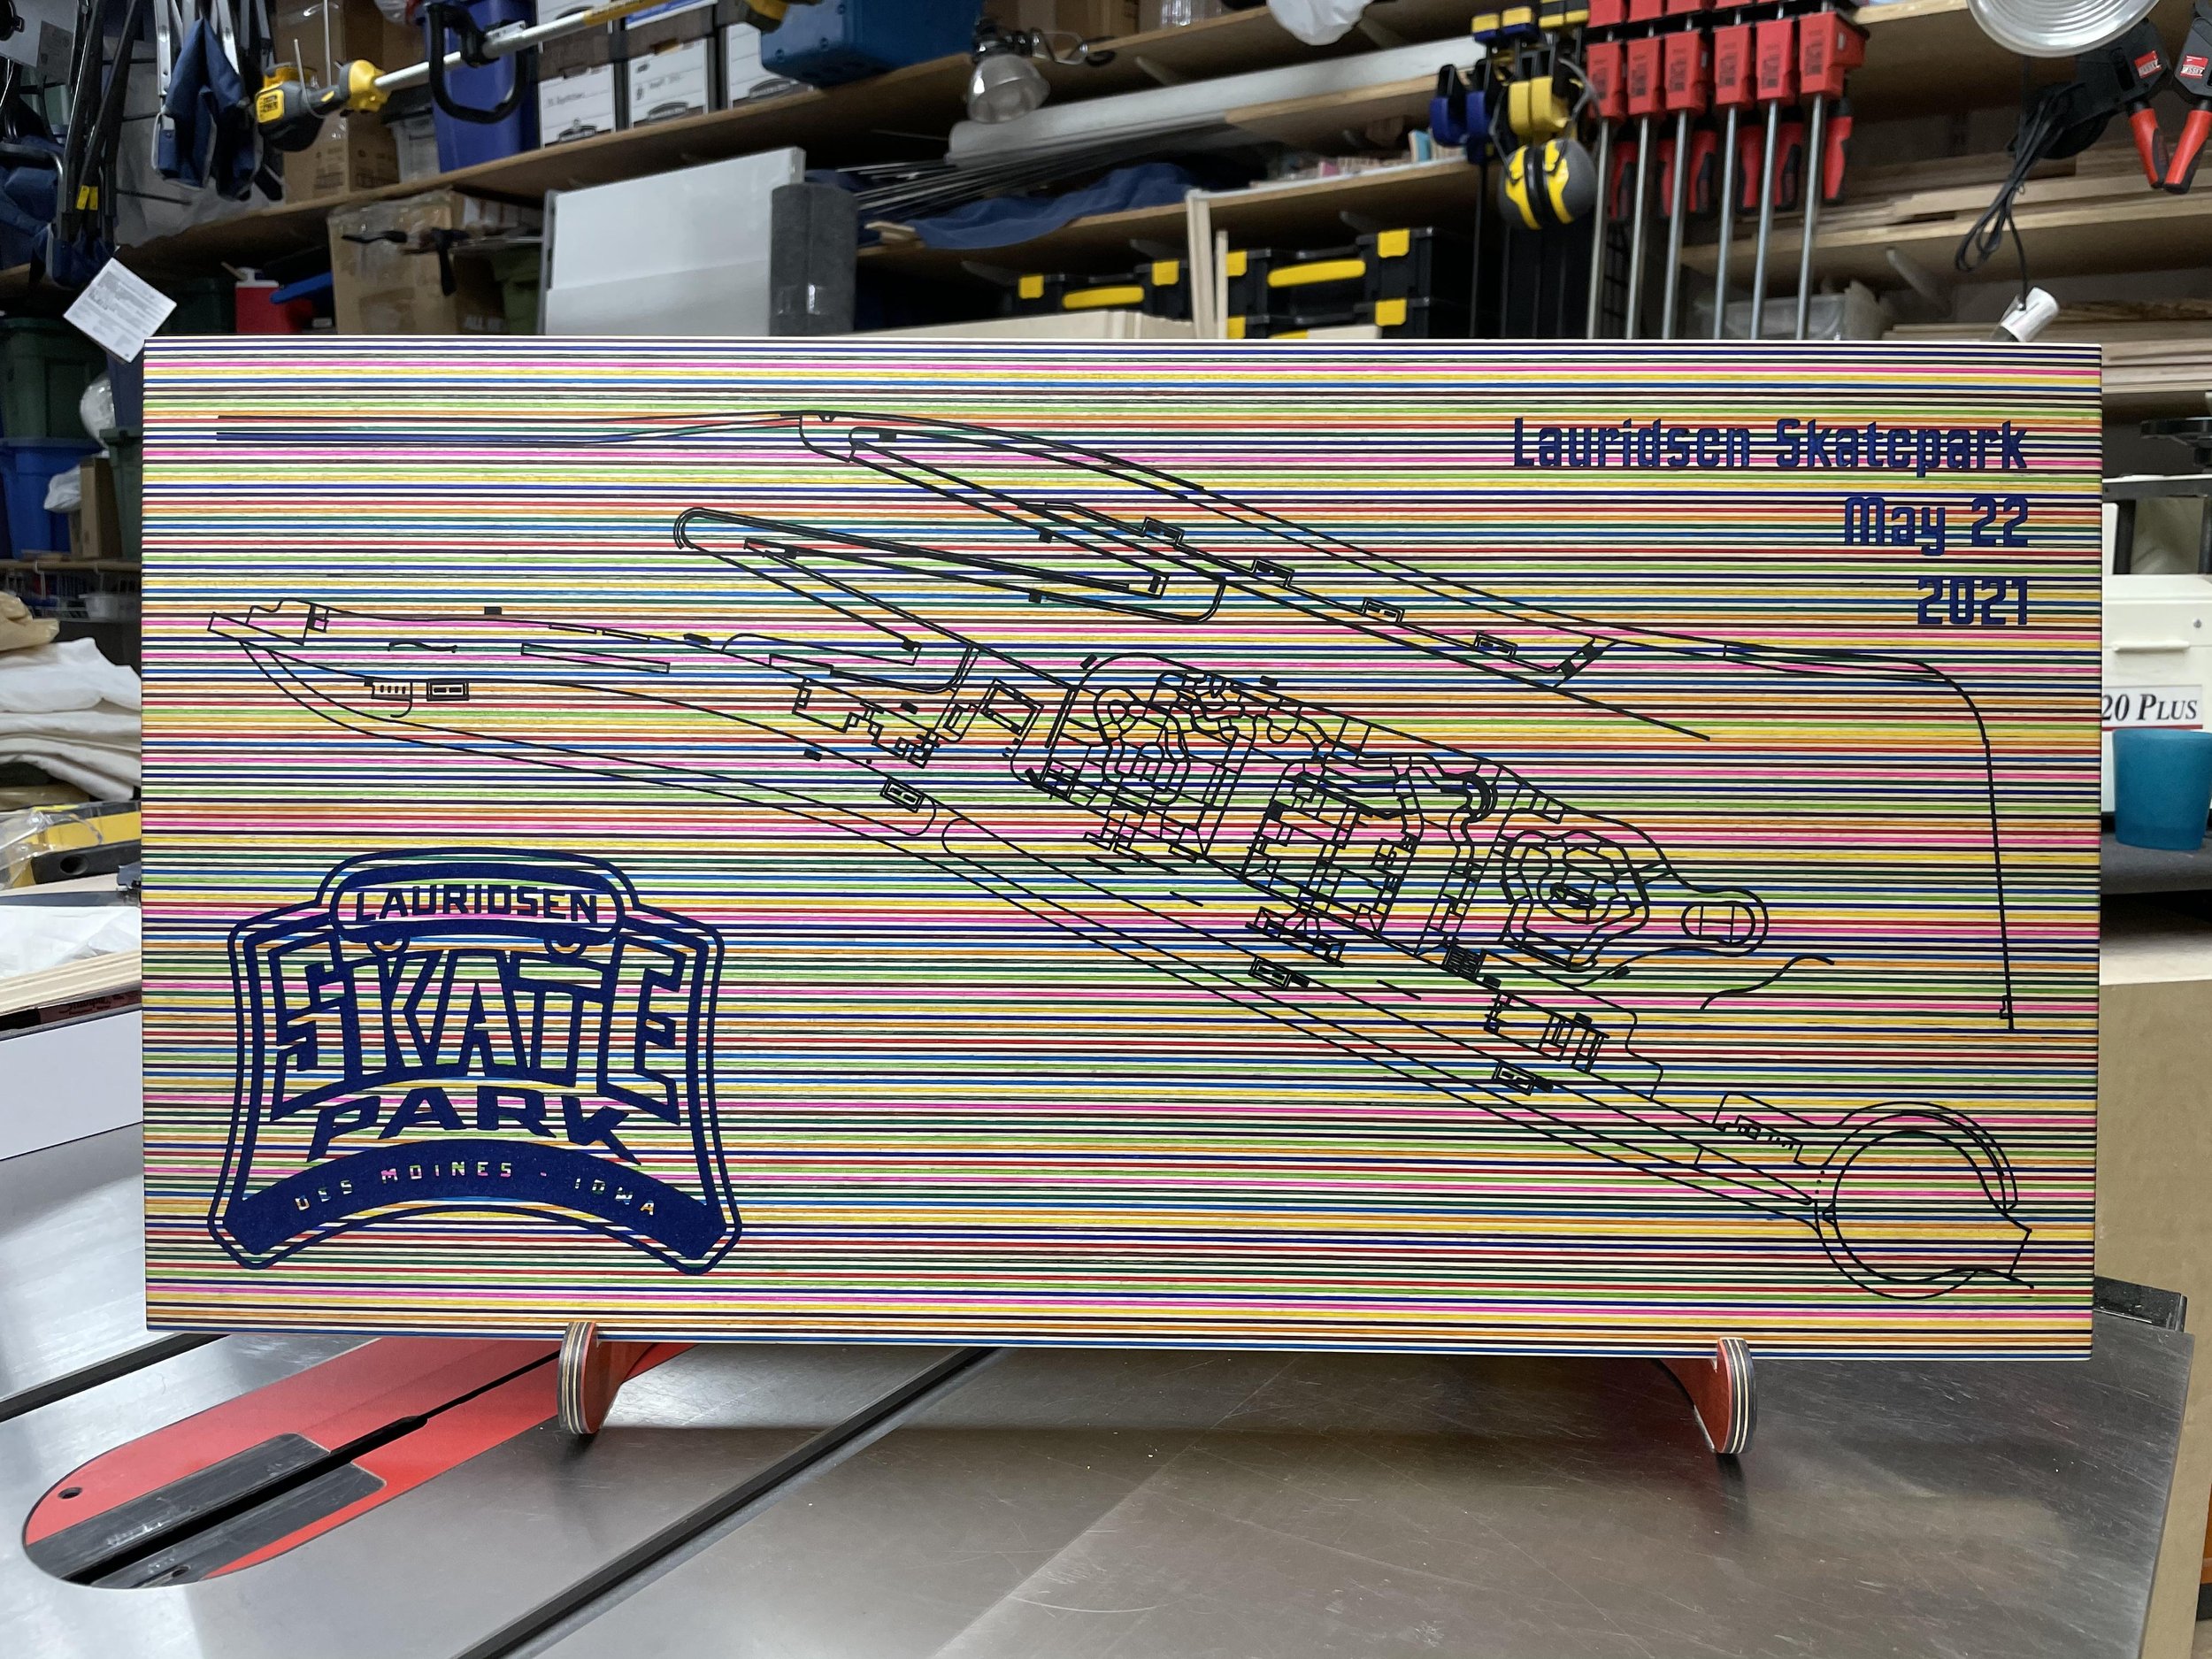
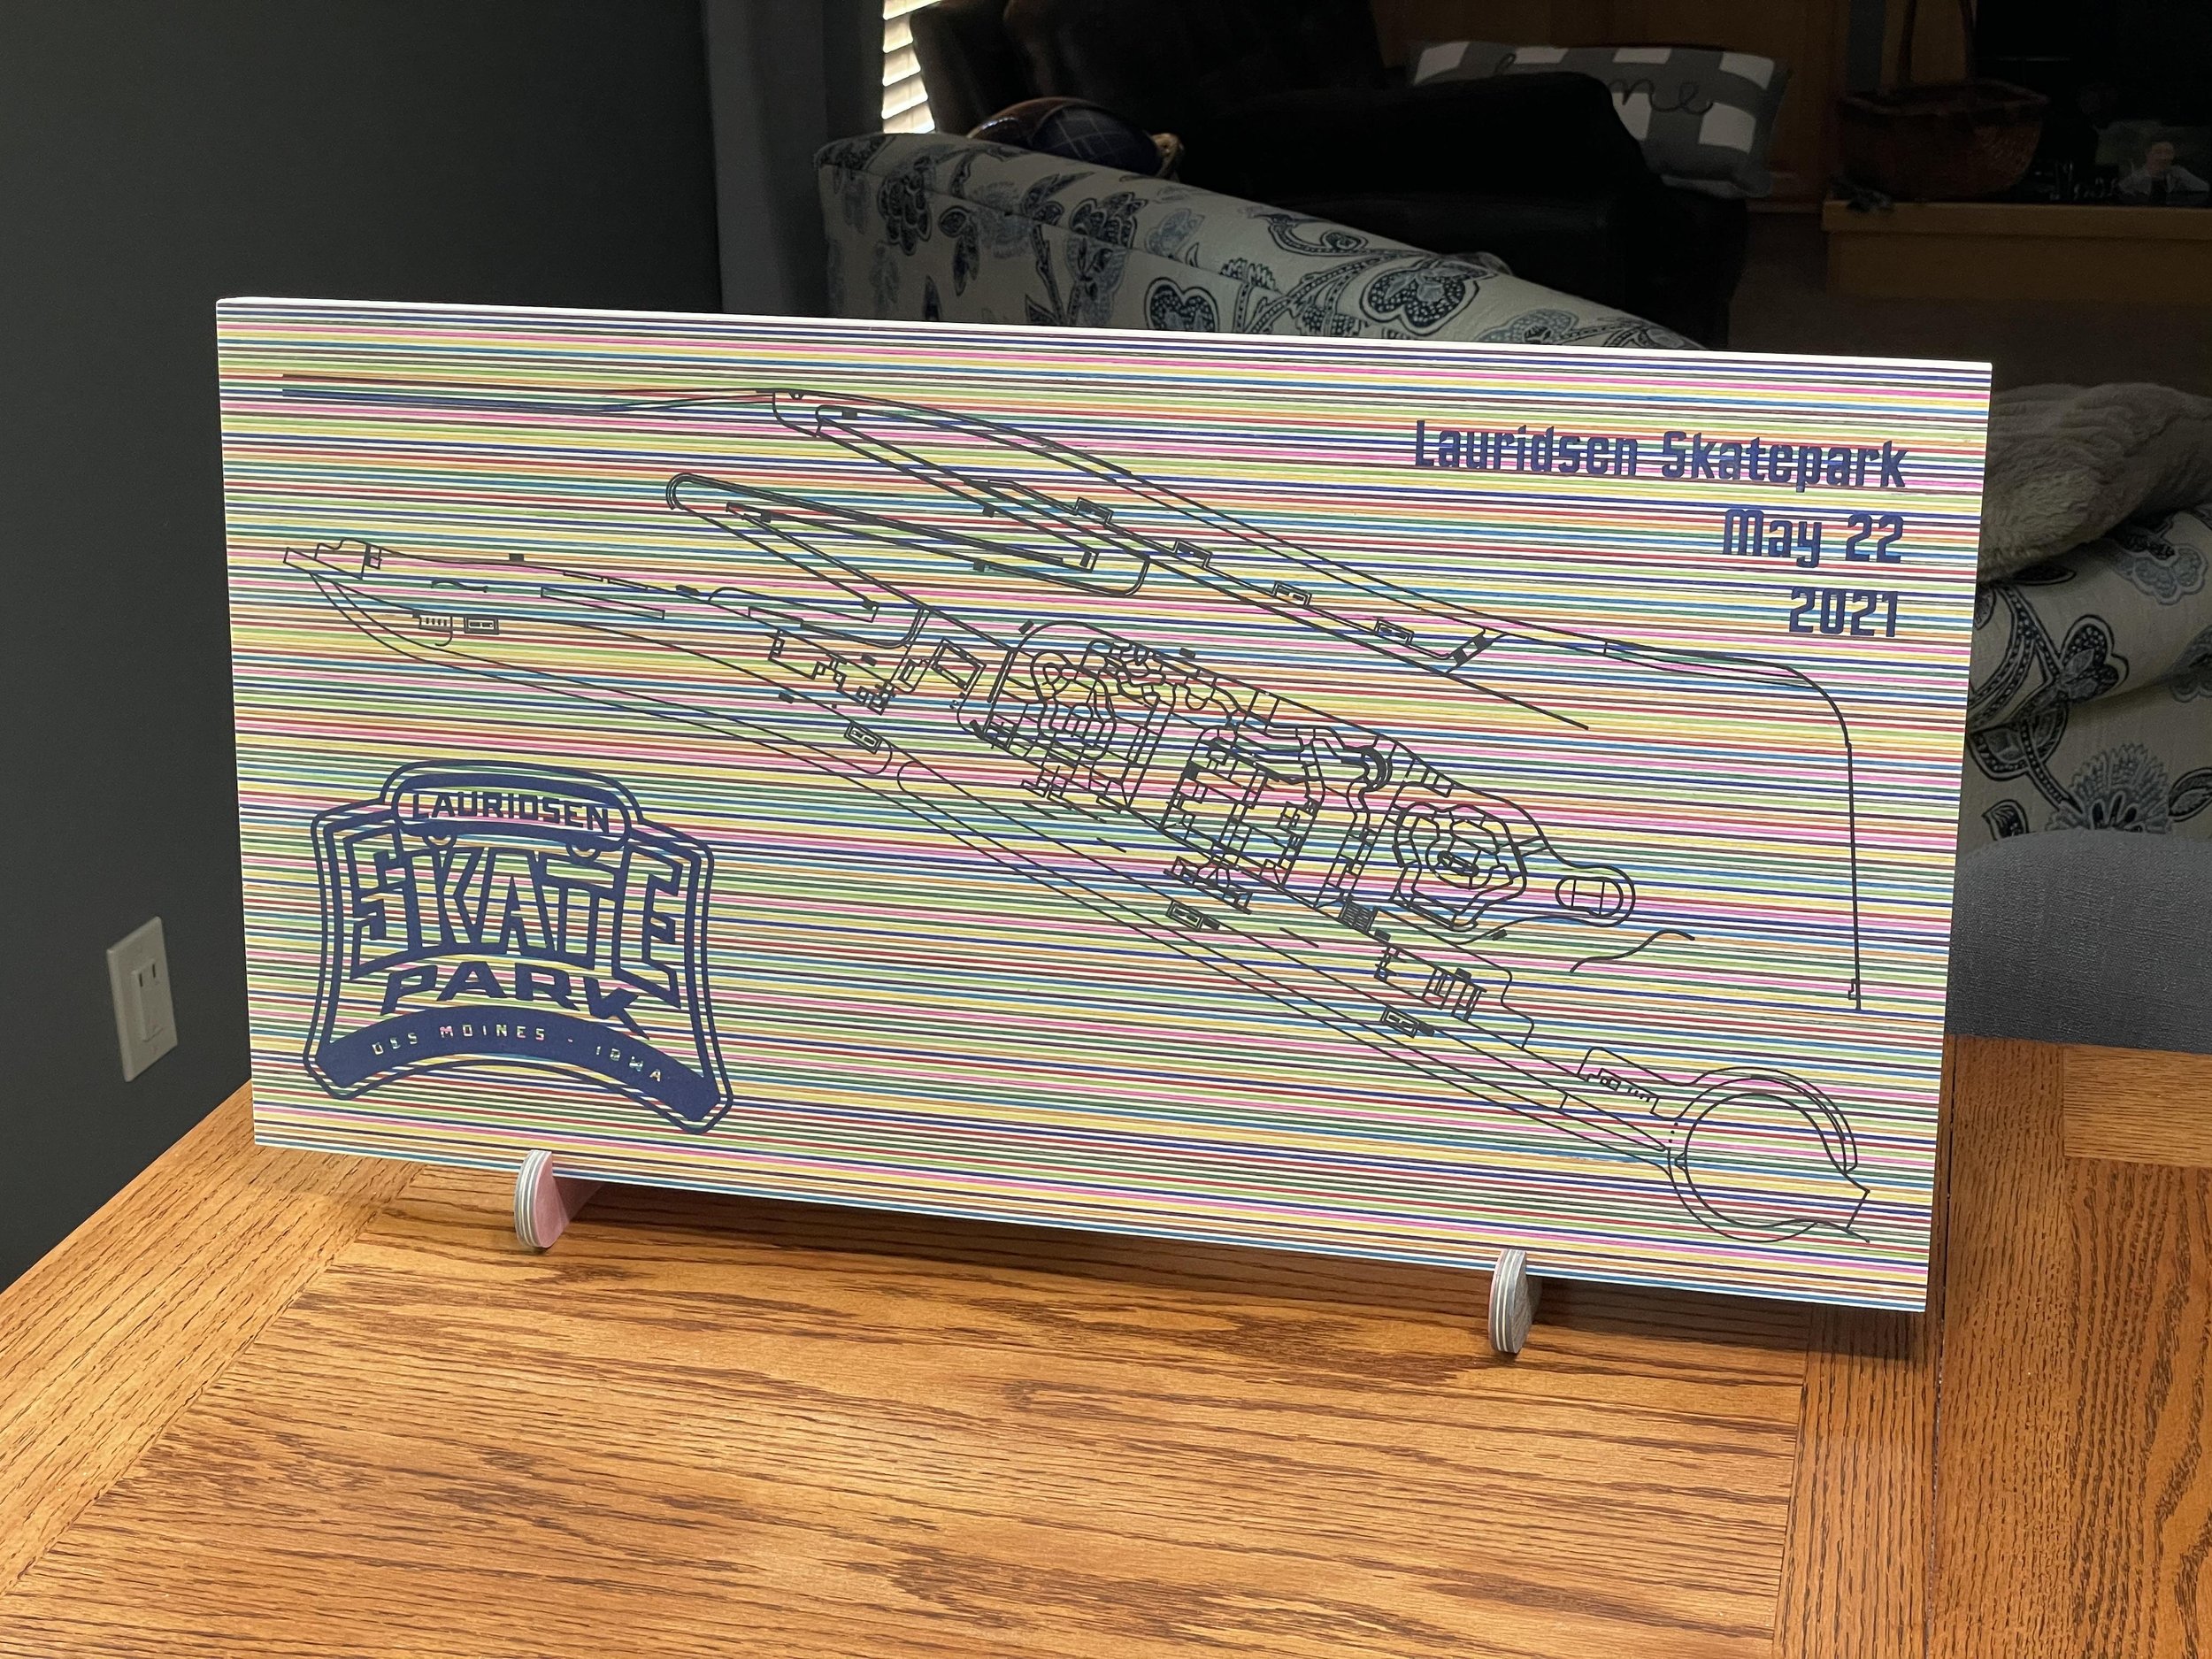
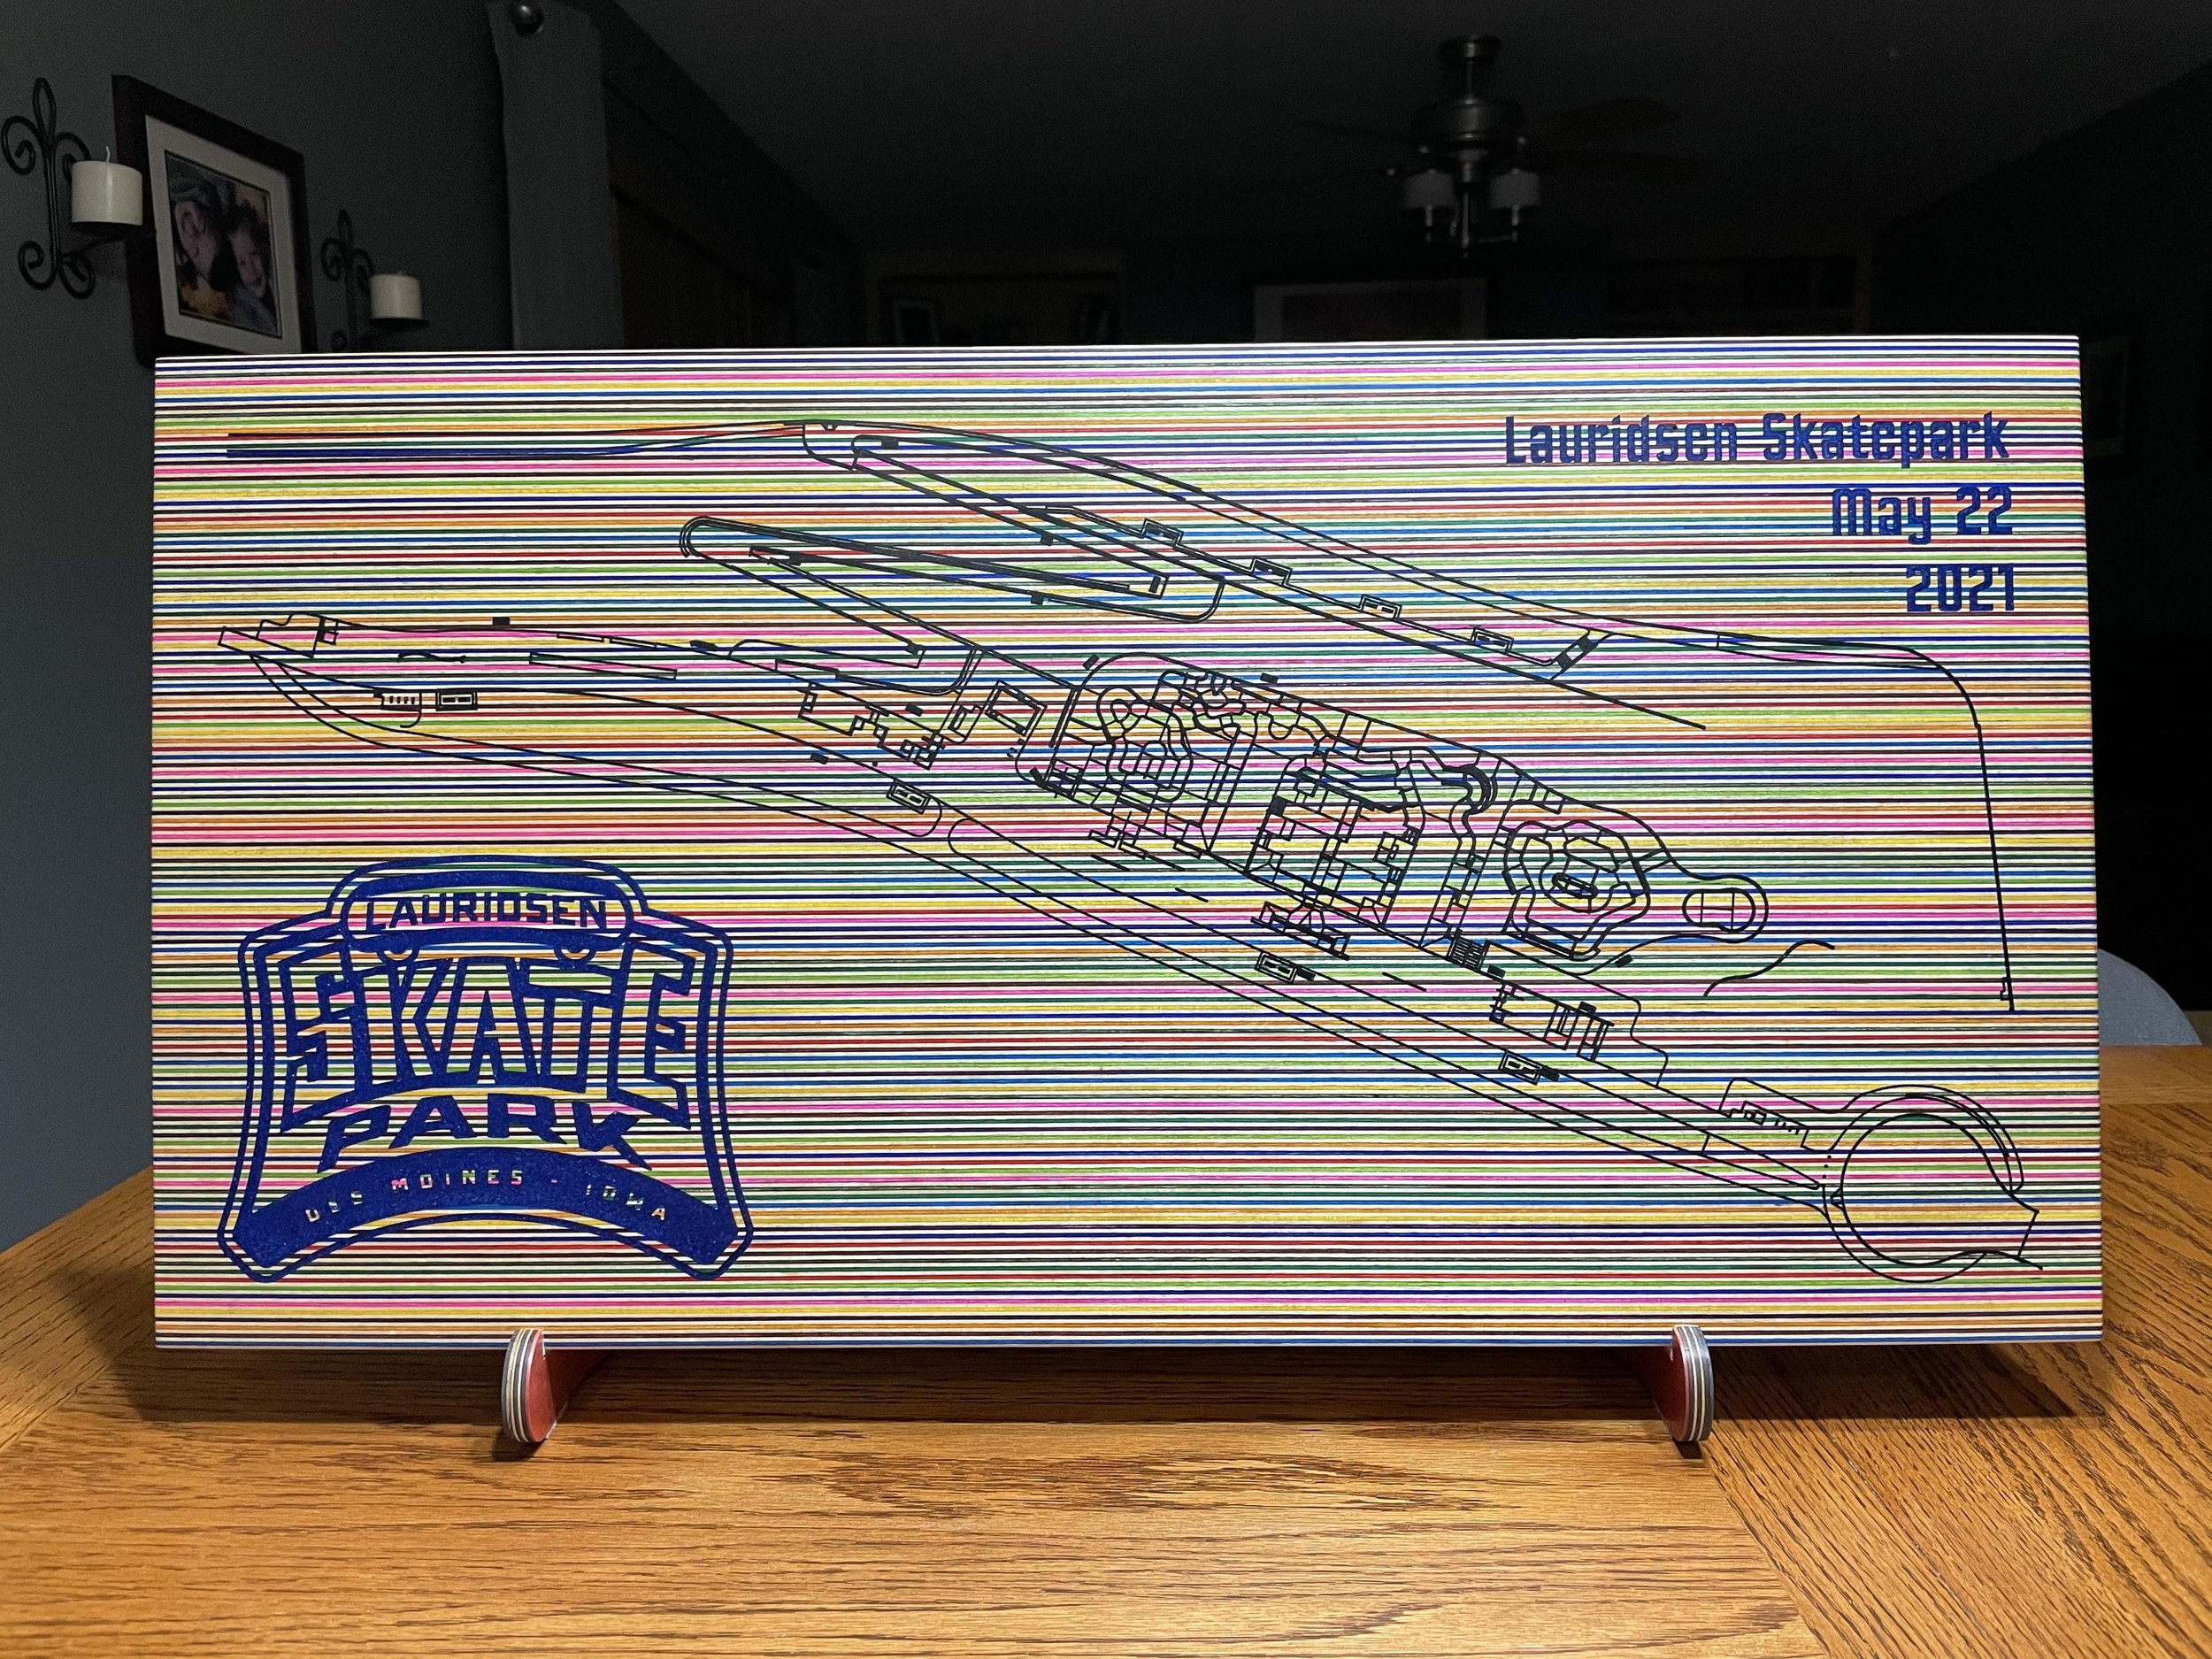
I was asked to create a gift for the Lauridsen family who was the top donor for the new Lauridsen skatepark that just opened in Des Moines, Iowa. This is one of the largest outdoor skateparks in the United States and also hosted the last US skateboard qualifying event for the 2021 Summer Olympics.
Here is a link to the venue:
After discussing options for the gift with the person in charge, we came up with the idea of making a plan view map of the skatepark carved into skateboard wood. This would be a nice representation of the skatepark and a one of a kind gift.
The designers for this skatepark were California Skateparks https://www.californiaskateparks.com/
and Snyder & Associates Engineers and Planners: https://www.snyder-associates.com/

Step 1: Materials and Tools

SOFTWARE
Easel Pro Software by Inventables - https://www.inventables.com/technologies/easel?ref=MakingAtHome
MATERIALS
Skateboard Wood Veneer from Cousineau Wood Products - https://www.cwp-usa.com/collections/dyed-veneer-sheets
Odie's Oil - Universal - 9oz Jar (A little goes a long way) - https://amzn.to/2Fd7he6
TotalBoat High Performance Epoxy Kit - https://amzn.to/3fMxHSH
Black Diamond Pigments
- Black Onyx - https://www.blackdiamondpigments.com/products/black-onyx-42g-1-5oz?_pos=1&_sid=e23b154ab&_ss=r&&sca_ref=720311.3R7VmpIqEs
- Deep Blue Sea - https://www.blackdiamondpigments.com/collections/diamond-series/products/diamond-deep-blue-sea-42g-1-5oz?sca_ref=720311.3R7VmpIqEs
3M Scotch-Brite Light Cleansing Pad Comparable to 0000 - https://amzn.to/3dDWhpv
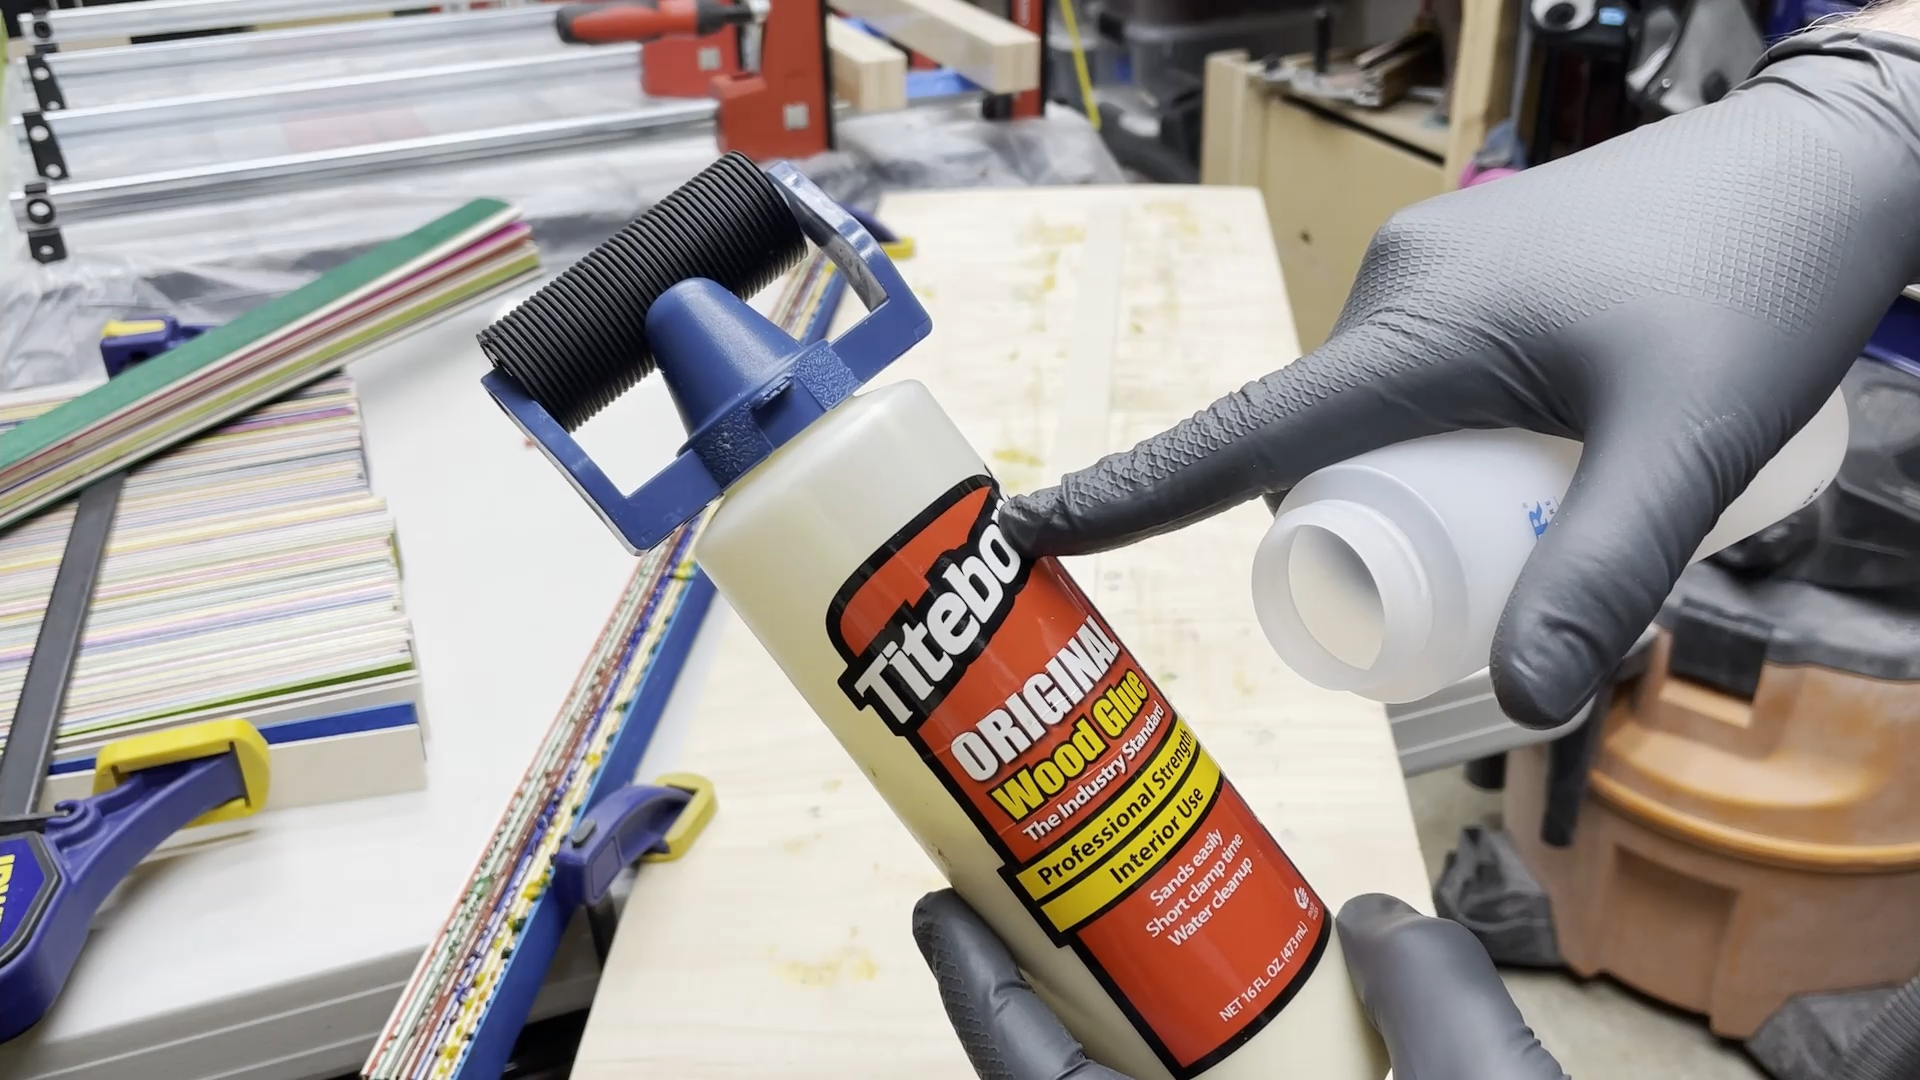
Titebond Orignal Wood Glue - https://amzn.to/349SiuK
Various sand paper
TOOLS
The tools I used on the project were as follows:
X-Carve 1000mm CNC Machine by Inventables - https://www.inventables.com/technologies/x-carve?ref=MakingAtHome
Router Bit - 1/8" Diameter Fish Tail, Downcut Spiral Bit from Inventables (roughing bit) - https://www.inventables.com/technologies/solid-carbide-fish-tail-downcut-spiral-bit-1-8-in-d?ref=MakingAtHome
Router Bit - 1/32" Diameter Fish Tail, Downcut Spiral Bit from Inventables (detail bit) -https://www.inventables.com/technologies/solid-carbide-fish-tail-downcut-spiral-bit-1-32-in-d?ref=MakingAtHome
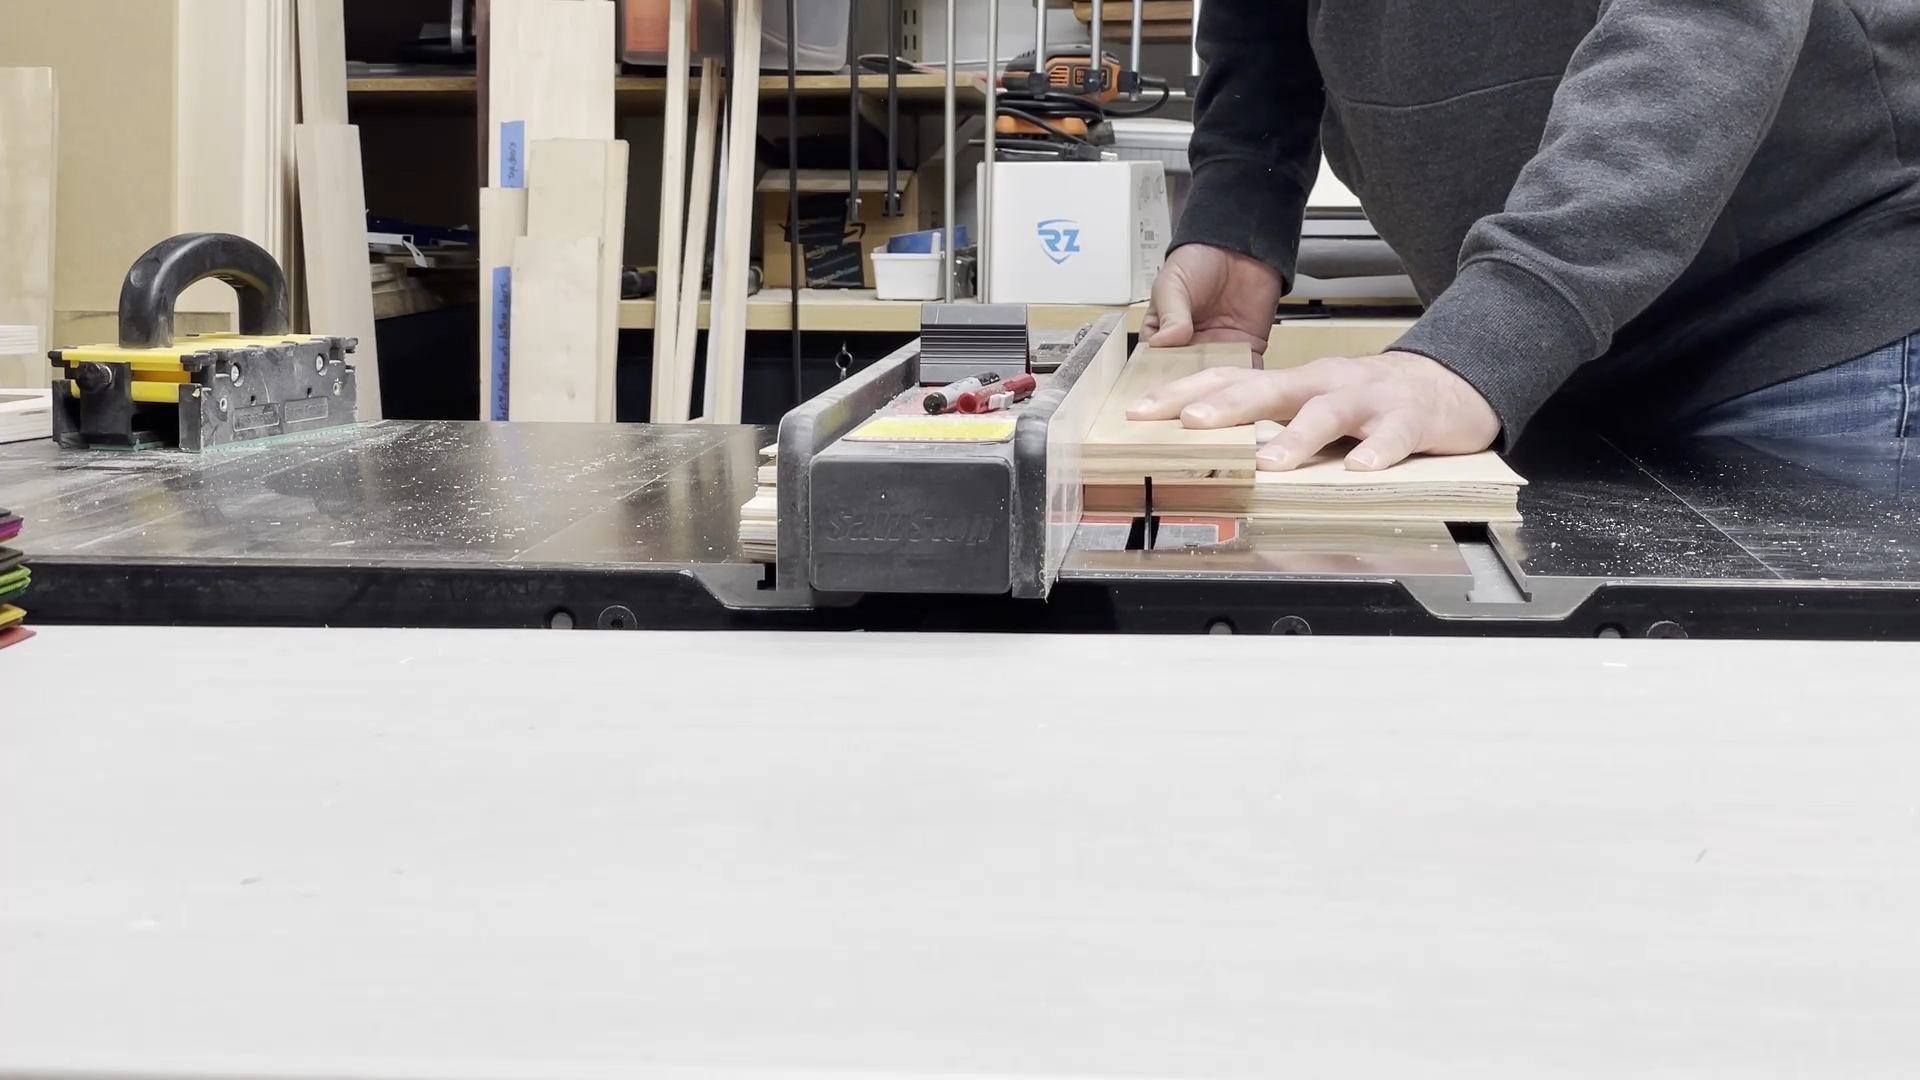
Saw Stop table saw - https://amzn.to/3a8znCE
Rockler Glue Bottle with Roller top - https://amzn.to/2Rxe5Kh
Grizzly 14" Band Saw
Random orbit sander
Shop vac
Tape Measures (my favorite two):
Fastcap PMS-16 Auto Lock ProCarpenter Tape Measure - https://amzn.to/333fTMN
or FastCap PSSR16 16 ft Standard Reverse Measuring Tape - https://amzn.to/35eQe6k
NOTE: As an Amazon Associate I earn from qualifying purchases.
NOTE: If you plan on using any tool for a project please make sure you are familiar with the tool and all of the dangers associated with it. If you are not familiar with a tool then you should ask someone who is to show you the proper way to use it. A lot of communities have classes at local colleges on the proper use of tools and machinery. There are also local woodworking clubs that offer classes at very reasonable rates for beginners. I highly recommend using these resources for your safety and for the most efficient use of the tool.
SAFETY FIRST
Always wear eye and hearing protection.
Always work safe with the proper safety equipment and guards on your tools.
Note: As an Amazon Associate I earn from qualifying purchases.
Step 2: Set Up Layout in Software

The layout for the skatepark was obtained from the site designers for the project. This made importing the layout into the Easel software much easier.
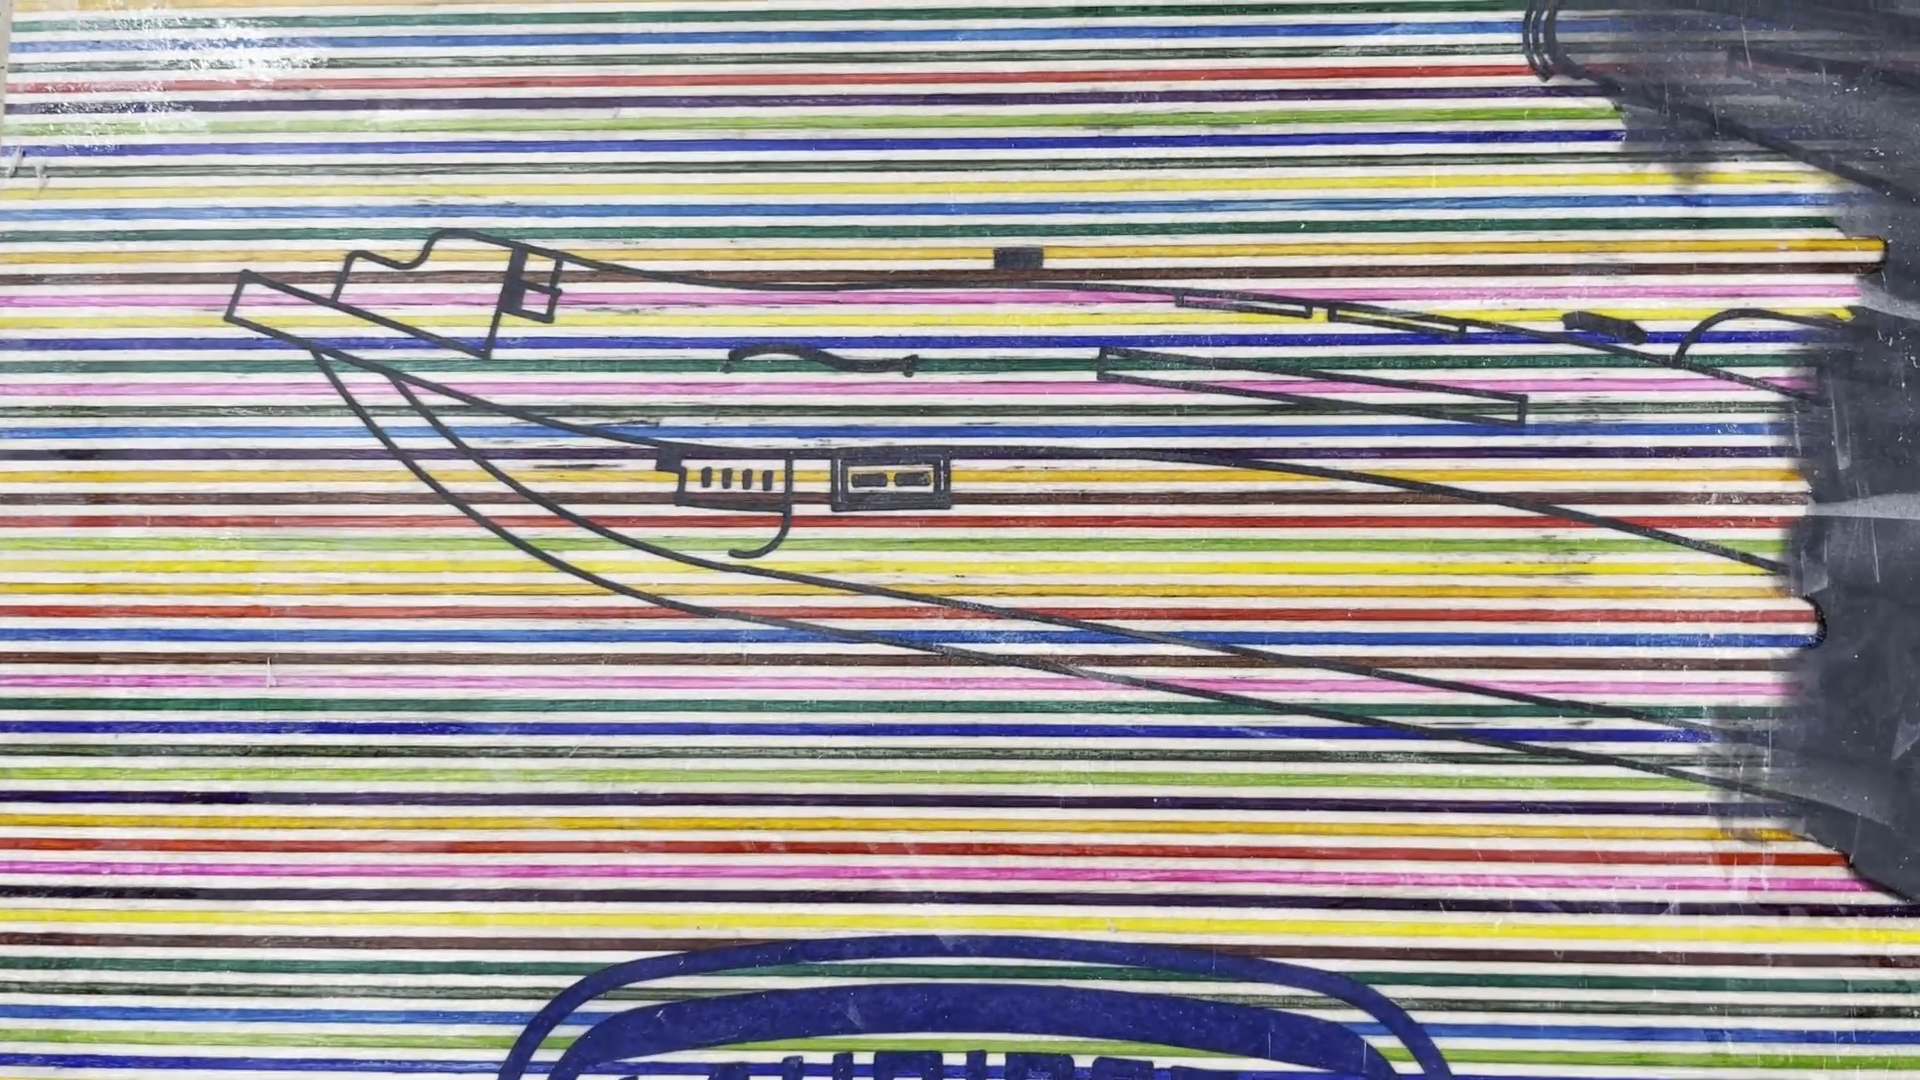
I was able to import the file and set all of the carve settings for the linework to carve on the line. The idea was to reproduce the thin lines from the engineering plans.
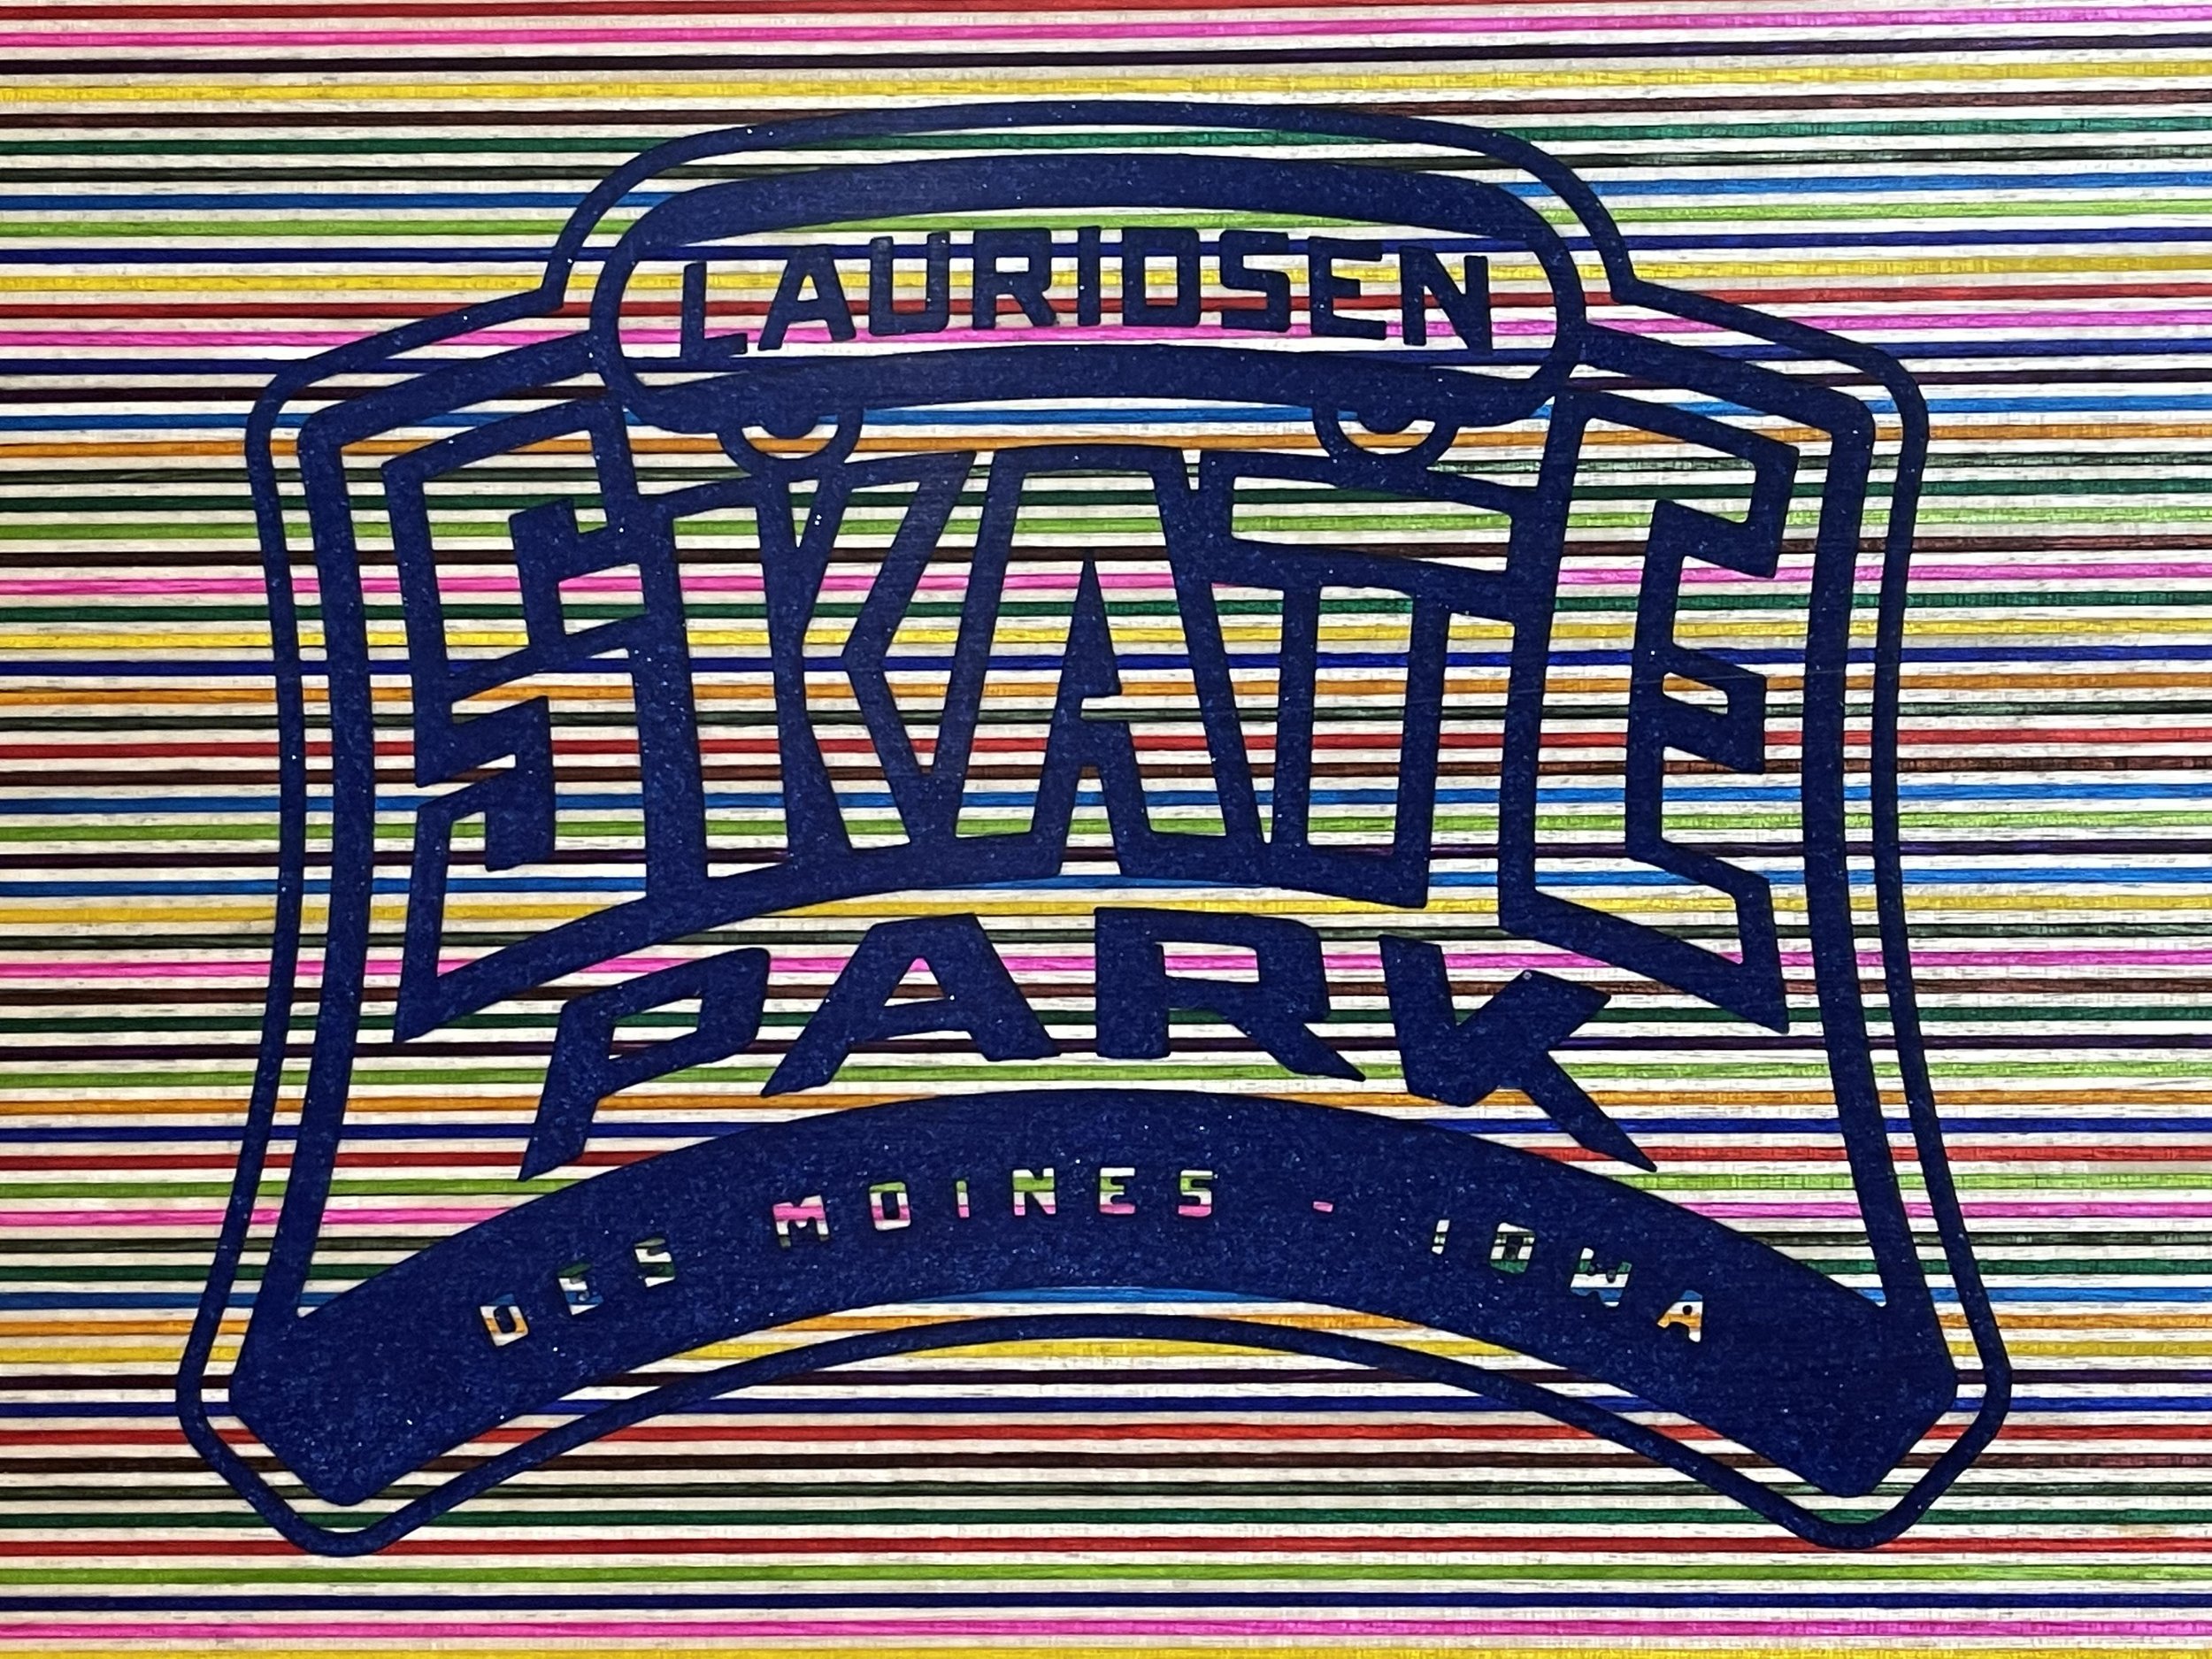
I added the logo for the skatepark in the lower left corner where there was plenty of room and added the text in the upper right corner.
Step 3: Carve a Sample Piece

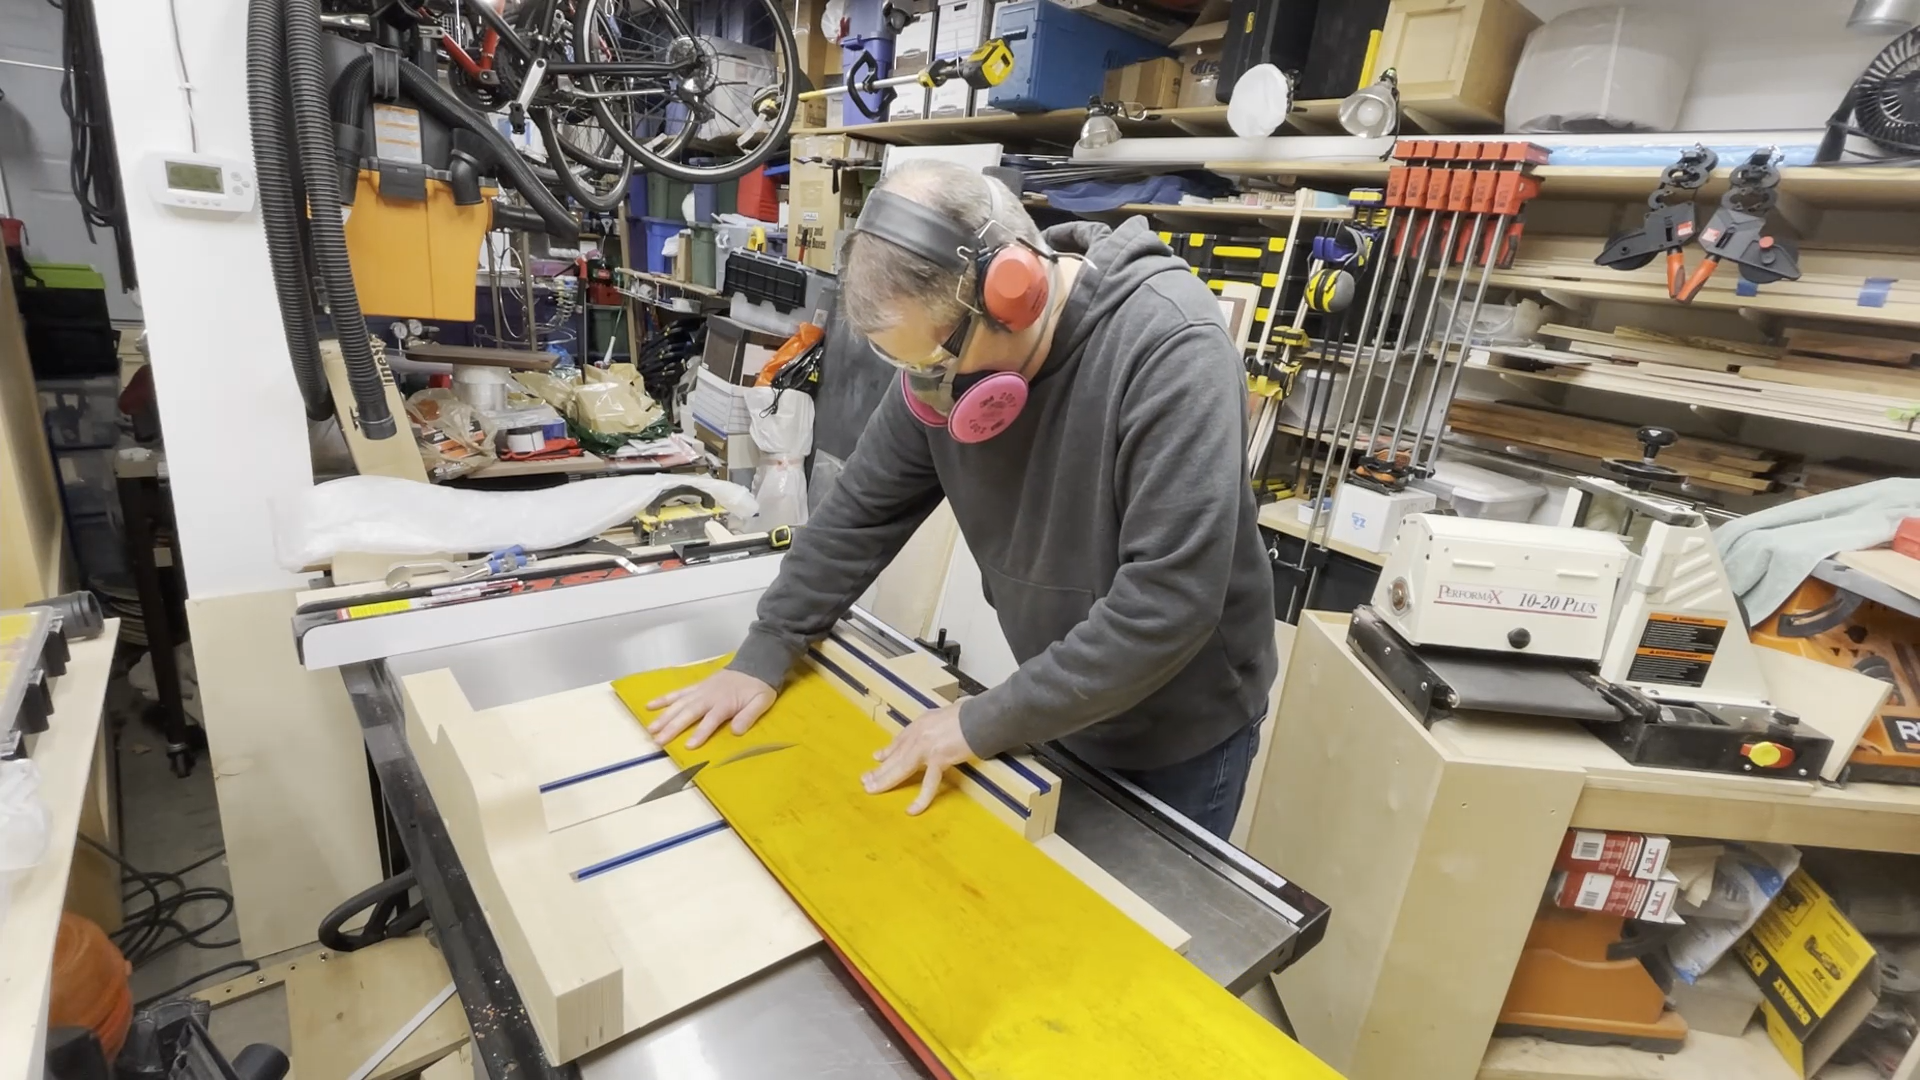
Before making the actual project we thought it would be a good idea to do a trial run in some cheaper material, like plywood. I created a 15" tall by 29" long blank of wood by cutting strips of 3/4" thick baltic birch plywood and then gluing those strips together.
Once the glue had dried in this slab of wood I put it into the X-Carve CNC and flattened one side and then the other. This worked very well and gave me a nice and flat surface in which to carve the skatepark design.
I carved the sample layout using a 1/32" diameter router bit for the layout for the skatepark and a 60 degree V- carving bit for the logo.
Since this bit is so tiny, the carving process is slow. The overall carve was estimated to take over 12 hours. To make this easier, I broke the carve into smaller carving jobs that were 1.5 hours to 2.5 hours long.
The problem with trying to carve something on a CNC that can take a long time is that if you break one of these tiny bits then you may have to start the entire carve over.
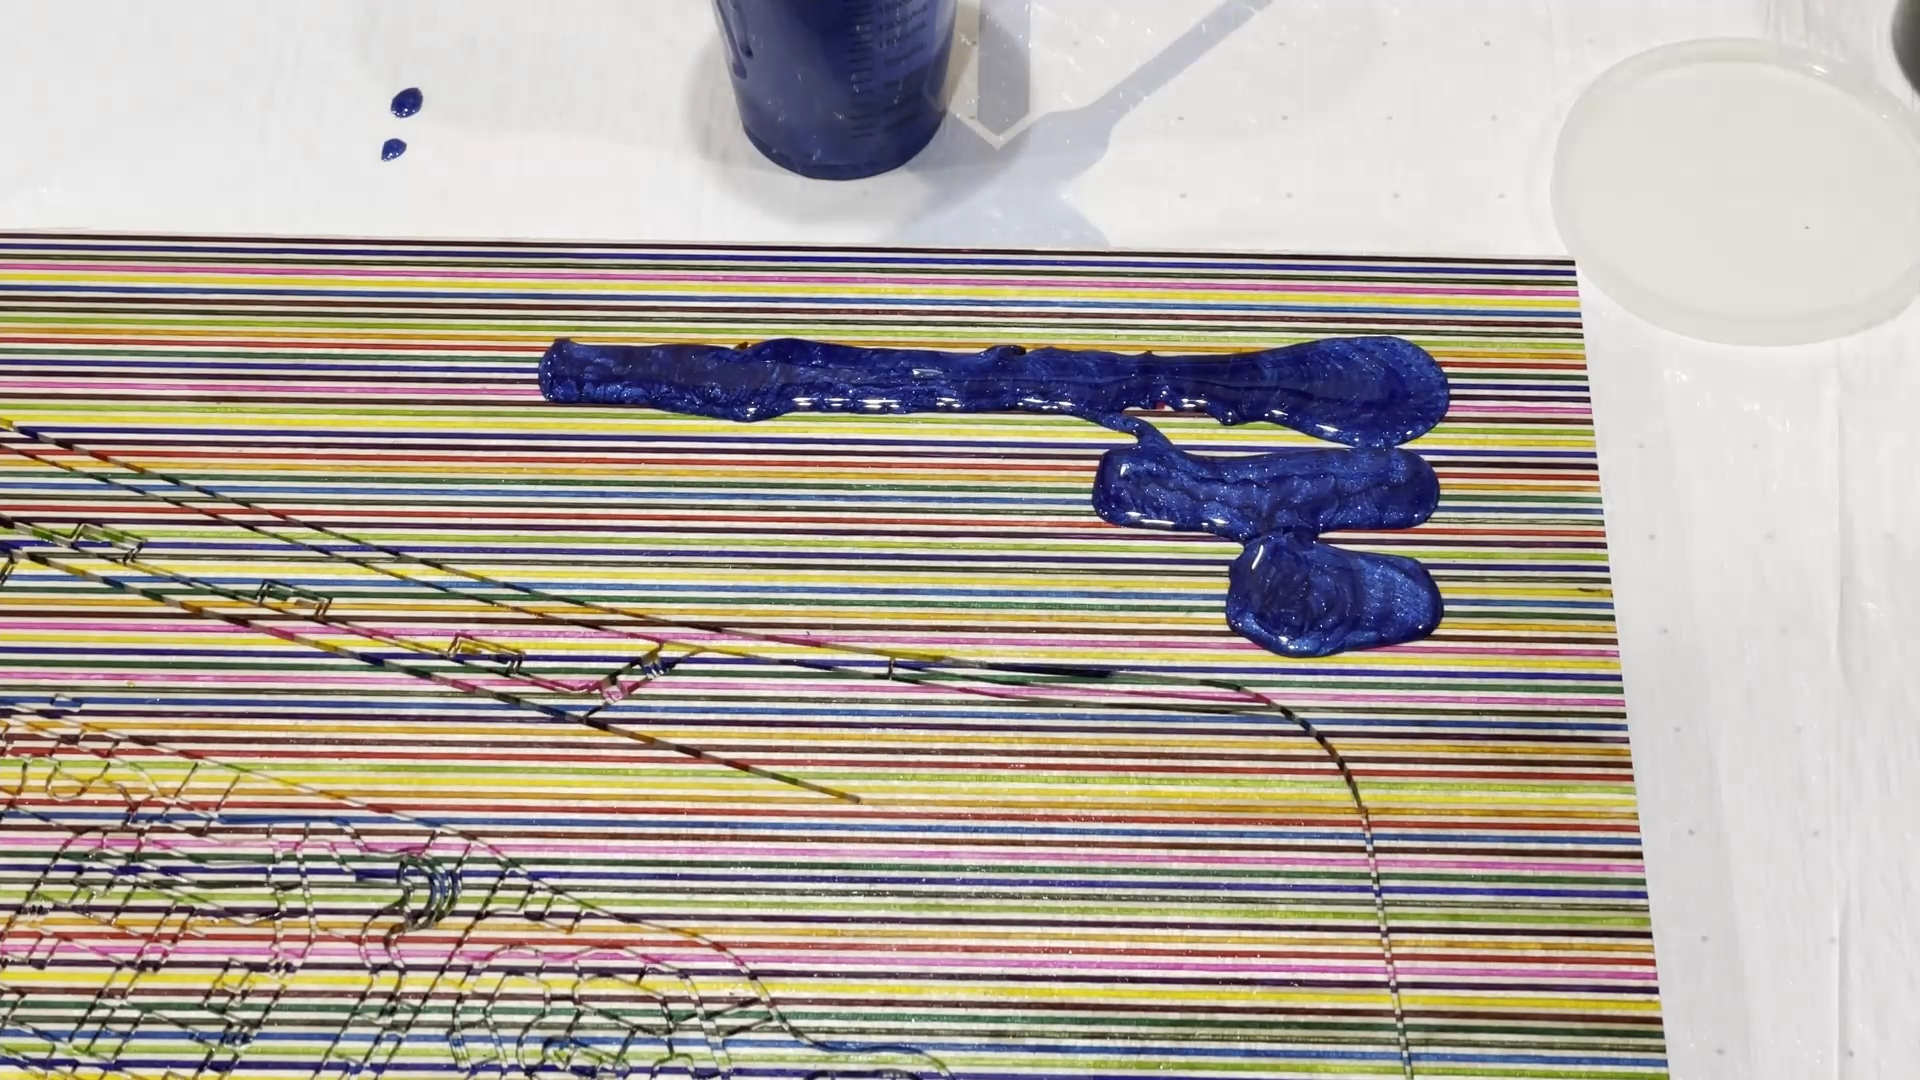
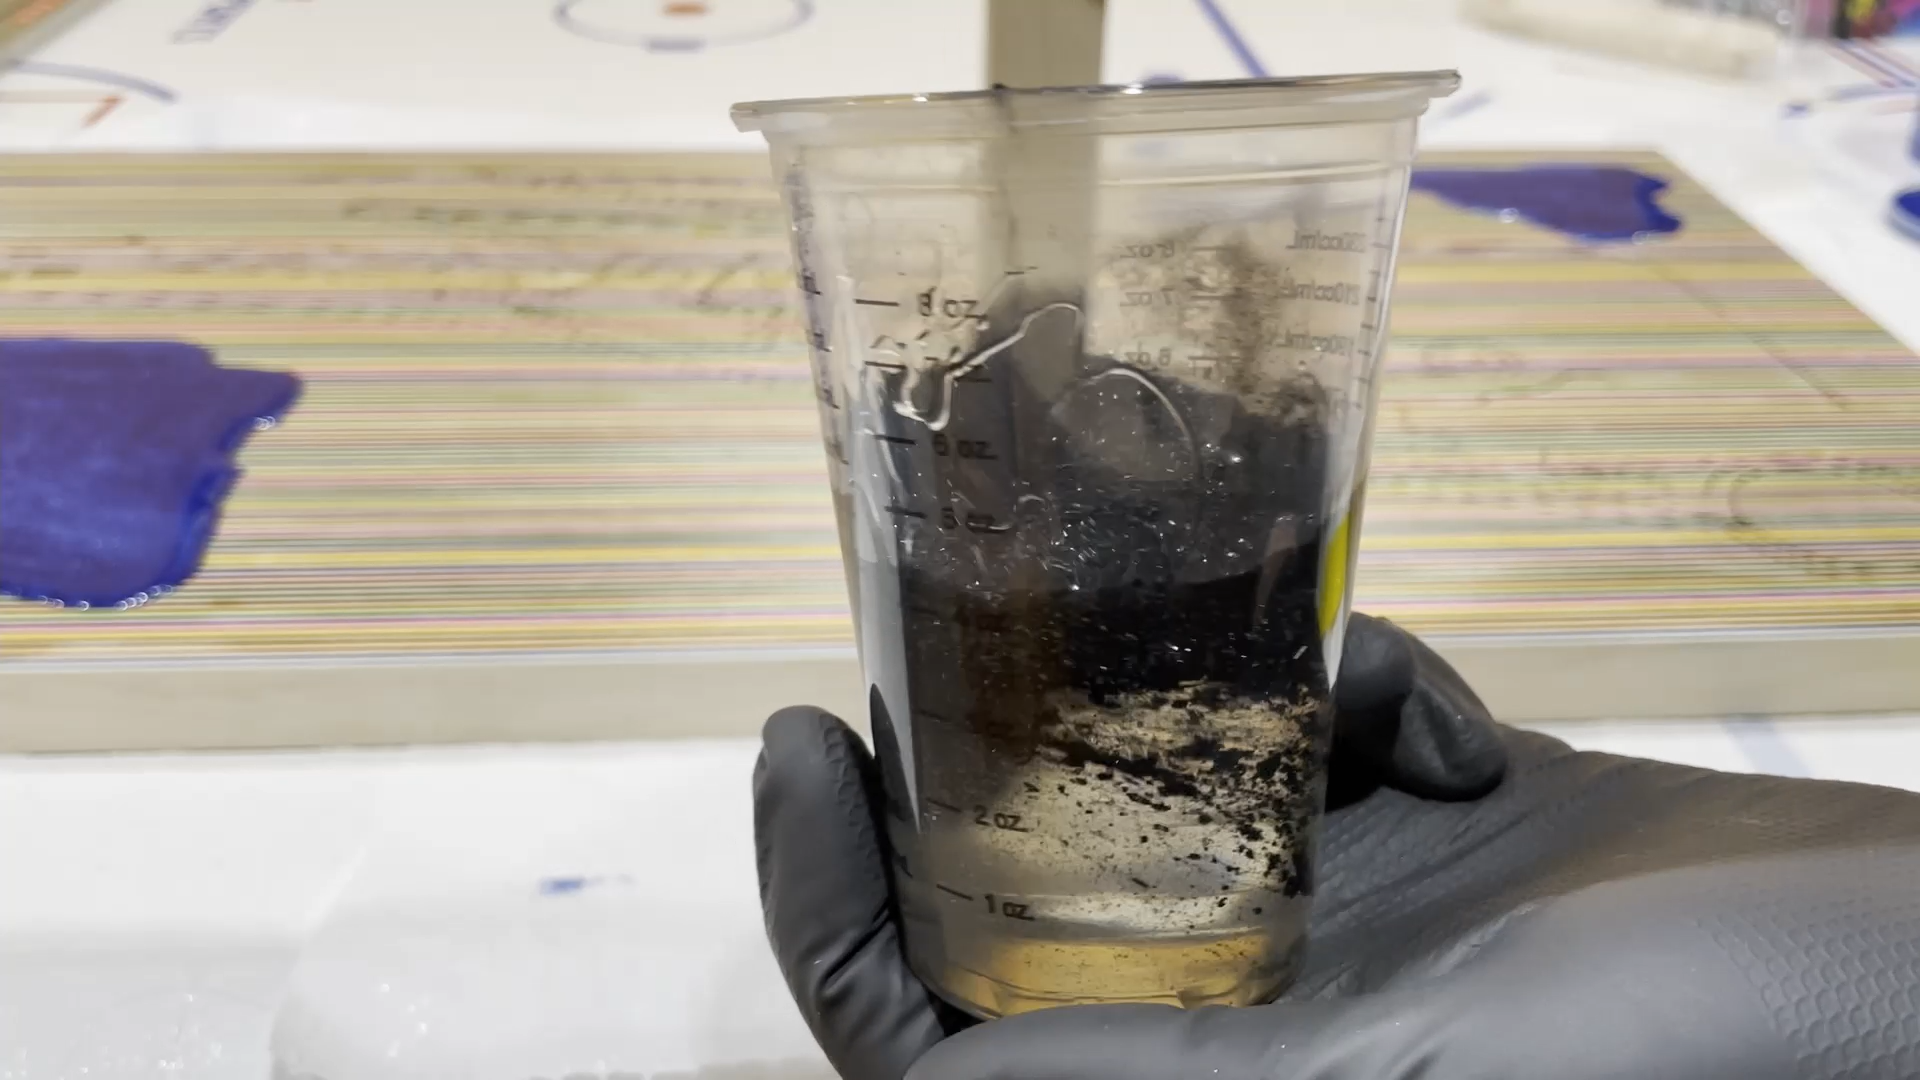
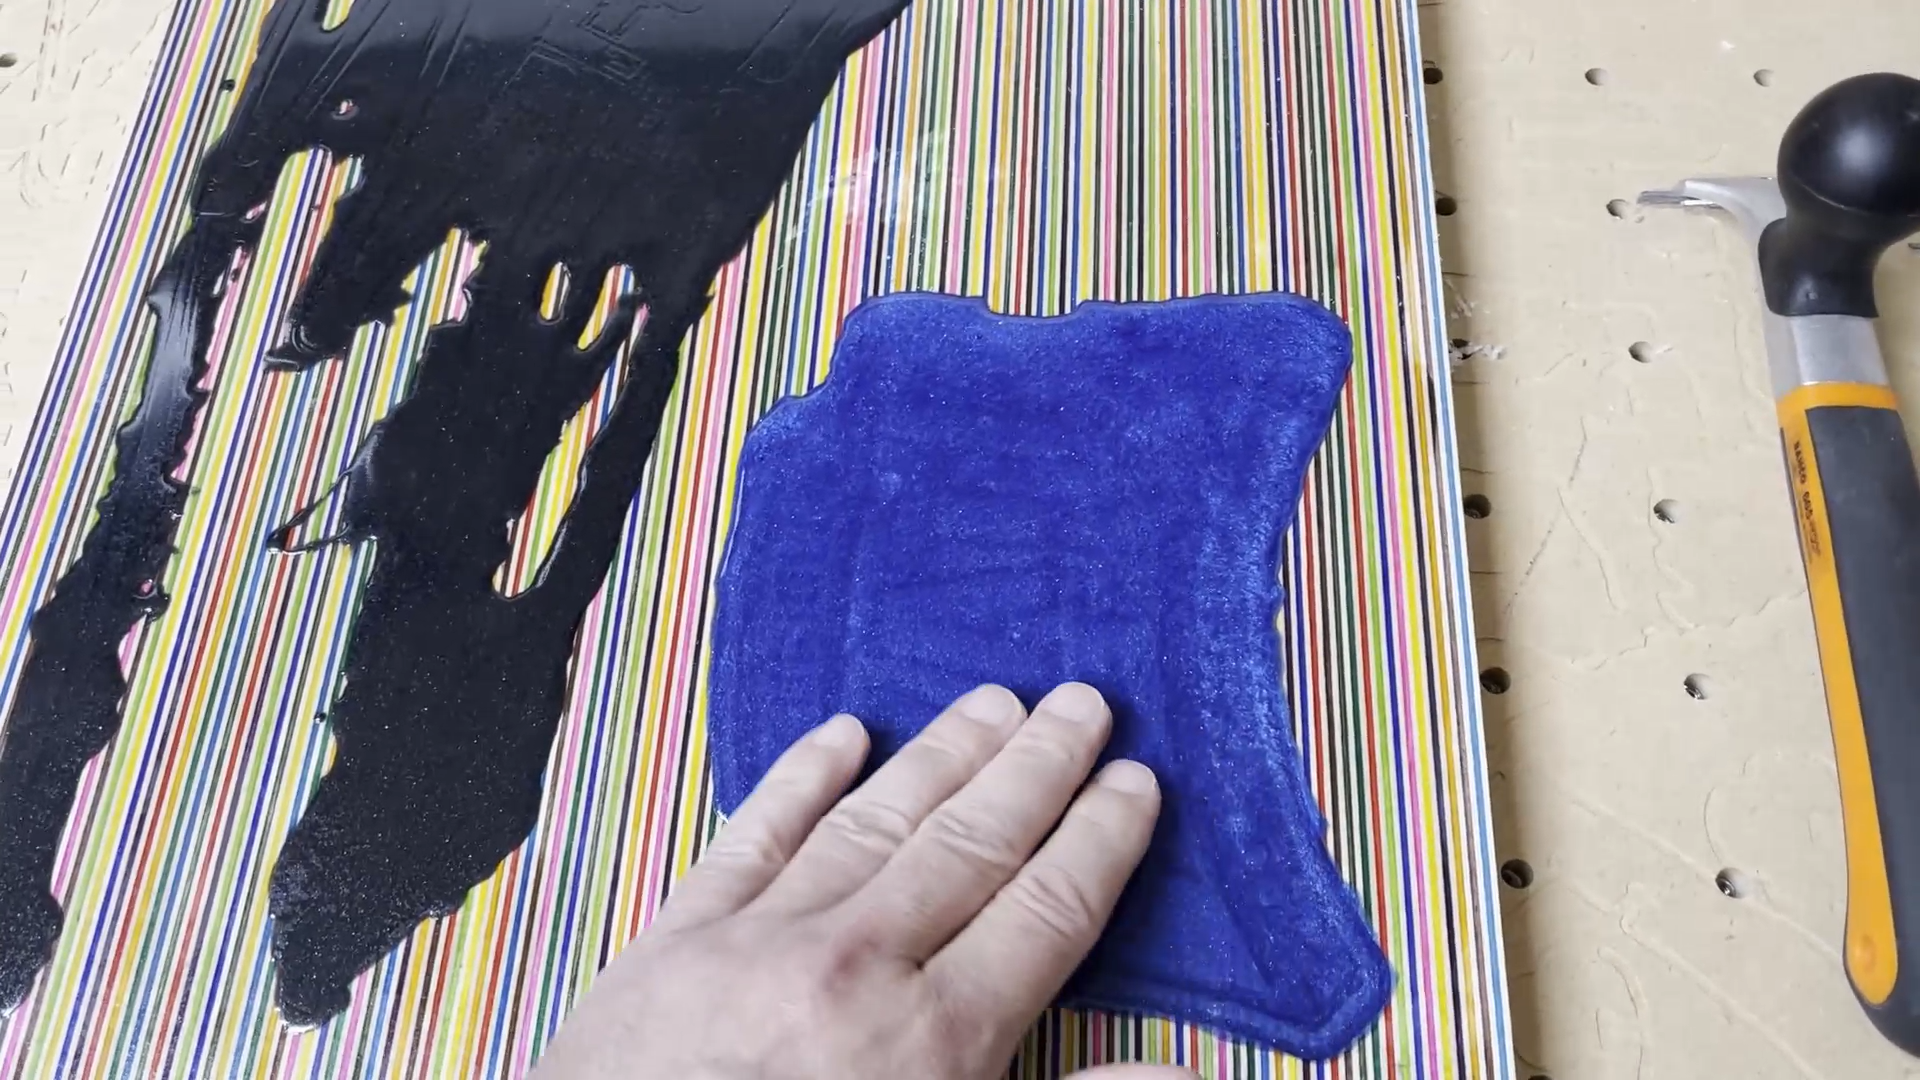
Step 4: Pour Epoxy


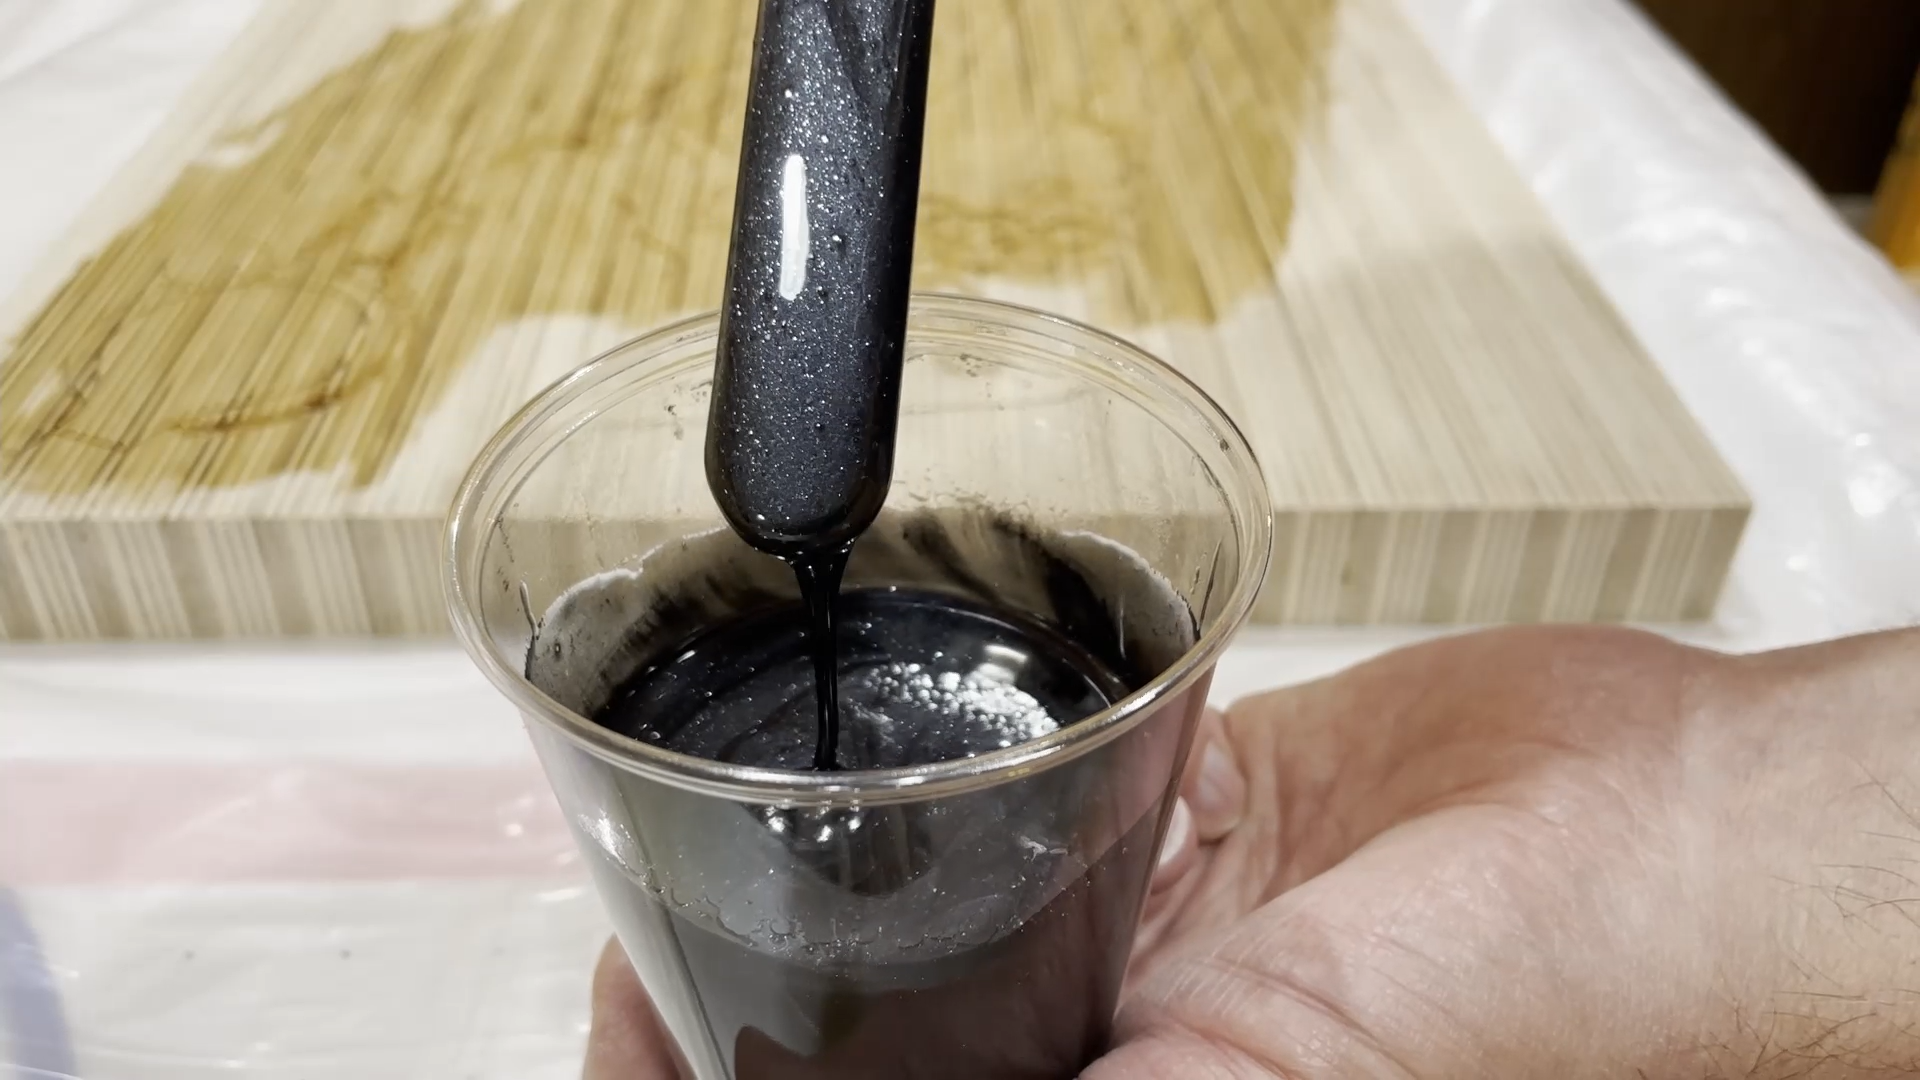
I used TotalBoat High Performance epoxy for this project. Before I poured the colored epoxy into the carved areas I used a small paint brush and painted a thin layer of clear epoxy over the entire surface to help prevent possible bleeding of the pigment into the adjacent wood areas.
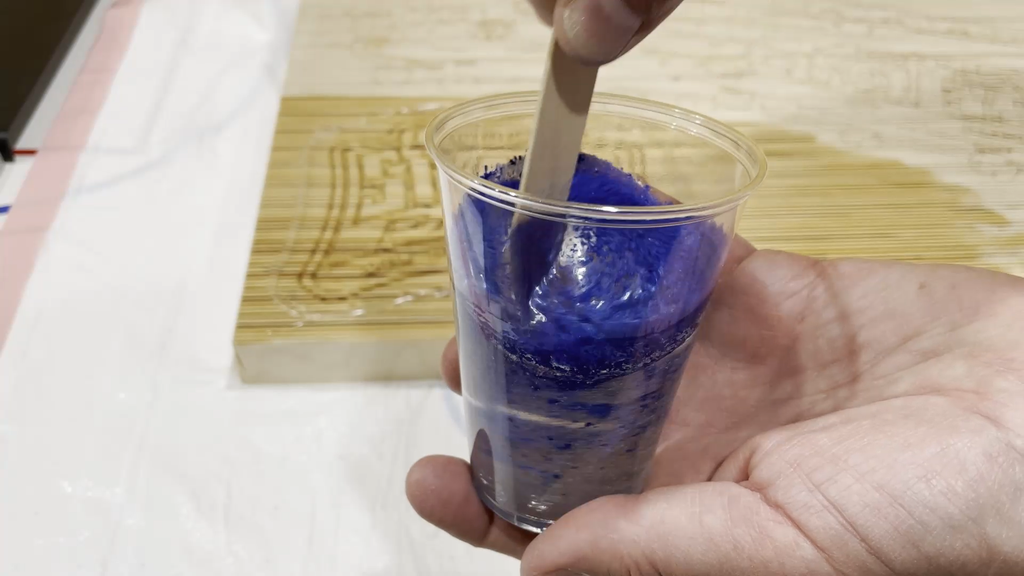
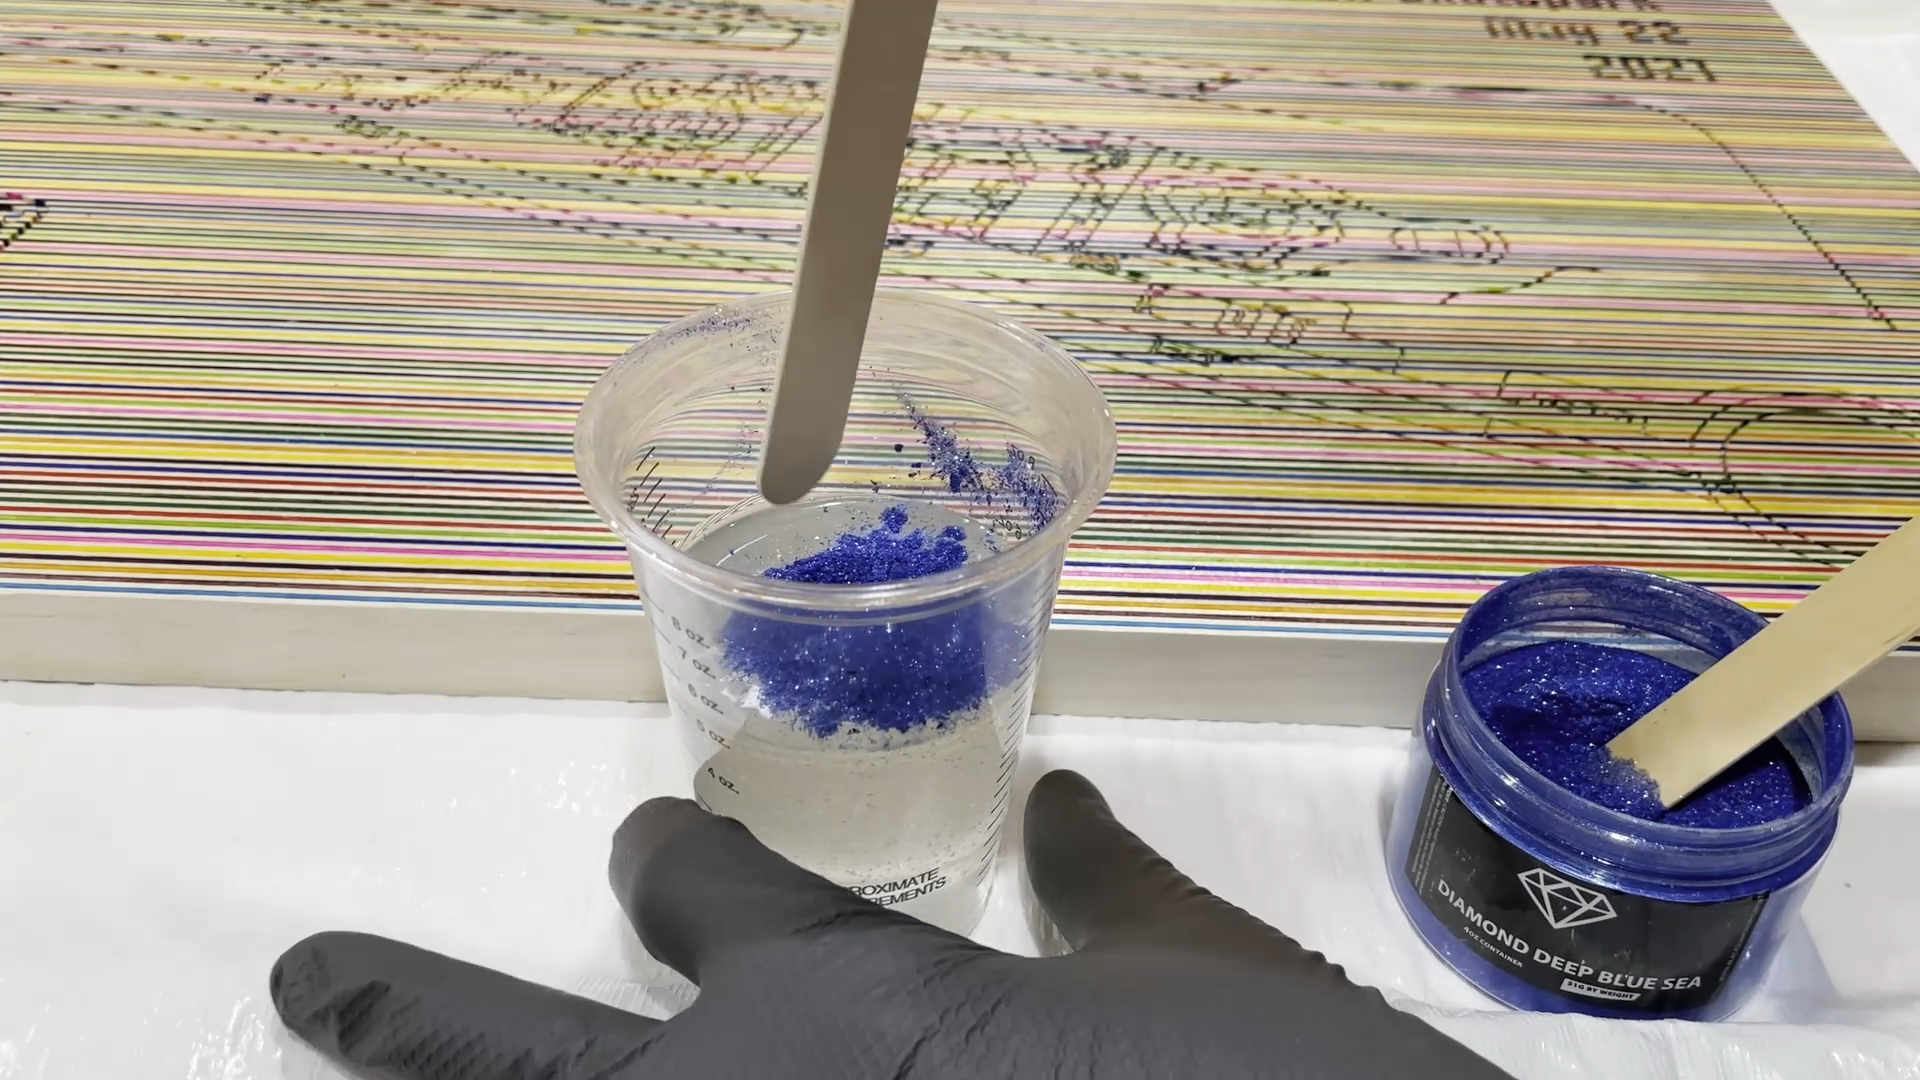
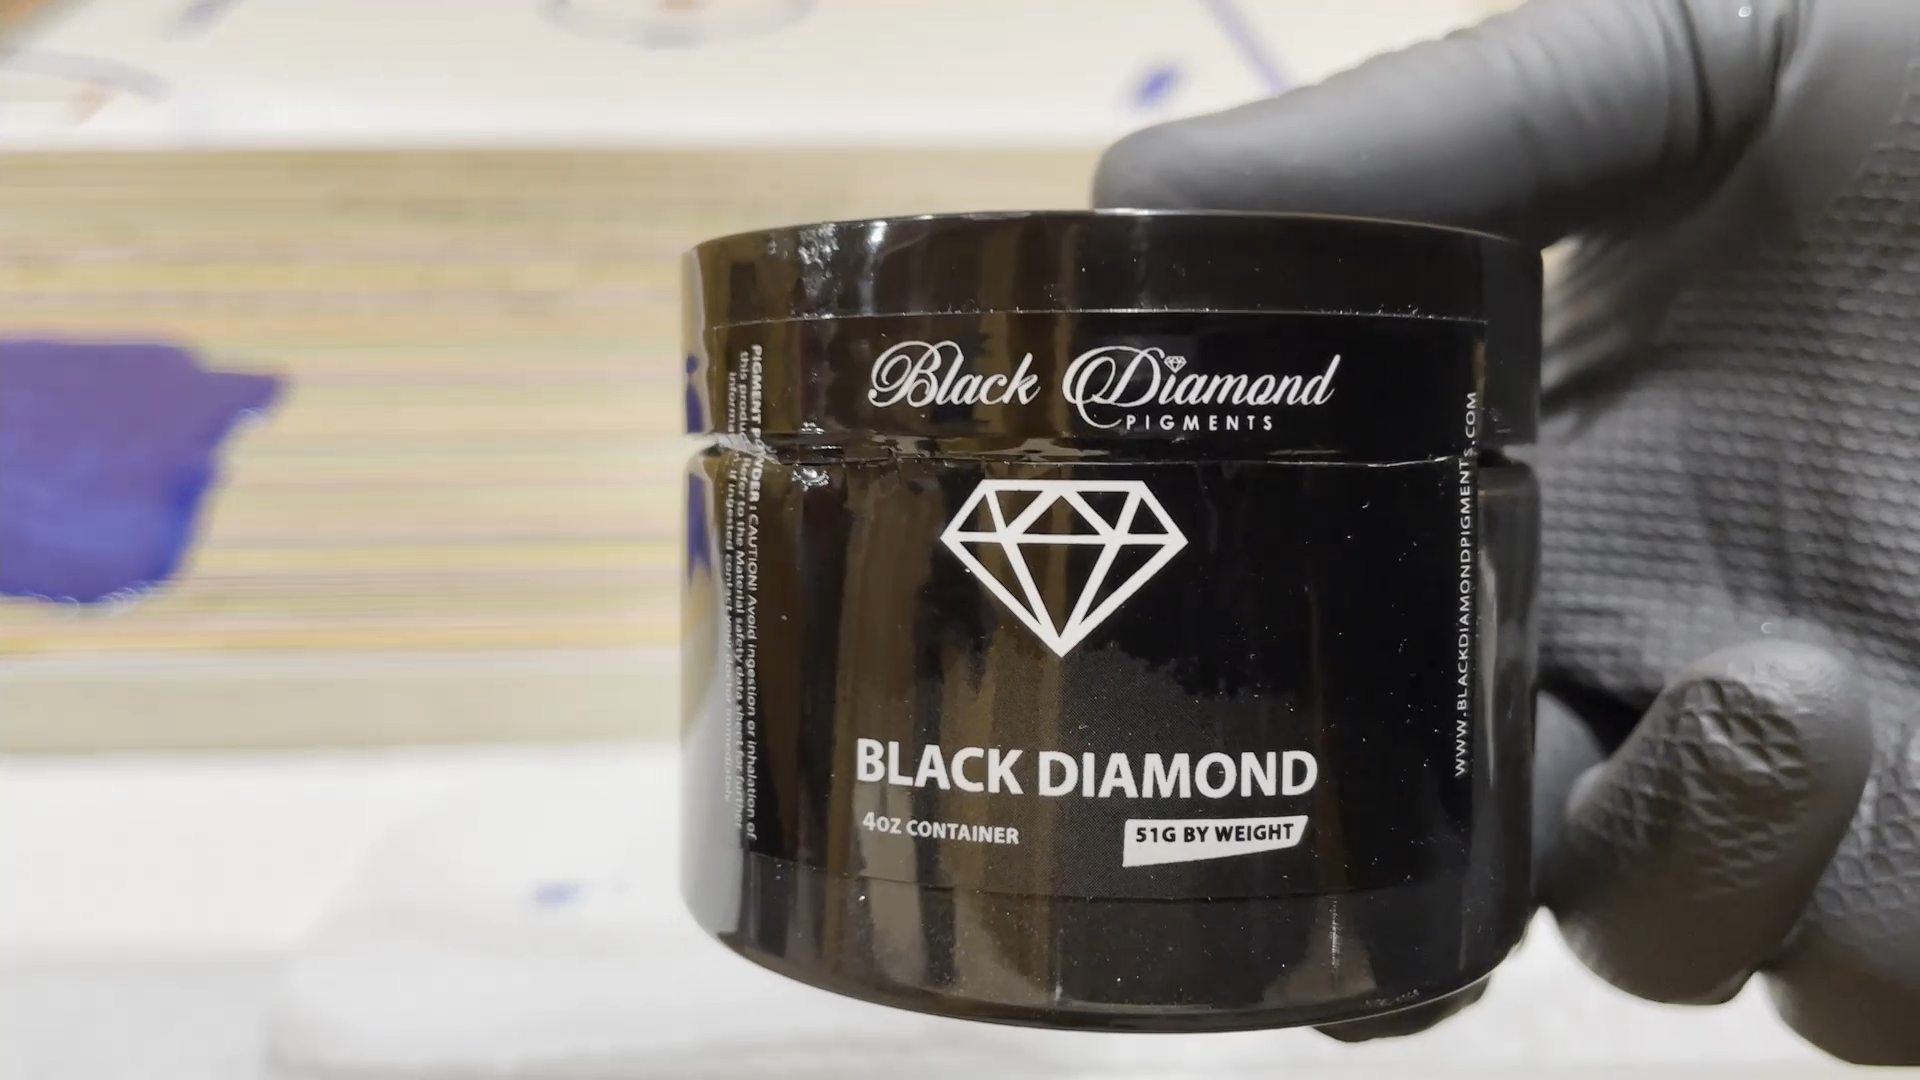
I used two different colors of Black Diamond pigments for the coloring of the epoxy. The black color for the epoxy that I used was "Black Onyx" and the blue color was "Deep Blue Sea."
Since the depth of the carved areas I was filling in is pretty shallow, I mixed the pigments nice and thick so these areas would really stand out.
I poured the epoxy a little taller than the height of the wood surface so I would not lose any depth of the epoxy in the carved areas.
Step 5: Remove Excess Epoxy and Sand

I used a hand scraper to remove the excess epoxy that was still on the sample board after I ran it through the drum sander to remove a majority of the excess.
To help make the surface be nice and smooth I made sure to raise the grain of the wood by lightly wetting it with a wet cloth.
On the sample carve I sanded to 1200 grit, but could have easily stopped with 400 or 800 grit.
Step 6: Add Finish
I added Odie's Oil to the sample piece to see how everything looked. This finish is incredibly easy to apply. You just use a white Scotchbrite pad to wipe the oil into the wood, wait a short time like 20 minutes, and then buff off the surface.
I added two layers of the finish on consecutive days to see how the finished would look and feel on the final piece of wood.
I really liked how this made the wood and epoxy areas look and feel. The oil in the finish really brings out the color in the wood and epoxy.
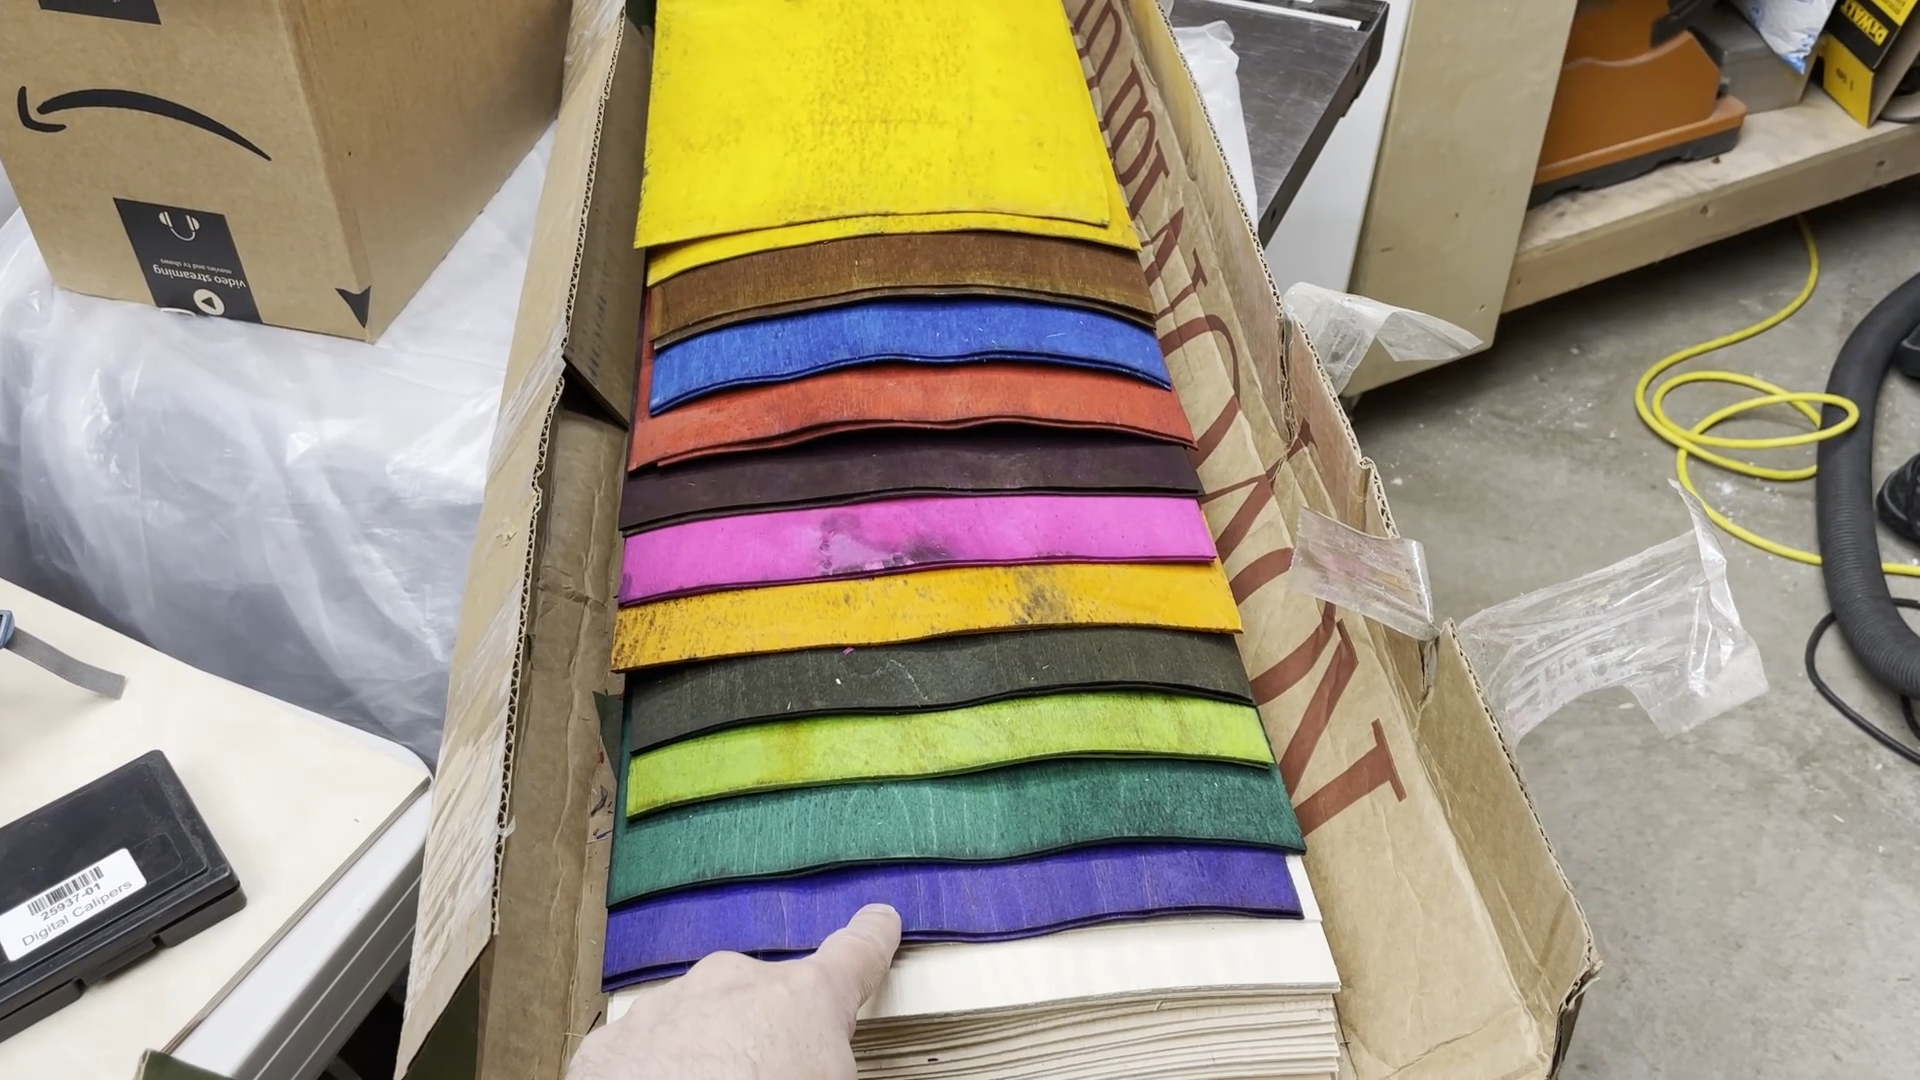
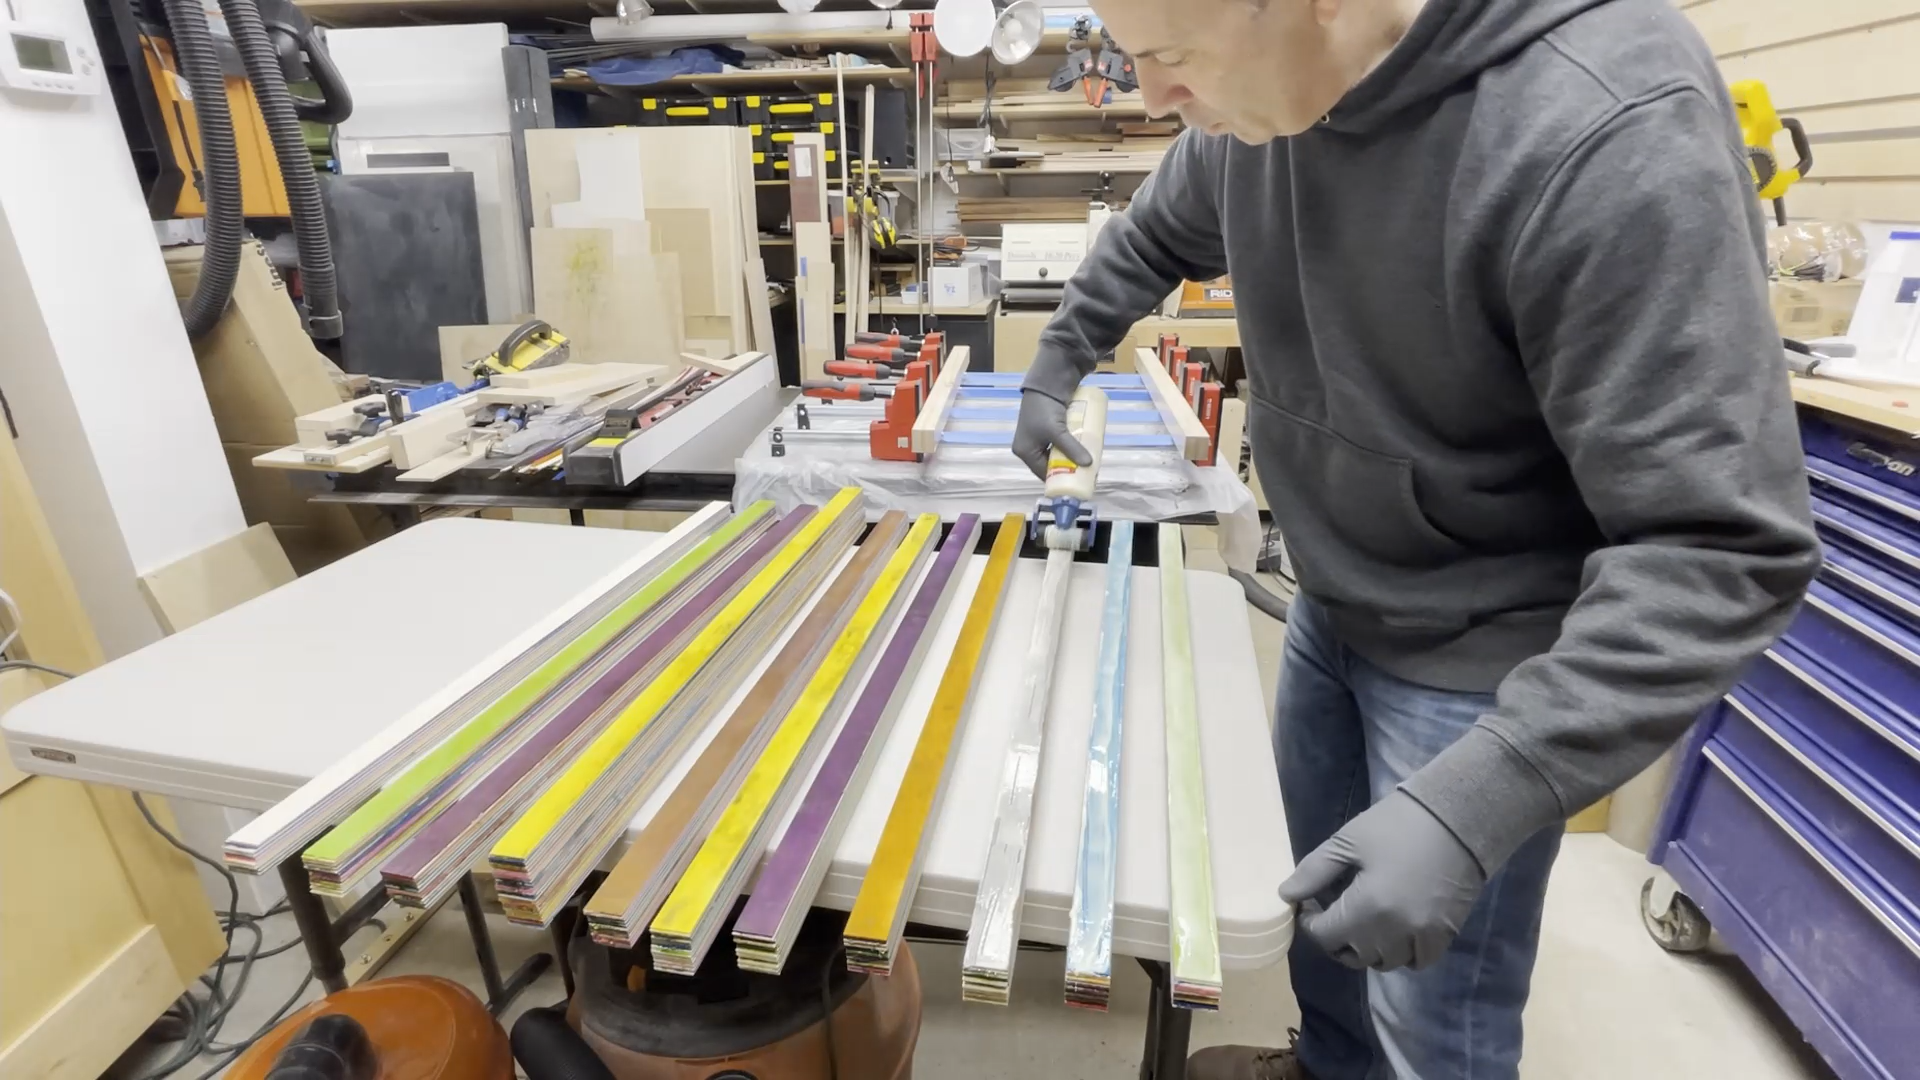
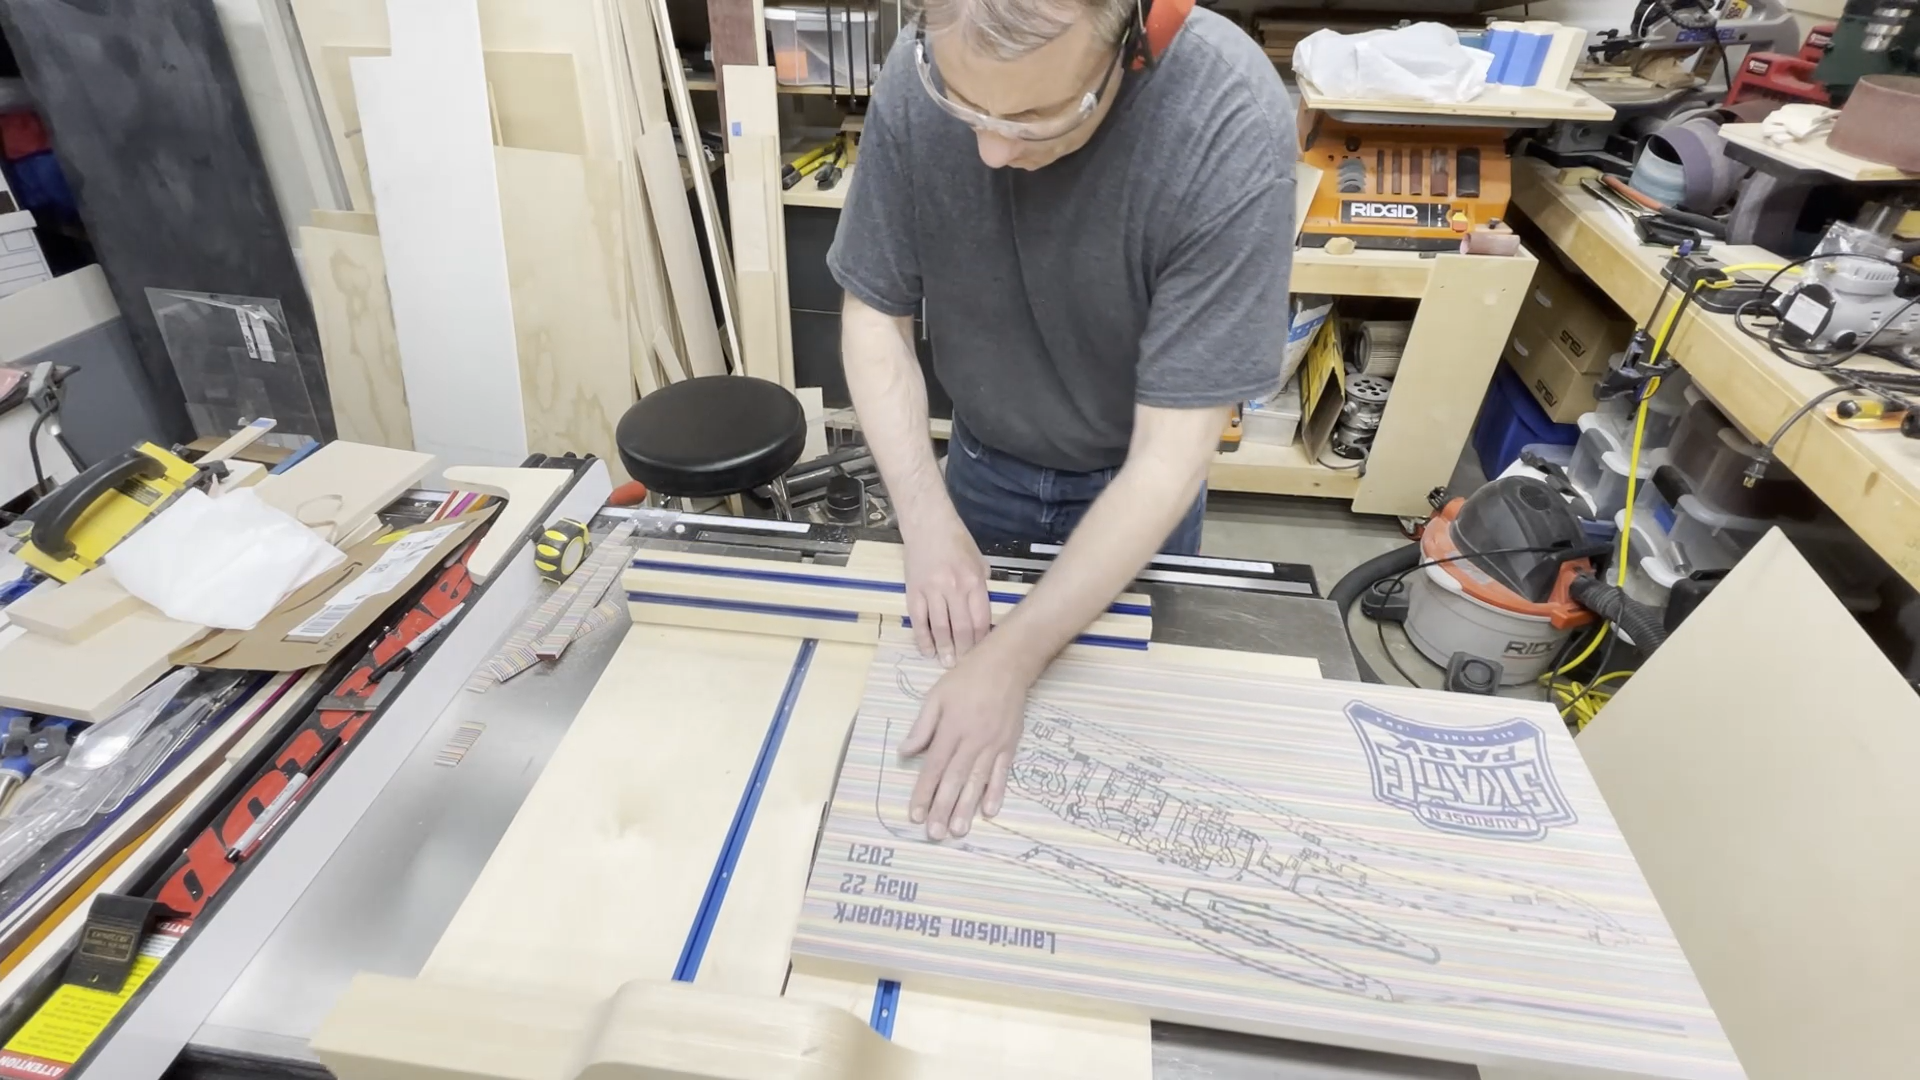
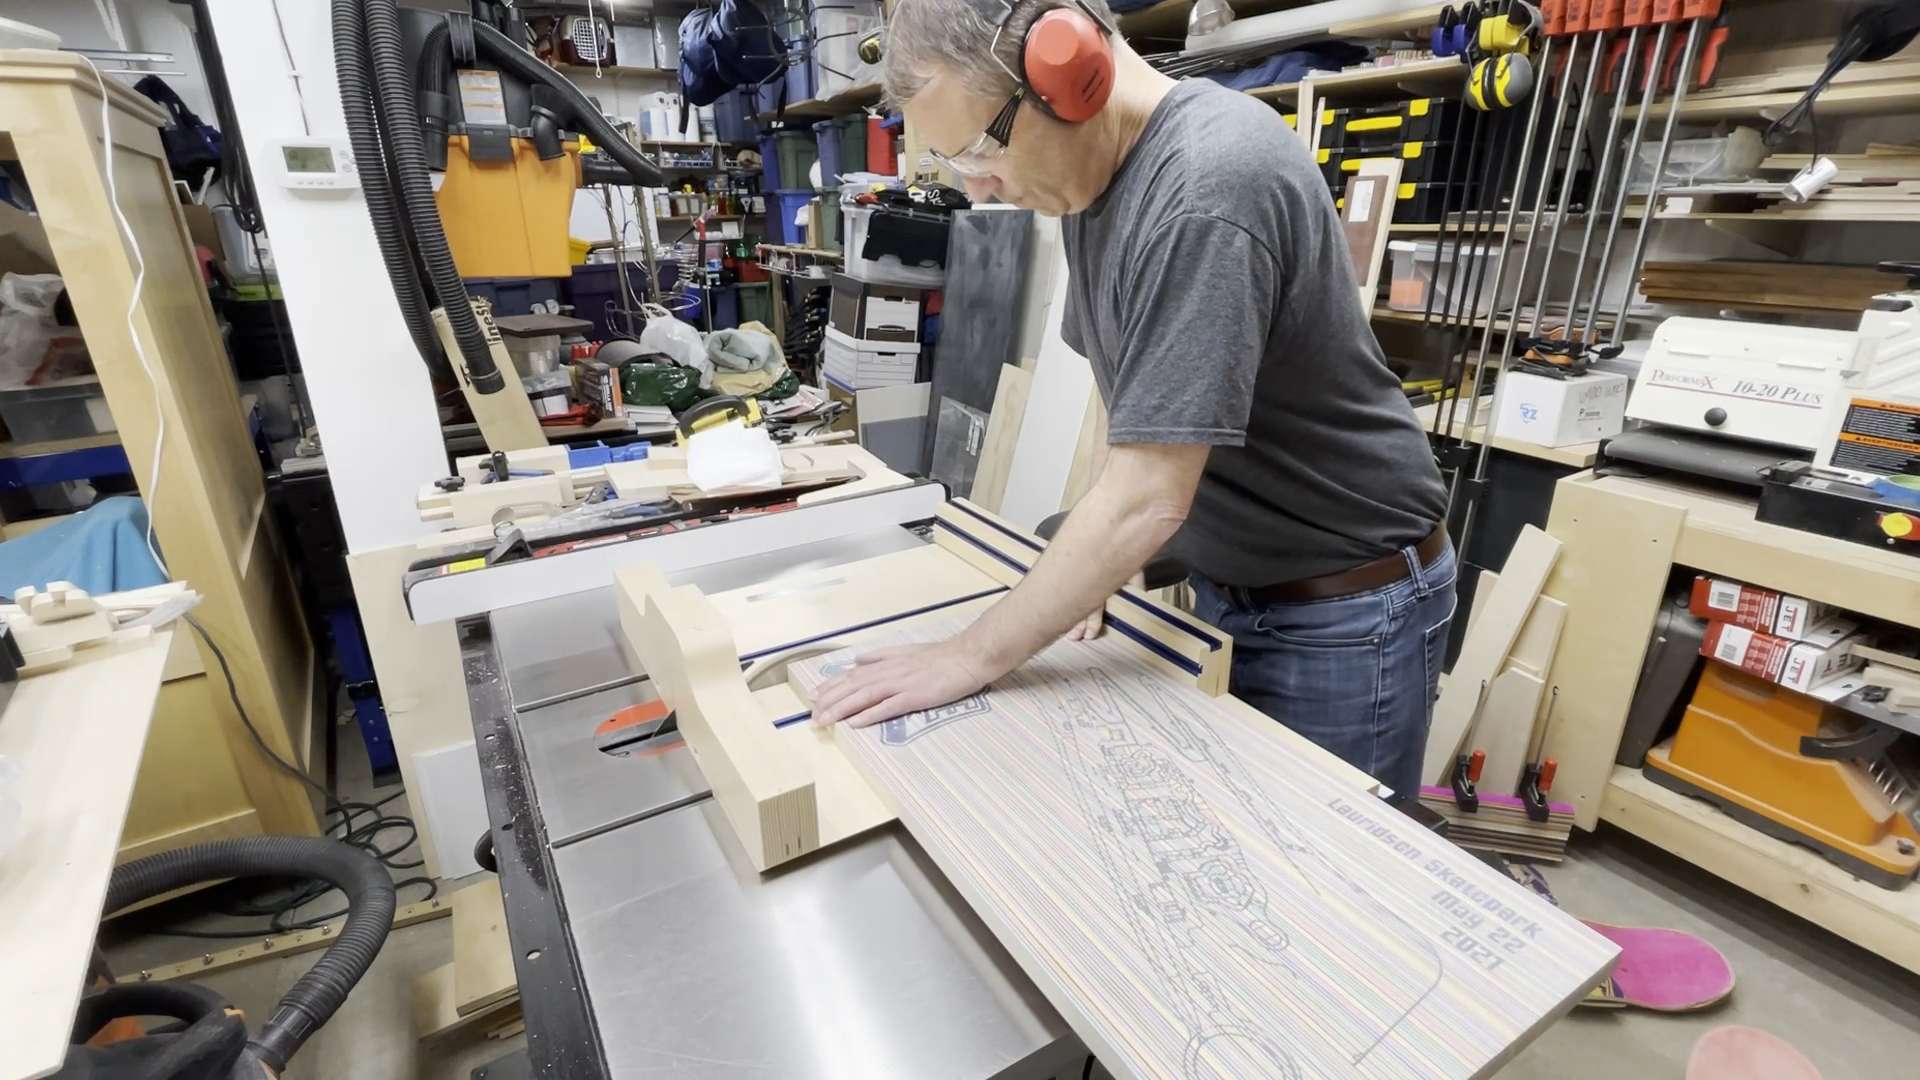
Step 7: Cut Strips of Dyed Veneer
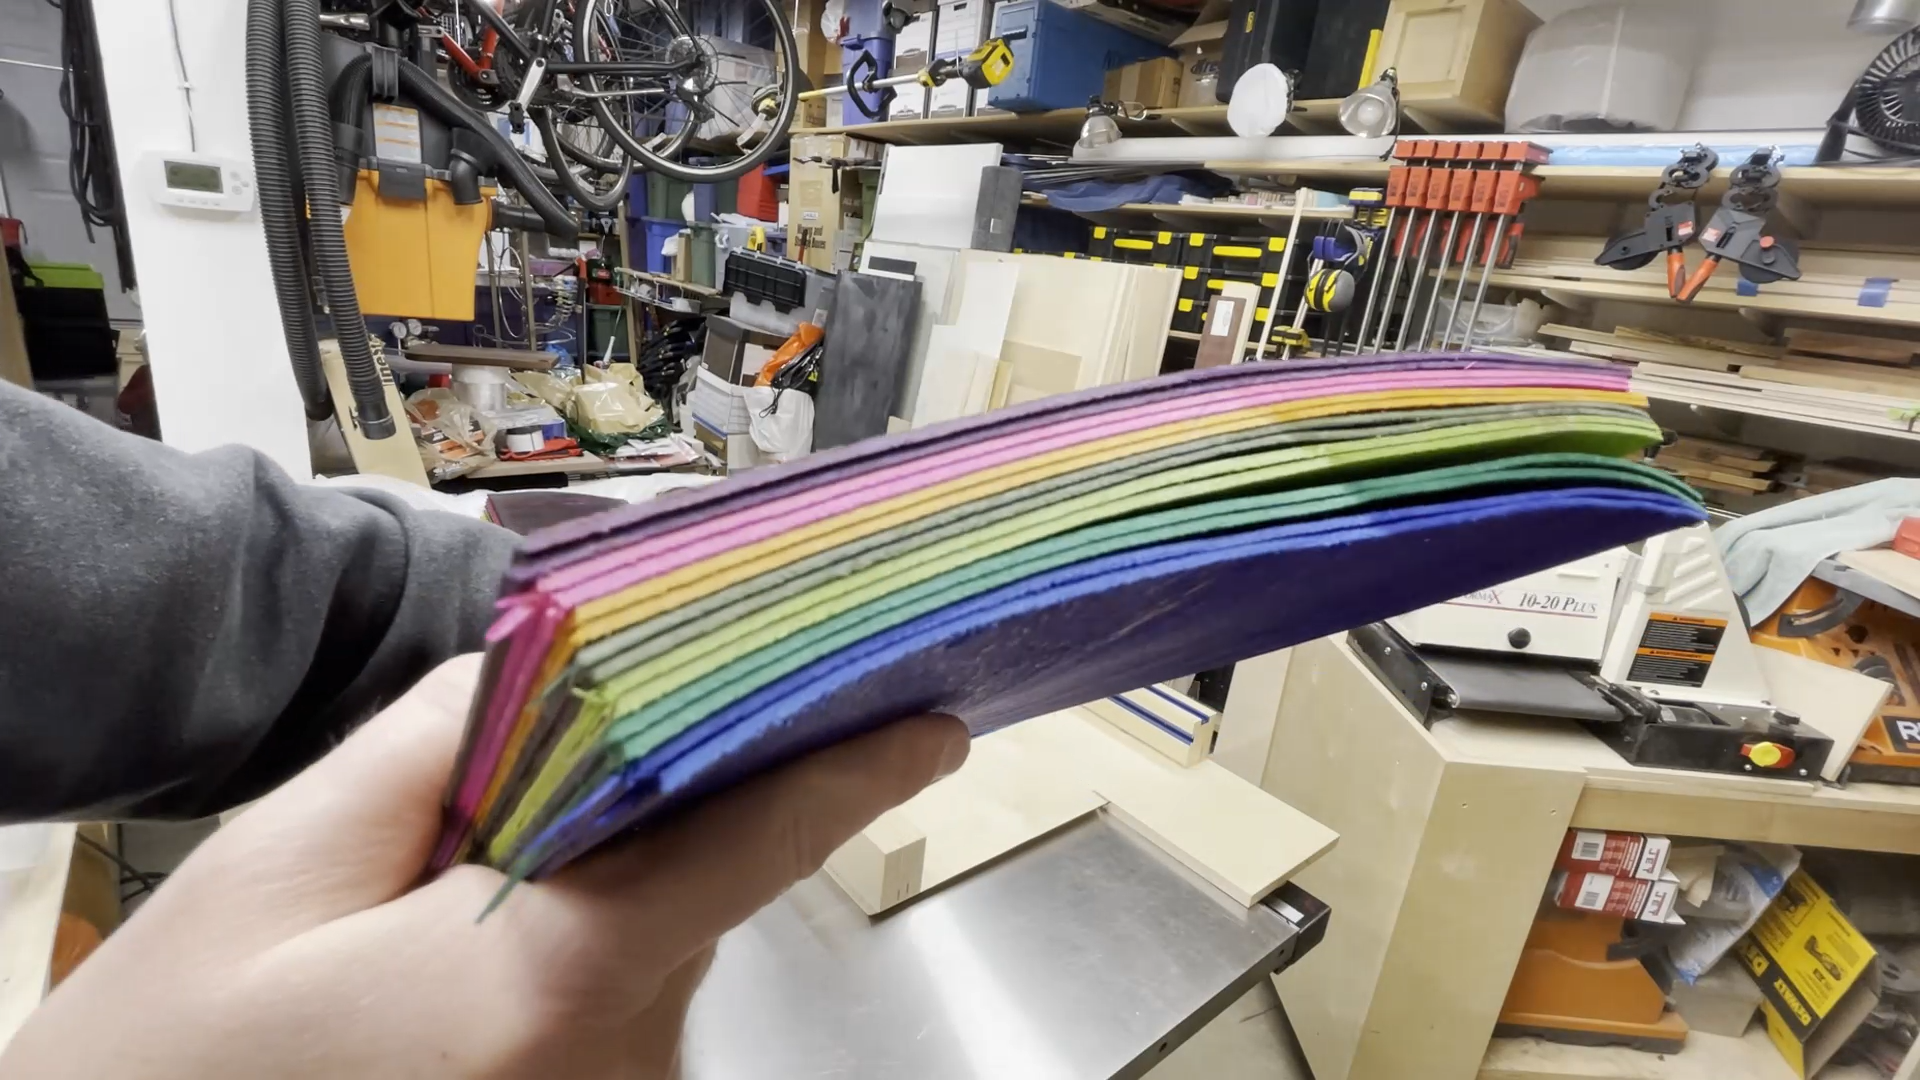
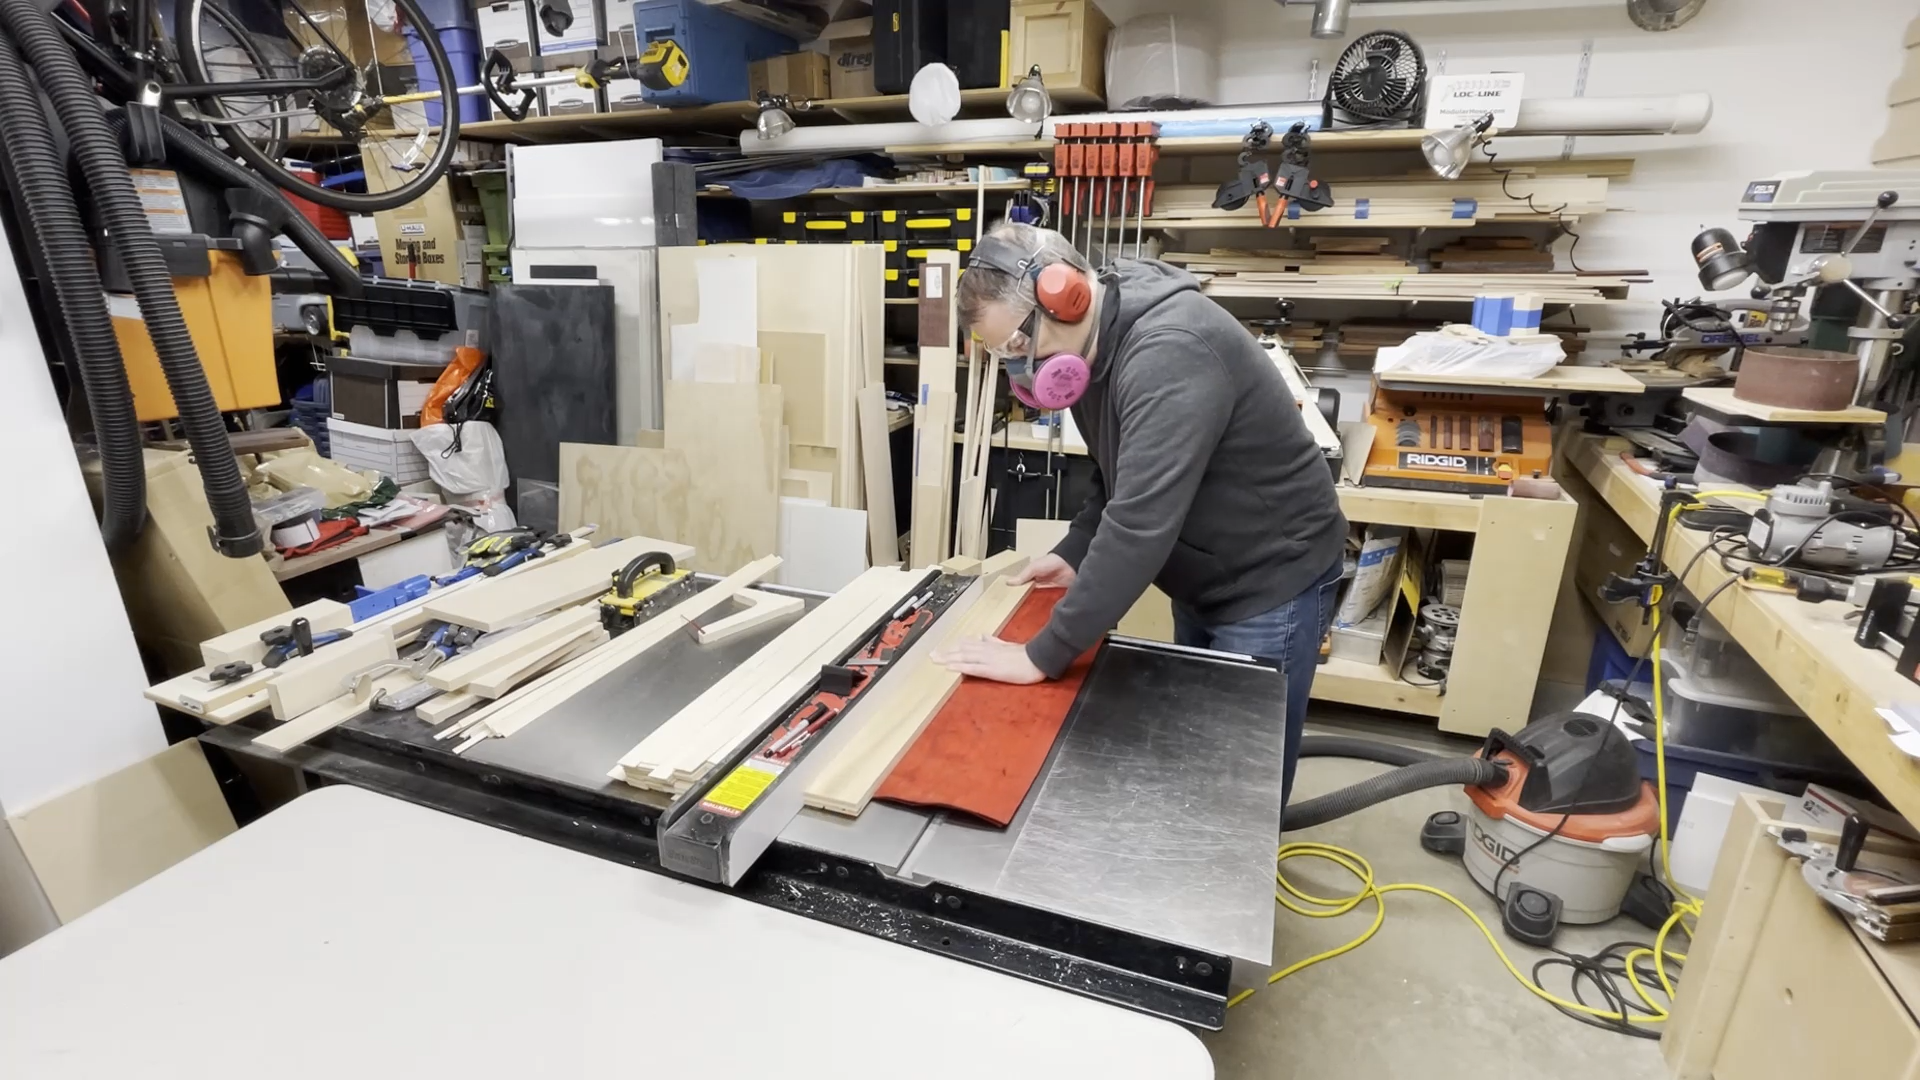
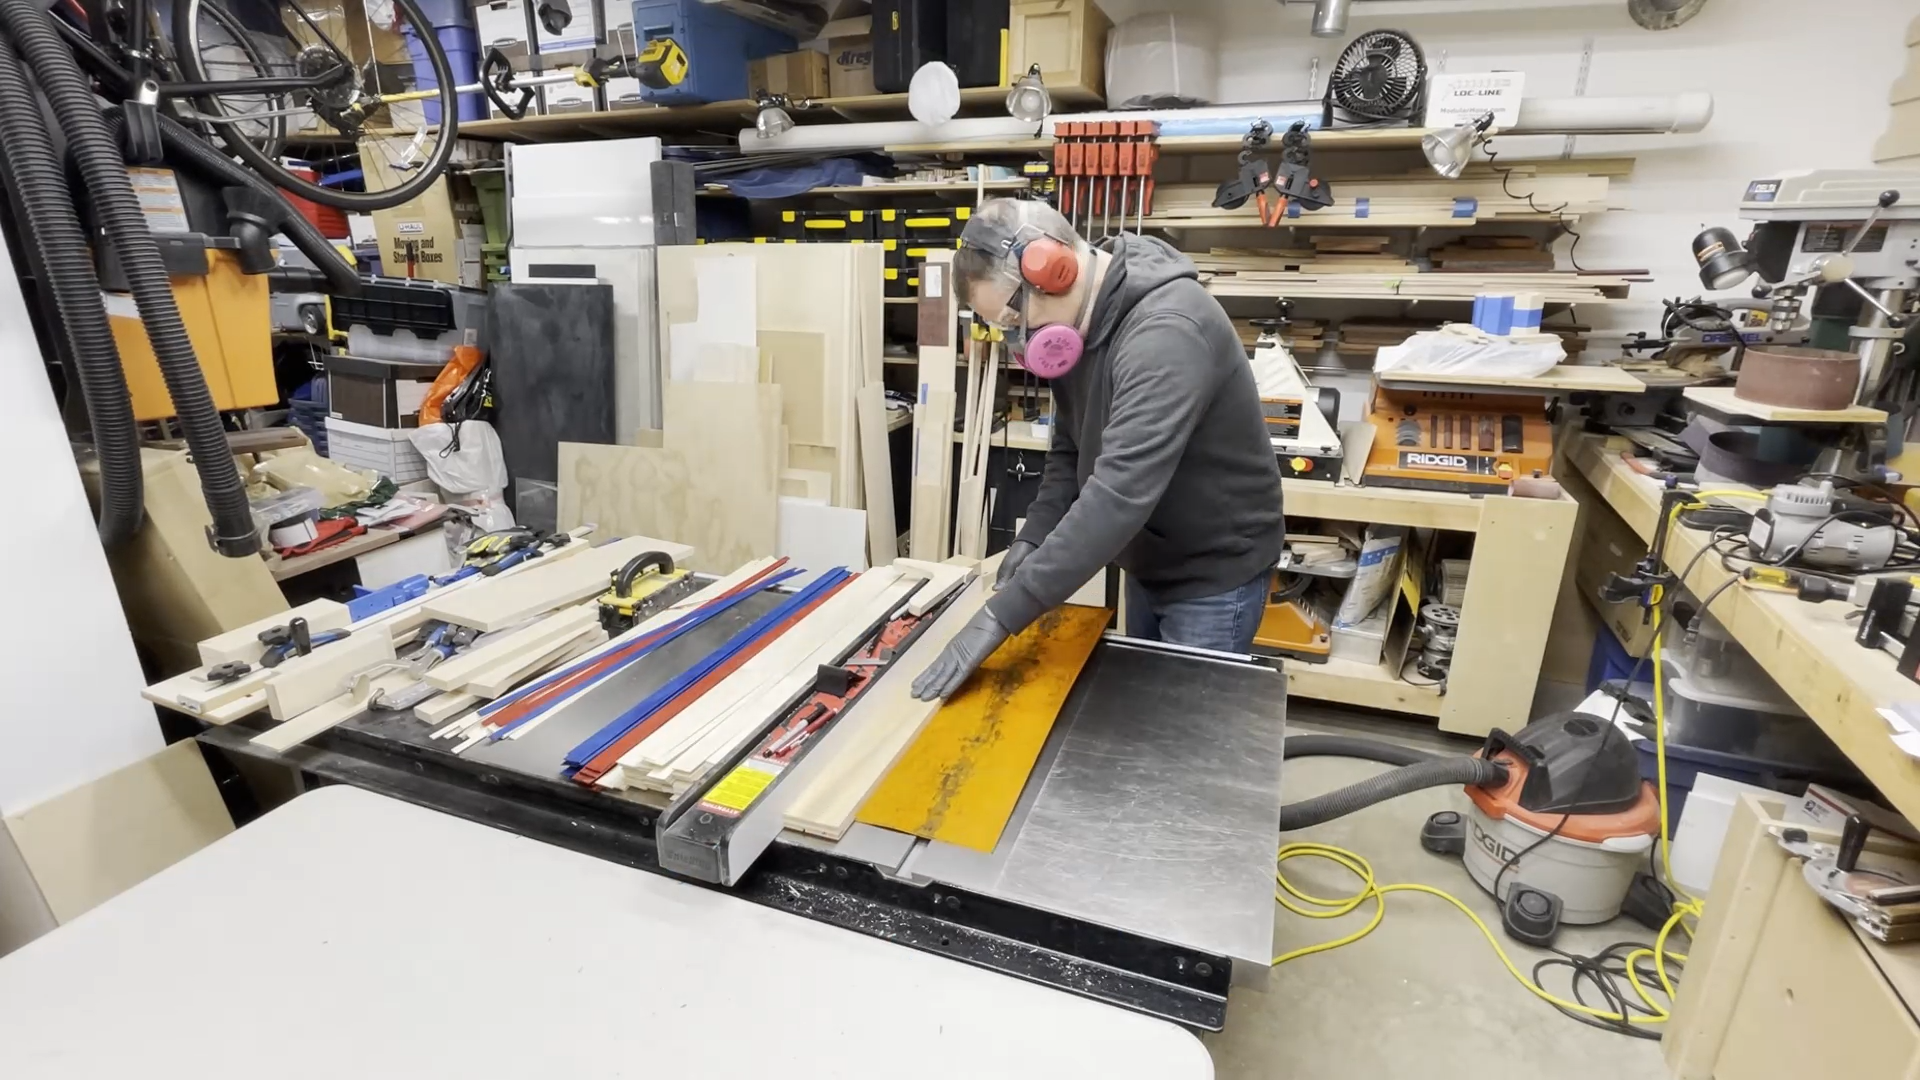
Now that the sample piece turned out great it was time to start getting the dyed skateboard veneer ready for the project. The veners were approximately 10" wide and 41" long.
I cut the overall length of the dyed veneers to 31". With the final piece being 29" long, this would give plenty of length to the glued up pieces that I could cut a 29" long section out of the glue up for this project.
I cut the veneers to a width of 1-1/8" wide so I could have some additional thickness in the board that could be removed during the flattening process.
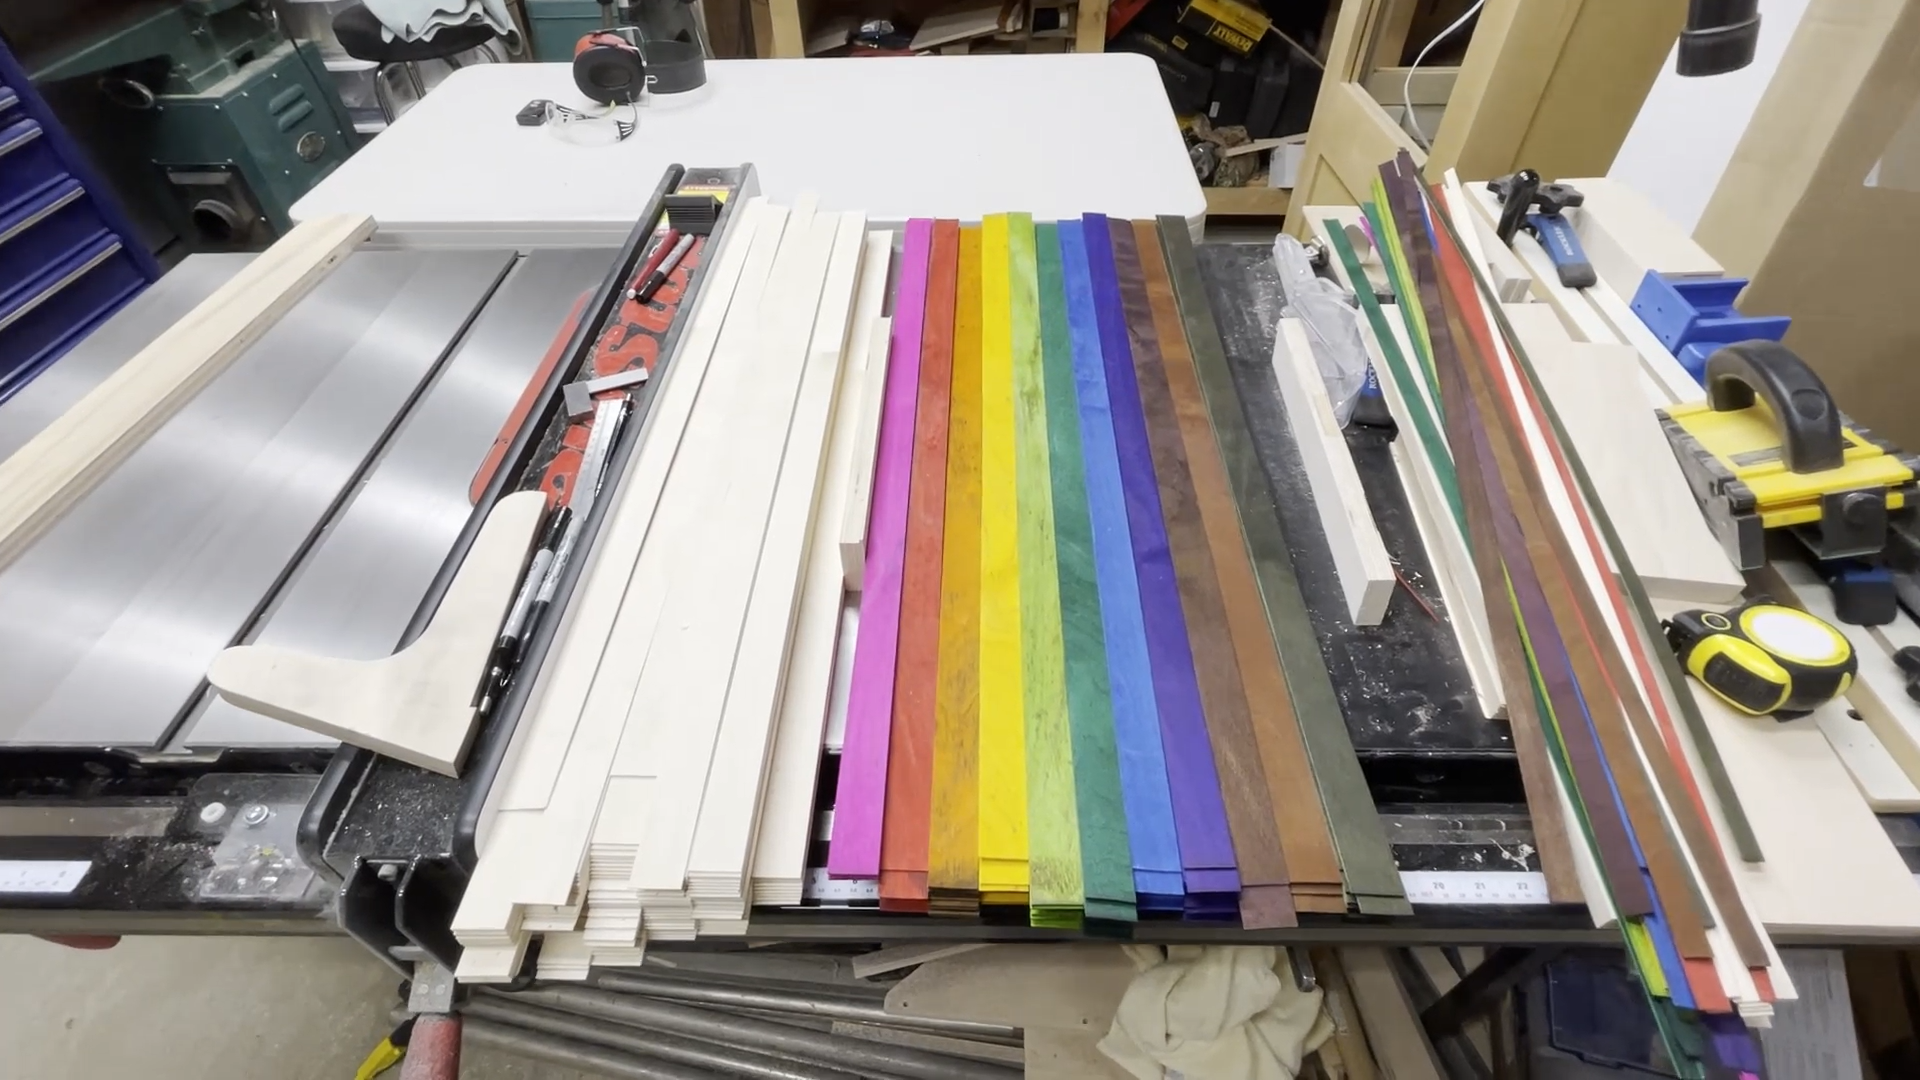
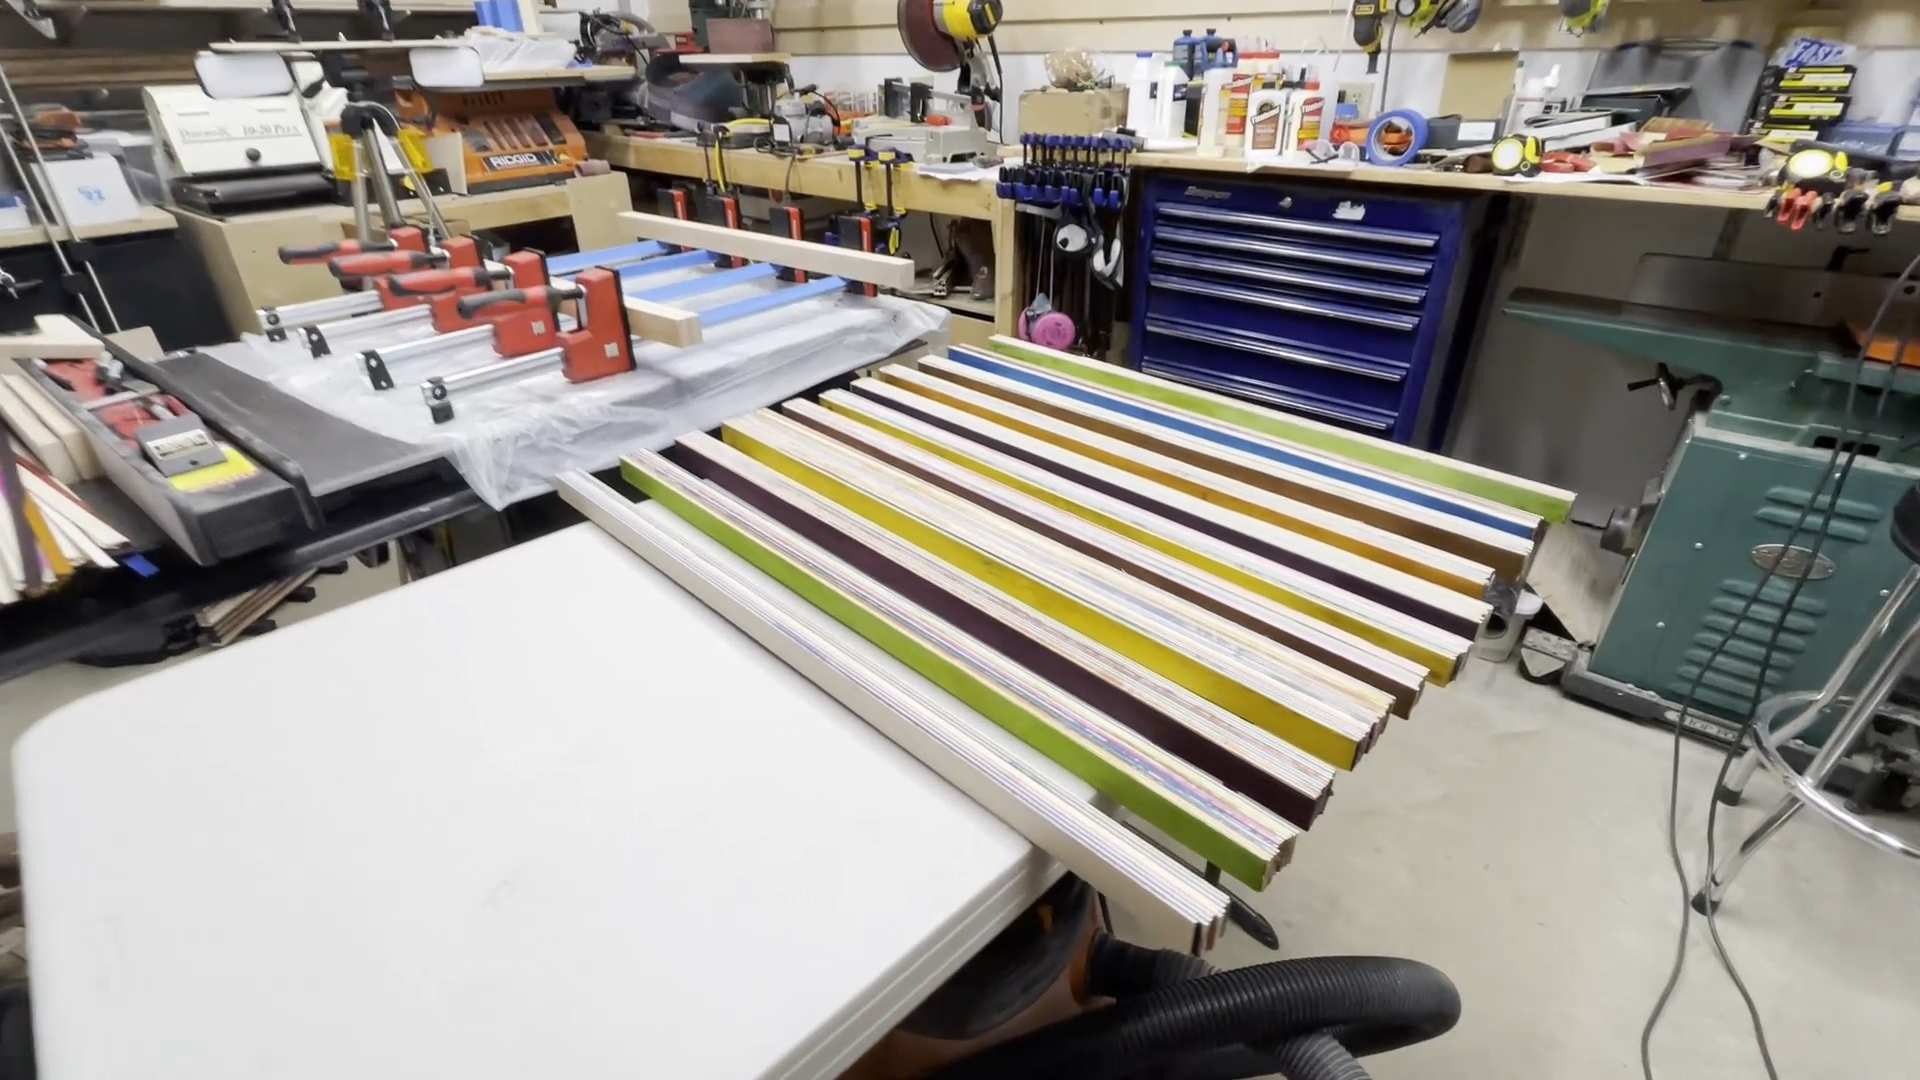
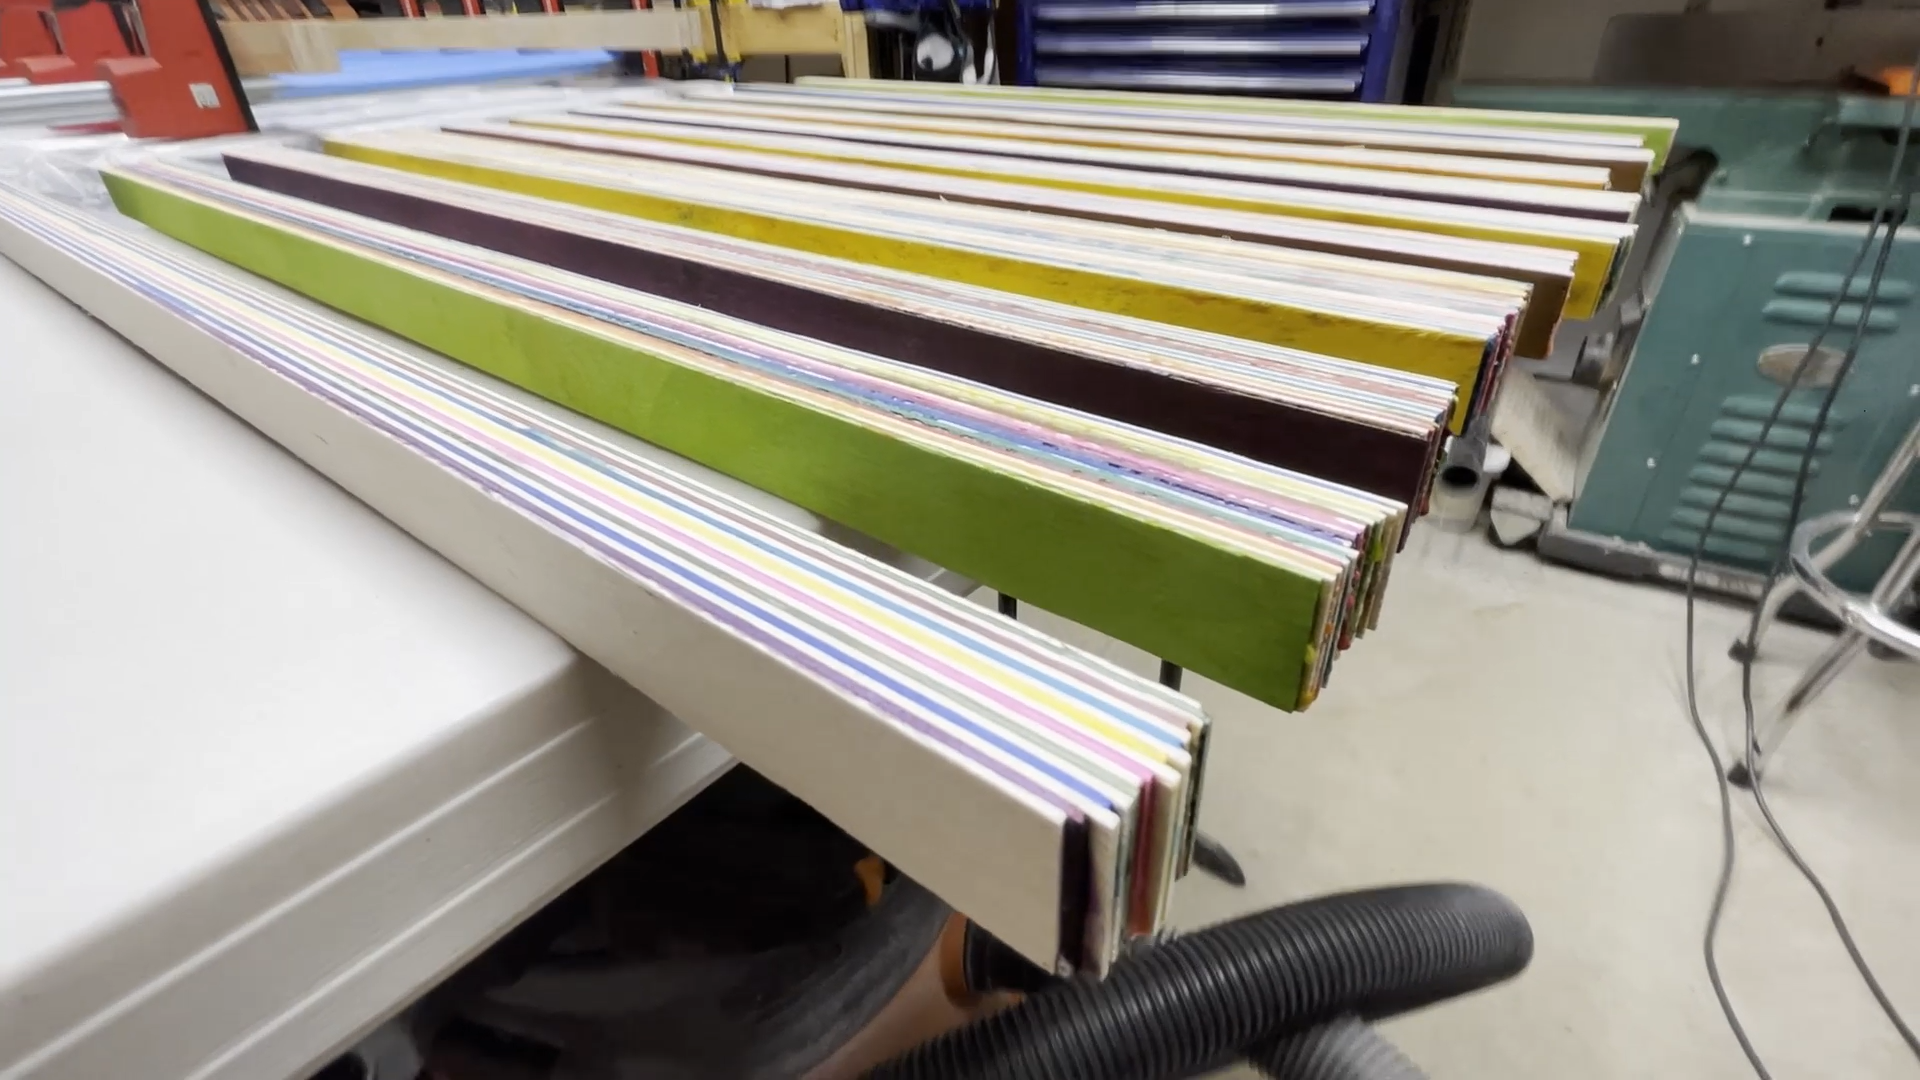
Step 8: Create Random Pattern of Veneer Strips

The people I was making this for wanted to have a random pattern in the veneer so I took stacks of one strip of every color and the same number of plain maple veneer and randomly stacked the strips until I had used all of the strips for that section. Since I had eleven different color strips and every other strip was plain maple, I had 2 pieces of 1/16" thick veneer in each section.
We went with every other layer being that of a plain maple color veneer. We didn't want to have two color pieces together as we though that would create a darker background for the linework and logo.
After assembling all of the strips of wood in a random order I used a clamp to hold them all together before I glued them together.
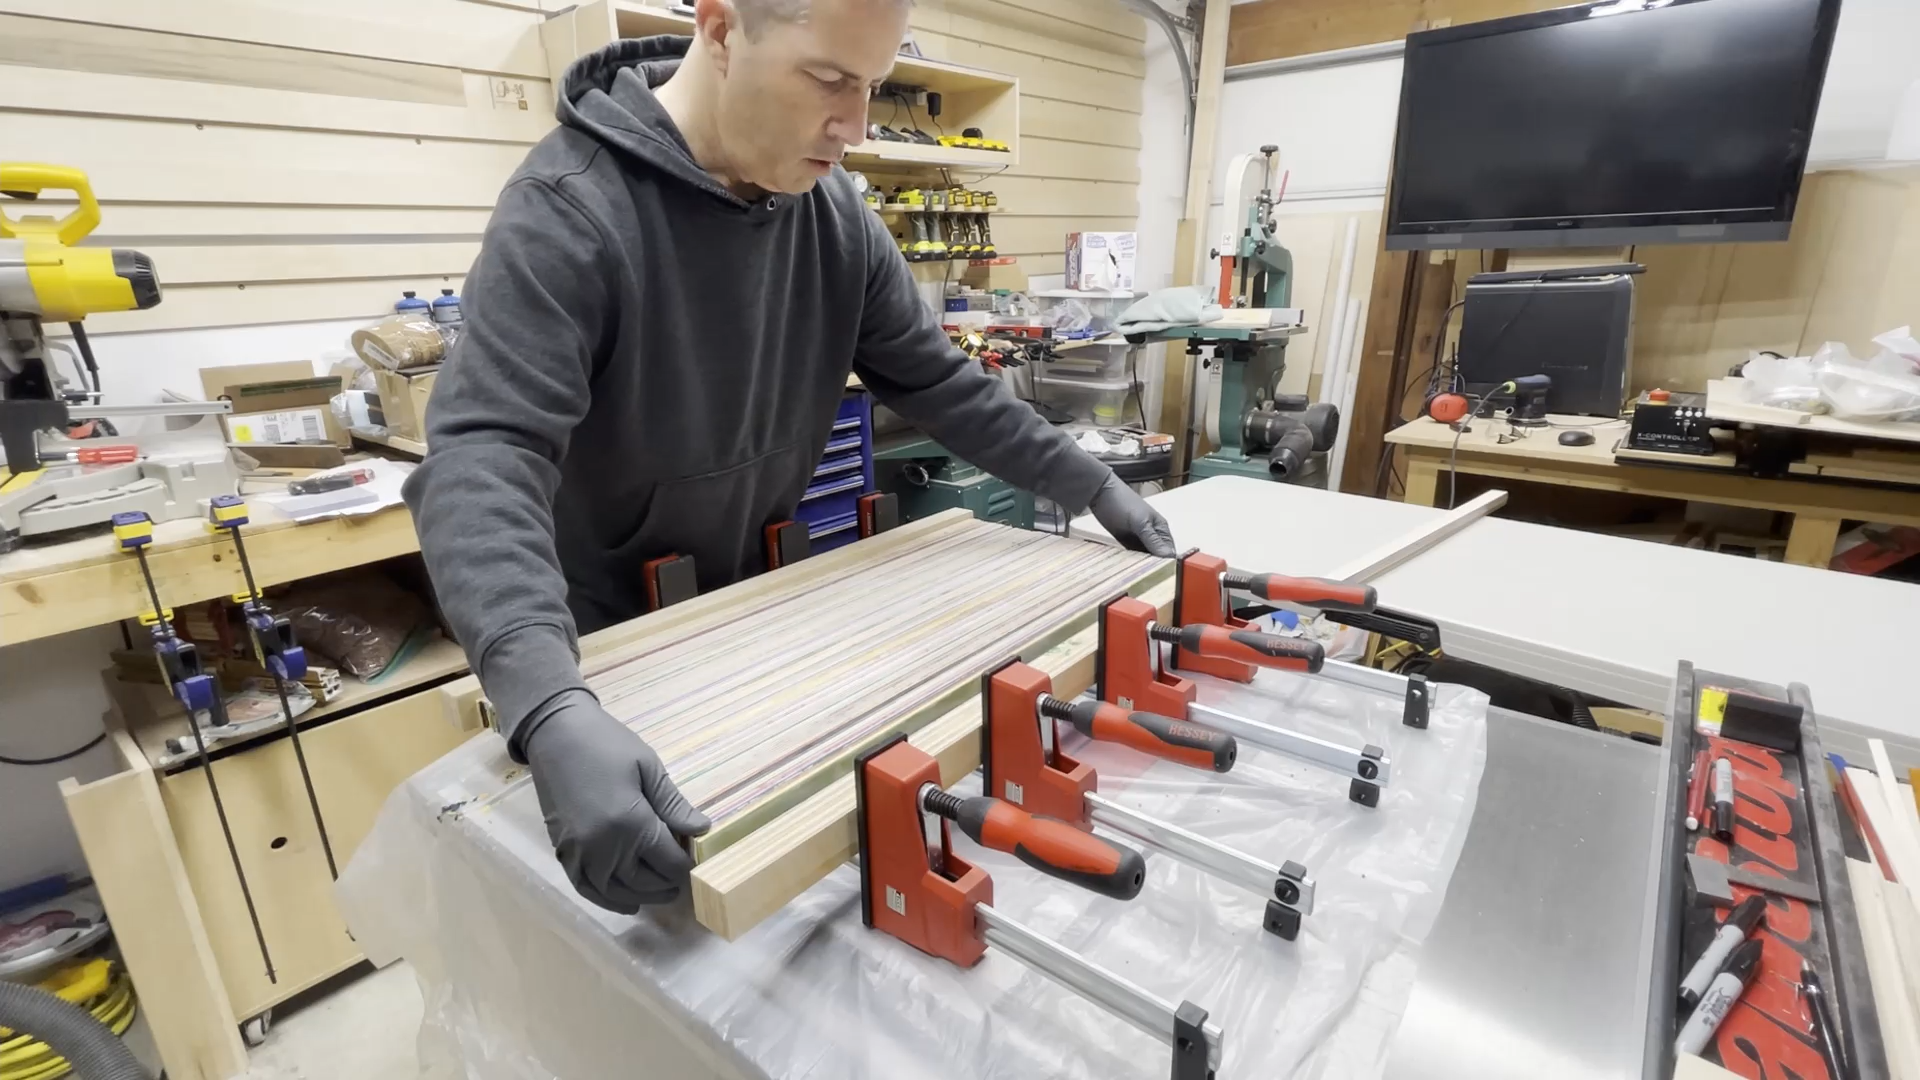
Step 9: Glue Together Sections of Veneer
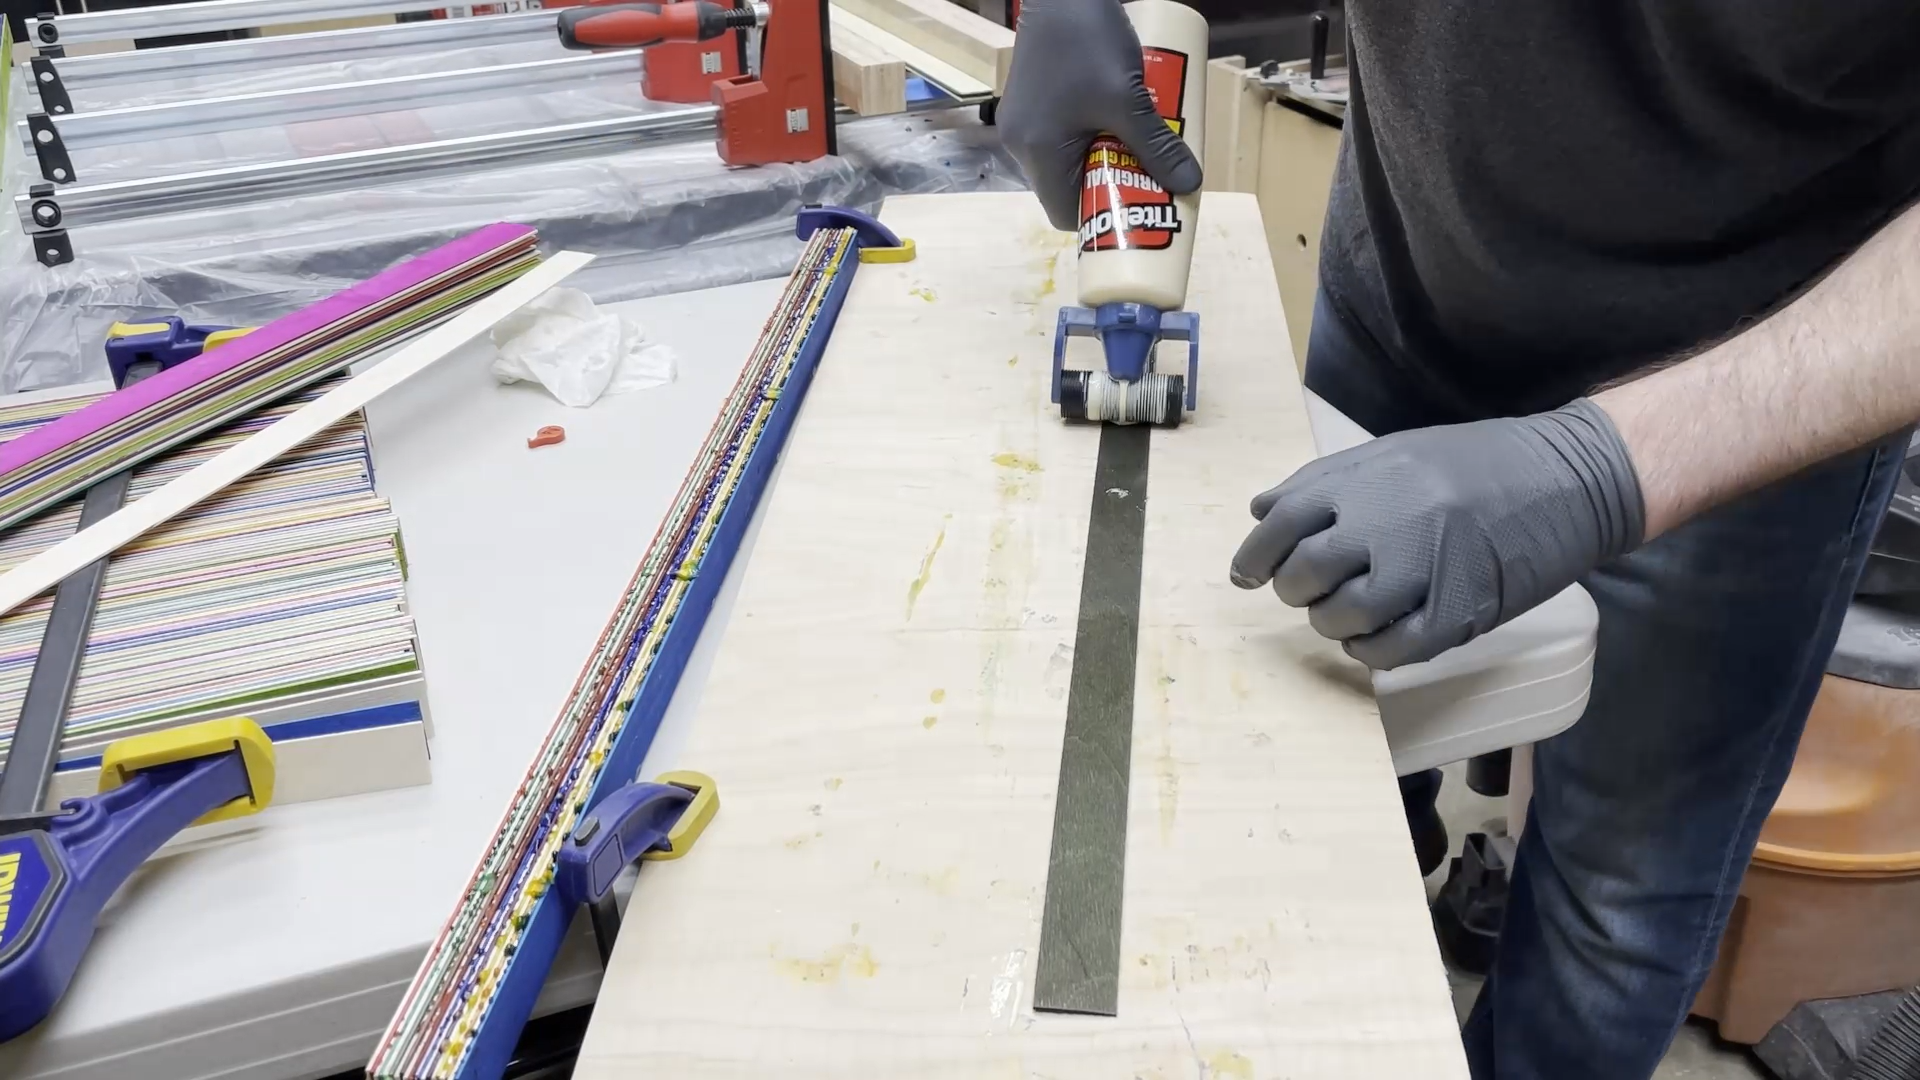
I made two pieces of wood out of two strips of 3/4" thick plywood to use for clamping all of the veneer strips together. I covered the side facing the veneer layers being glued with packaging tape. This gives you an extra slick surface that any glue squeeze out will not stick to.
I determined that I could consistently glue together 22 layers of the veneer strips at a time before I got past the roughly 9 minute mark where the Titebond wood glue I was using might start setting up.
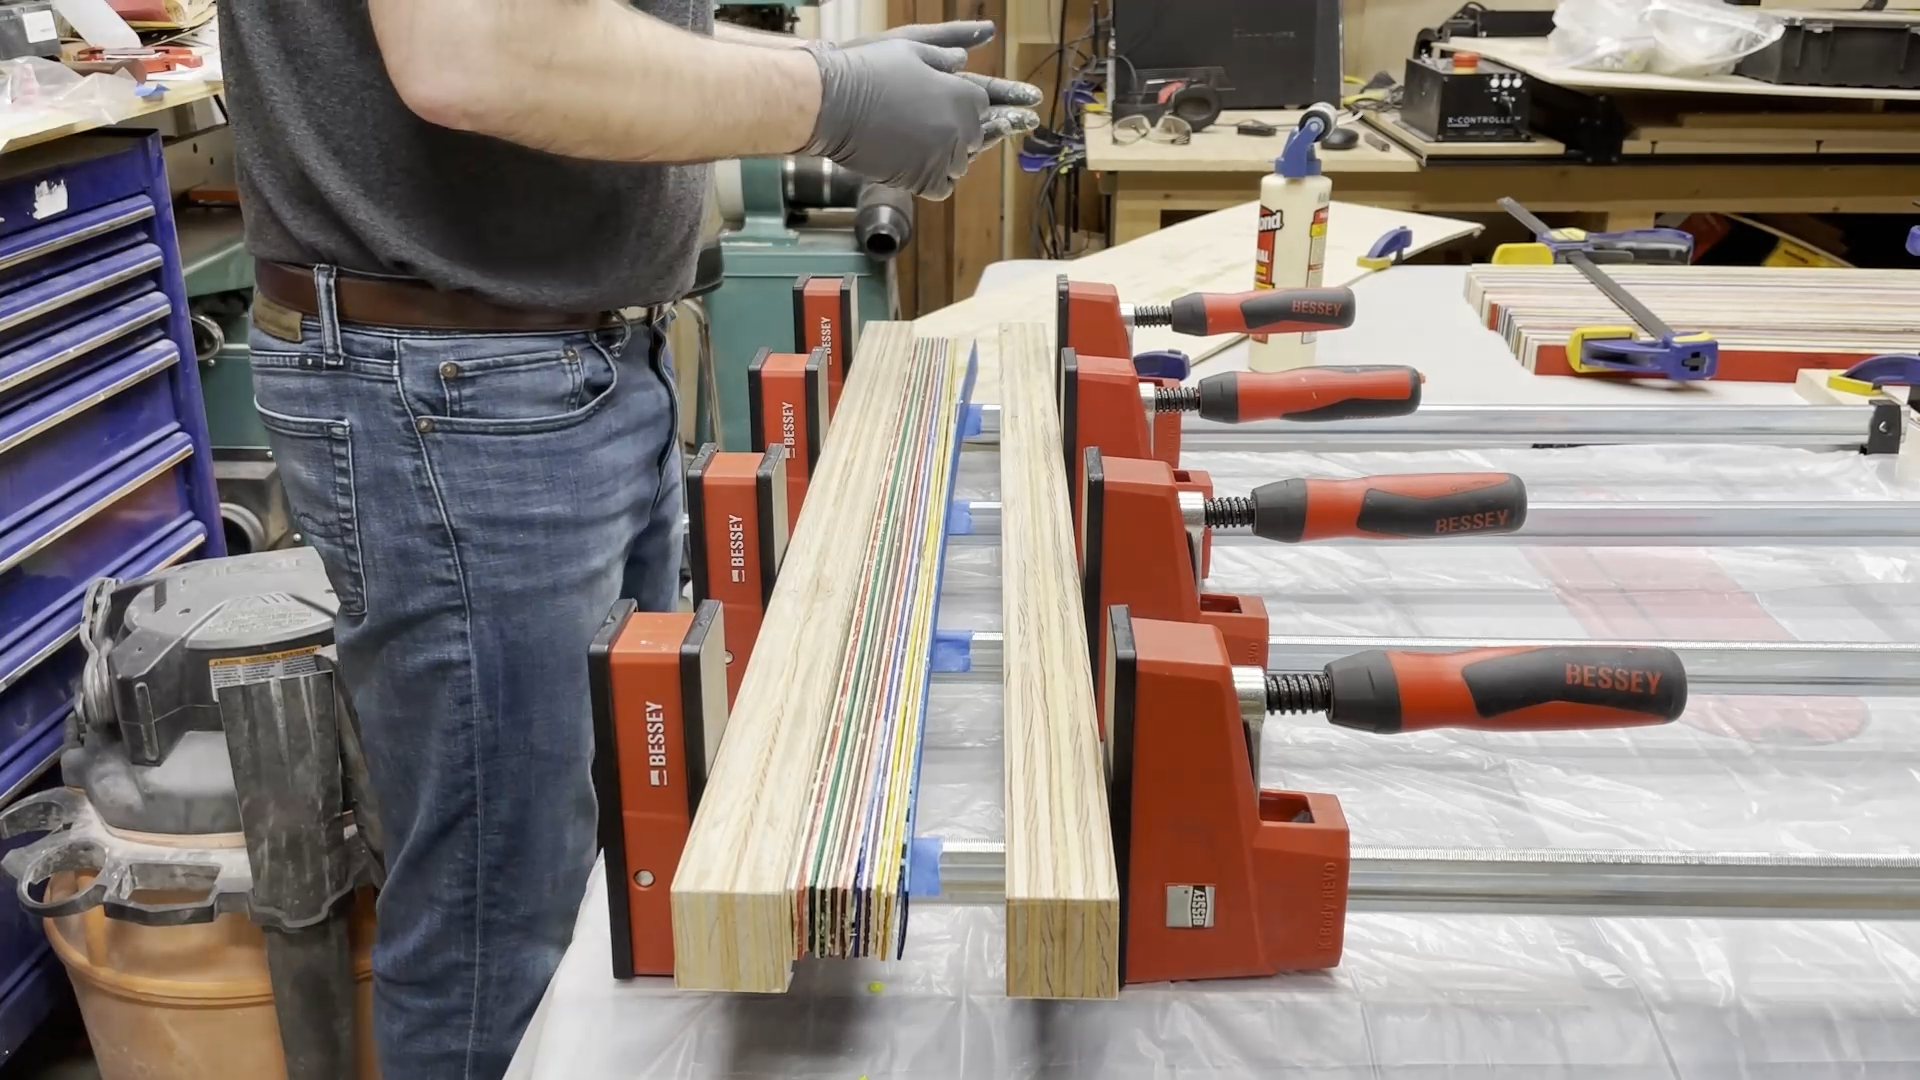
I pulled veneer pieces out of the clamp and glued them together in the same order. I stopped when I had enough sections of wood for the full height of the wood blank for the final piece. This ended up being 249 layers of veneer. I made sure to label each glued up section of veneer with a number so I knew what order the sections would need to be glued together in the next step.
Step 10: Glue All Sections Together to Make One Large Board
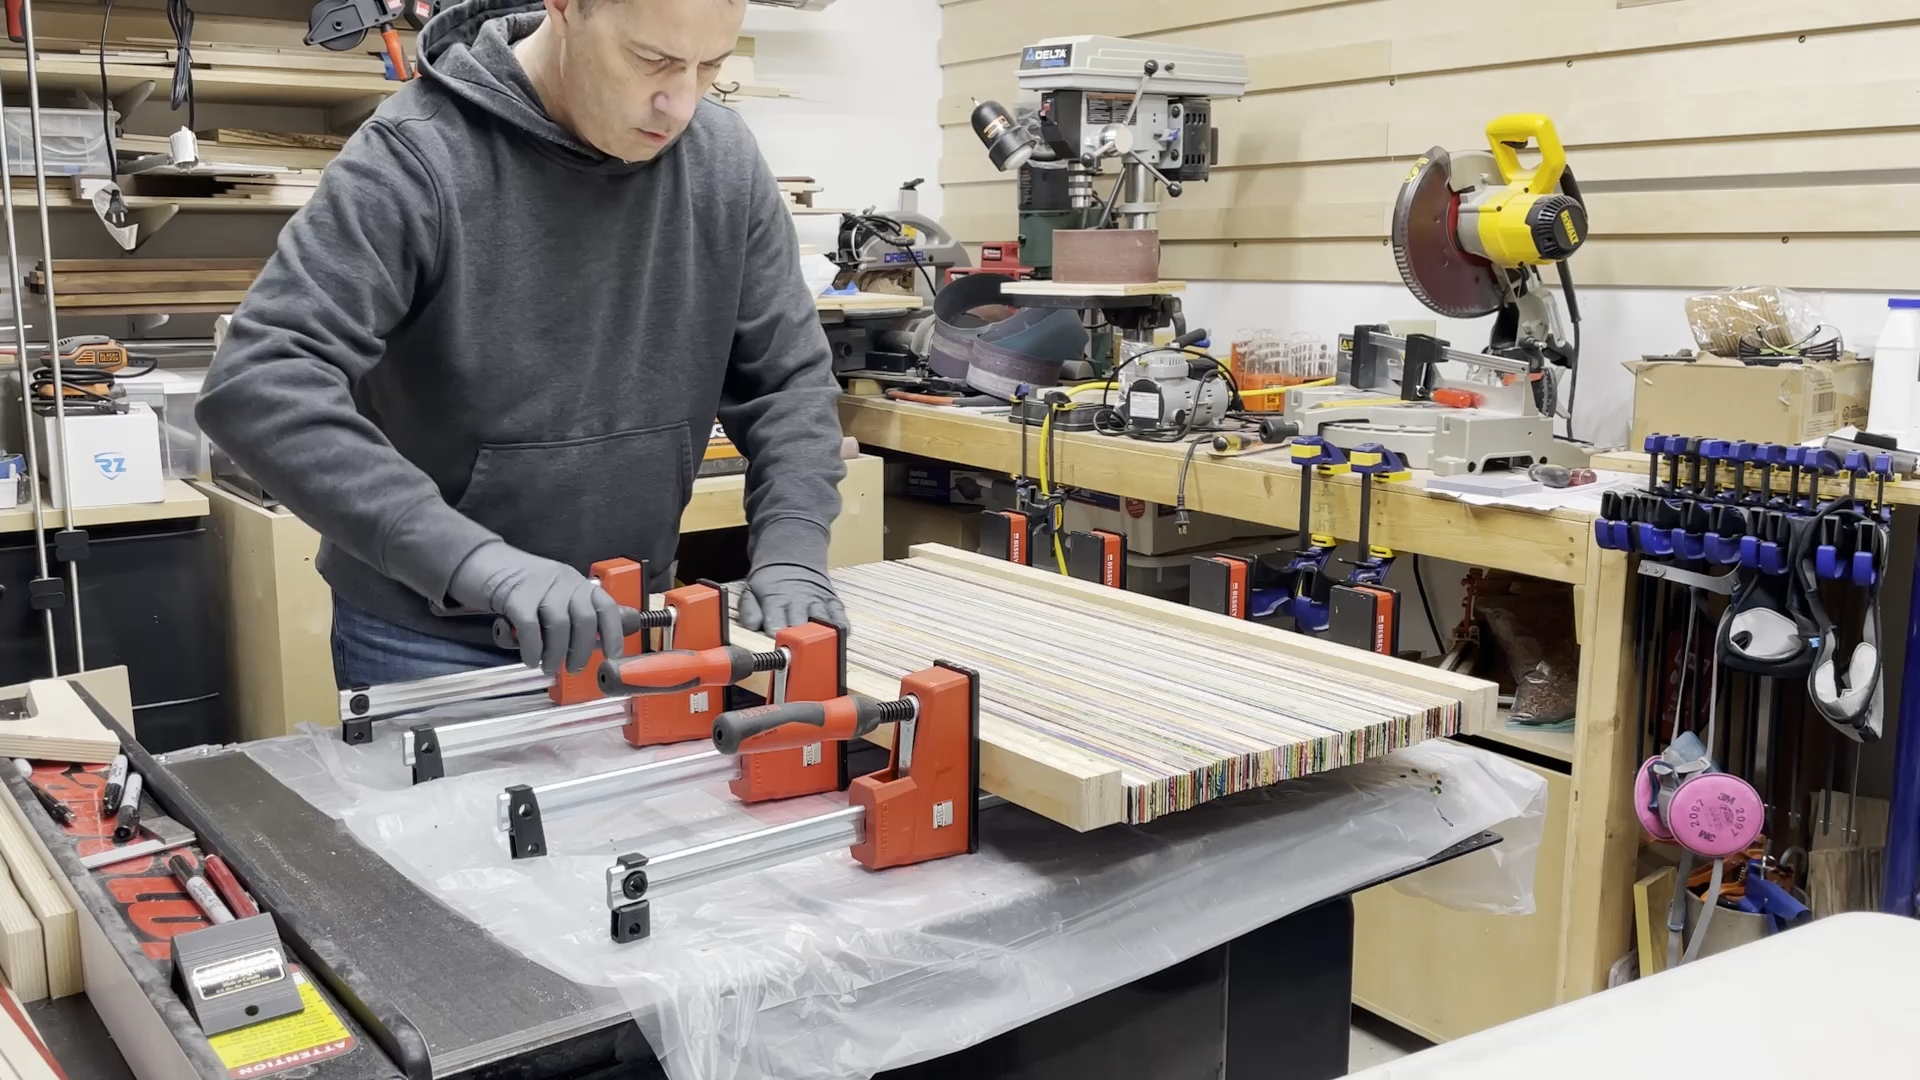
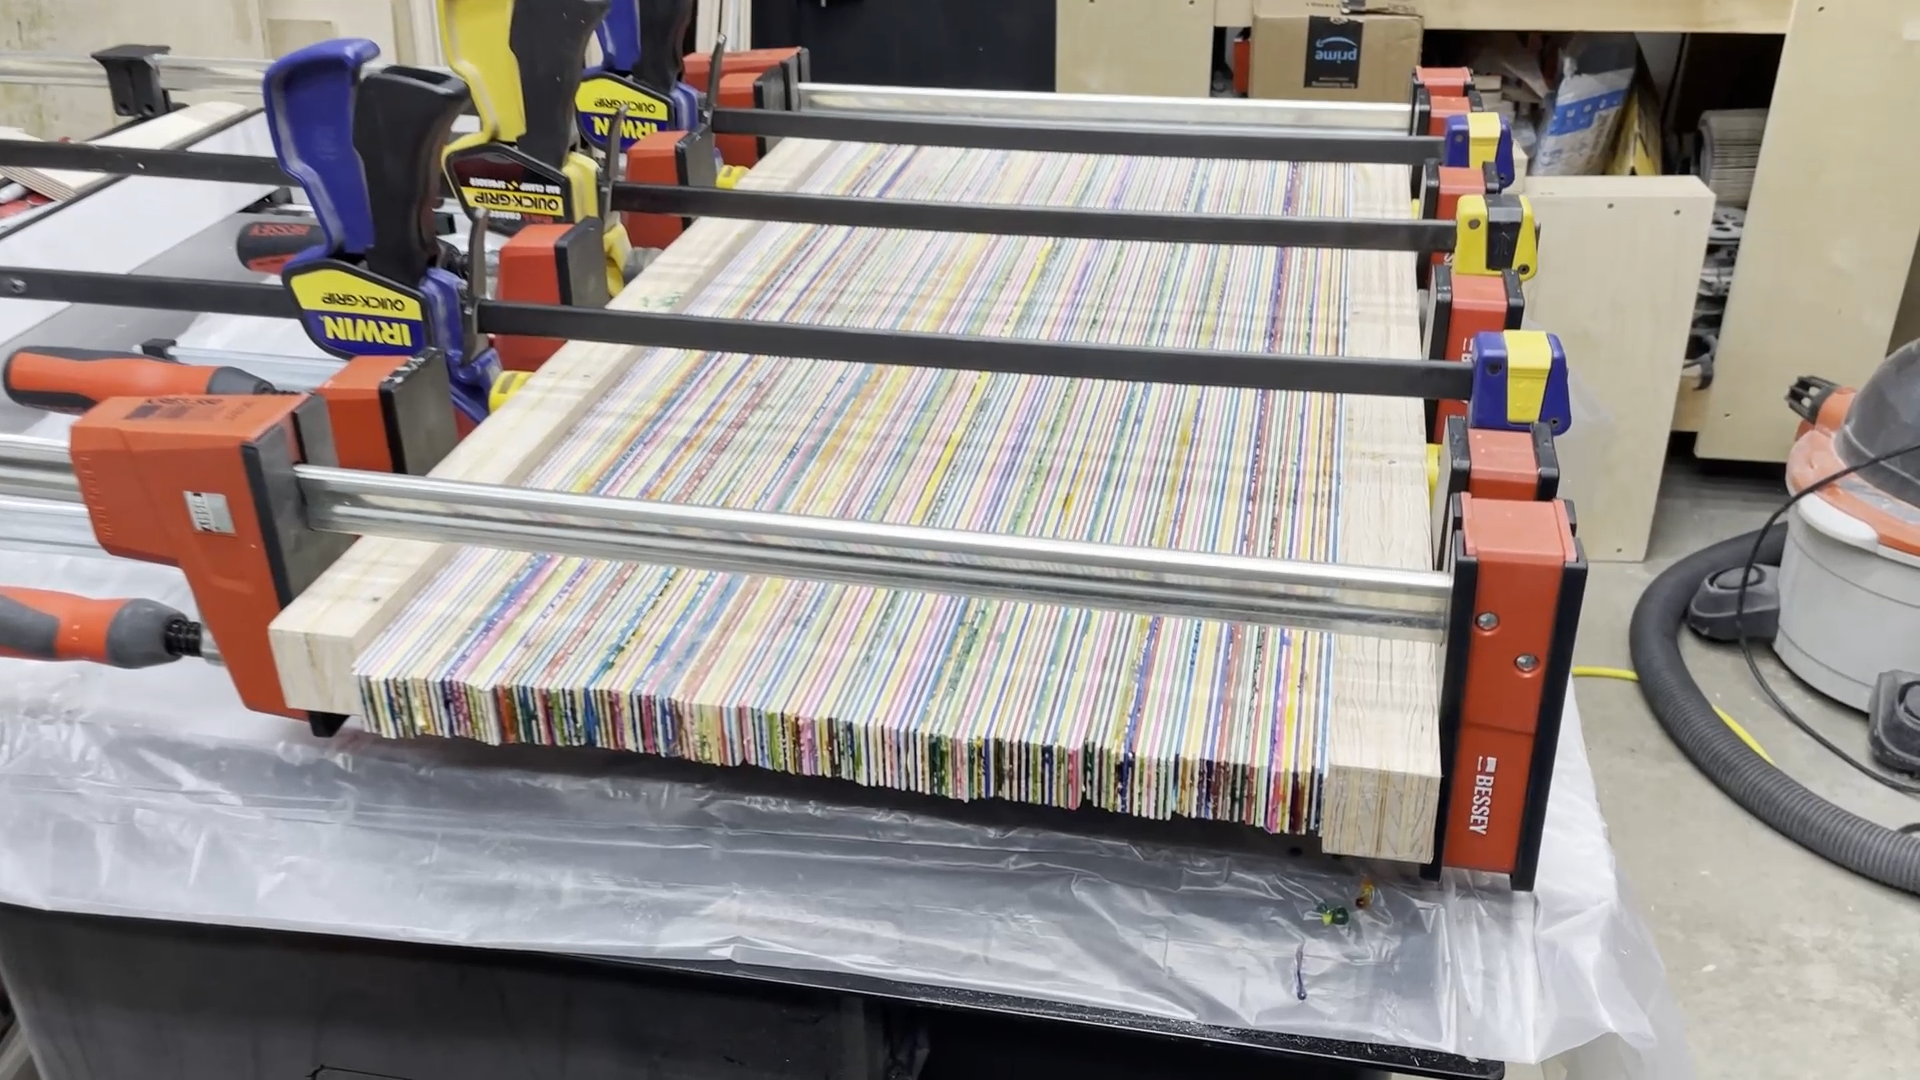
I took all of these smaller glued up sections of wood and gave them a light sanding where the sections would be glued together. I added glue to the sections and put them into the clamps to create the final large piece of skateboard veneer wood.
This is where having all of the sections labeled is necessary so we can keep everything in the original random order as planned.
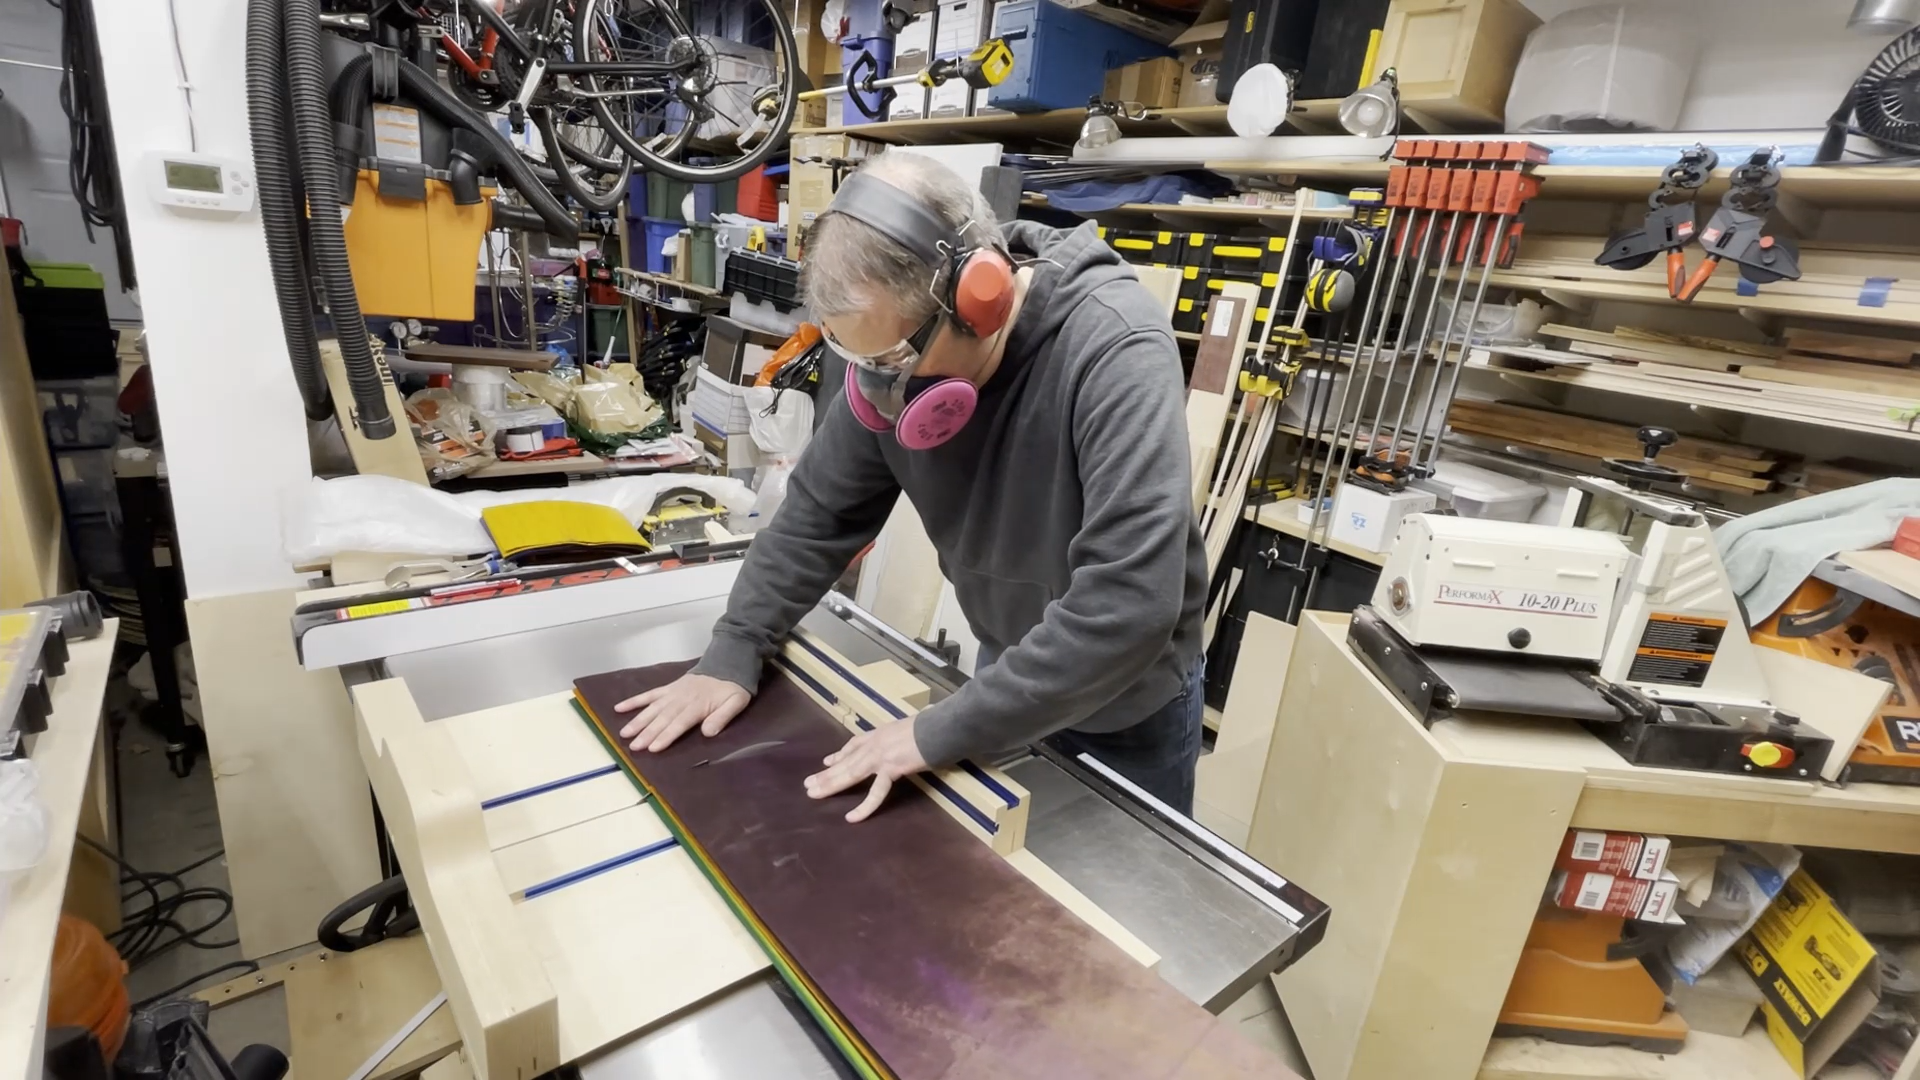
Step 11: Flatten Both Sides of the Board
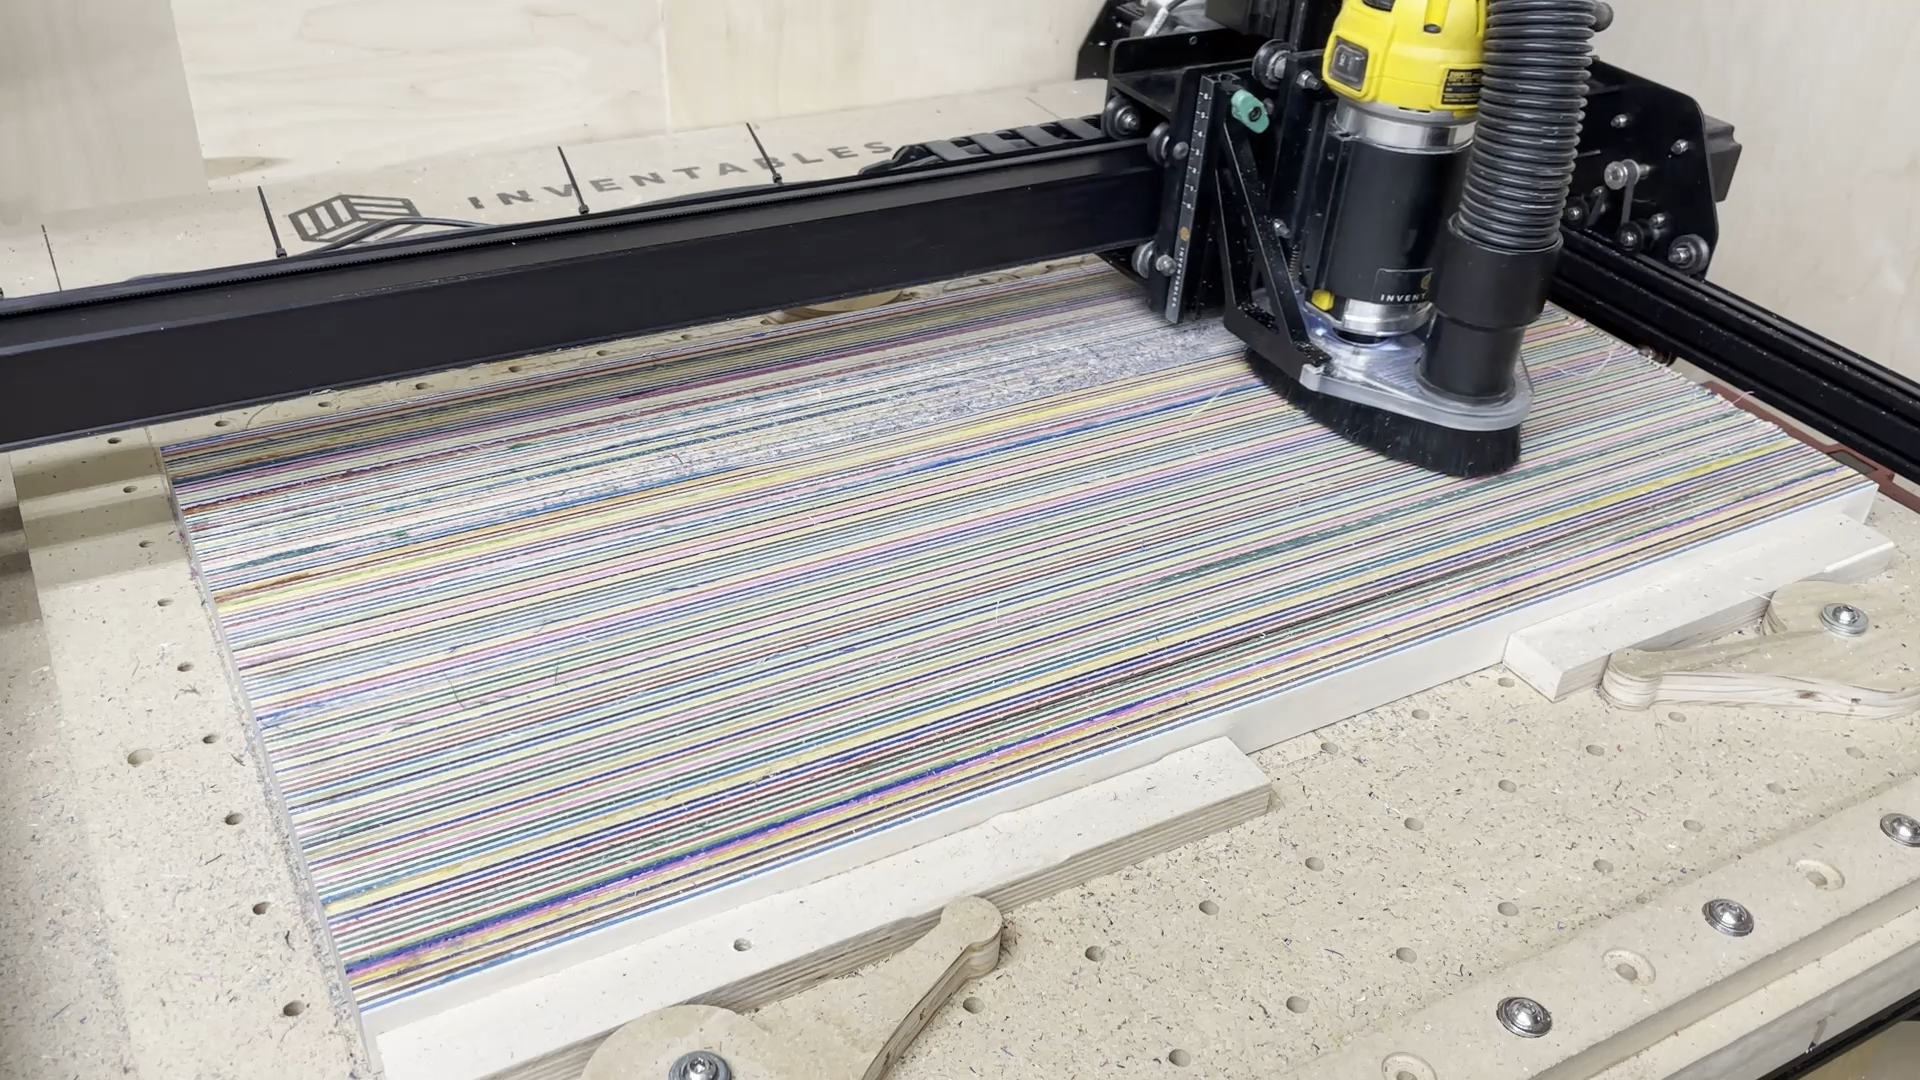
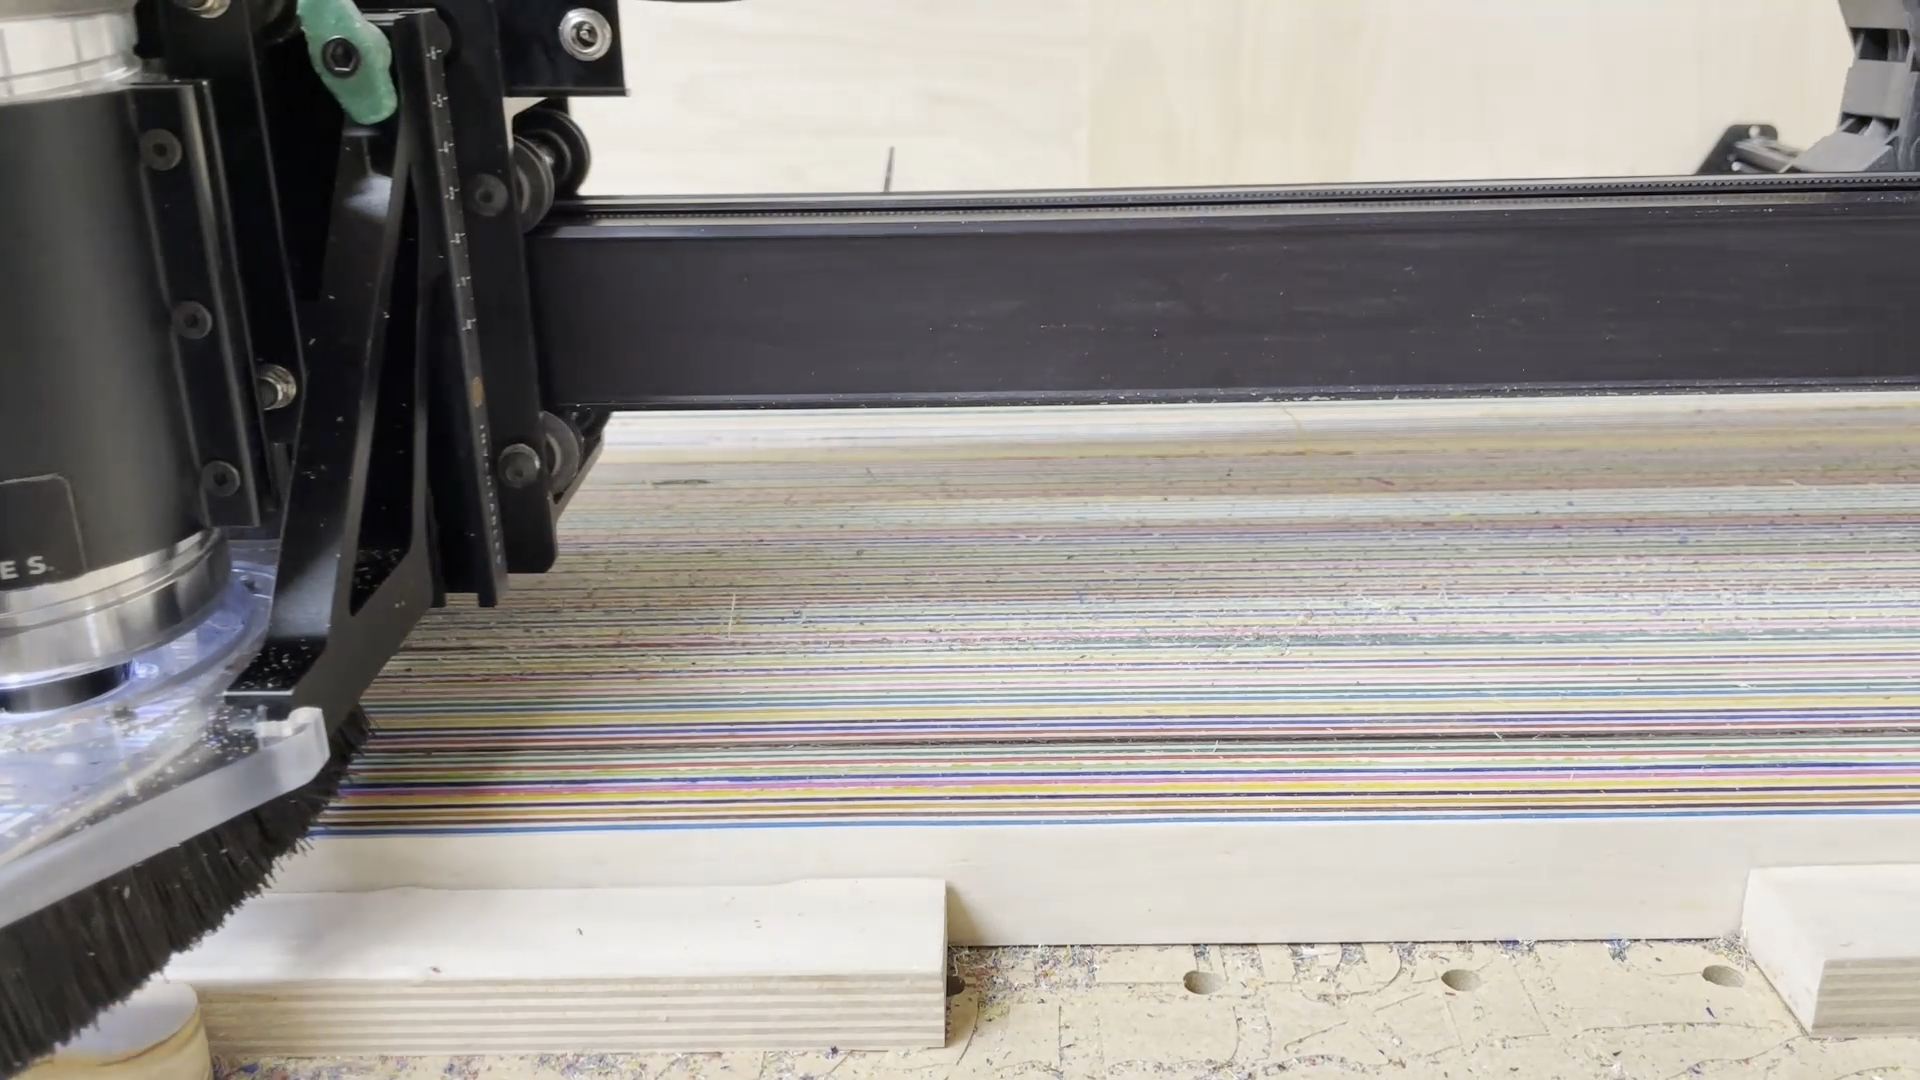
Just like with the sample piece of wood made with plywood, once the glue had dried I put it into the X-Carve CNC and flattened one side and then the other.
This time I did sand the surfaces with a random orbit sander after running the flattening bit to take care of the slight ridges that can be noticeable between the passes of the flattening bit.
I just went up to 180 grit on the sander as I would have to sand the surface again after pouring the epoxy and removing the excess material.
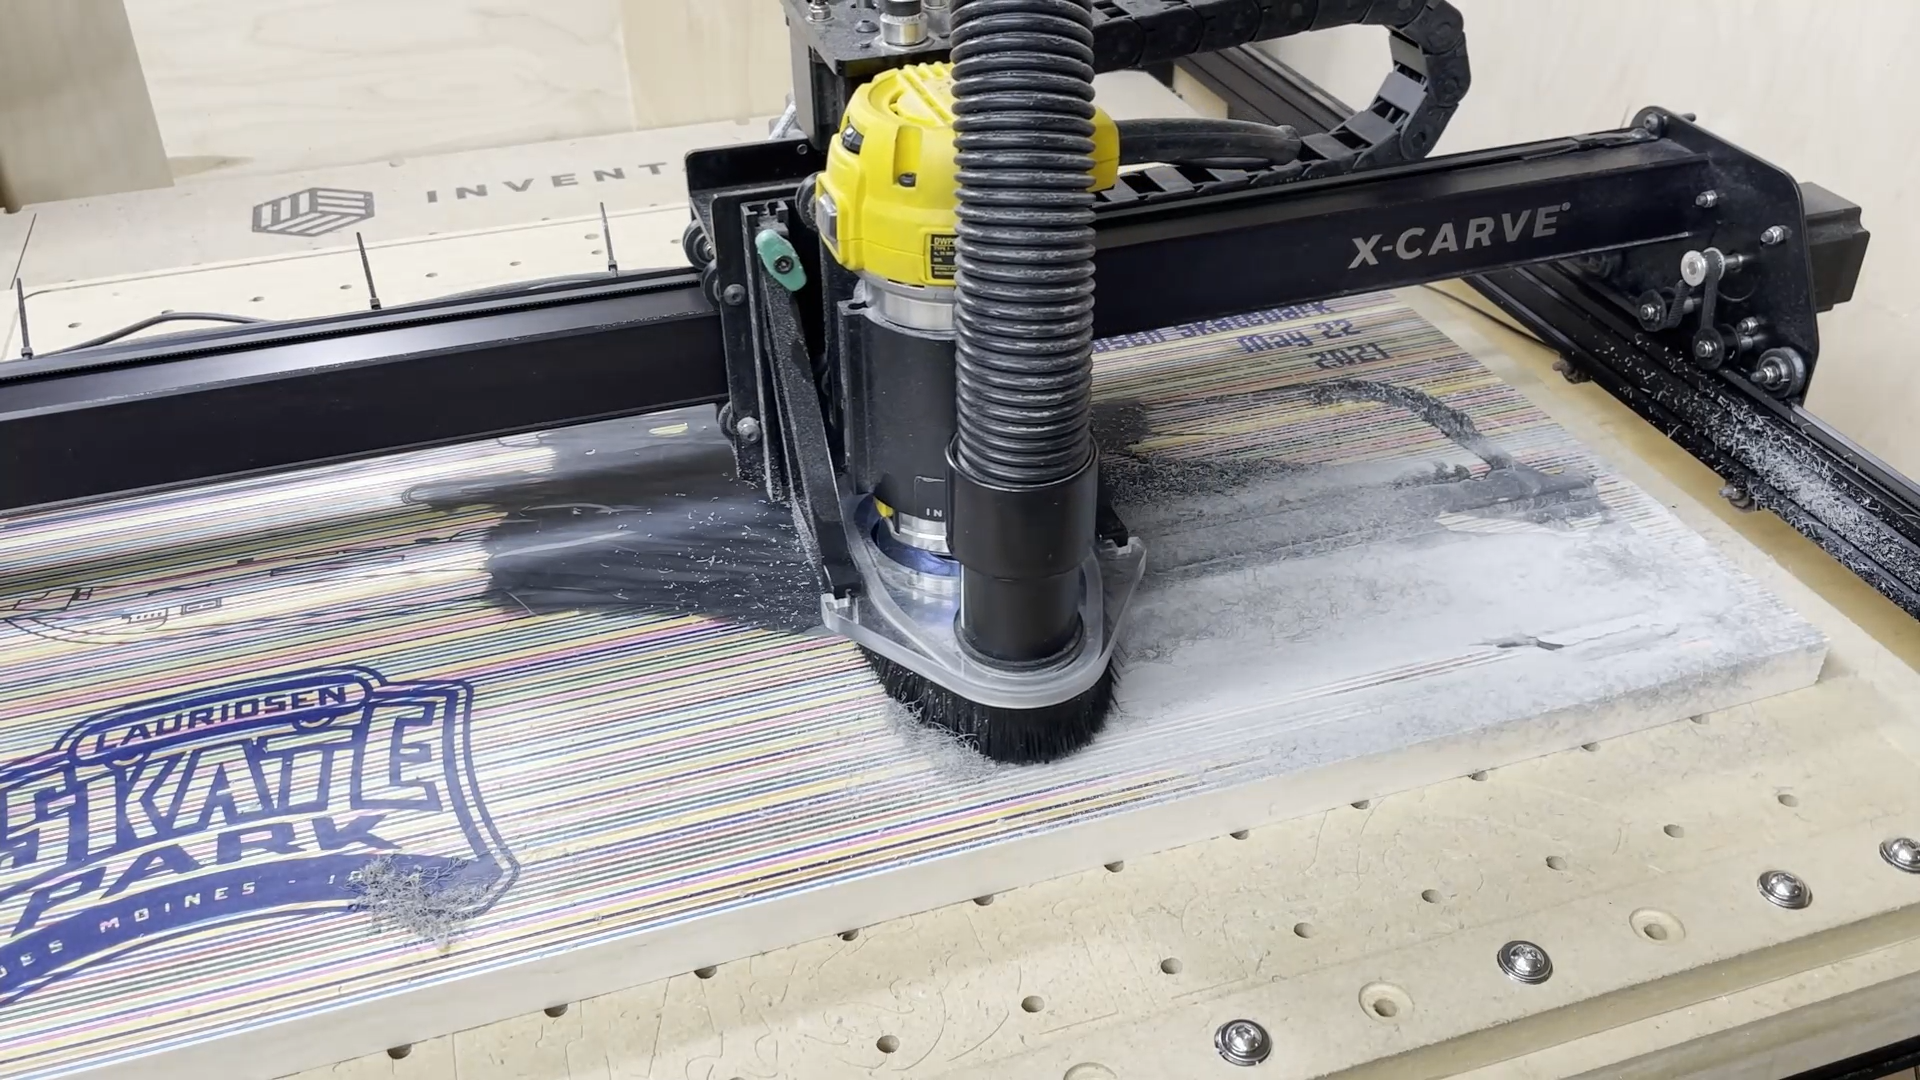
Step 12: Carve Design
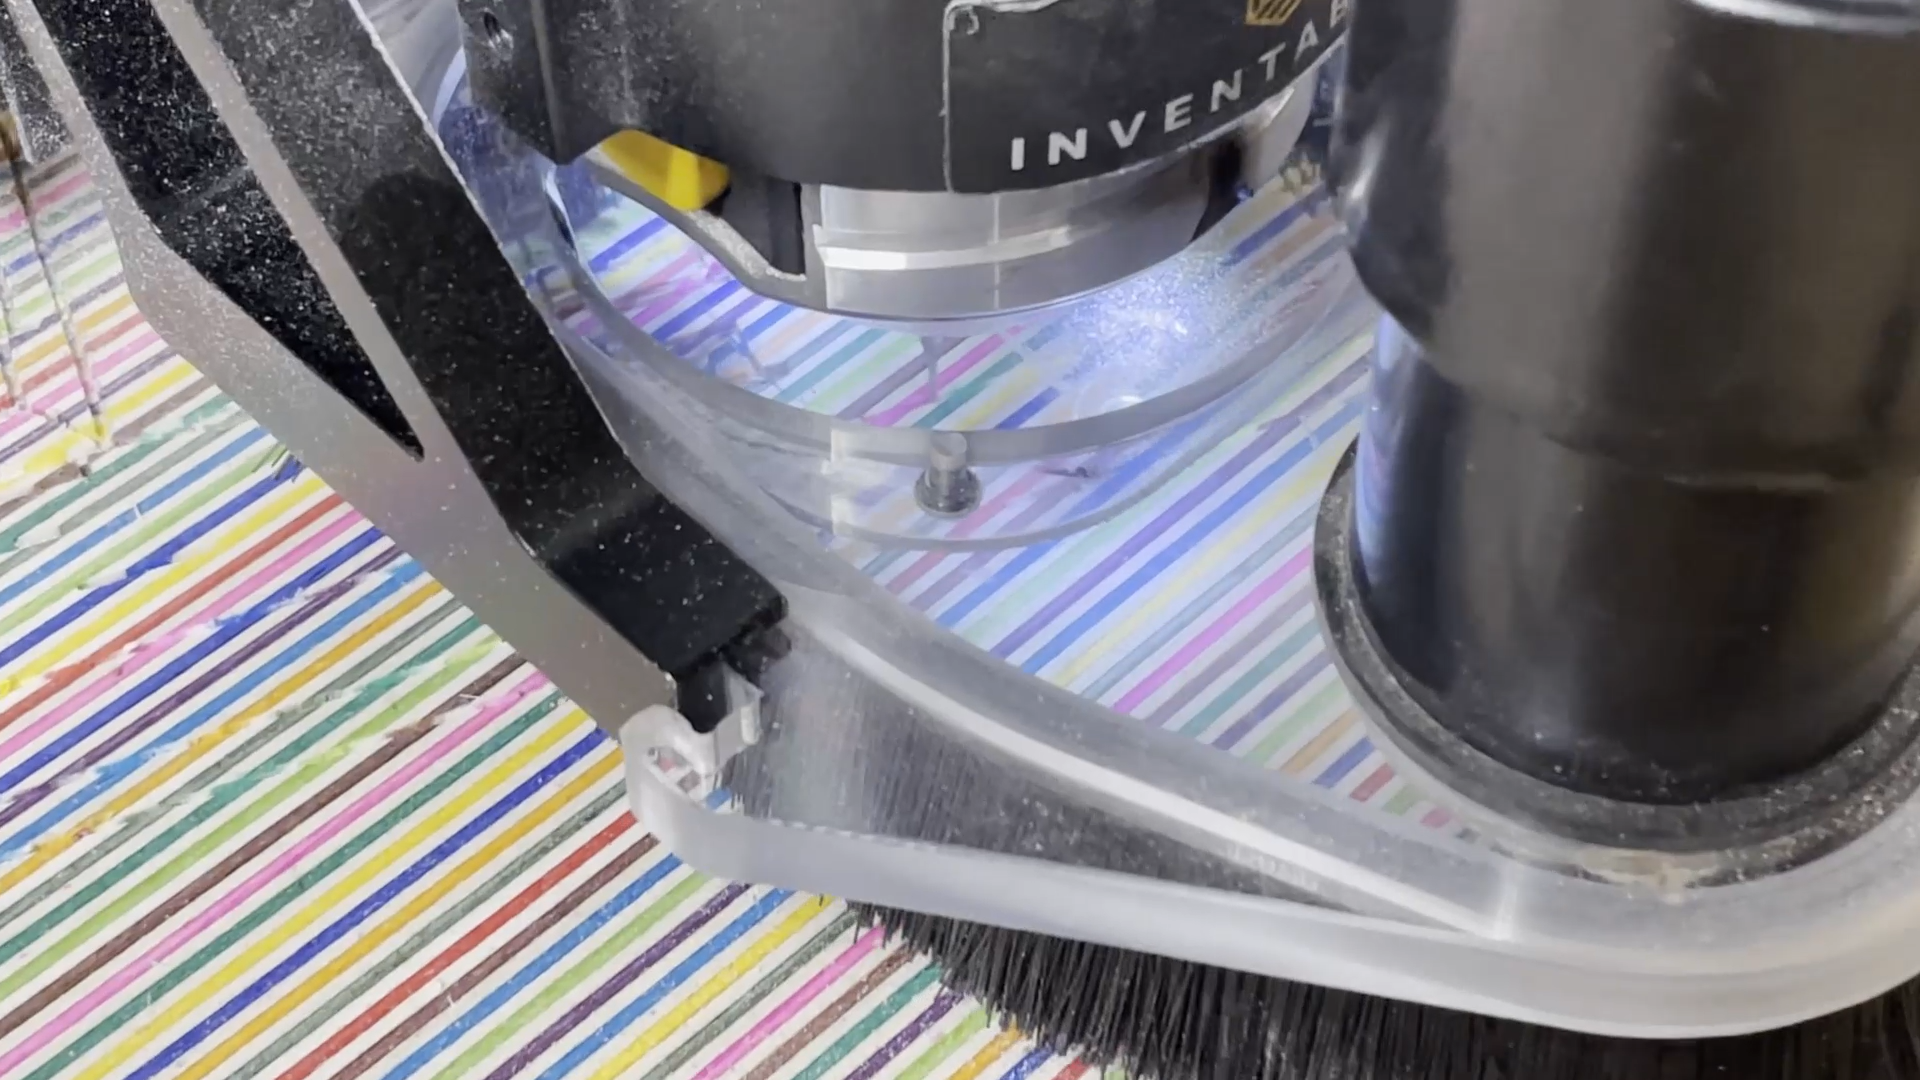
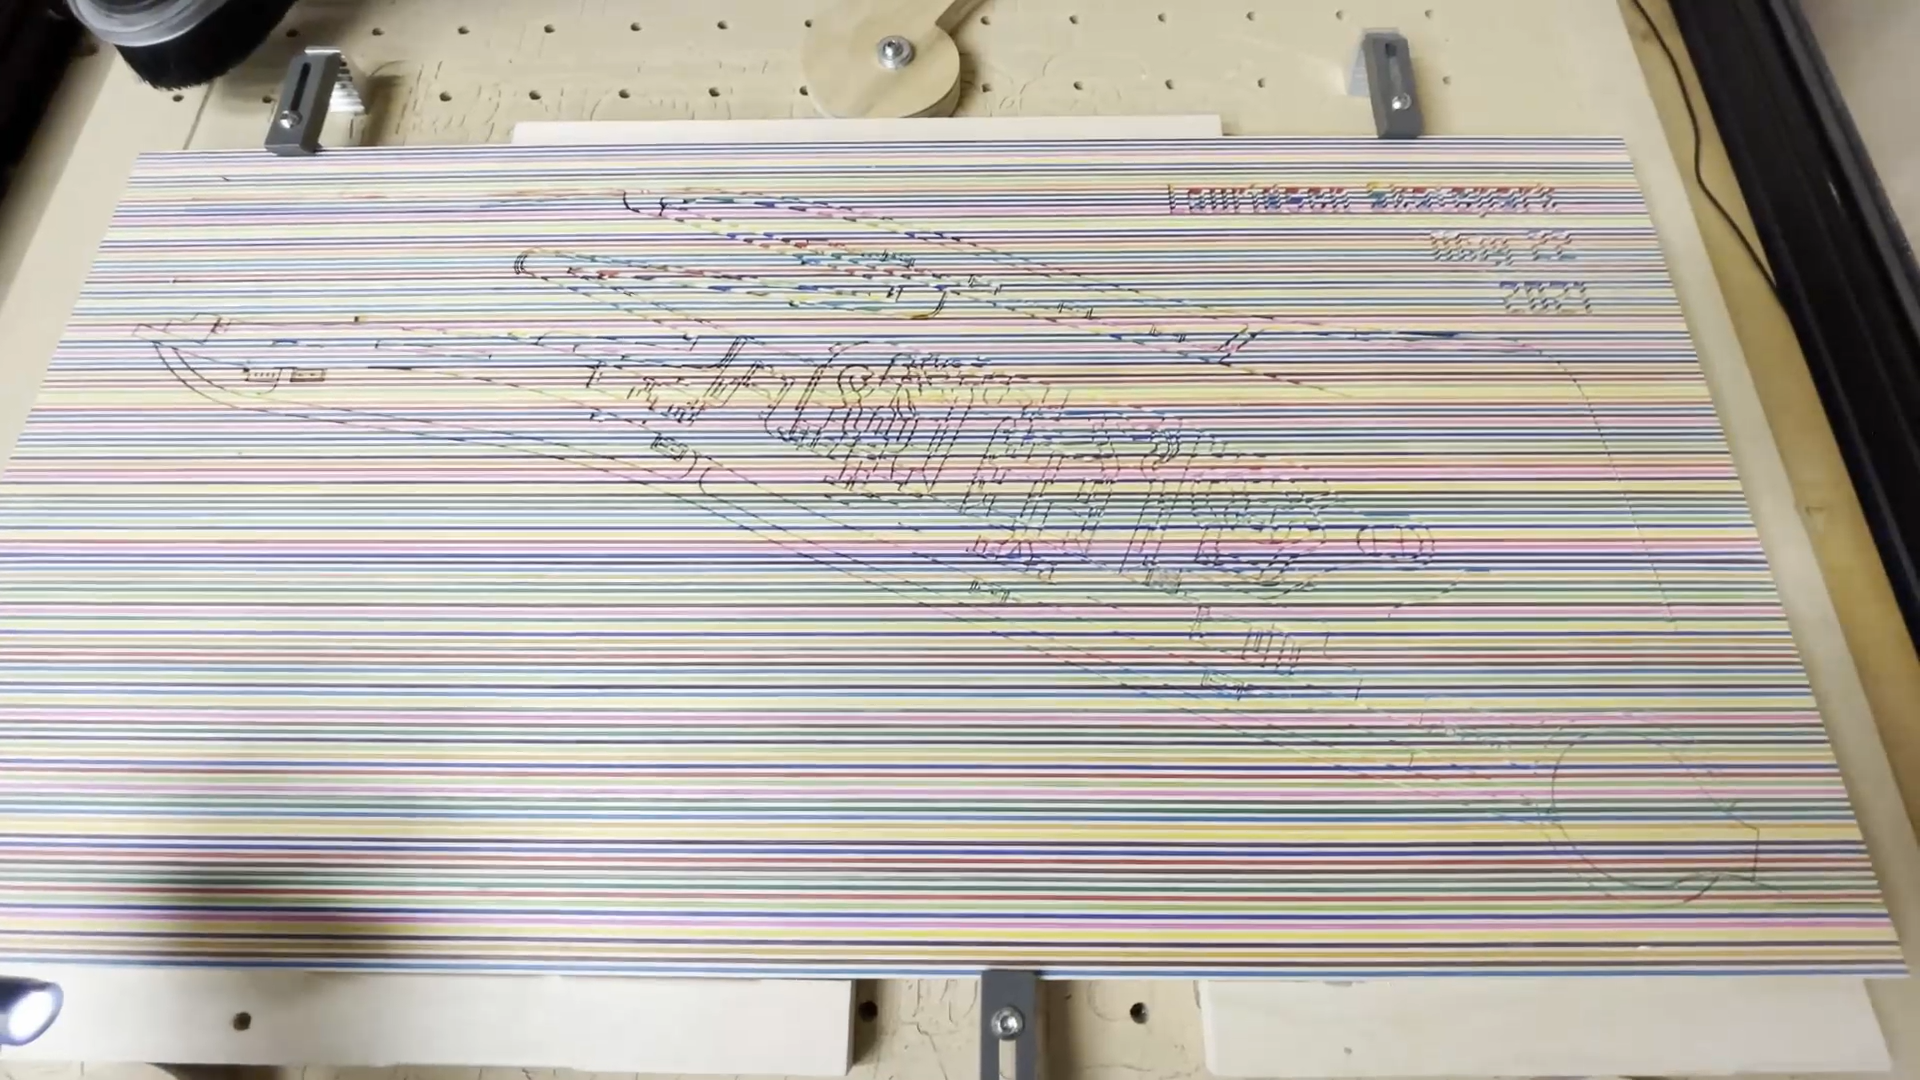
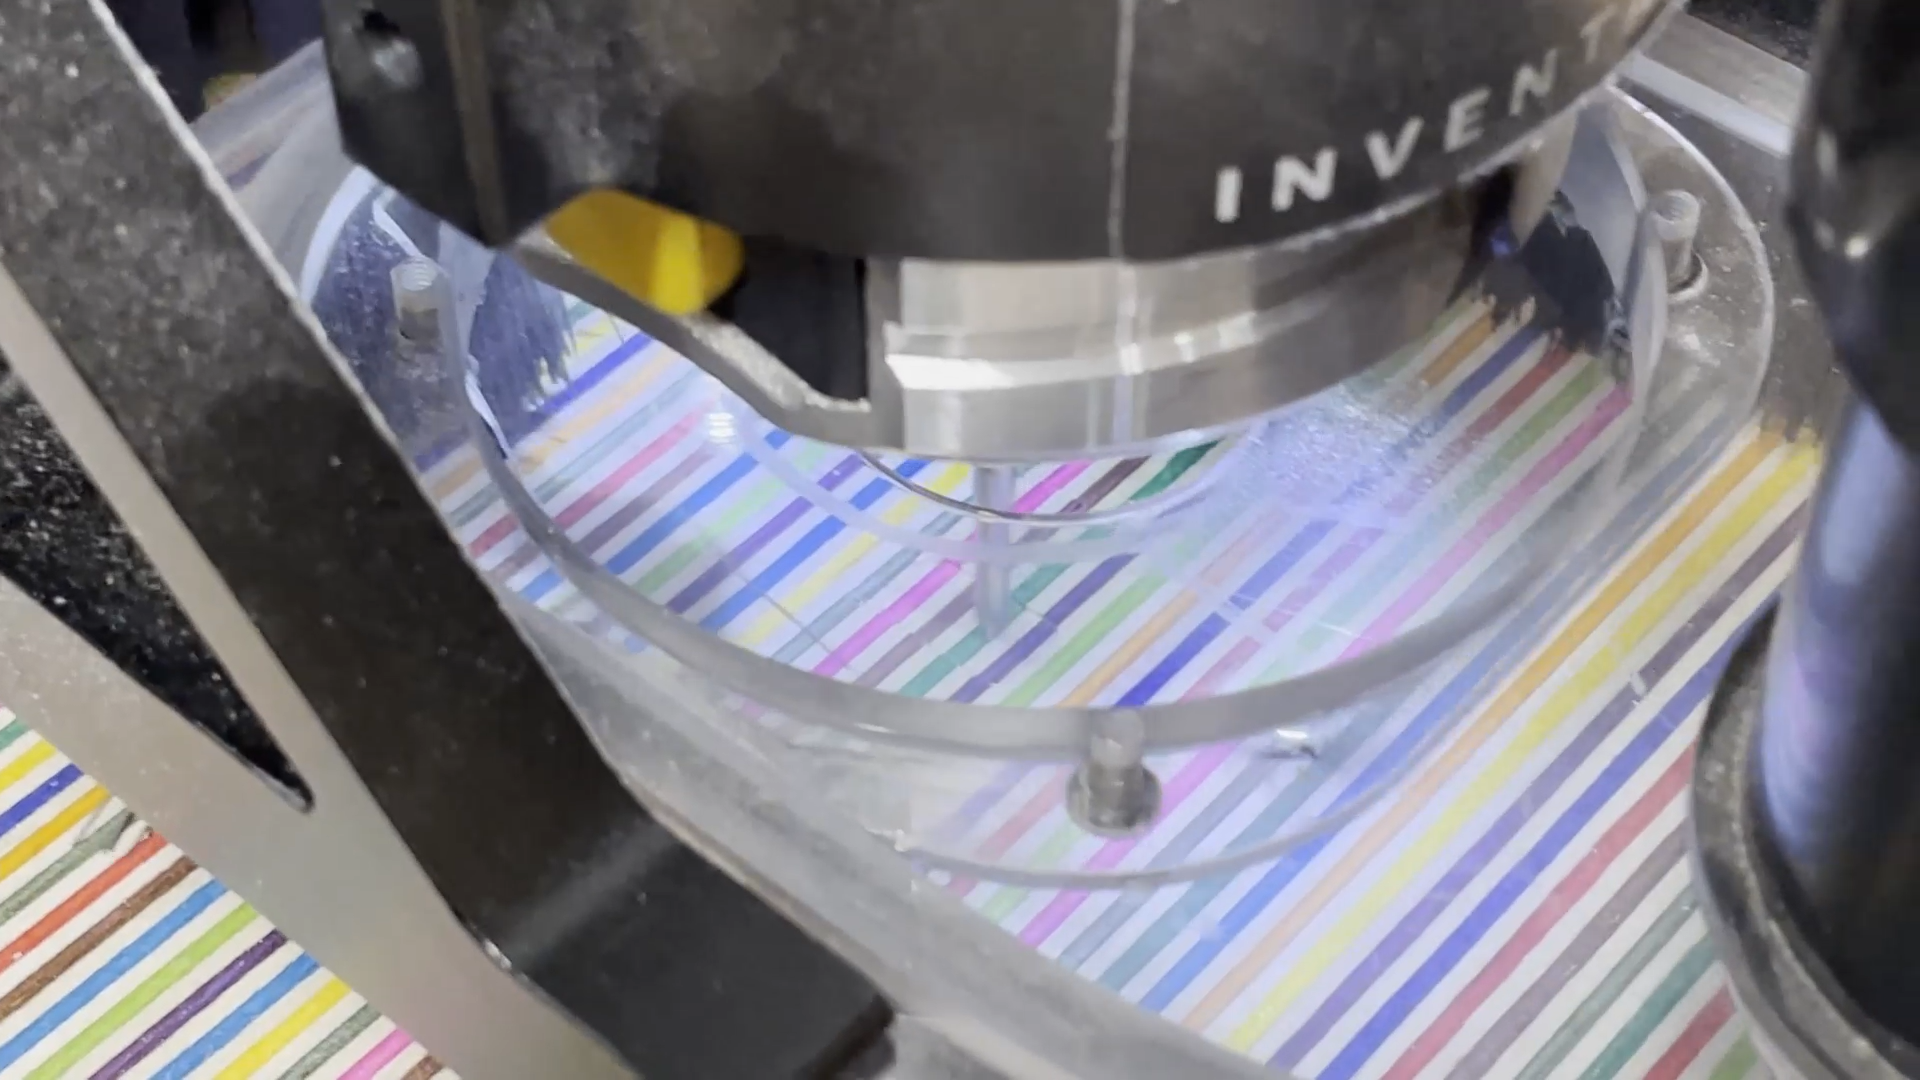
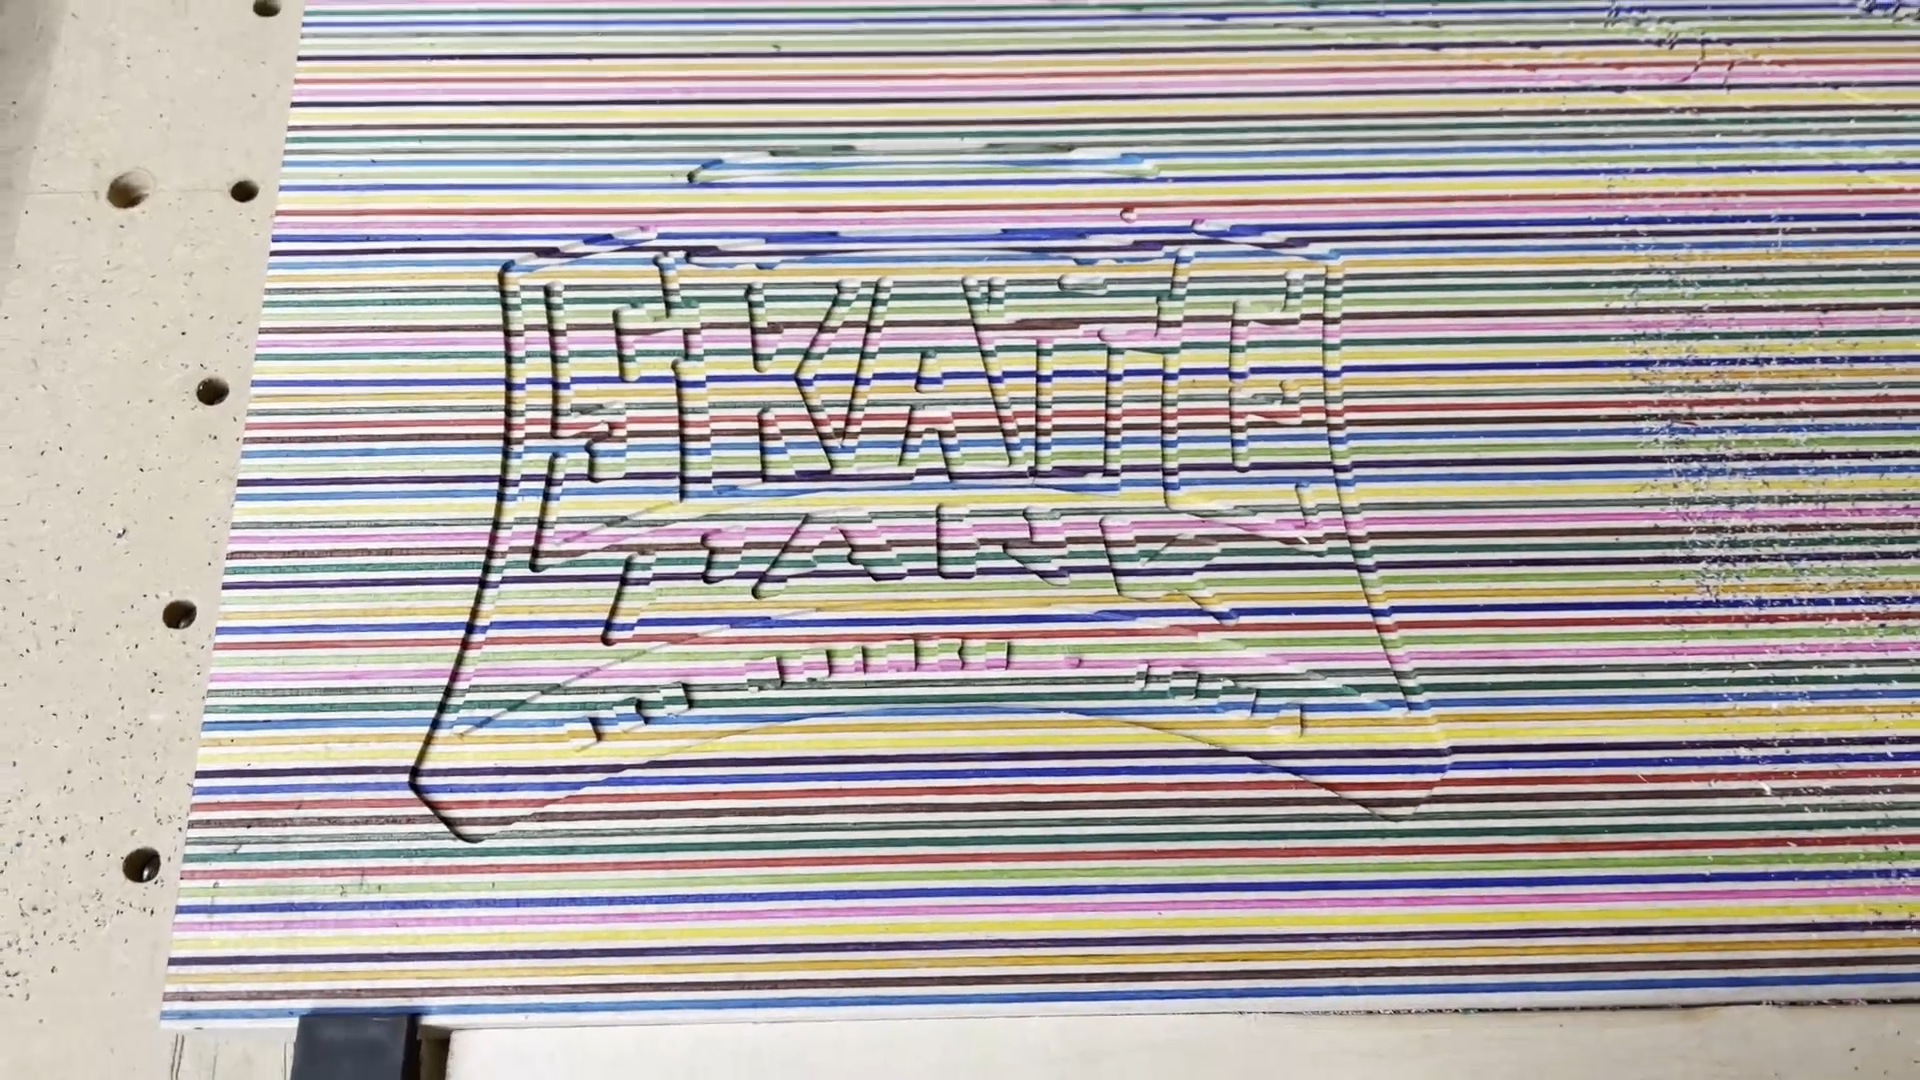
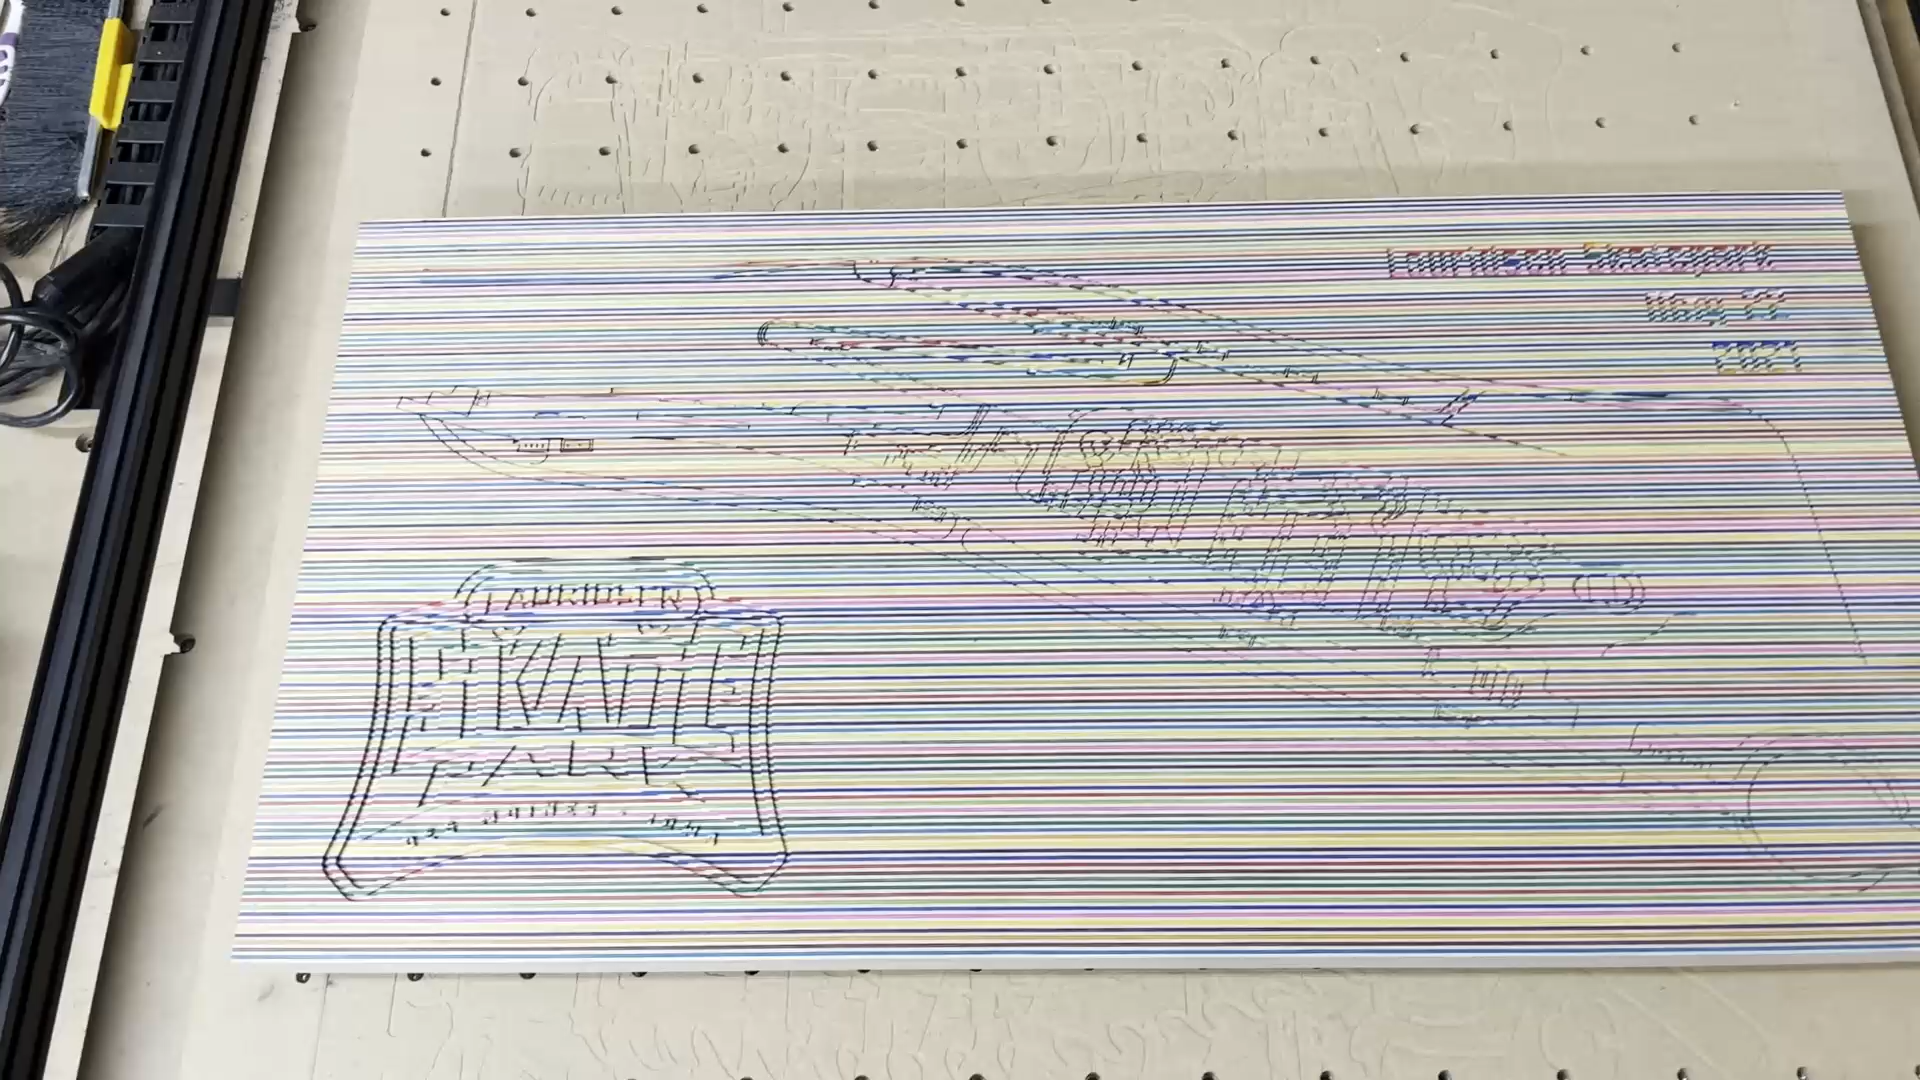
I carved the final layout layout using a 1/32" diameter downcutting router bit for the layout for the skatepark and the lettering in the upper right corner.
The cut settings I used for the carving were as follows:
1/8" downcutting roughing bit
Feed Rate: 30 in/min
Plunge Rate: 9 in/min
Depth Per Pass: 0.03"
1/32" downcutting detail bit.
Feed Rate: 20 in/min
Plunge Rate: 6 in/min
Depth Per Pass:0.017"
I like how detailed and crisp items look with these tiny bits and also how nice the inside corners look.
Like with the sample carve, this is a slow process. I broke the carve down to one and a half to two hour carves so if I broke a bit I would not need to spend too much time going back to re-carve an area.
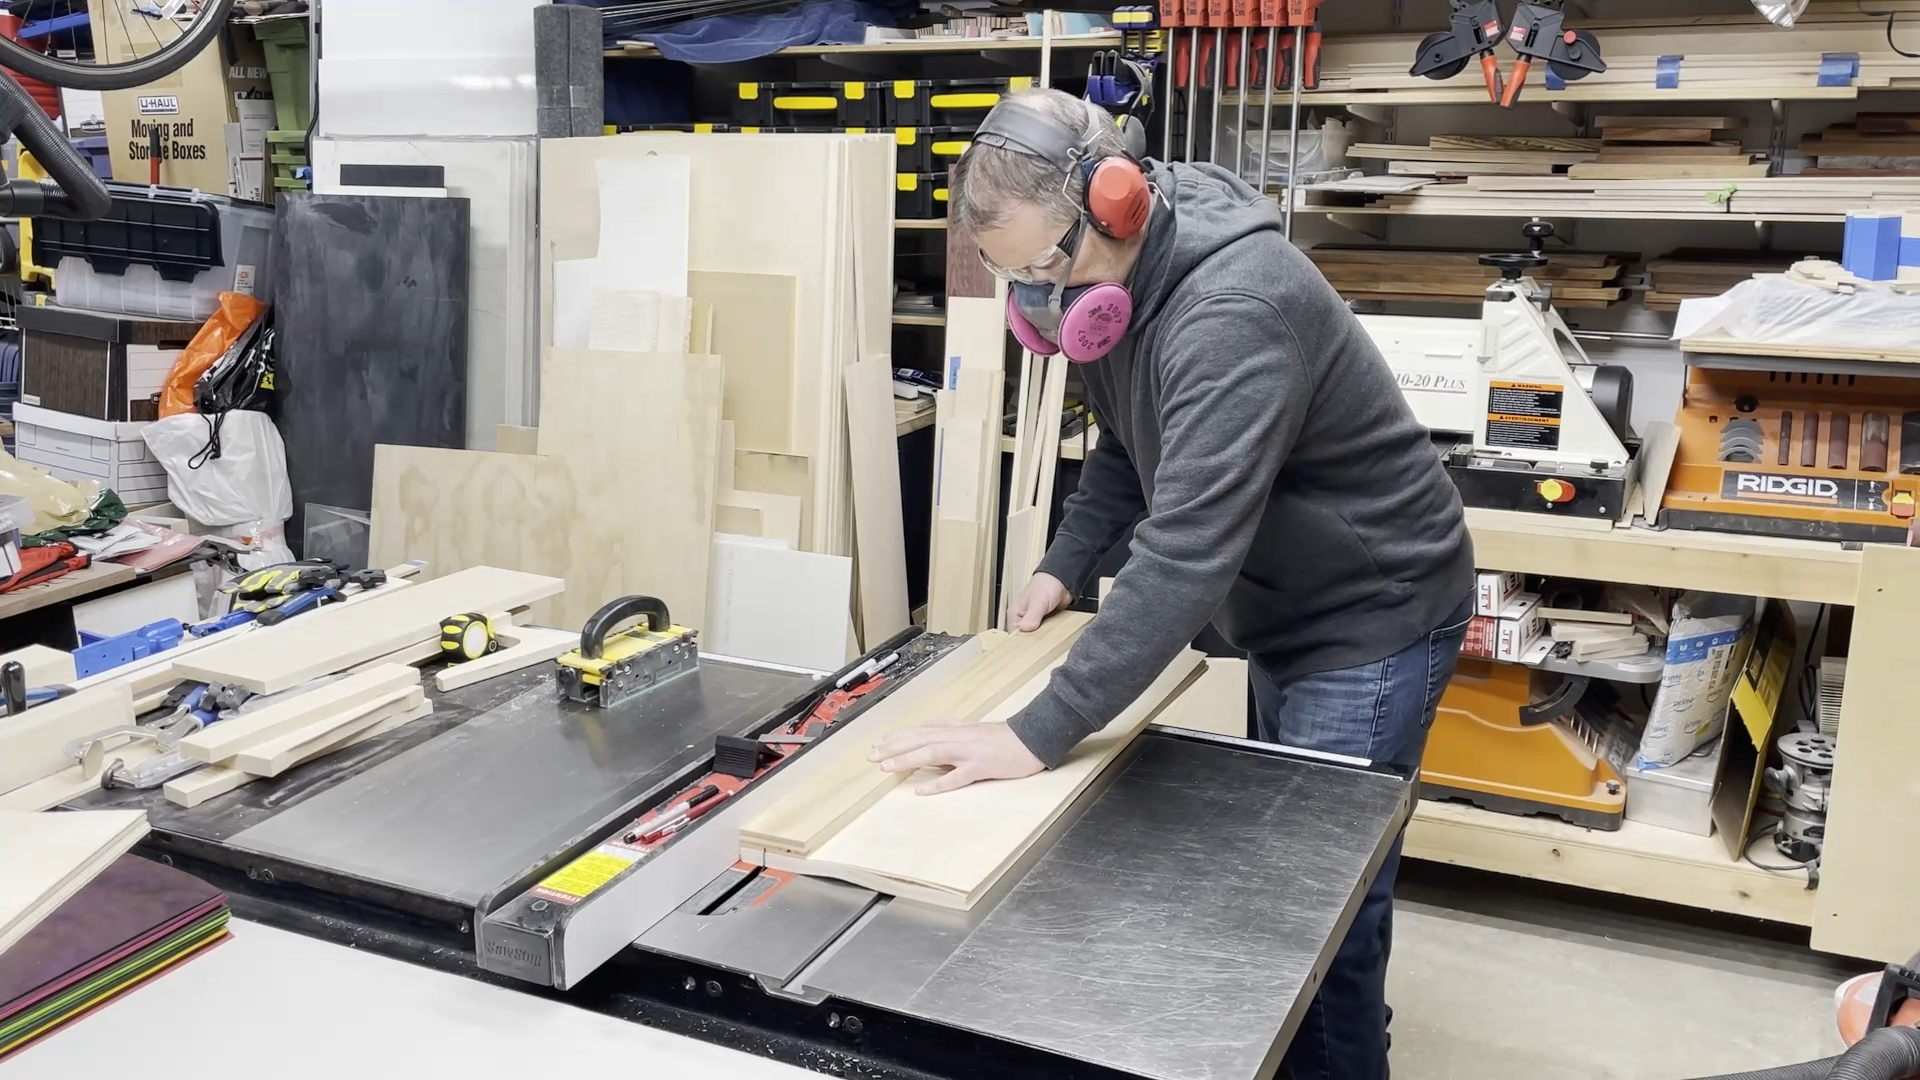
Step 13: Lightly Sand and Remove Sawdust From Grooves

Even with the downcutting bit, there can be some small fuzzy pieces of wood at the edges of the carved areas. I used a block of wood and some 400 grit sandpaper to go over the surface of the board. This actually breaks a lot of those little fuzzy fibers loose from the wood.
The next step can take a little while, but you want to go through all of the carved areas and make sure that all of the sawdust from curving has been removed. I did this by repeatedly going over the board with a shop vac hose and sucking up the sawdust. Sometimes it will not easily come out of the grooves so you will need to help it a little. I used a toothbrush to get down into the grooves and break this sawdust out.
One thing I found helpful was to turn the lights down and then go over the surface of the wood with a flashlight. With the colored parallel lines with can be hard to pick out the details of a groove that runs parallel to those so the flashlight shining across the surface helps.
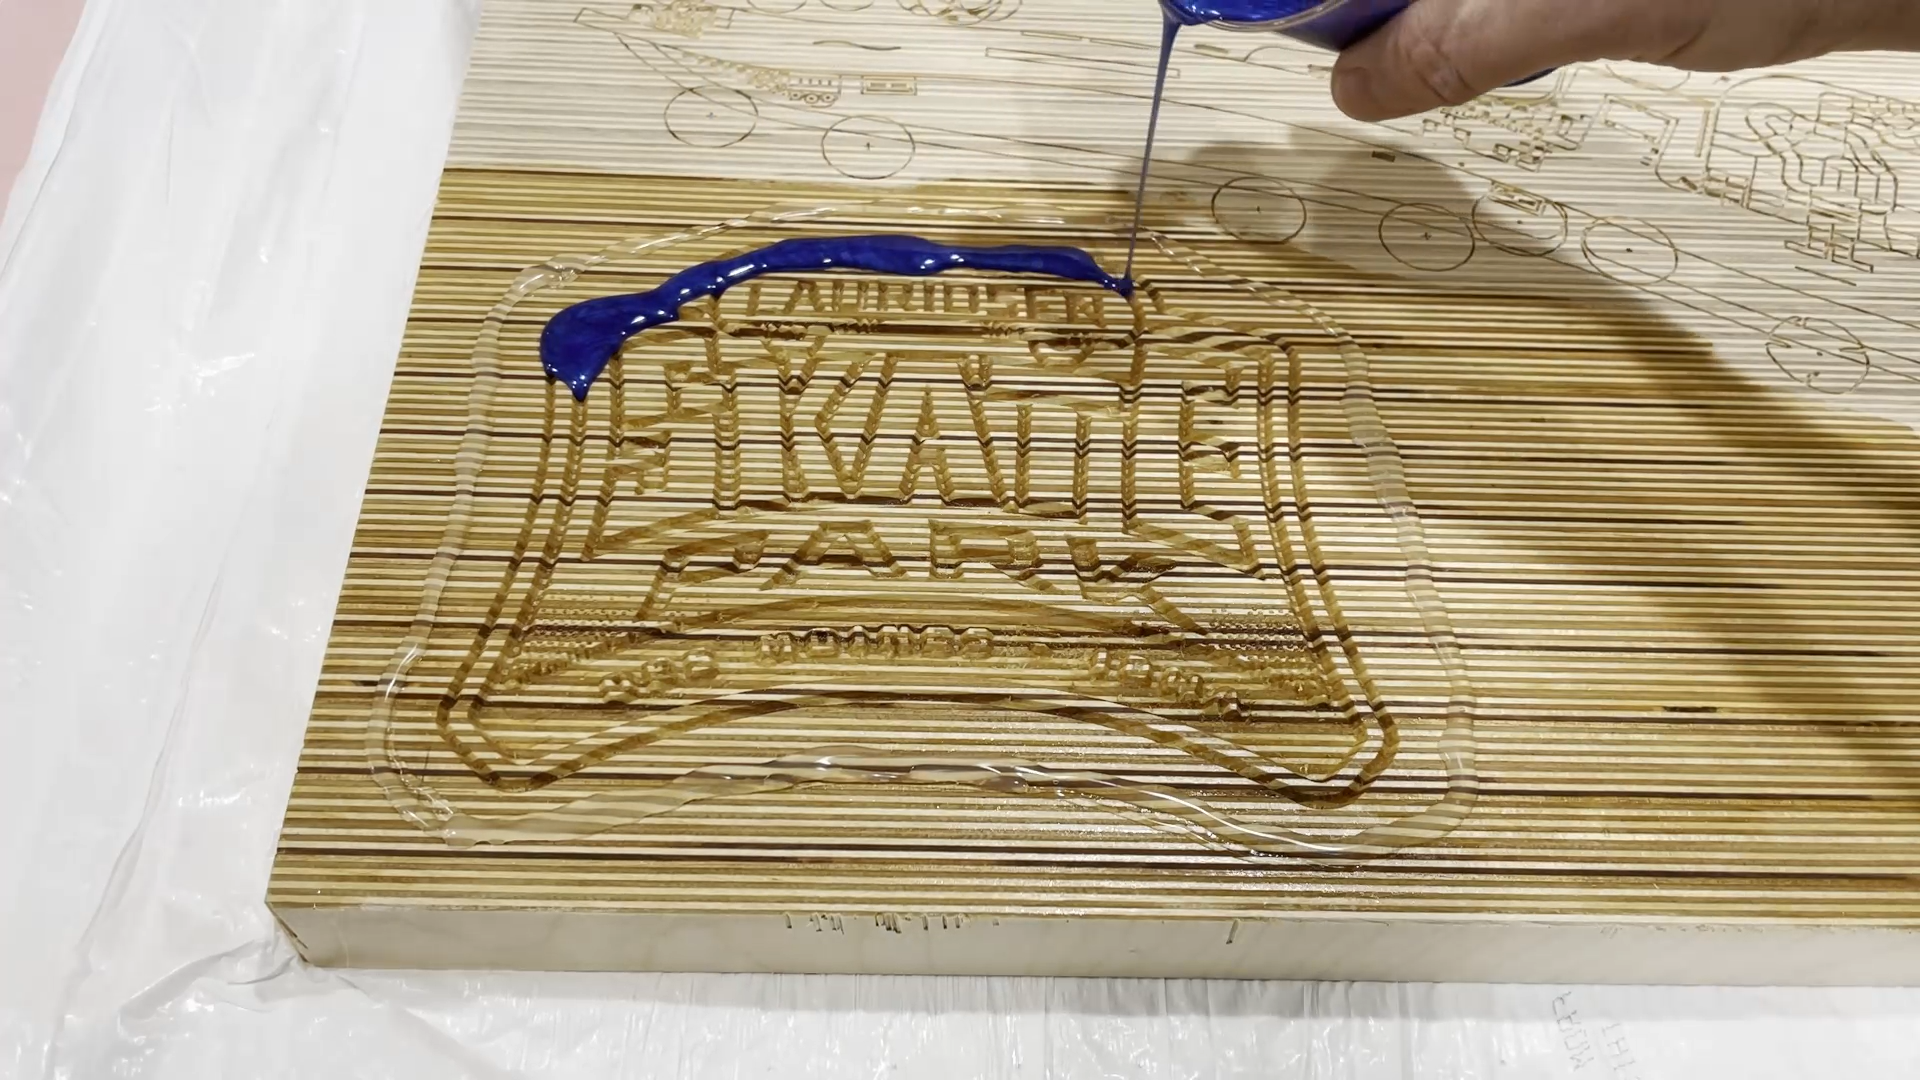
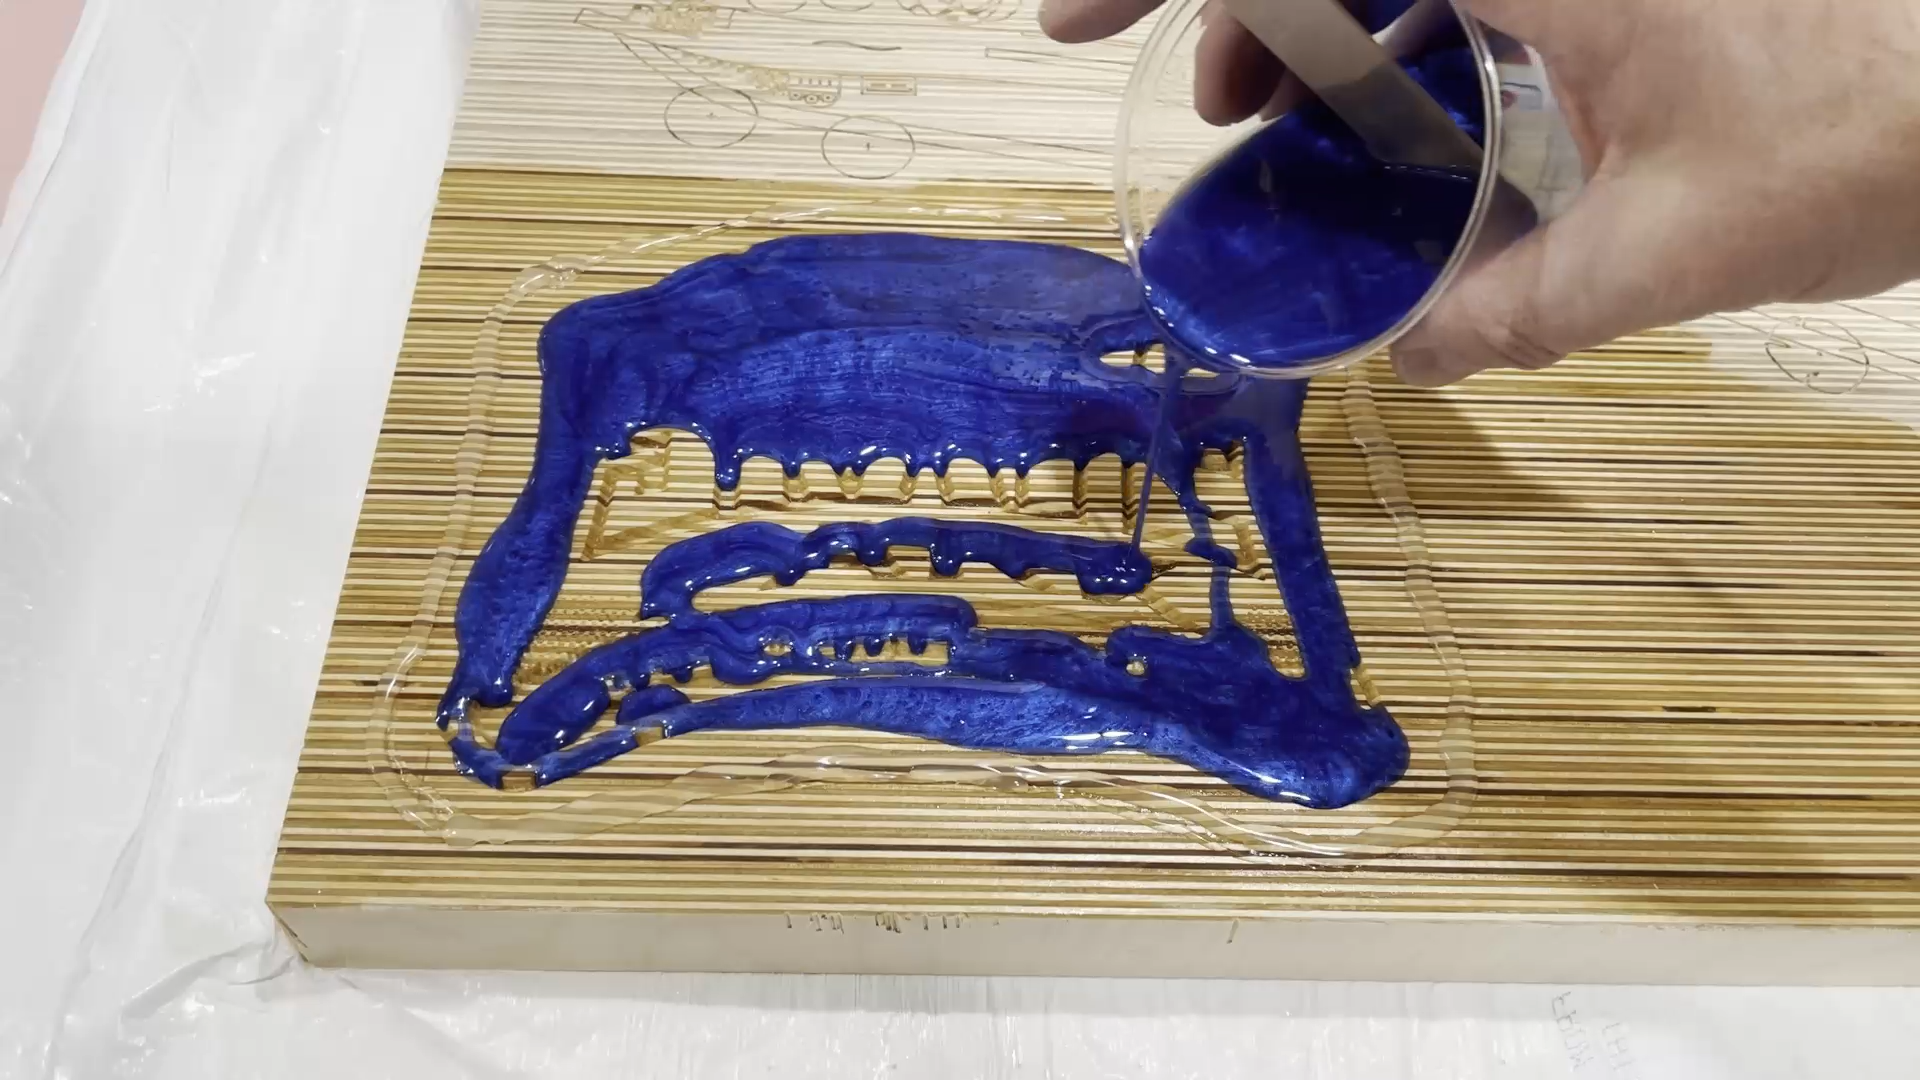
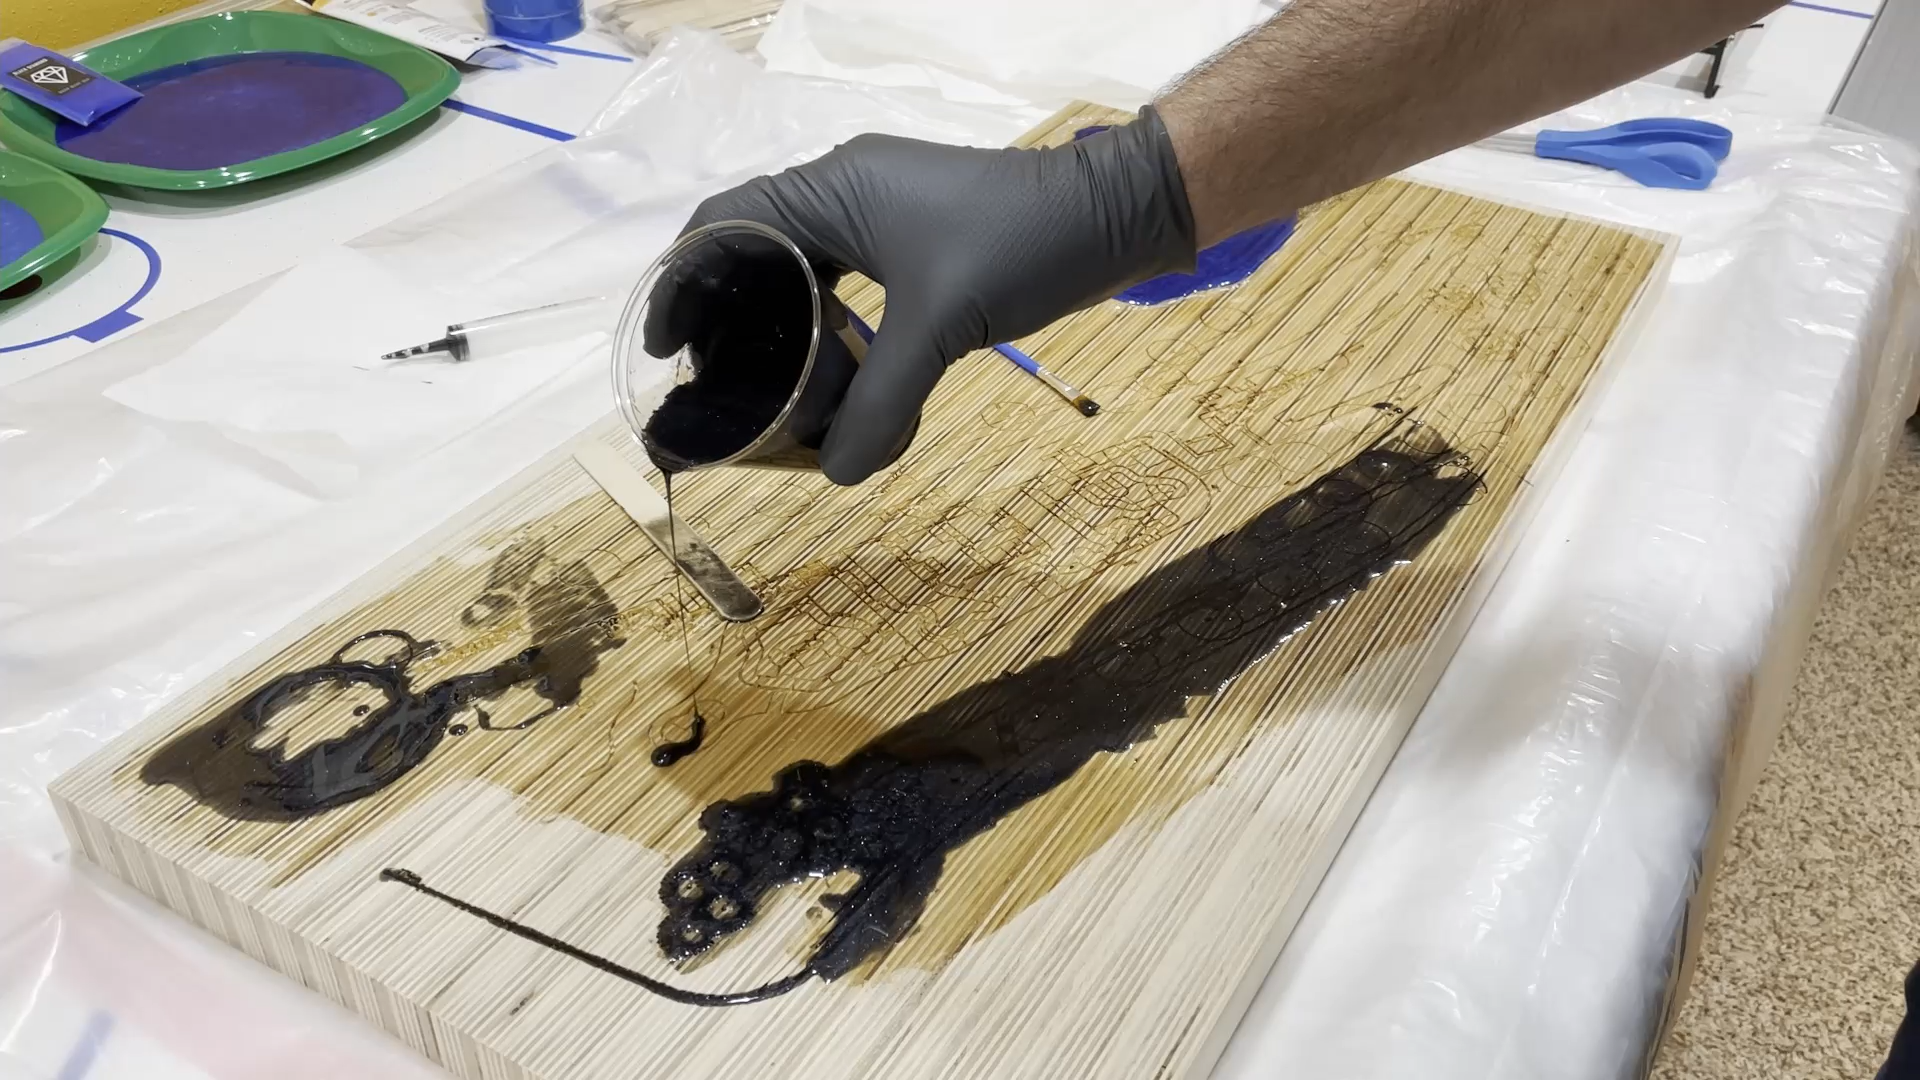
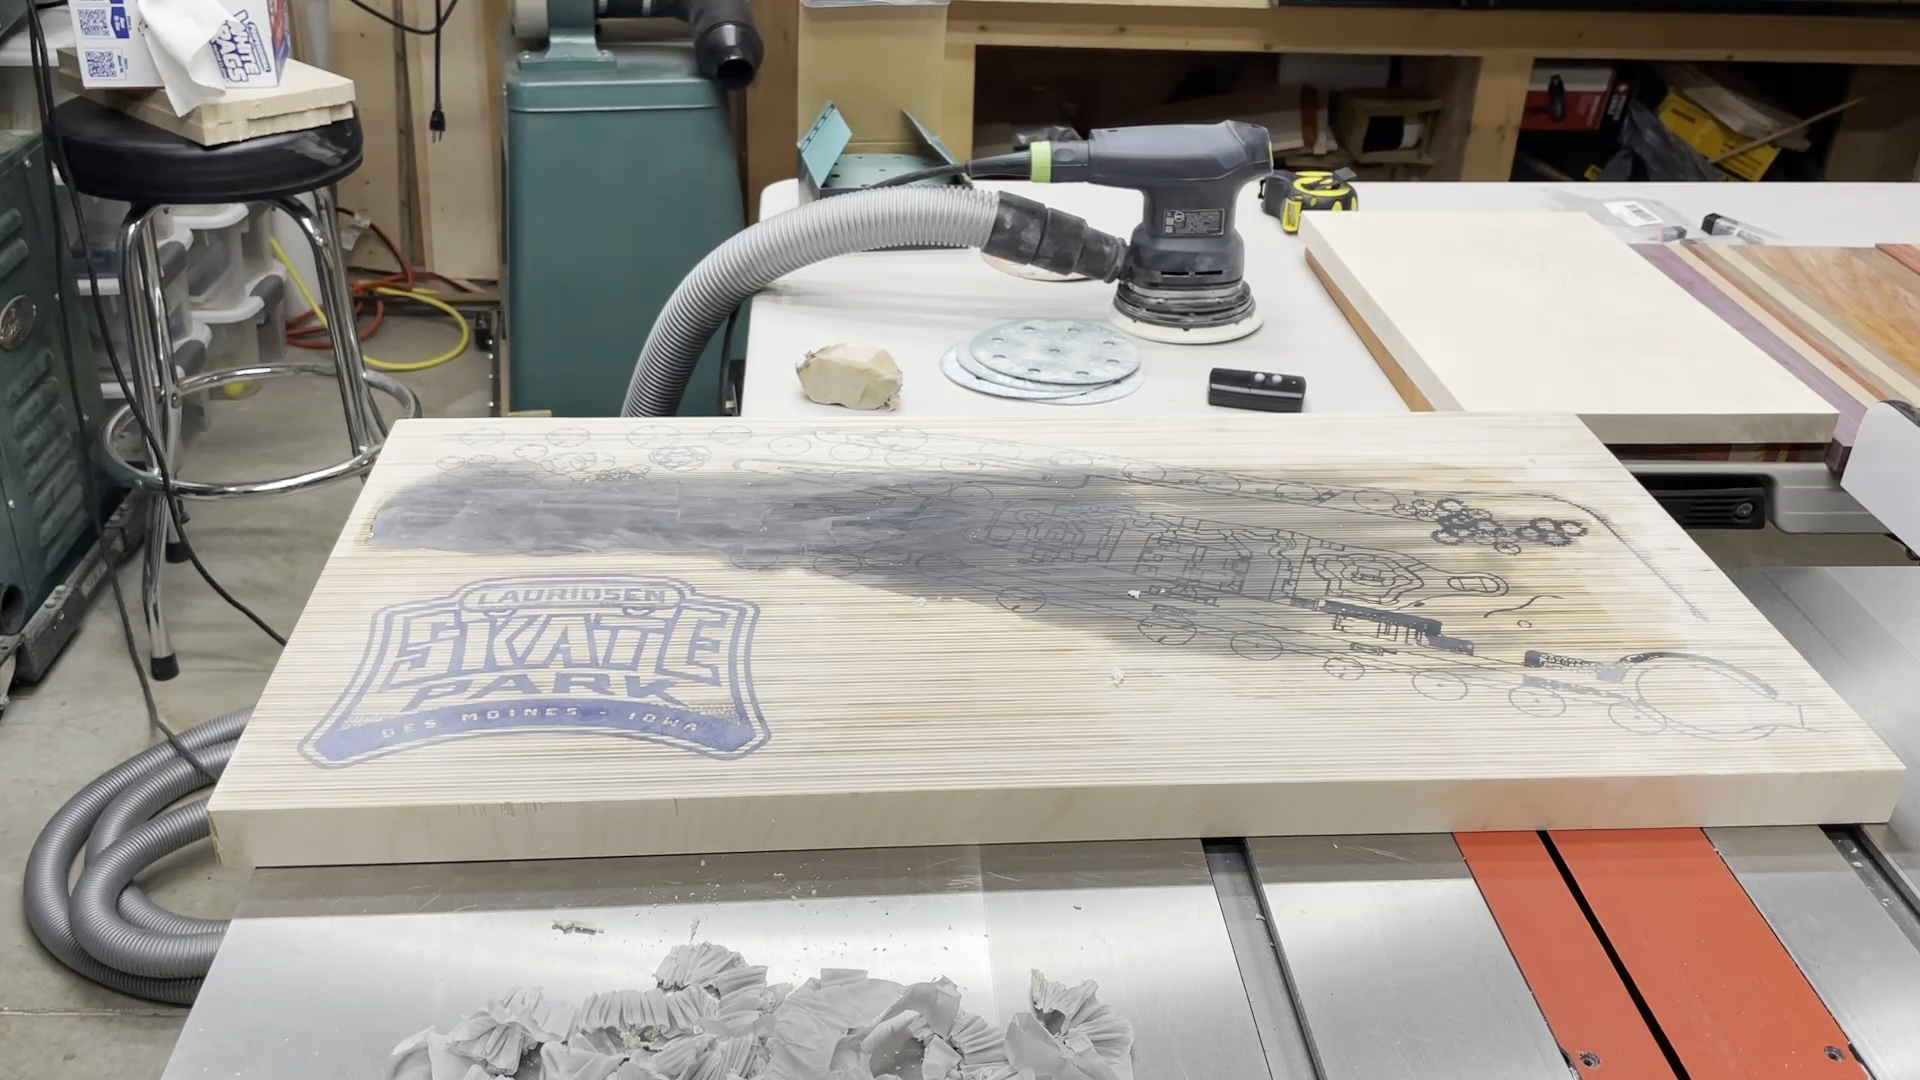
Step 14: Pour Epoxy
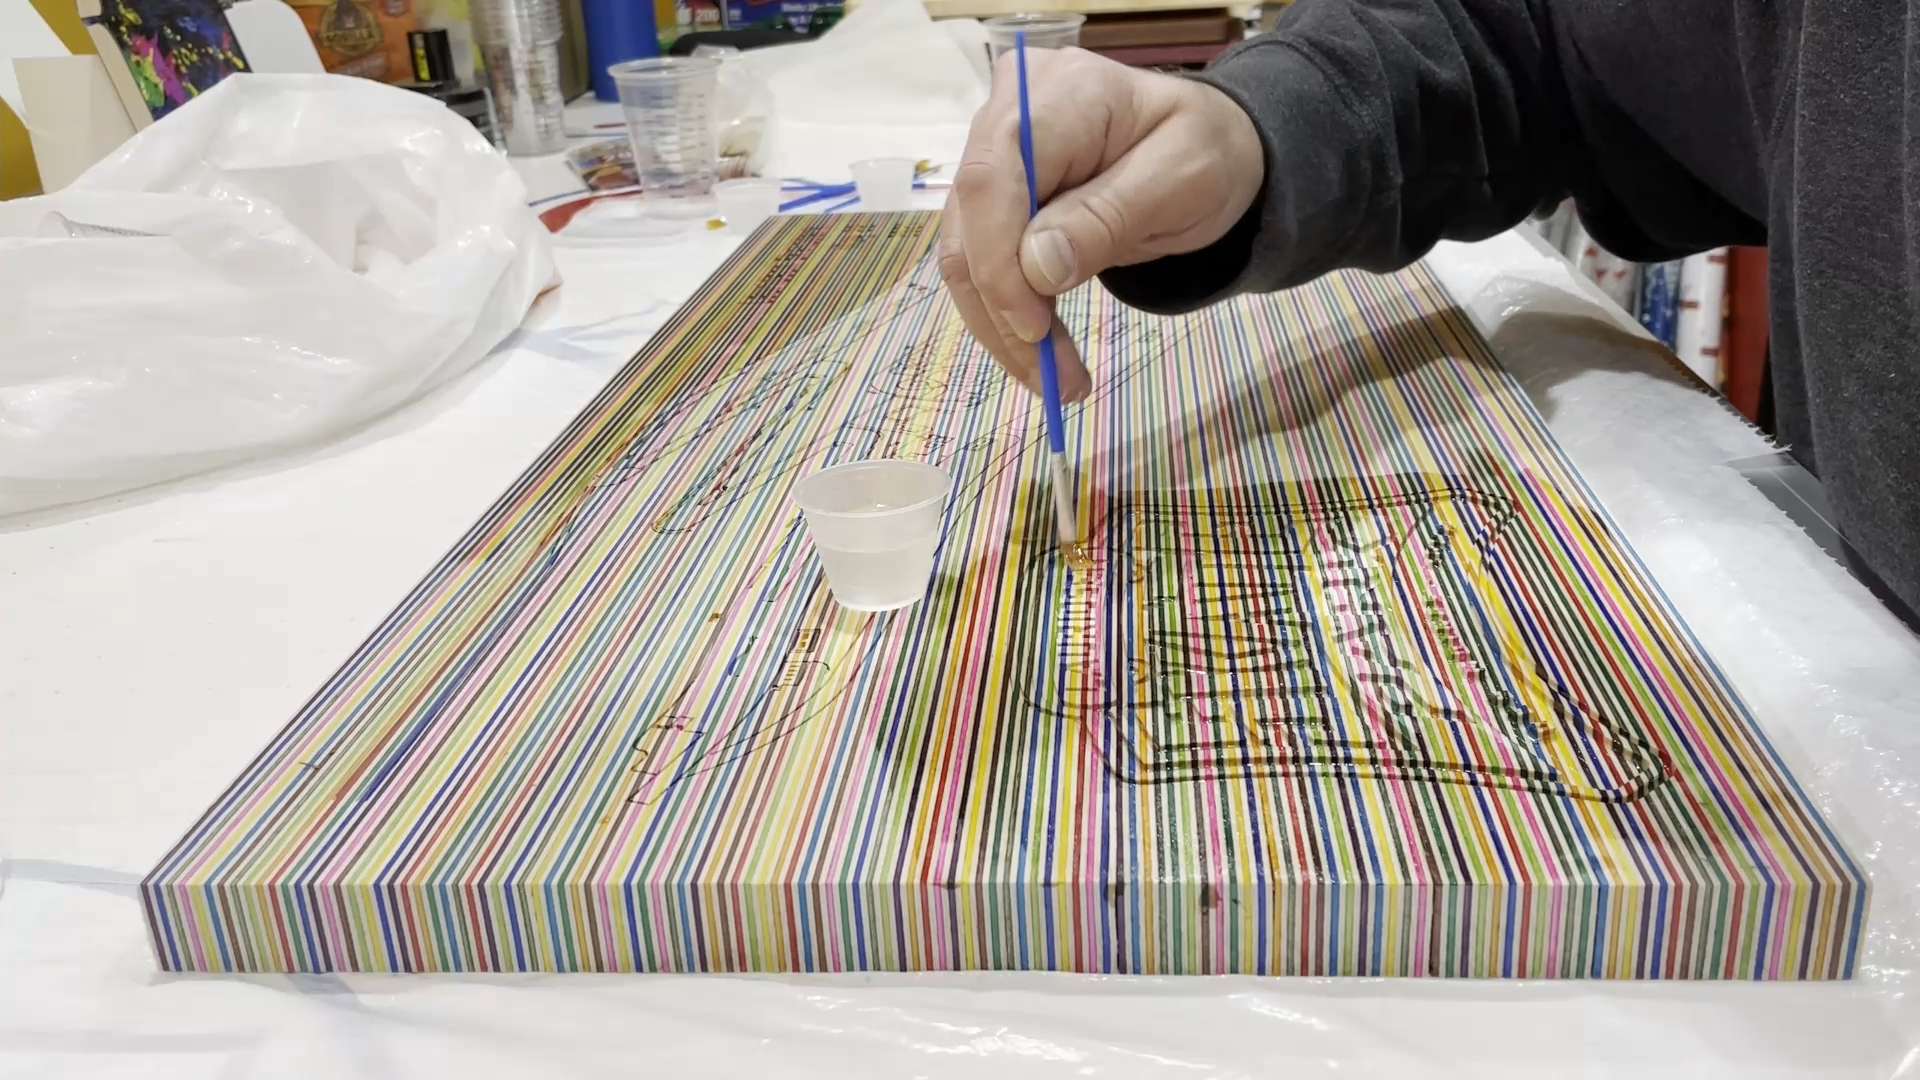

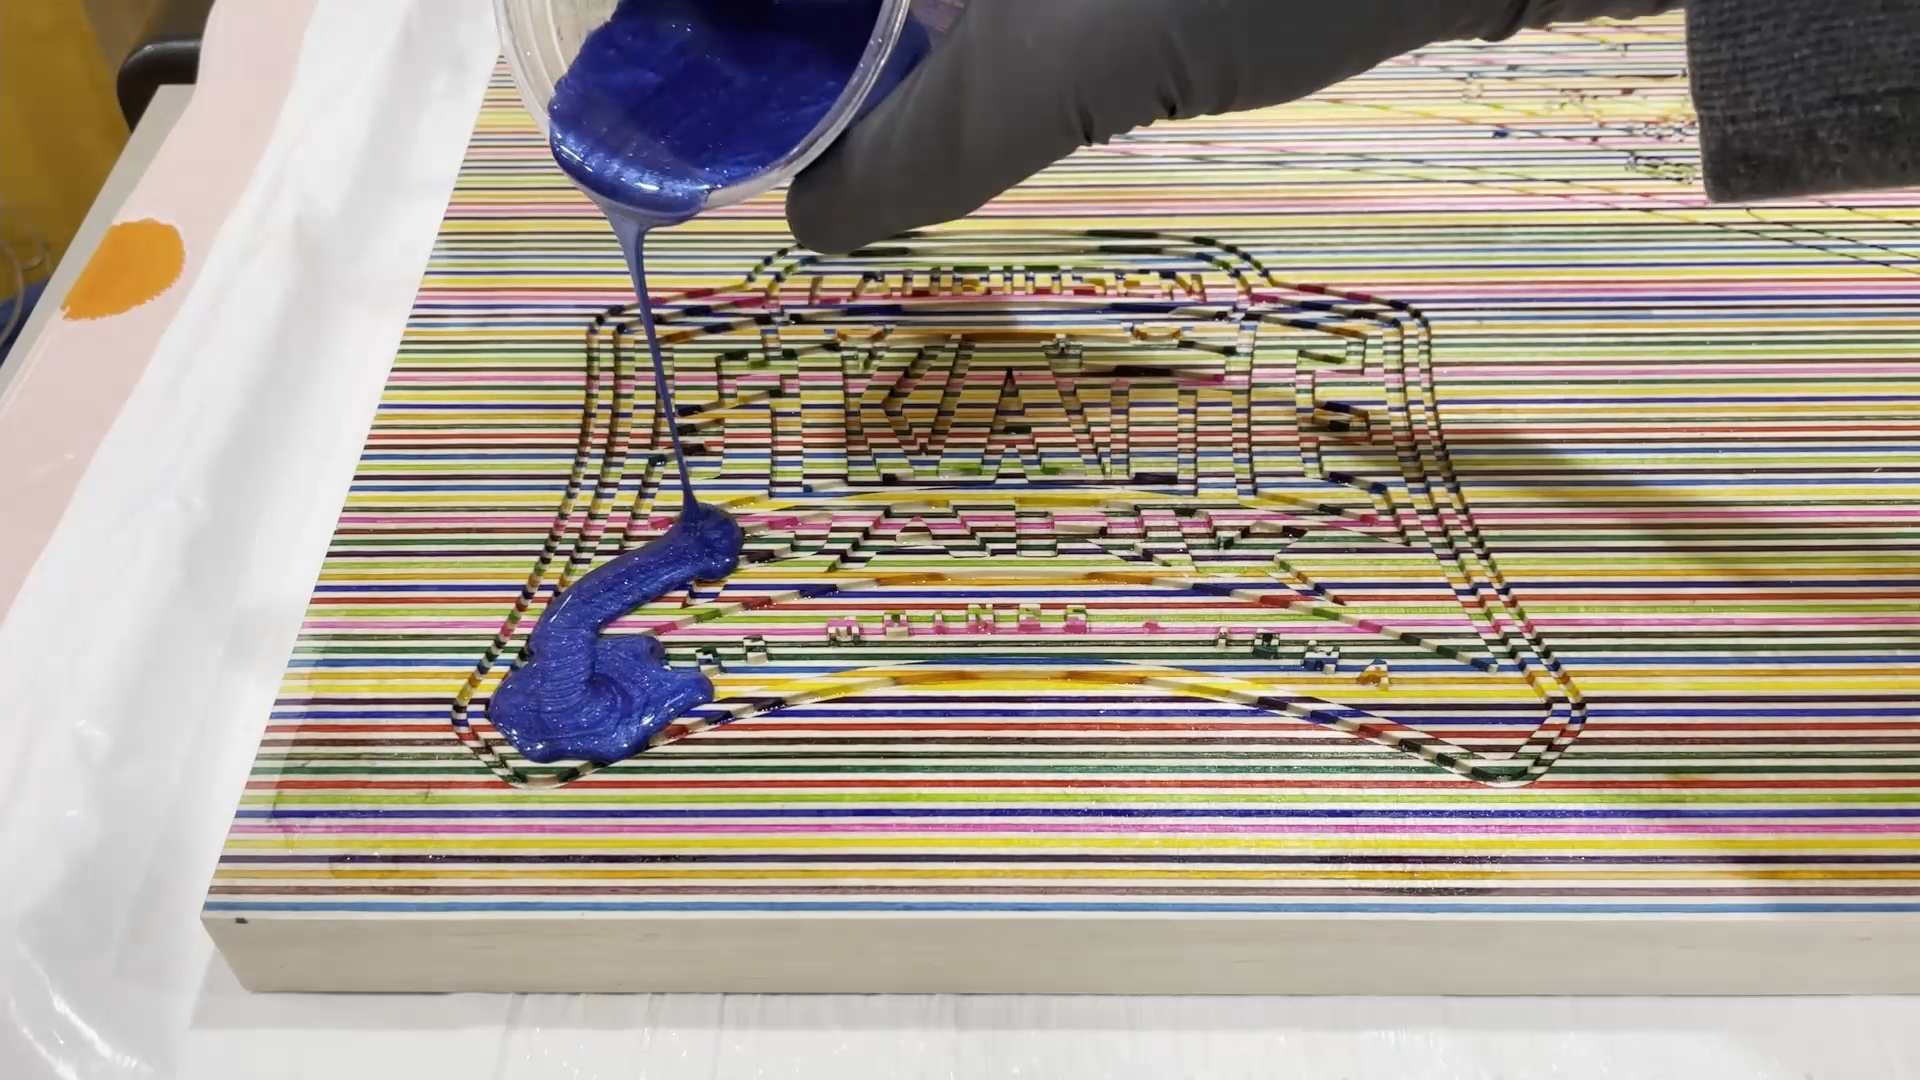
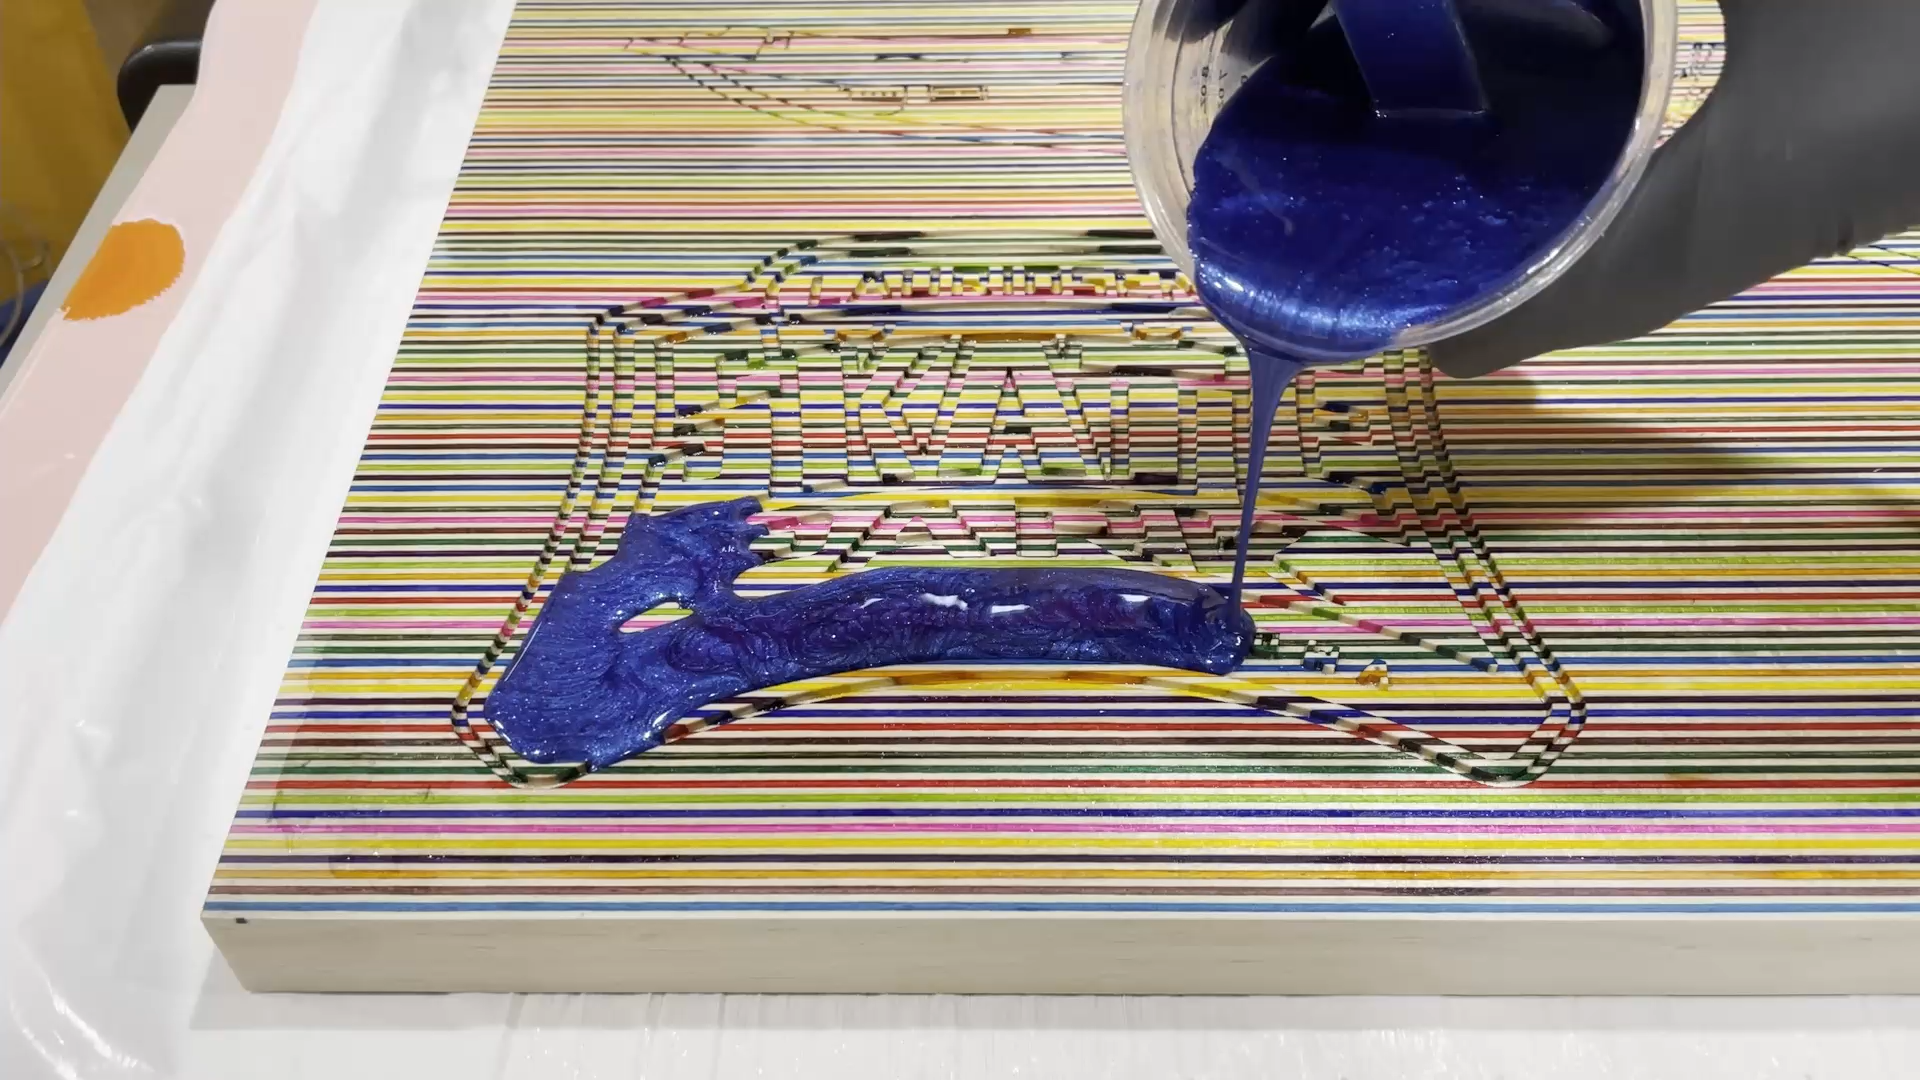

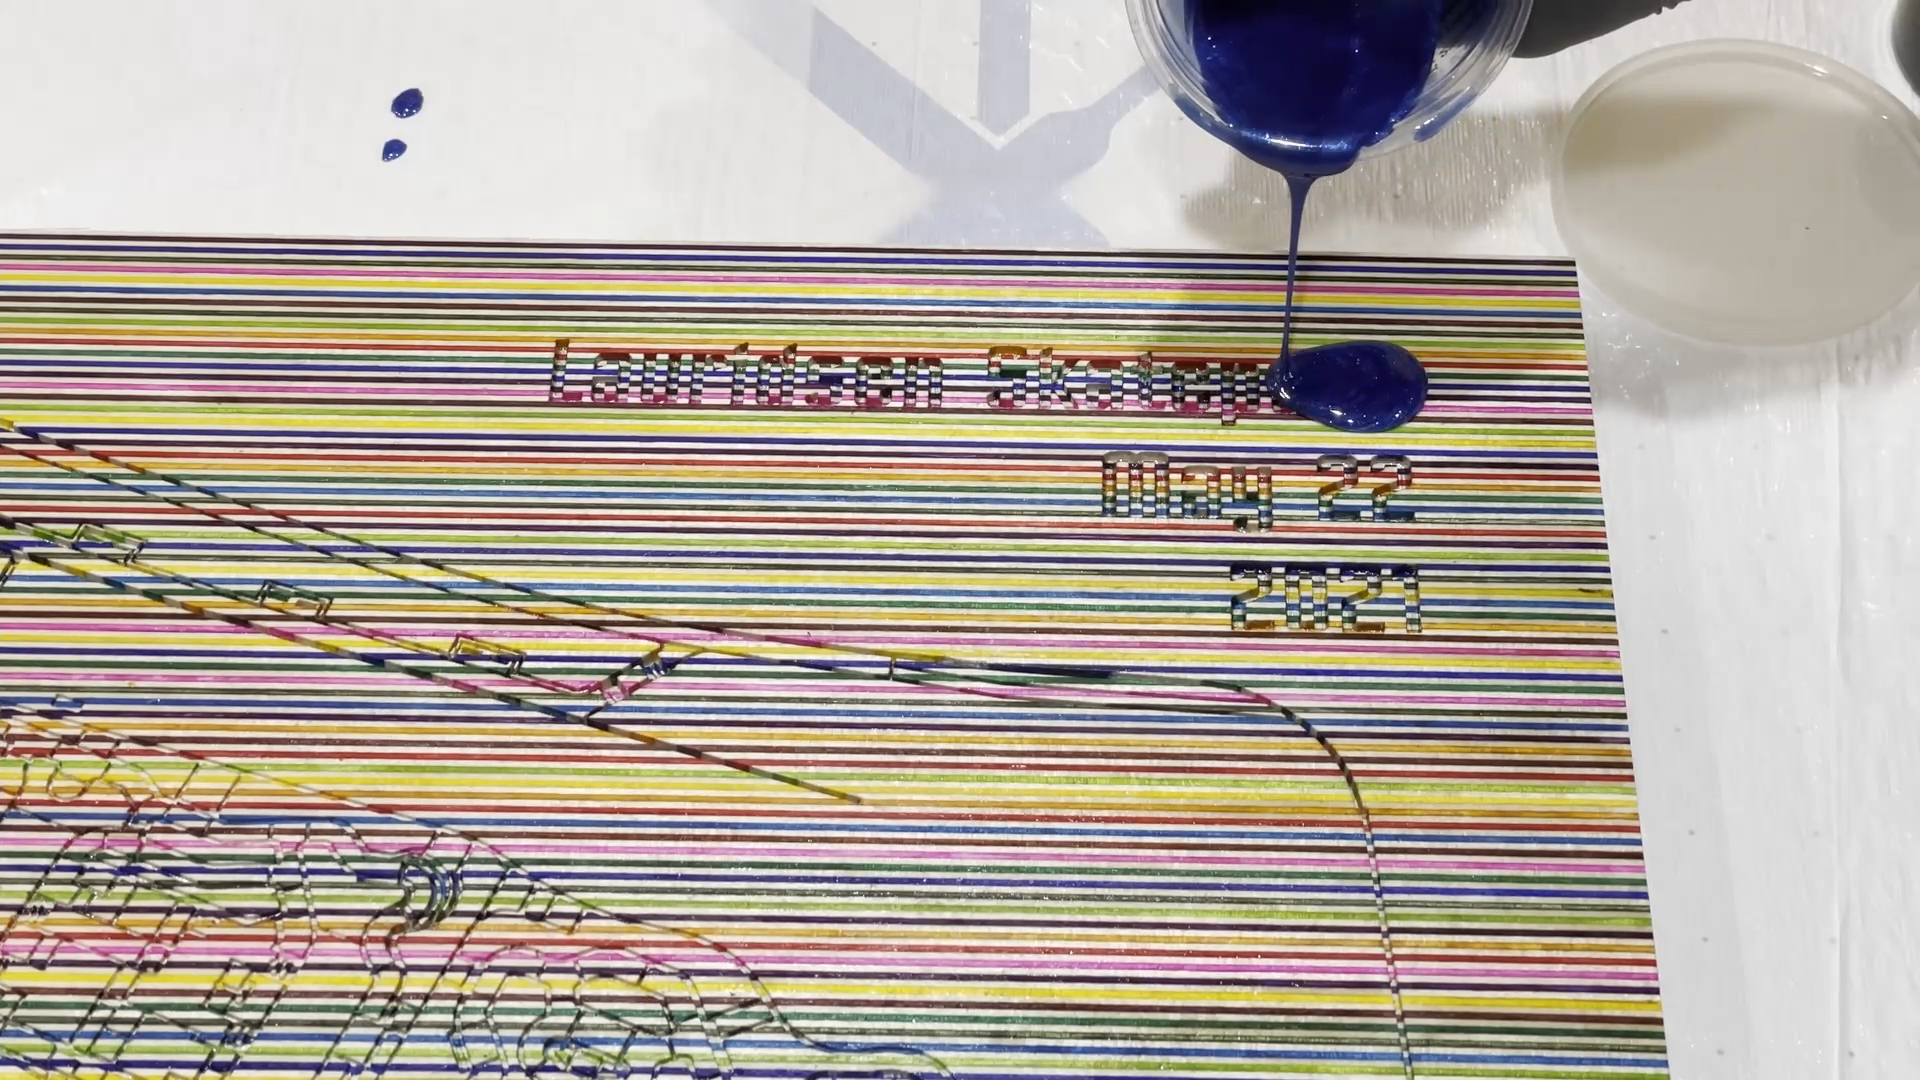
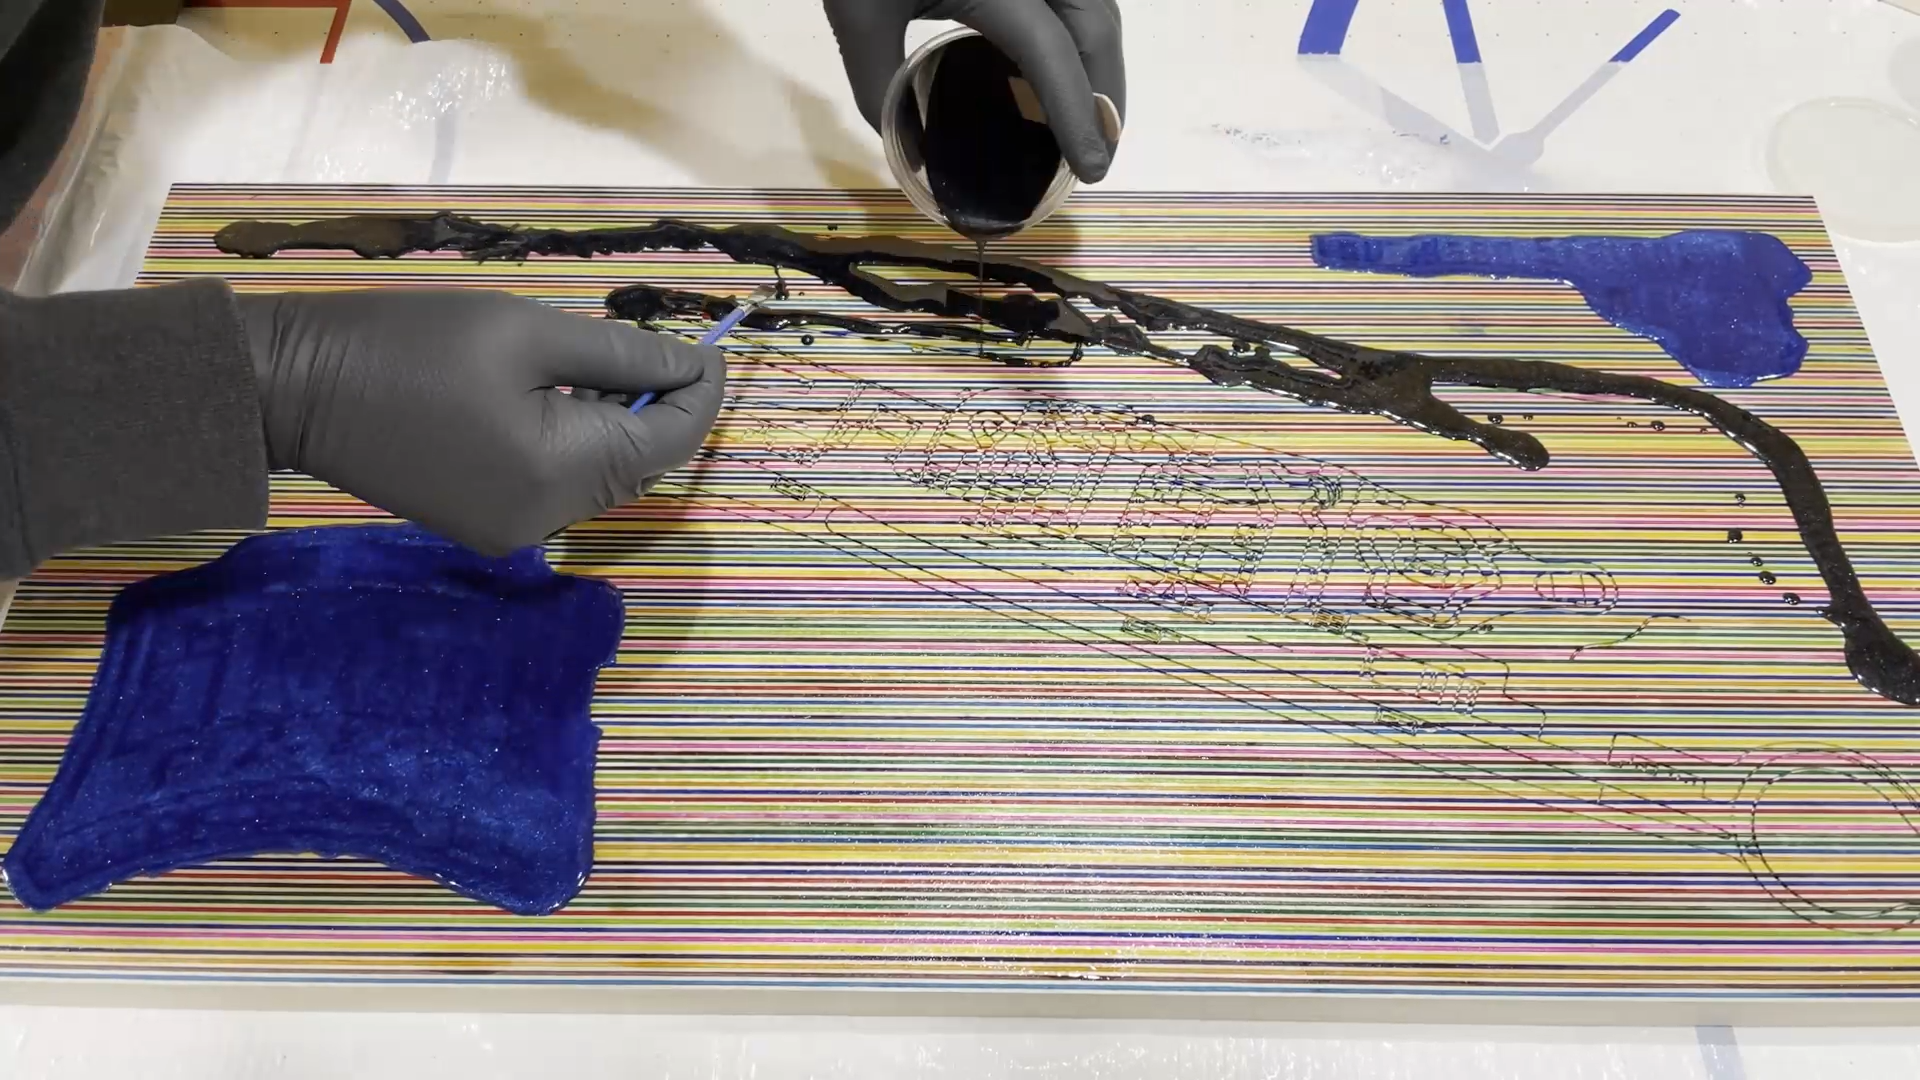
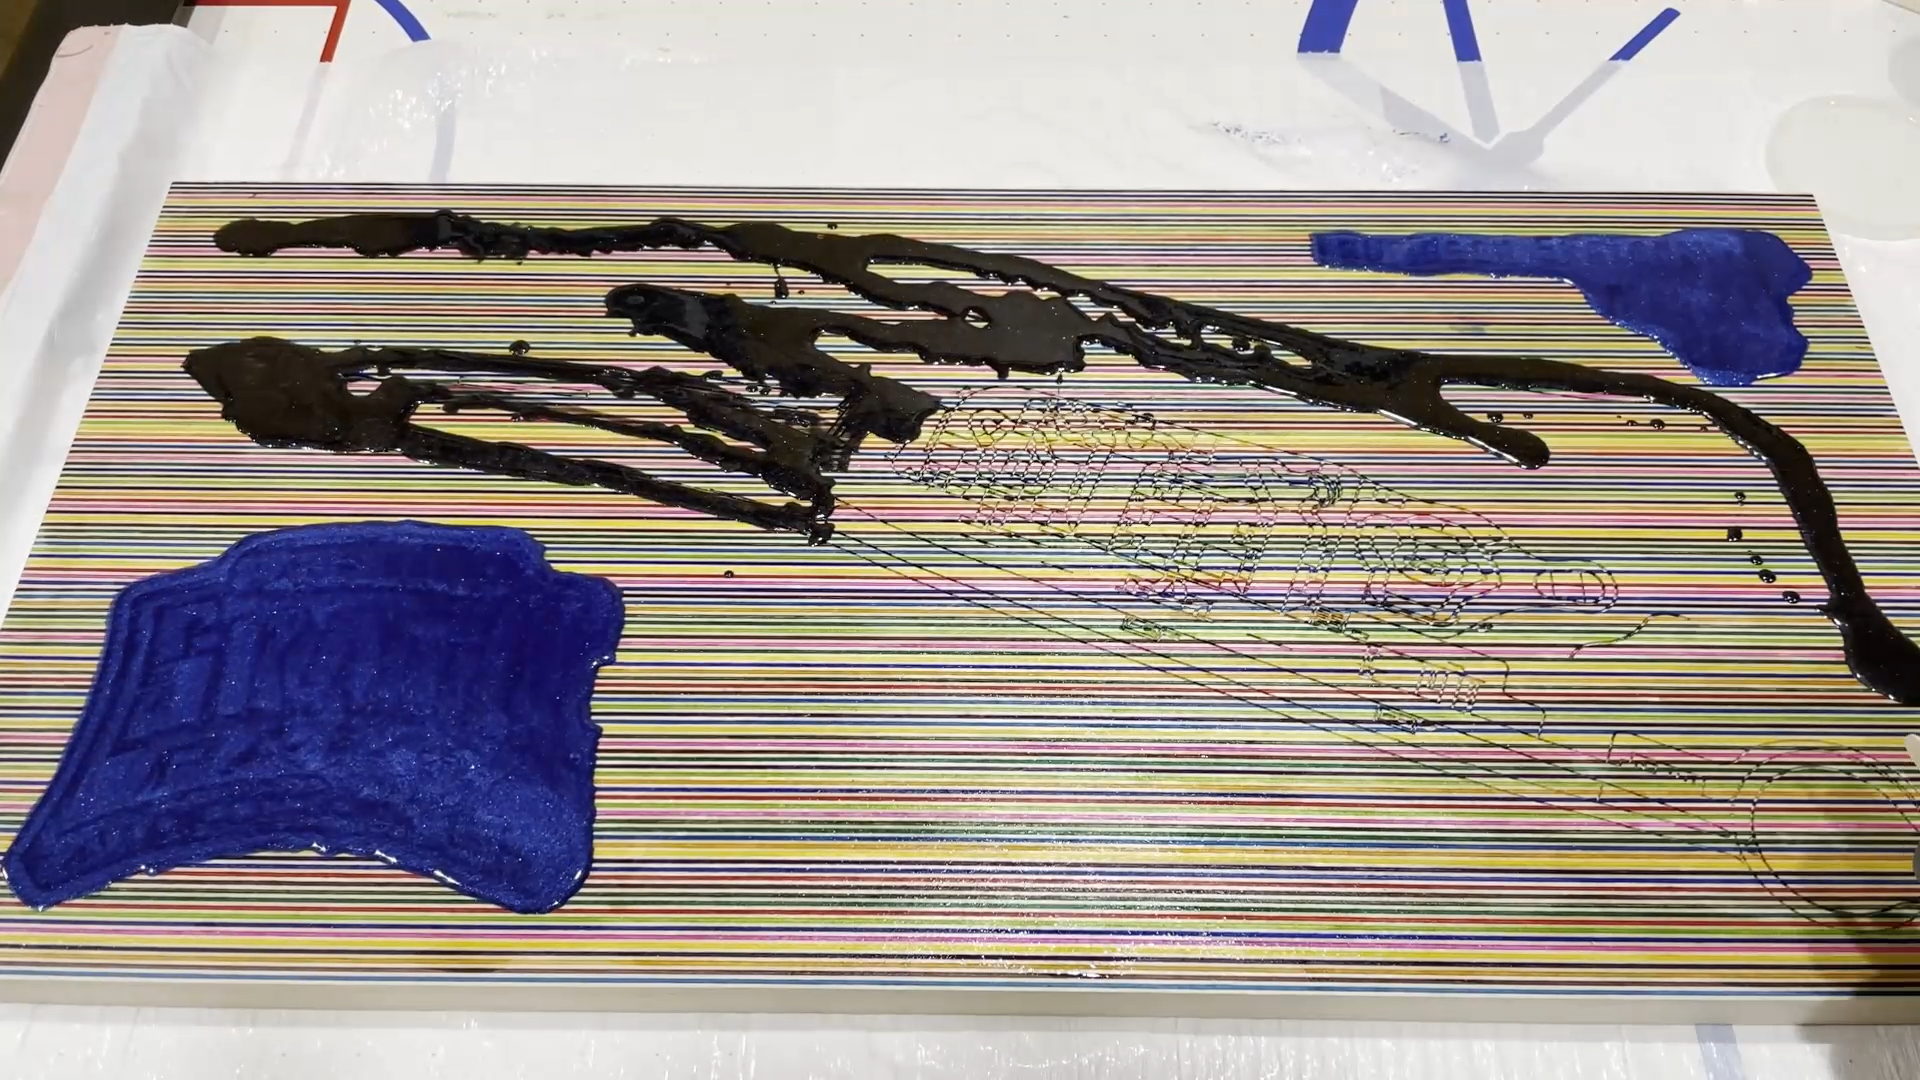
Just like before, I used a small paint brush and painted a thin layer of clear epoxy over the entire surface to help prevent possible bleeding of the pigment into the adjacent wood areas. I left this set for a couple hours until the epoxy was a little tacky to the touch. This way the epoxy with pigment will still bond to the first layer. Depending on the epoxy you use and the temperatures at the time you pour, this time period to when your first layer gets tacky to the touch could vary considerably so keep an eye on it and keep checking the condition.
I used the same Black Diamond pigments for the epoxy in the final version of the project. The black color for the epoxy that I used was "Black Onyx" and the blue color was "Deep Blue Sea."
I still mixed a lot of the pigment in the epoxy so the color would be nice a dark and stand out.
I poured the epoxy a little taller than the height of the wood surface so I would not lose any depth of the epoxy in the carved areas due to spreading or shrinkage.
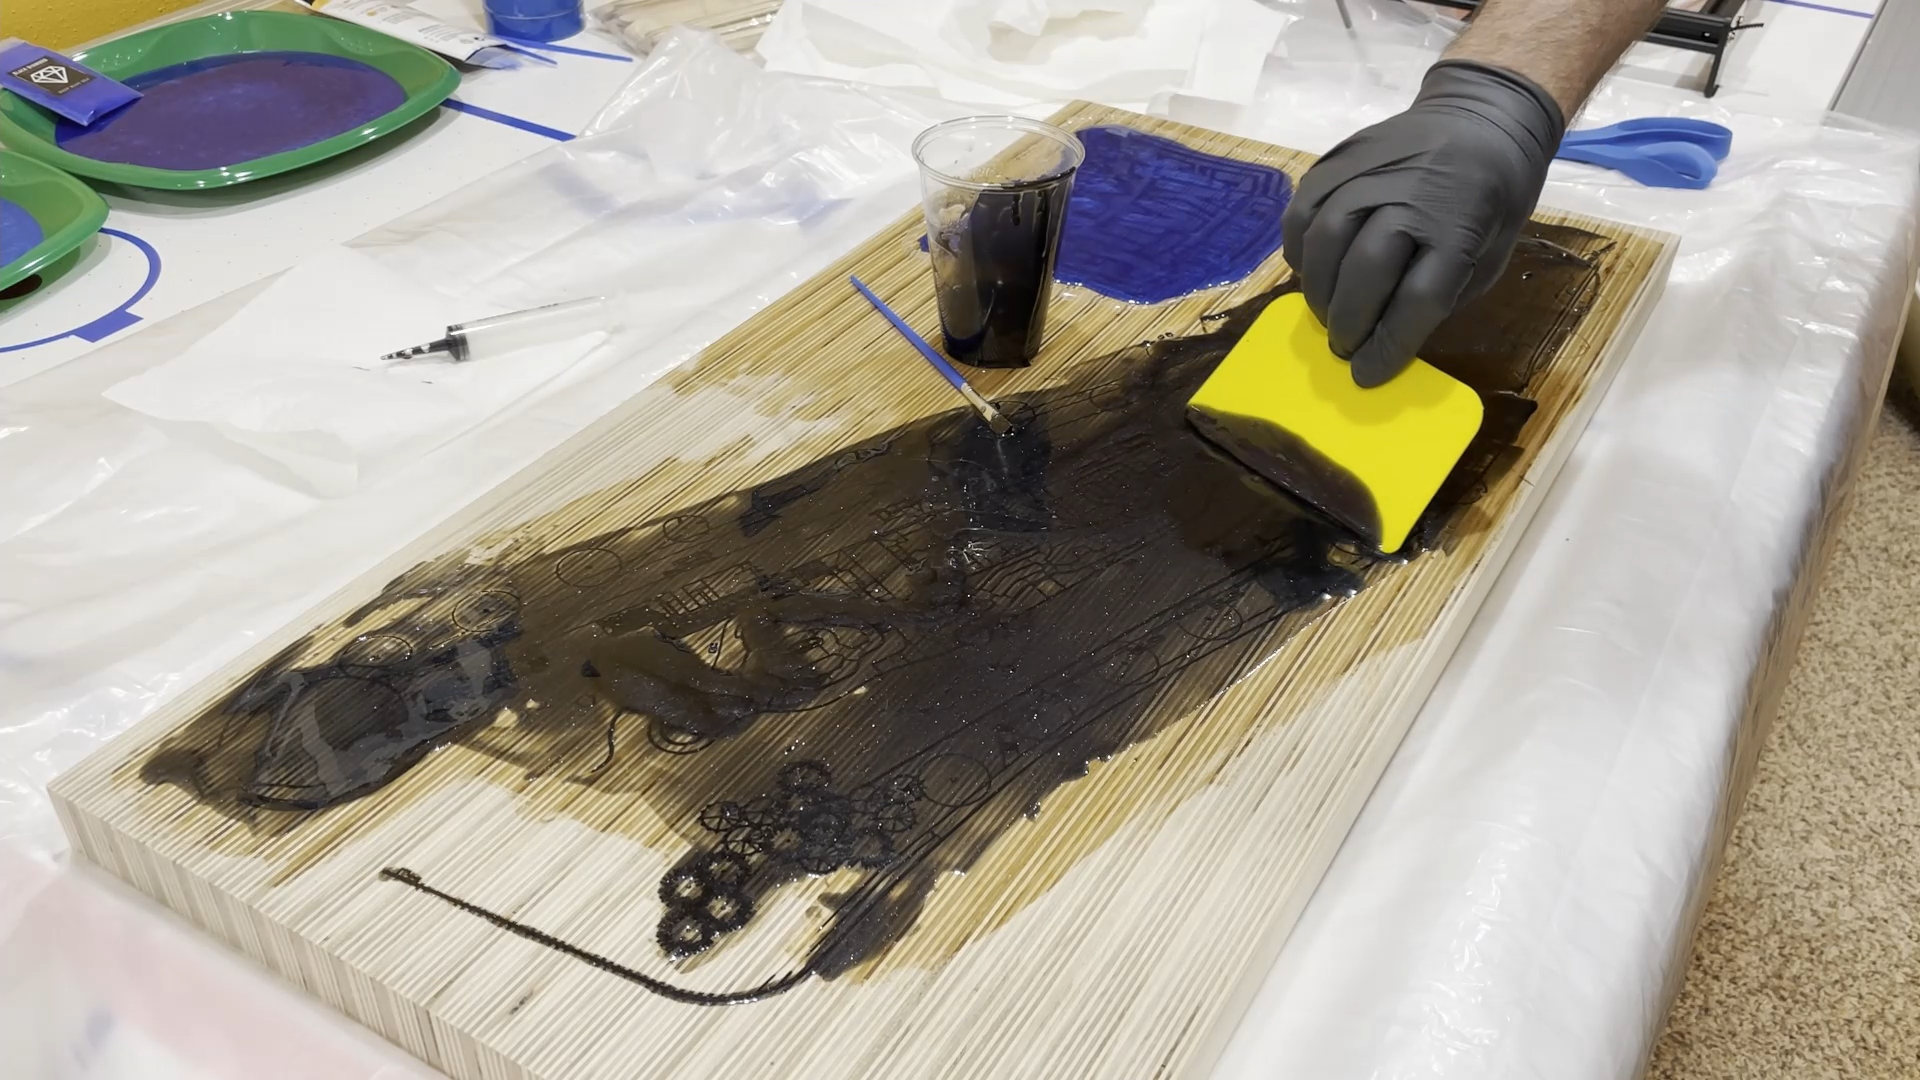
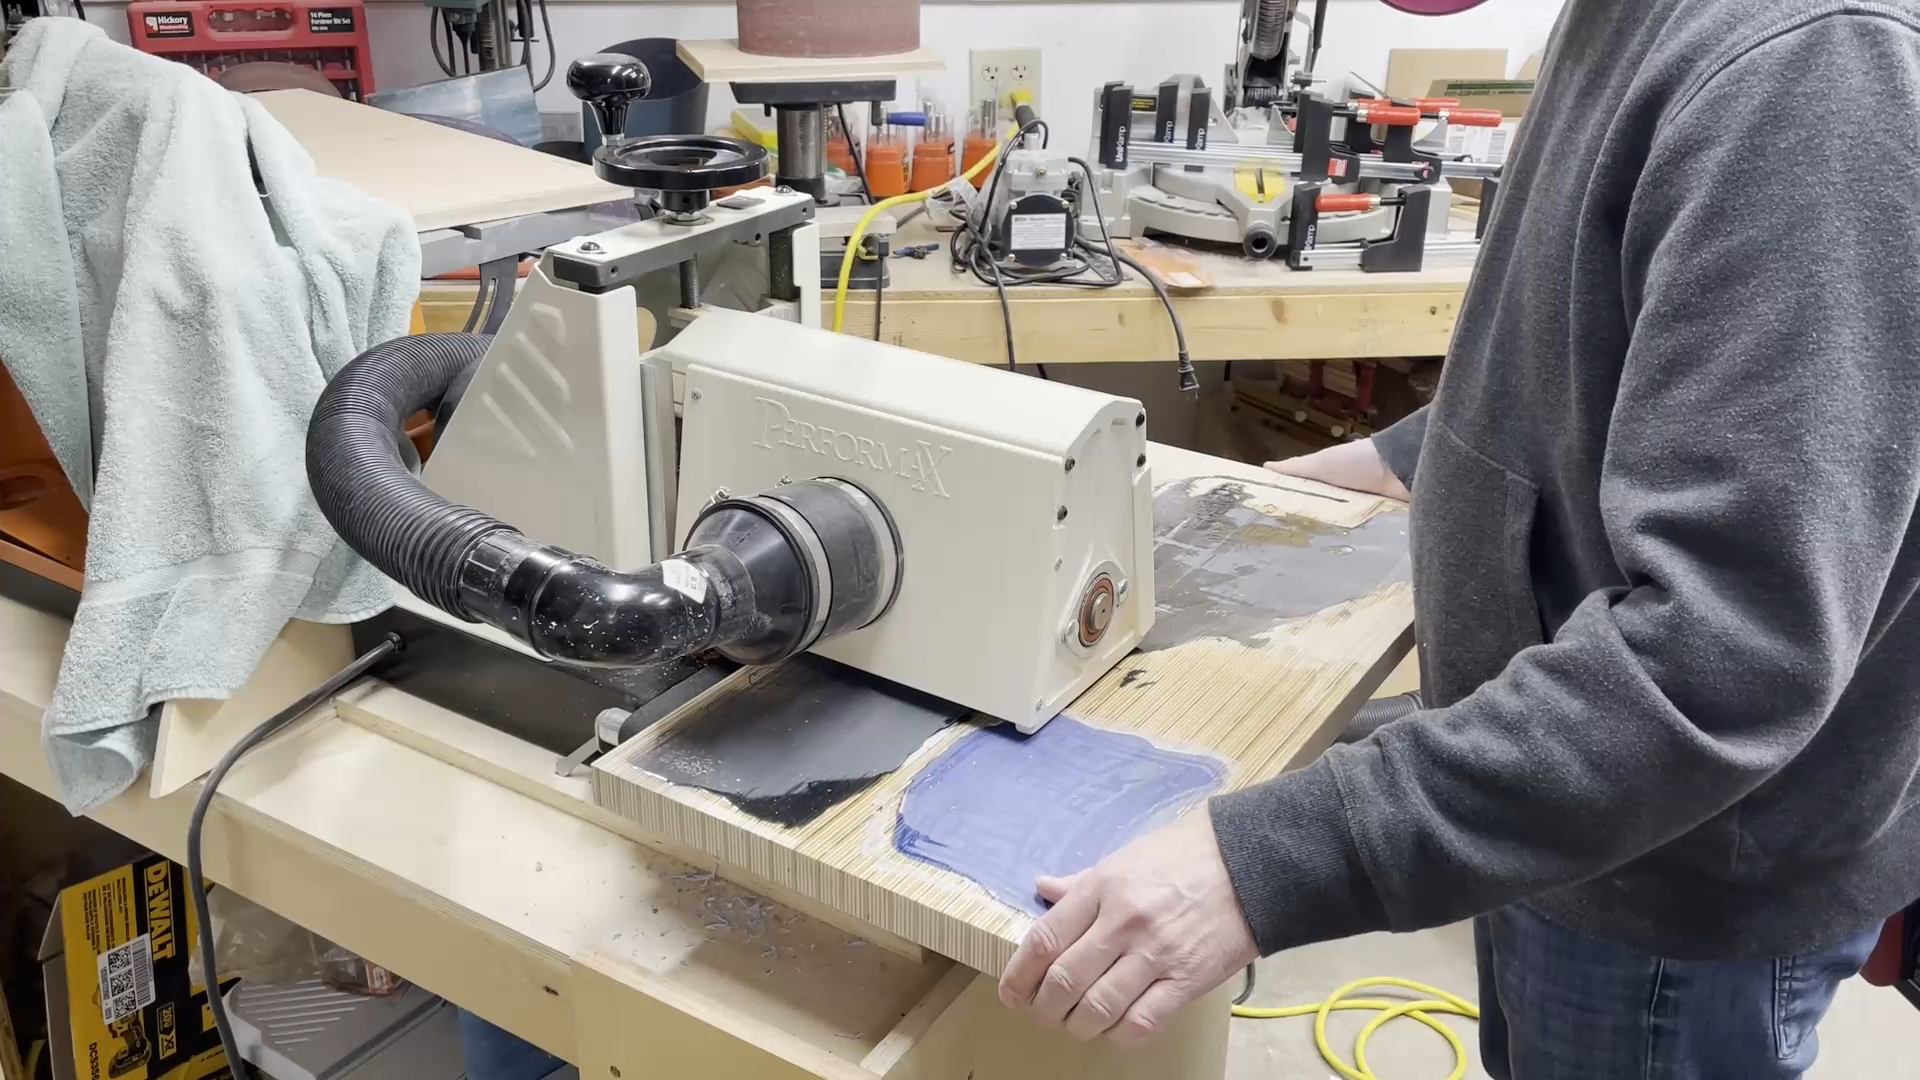
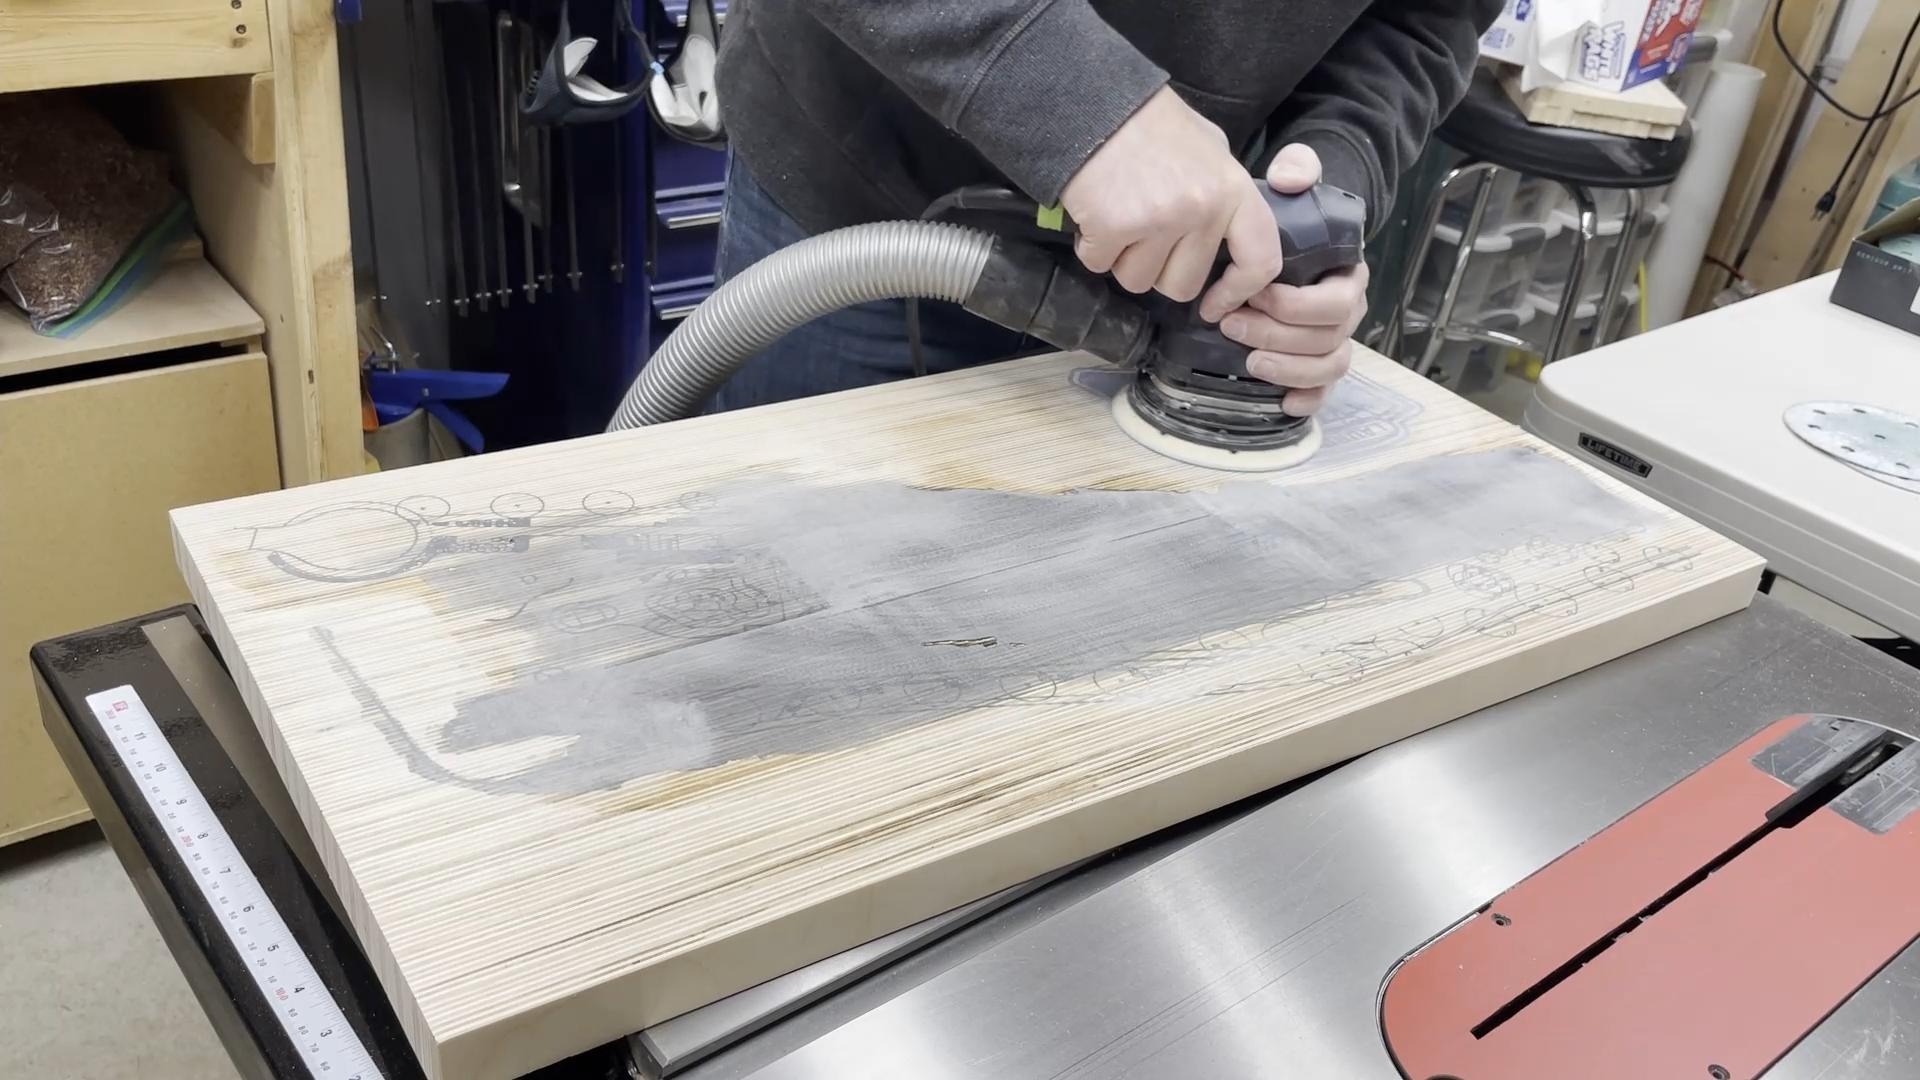
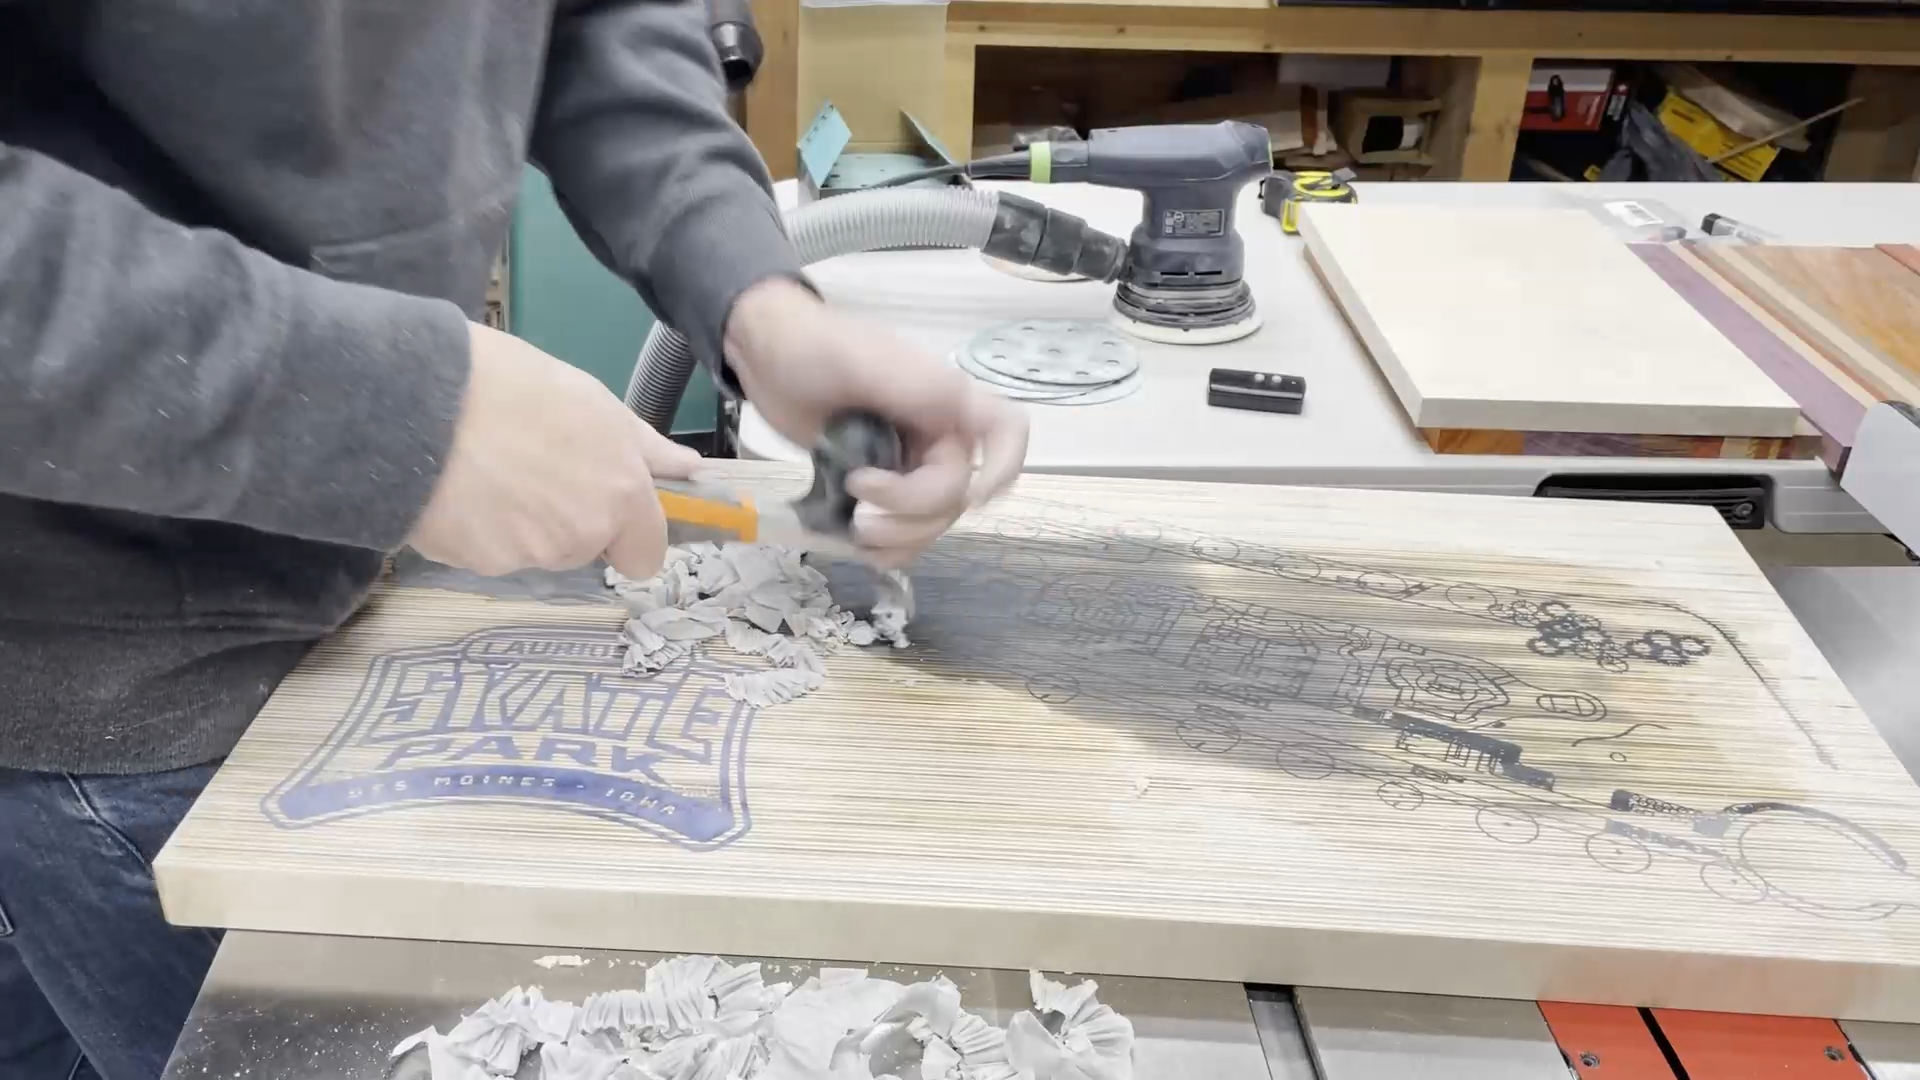
Step 15: Remove Excess Epoxy and Sand
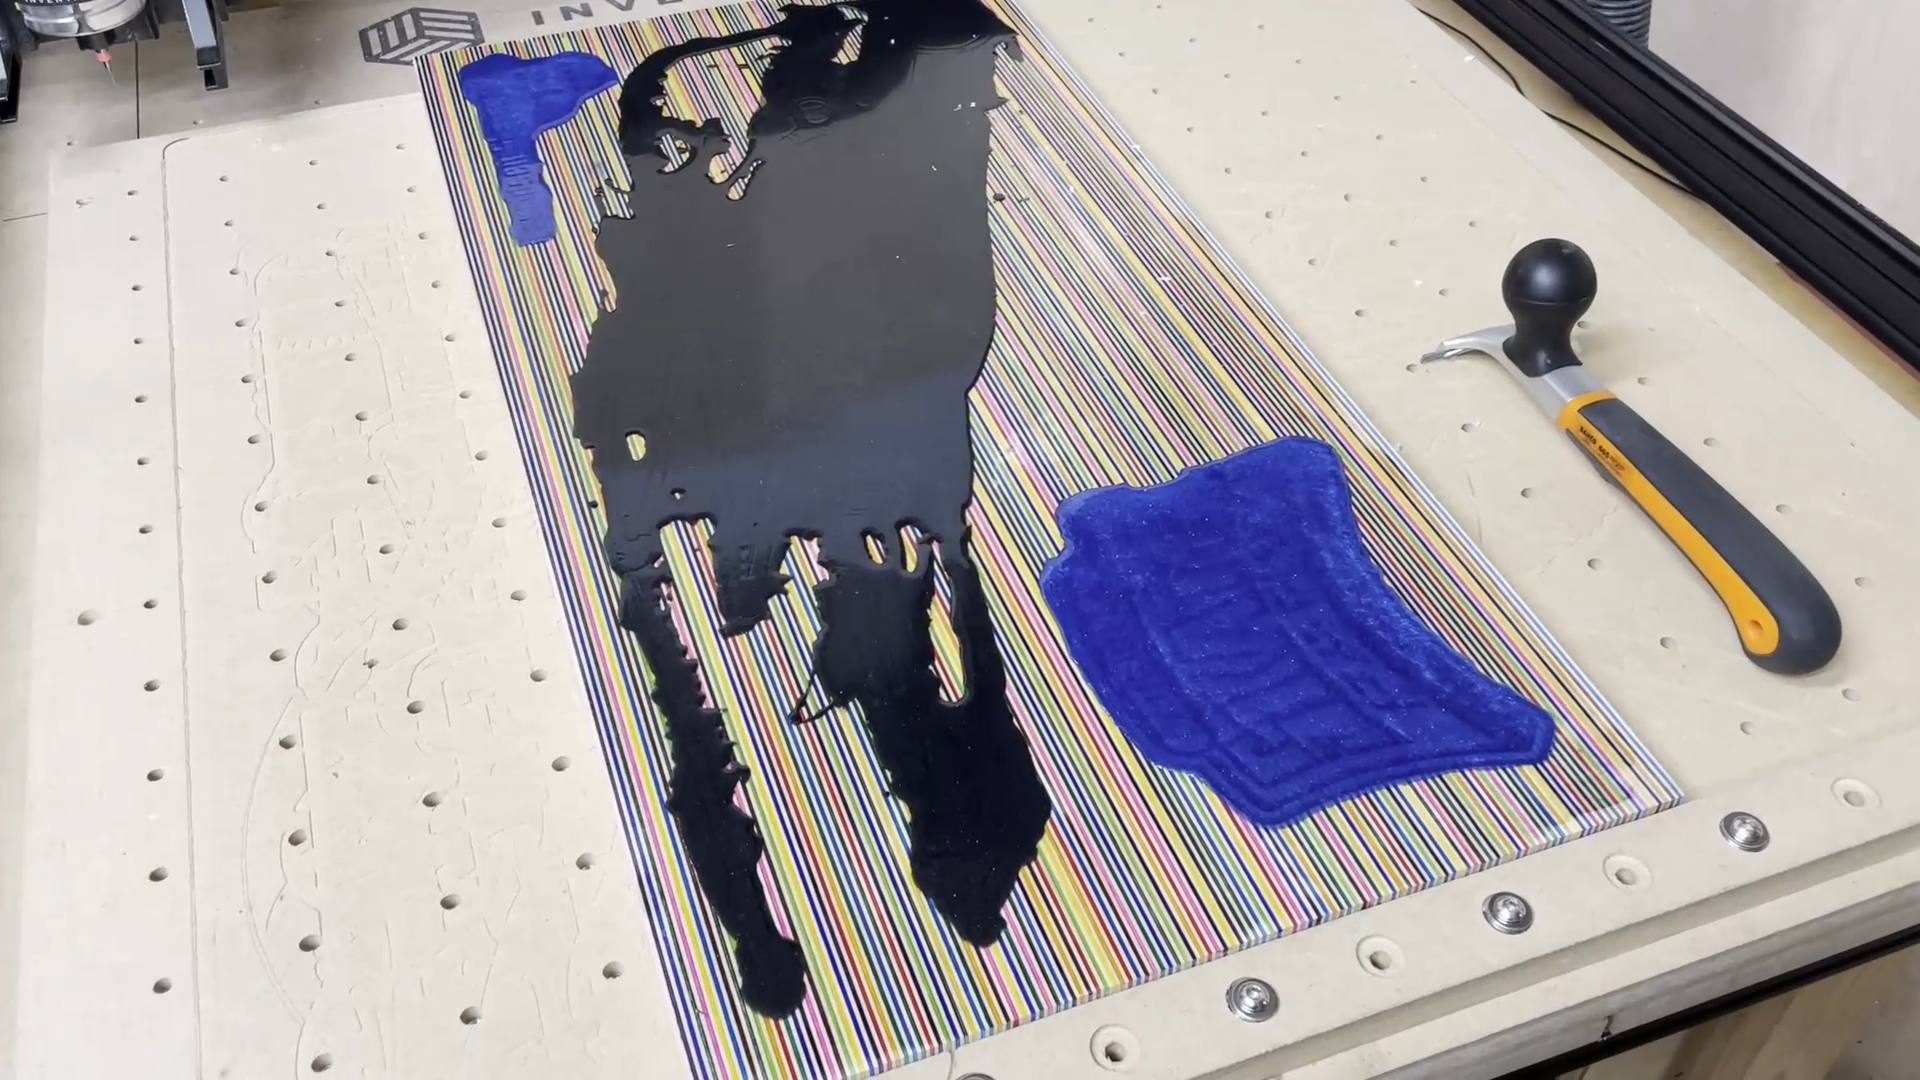
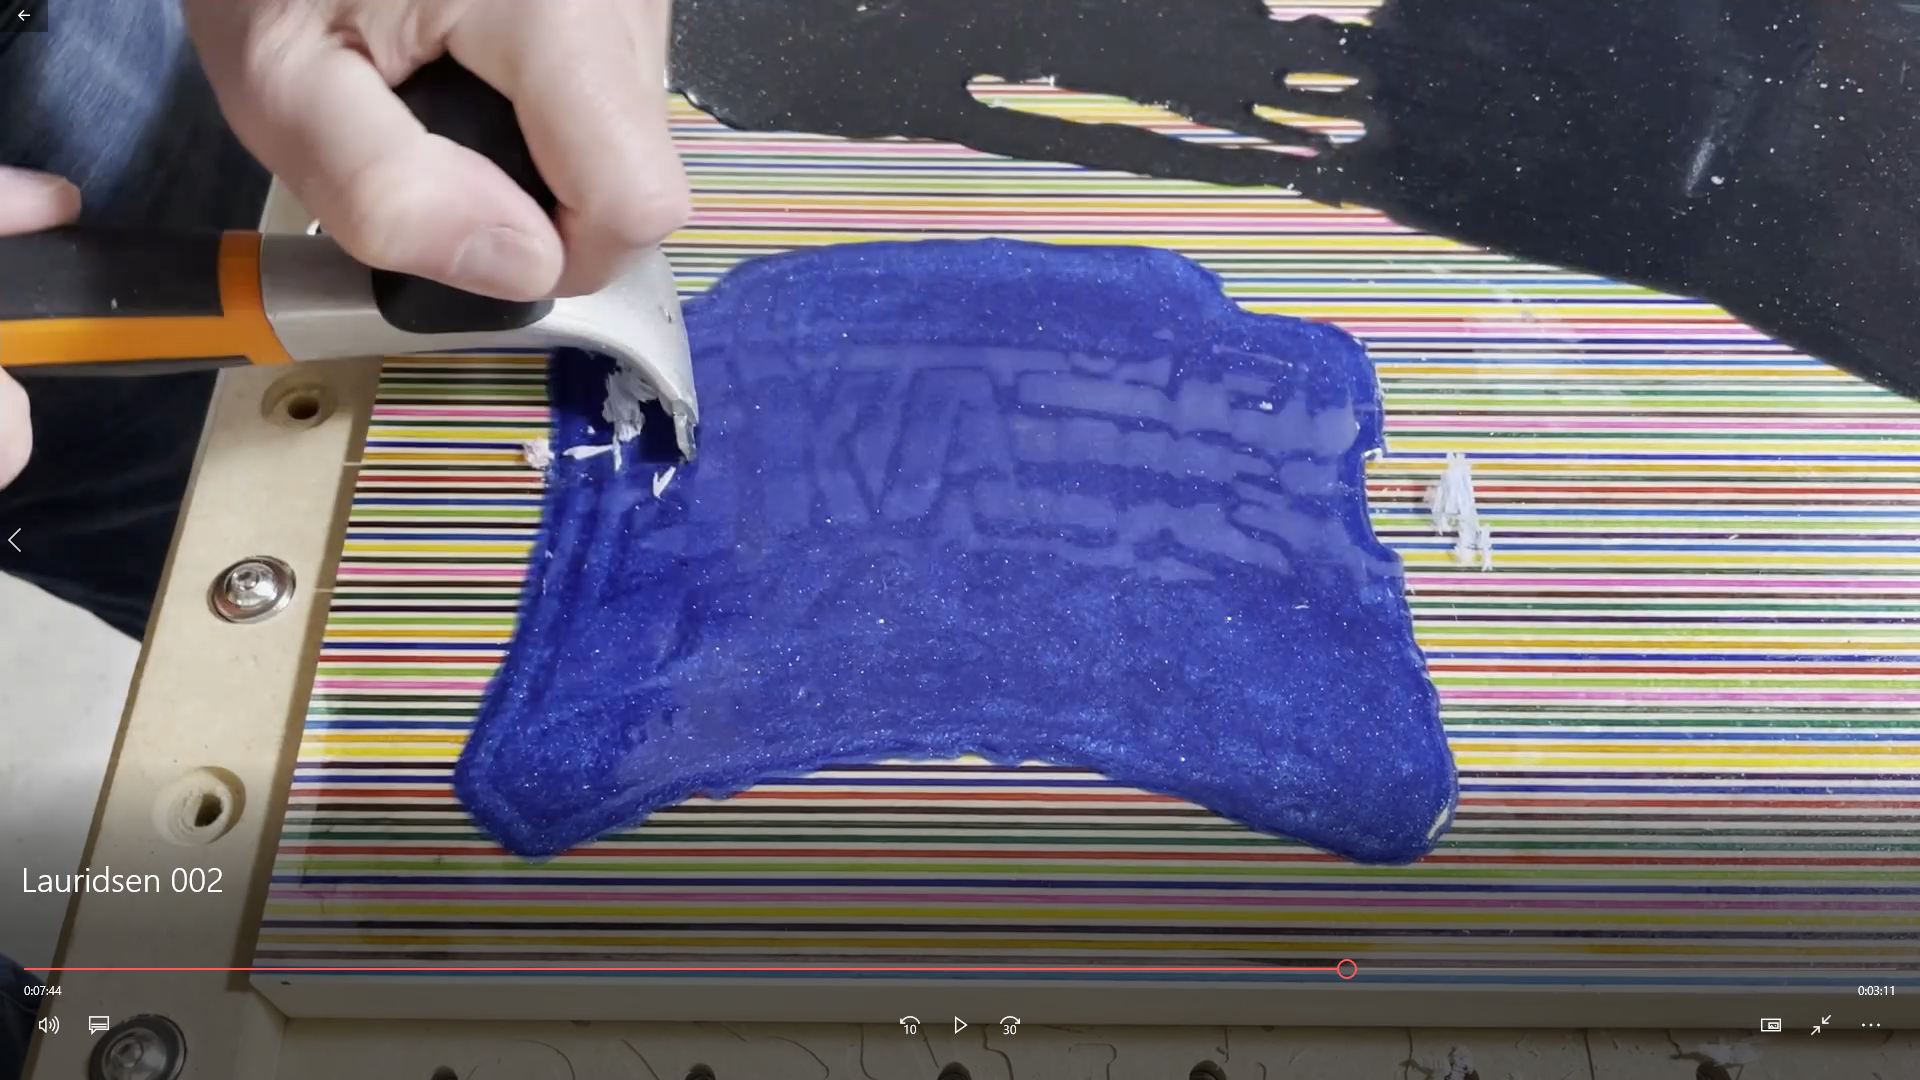

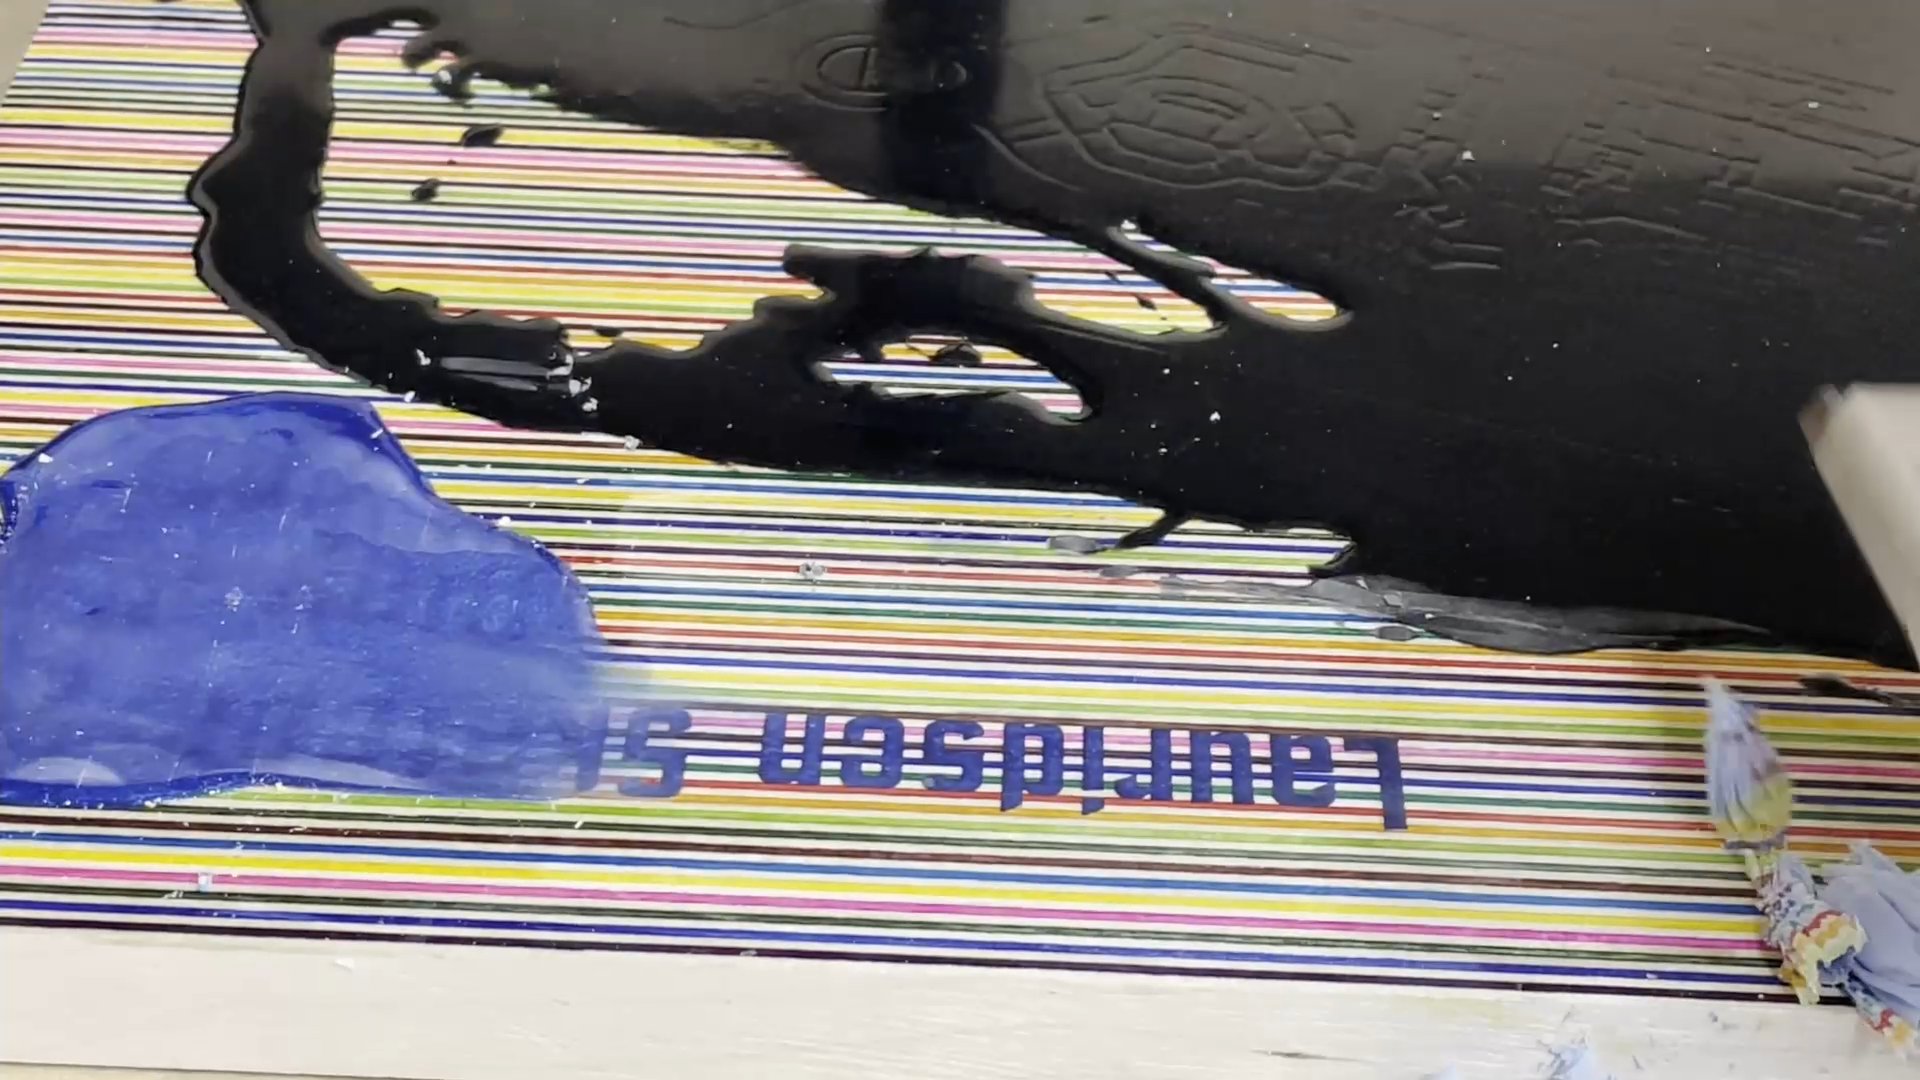

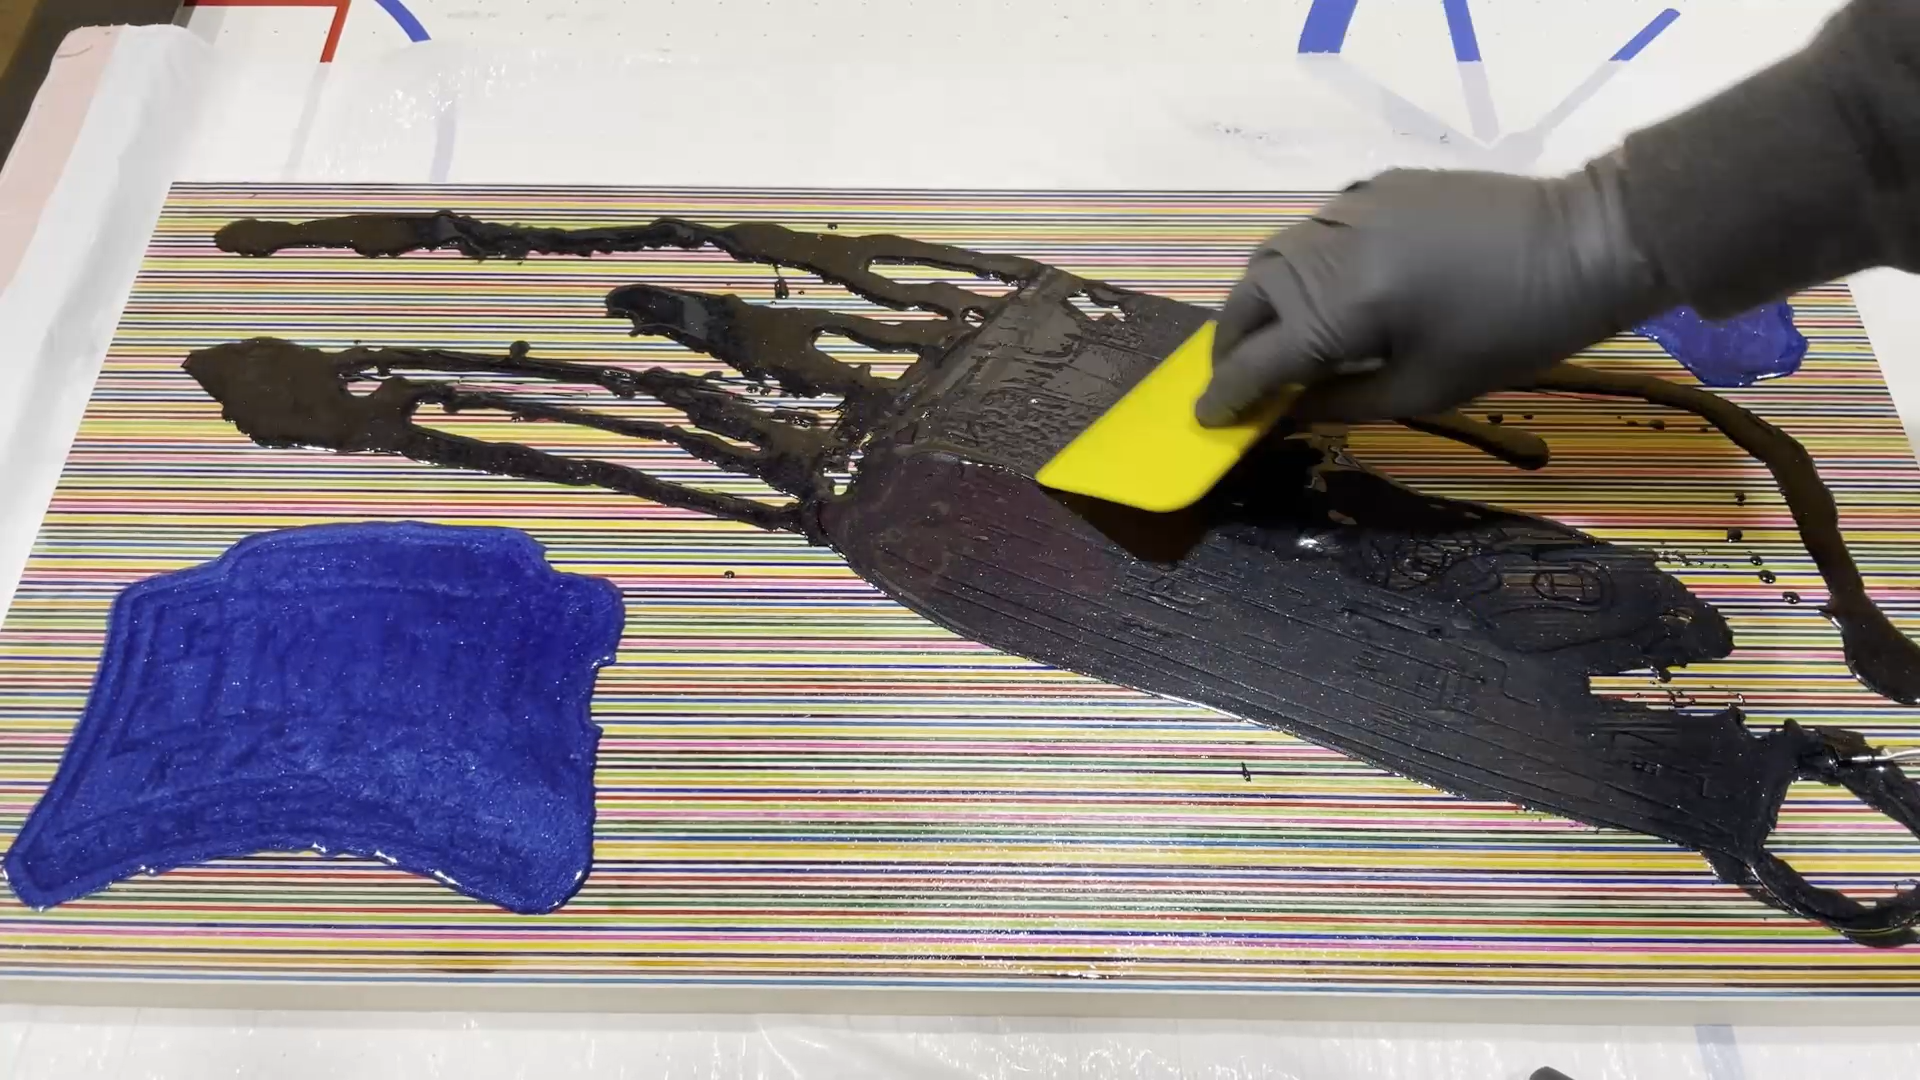
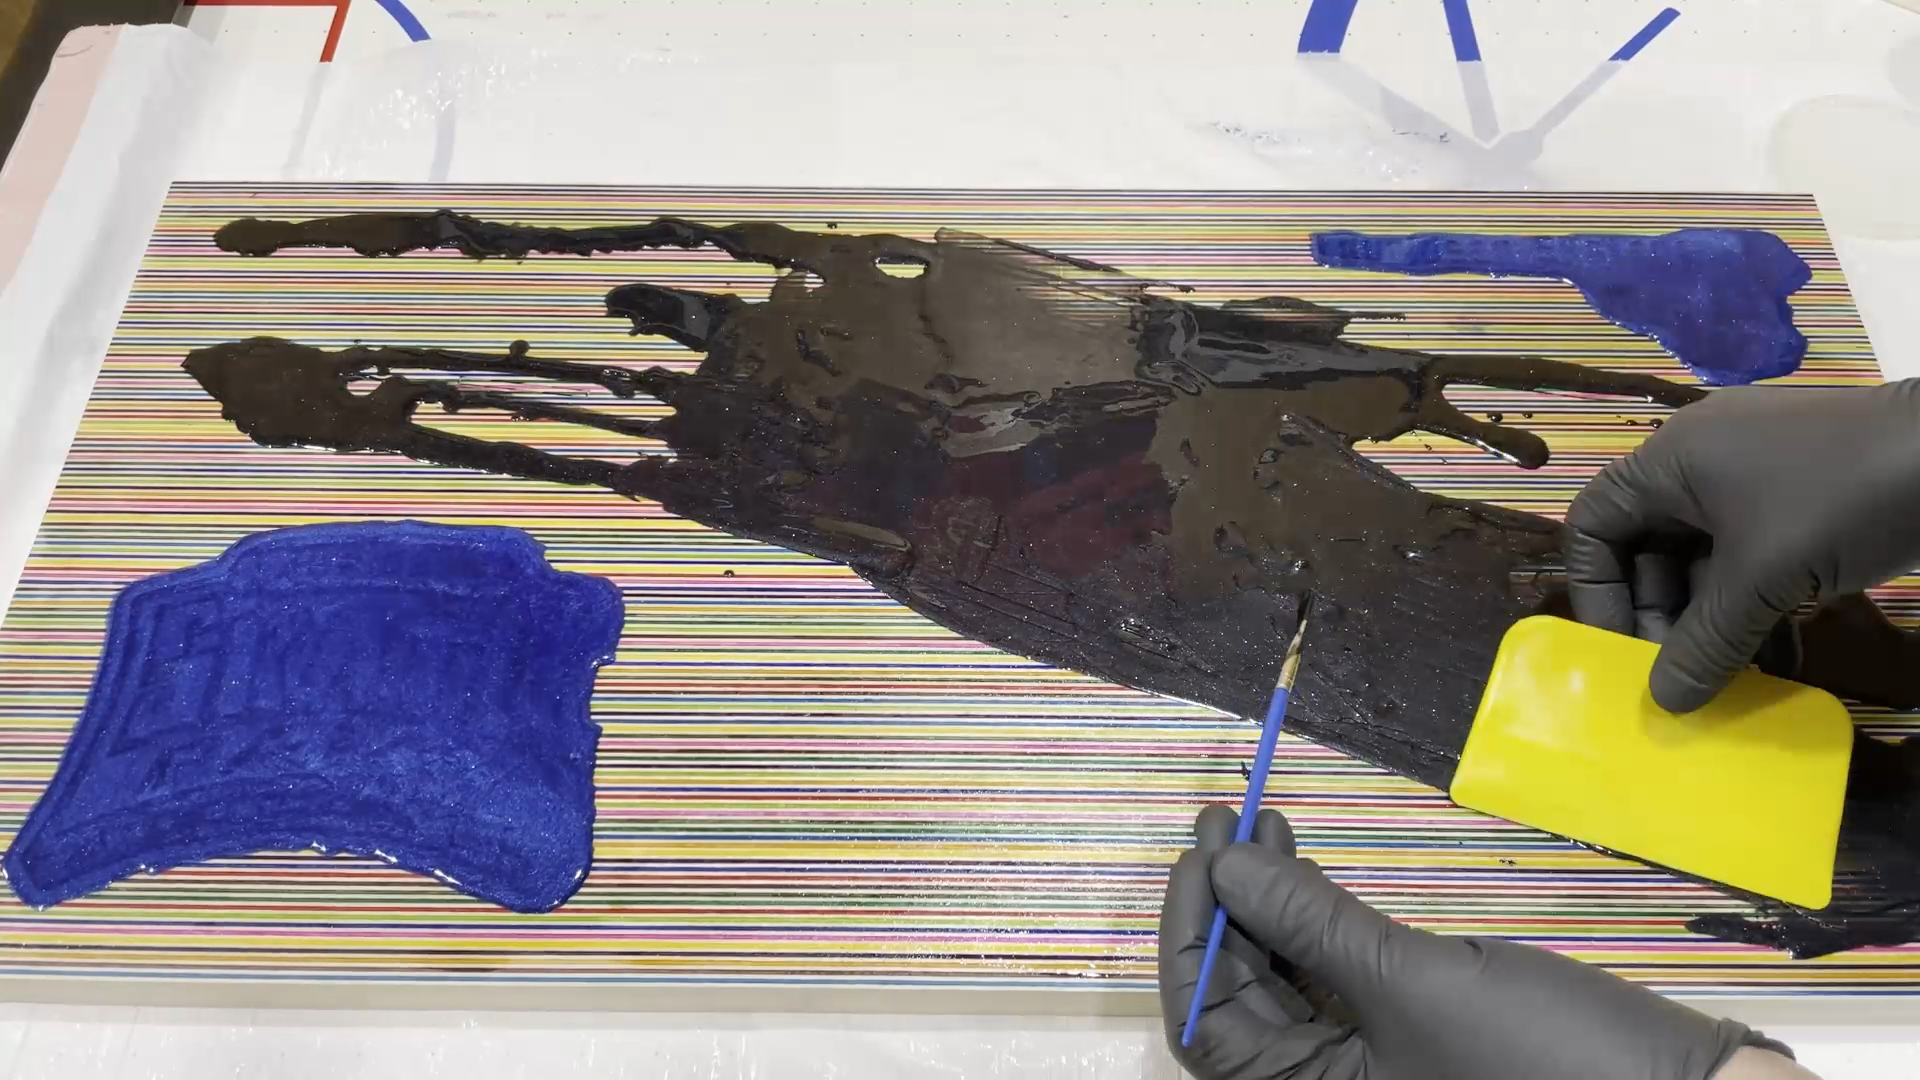
Next it was time to remove the excess epoxy. I decided to start the removal with a hand scraper. That worked great, but it was a little slow to remove that much thickness of epoxy. I went through the removal of the excess epoxy with the hand scraper just on the logo and the lettering.
For the large area of black tinted epoxy I decided to remove most of the excess with the flattening bit on the X-Carve CNC. I creeped up on the surface of the wood by using a depth of 1/100" per pass. This worked really great. Once I had removed enough epoxy to get to the surface of the wood I then changed to the hand scraper again. This saved a lot of time and effort.
I sanded up to 400 grit, then wiped it down with a damp cloth to raise the grain, then sanded up to 800 grit for the final sanding before adding the finish.
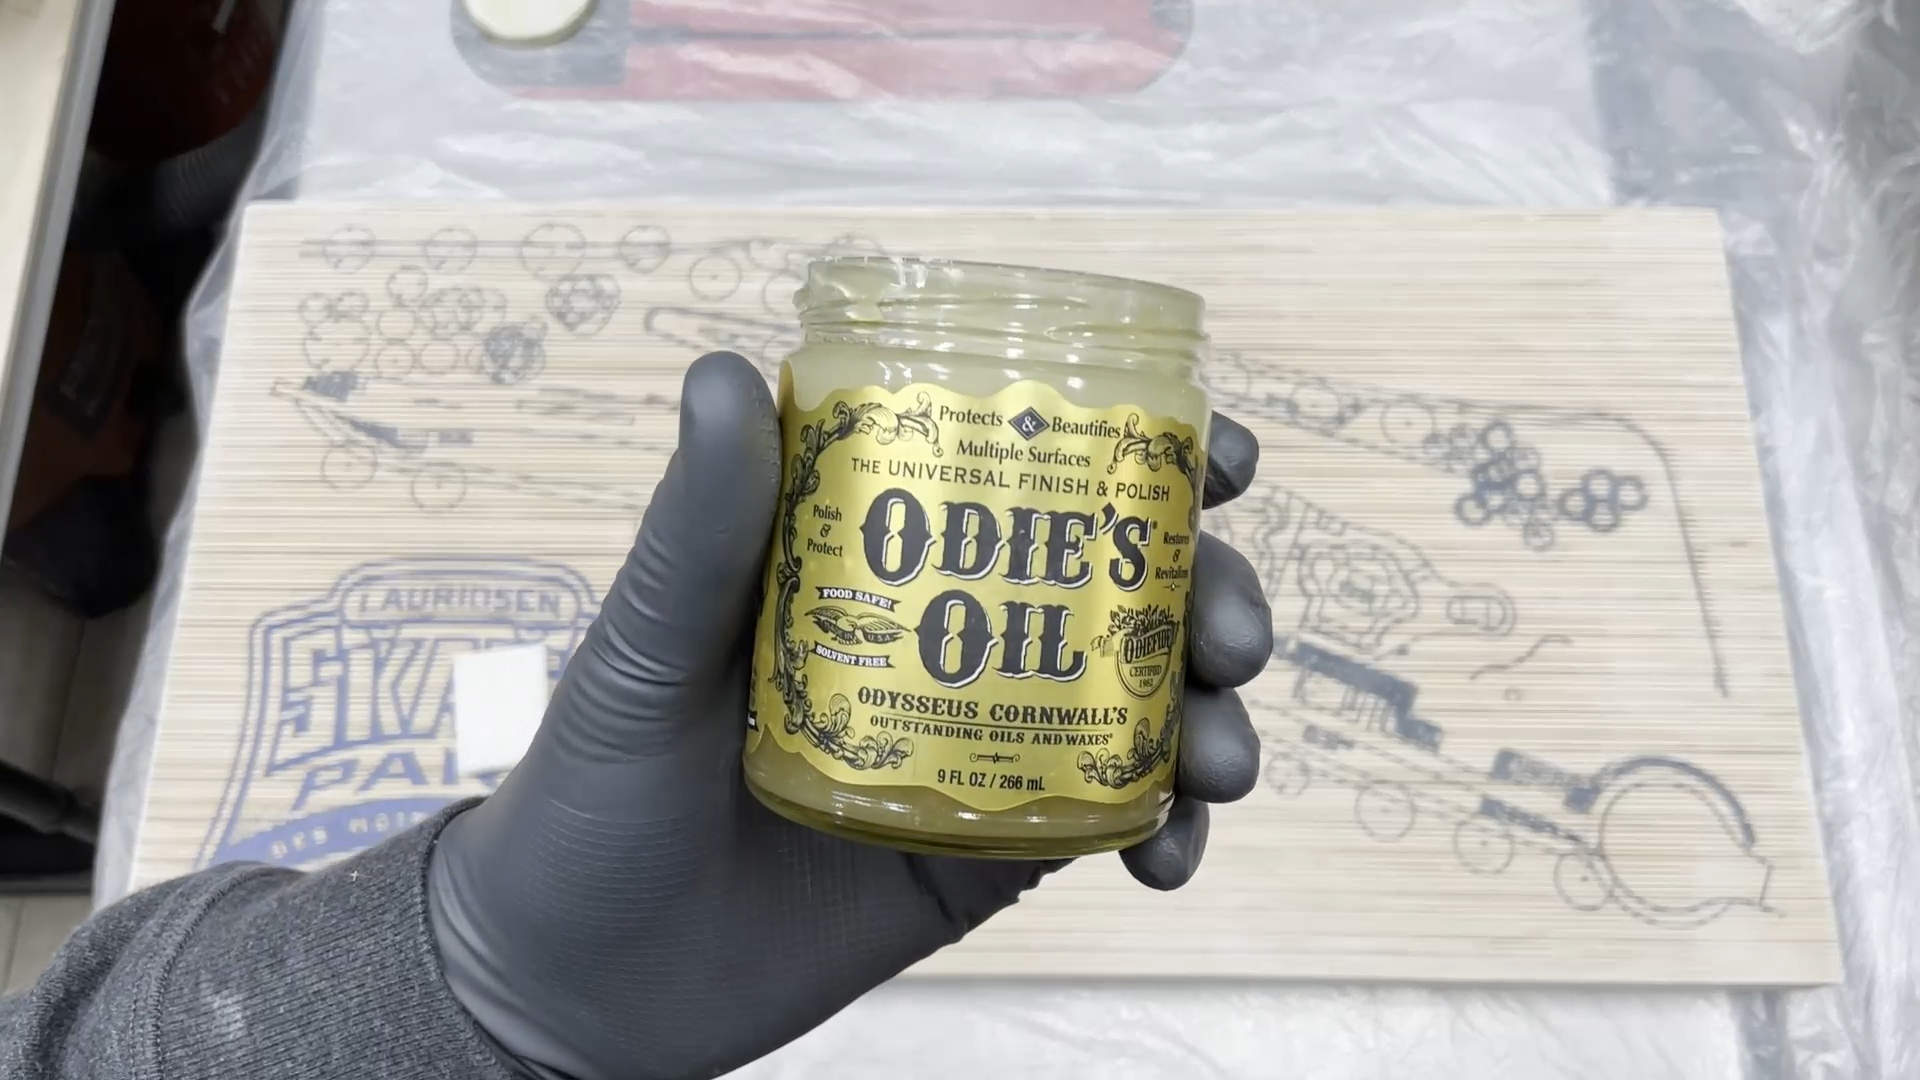
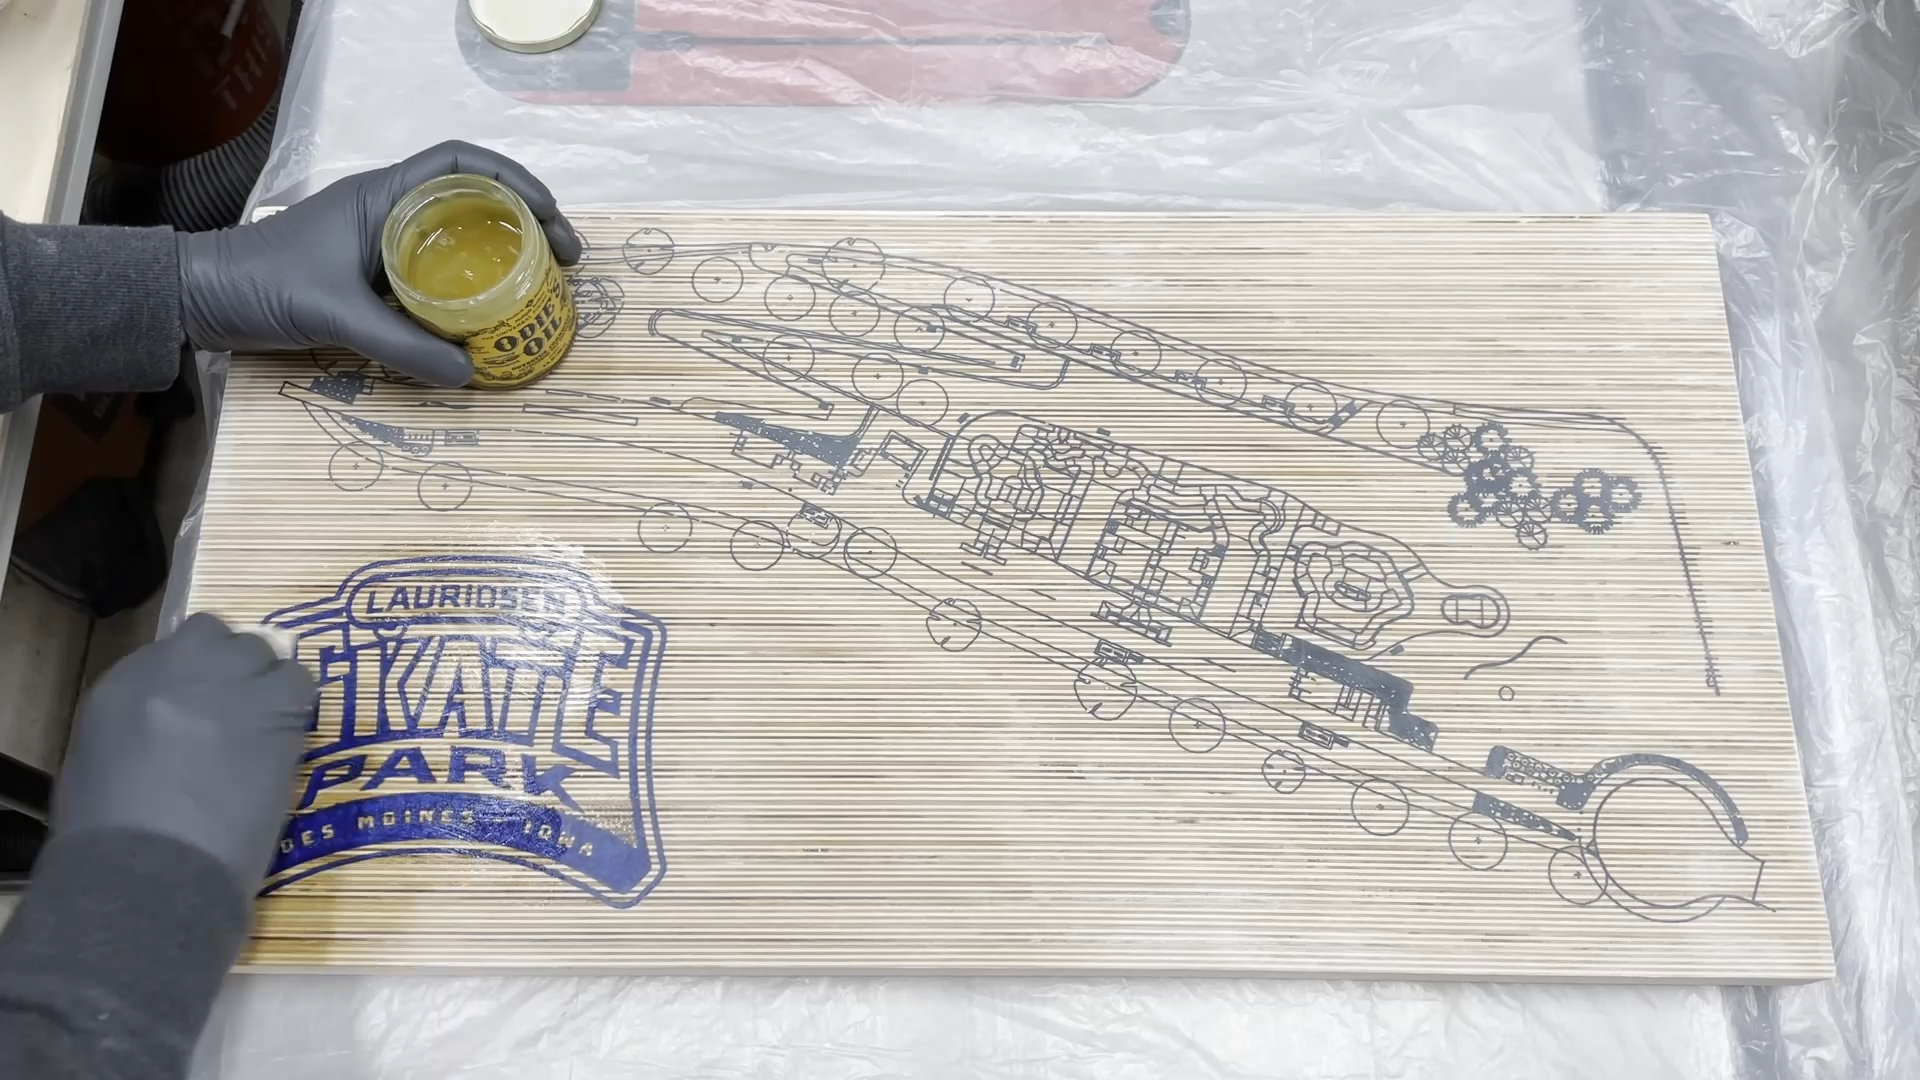
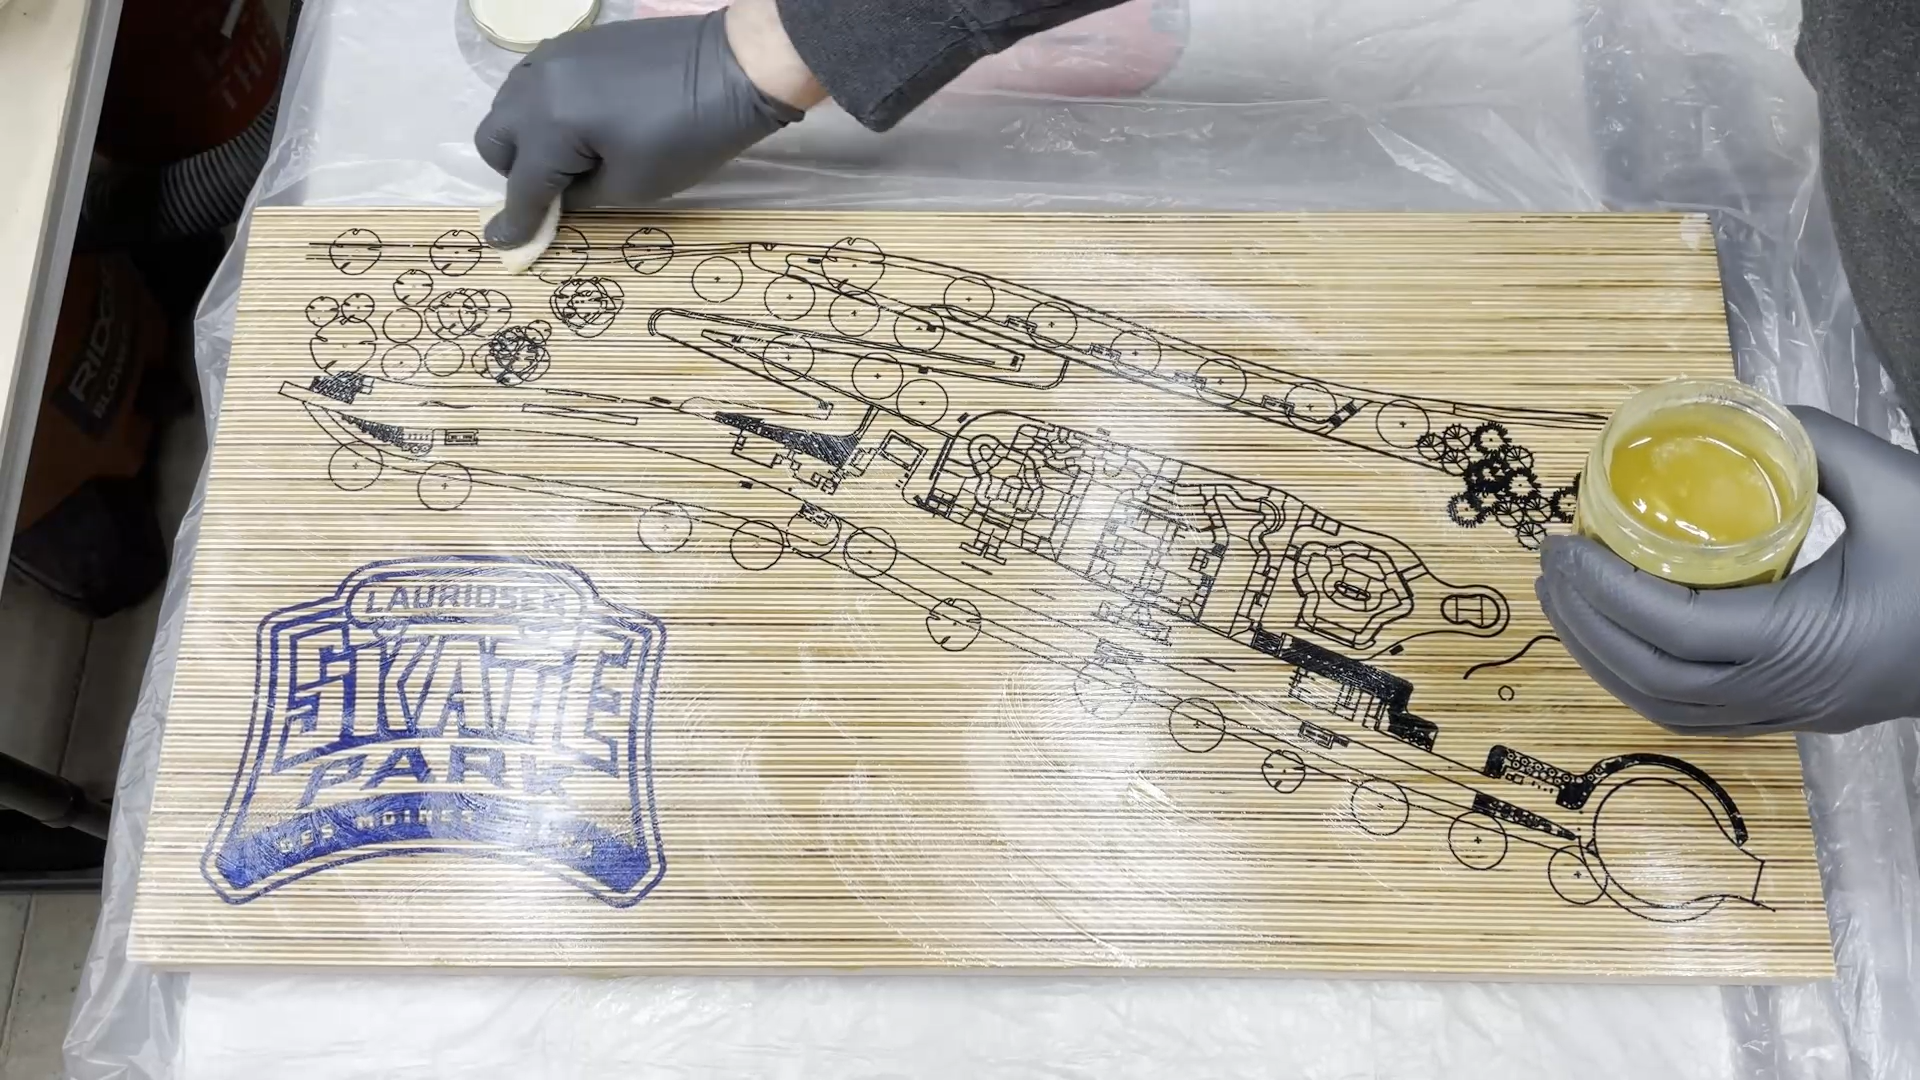
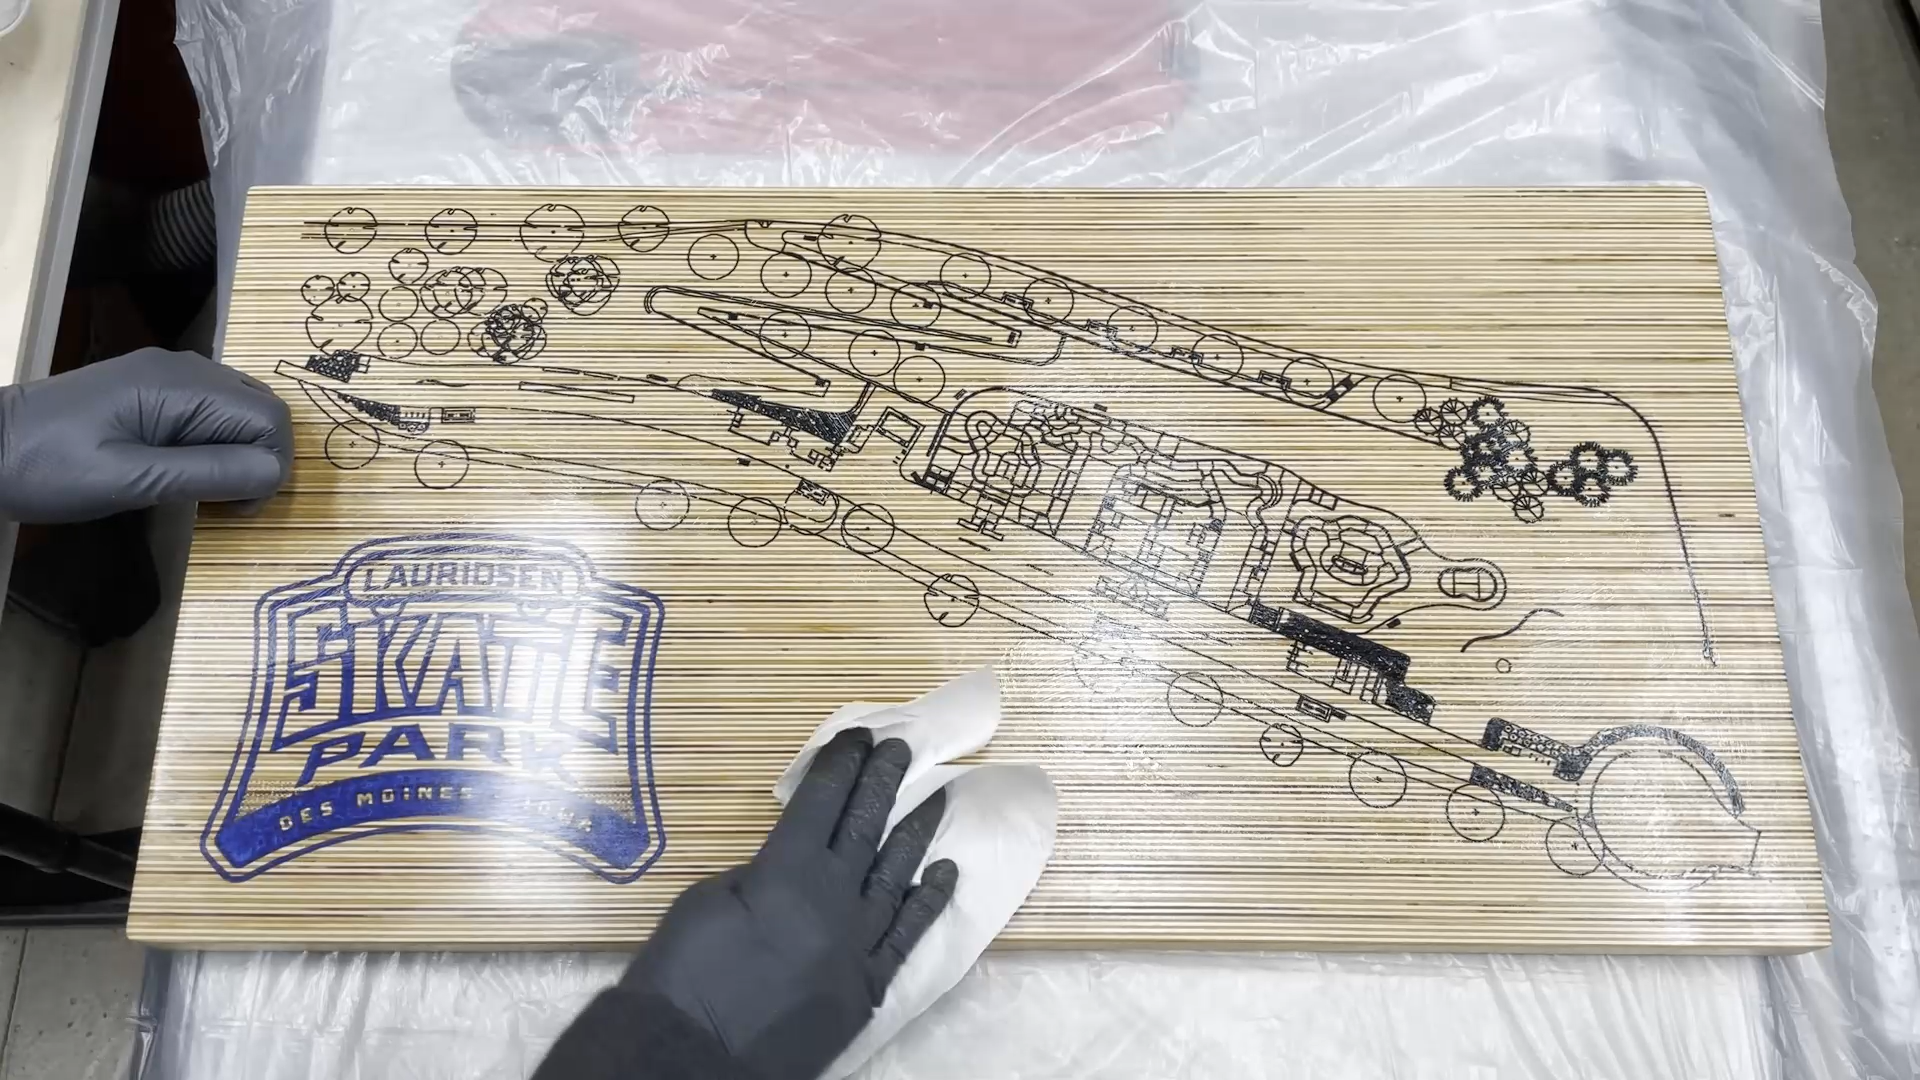
Step 16: Add Finish
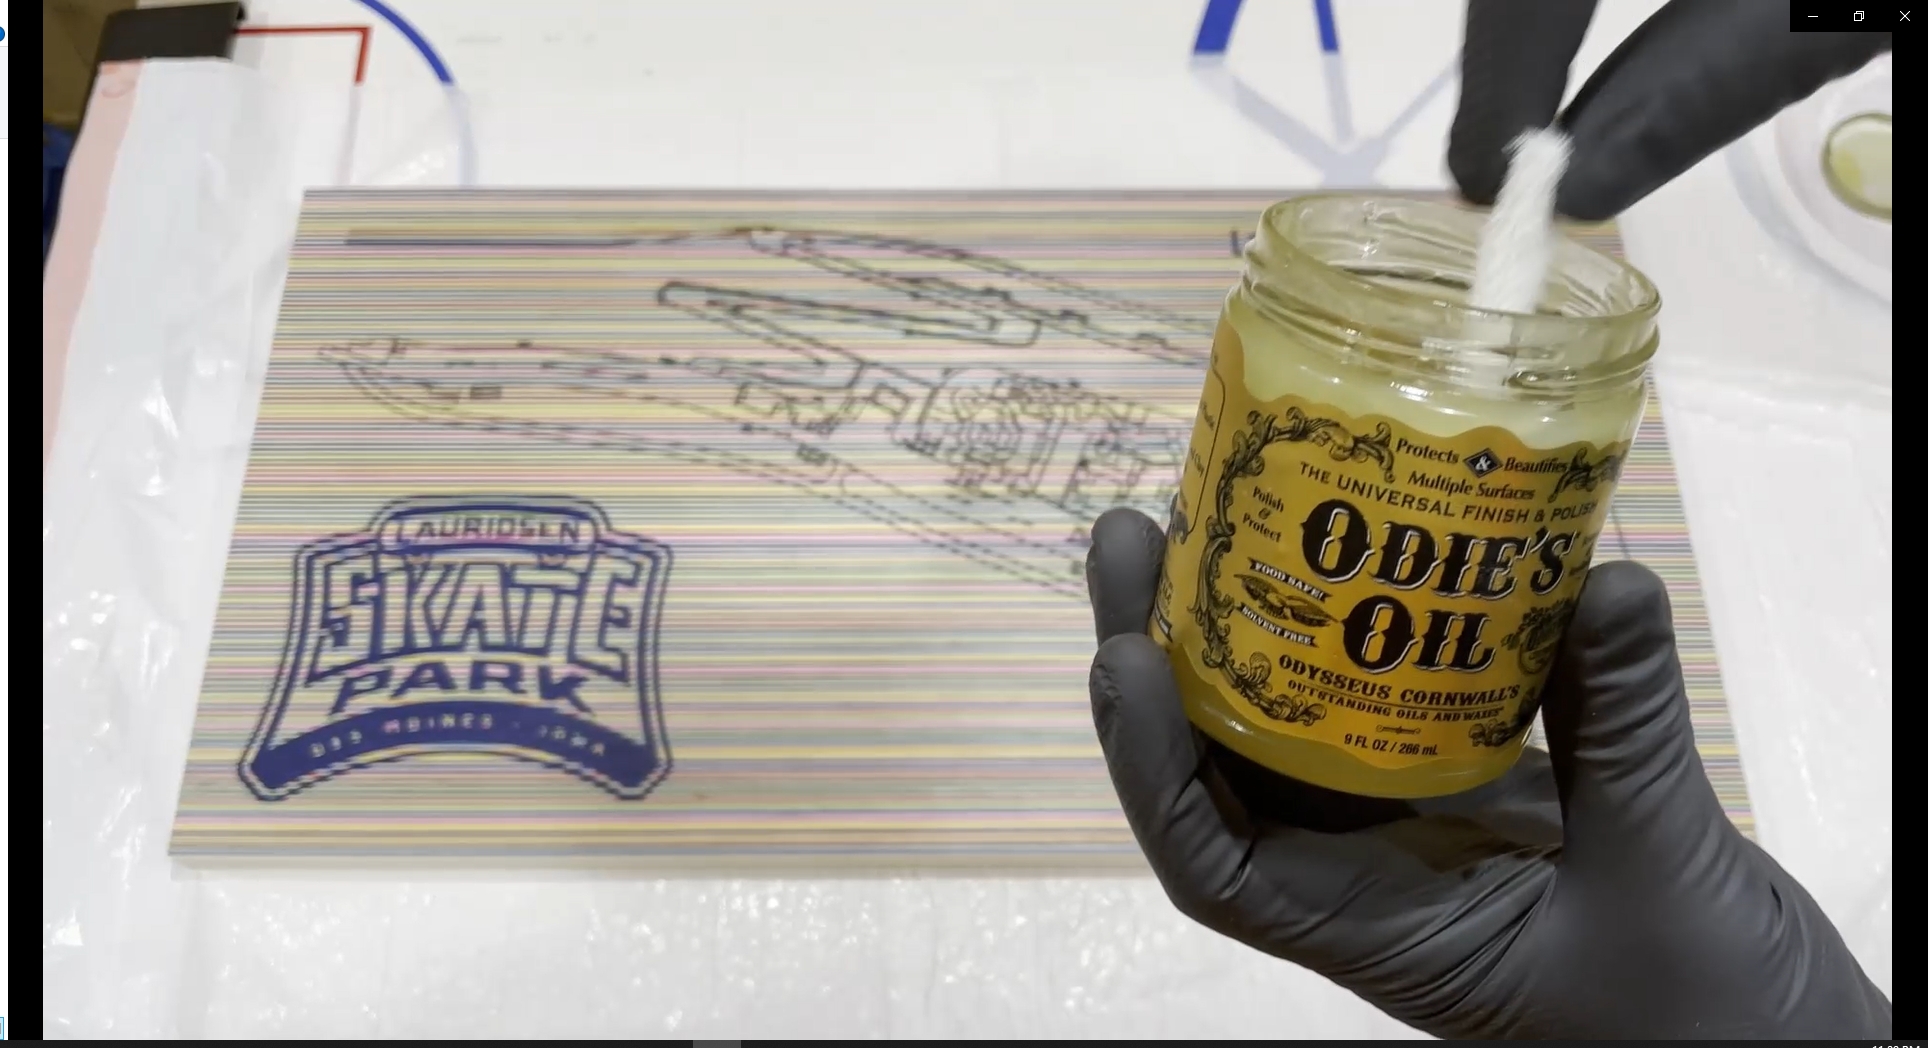
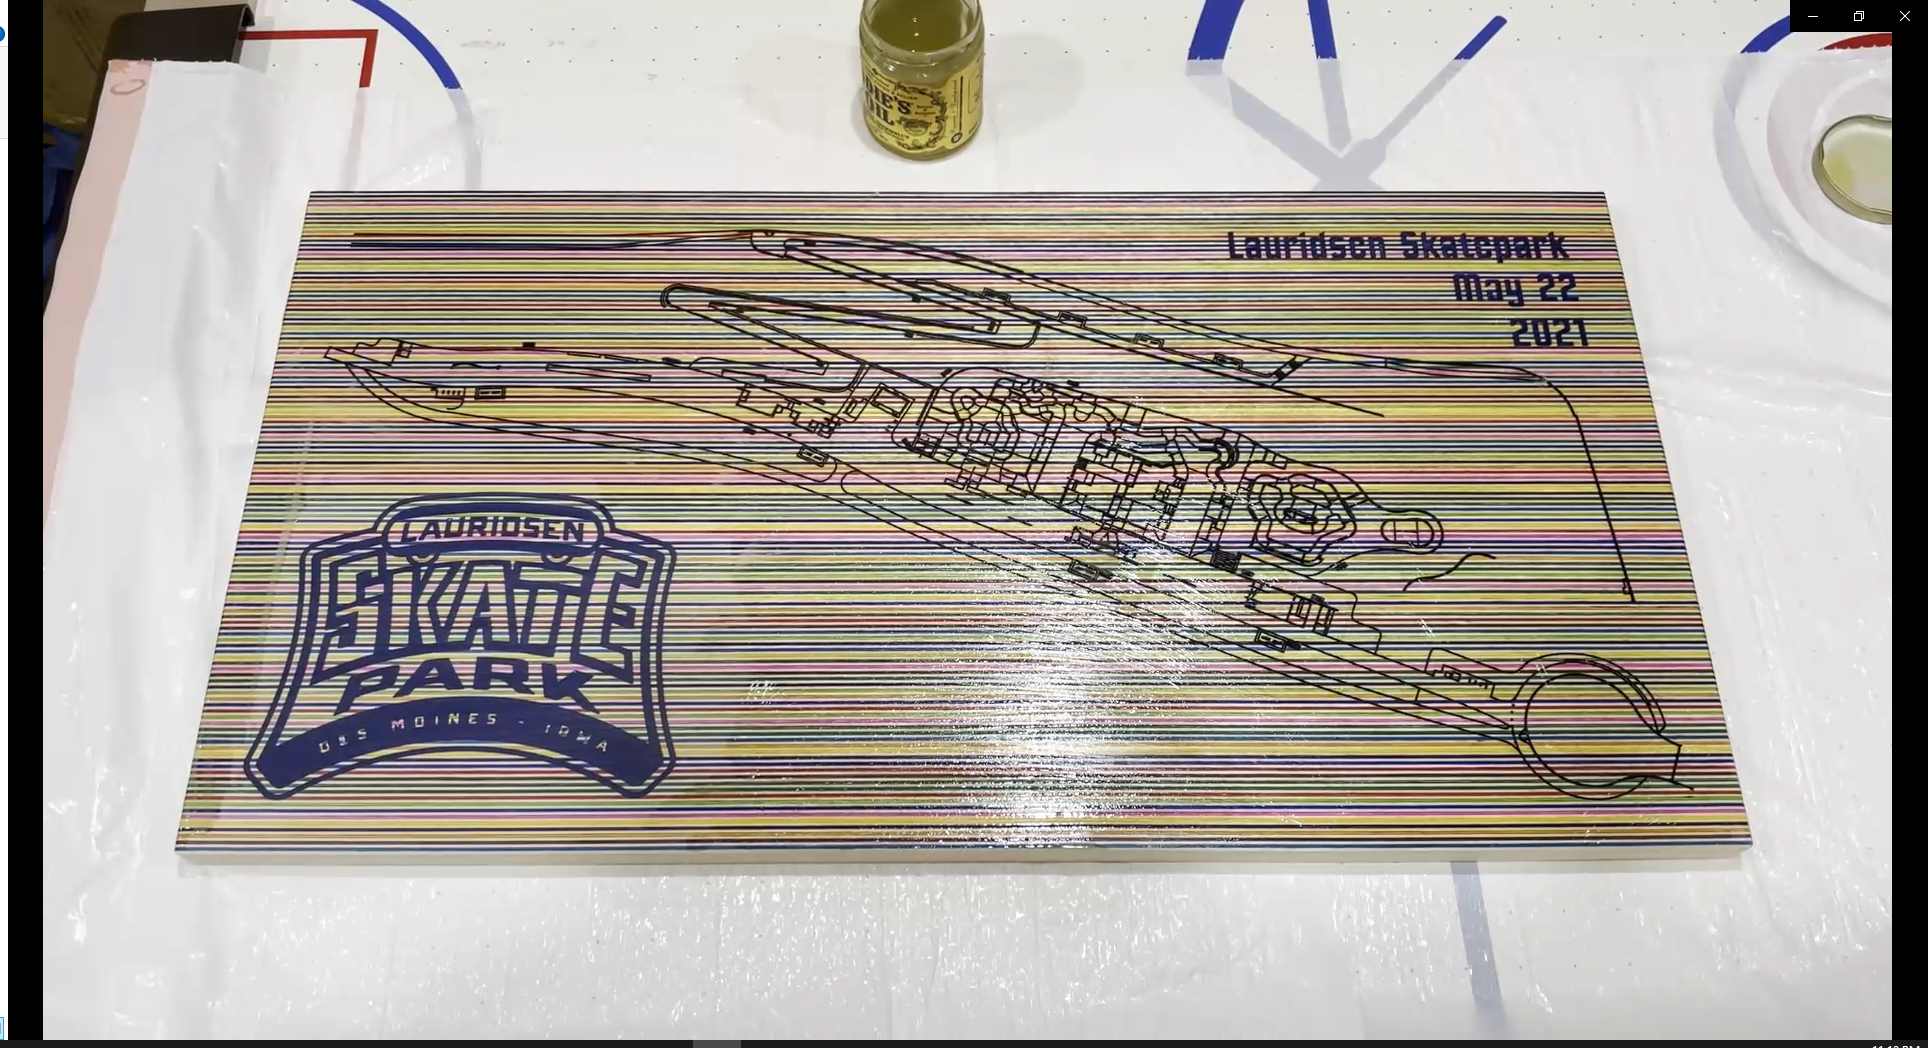
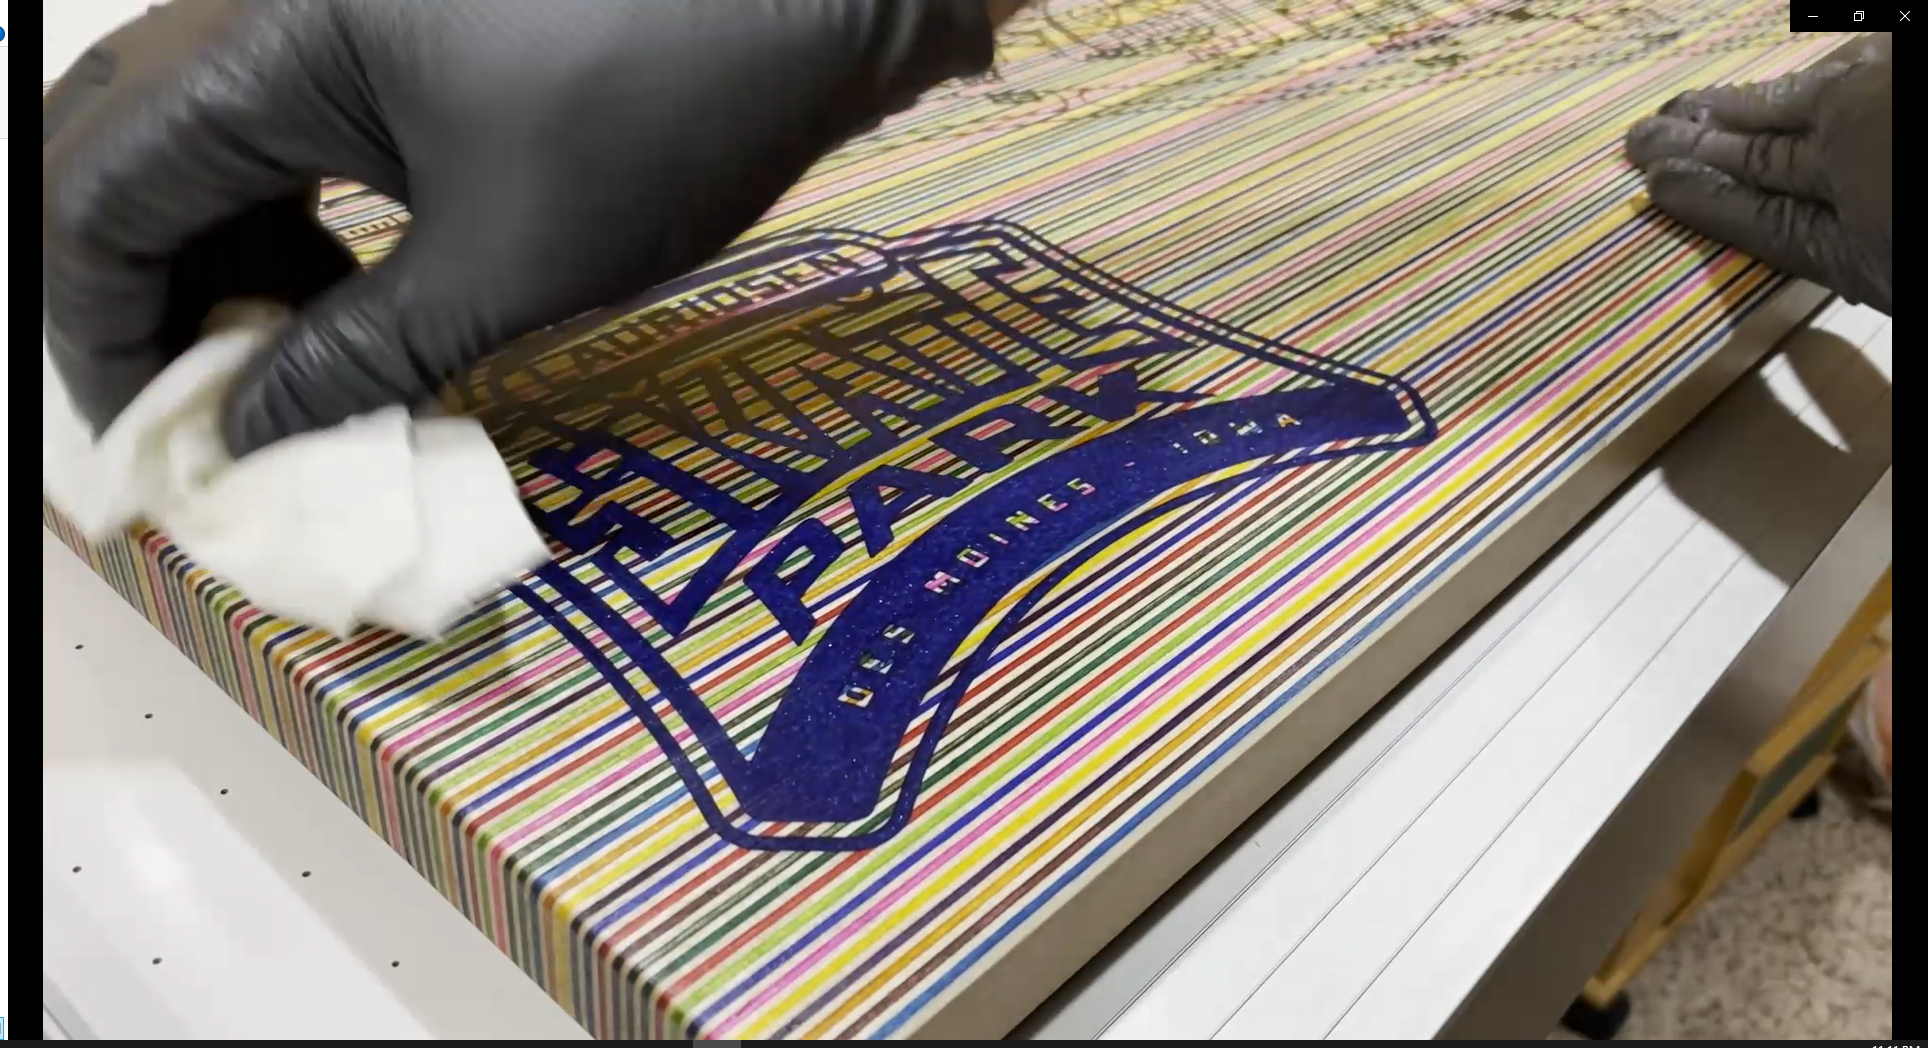
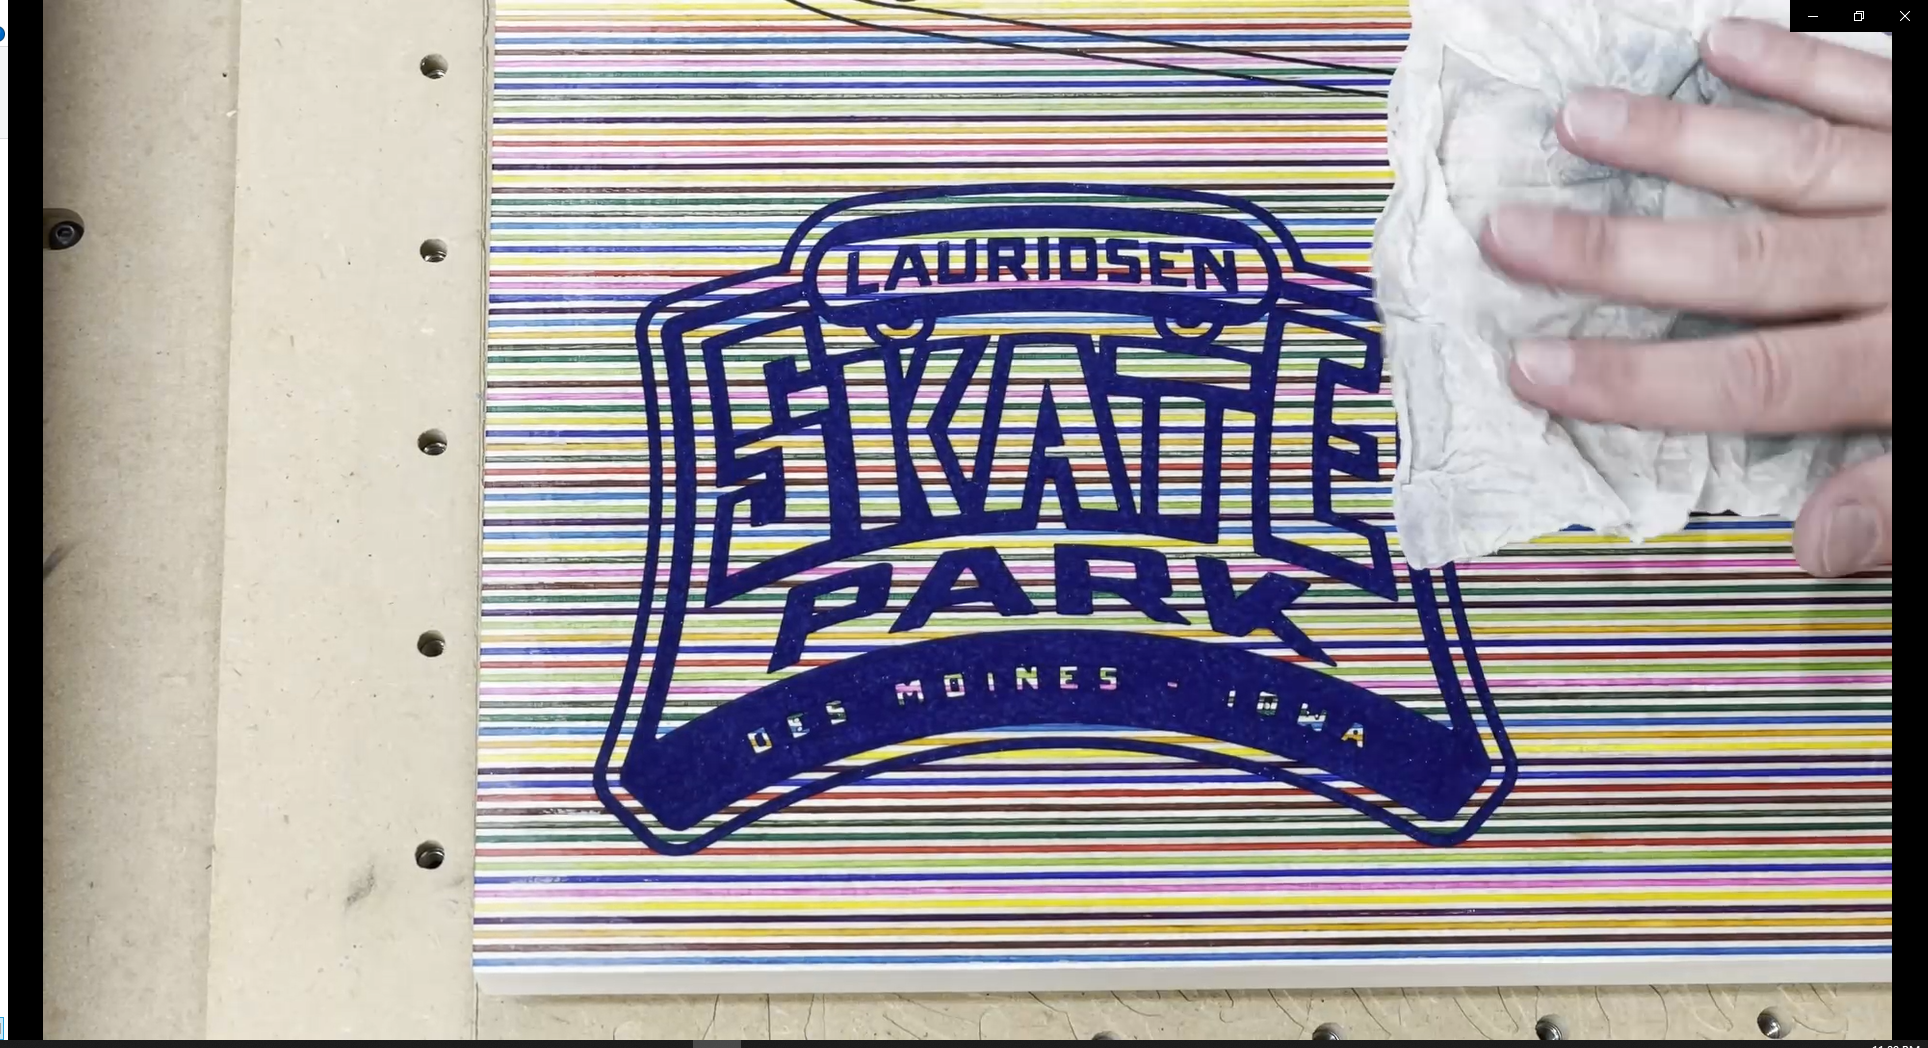
The finish I used on the board was Odie's Oil Universal finish. This really brings out the color in the skateboard veneers. This finish is incredibly easy to apply. Just wipe it on with a Scotchbrite polishing pad (white) and then after 15 to 20 minutes you can wipe off the excess with a clean soft rag.
Just use some light circular motion with the Scotchbrite pad to work the Odie's Oil into the wood.
Step 17: Final Thoughts
Please make sure you subscribe to my YouTube channel.

I have to say that I learned a lot from this project and it has been an honor to work on such a great project that was a true passion for so many people over many years to bring it to reality.
A big thank you goes out to the Lauridsen Skatepark committee for giving me the opportunity to work on this gift for the top donor to the project. I hope it met and exceeded your expectations.
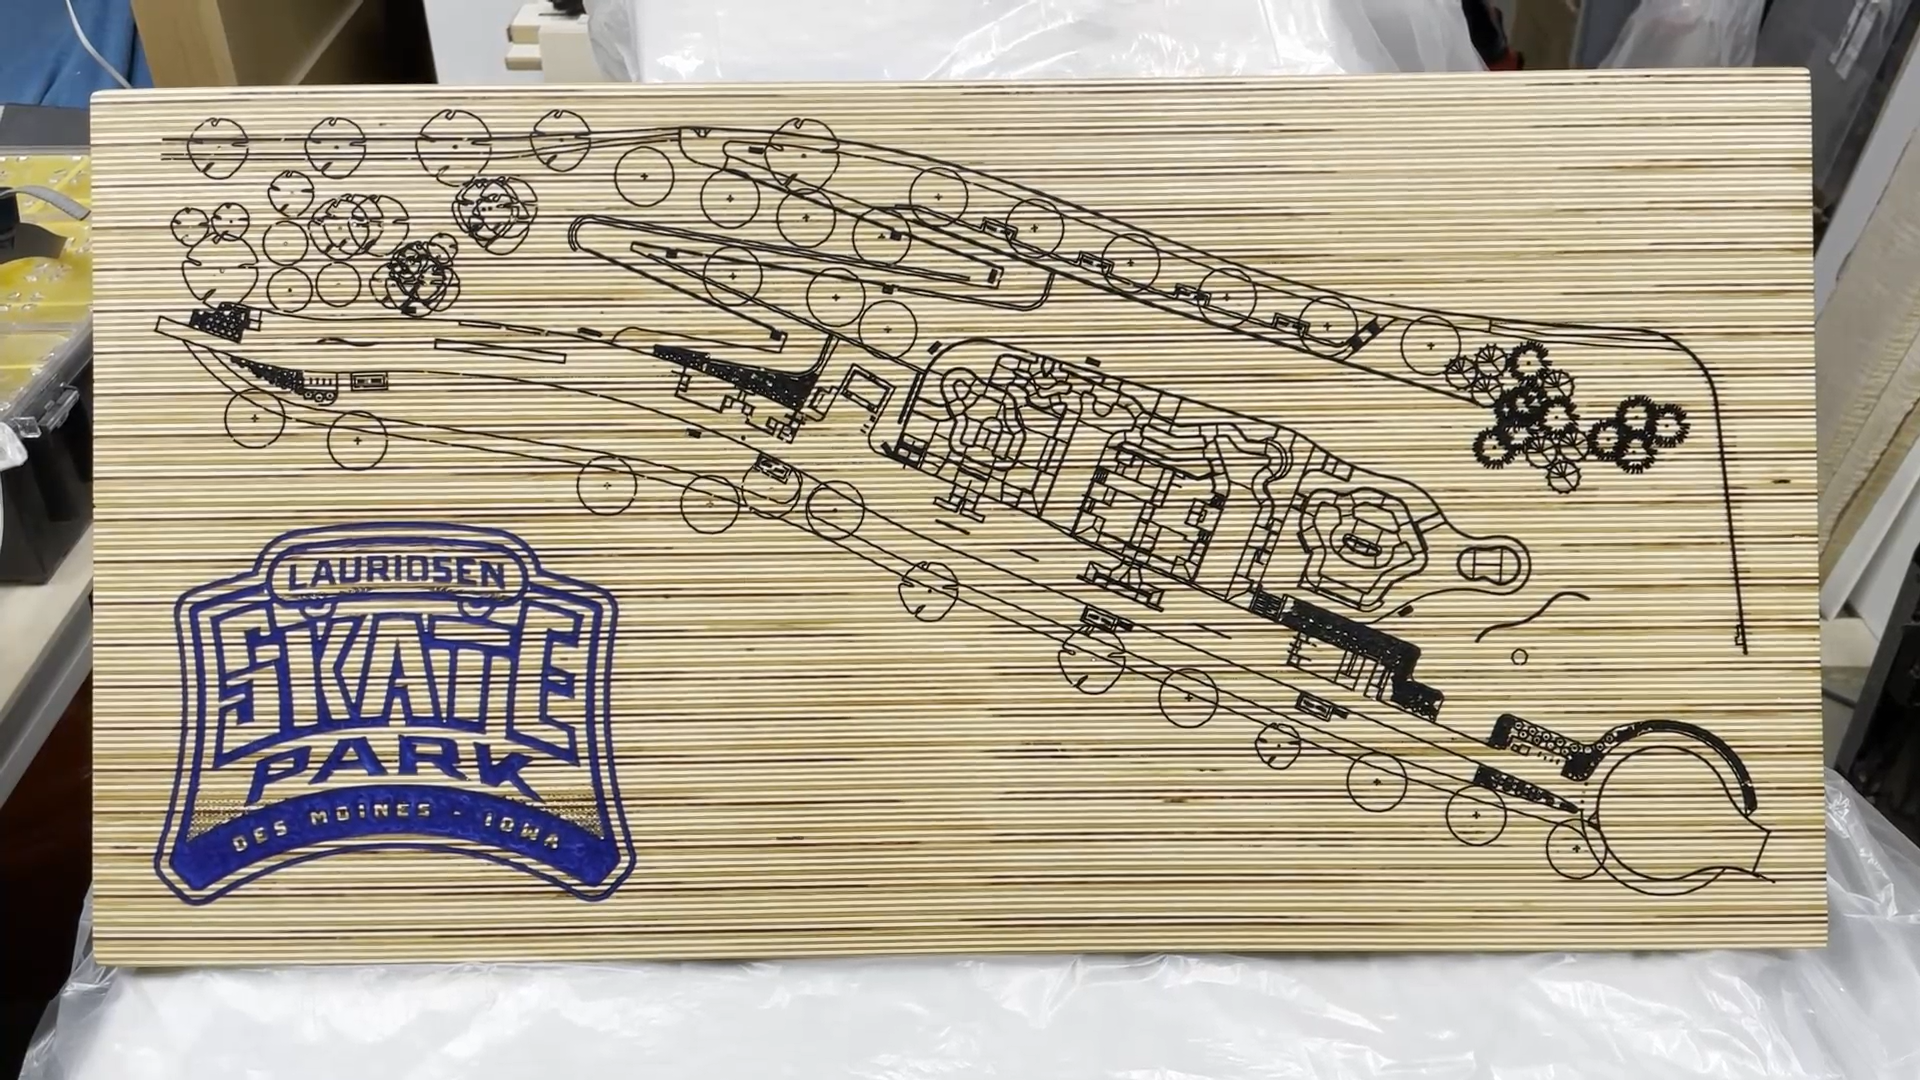
Some final details on the build:
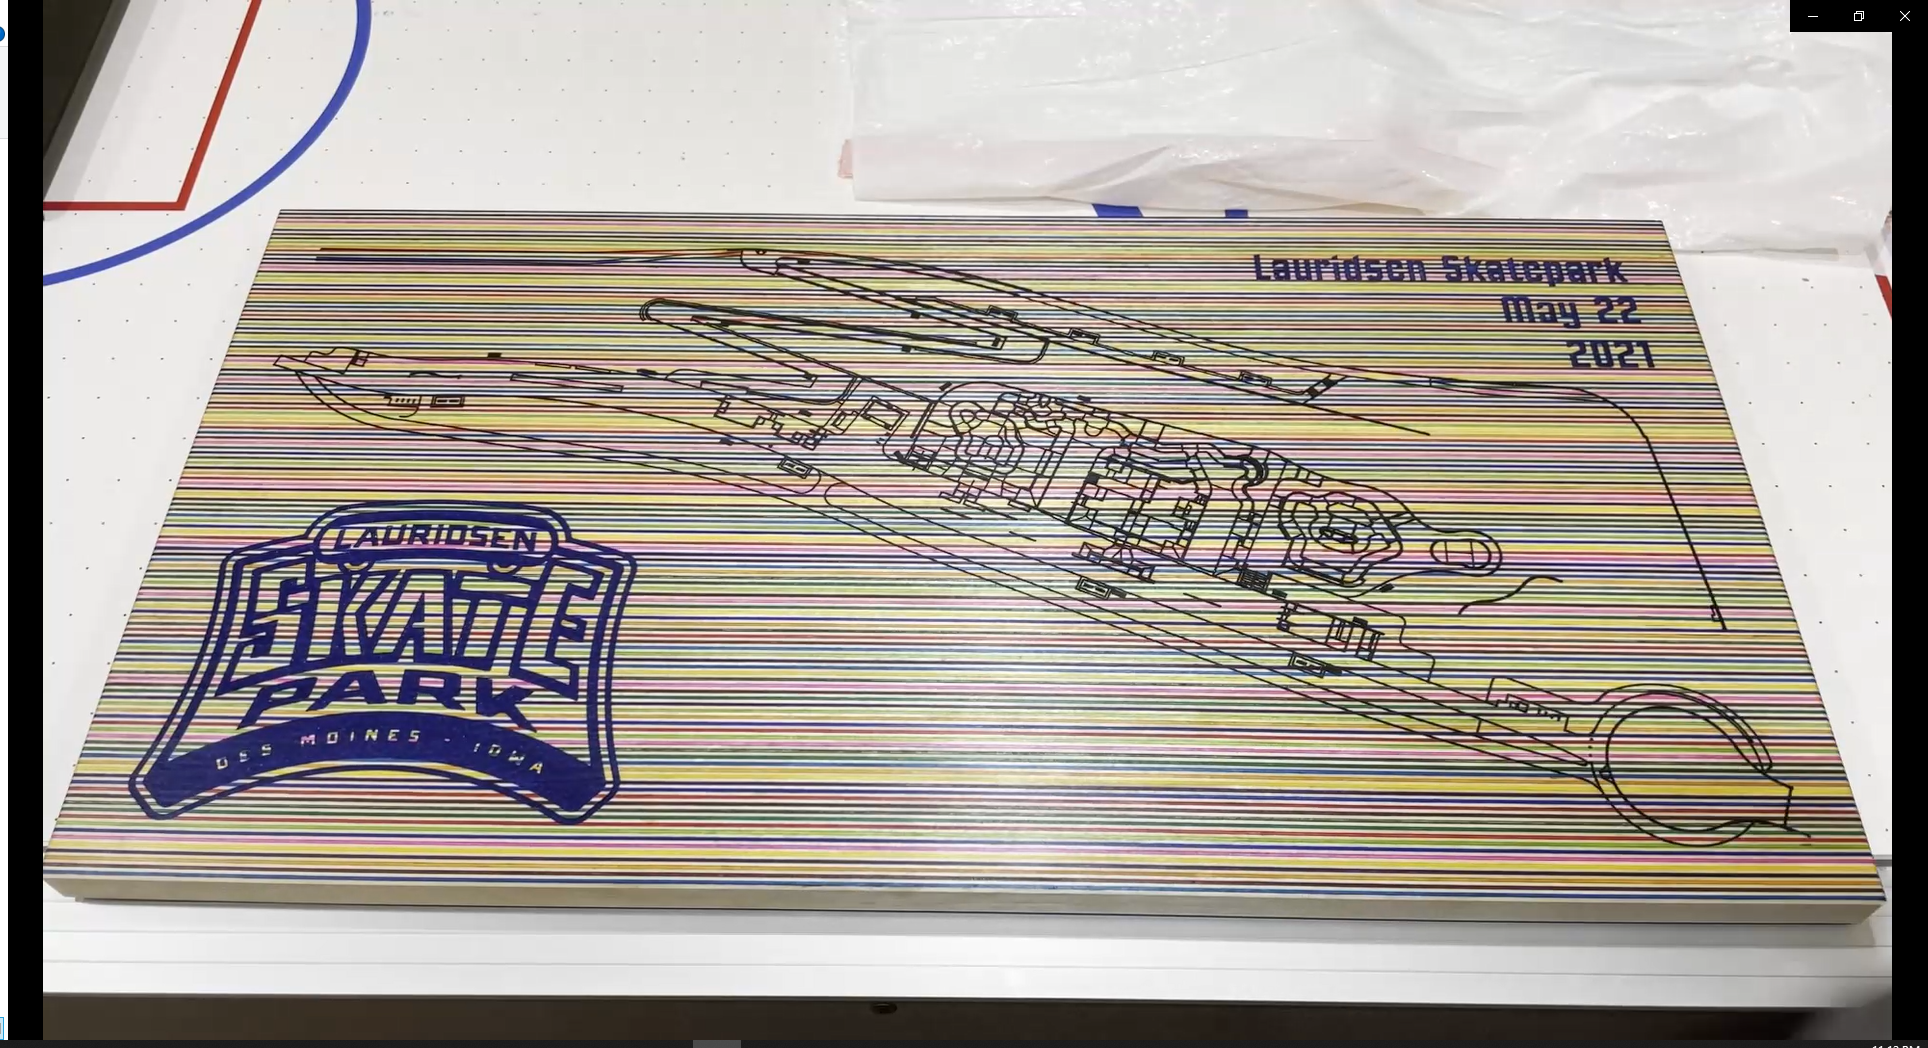
The board is approximately 29" wide x 15.25" tall x 1" thick.
There are 249 layers of 1/16" skateboard veneers that were glued together to make the board.
The layers of veneer are alternating between one clear maple and one of 11 dyed colors in a randomly selected pattern.
The linework for the skatepark was carved over a period of 20+ hours with a 1/32" diameter router bit and then filled with a black tinted epoxy using Black Onyx pigment from Black Diamond Pigments.
The Lauridsen logo and lettering were filled with a blue tinted epoxy using Deep Blue Sea pigment from Black Diamond Pigments.
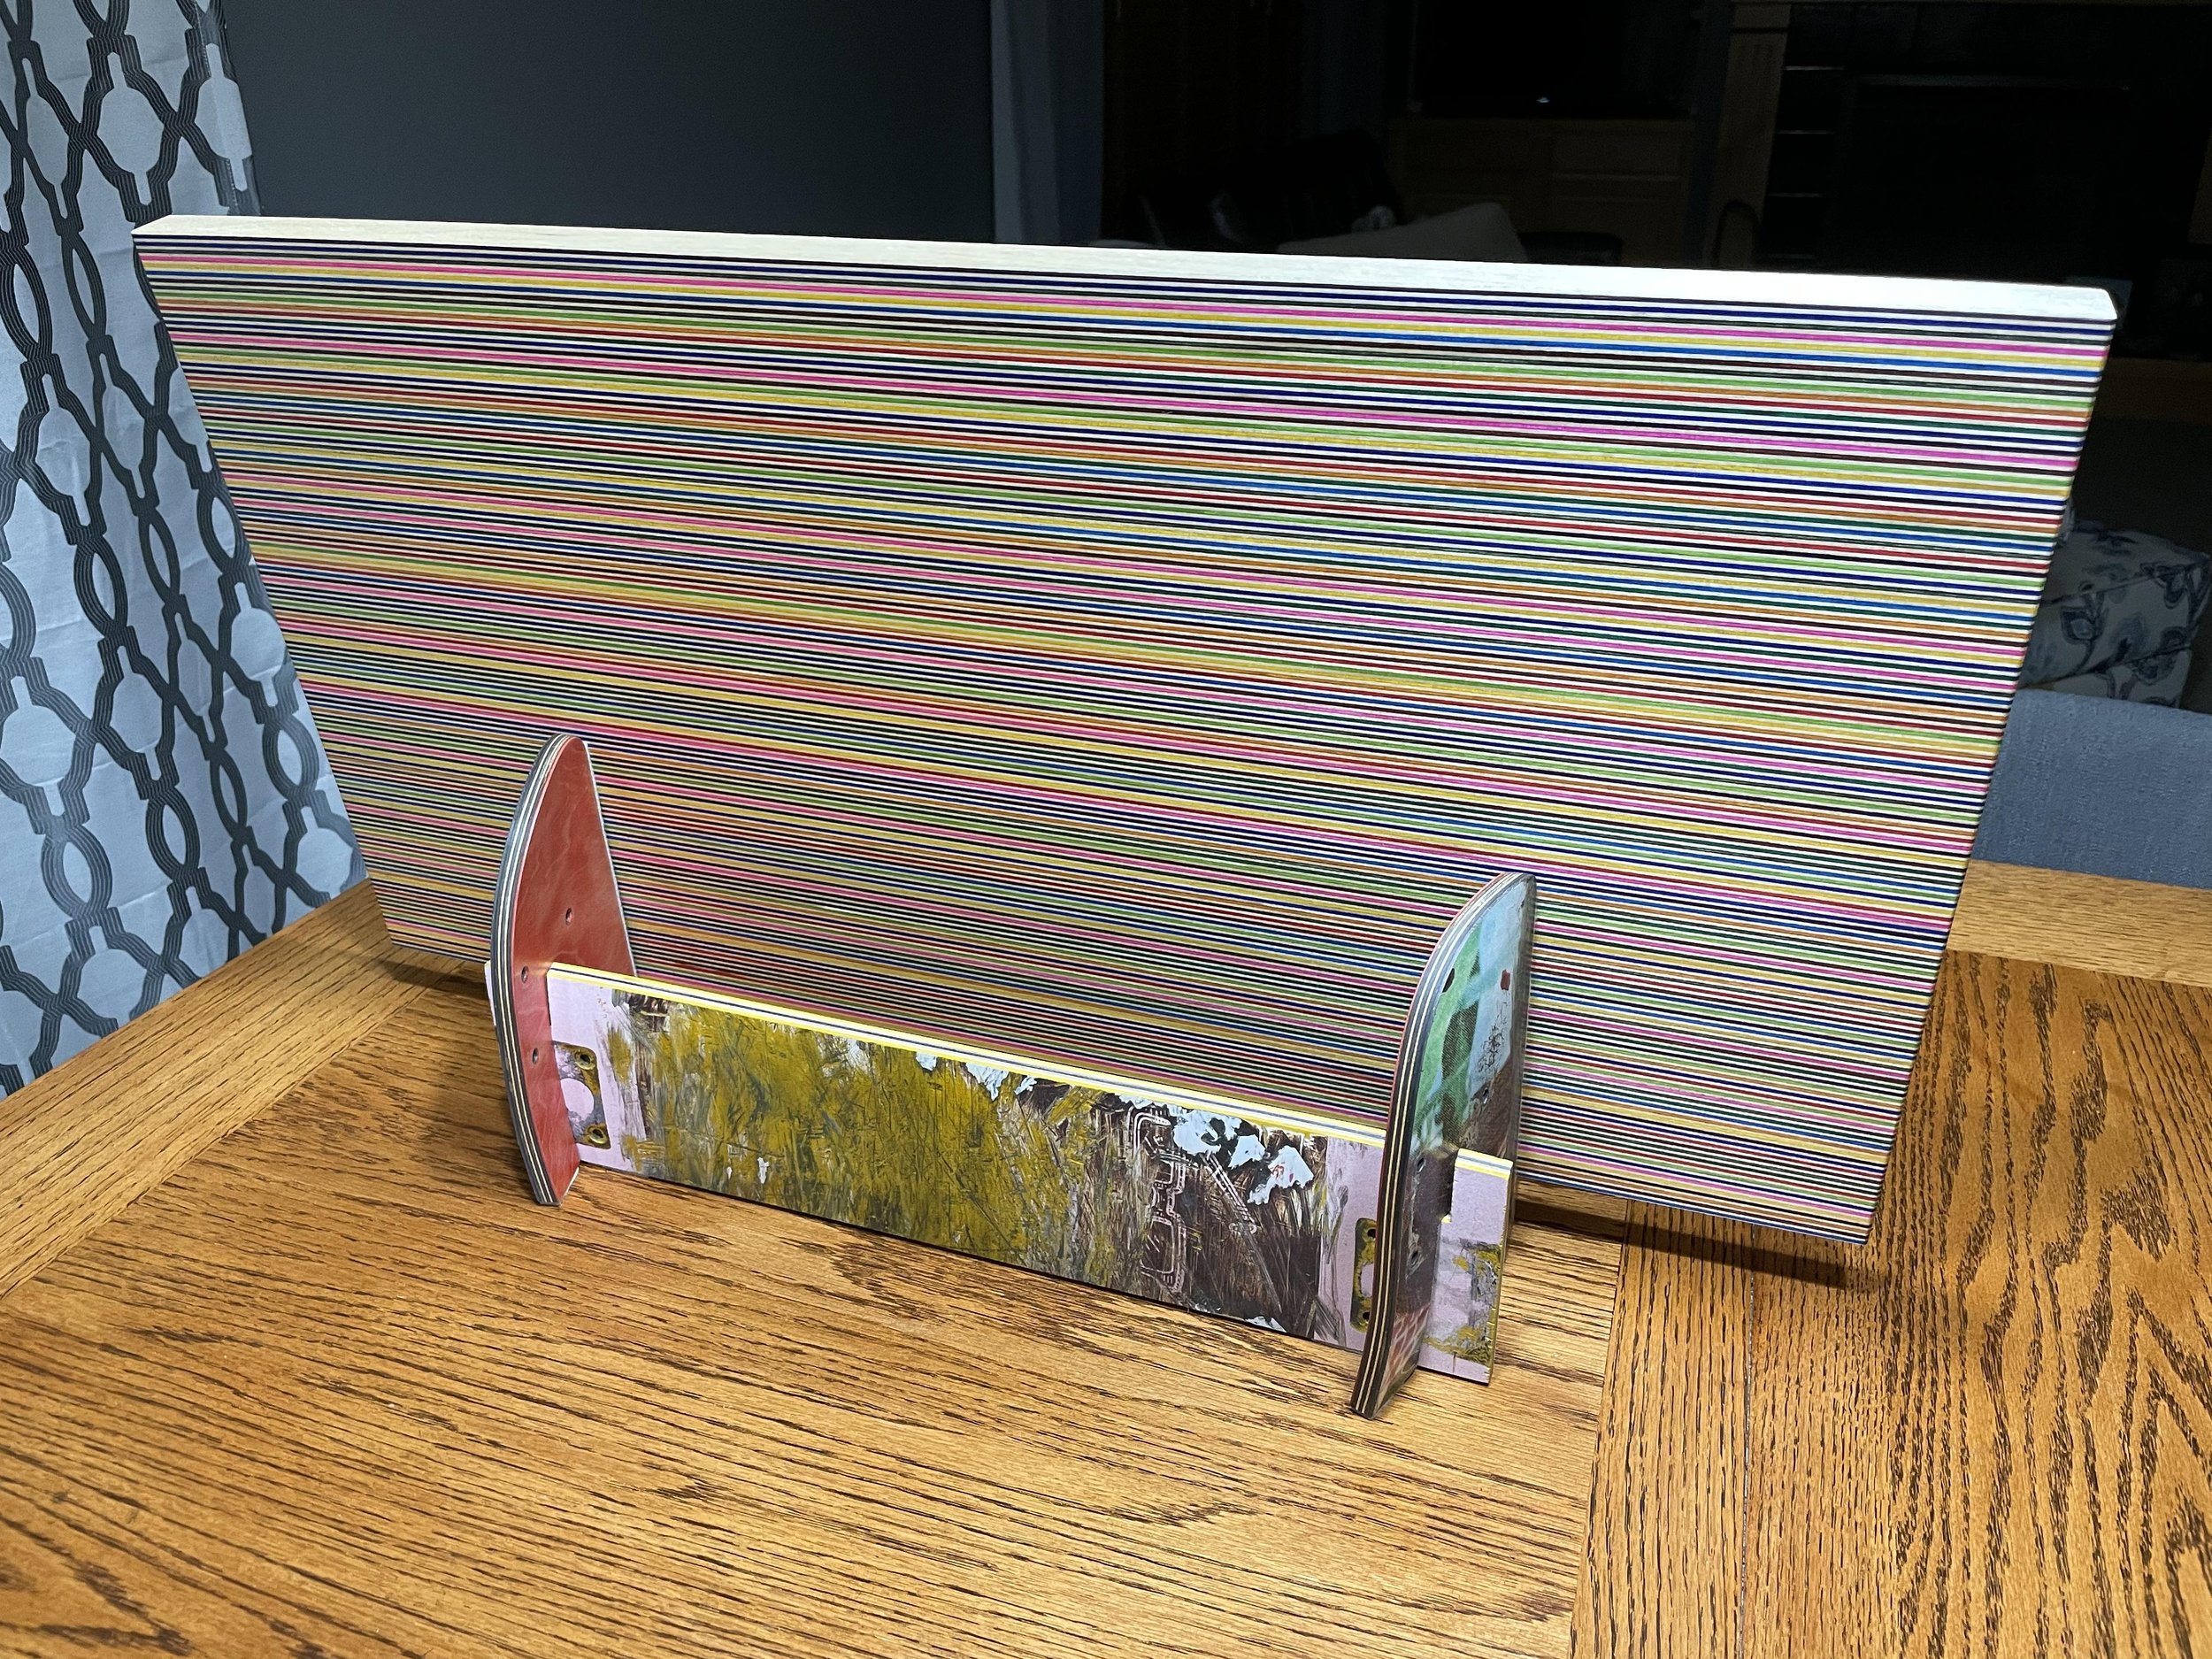
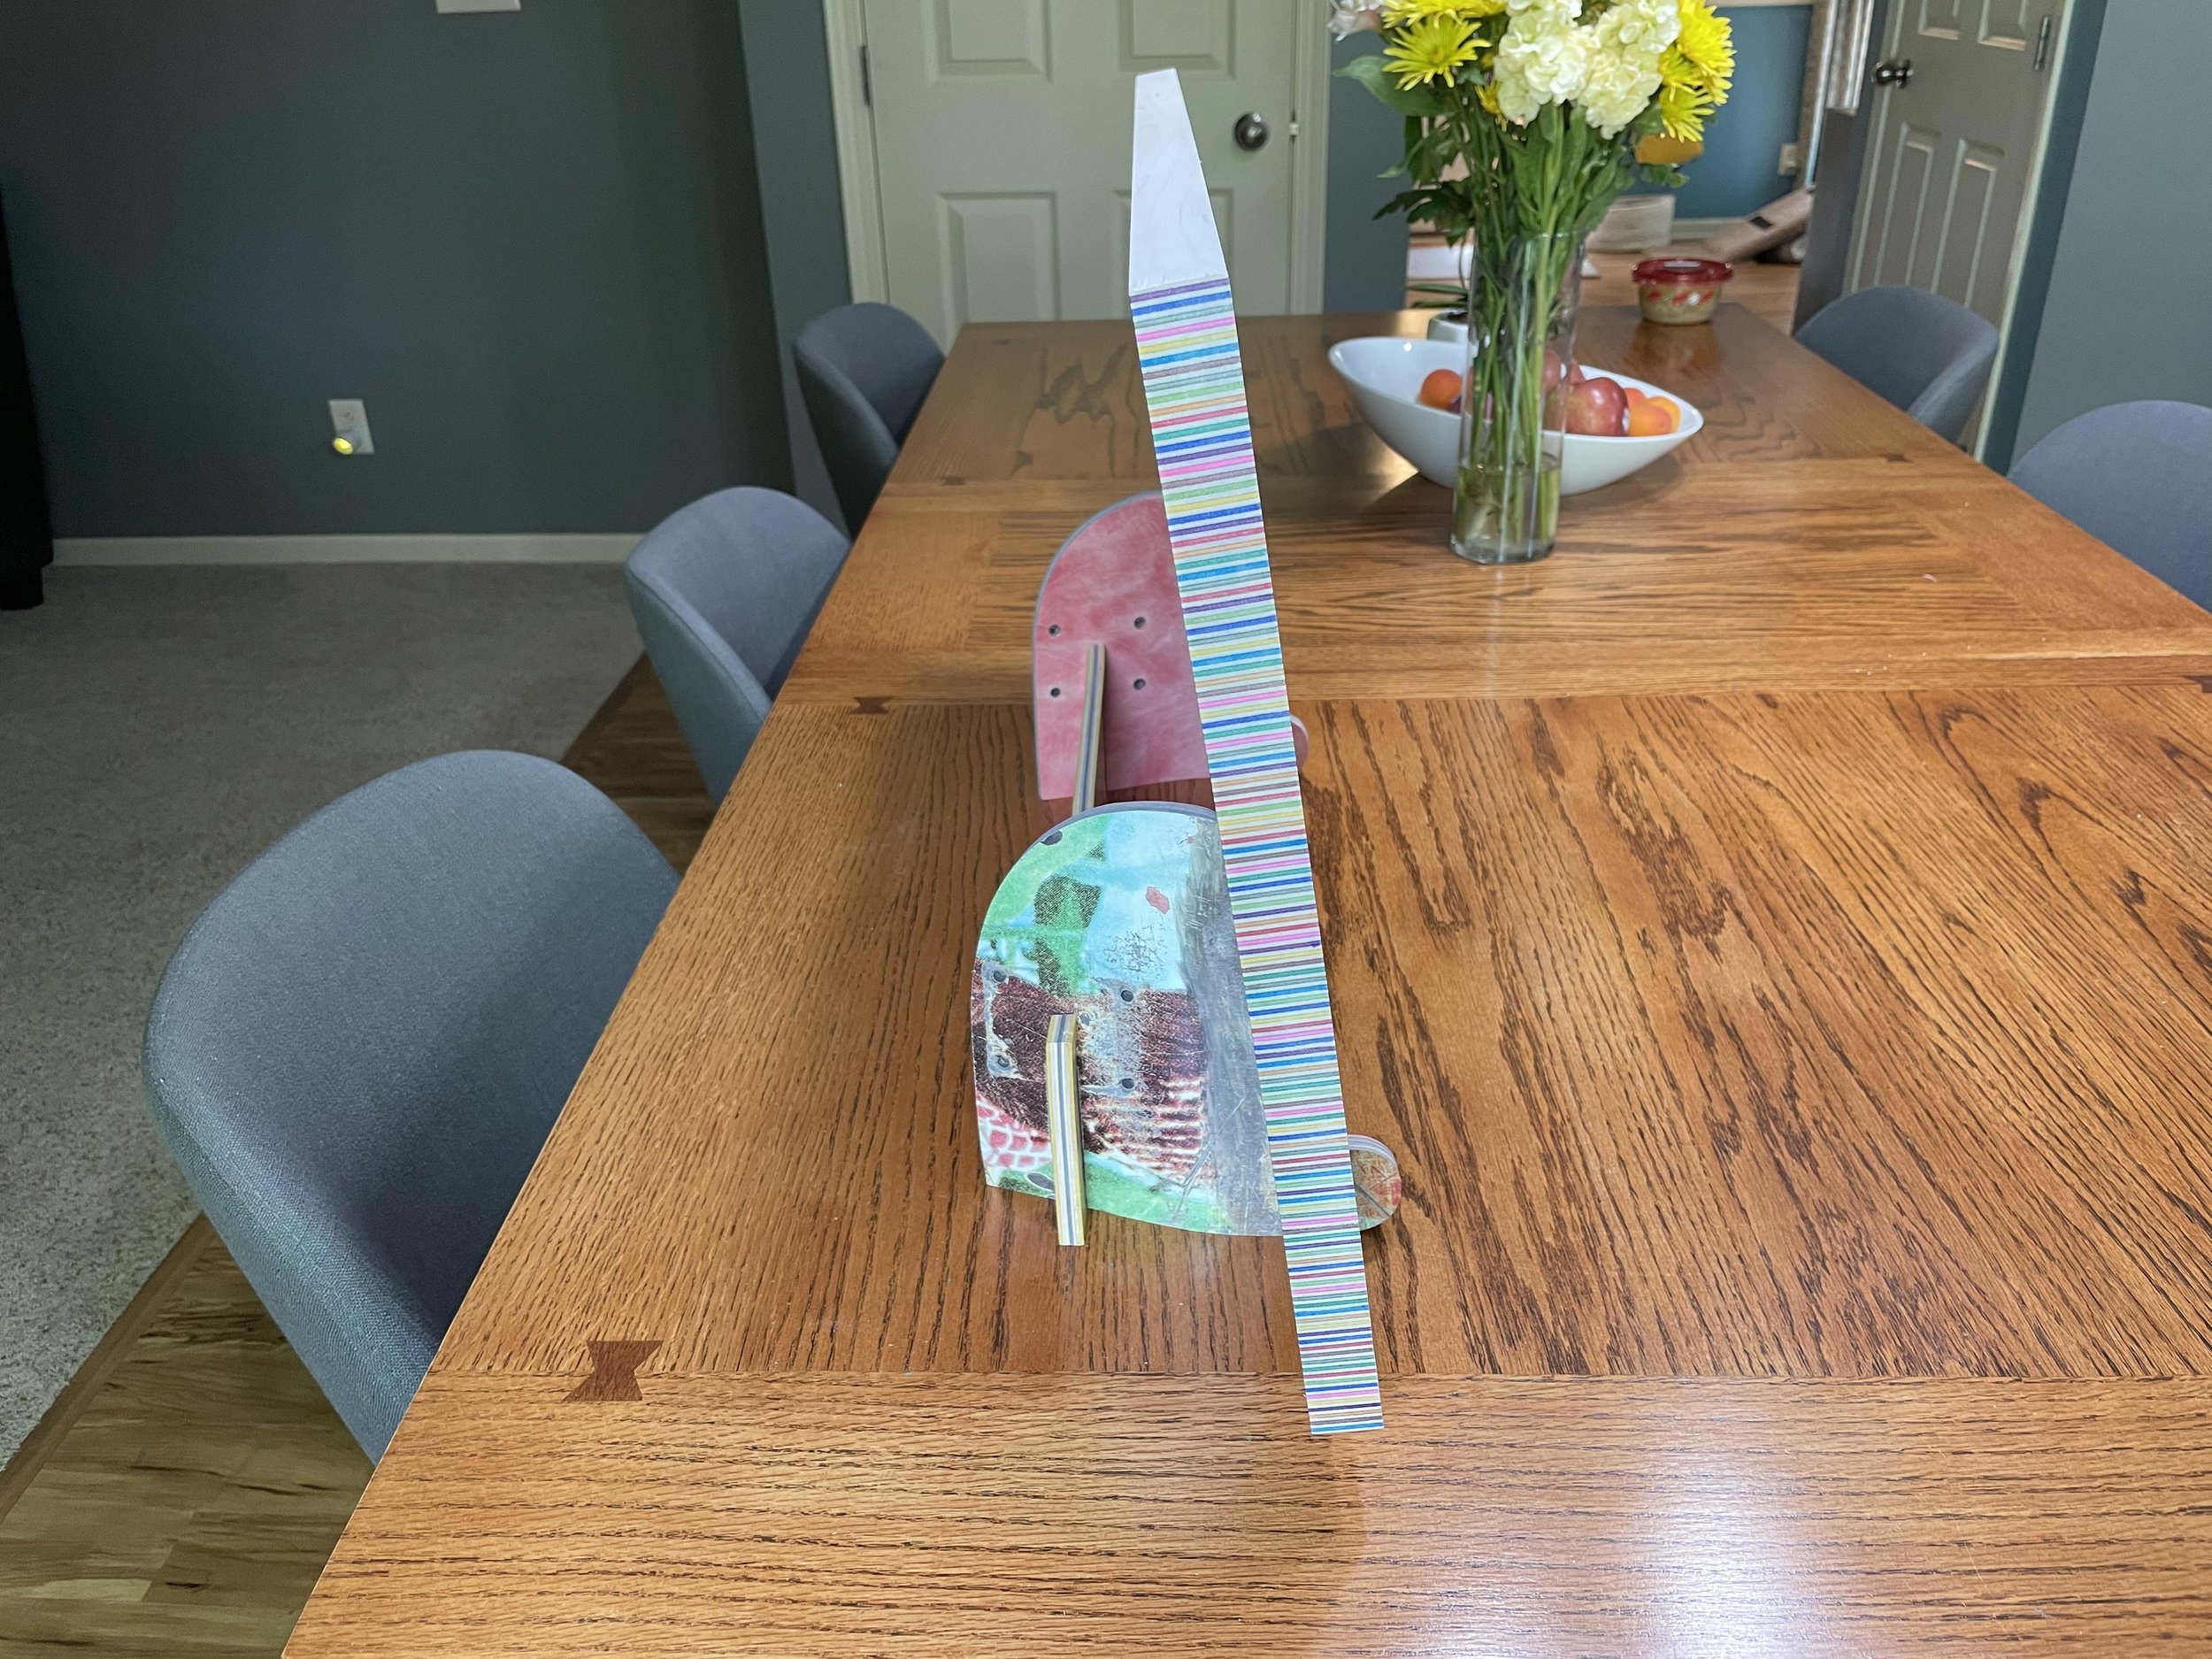
The stand was created using the tails from one used skateboard and the center section from another used skateboard from Subsect Skateshop.
Thanks for checking out this Instructable. I would love to get comments back from you if you have a couple minutes.