How to Make a Two Color Inlay Tray
Click here to subscribe to my YouTube channel.
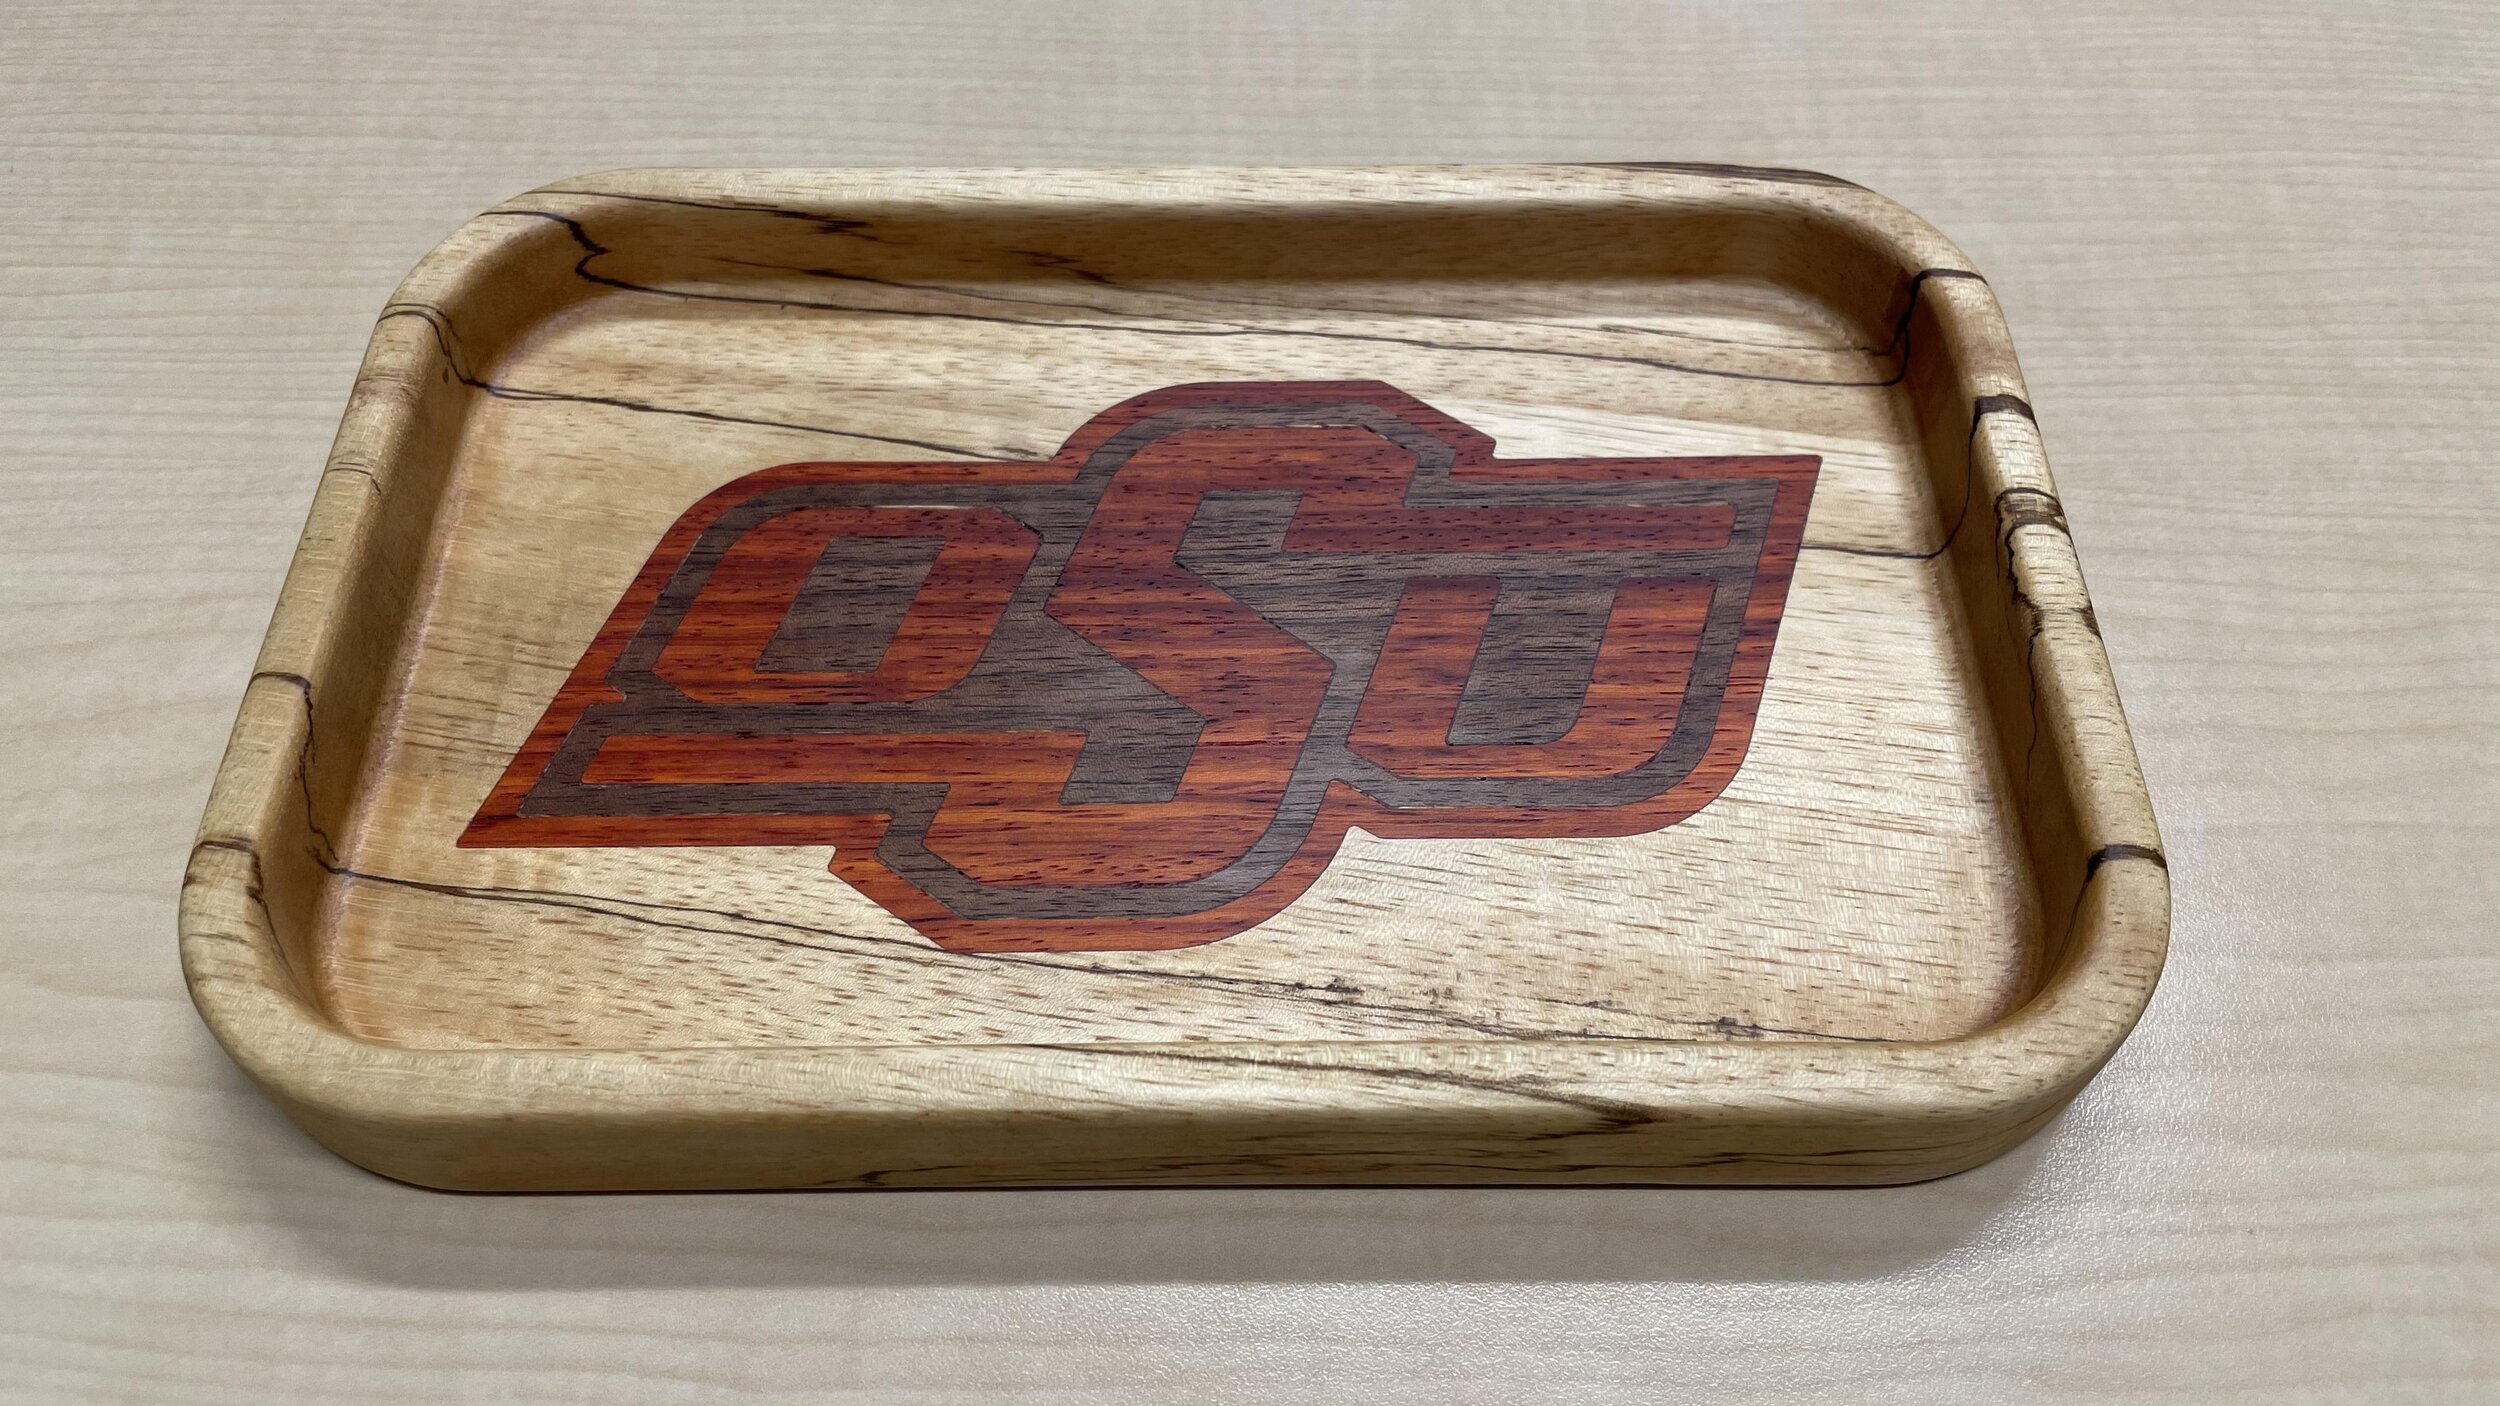
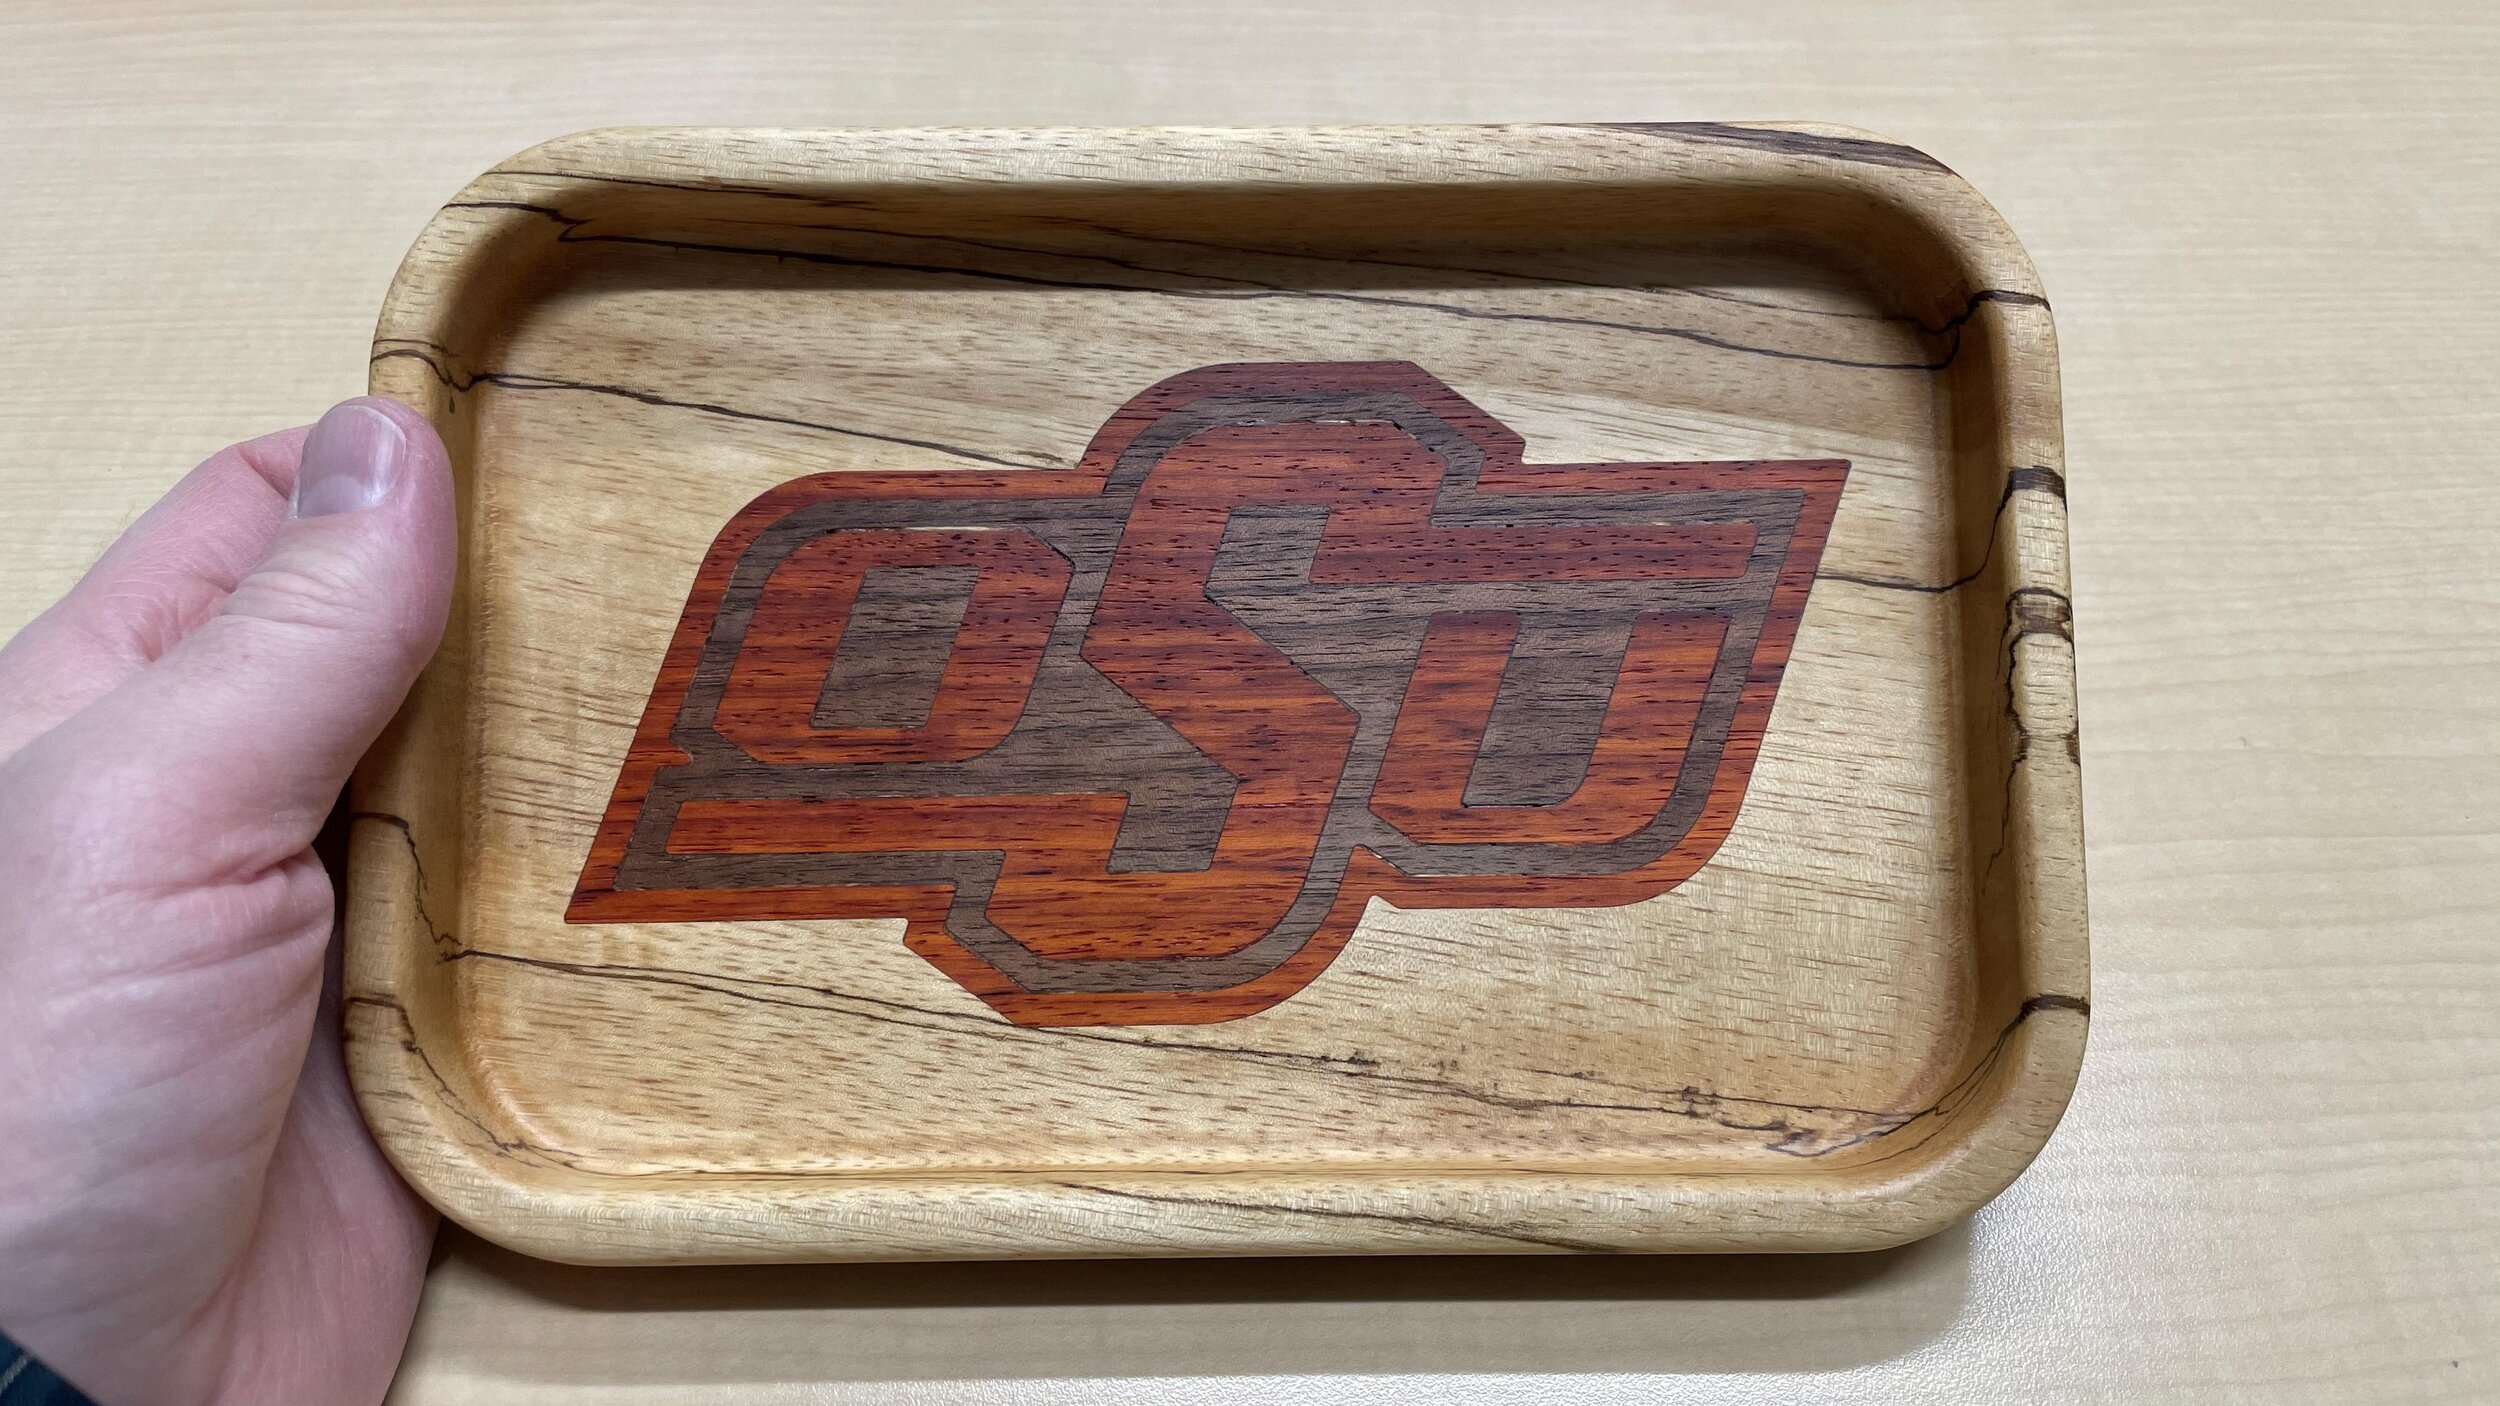
I am going to show you how I made a wood tray with a two-color wood inlay that goes all the way through the bottom of the tray. This is less complicated than it seems if you have access to a CNC. It's more a matter of following a series of steps in the correct order.
The process is the same as creating a one color wood inlay and then doing a second one.

Step 1: Material and Tools
MATERIALS
Wood of your choice. I used zabrawood, padauk, and walnut.
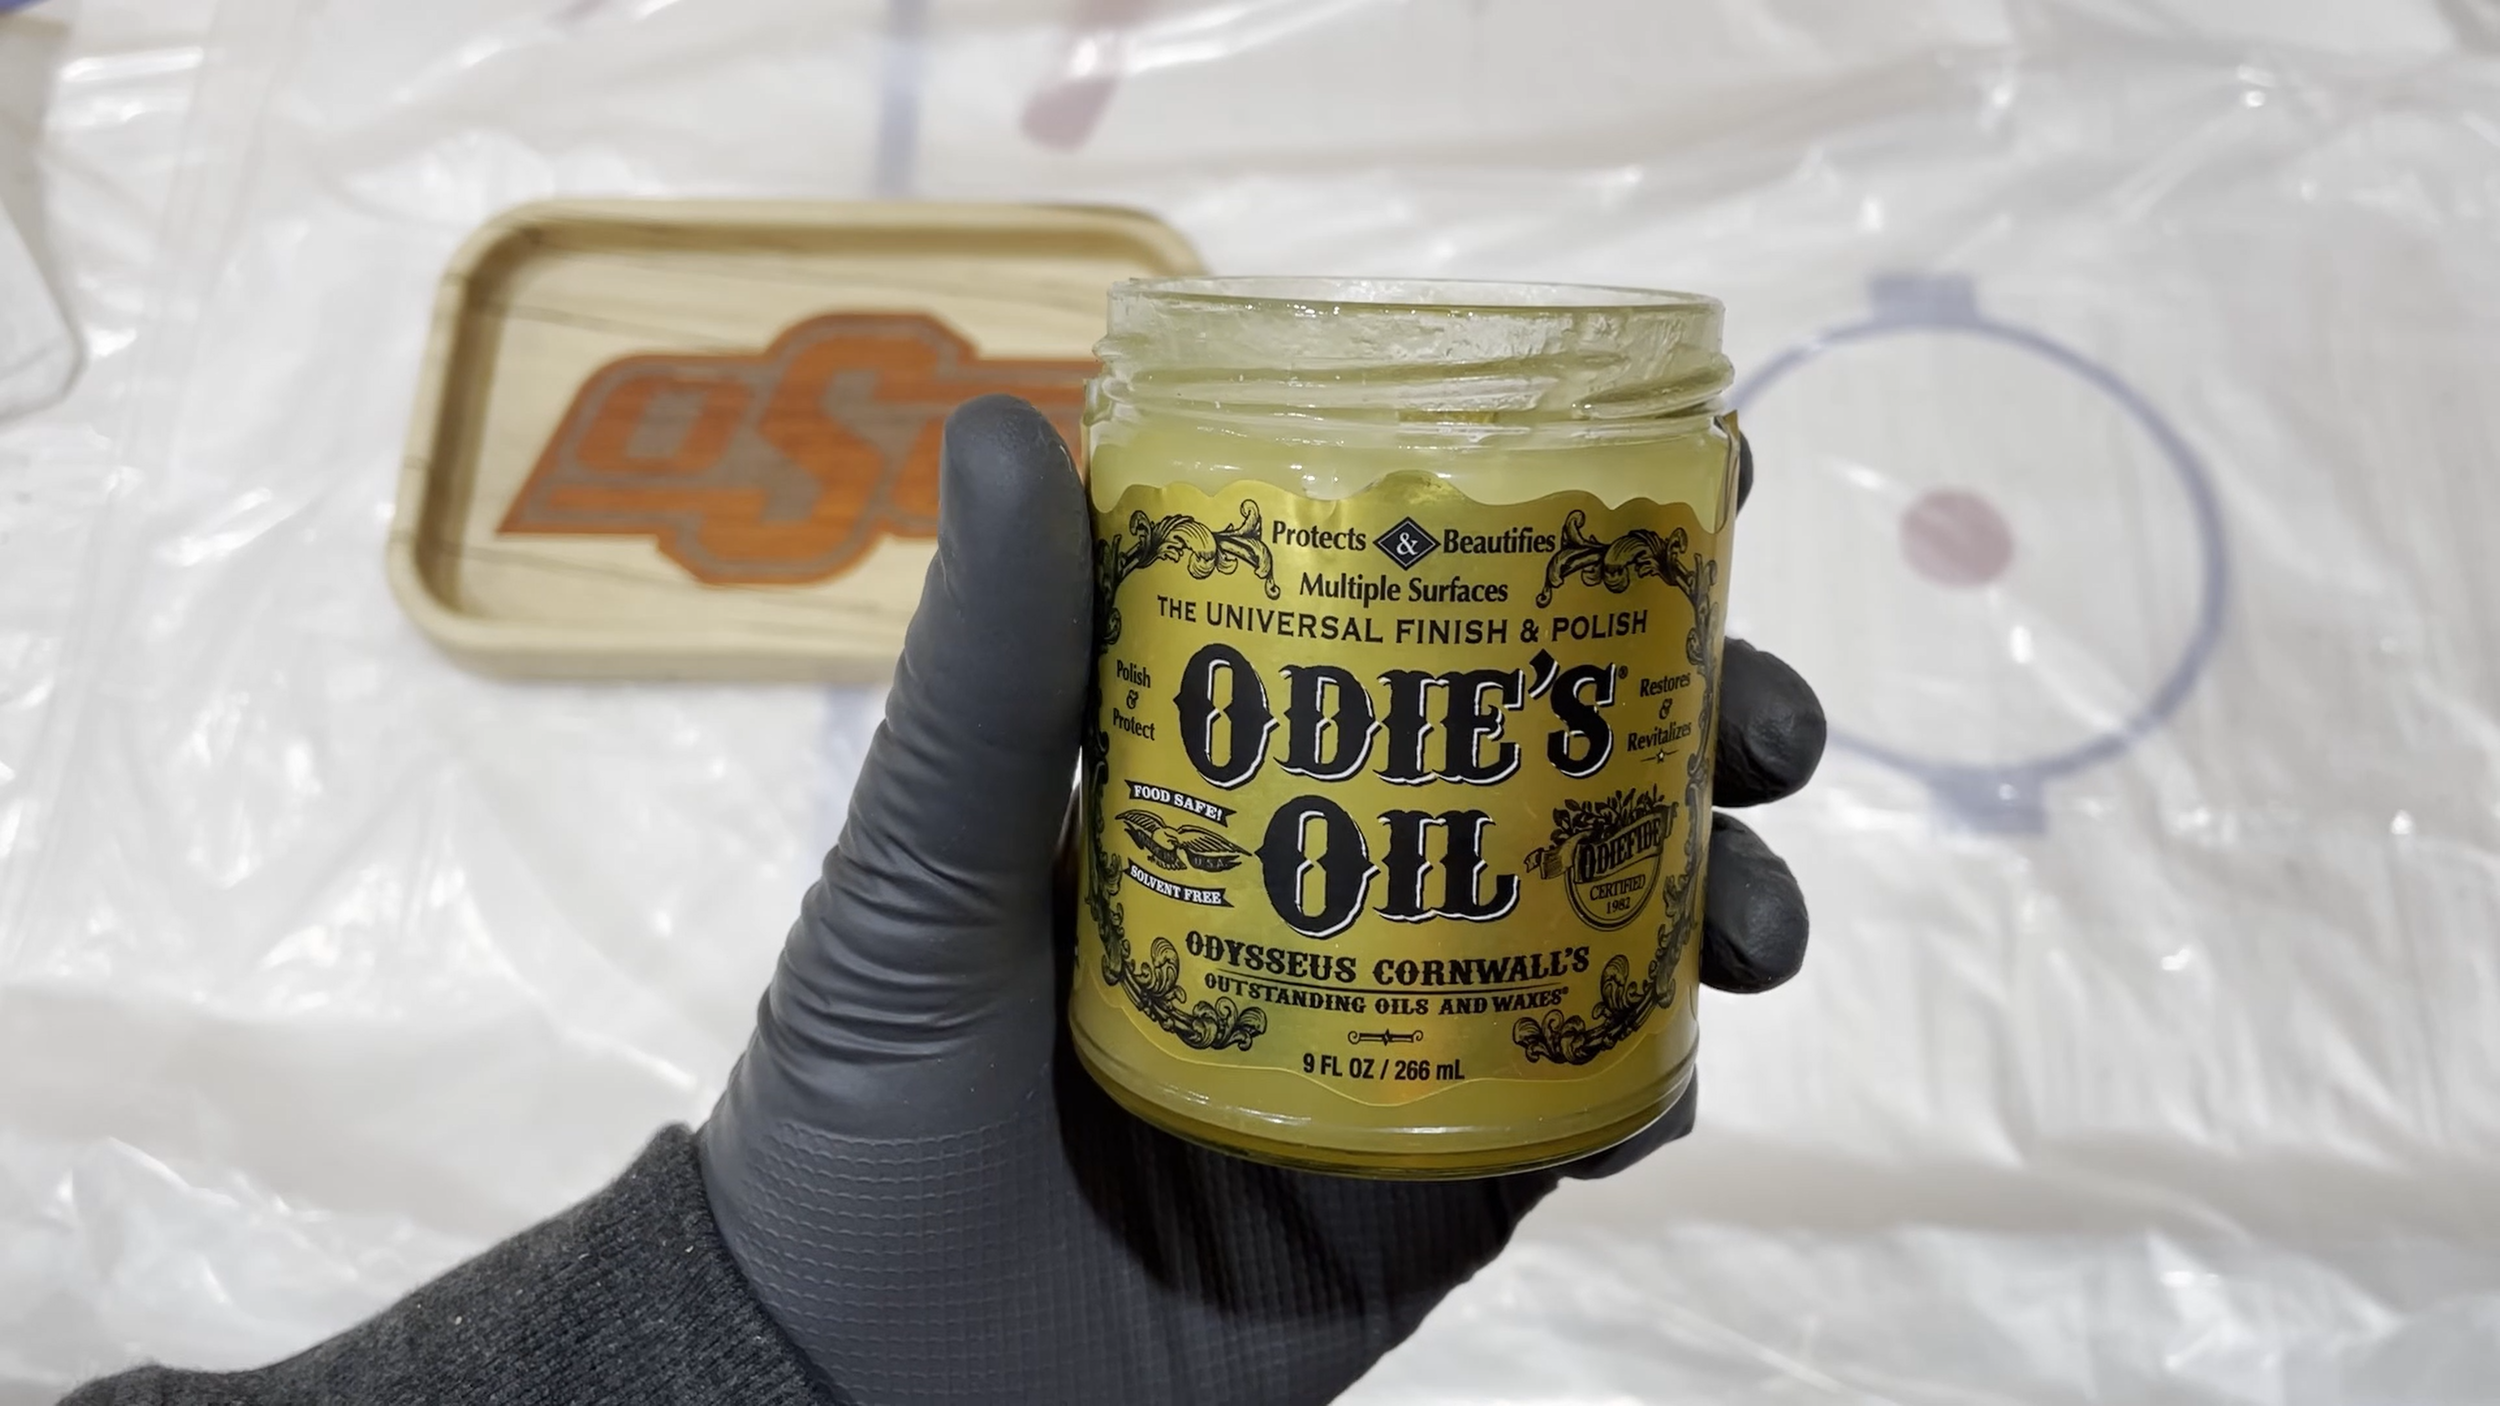
Odie's Oil - Universal - 9oz Jar (A little goes a long way) - https://amzn.to/2Fd7he6
3M Scotch-Brite Light Cleansing Pad Comparable to 0000 - https://amzn.to/3dDWhpv
Titebond Translucent Wood Glue - https://amzn.to/2FaZ5eC
Sand paper
TOOLS
The tools I used on the project were as follows:
X-Carve 1000mm CNC Machine by Inventables - https://www.inventables.com/
1/16" diameter fish tail, downcut spiral router bit from Inventables
Saw Stop table saw - https://amzn.to/3a8znCE
Grizzly 14" Band Saw
Ryobi Trim Router - https://amzn.to/3i9pIyQ
Random orbit sander
Shop vac
Tape Measures (my favorite two):
Fastcap PMS-16 Auto Lock ProCarpenter Tape Measure - https://amzn.to/333fTMN
or FastCap PSSR16 16 ft Standard Reverse Measuring Tape - https://amzn.to/35eQe6k
Amana Tool - 45983 Carbide Tipped Bowl & Tray 1/8 Radius - https://amzn.to/3k7nalJ
Amana Tool - 49496 Carbide Tipped Corner Round 1/8 Radius - https://amzn.to/2R1HND0
NOTE: As an Amazon Associate I earn from qualifying purchases.
NOTE: If you plan on using any tool for a project please make sure you are familiar with the tool and all of the dangers associated with it. If you are not familiar with a tool then you should ask someone who is to show you the proper way to use it. A lot of communities have classes at local colleges on the proper use of tools and machinery. There are also local woodworking clubs that offer classes at very reasonable rates for beginners. I highly recommend using these resources for your safety and for the most efficient use of the tool.
SAFETY FIRST
Always wear eye and hearing protection.
Always work safe with the proper safety equipment and guards on your tools.

Zebrawood, Padauk, and Walnut.
Step 2: Make the Design
The design of this tray is centered around a couple things.
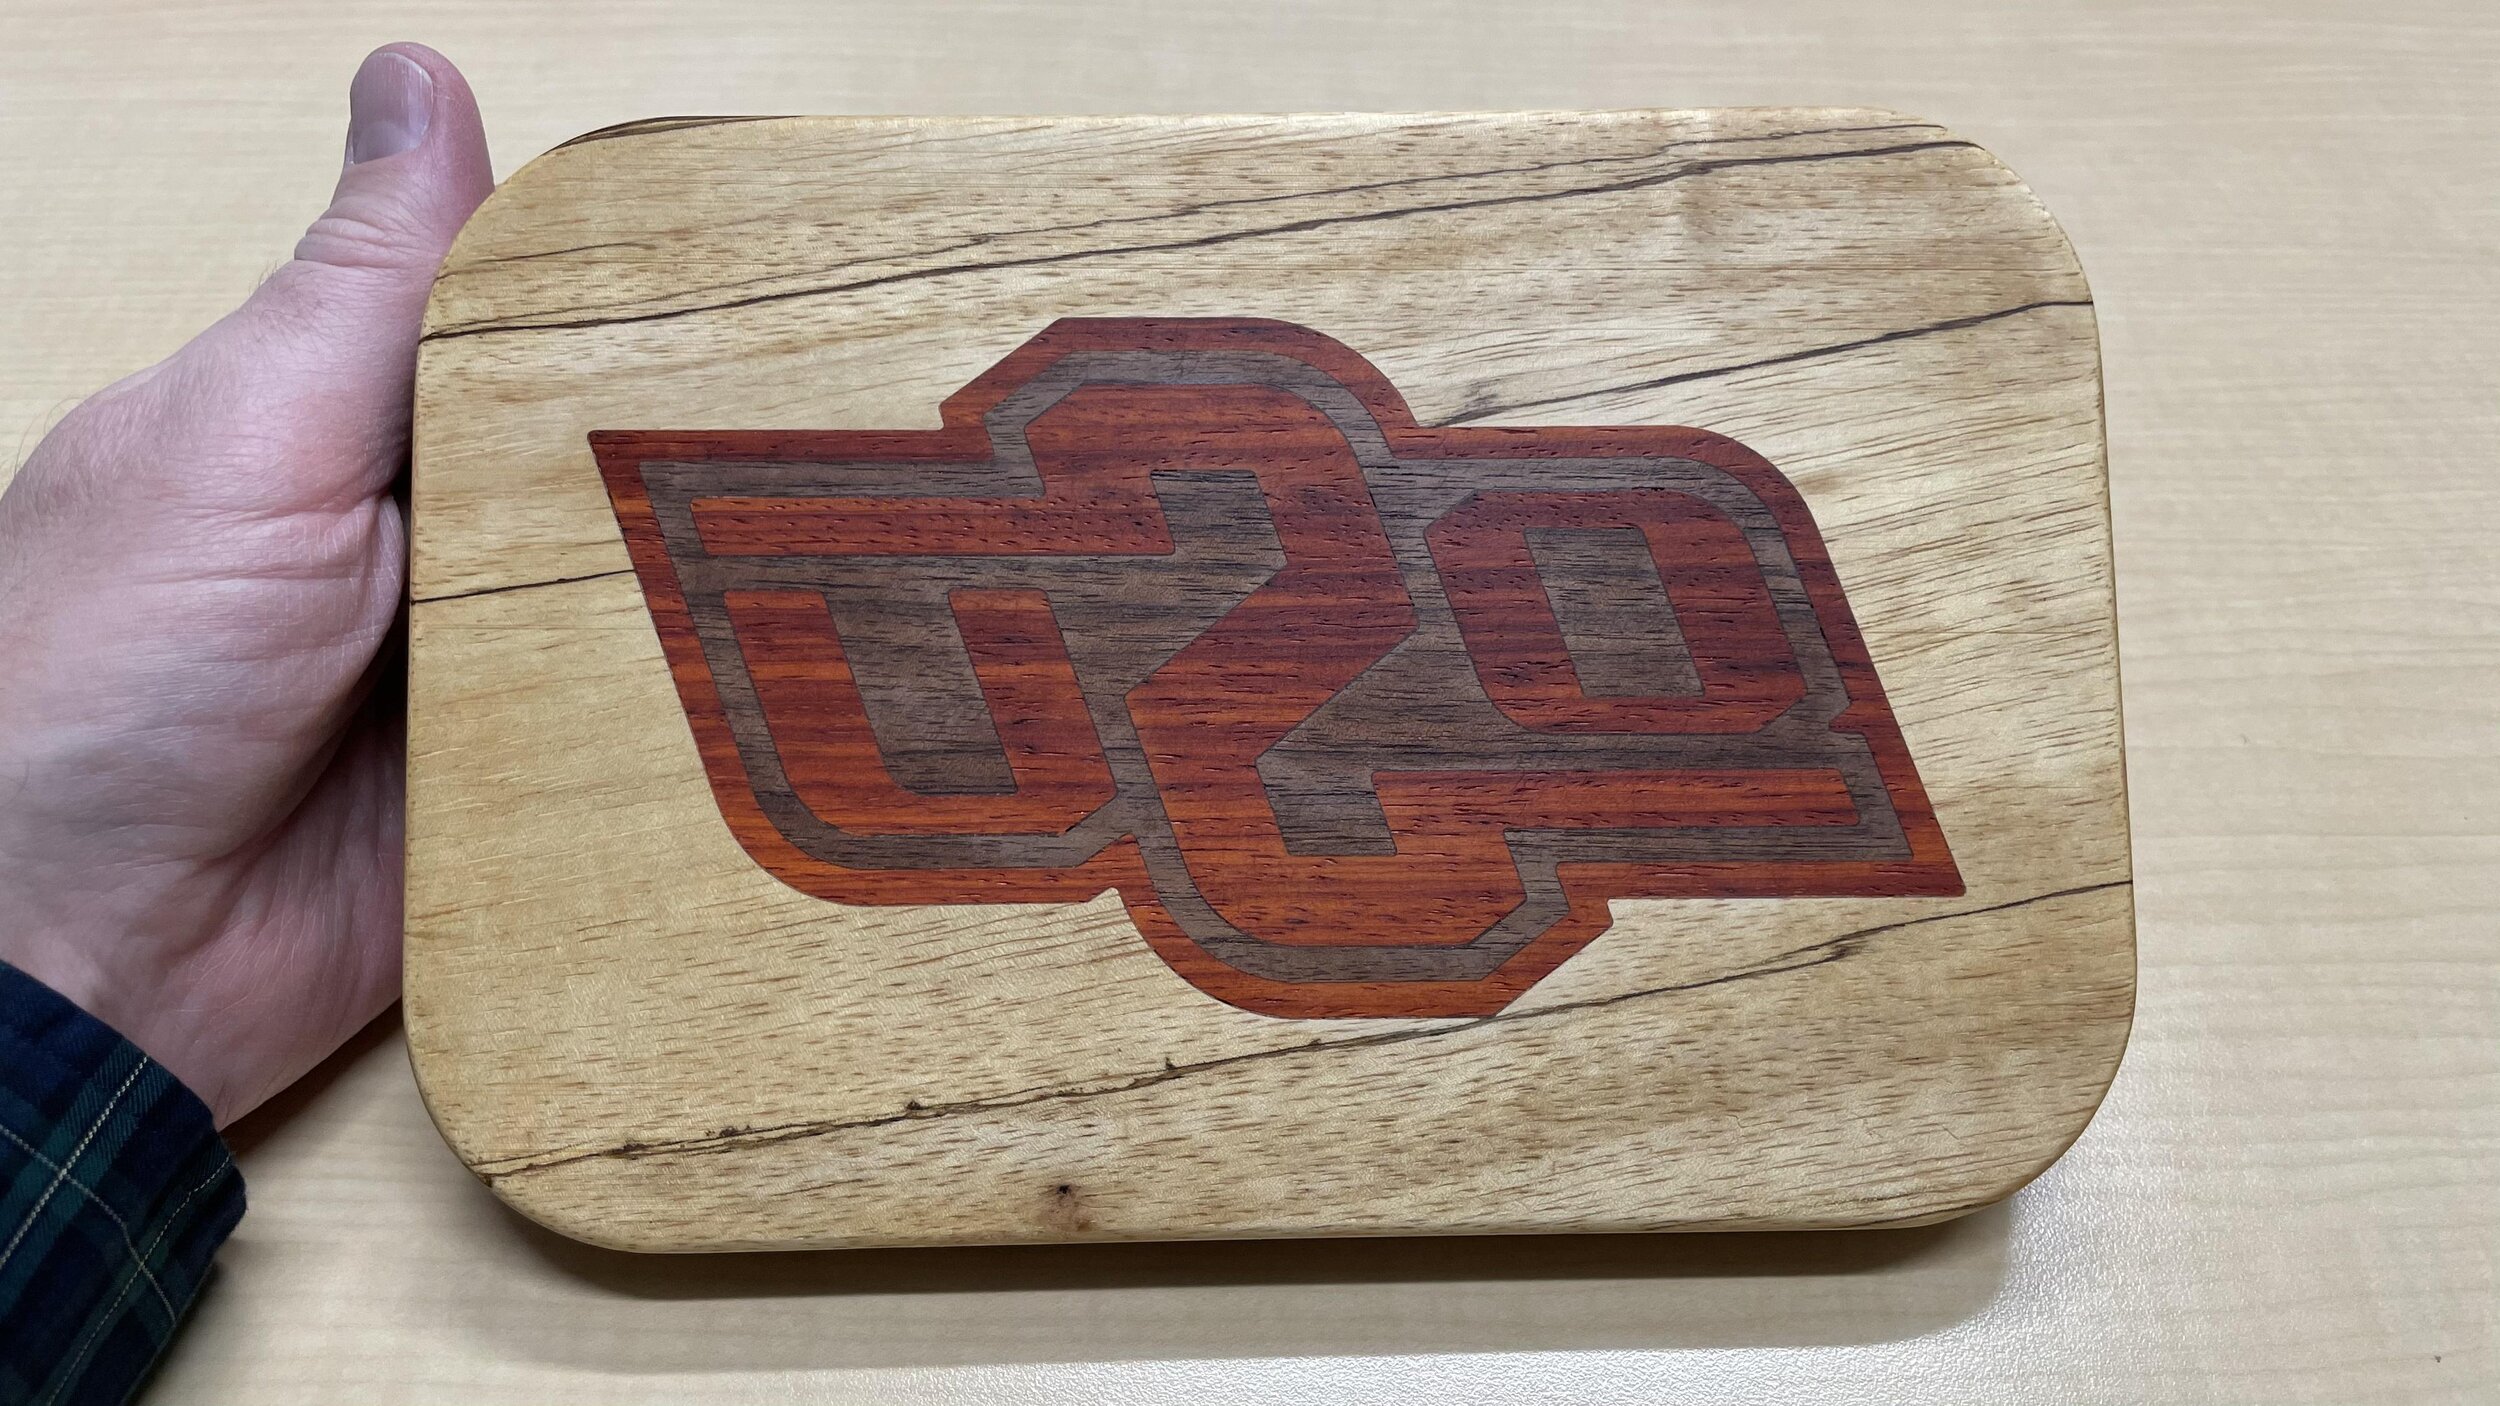
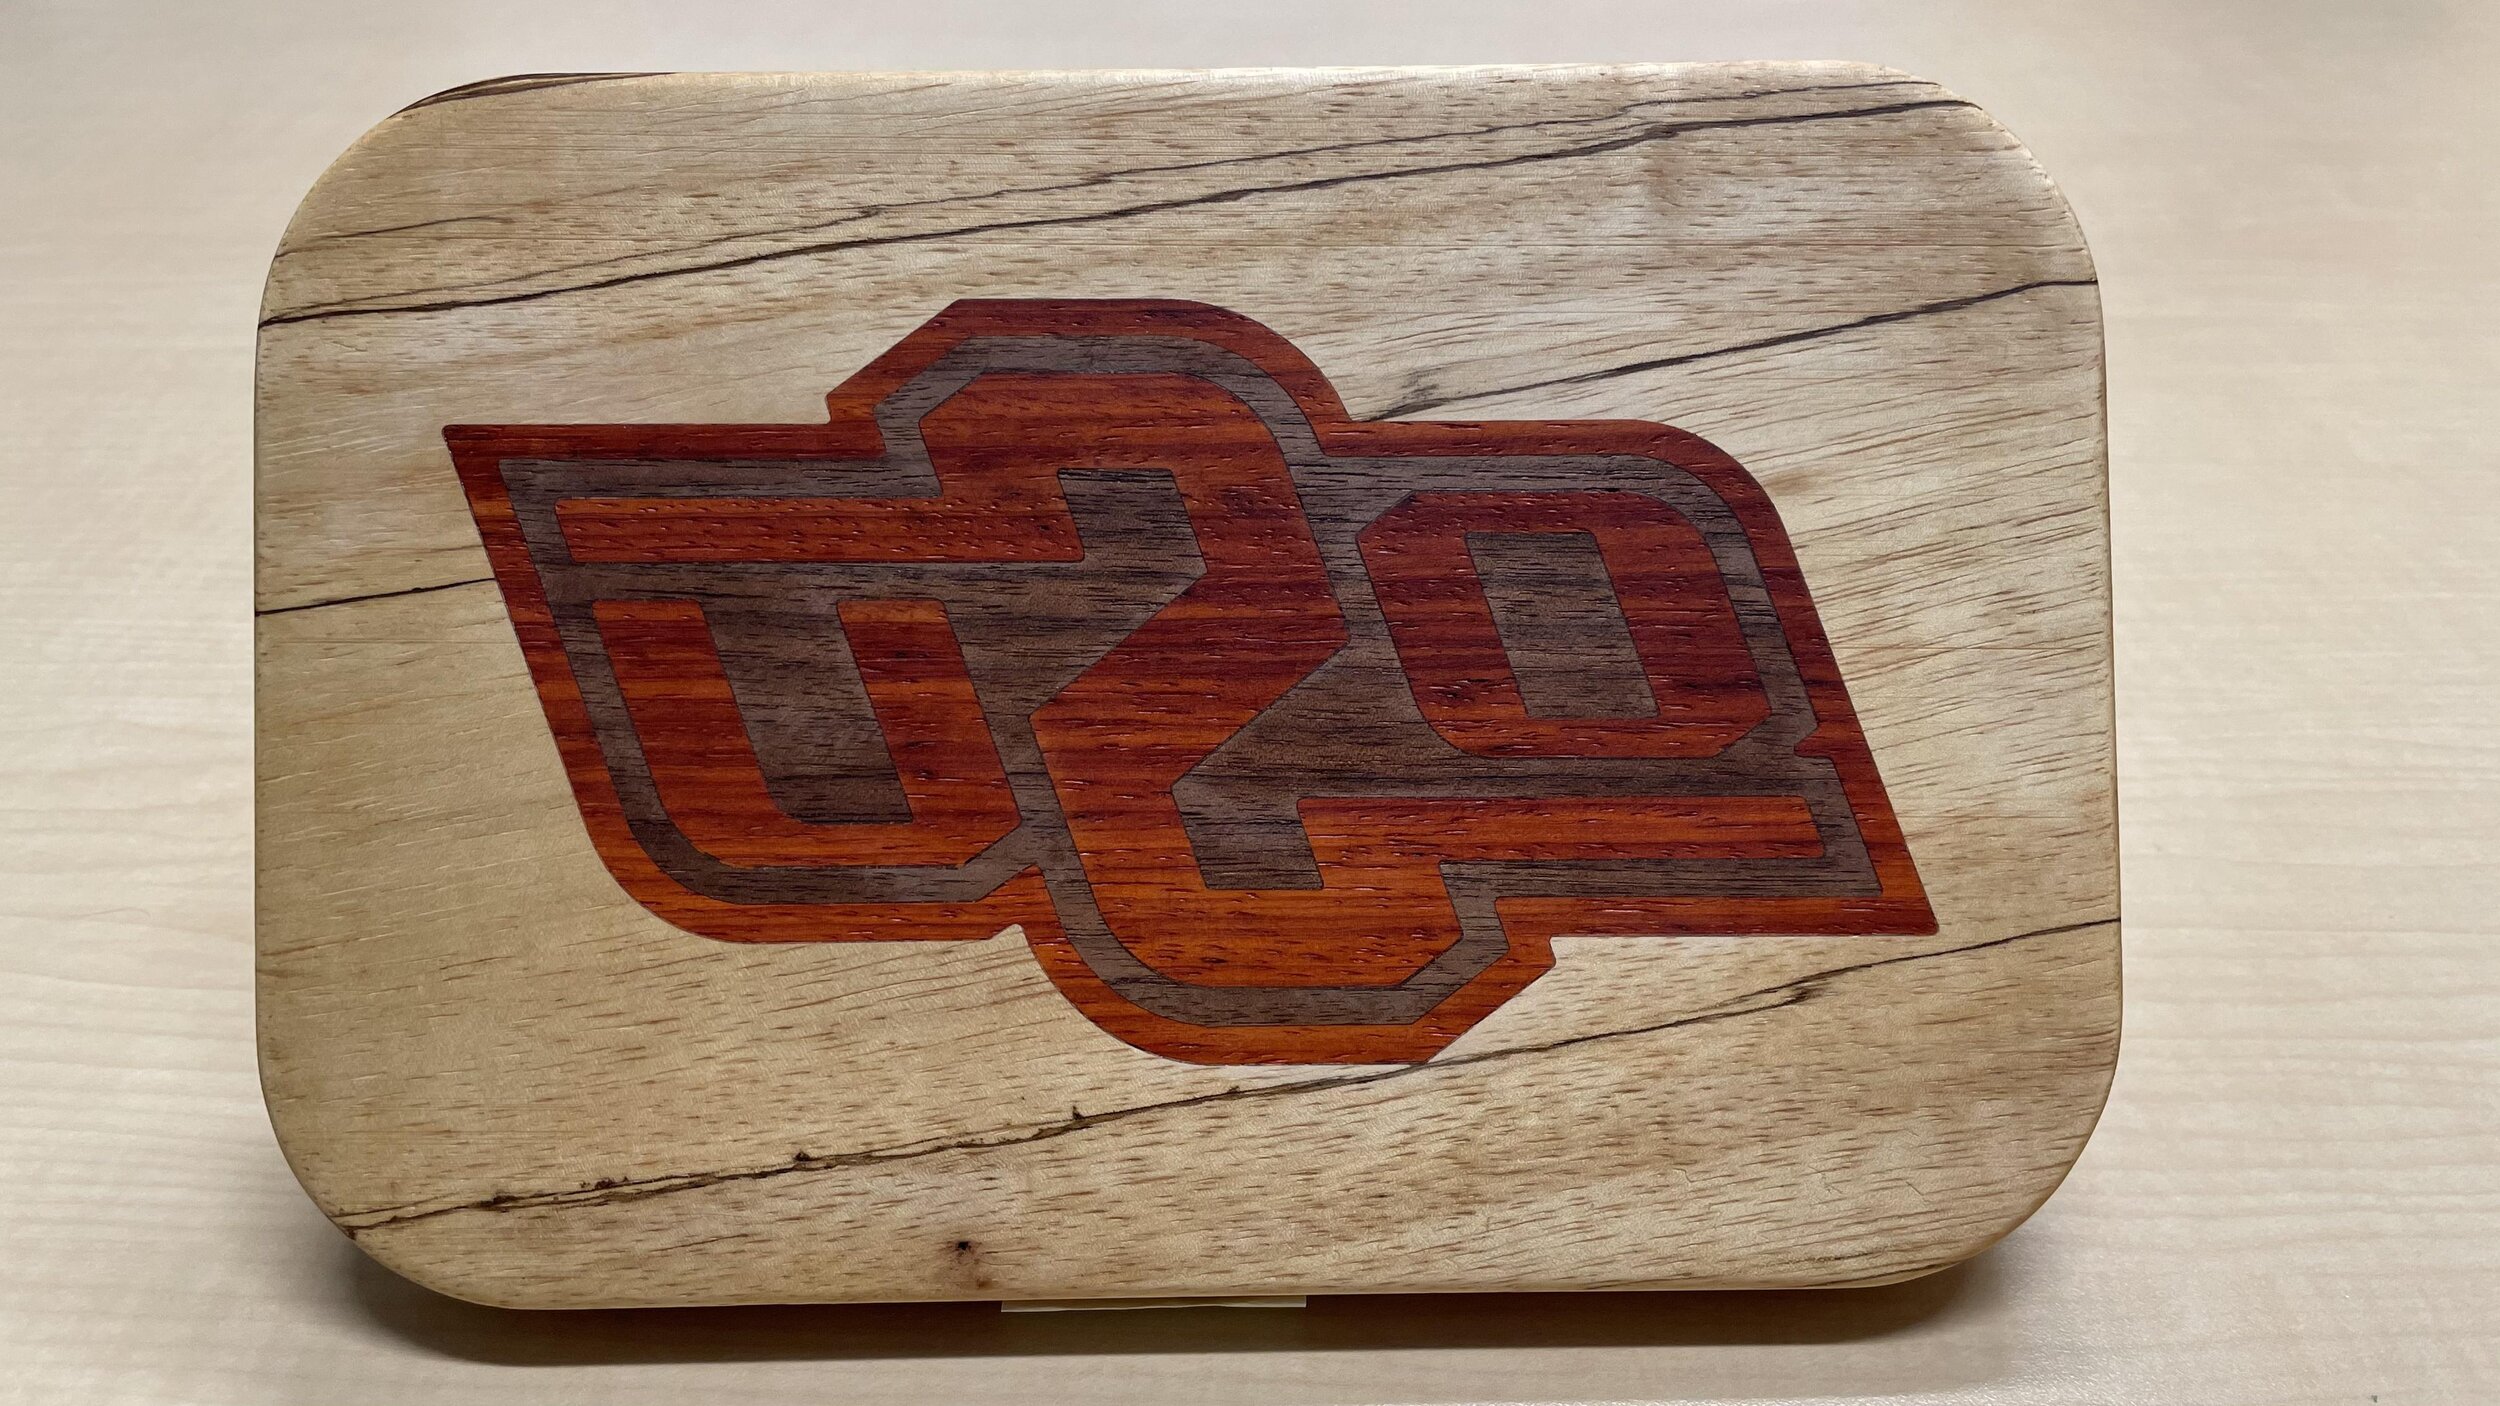
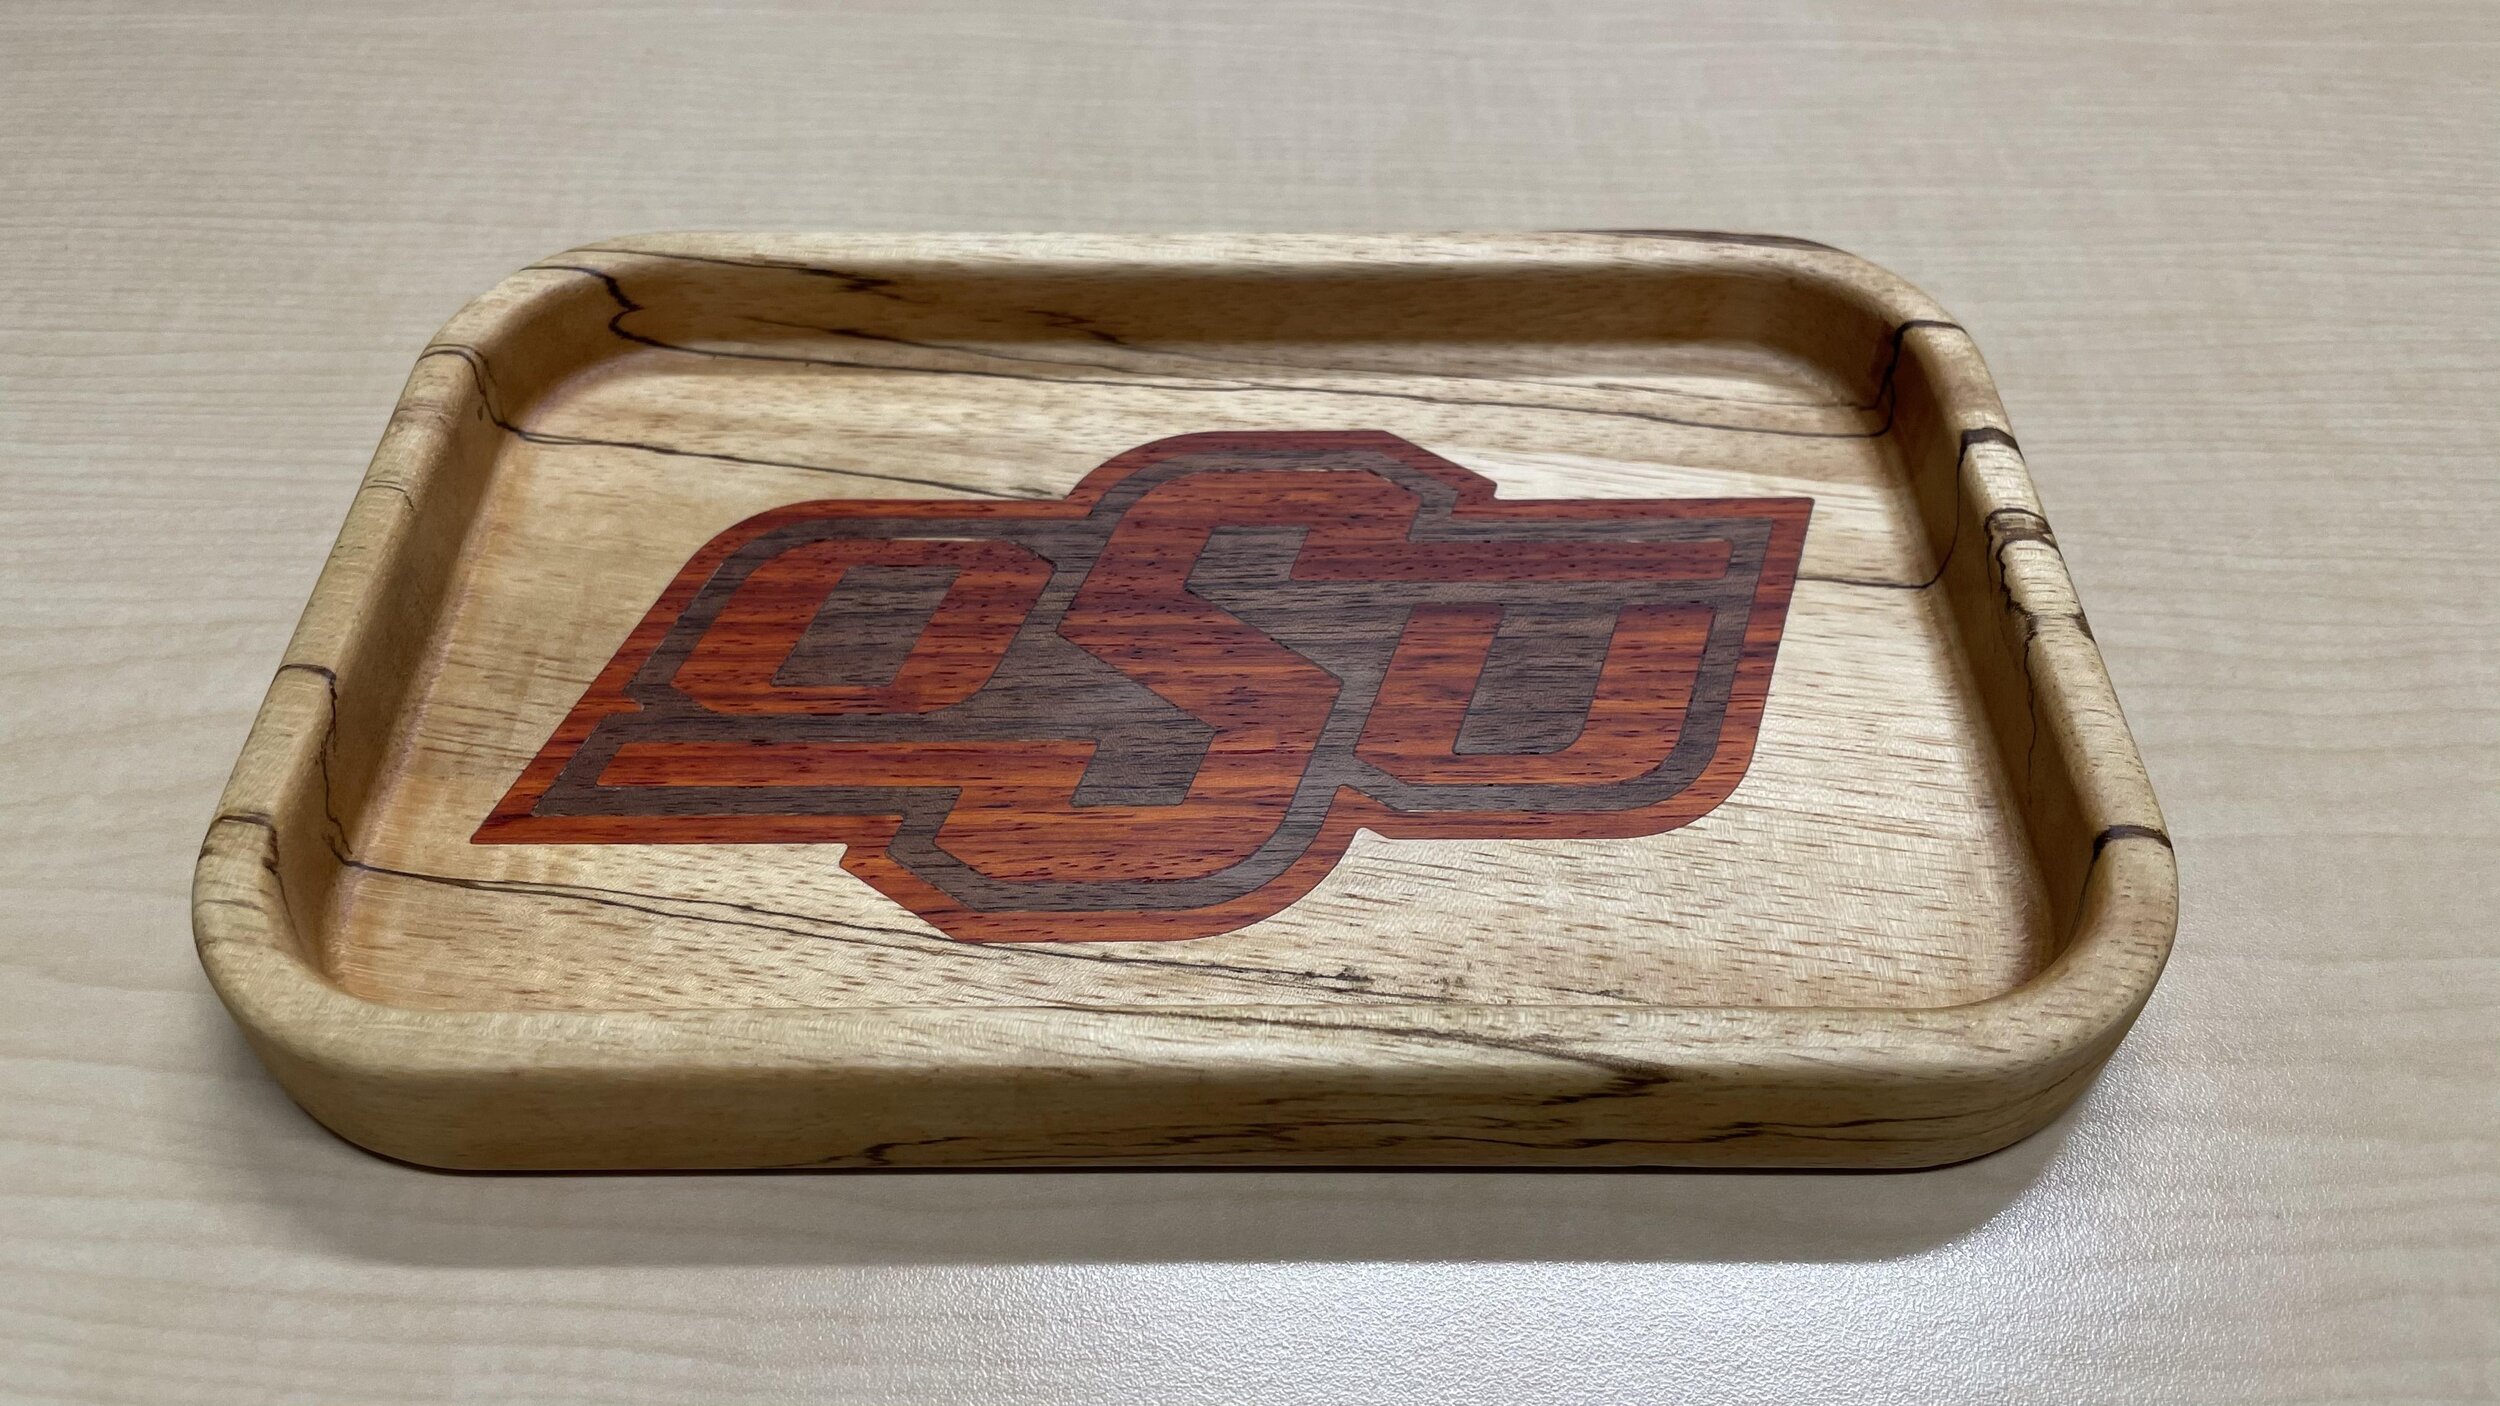
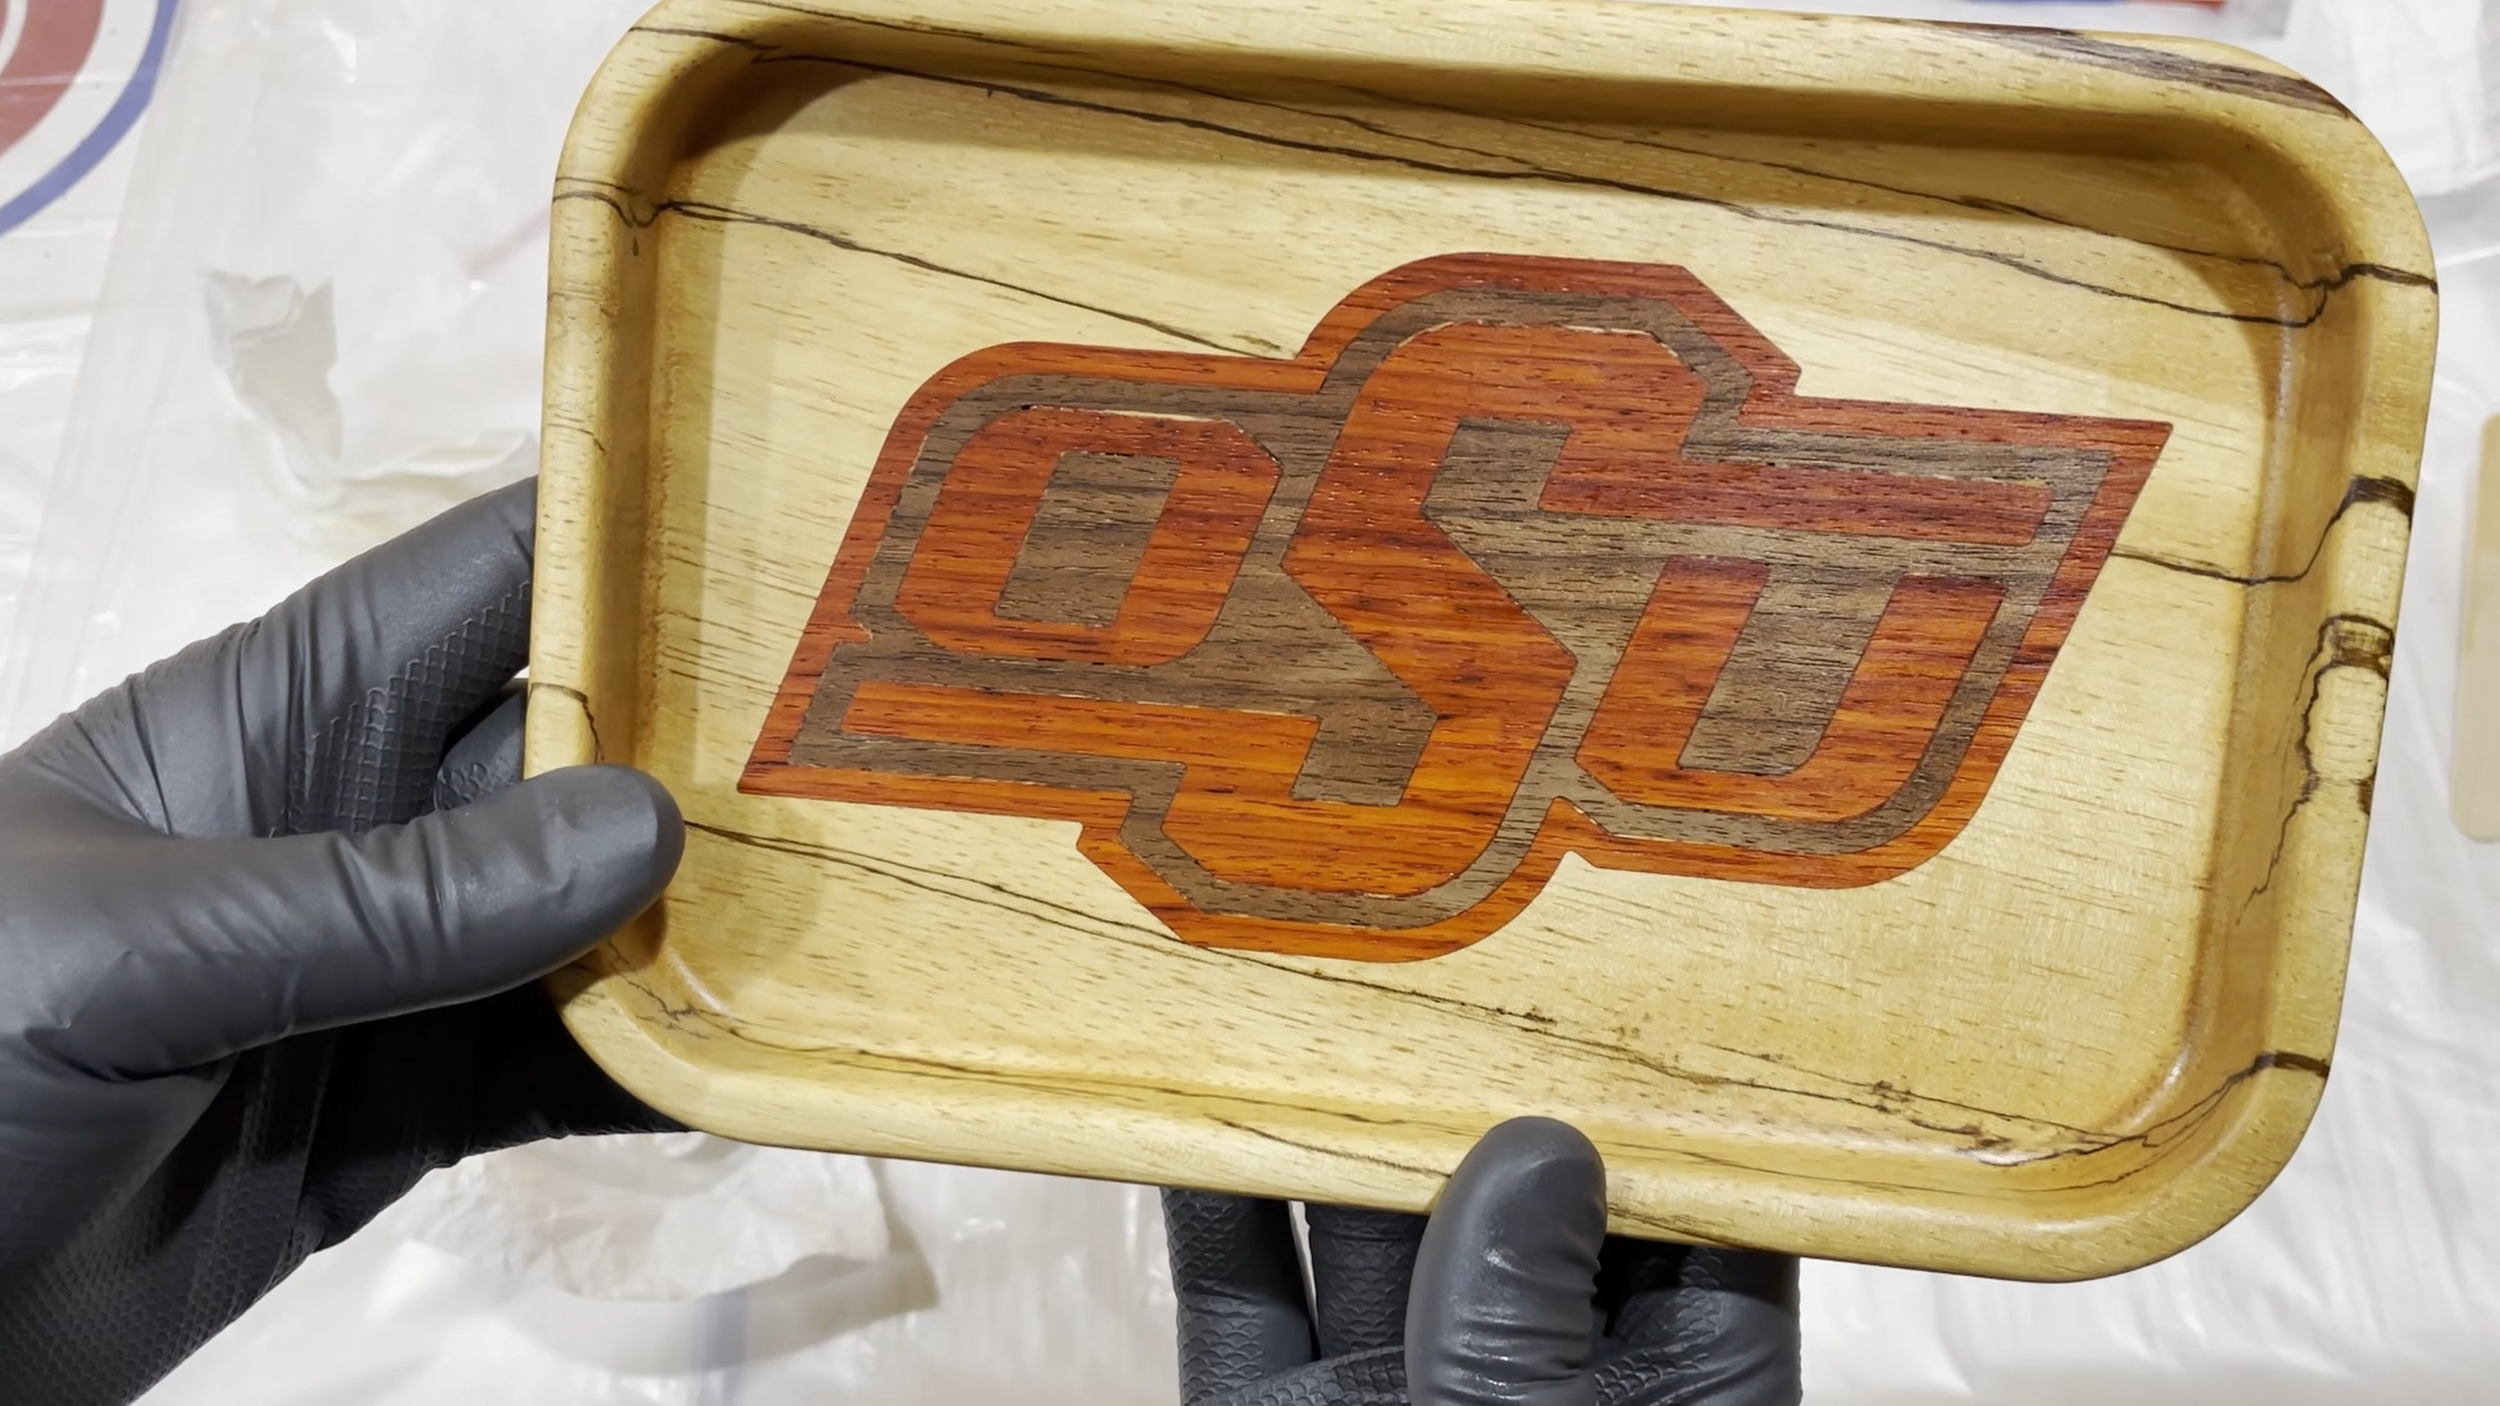
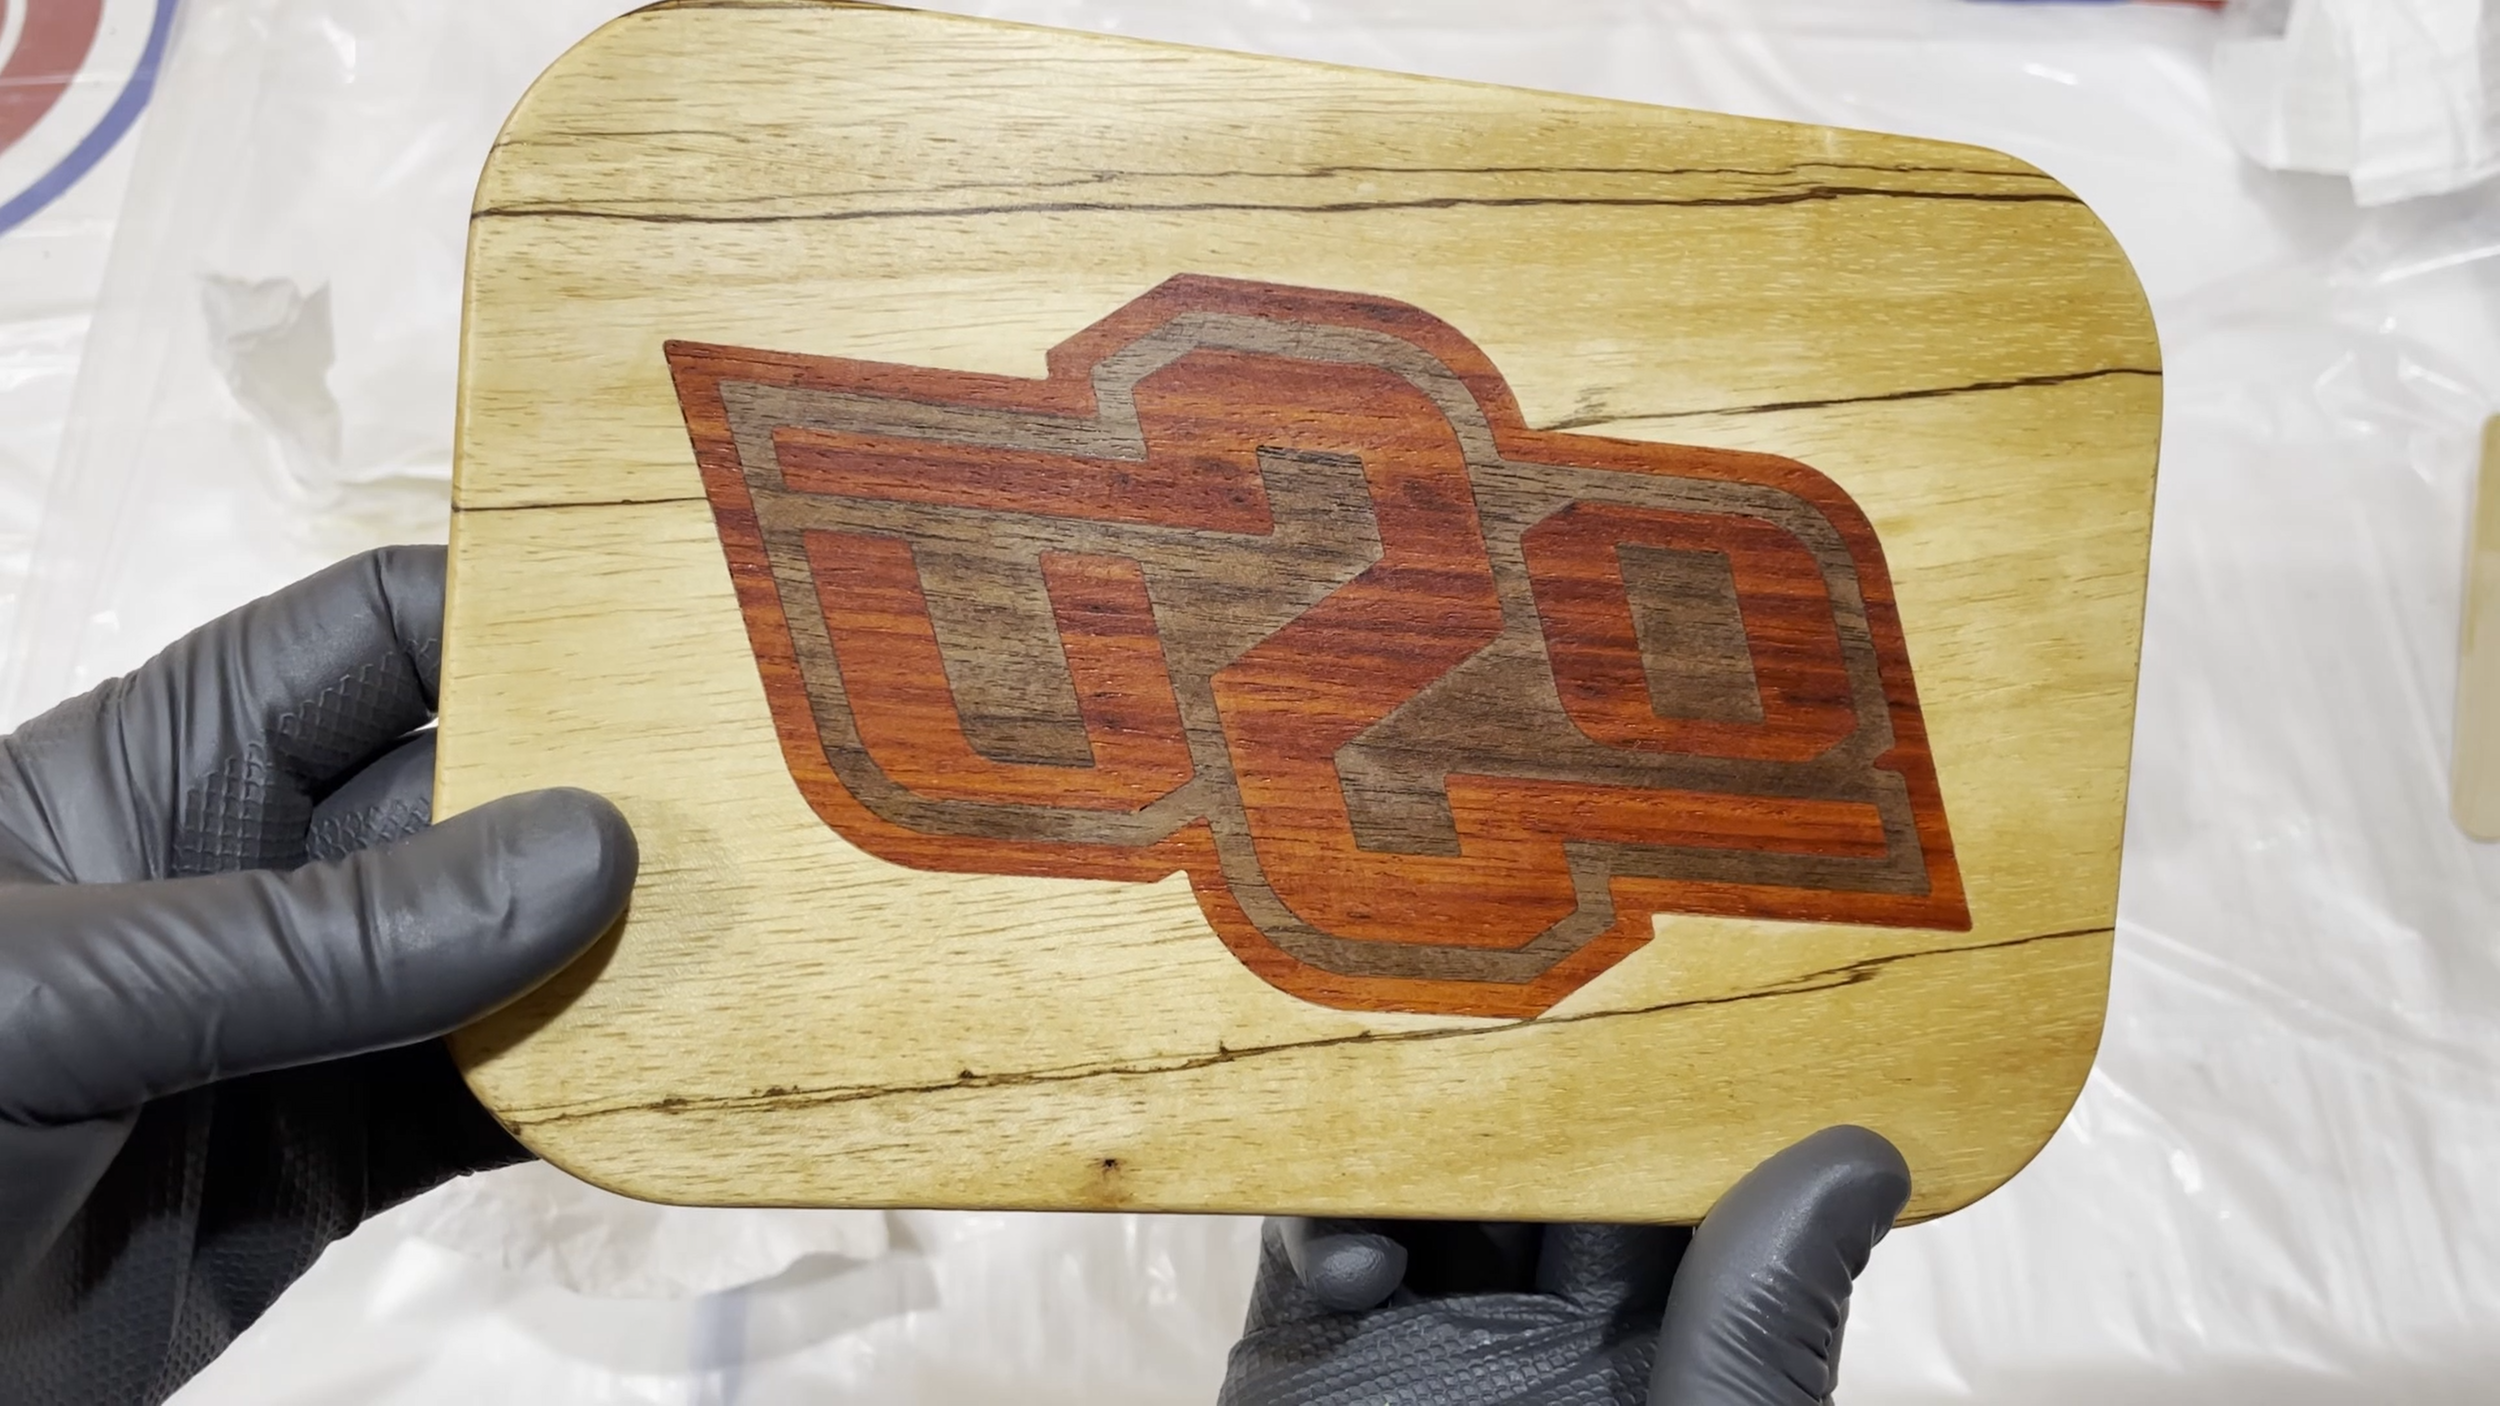
The first thing was that the tray needed to have the Oklahoma State University logo in the bottom as this was a request for a friend of mine. The woods I decided to use were zebrawood for the main piece with walnut and padauk for the two-color logo.
Since I knew I would need to run the logo parts through the bandsaw and mine only has 6 inches of resawing capacity, the maximum height of the logo could only be 6 inches.
Those two items really set the criteria. The only other thing to take into consideration is that the logo was appropriately sized for the overall size of the tray.
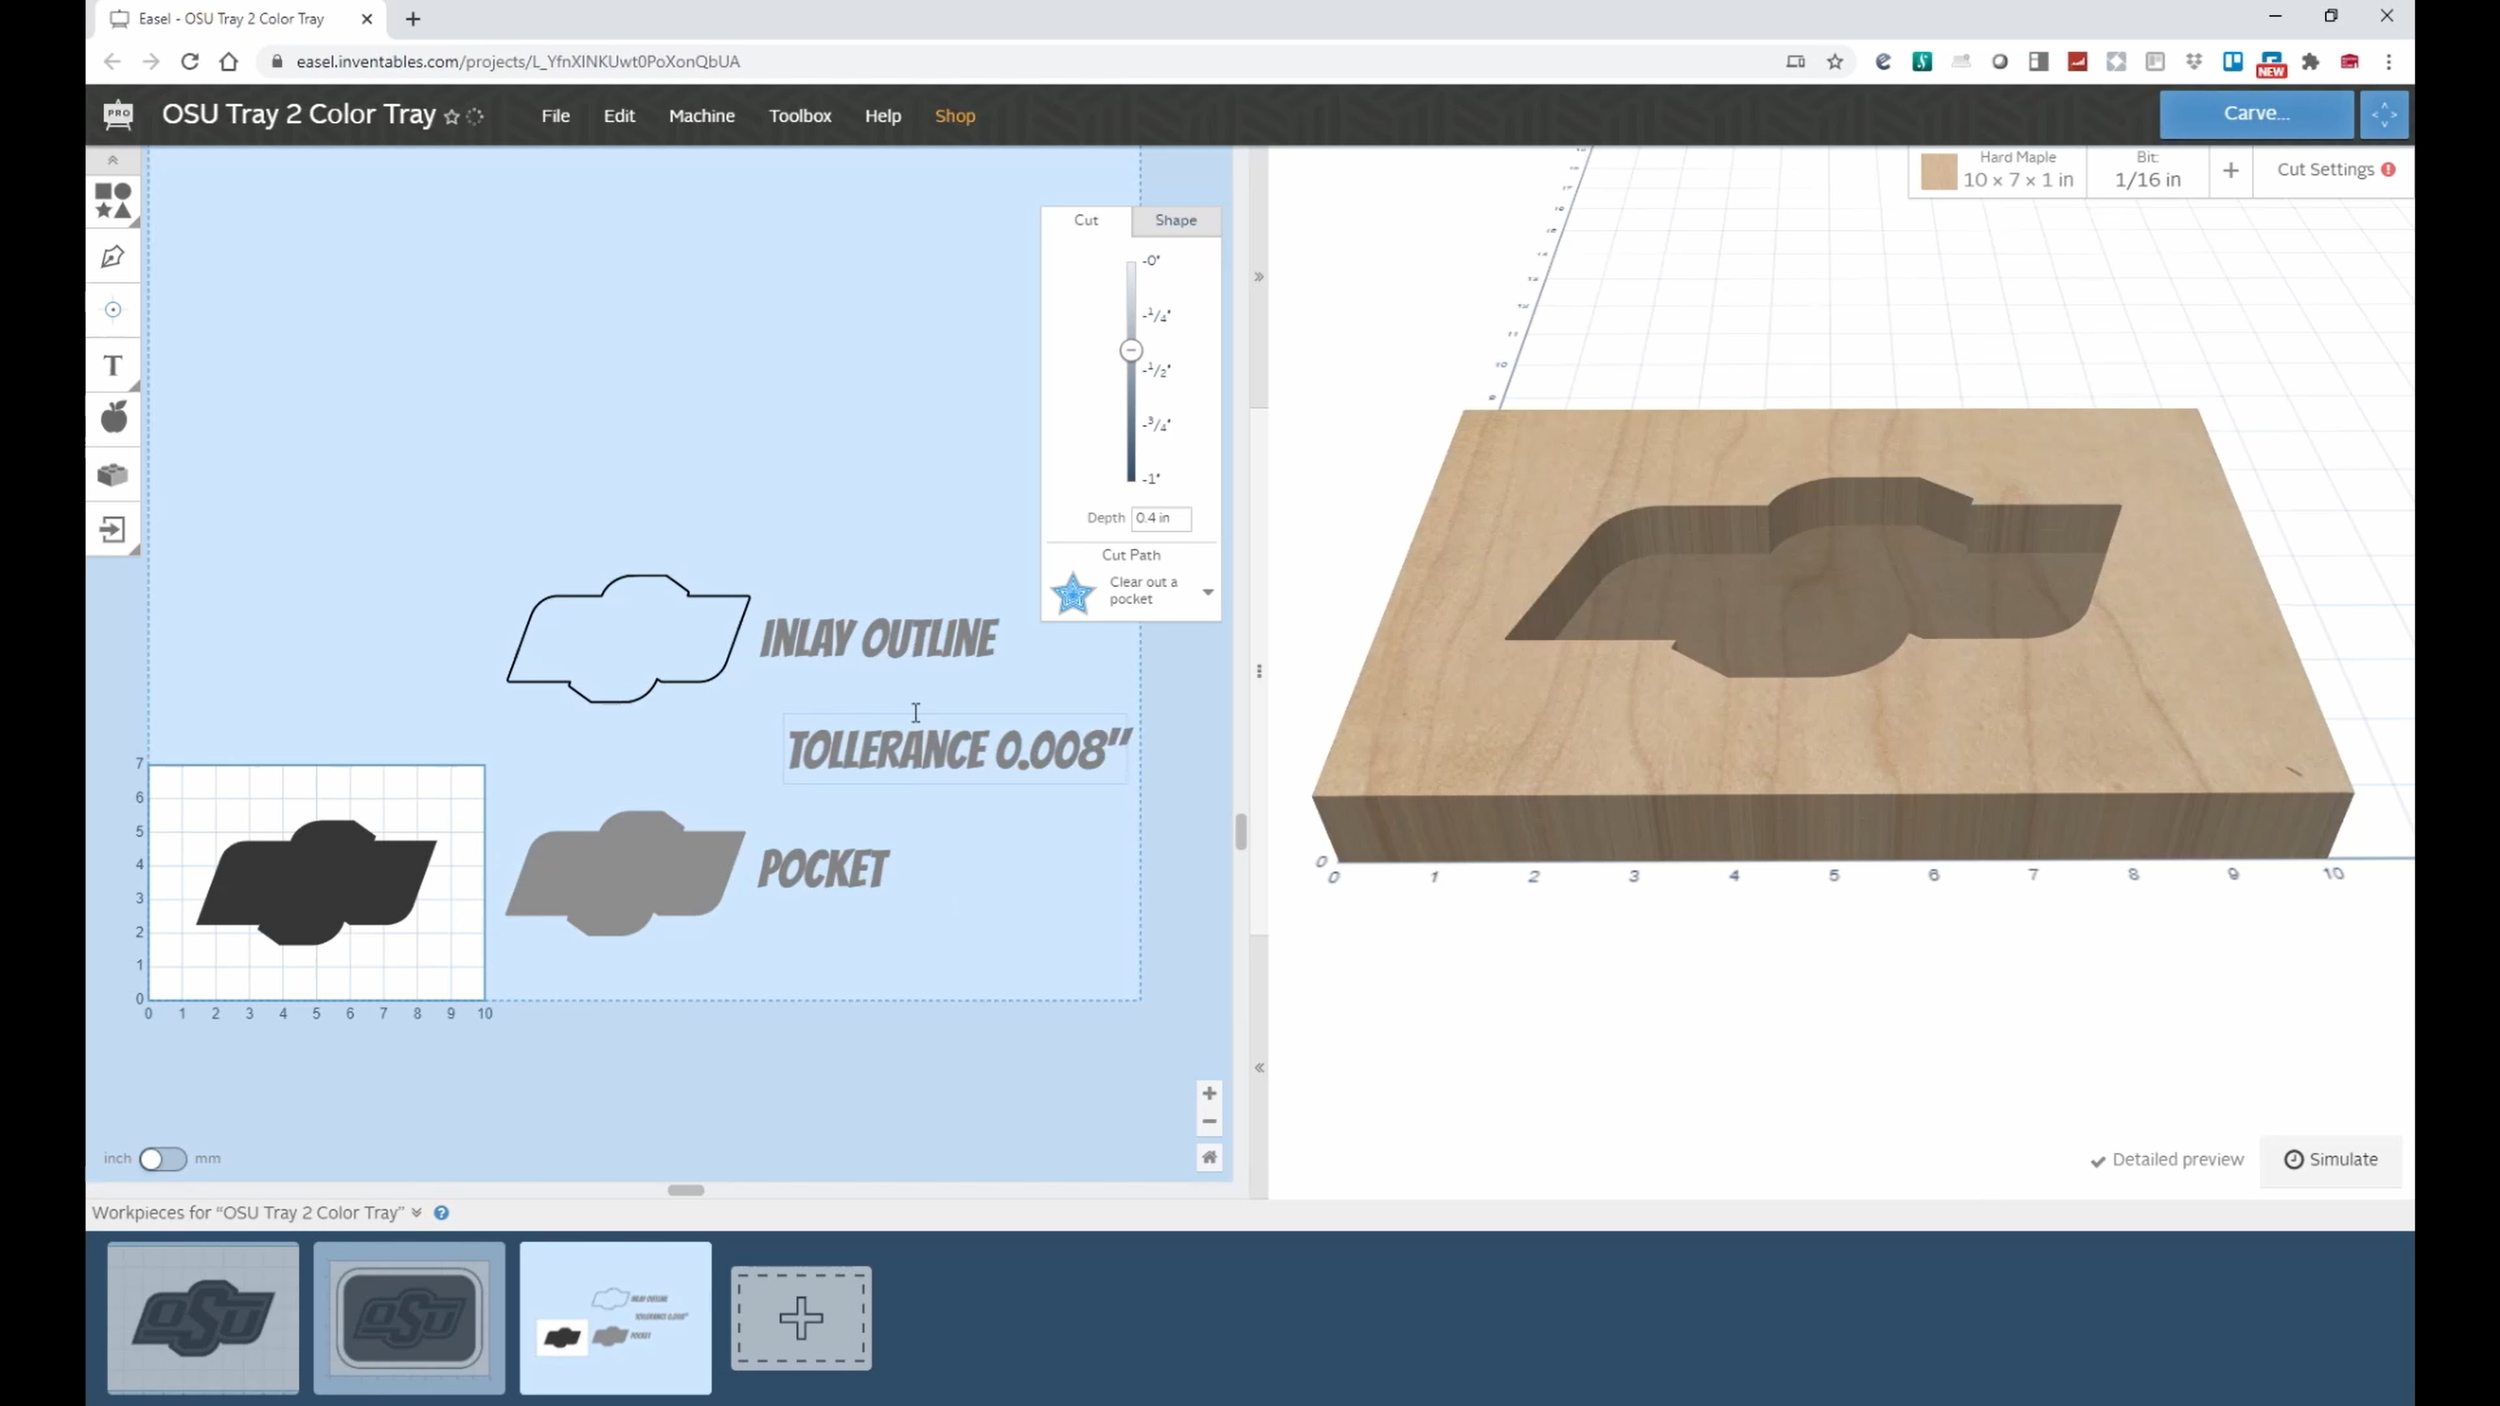
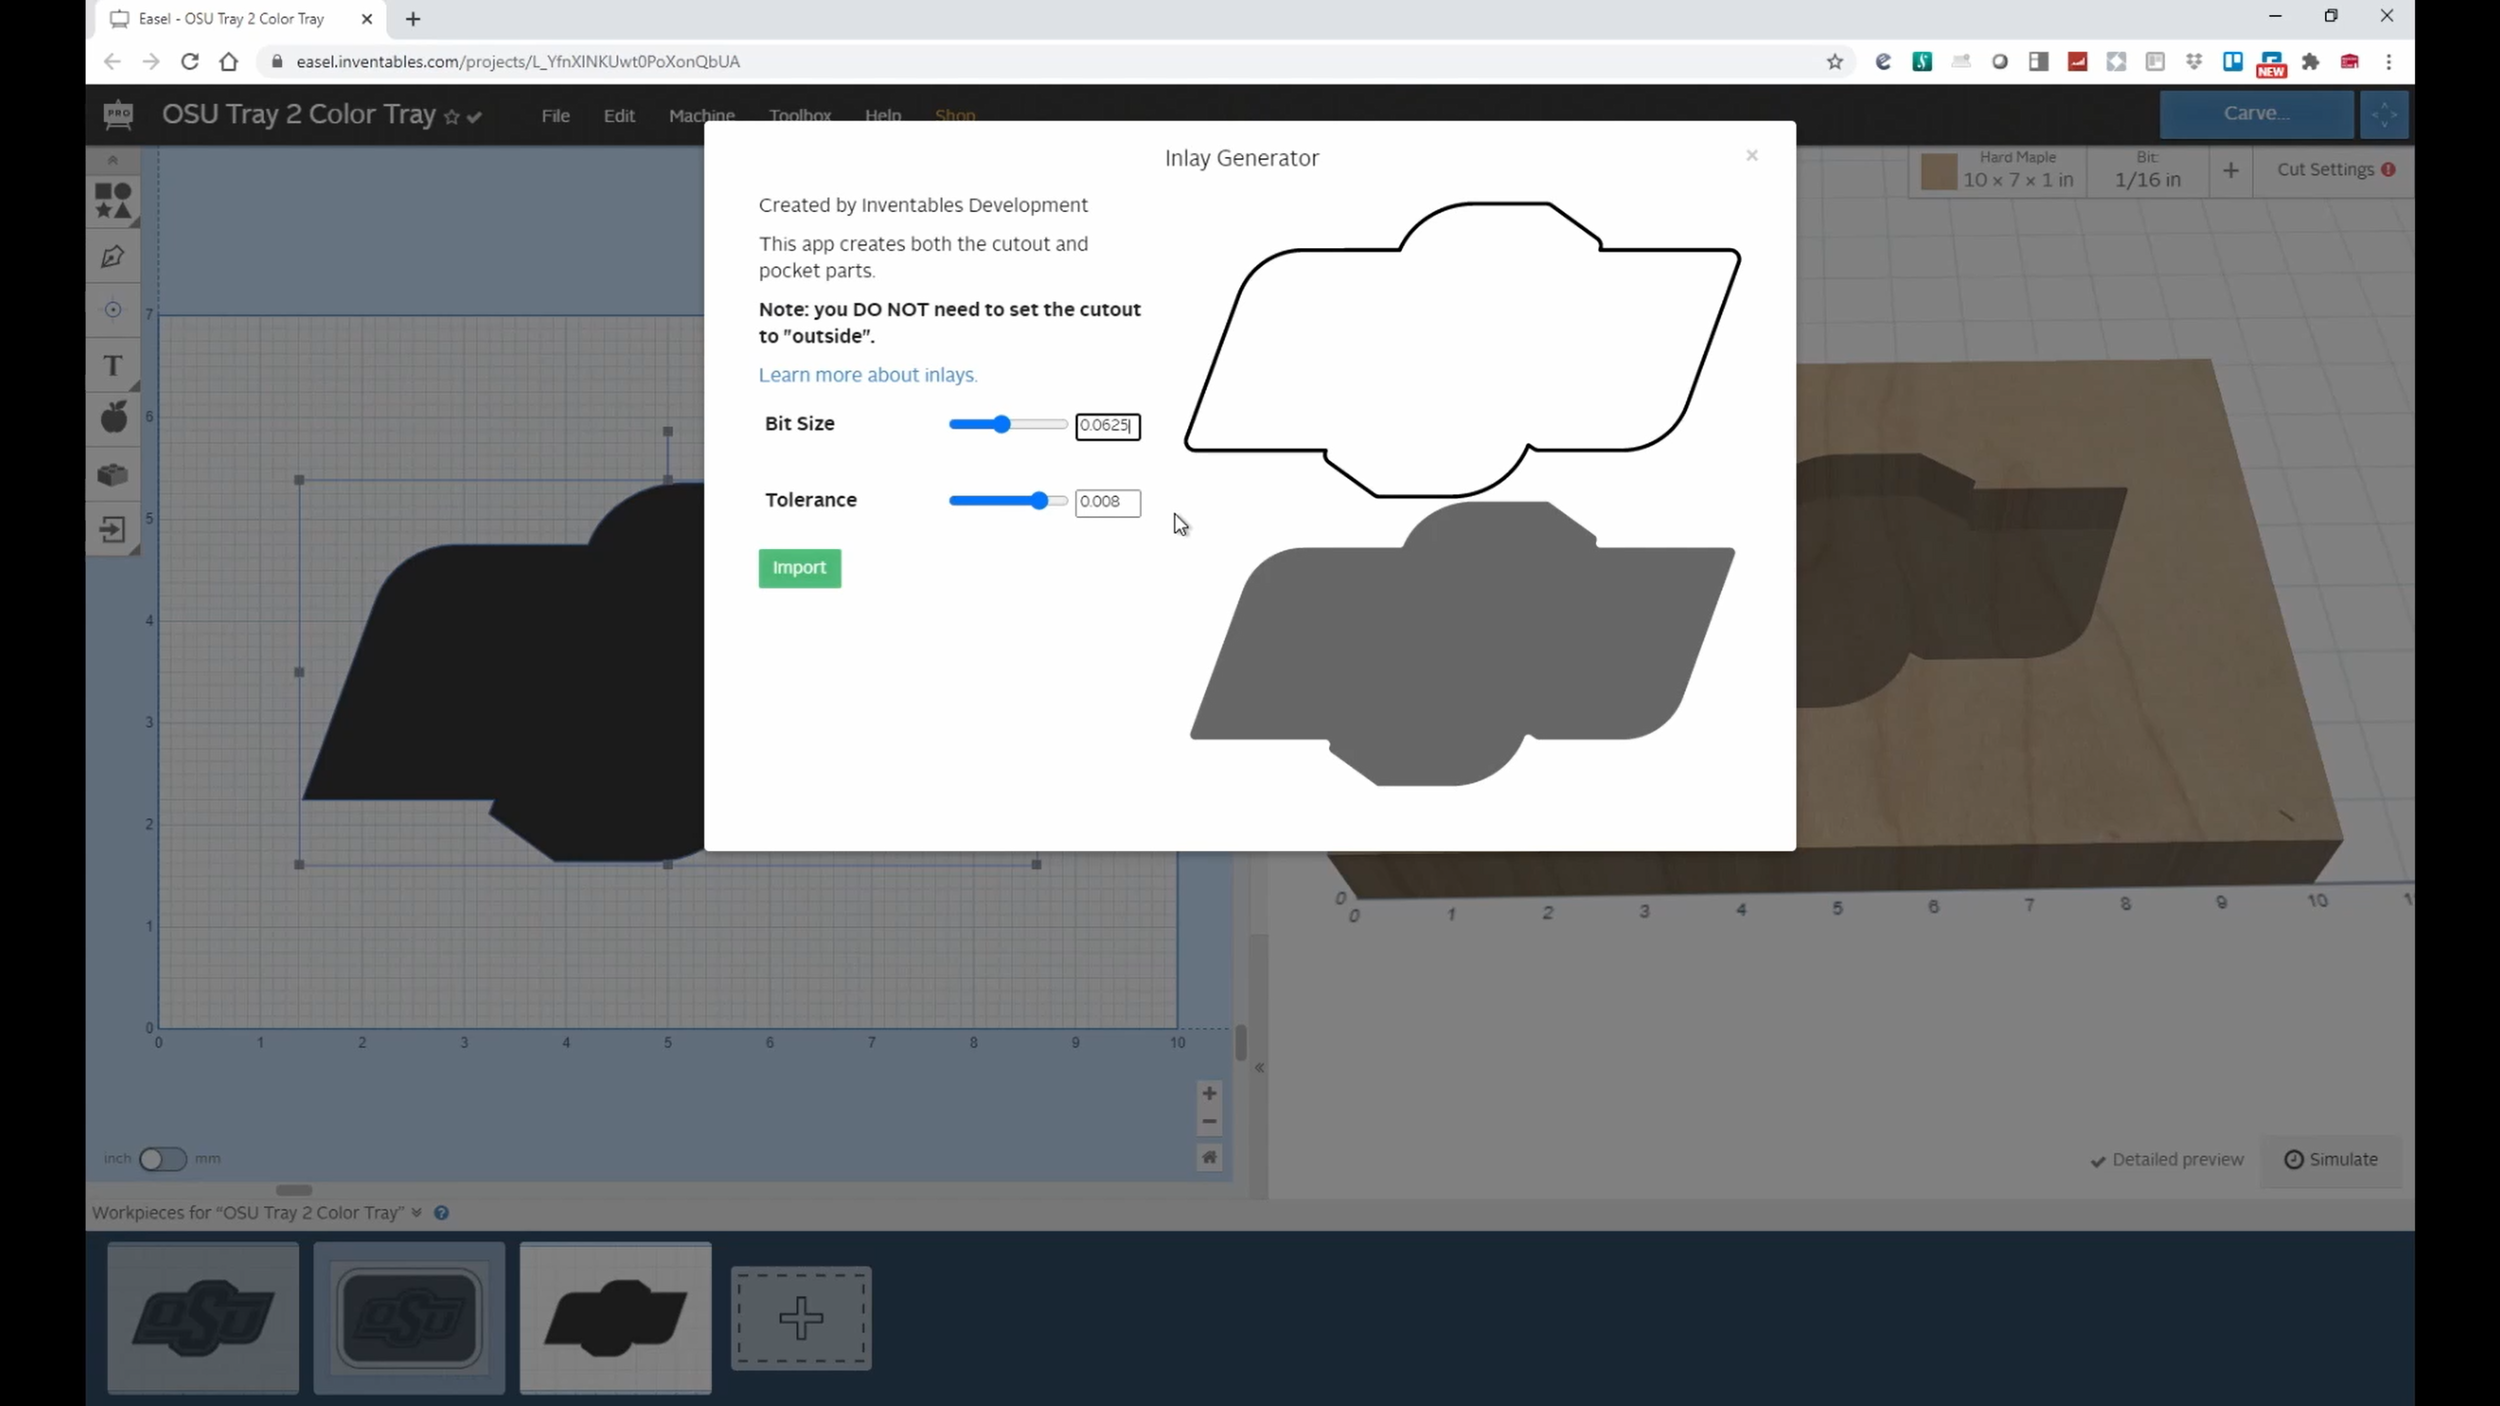
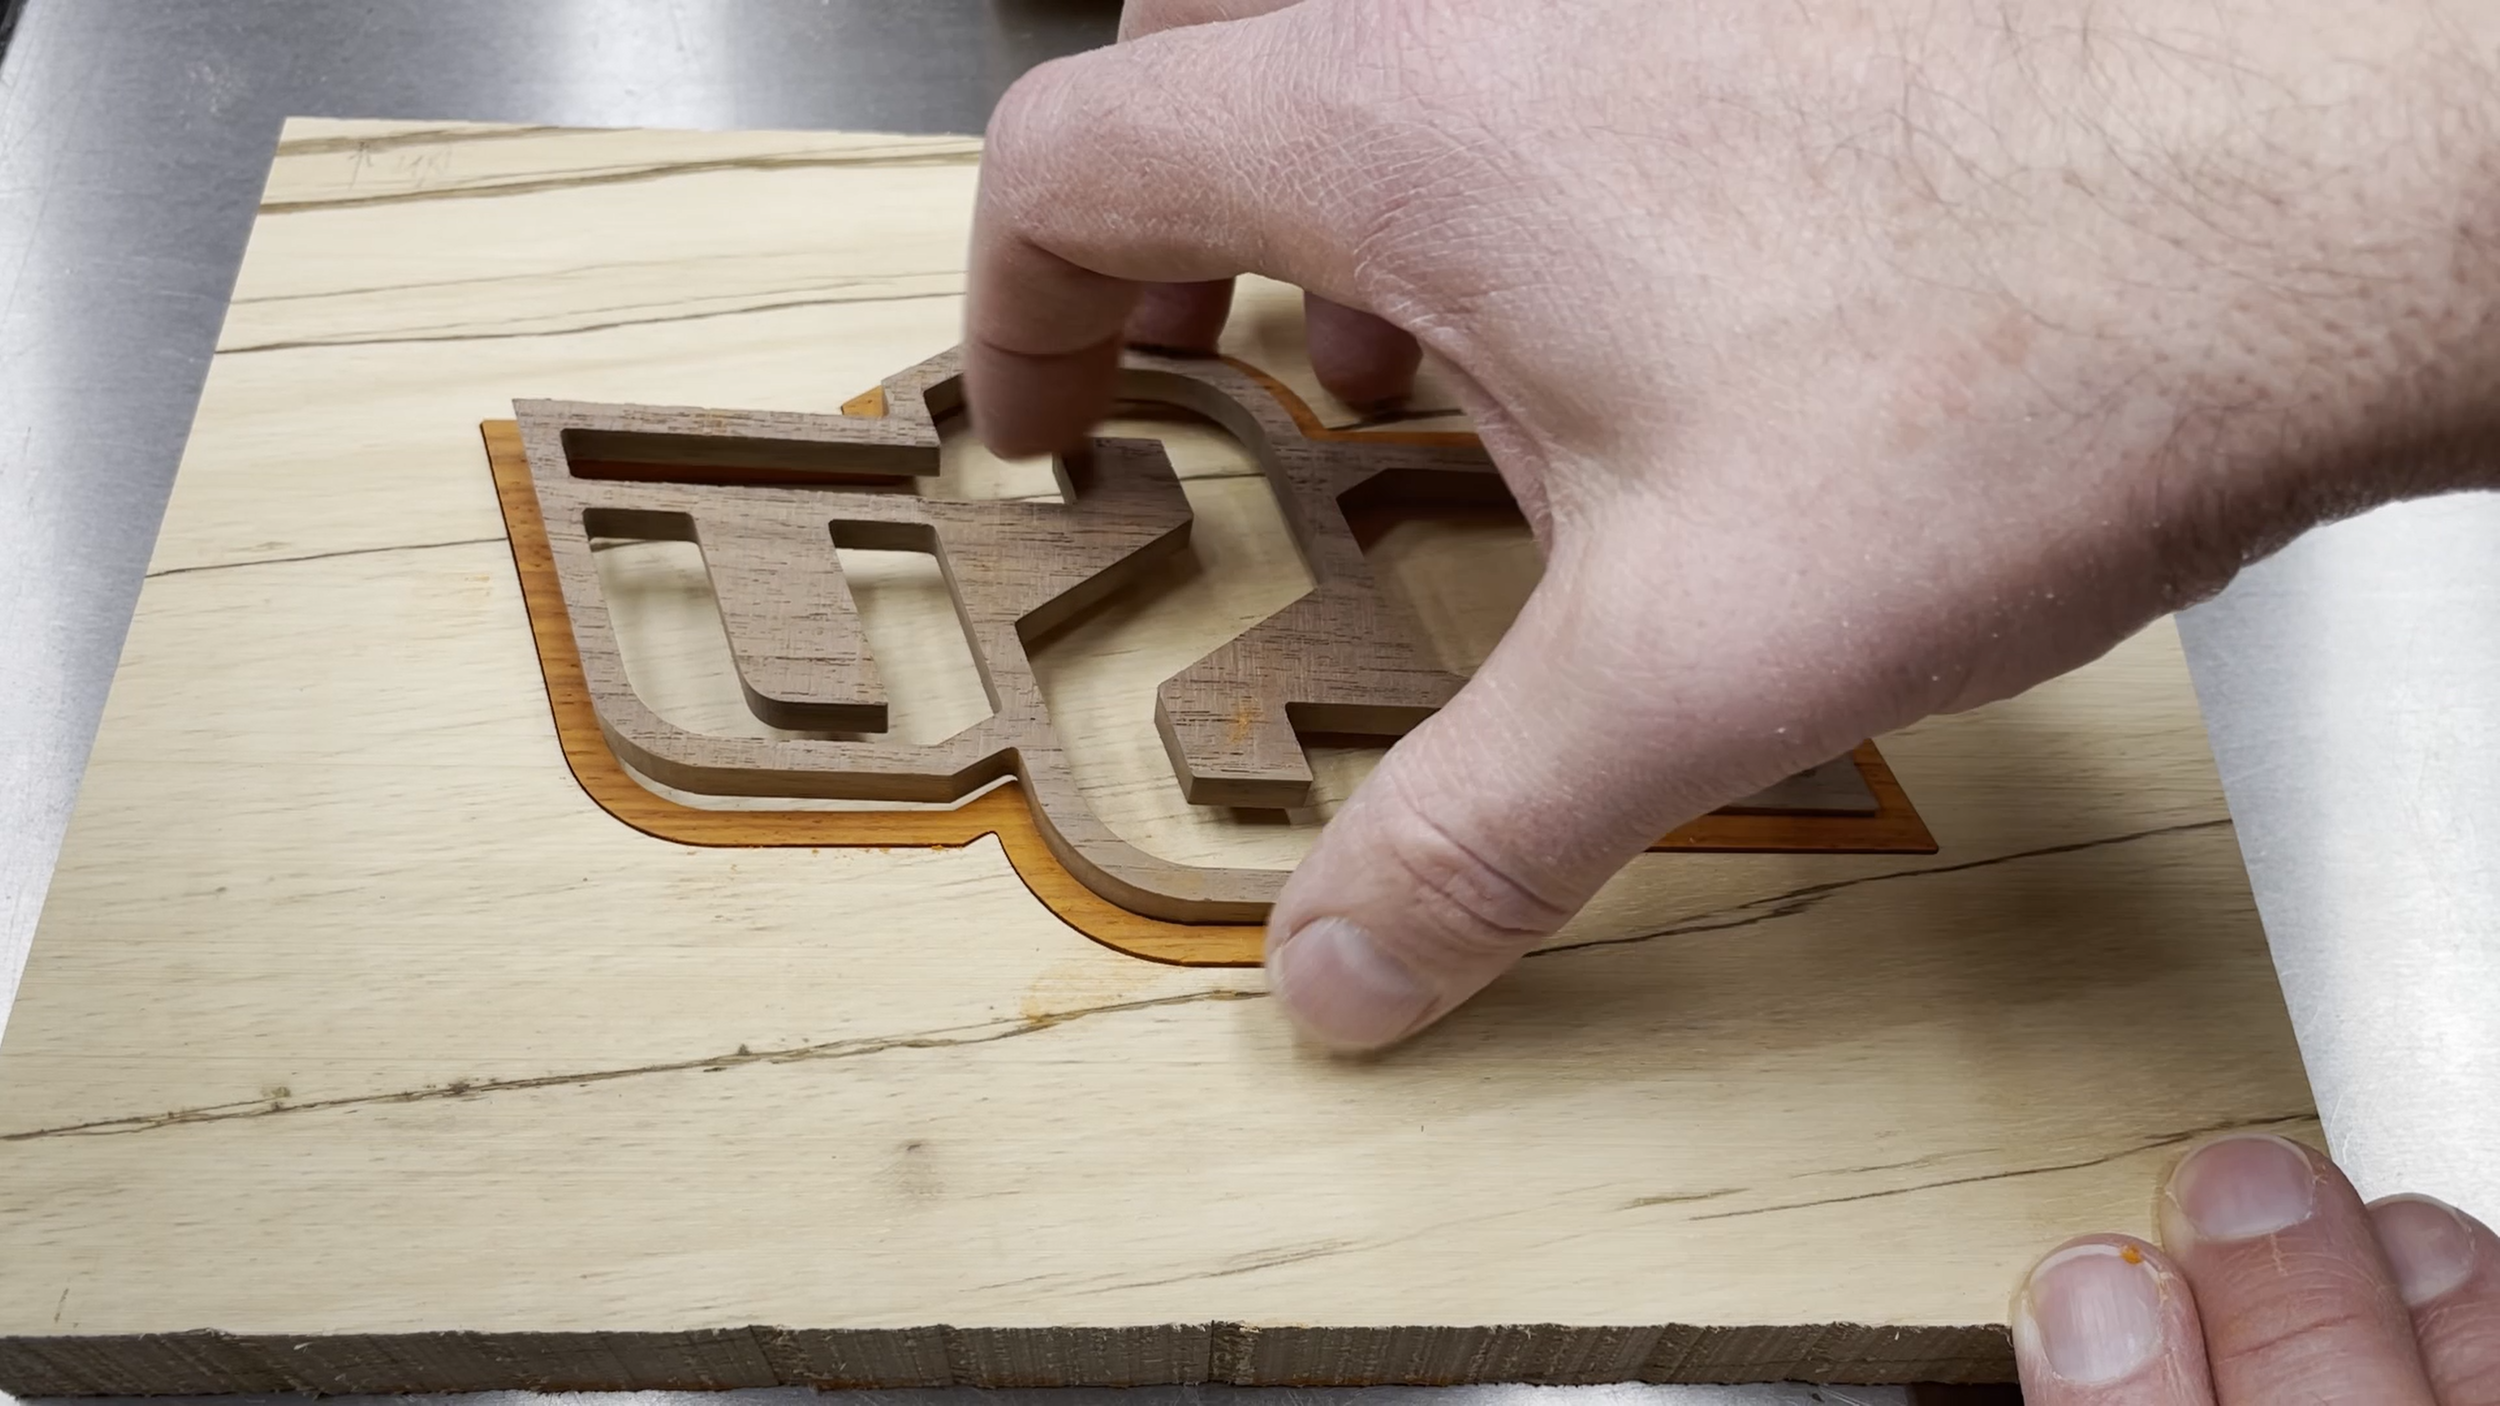
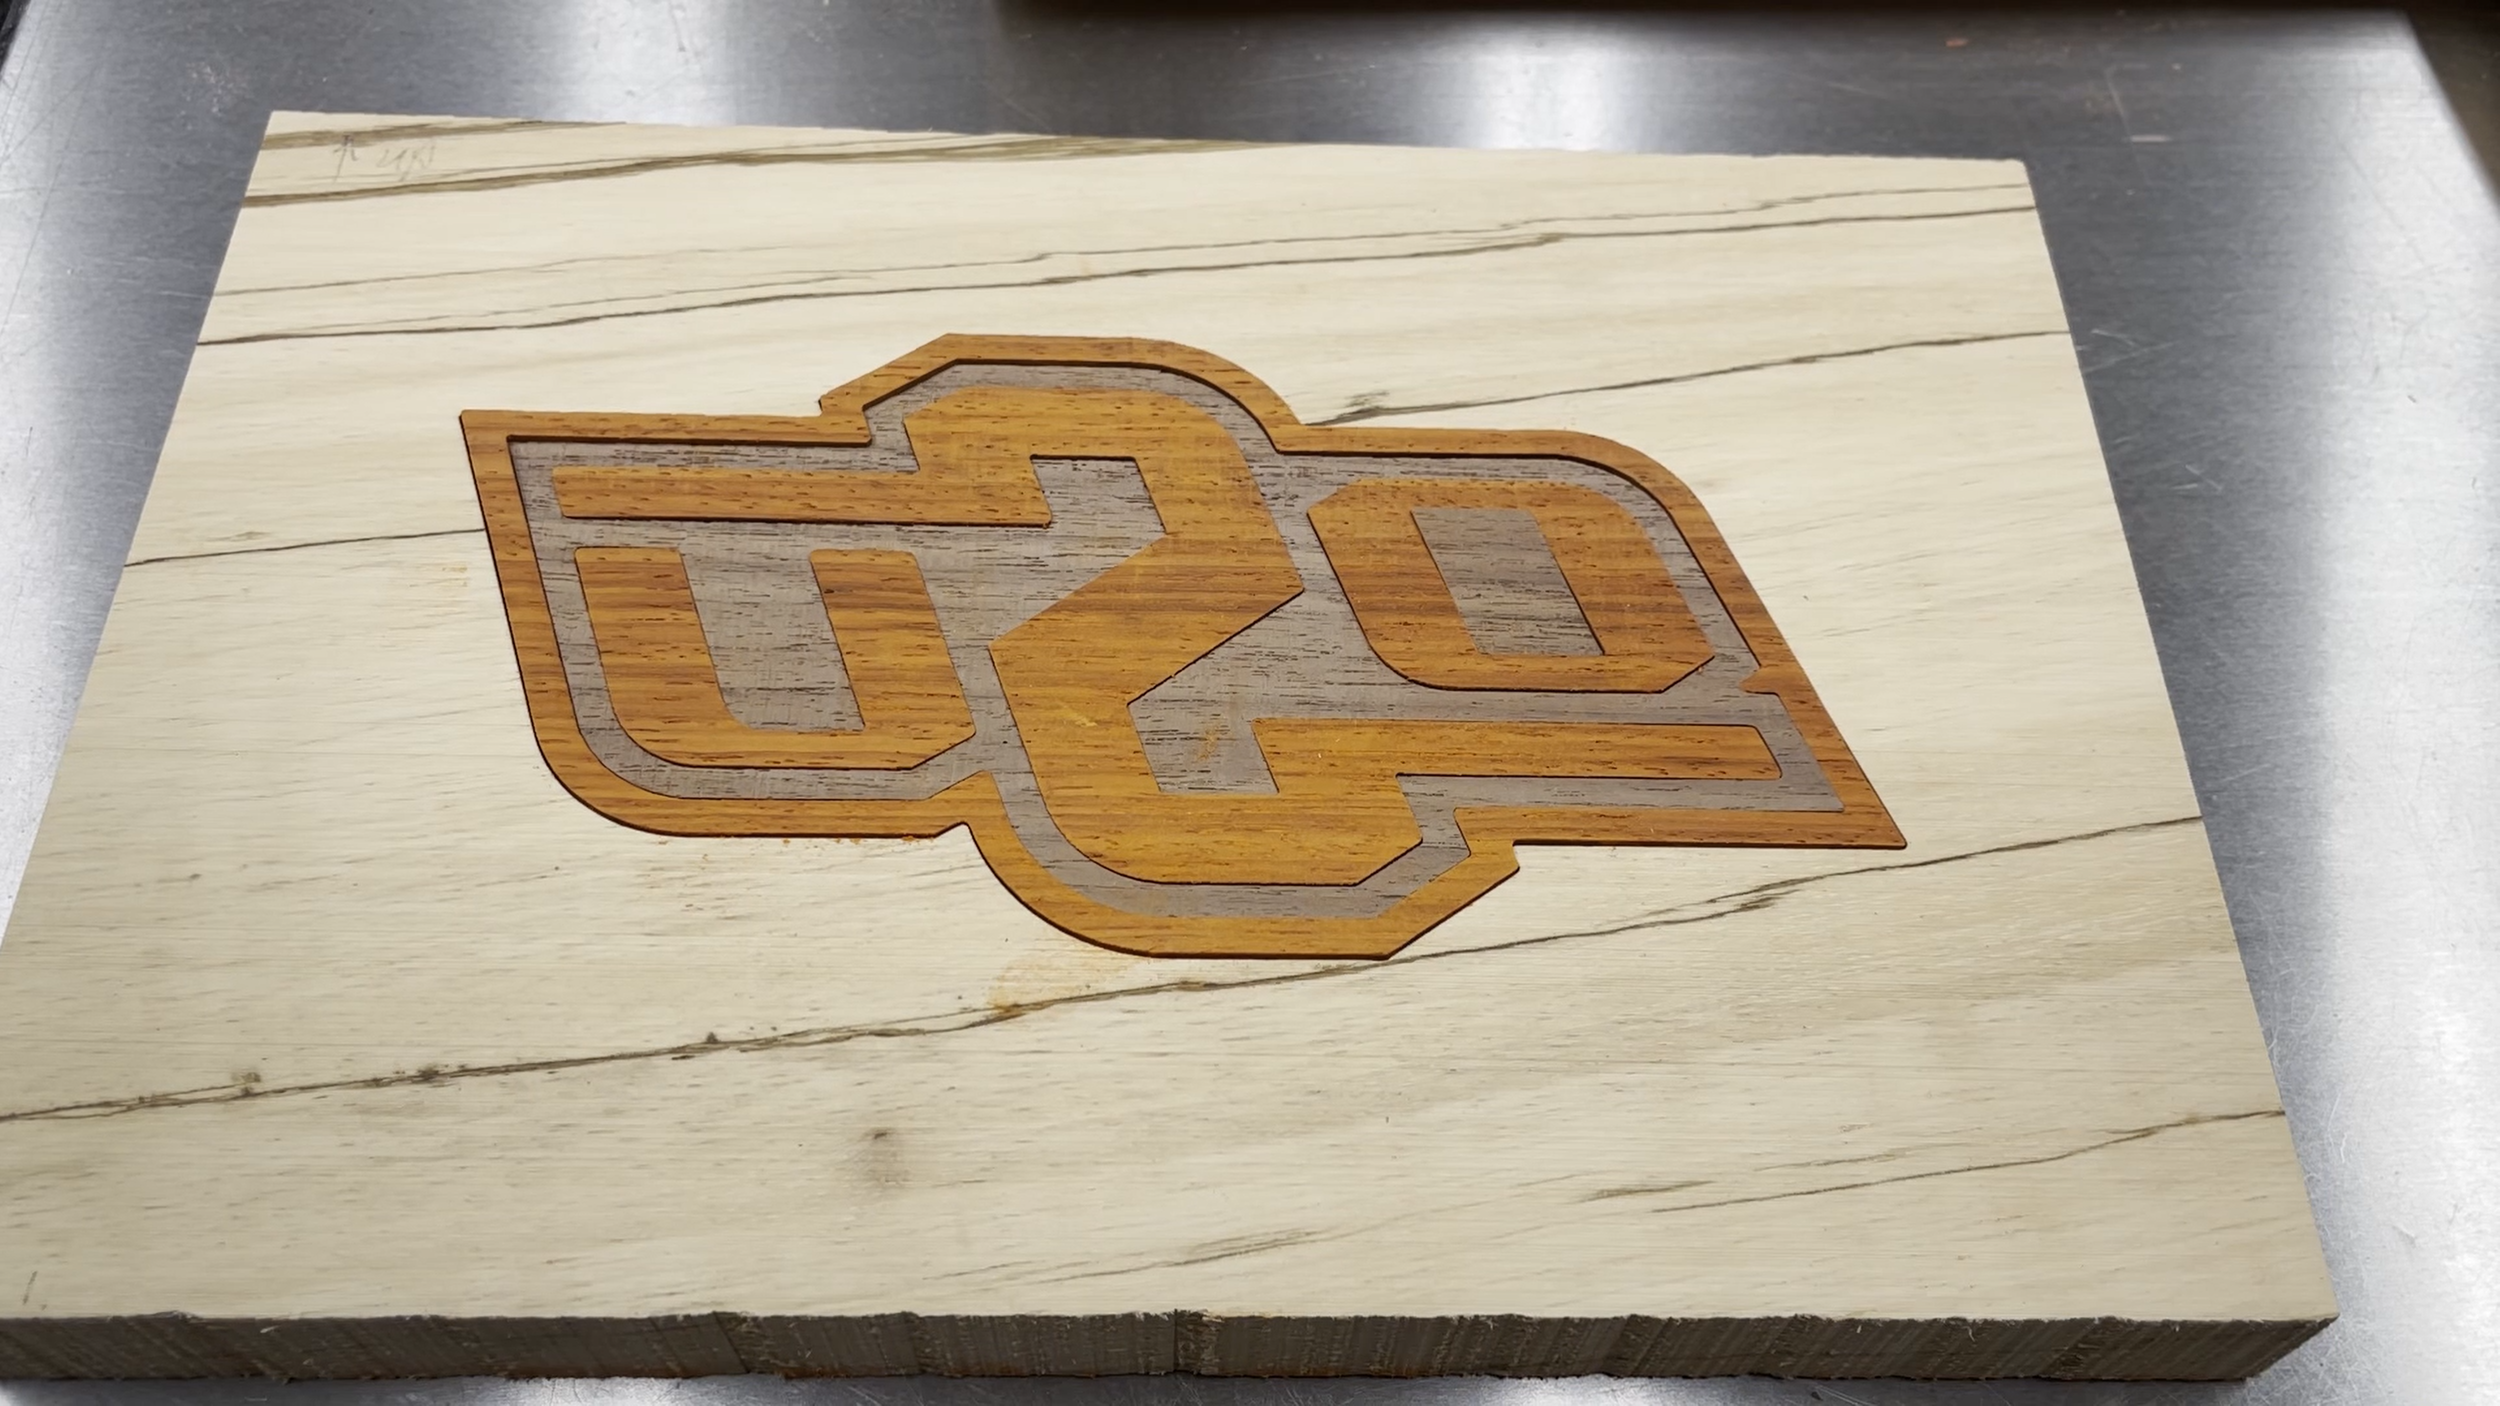
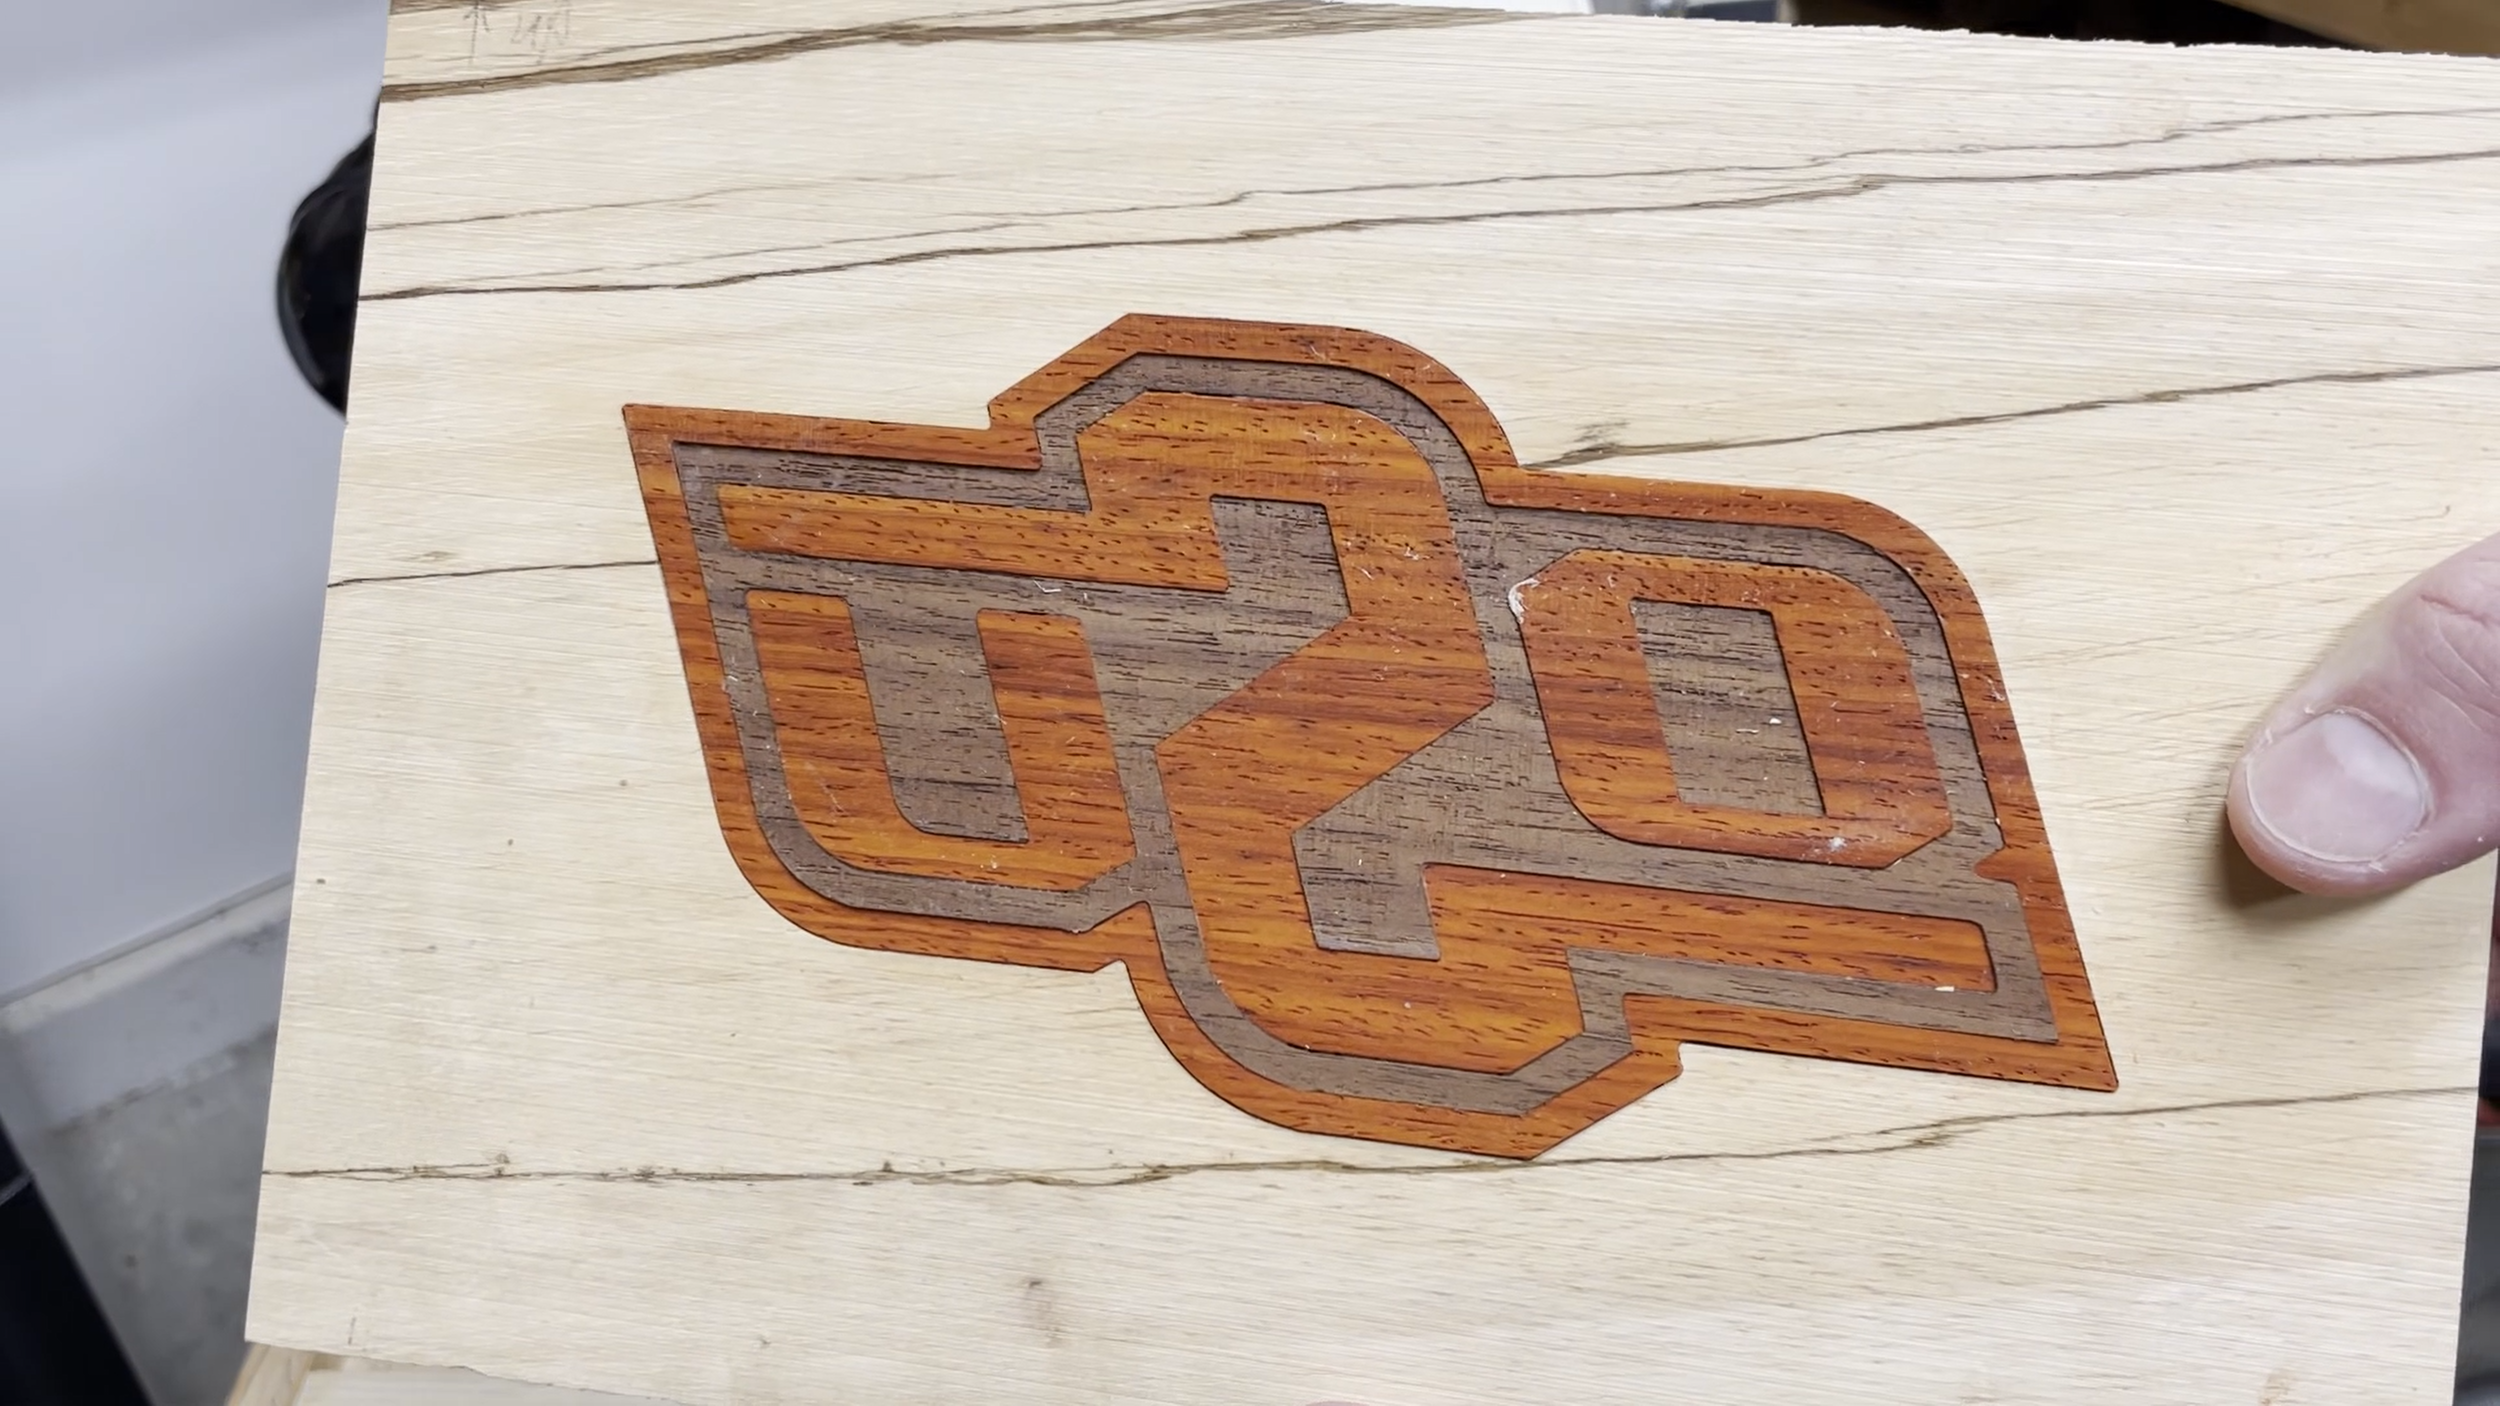
The logo was imported into the Inventables Easel software and processed by using the inlay generator app twice. The walnut portion of the logo is an inlay in the padauk portion. Then this overall log piece is an inlay in the zebrawood.
I set my tolerance for the inlay generator to 0.008" for both operations.
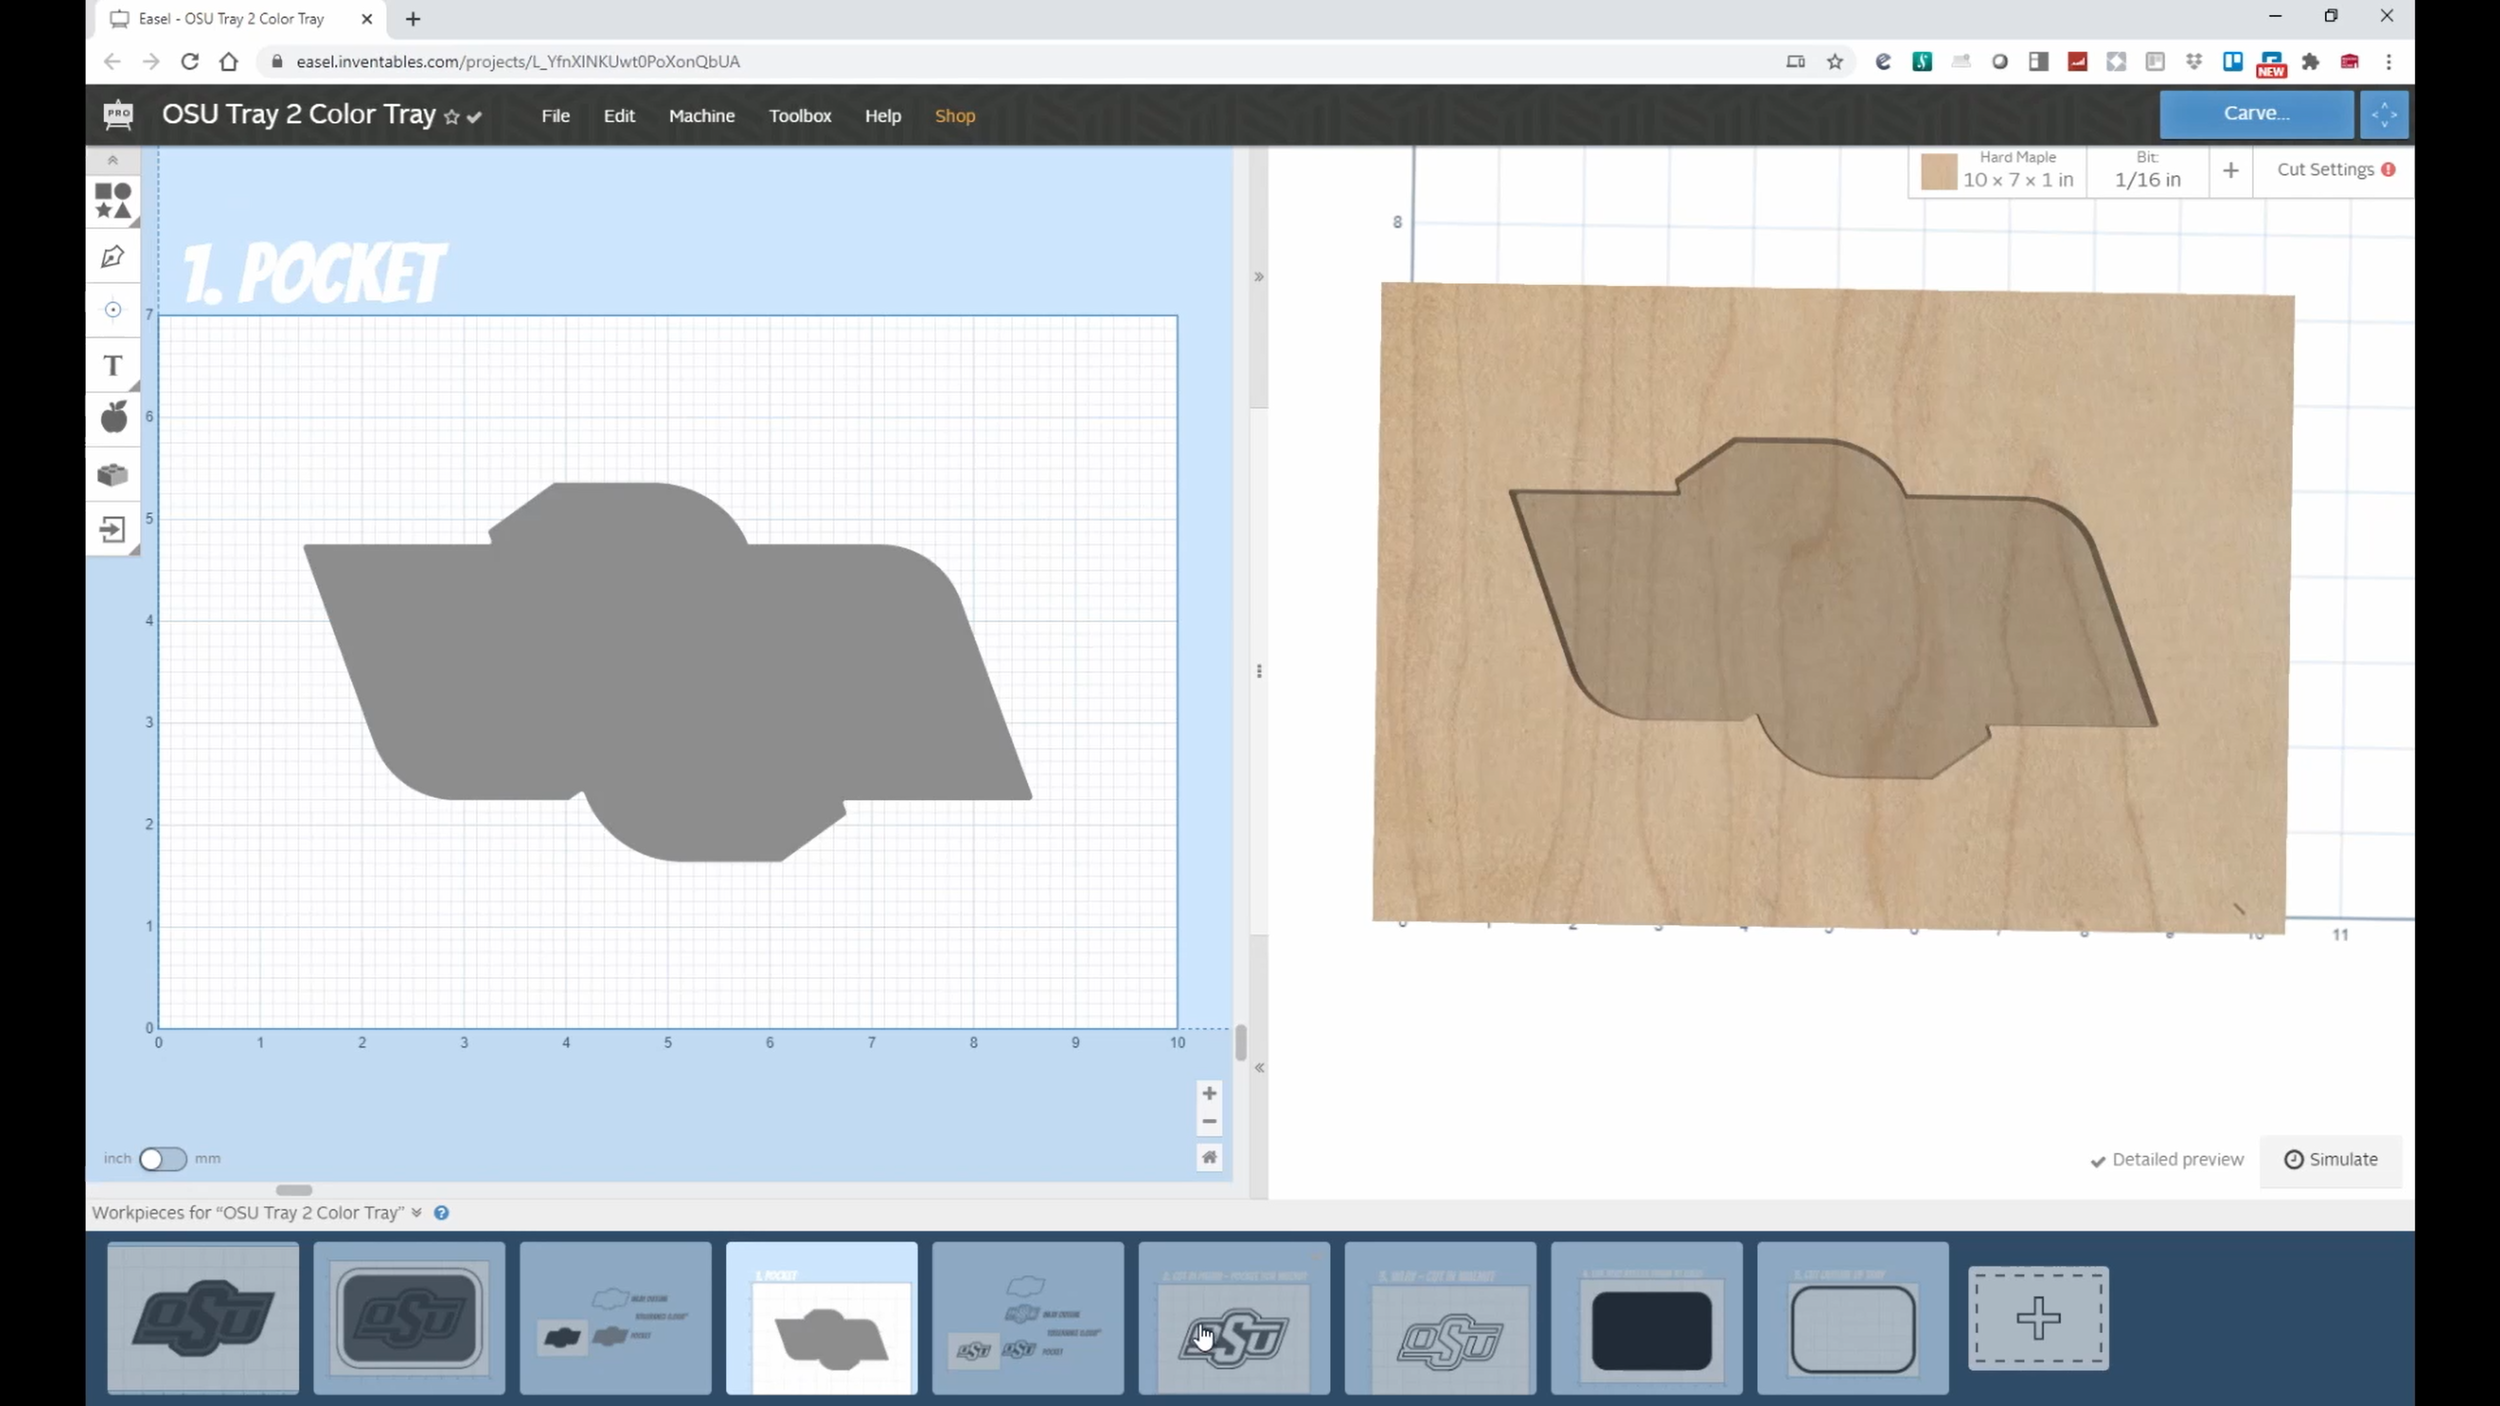
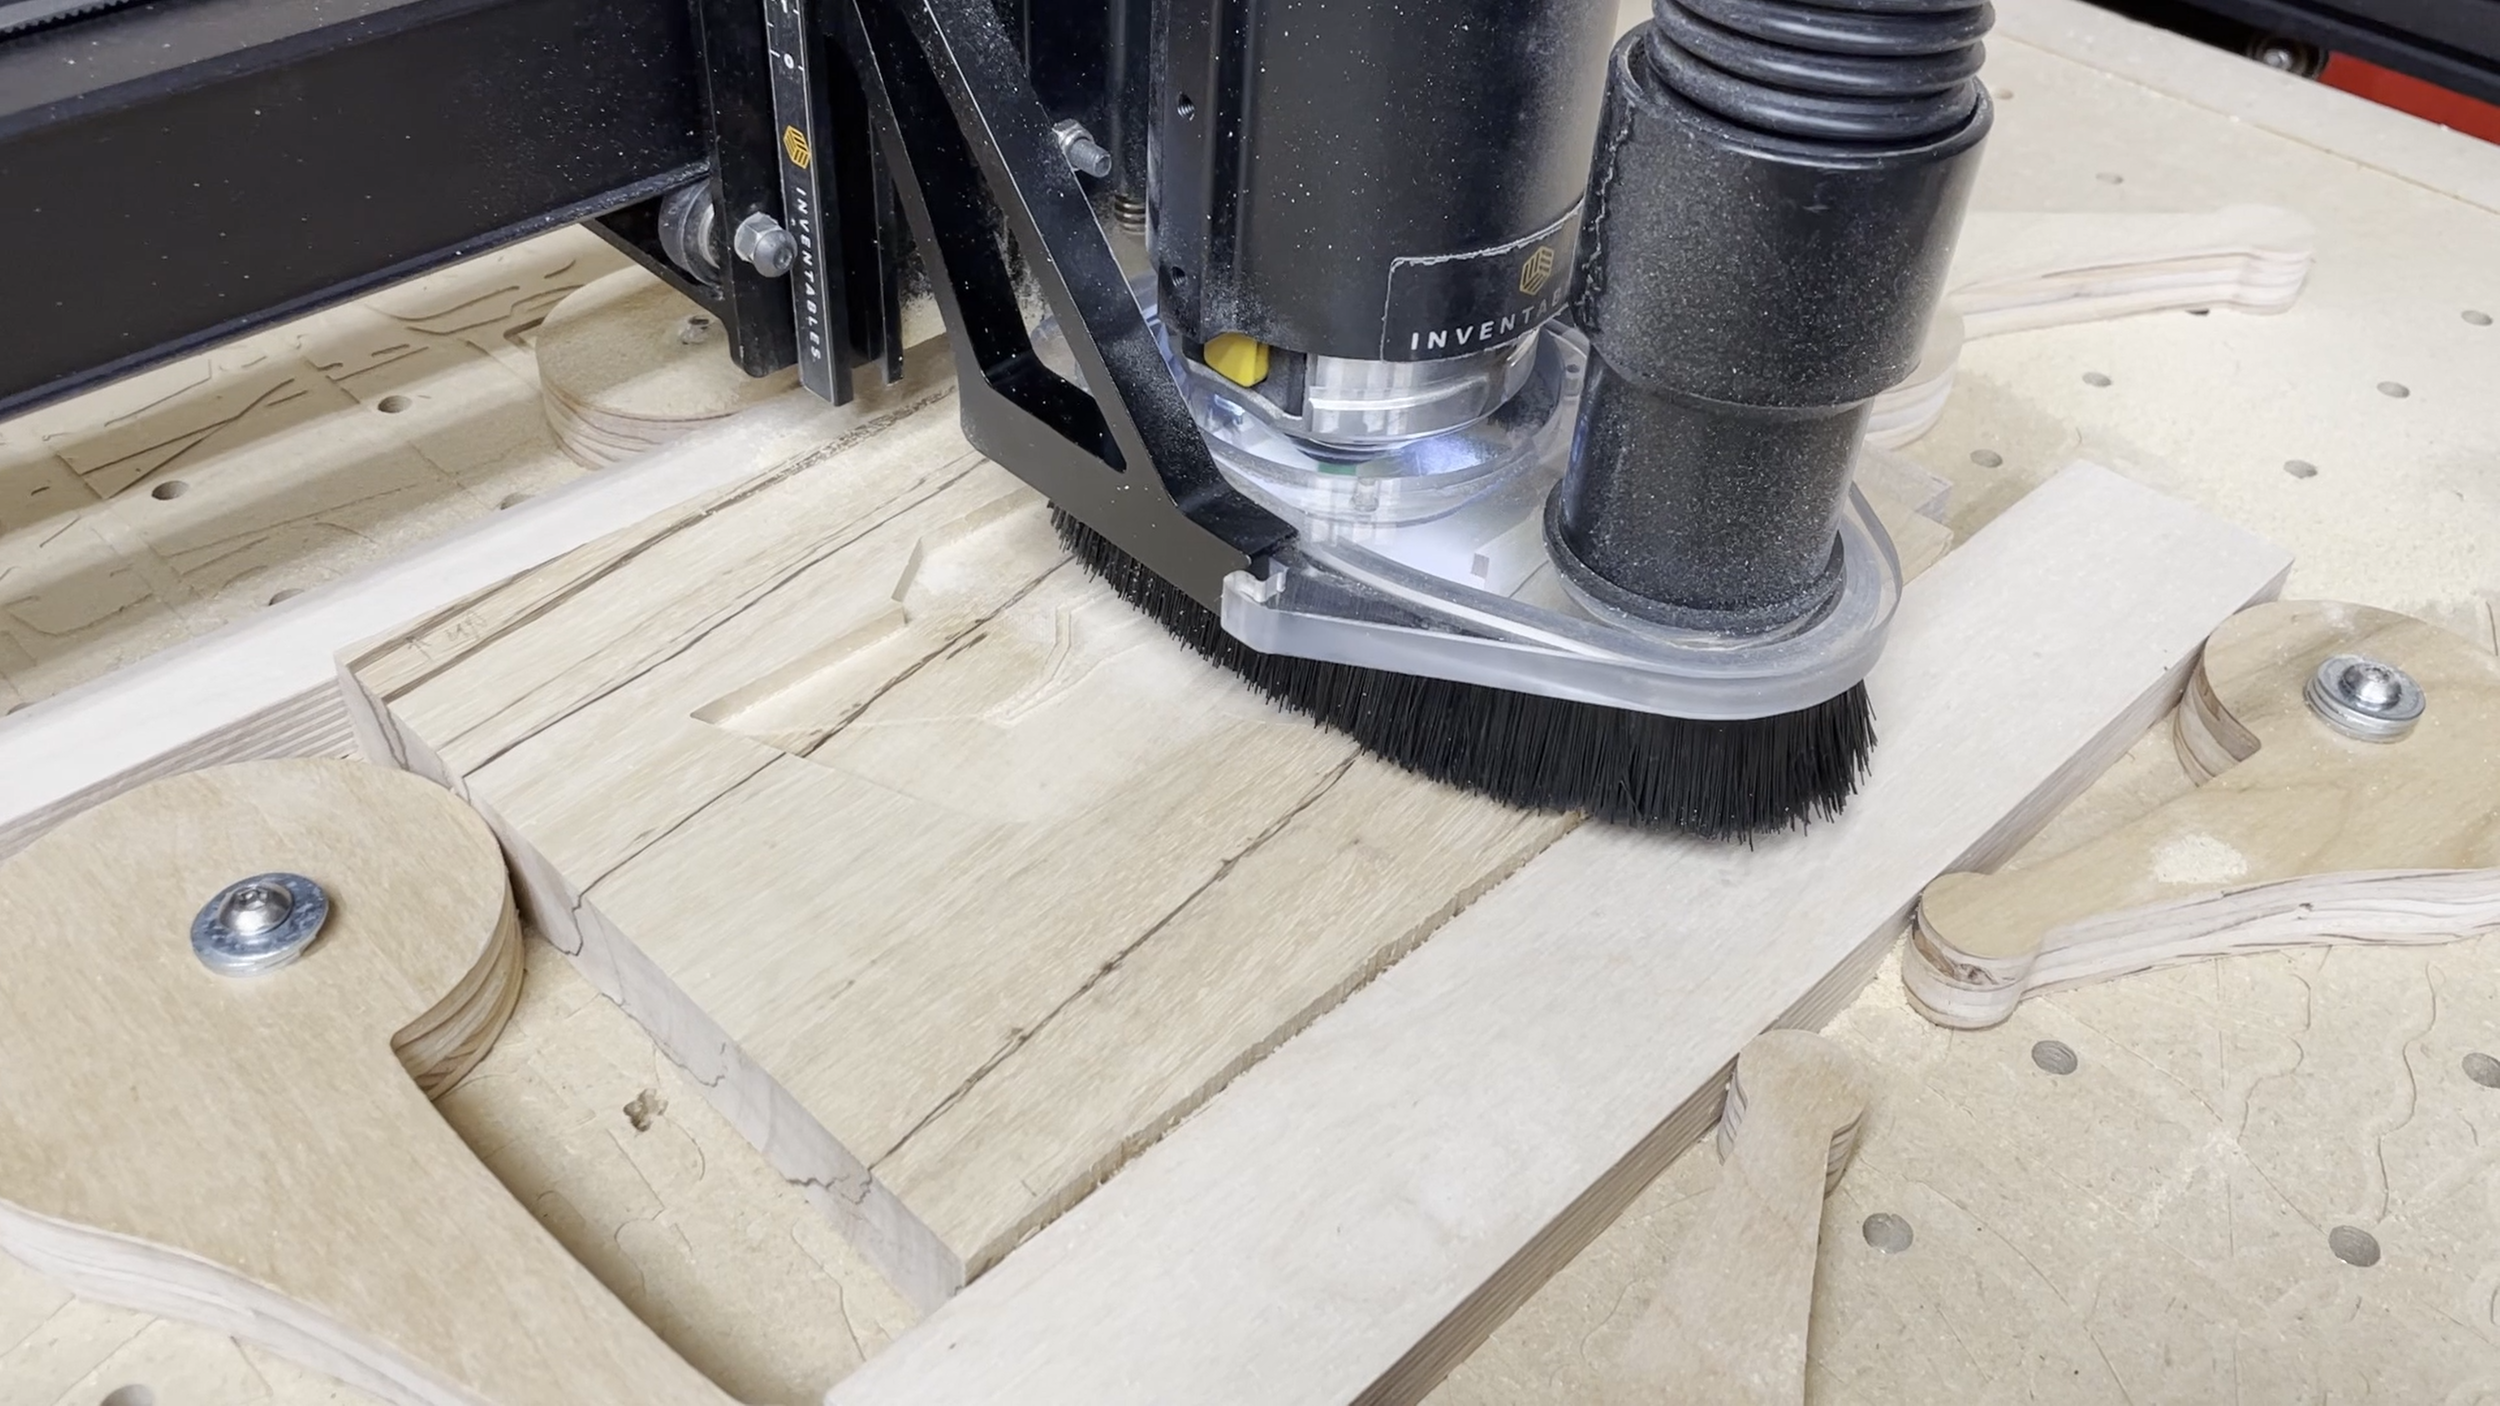
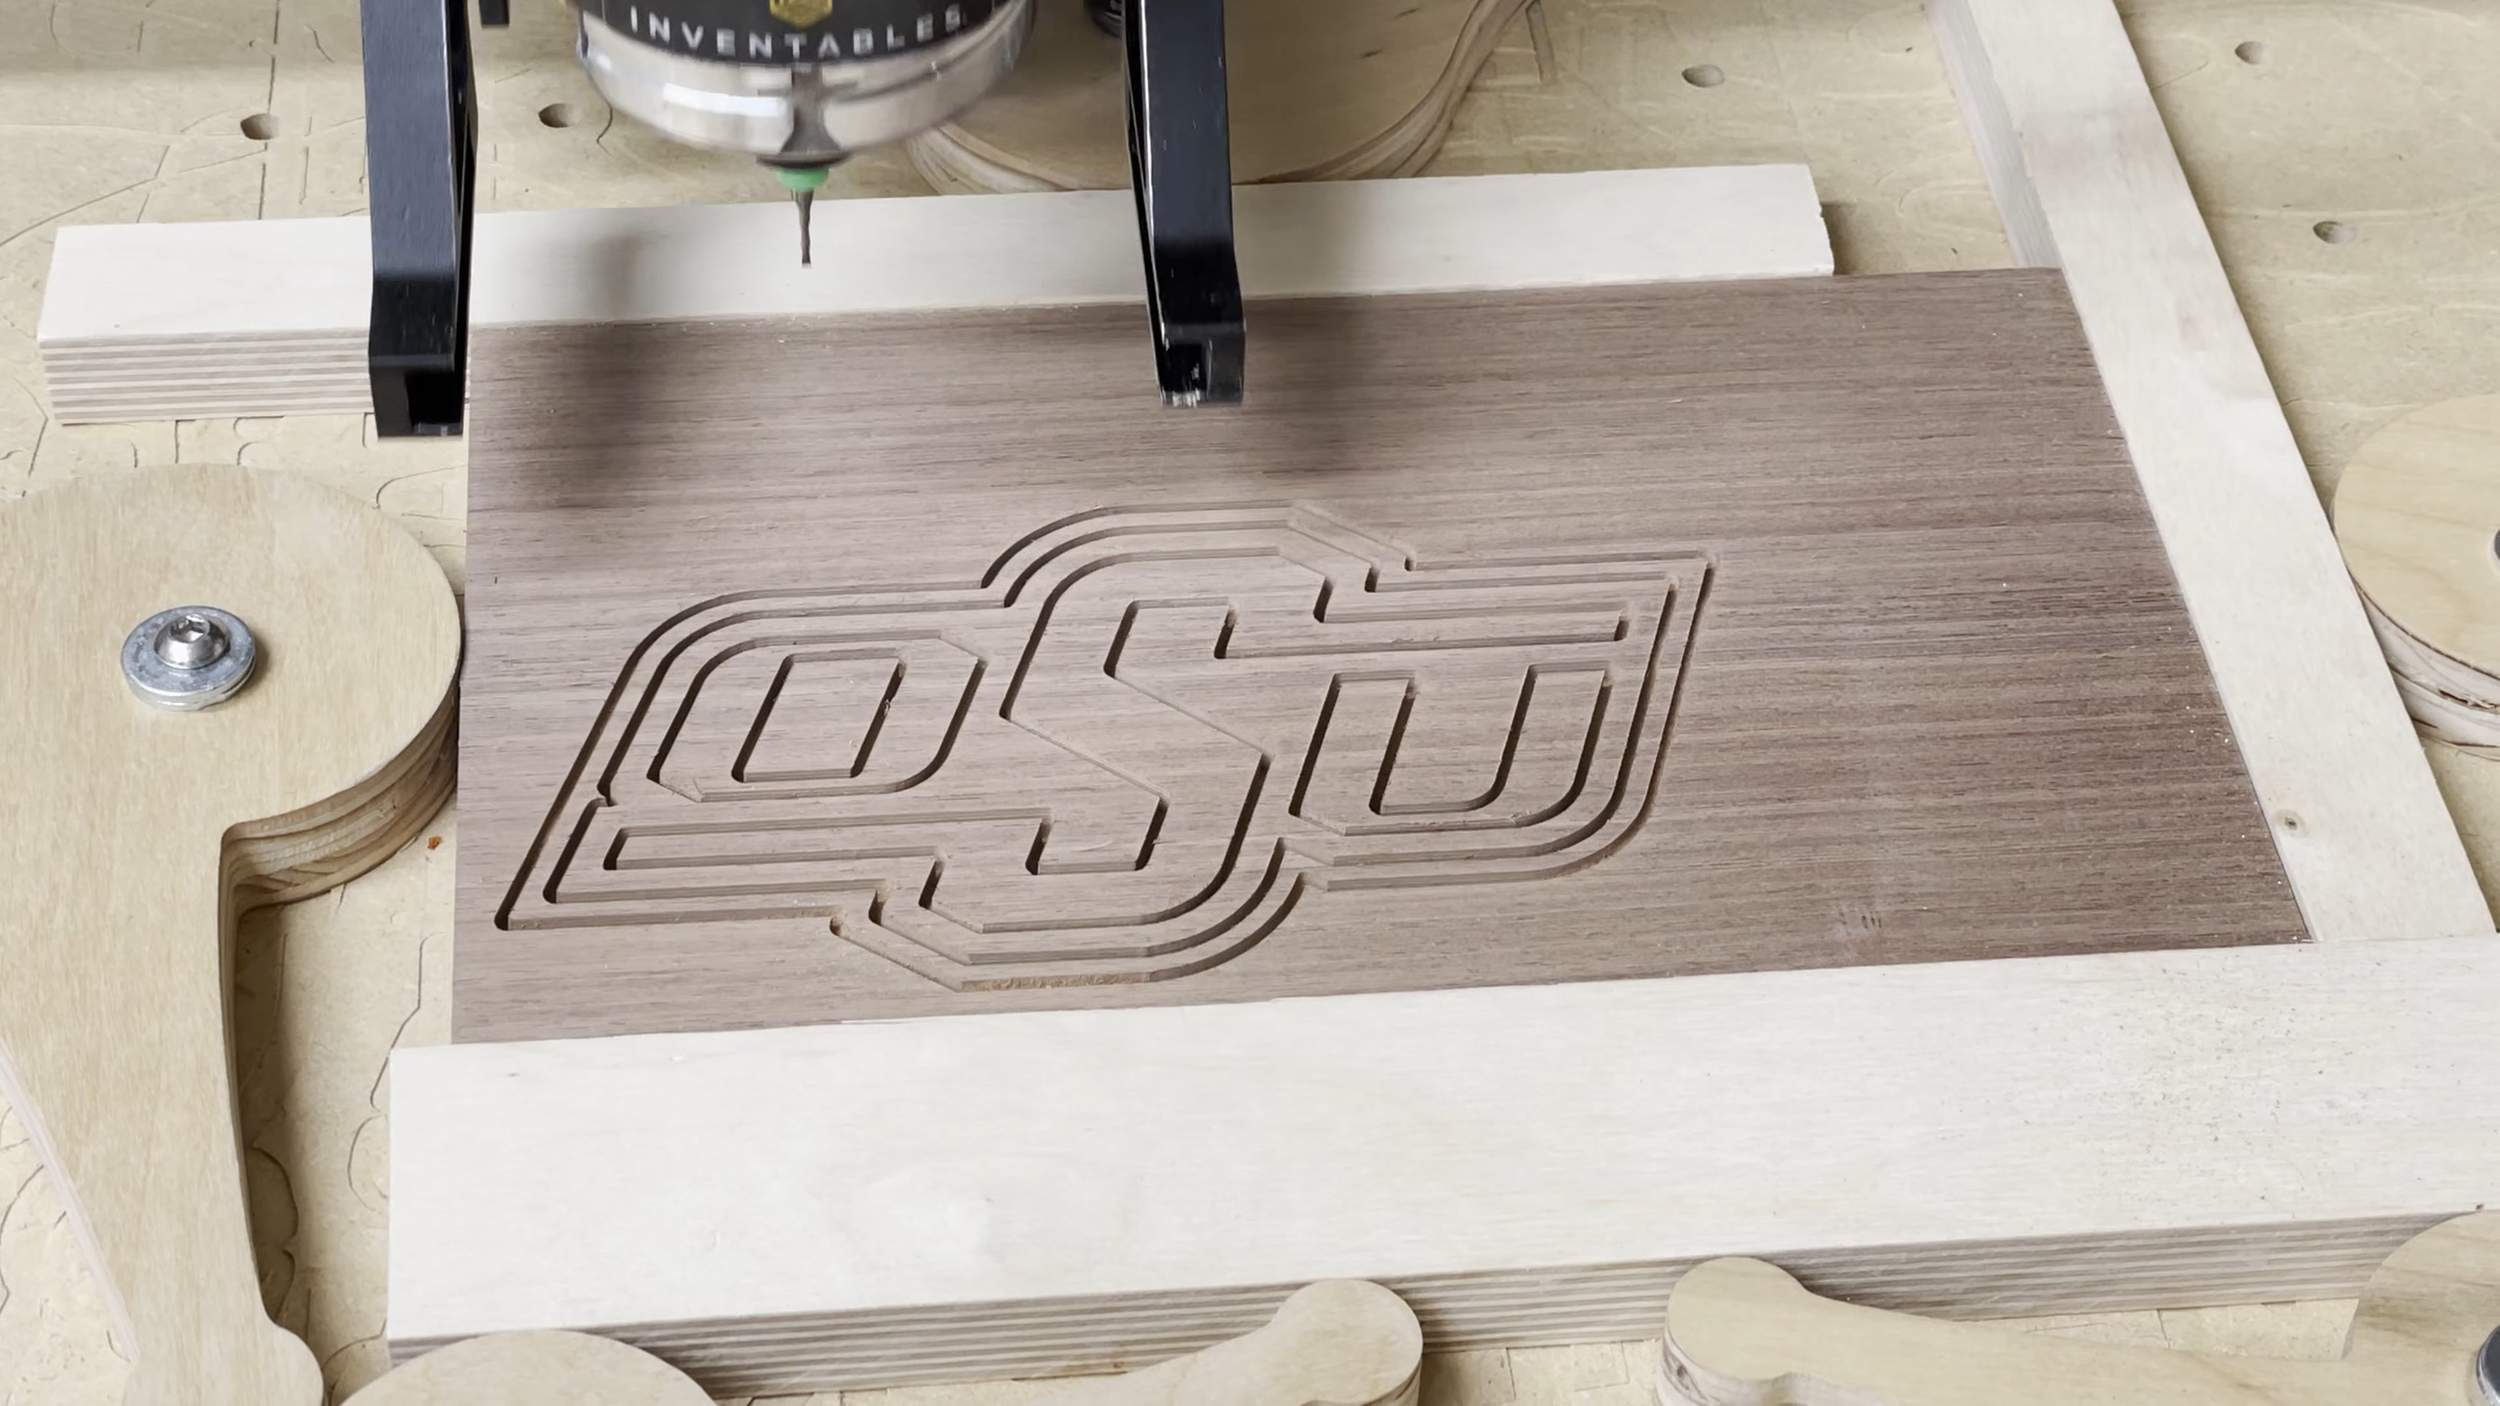
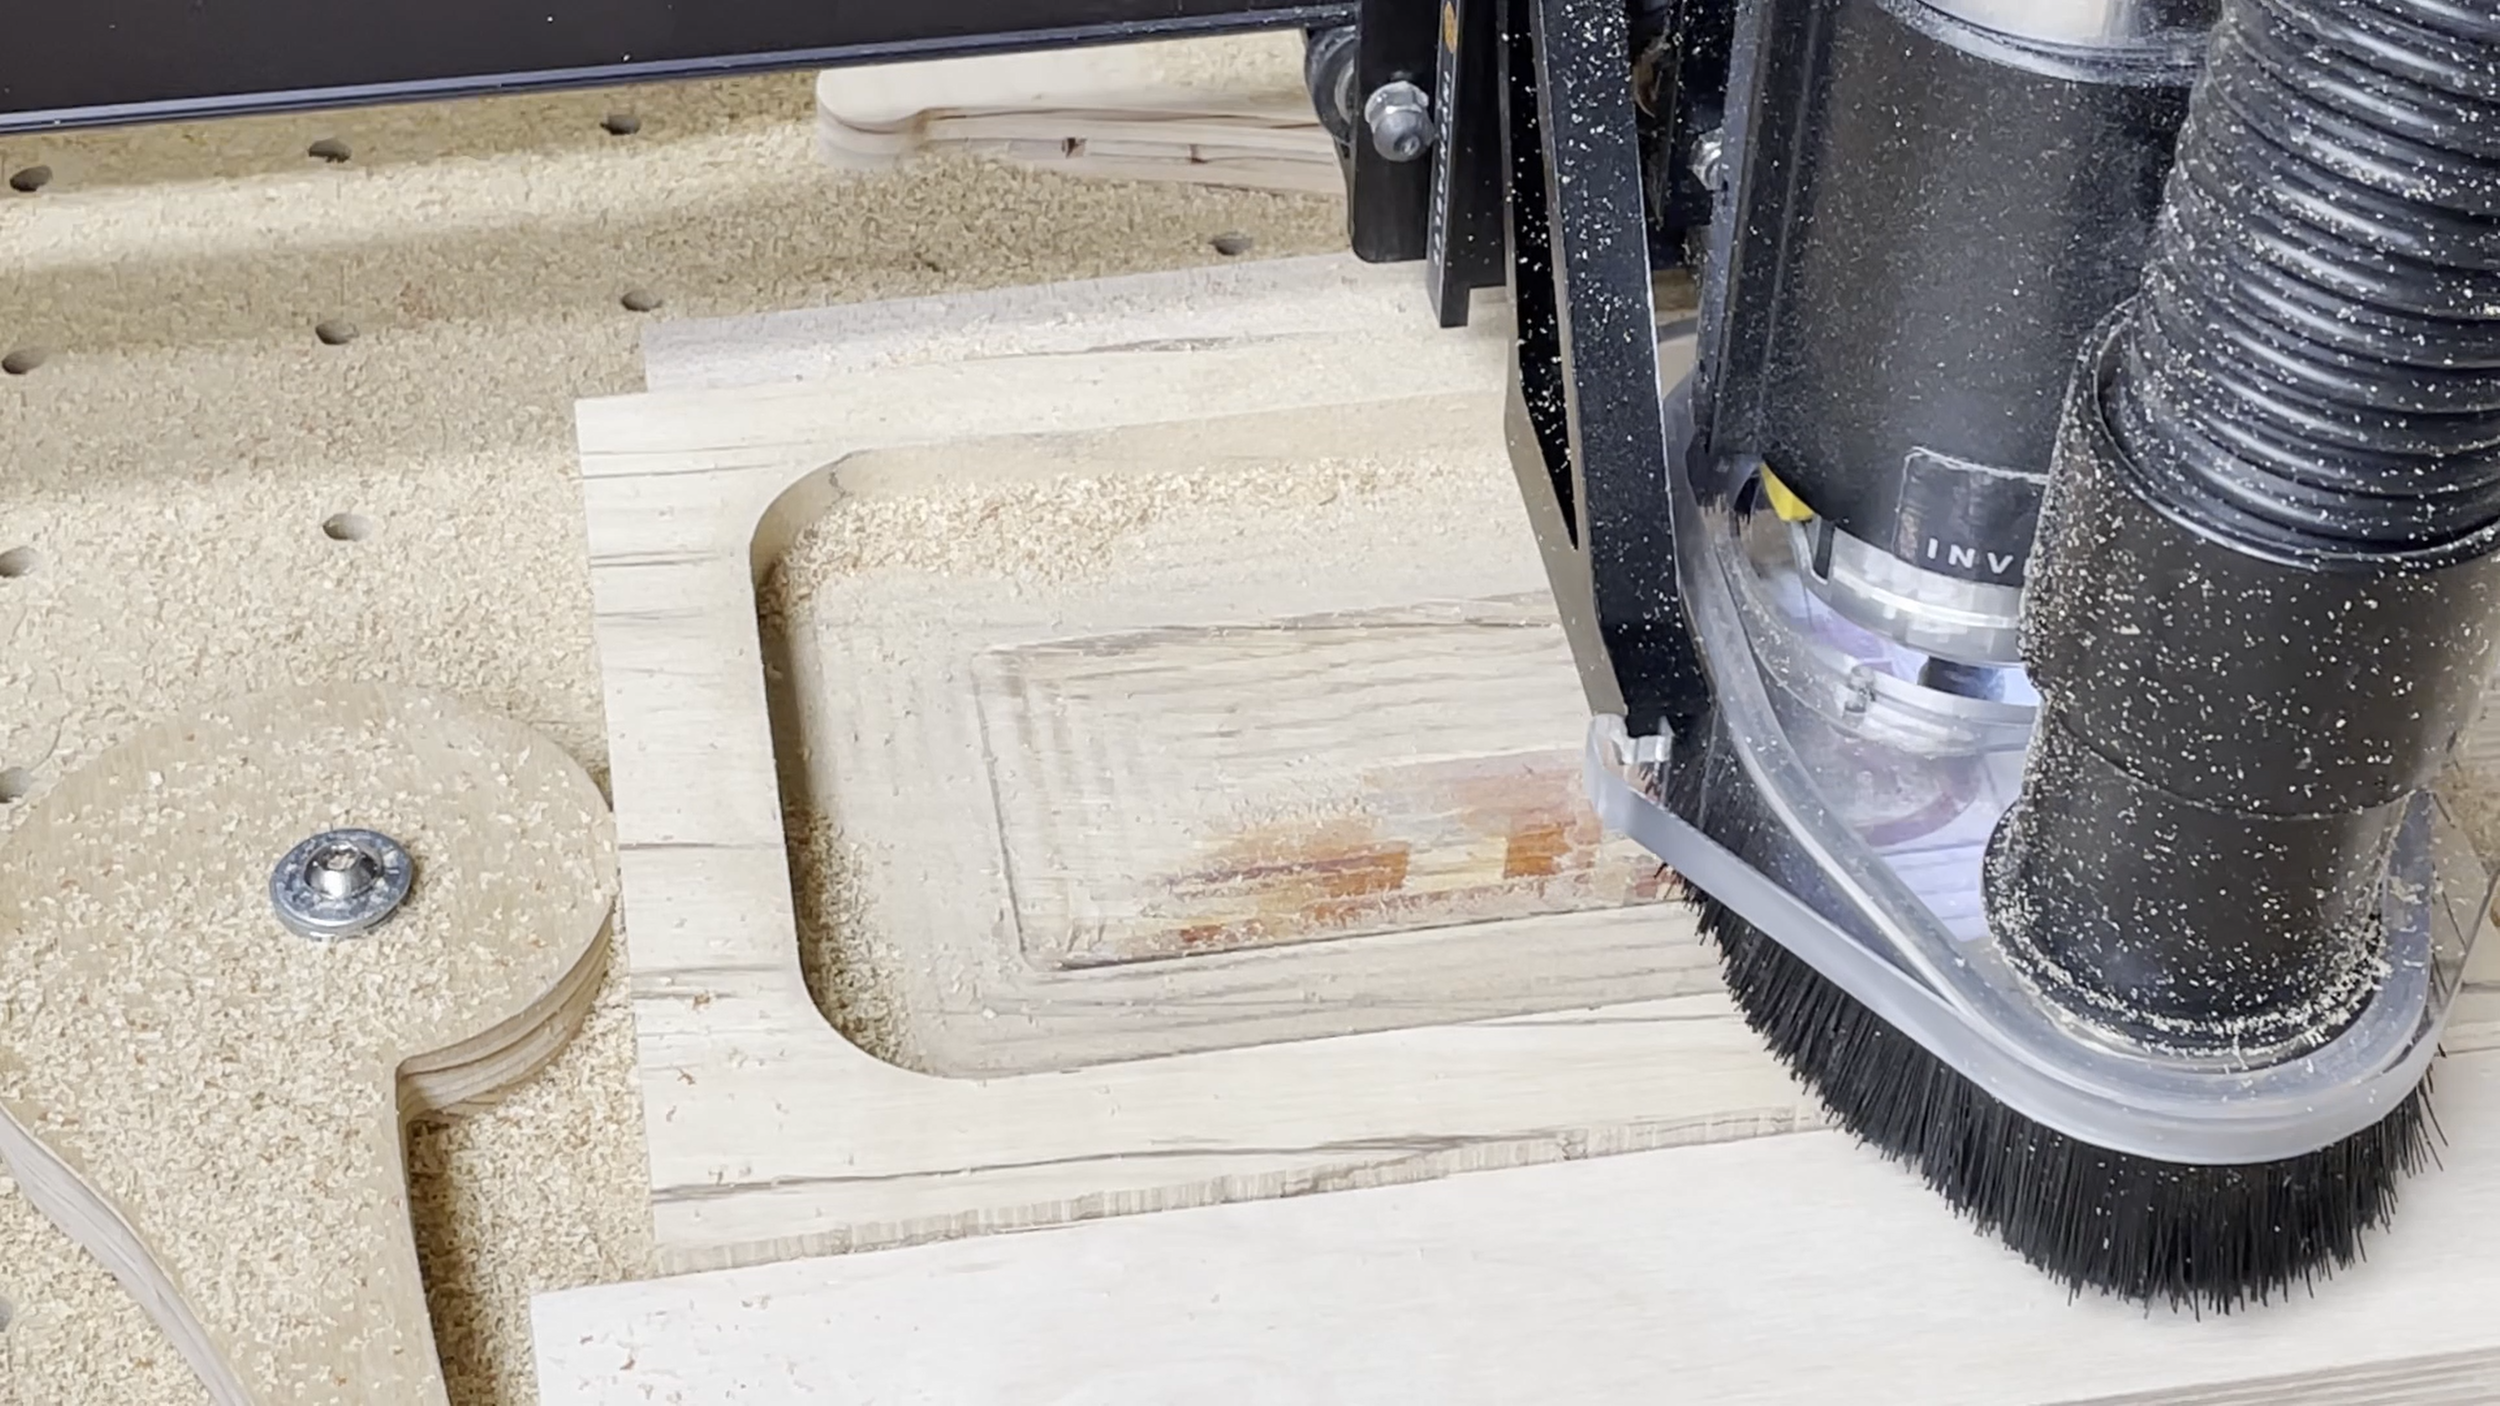
Step 3: Cut the Pocket
The first carve we will make is cutting the main pocket in the base piece of wood. I cut this at a depth of 0.3 inches, which is the maximum depth of cut for the 1/16" diameter router bit I was using. The downcutting router bid made for a nice and clean edge around the pocket cut.
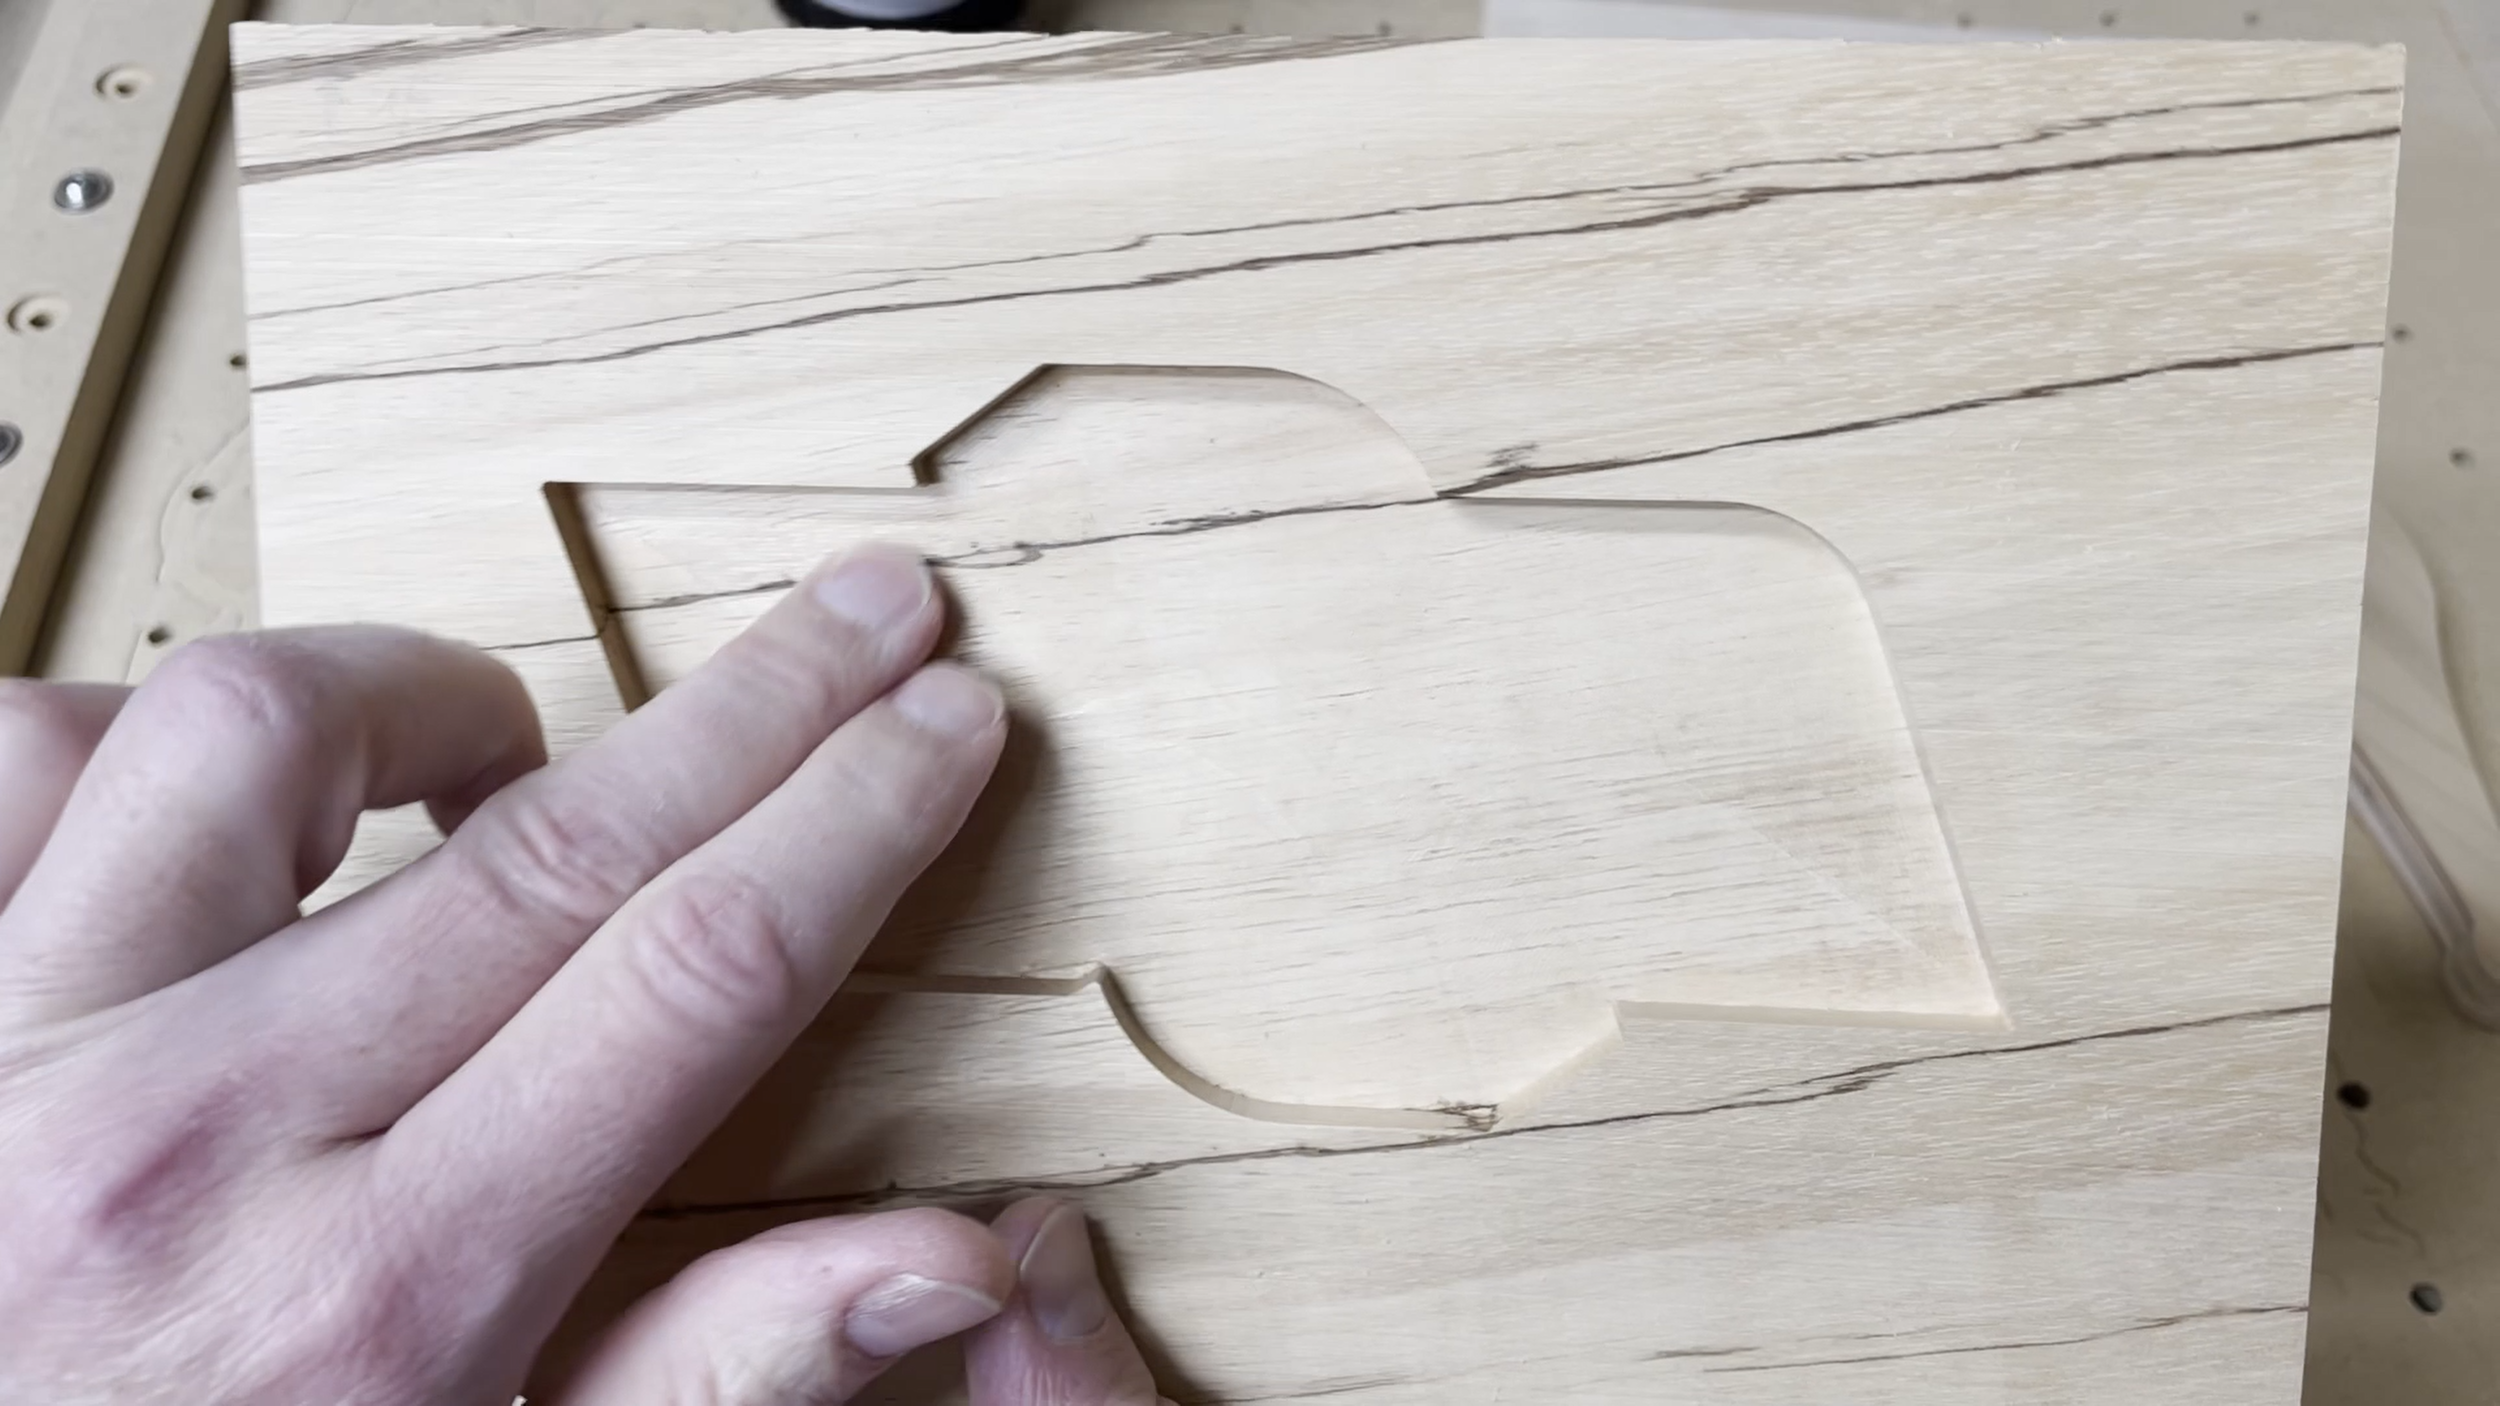
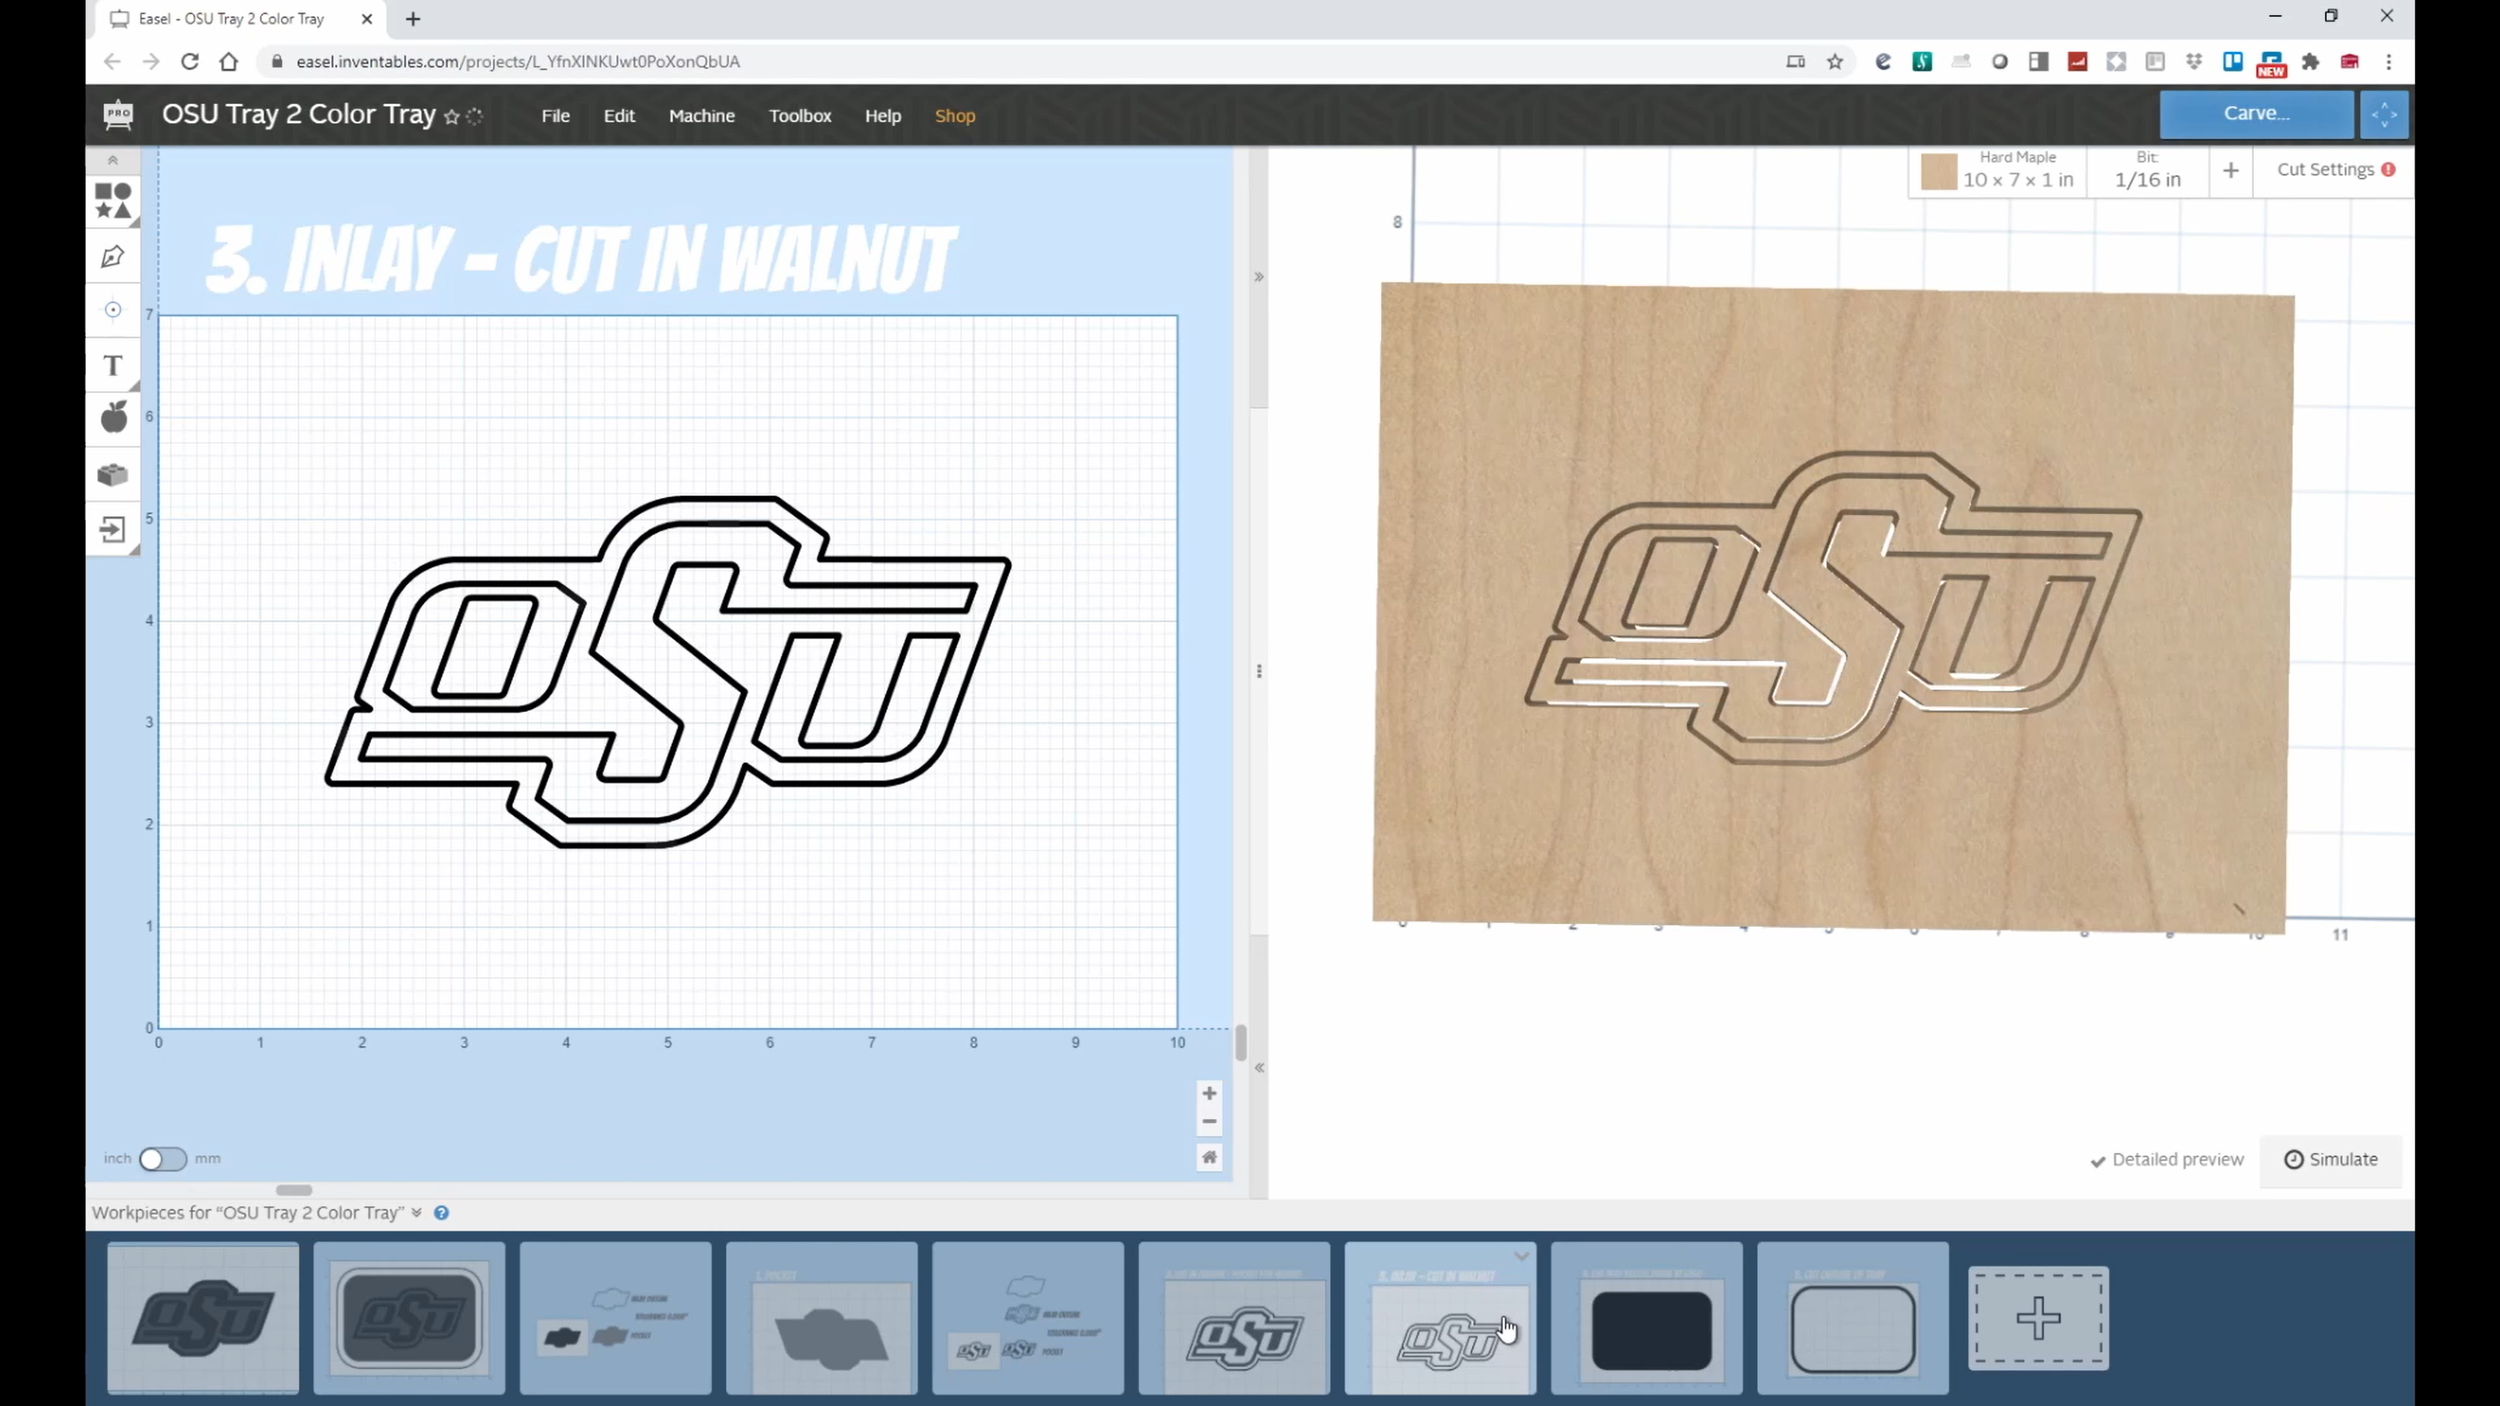
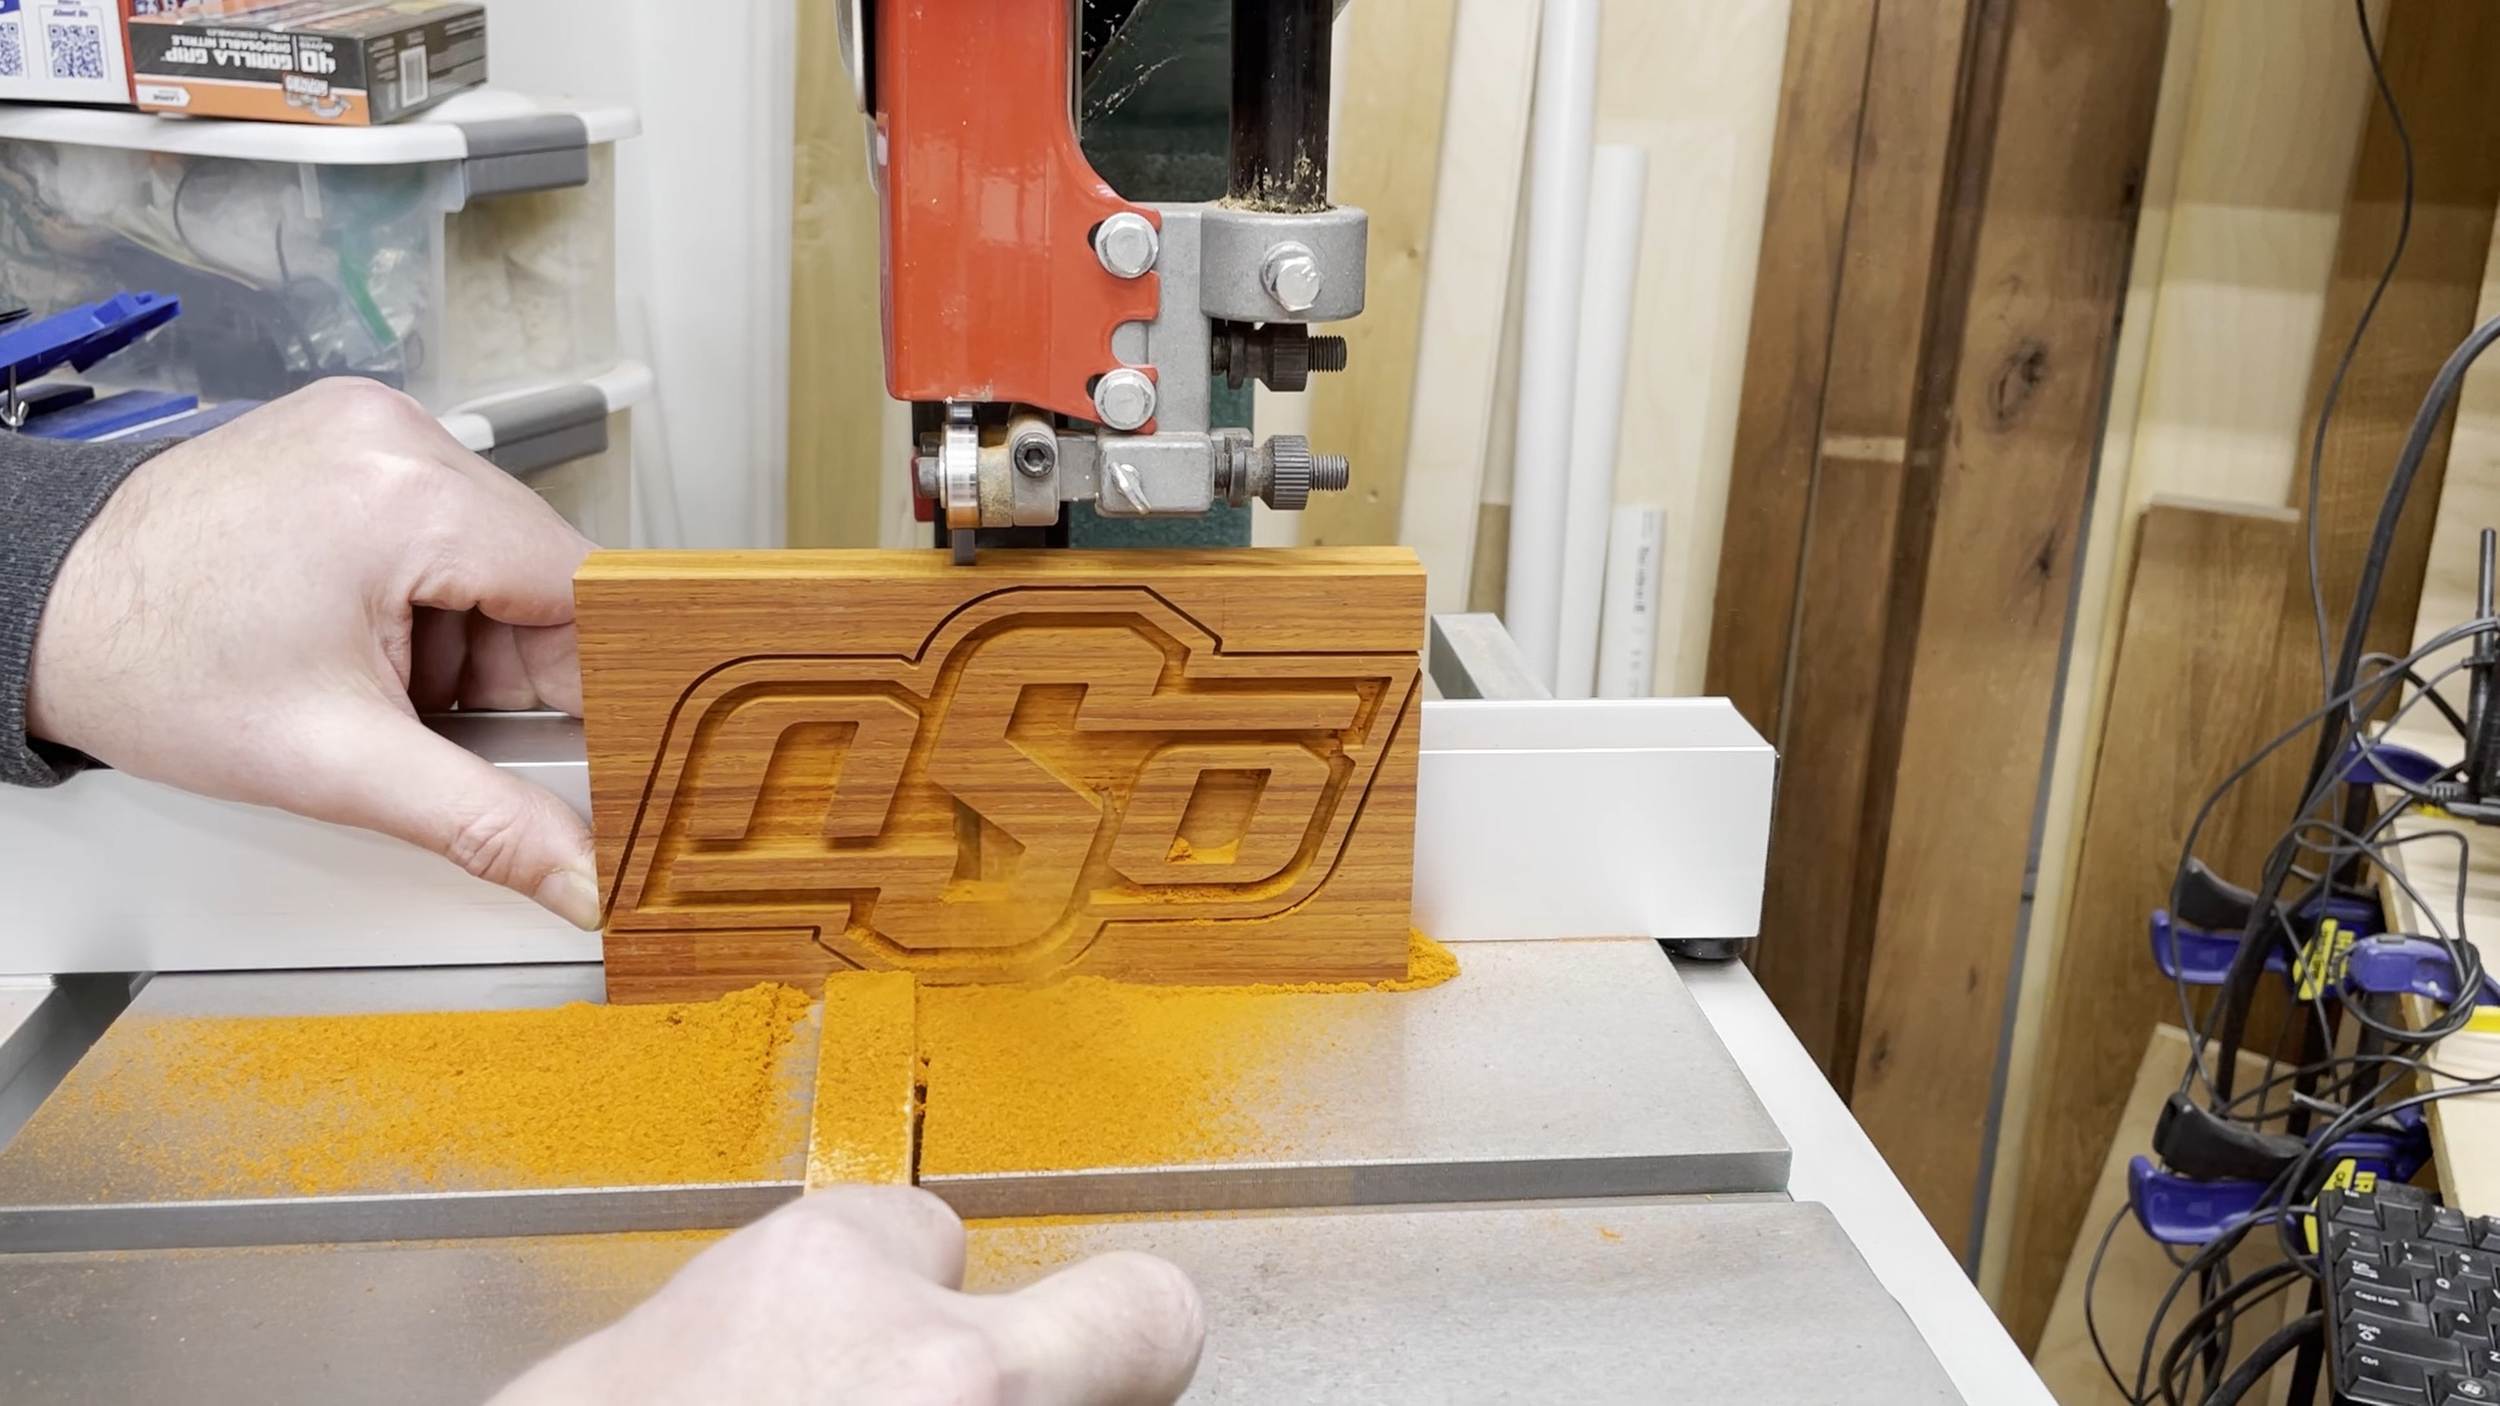
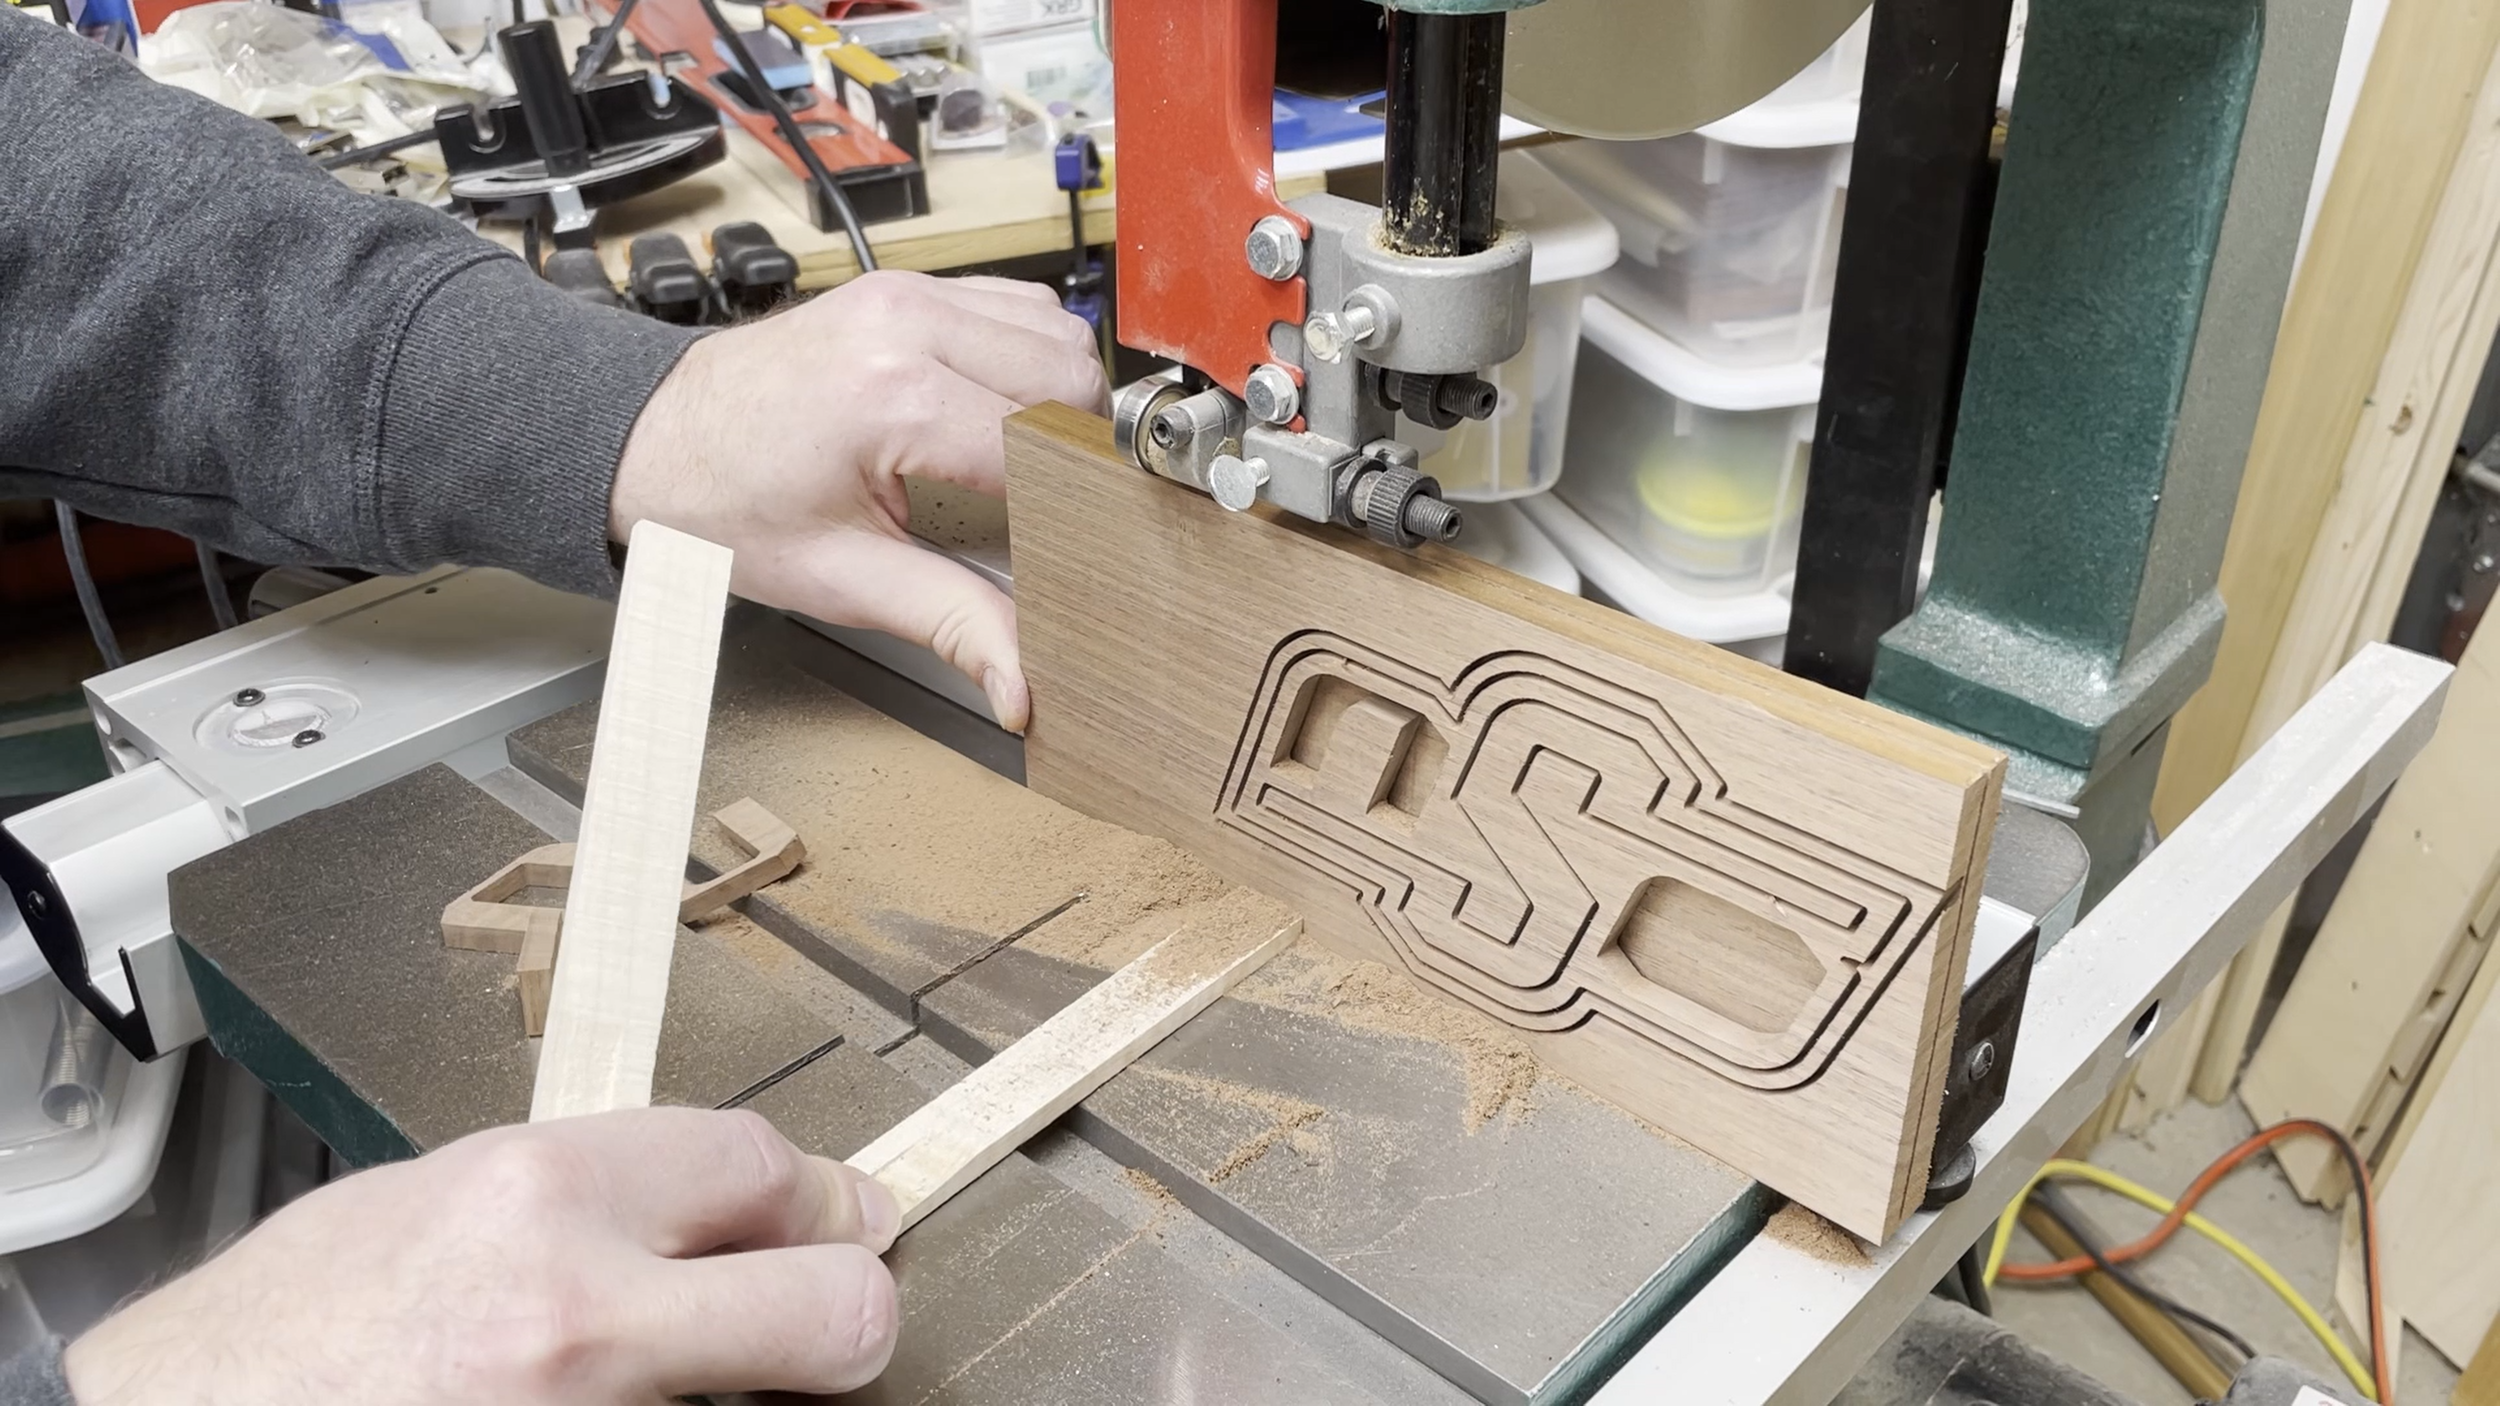
Step 4: Cut the First Inlay
Next I cut the first inlay out of walnut. This has the outline of the dark part of the logo.
I used the same router bit as the one I used for cutting the original pocket.
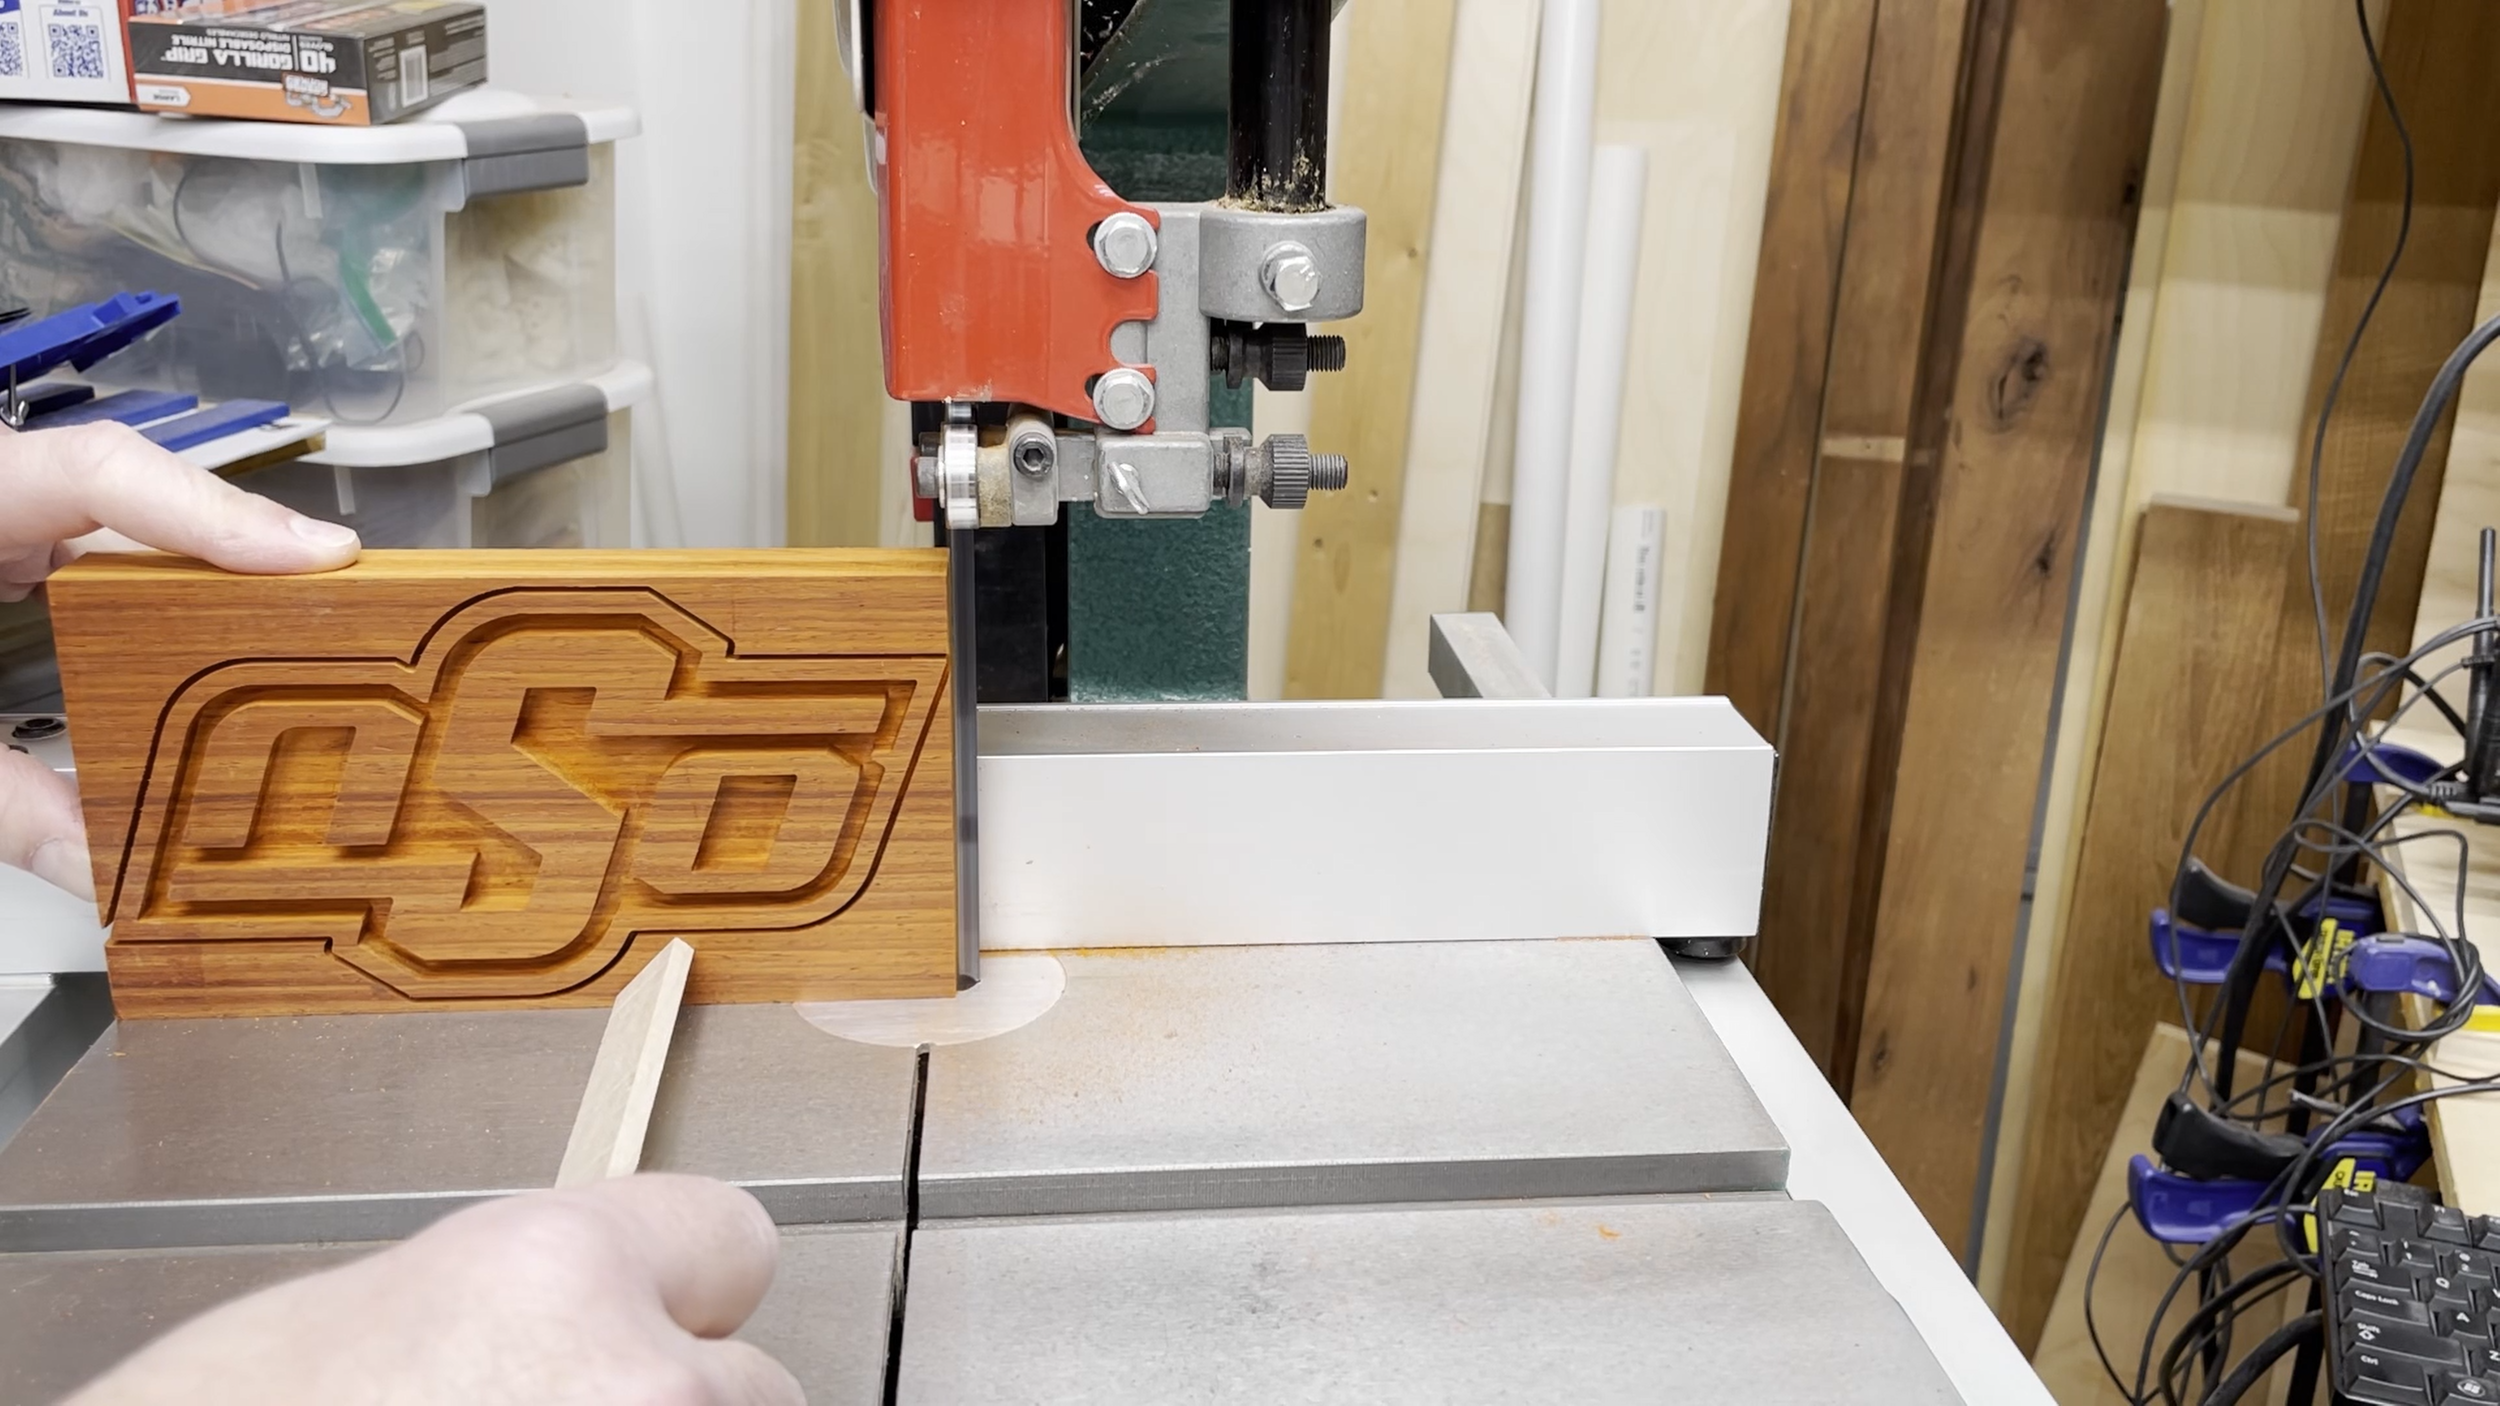
Once the CNC completed cutting the pattern for the inlay I took the piece of wood to the bandsaw and cut the piece of walnut vertically while running the walnut against the fence.
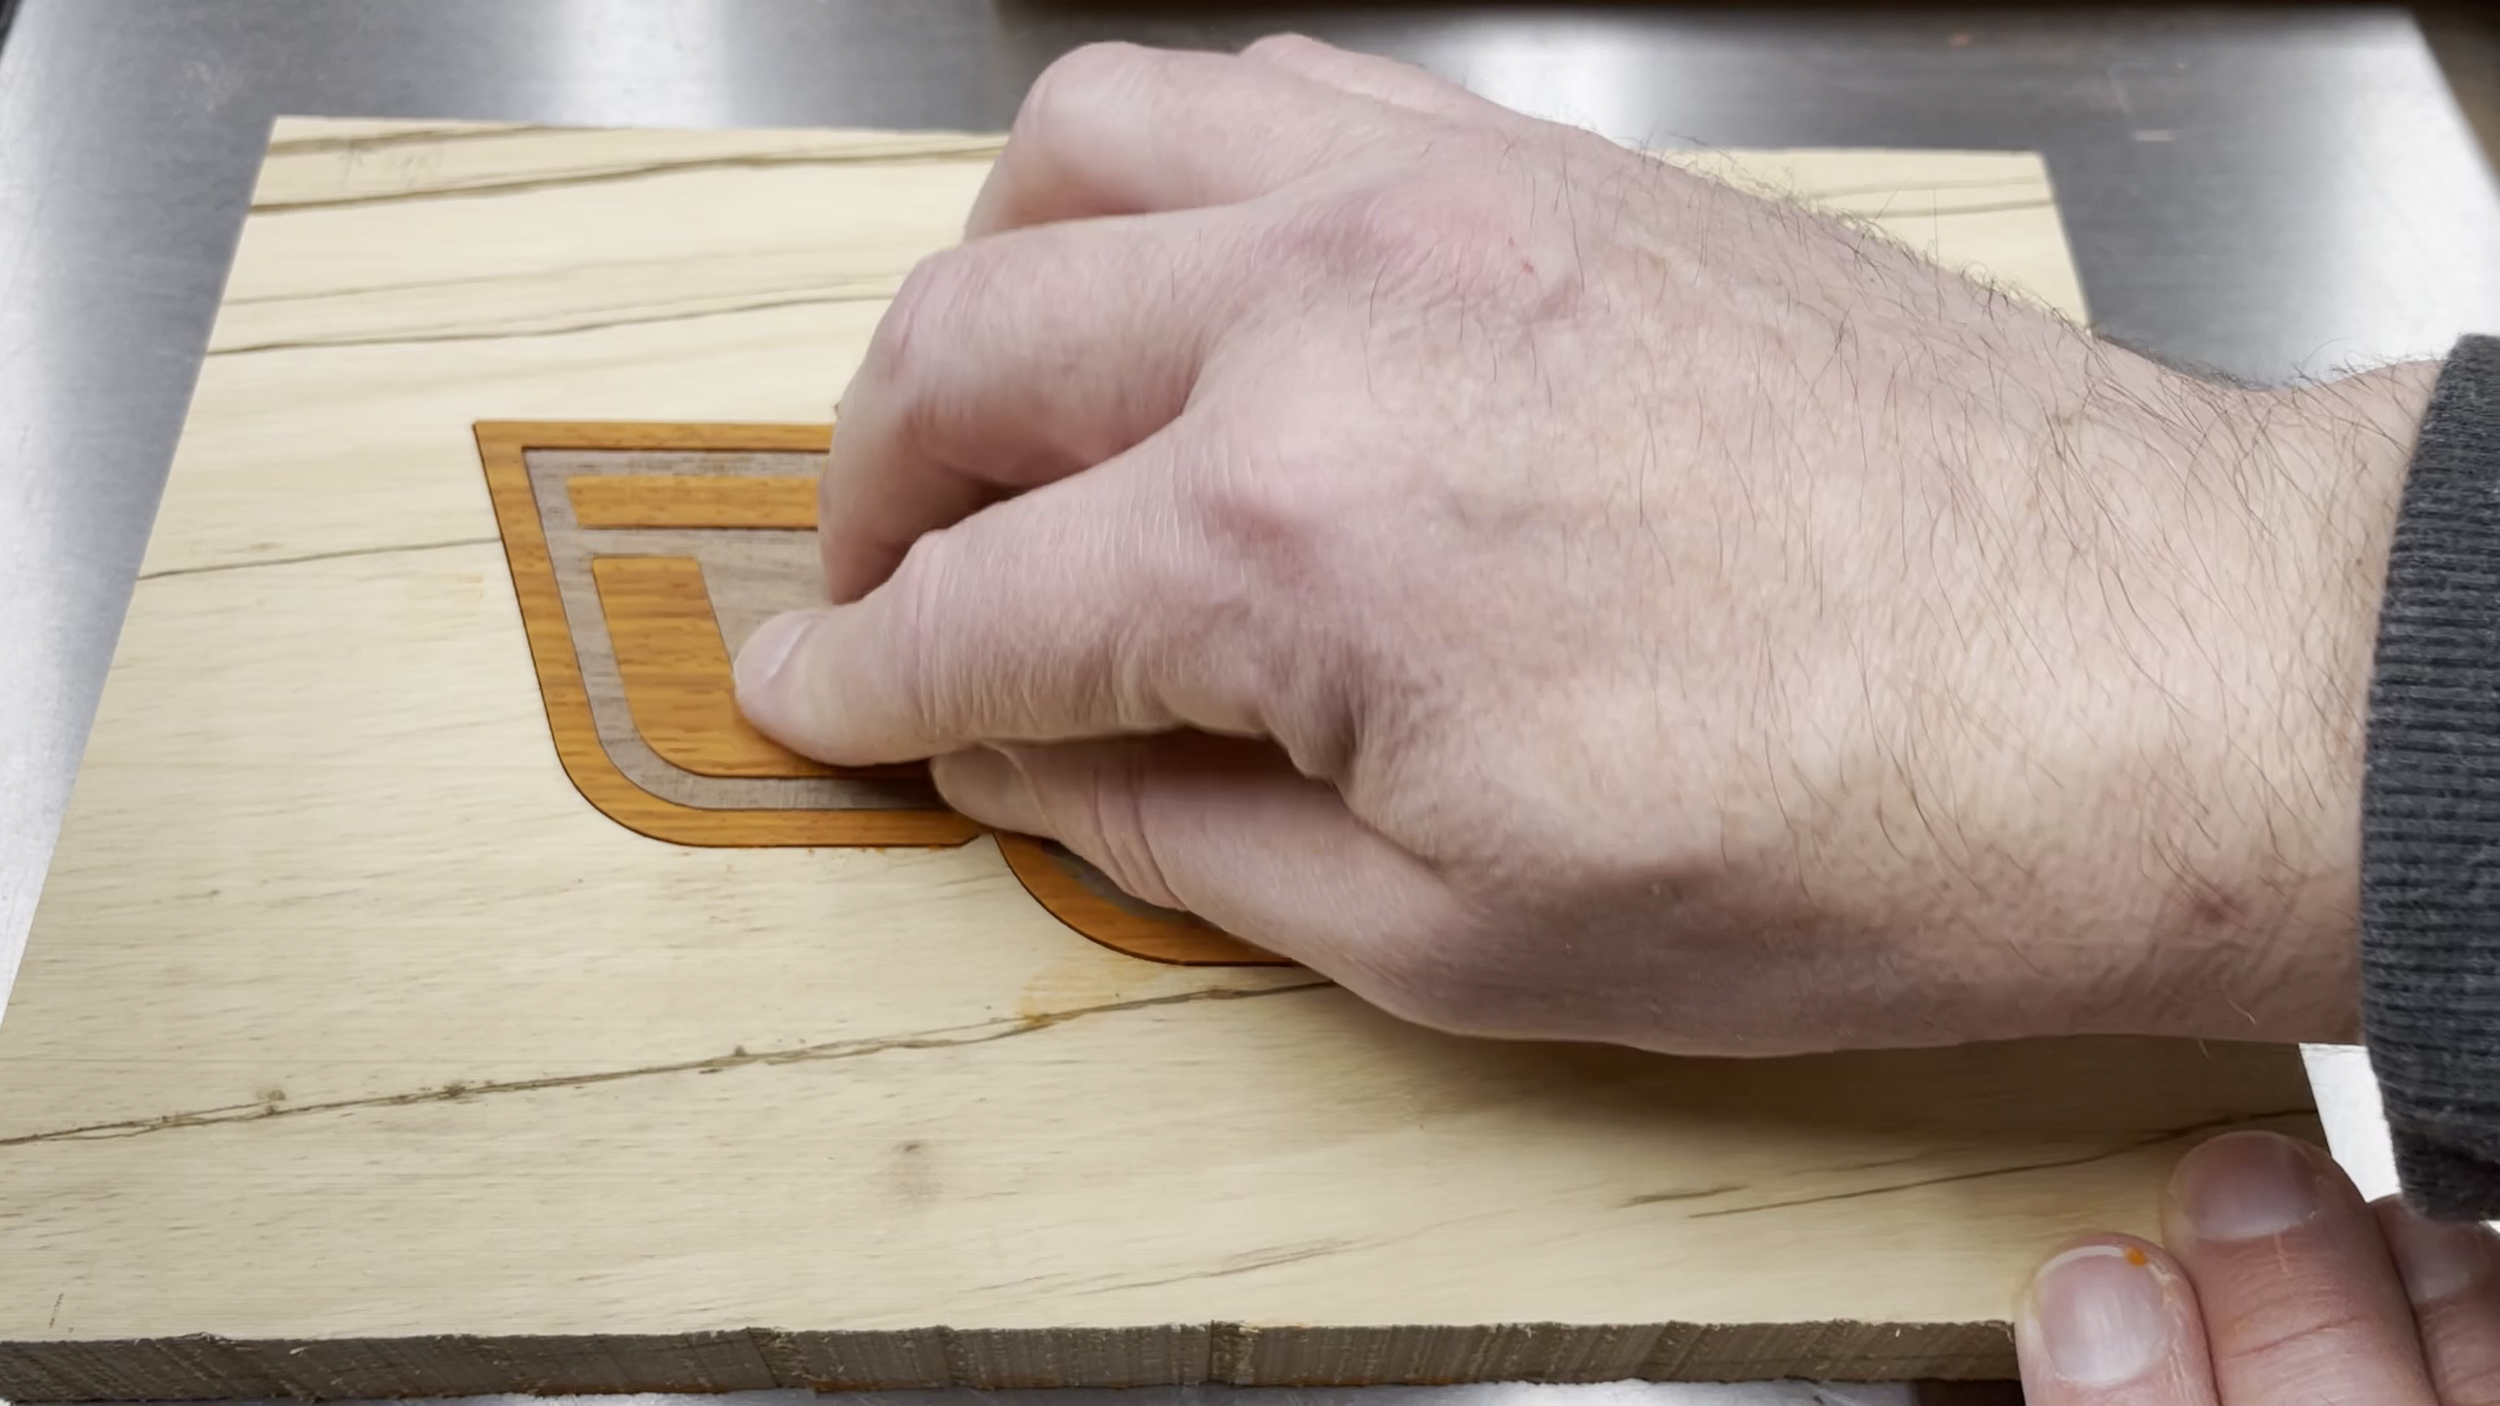
With the logo free, I cleaned up the edges with some light sanding.
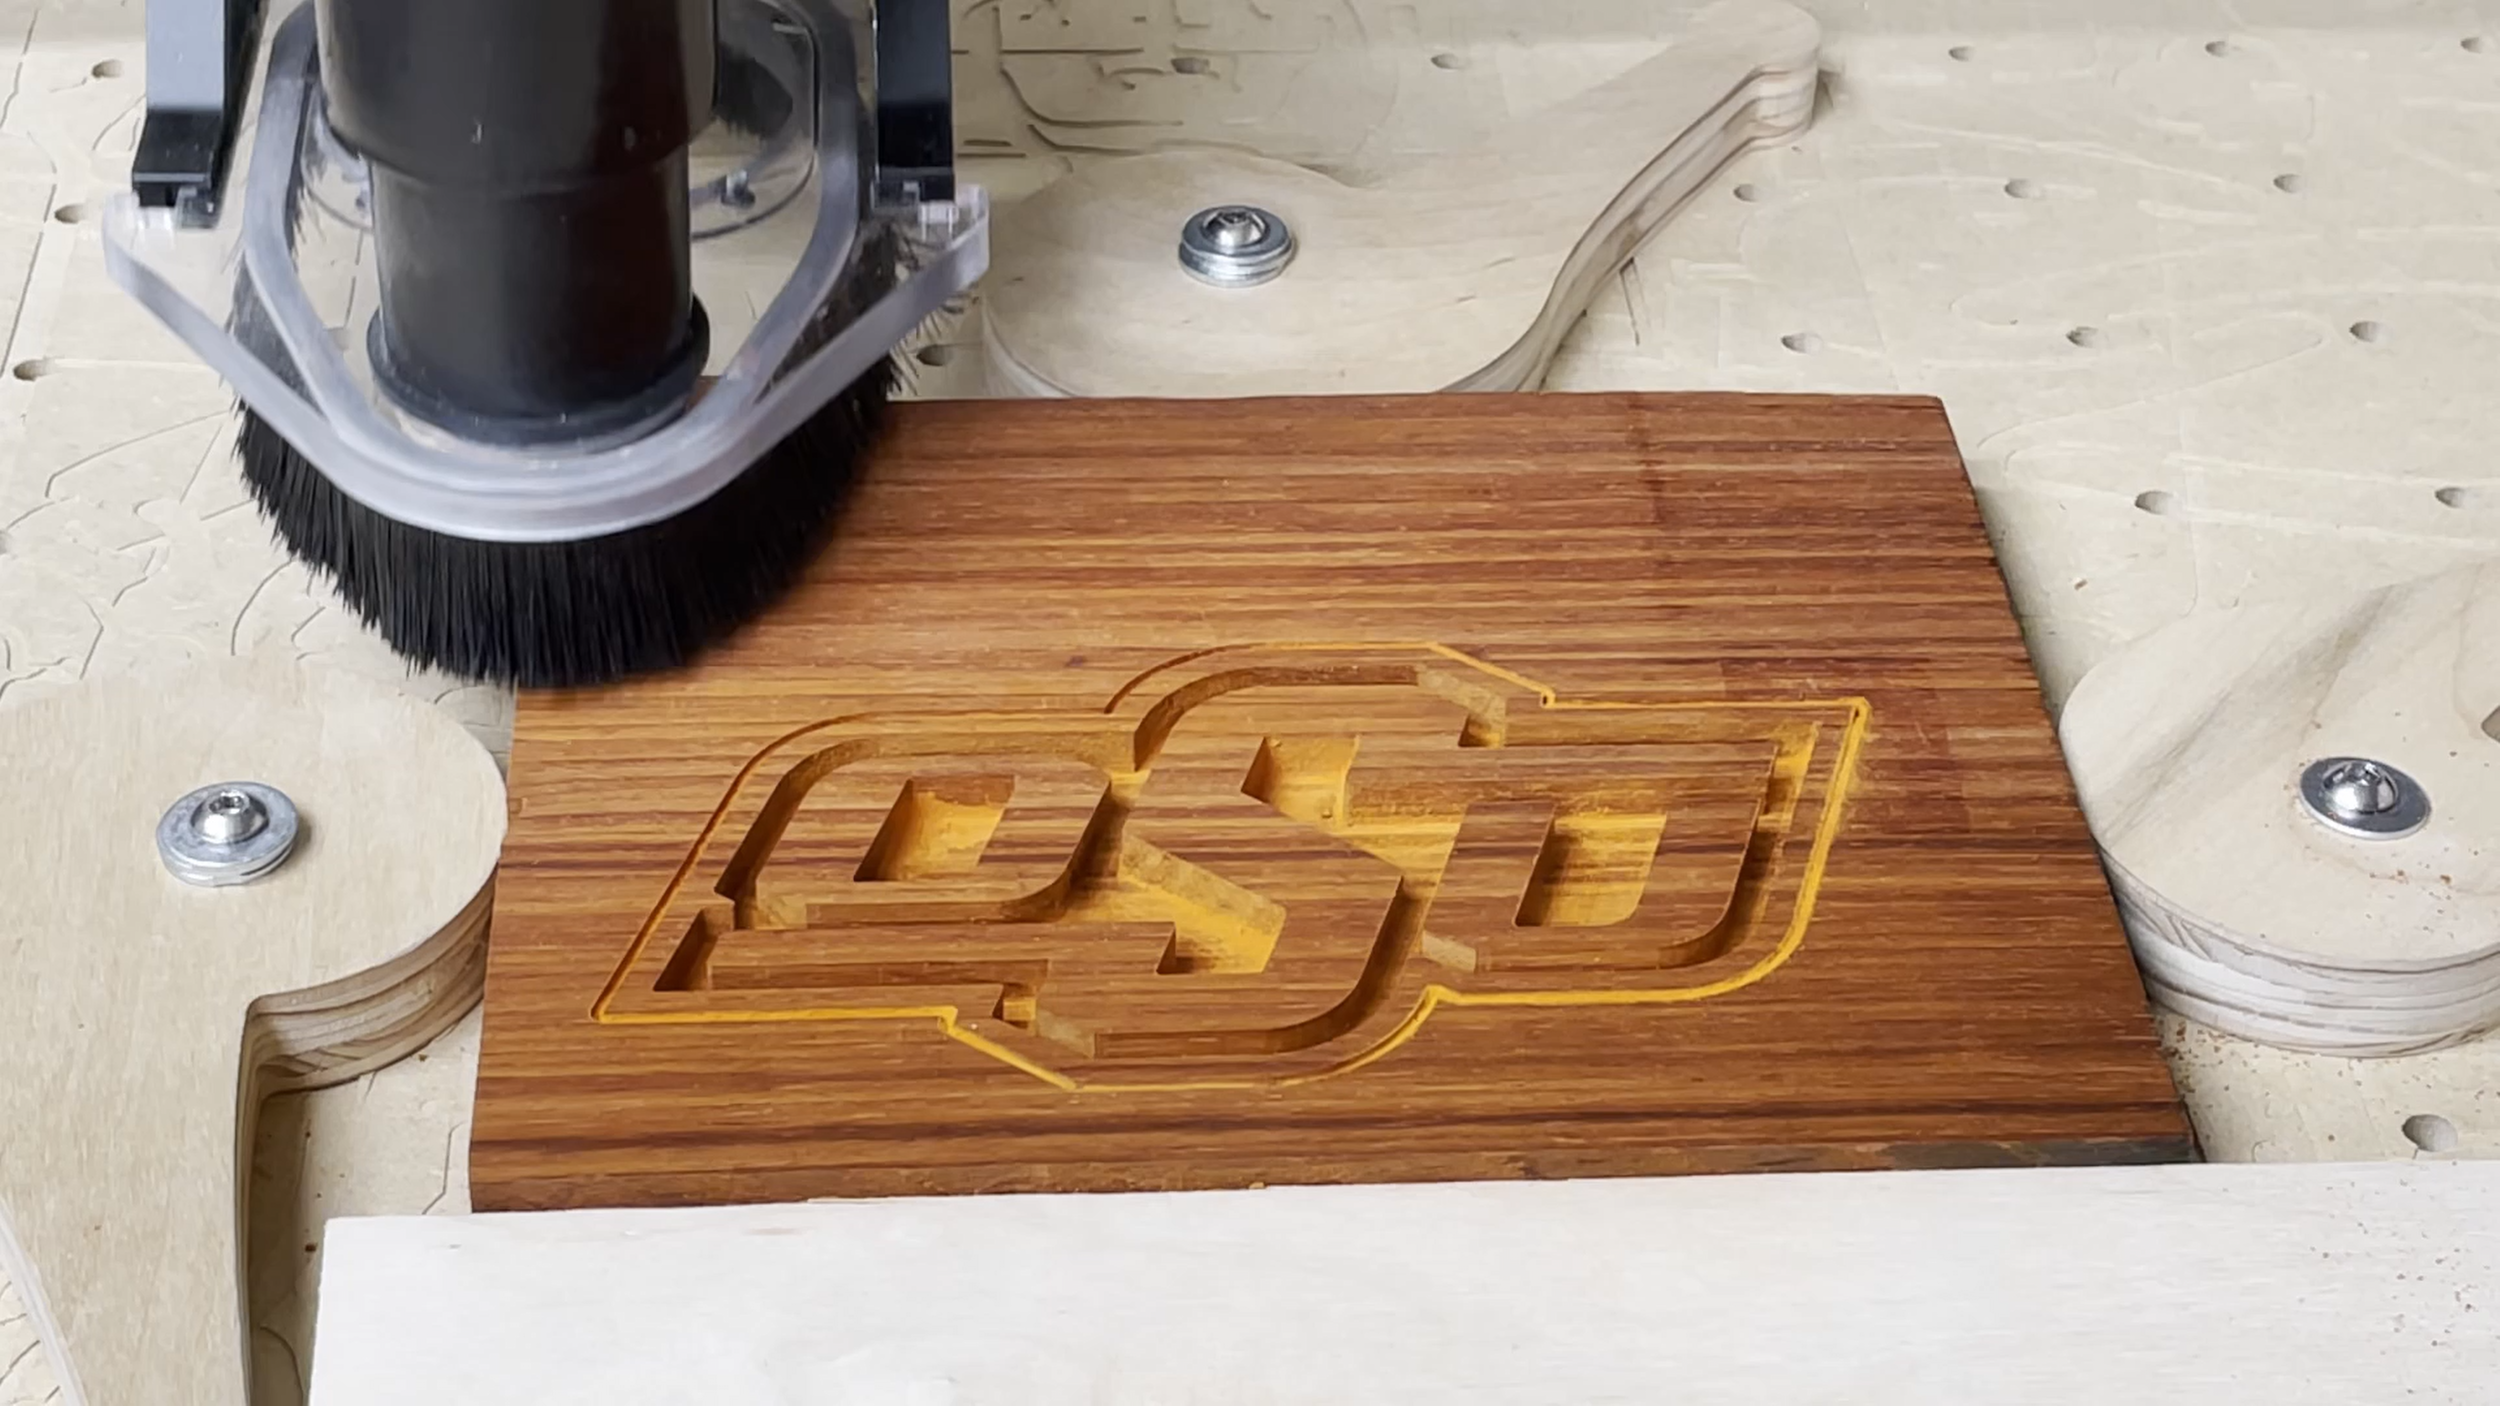
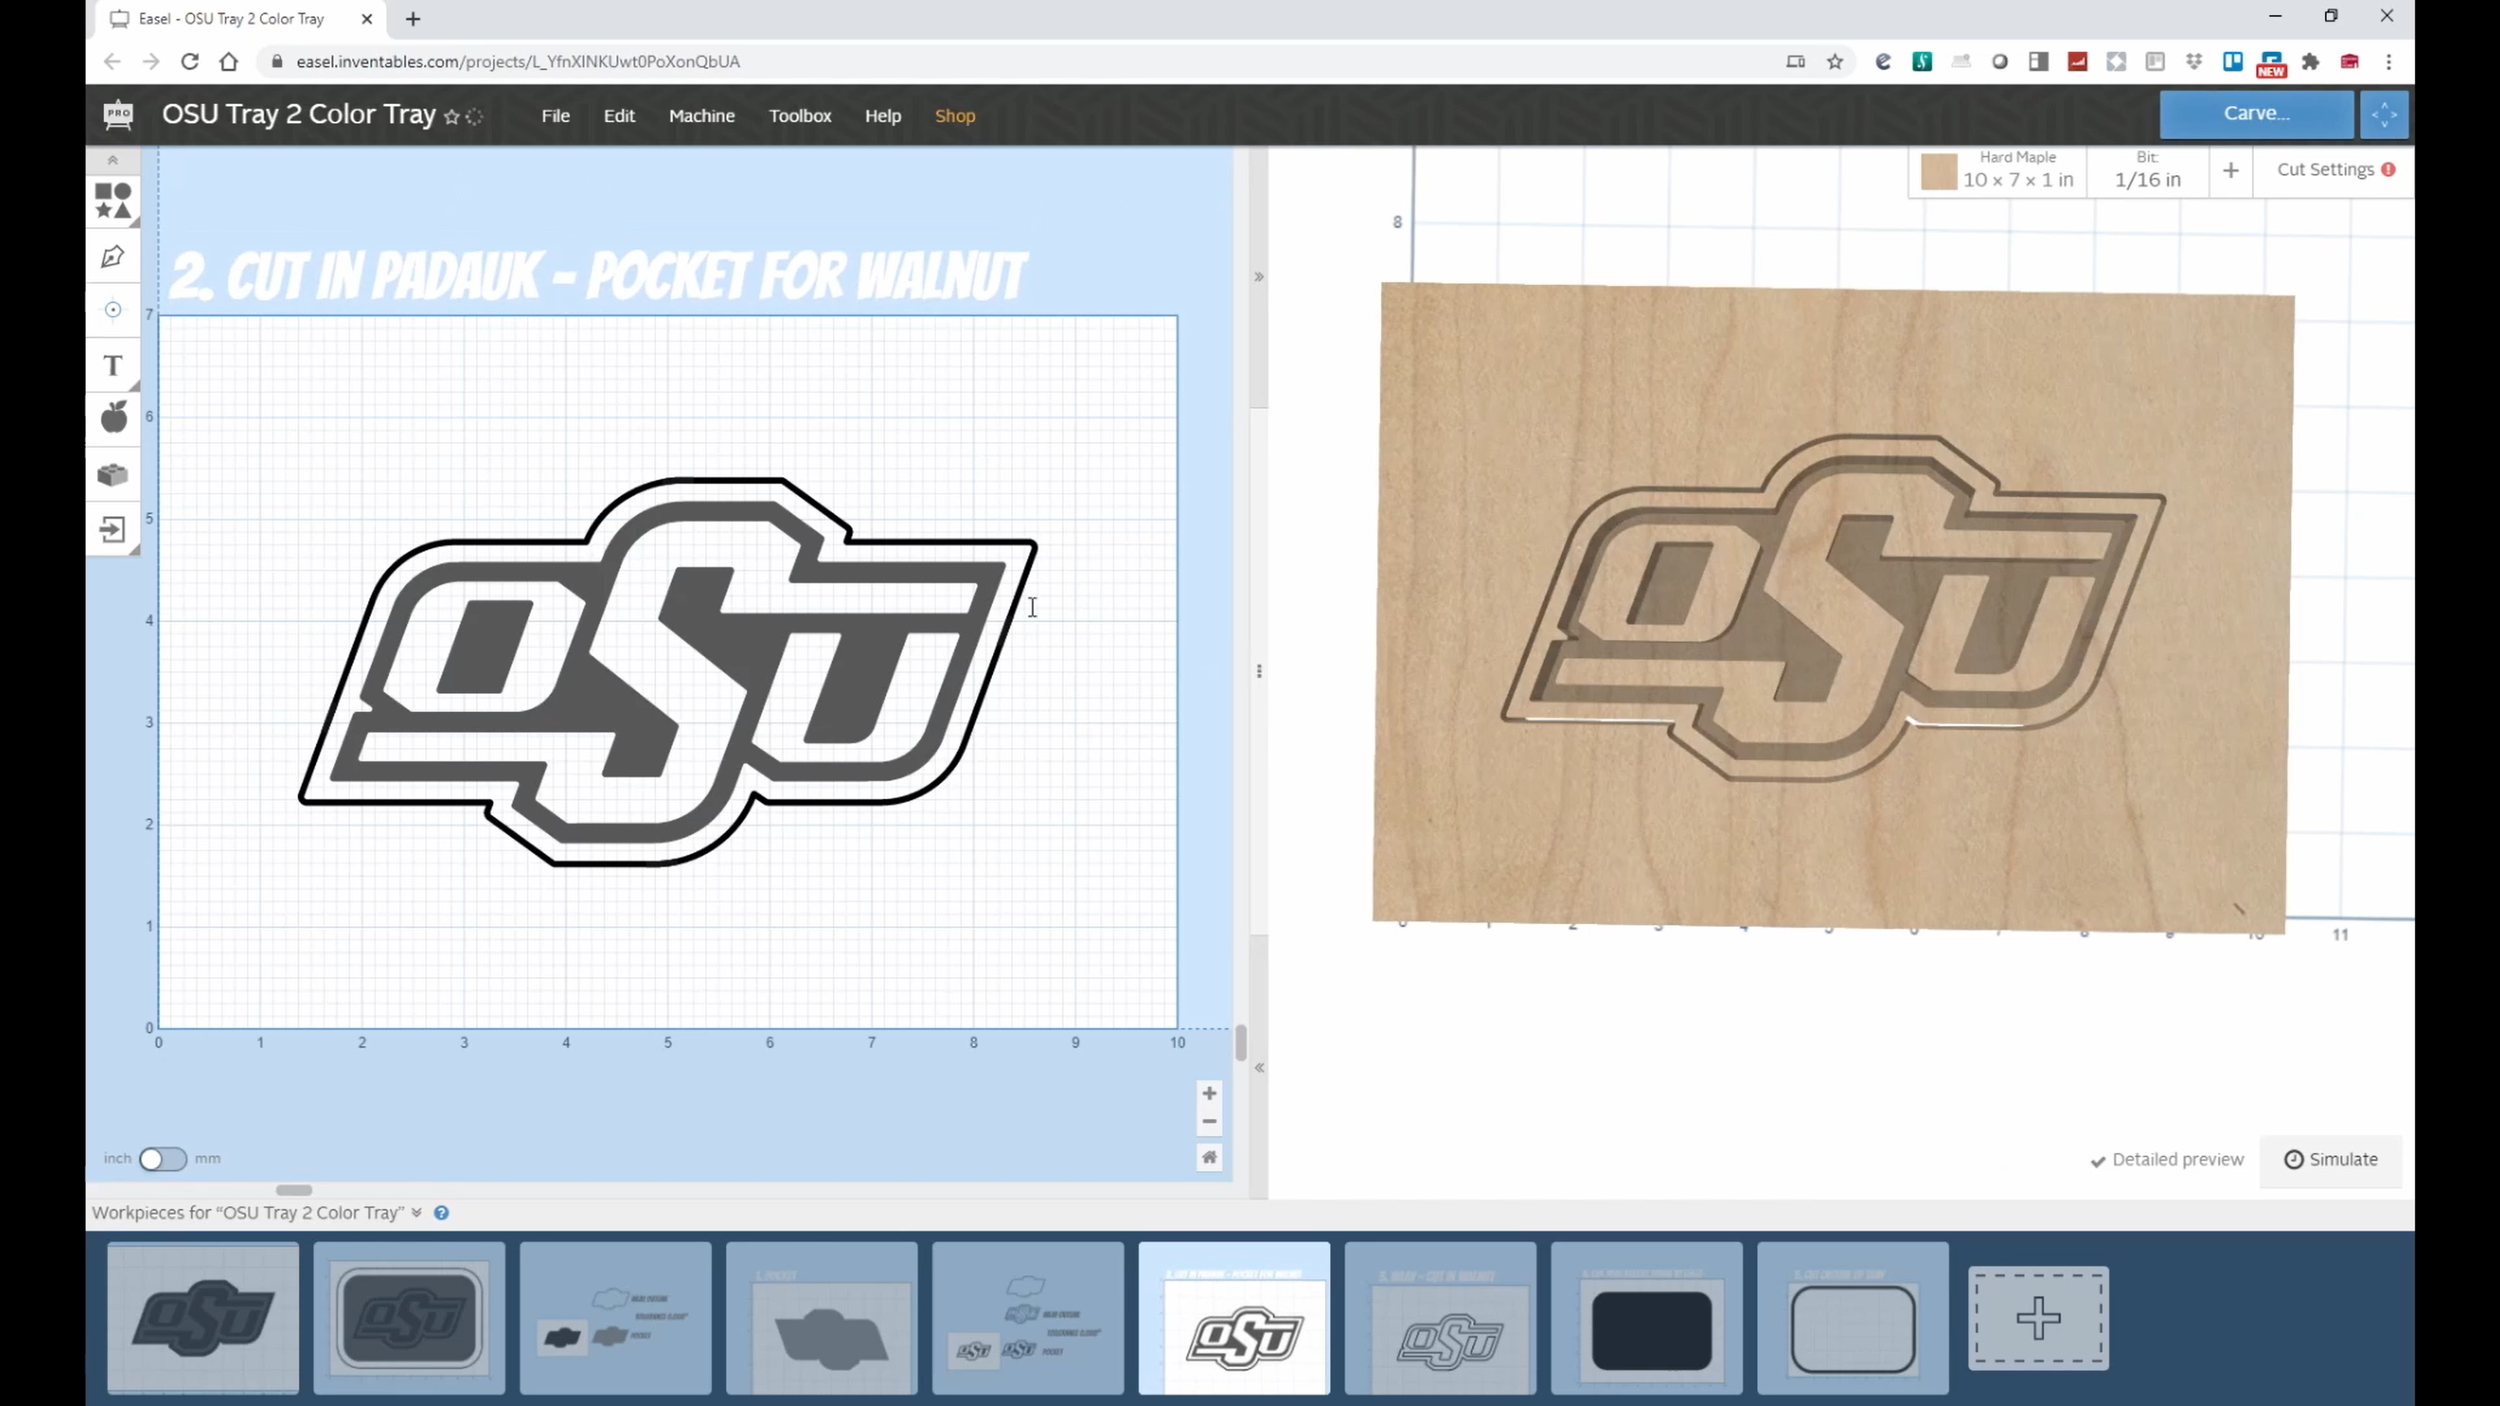
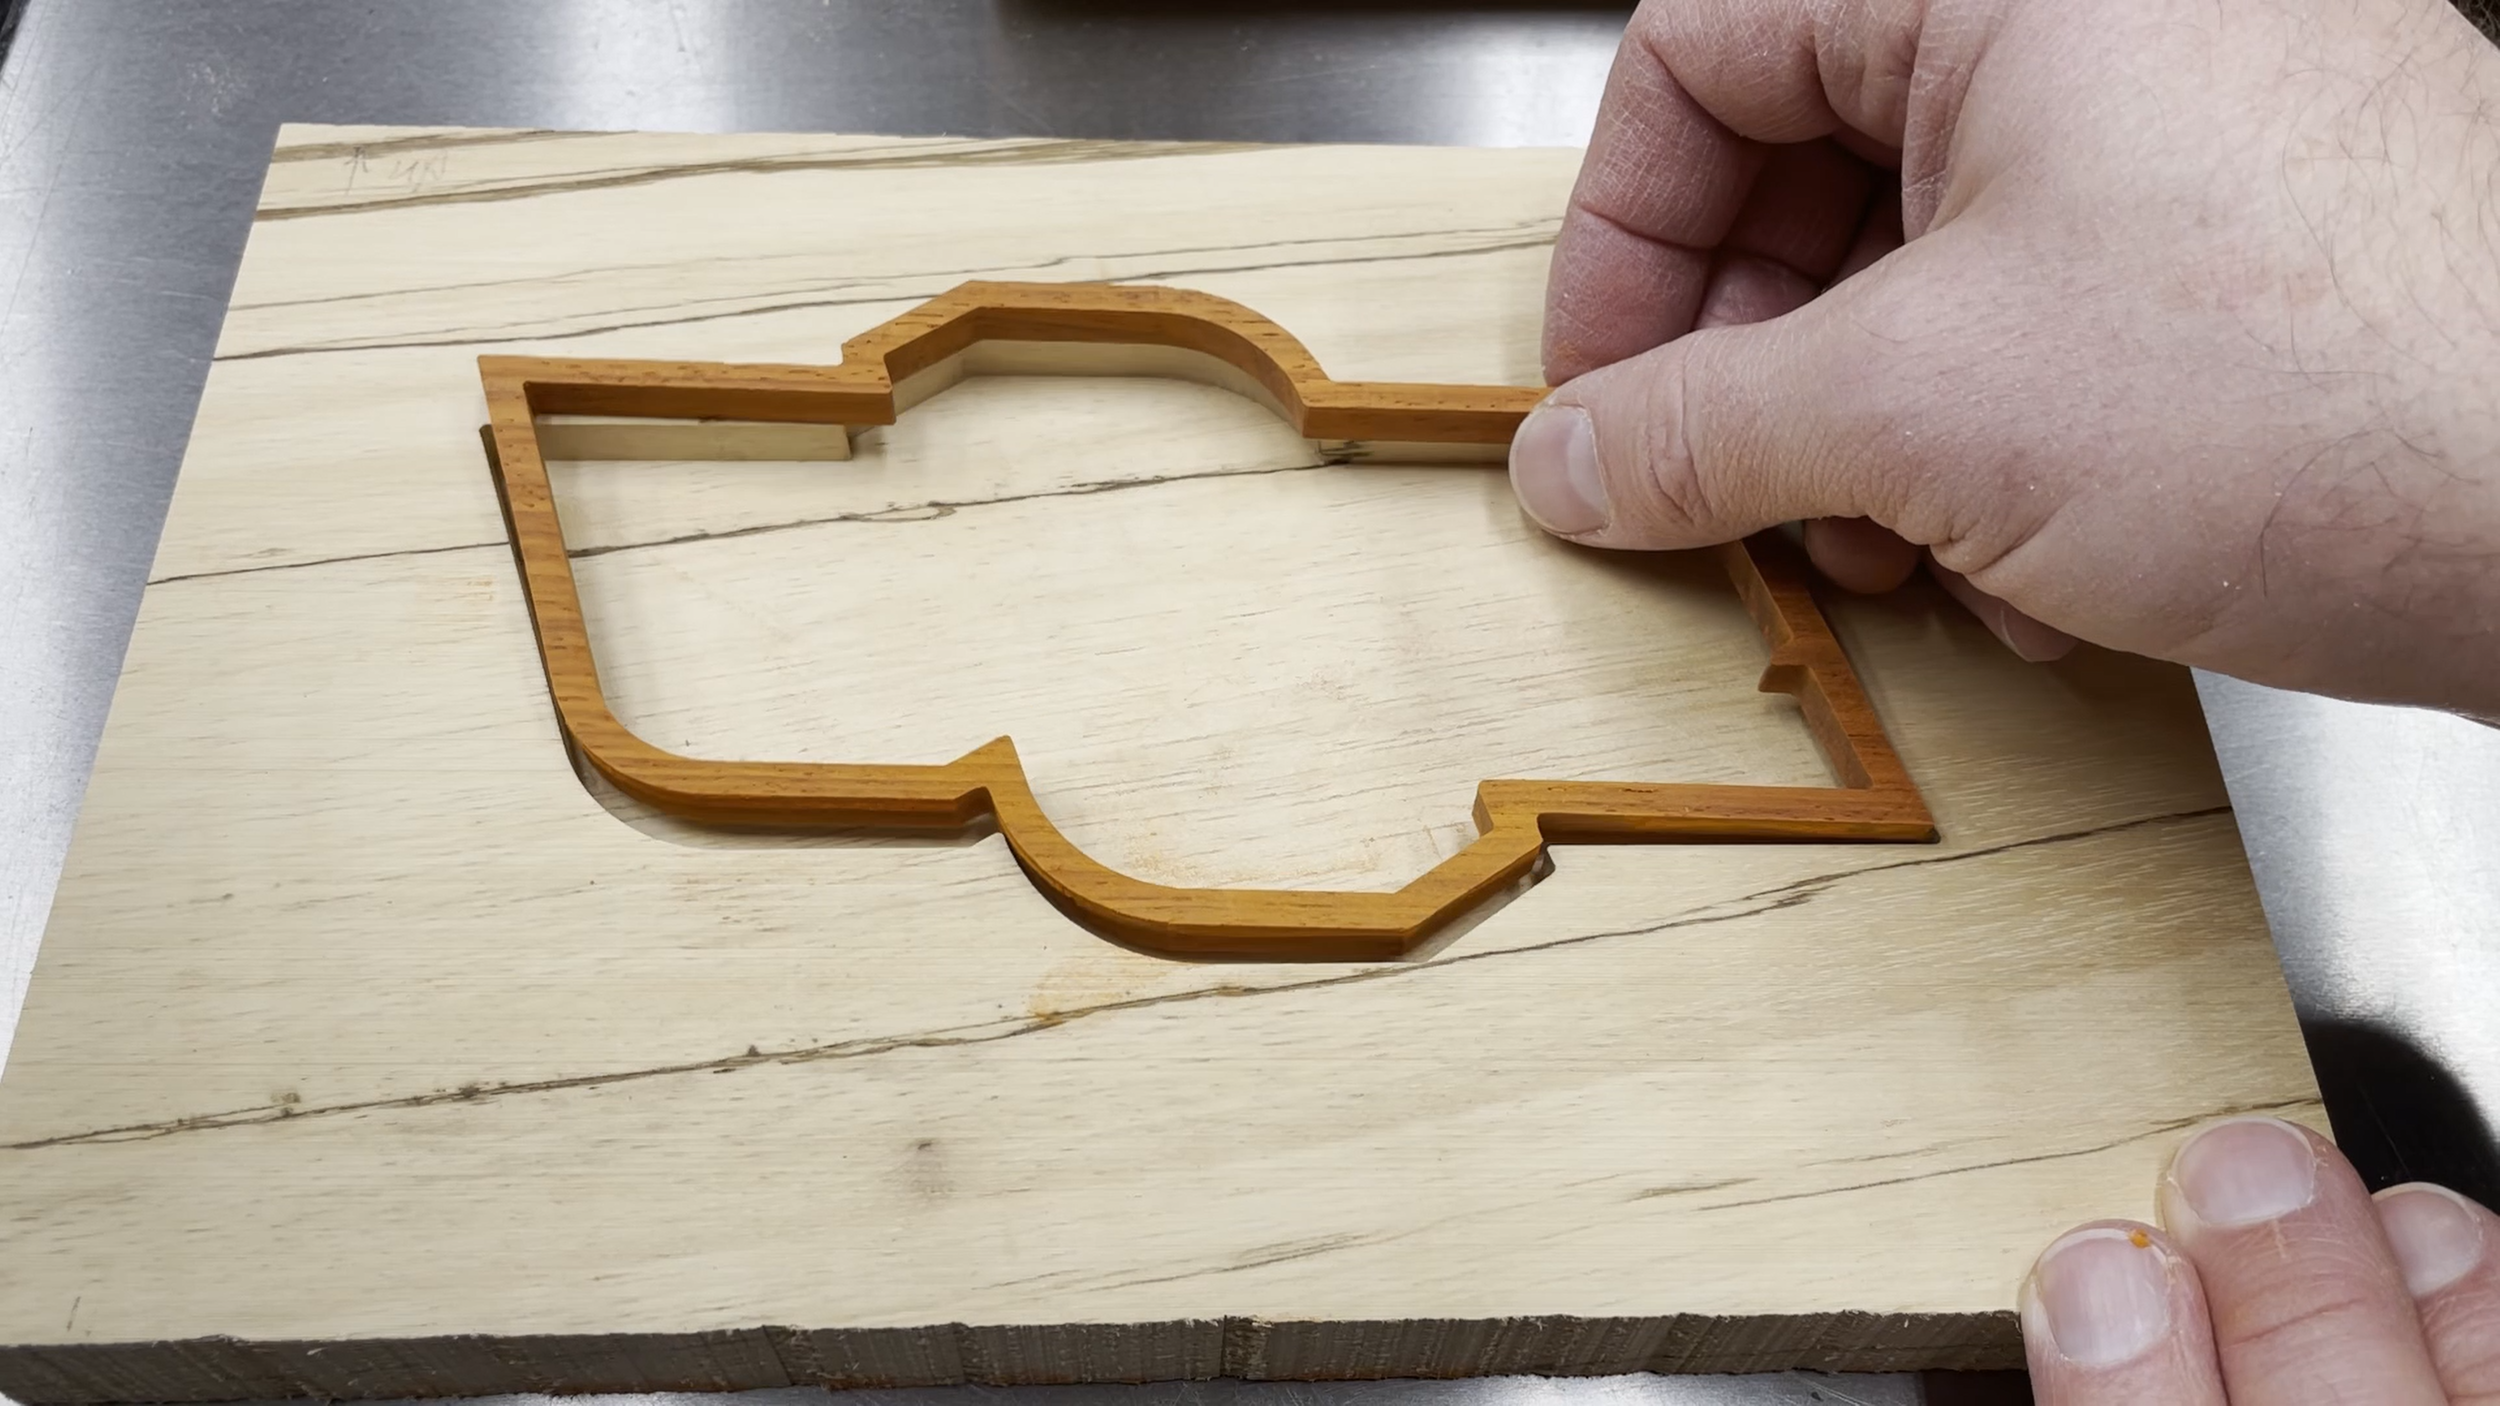
Step 5: Cut the Second Inlay
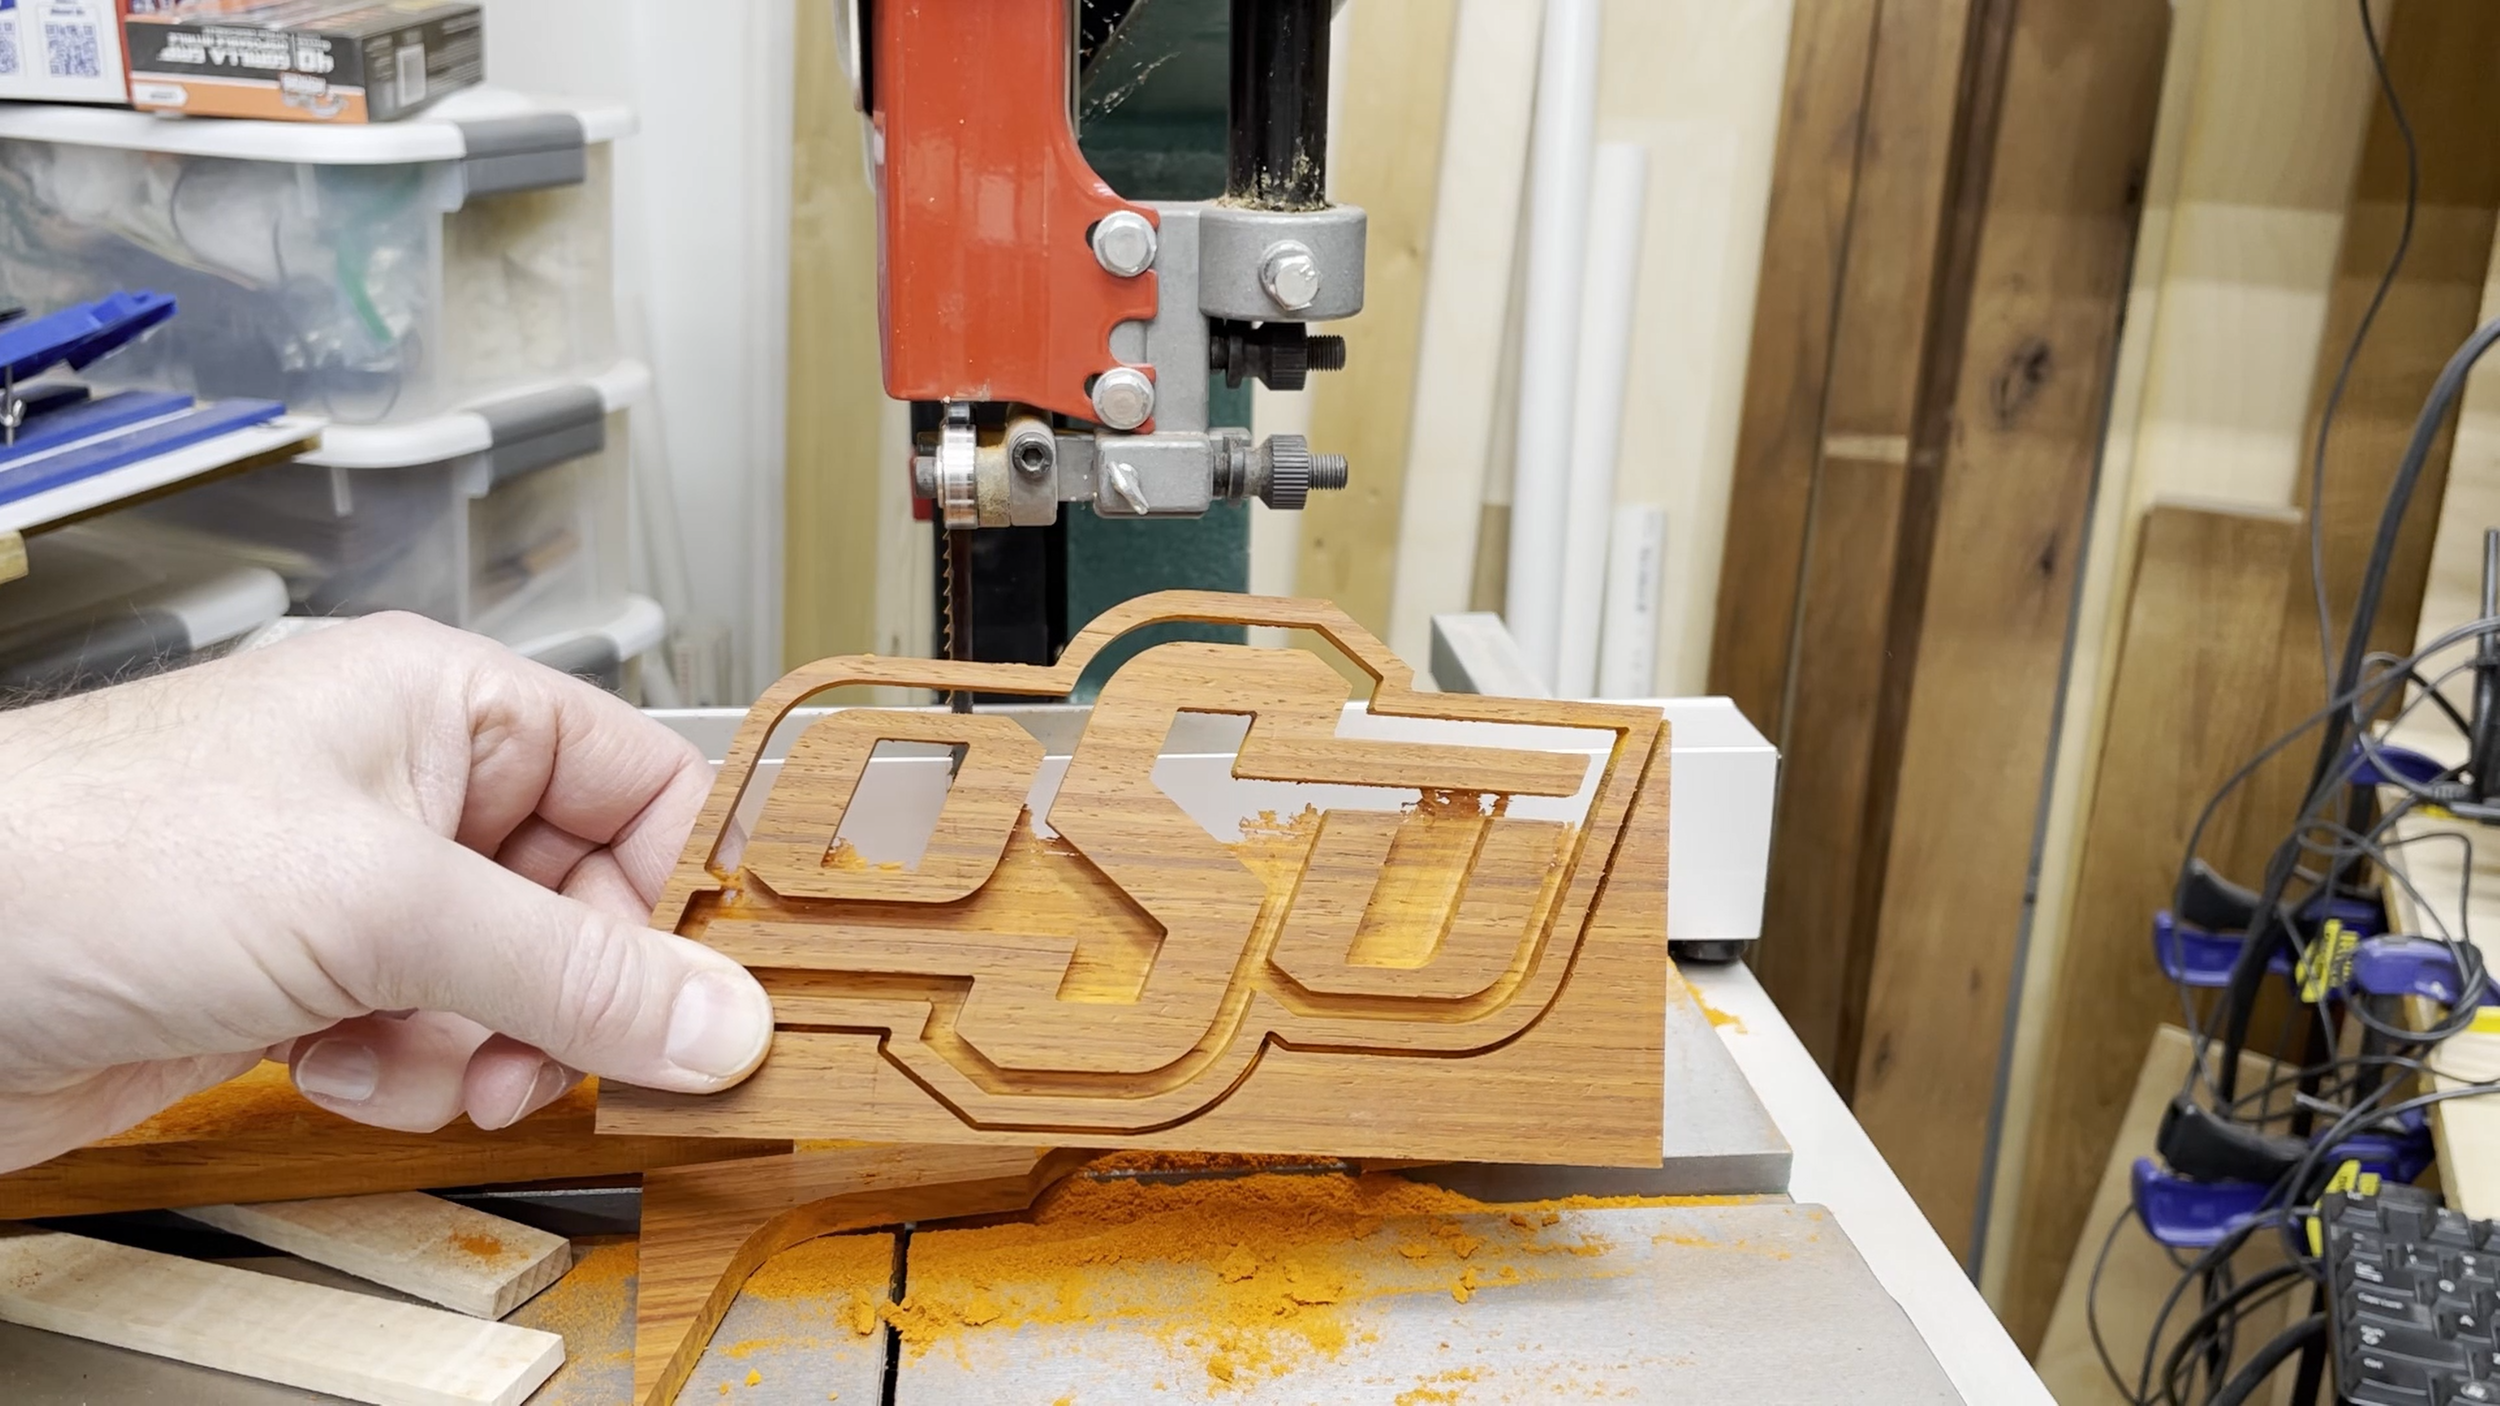
Next I cut the second inlay out of padauk. This is the shape for the orange pieces of wood in the logo.
Again, I used the same 1/16" router bit. As I mentioned before, the inlay generator in the Easel software creates matching pieces using the same router bit.
I used the bandsaw to cut the logo pieces free from the piece of wood by running the wood through the bandsaw blade vertically.
I cleaned up the edges with some light sanding like I did on the previous inlay.

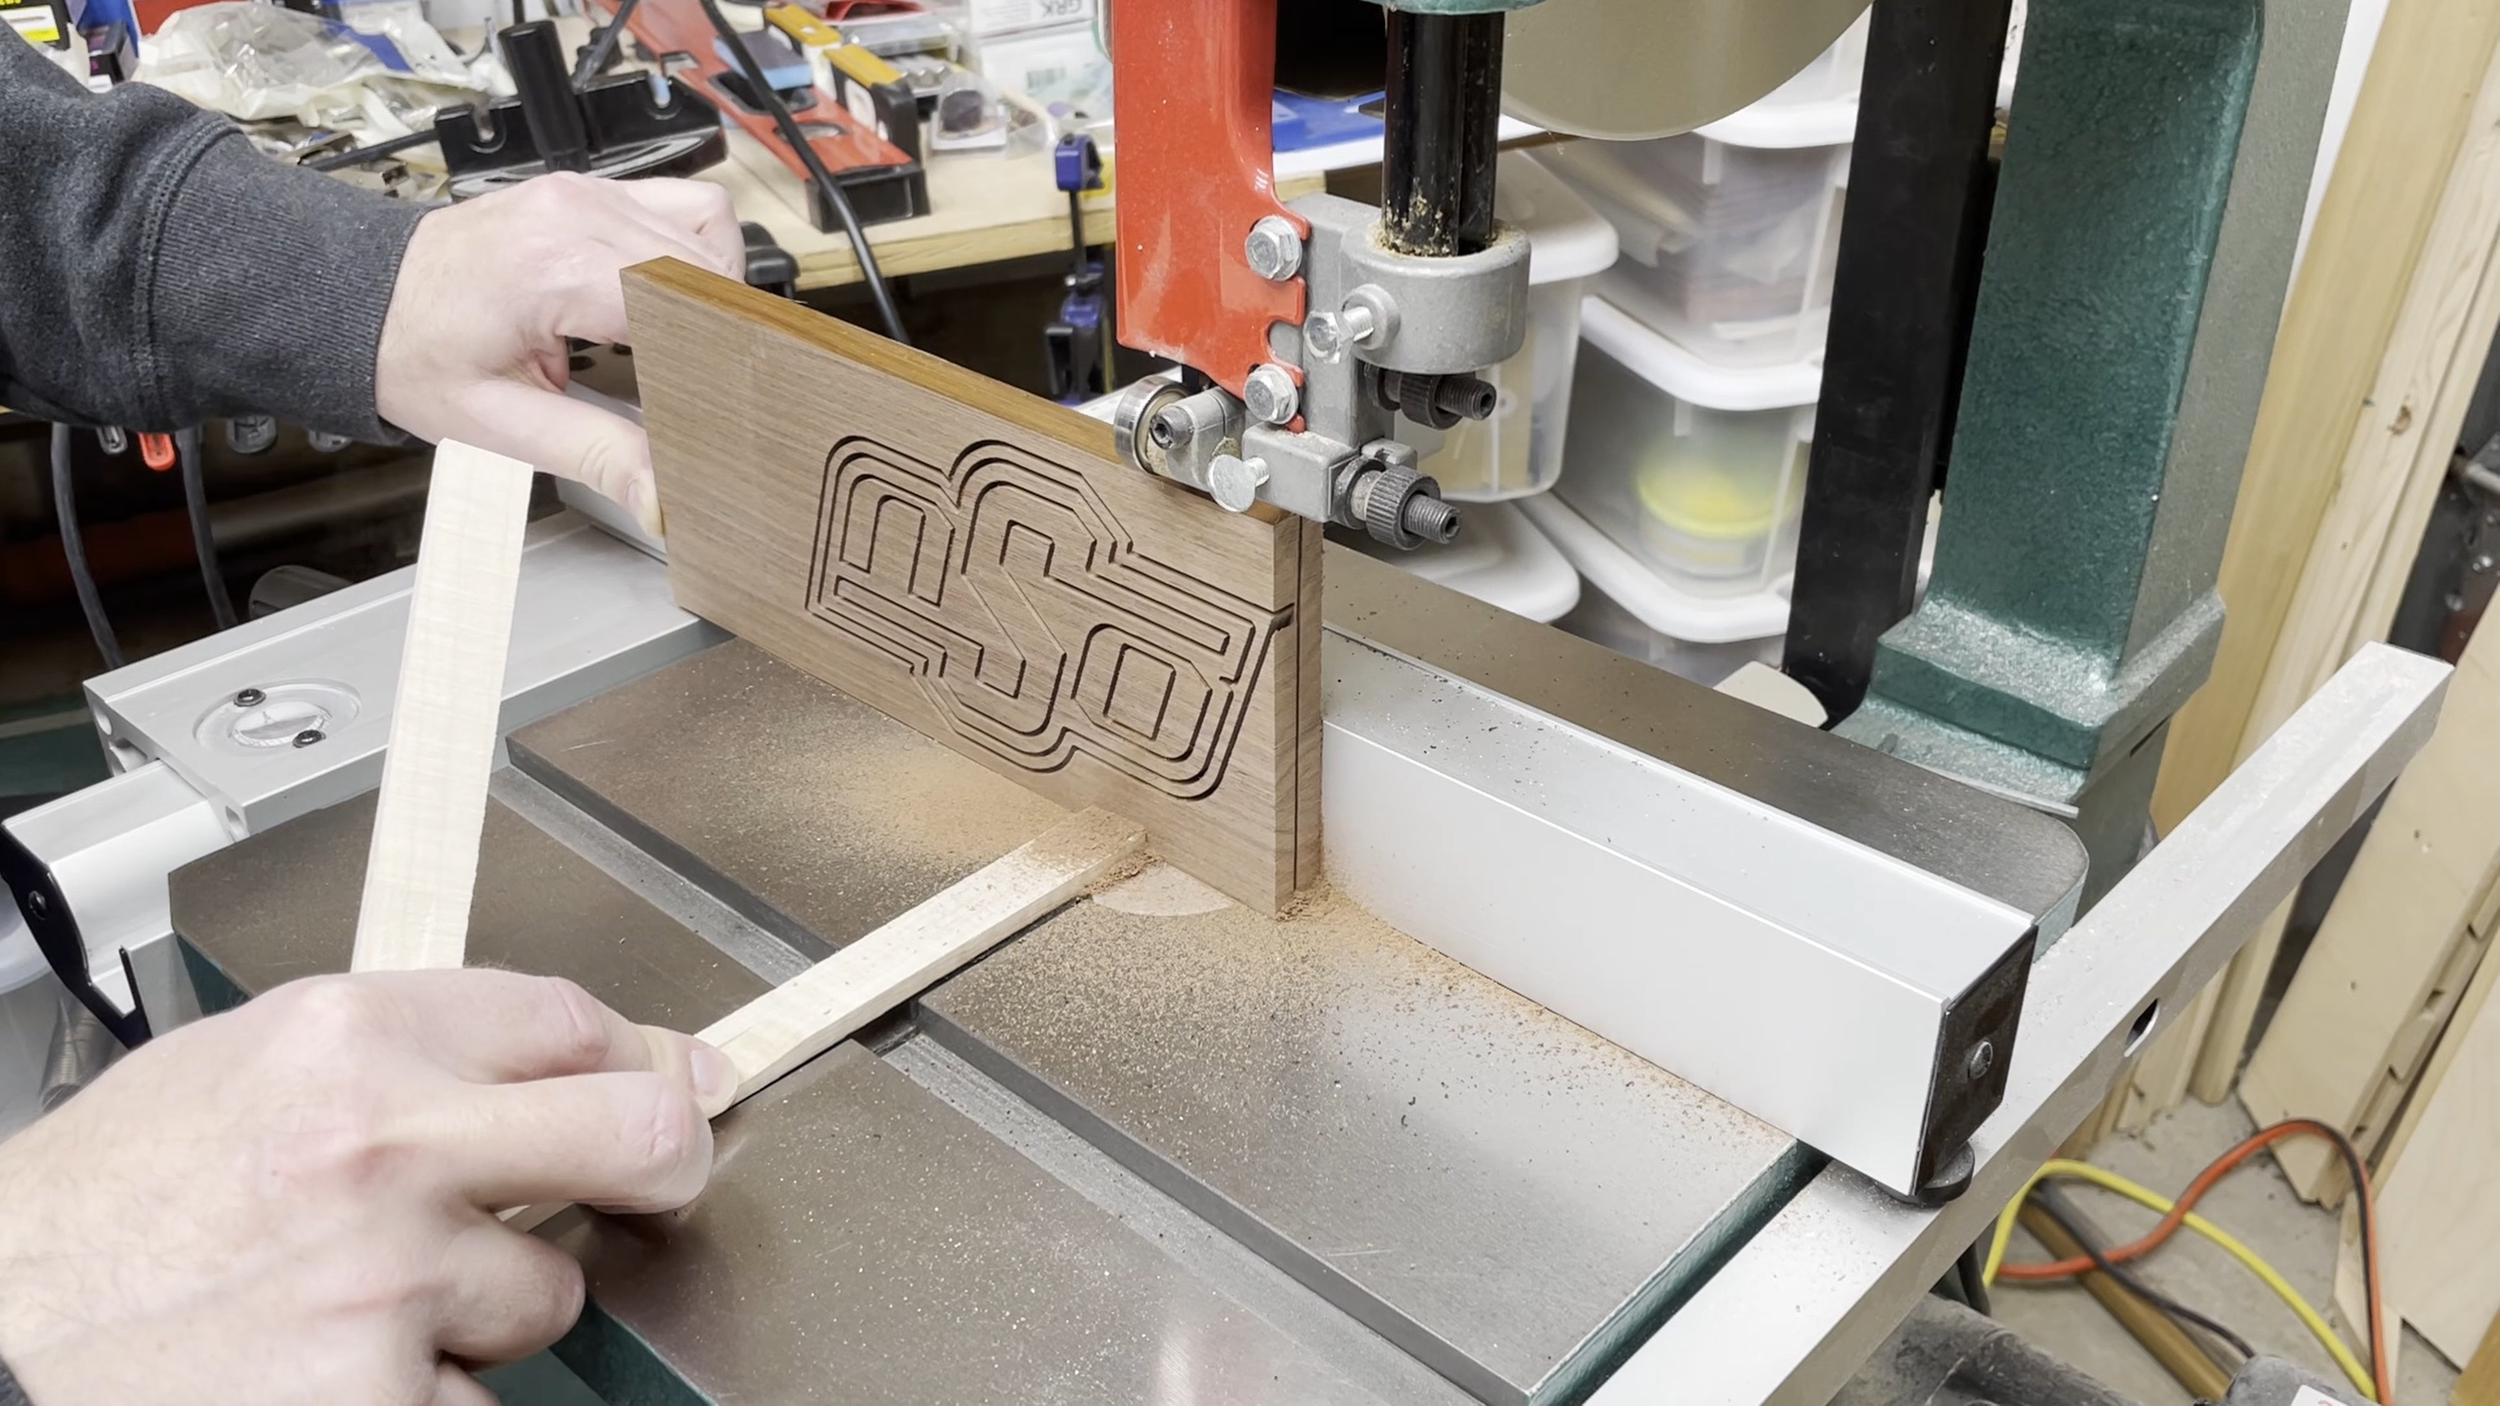
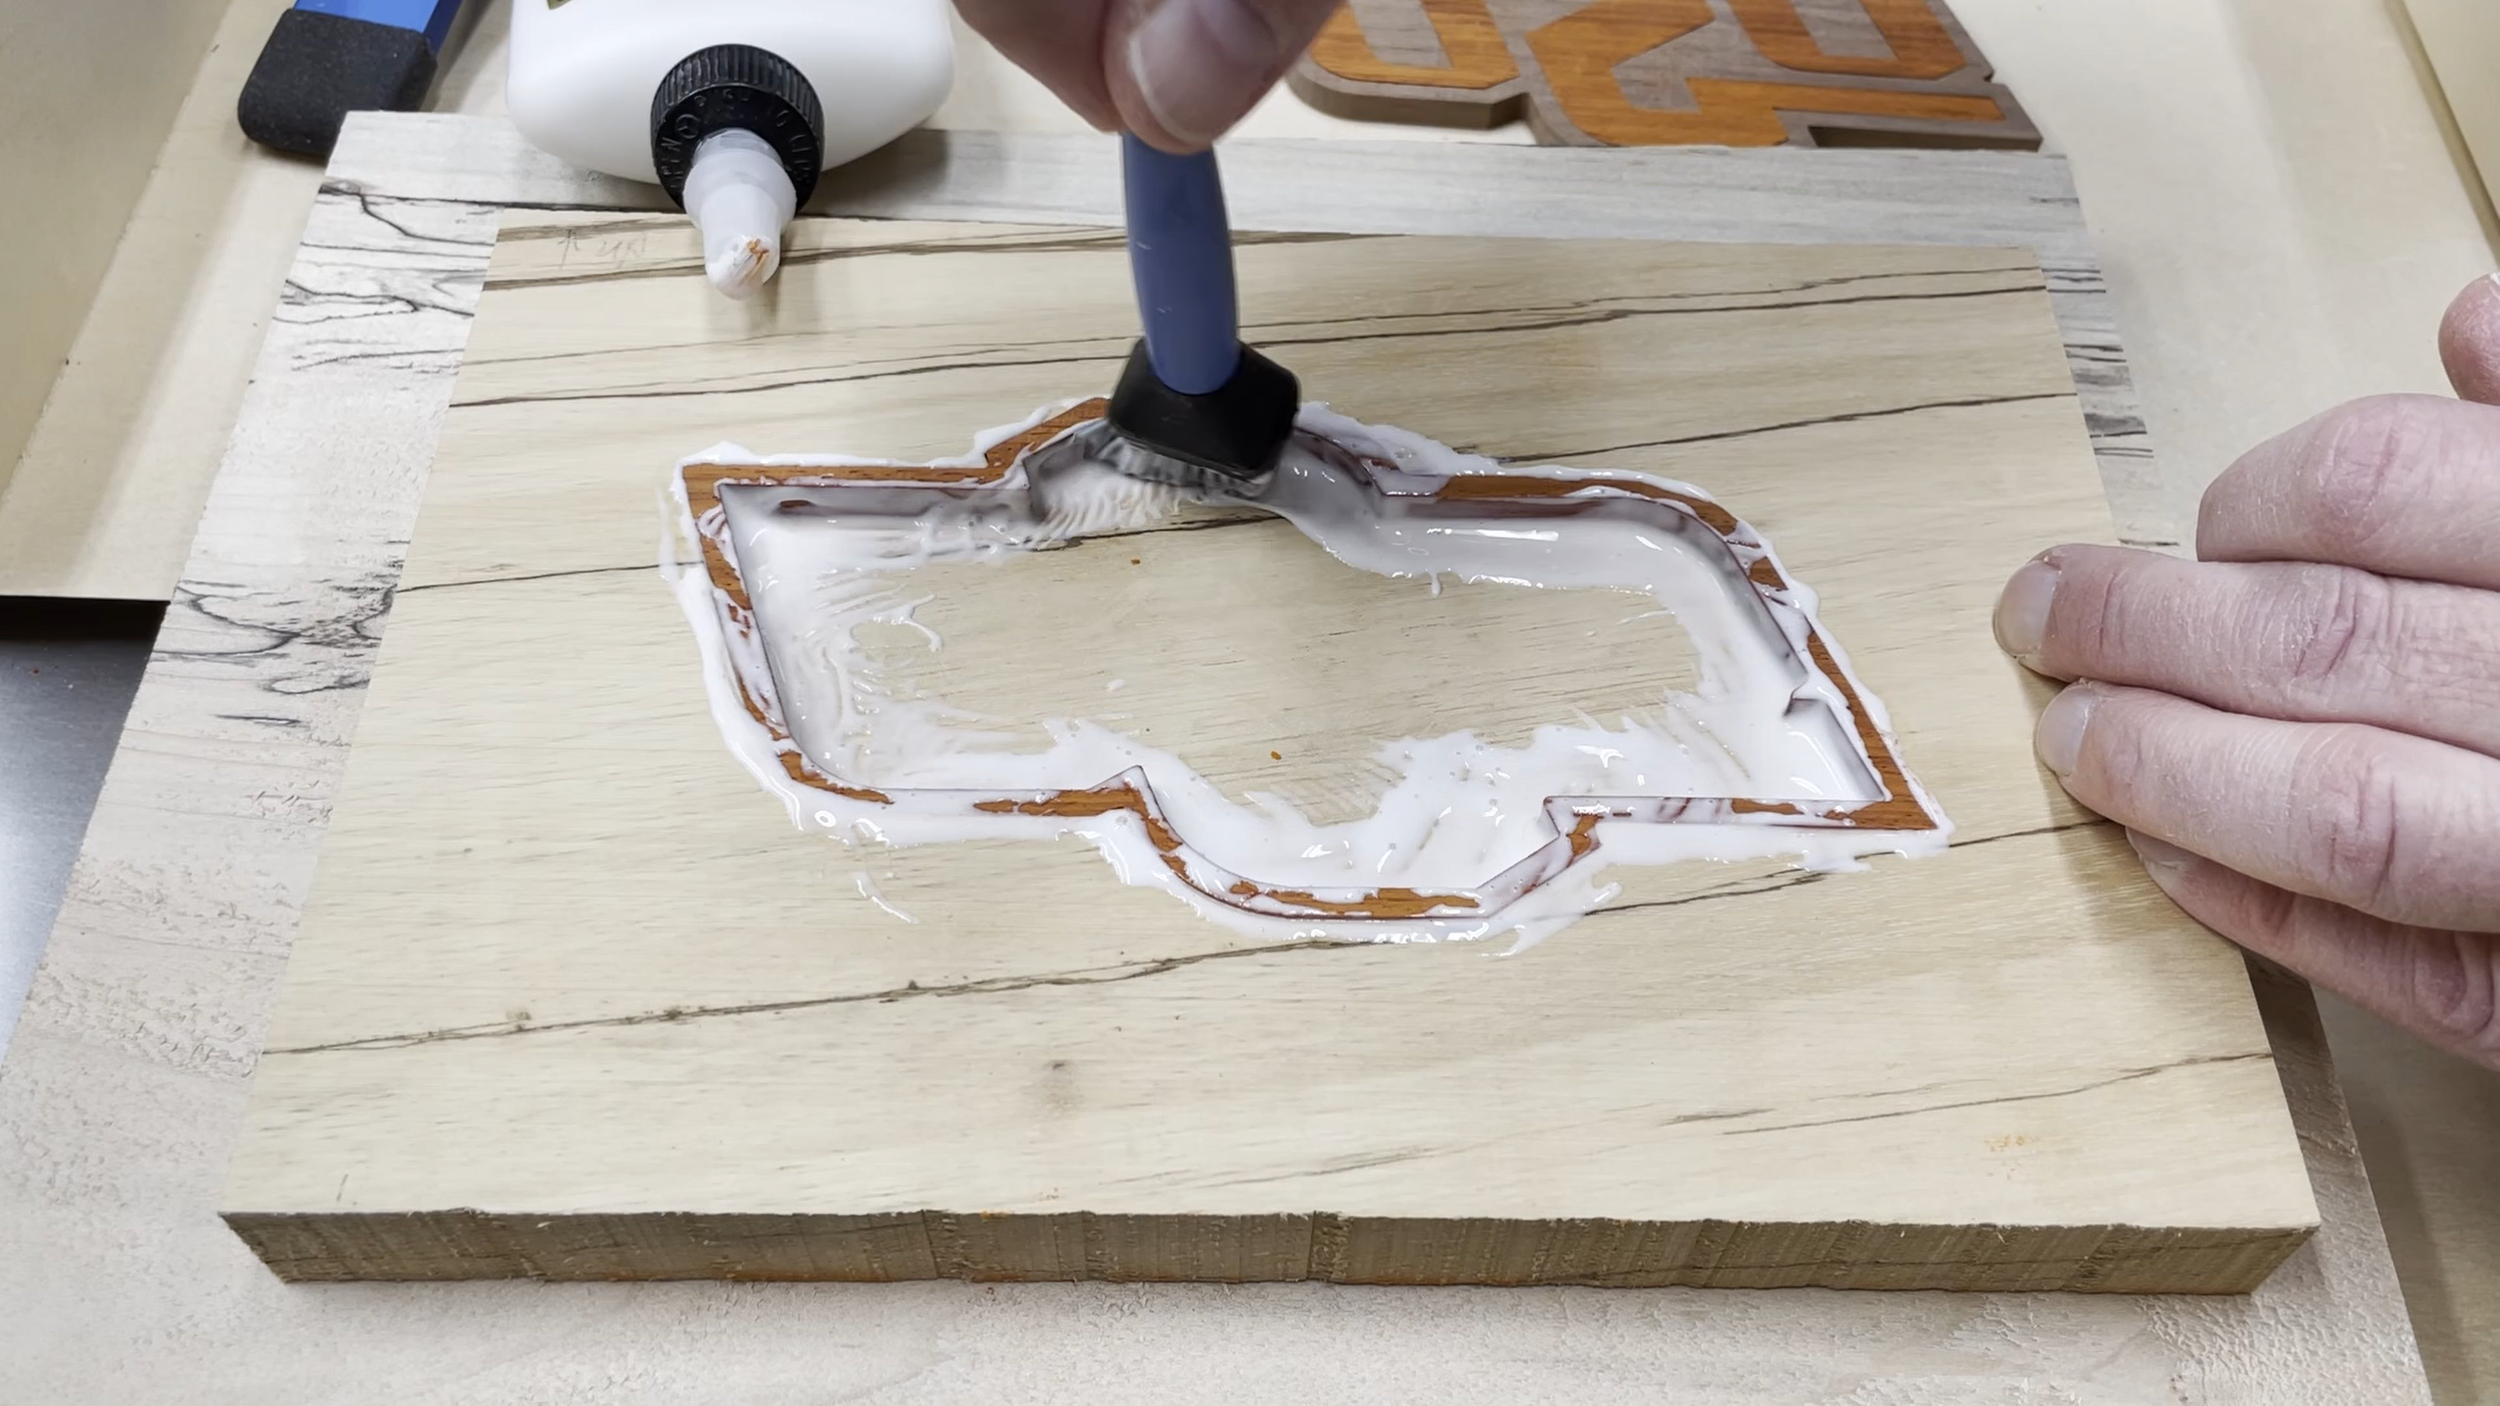
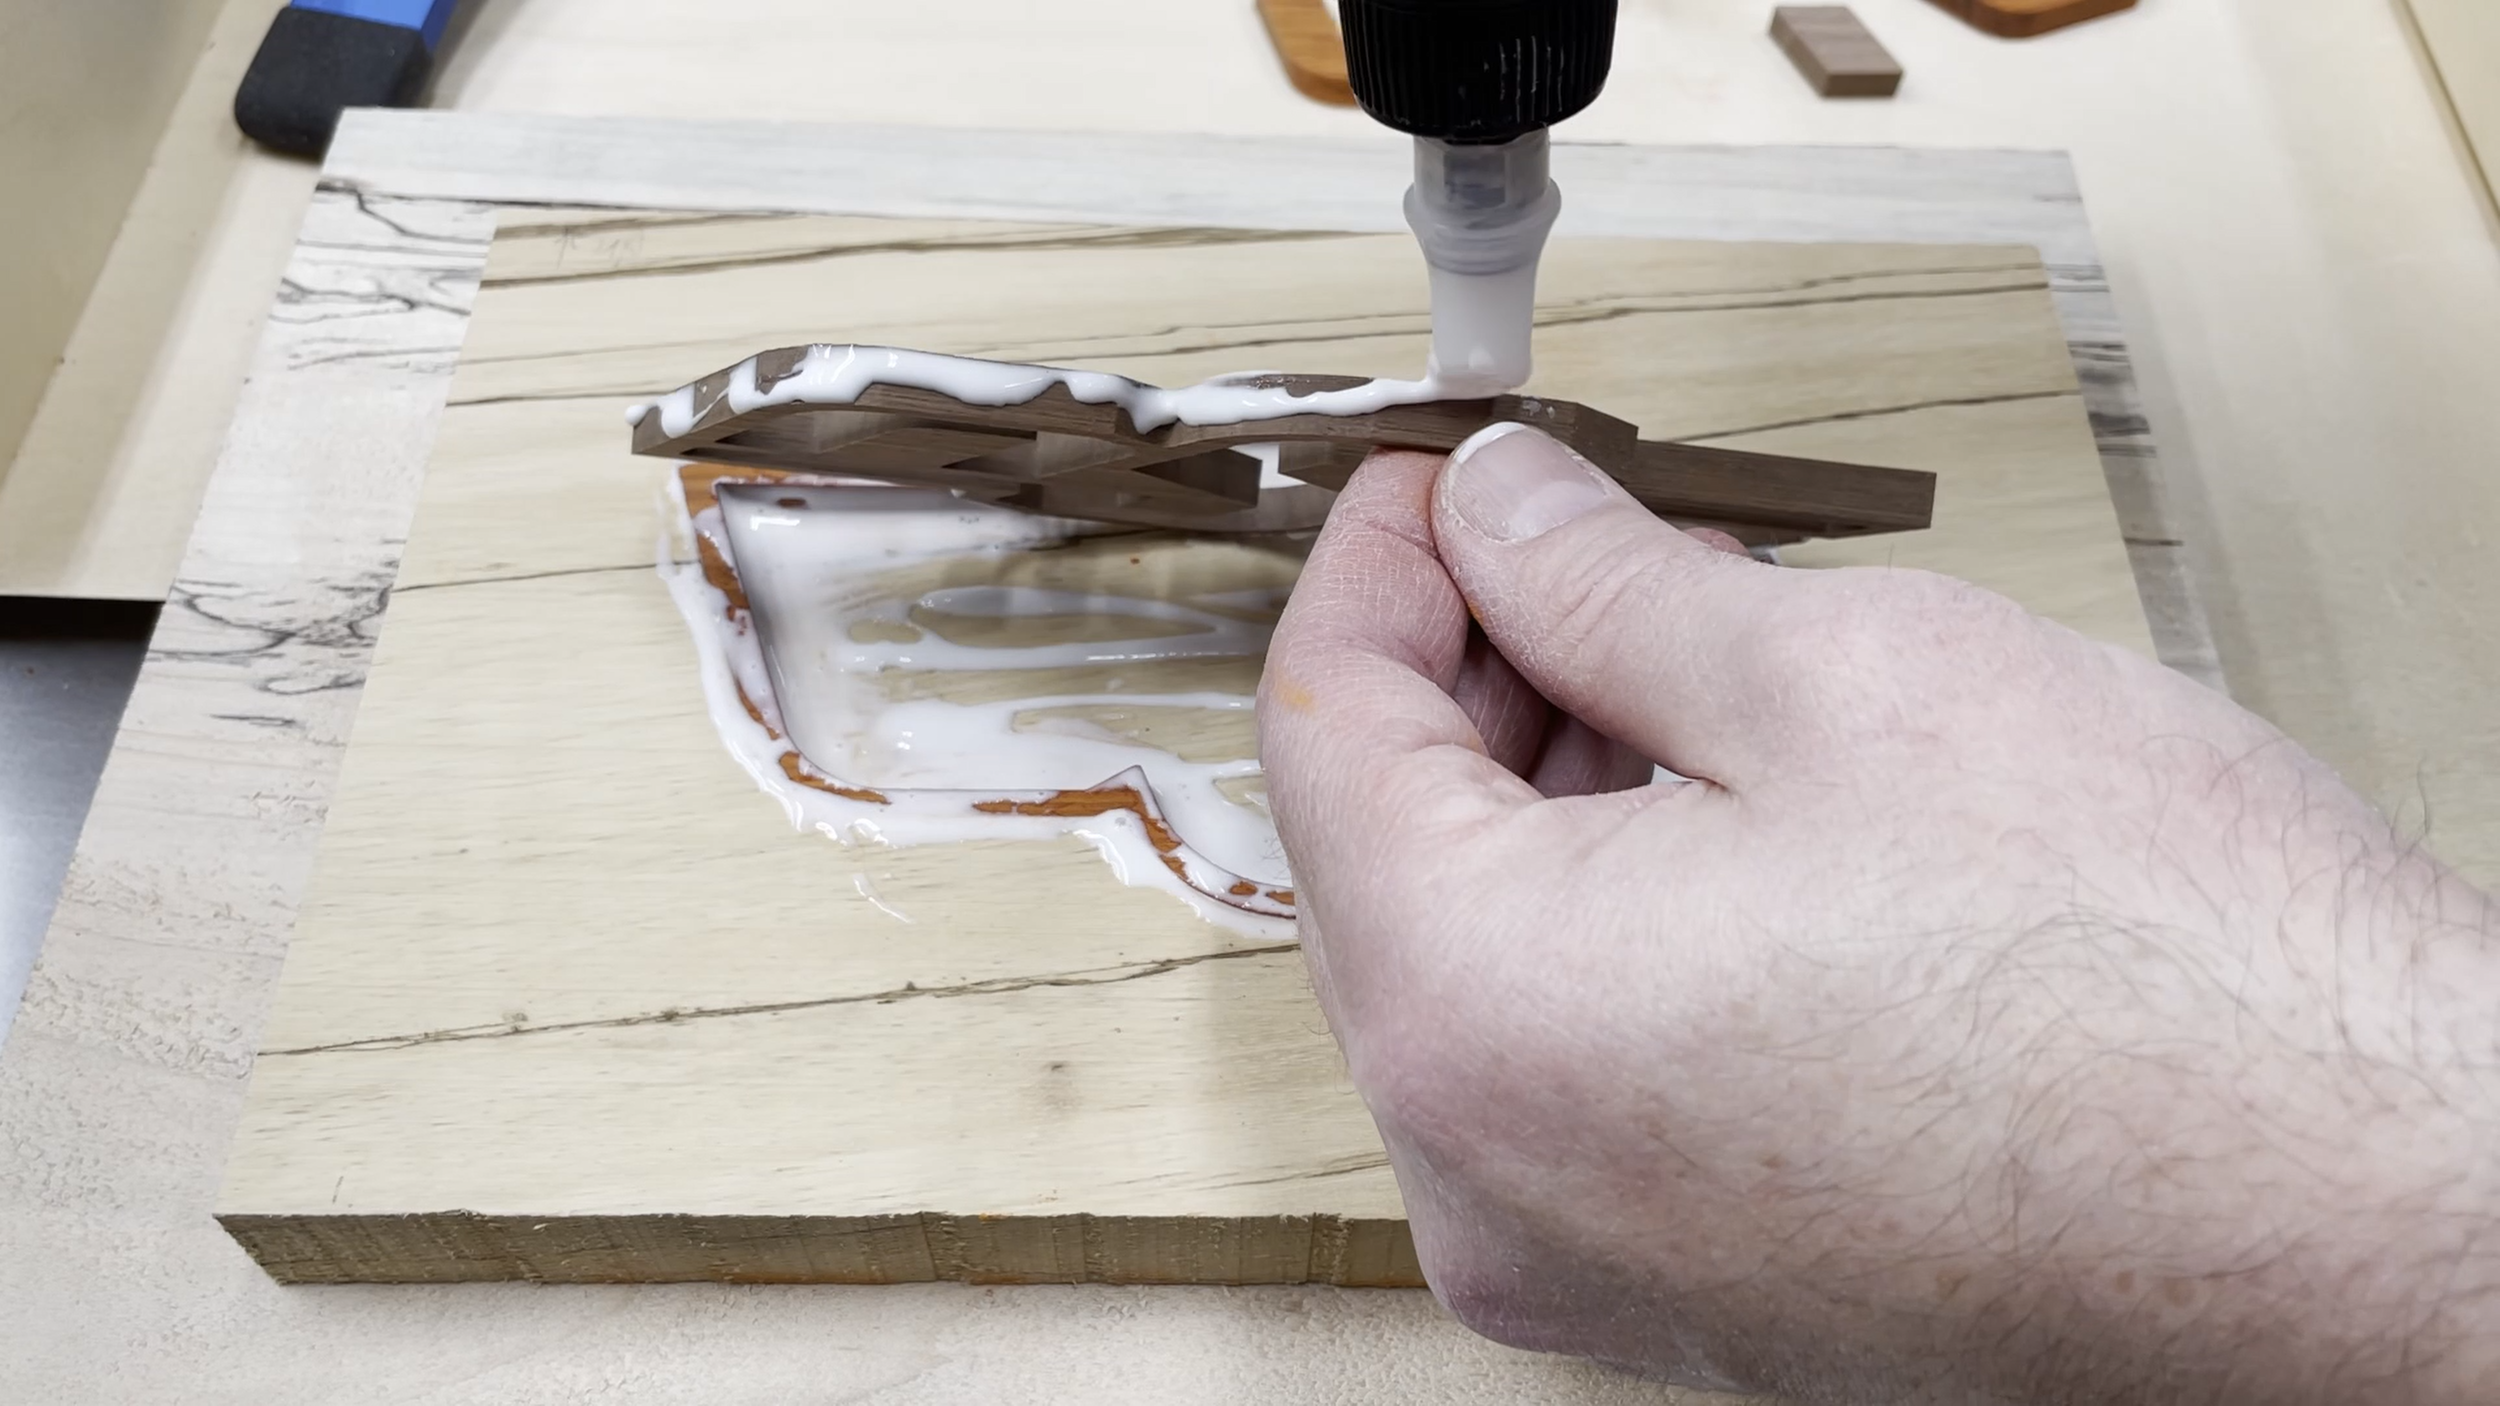
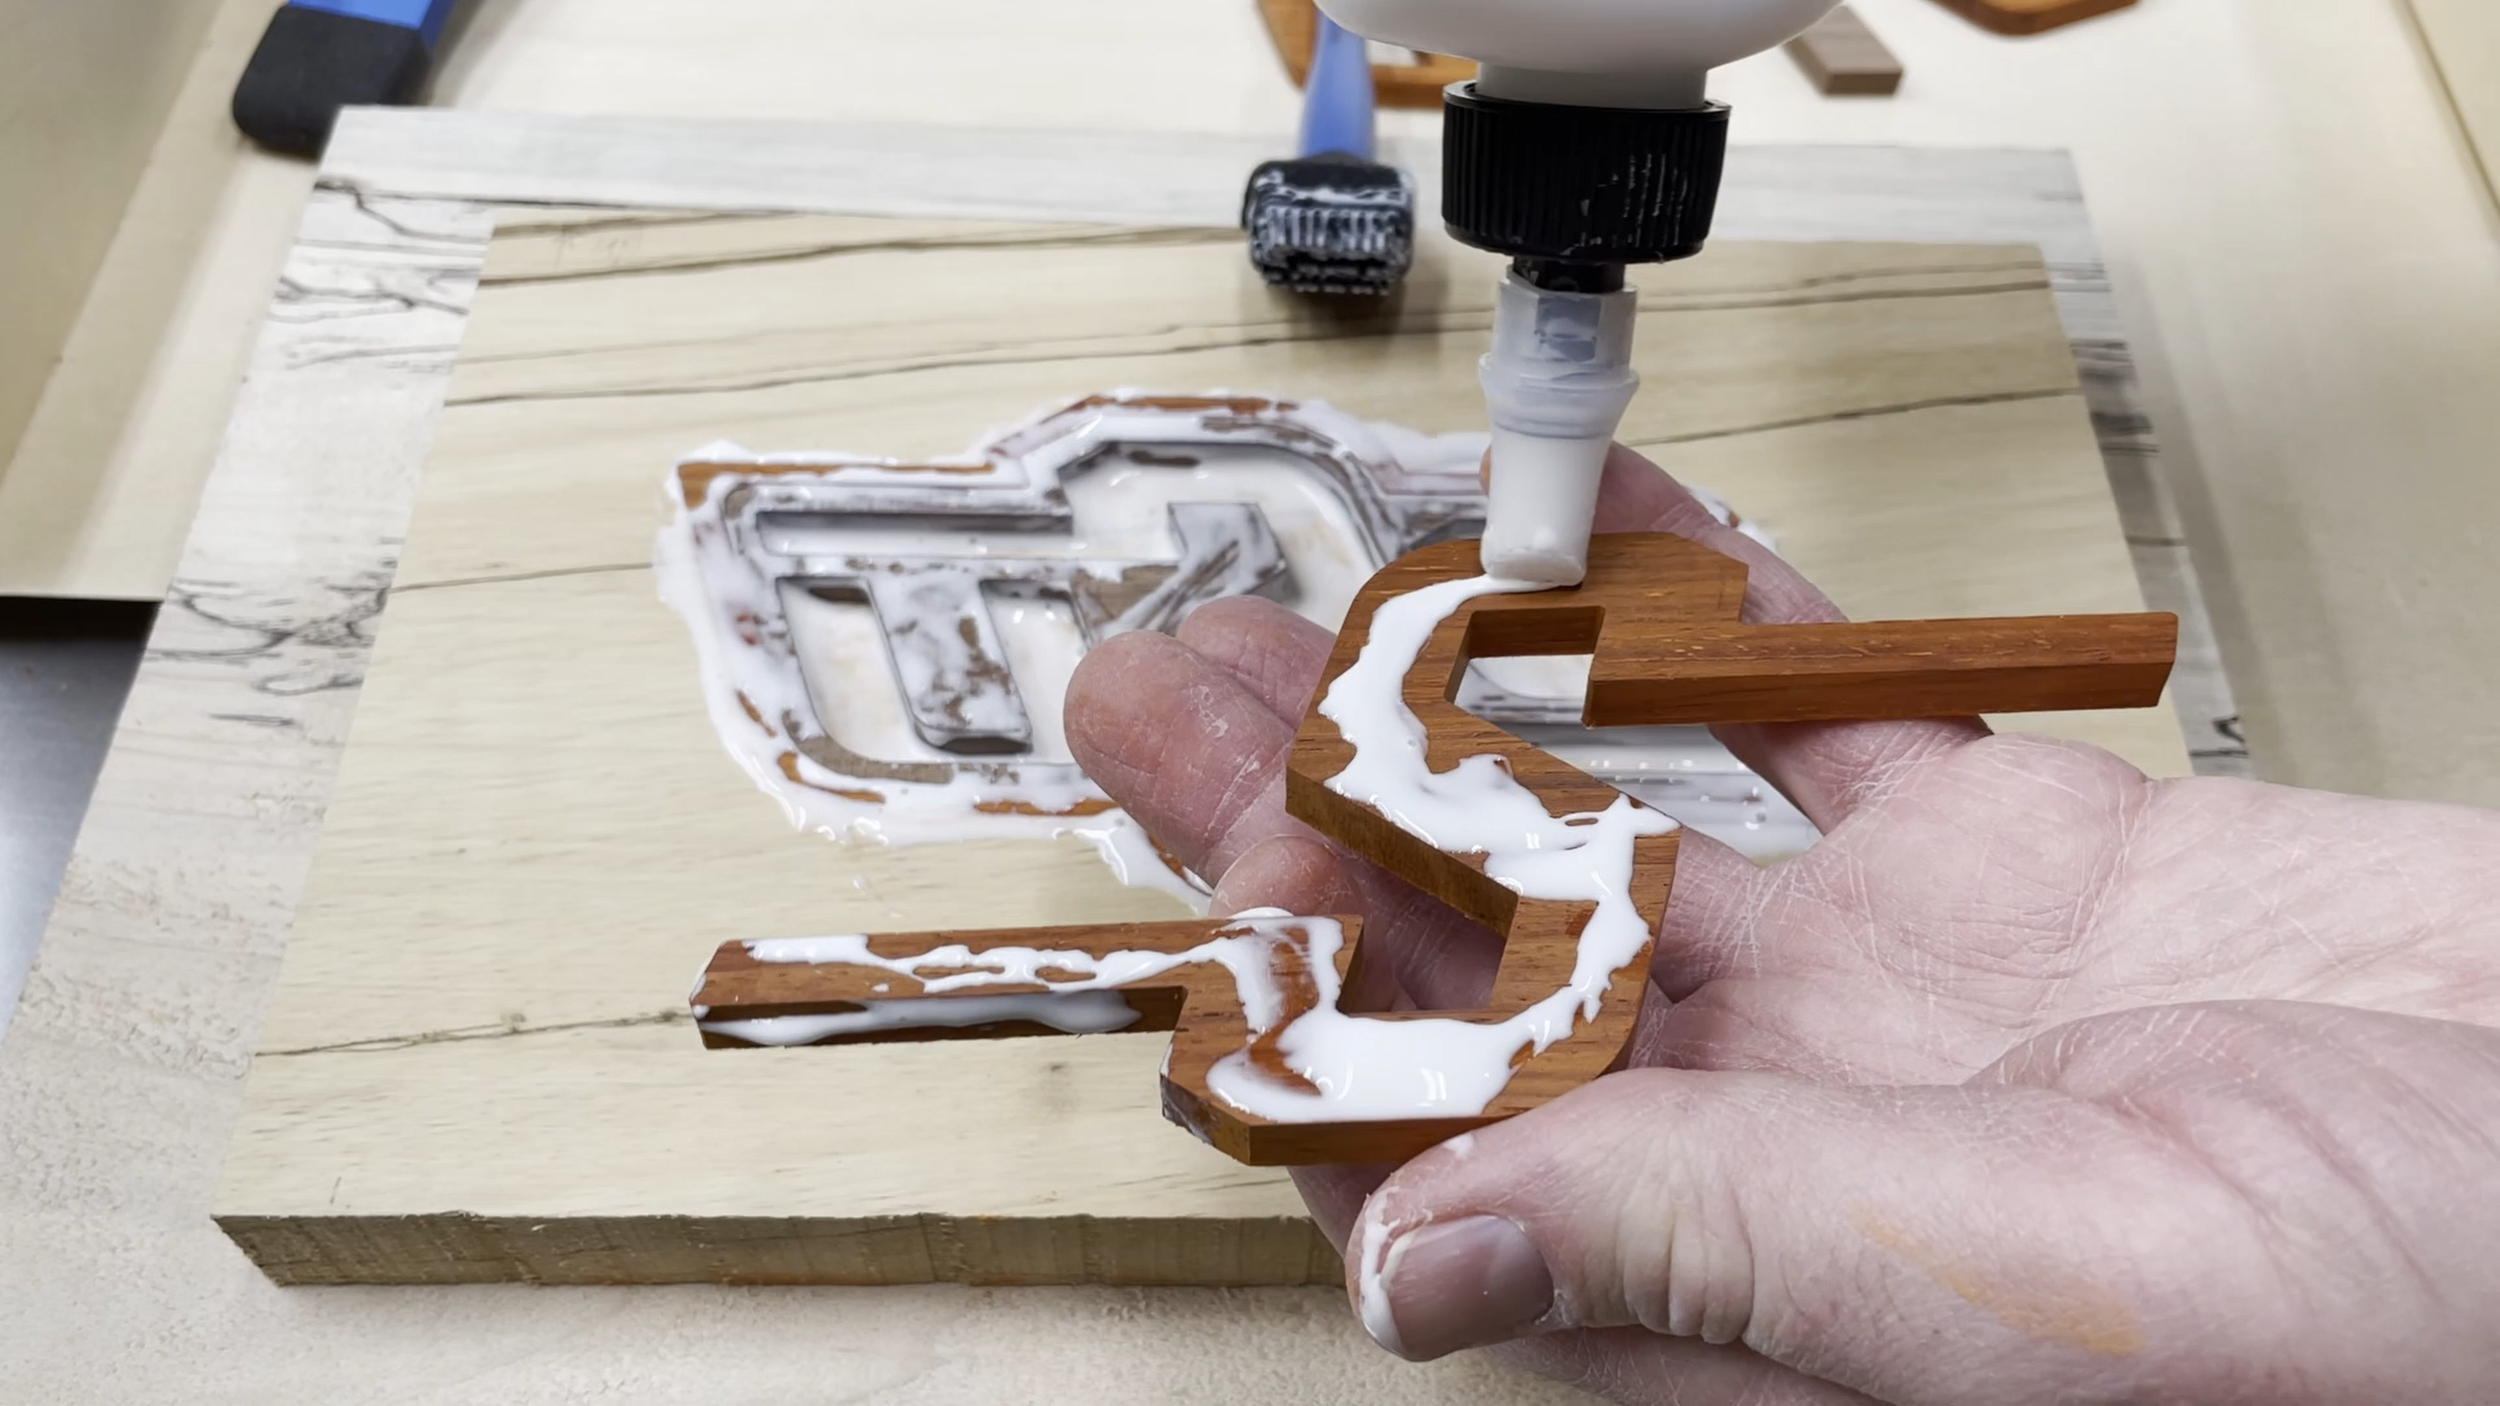
Step 6: Glue Inlay in Place
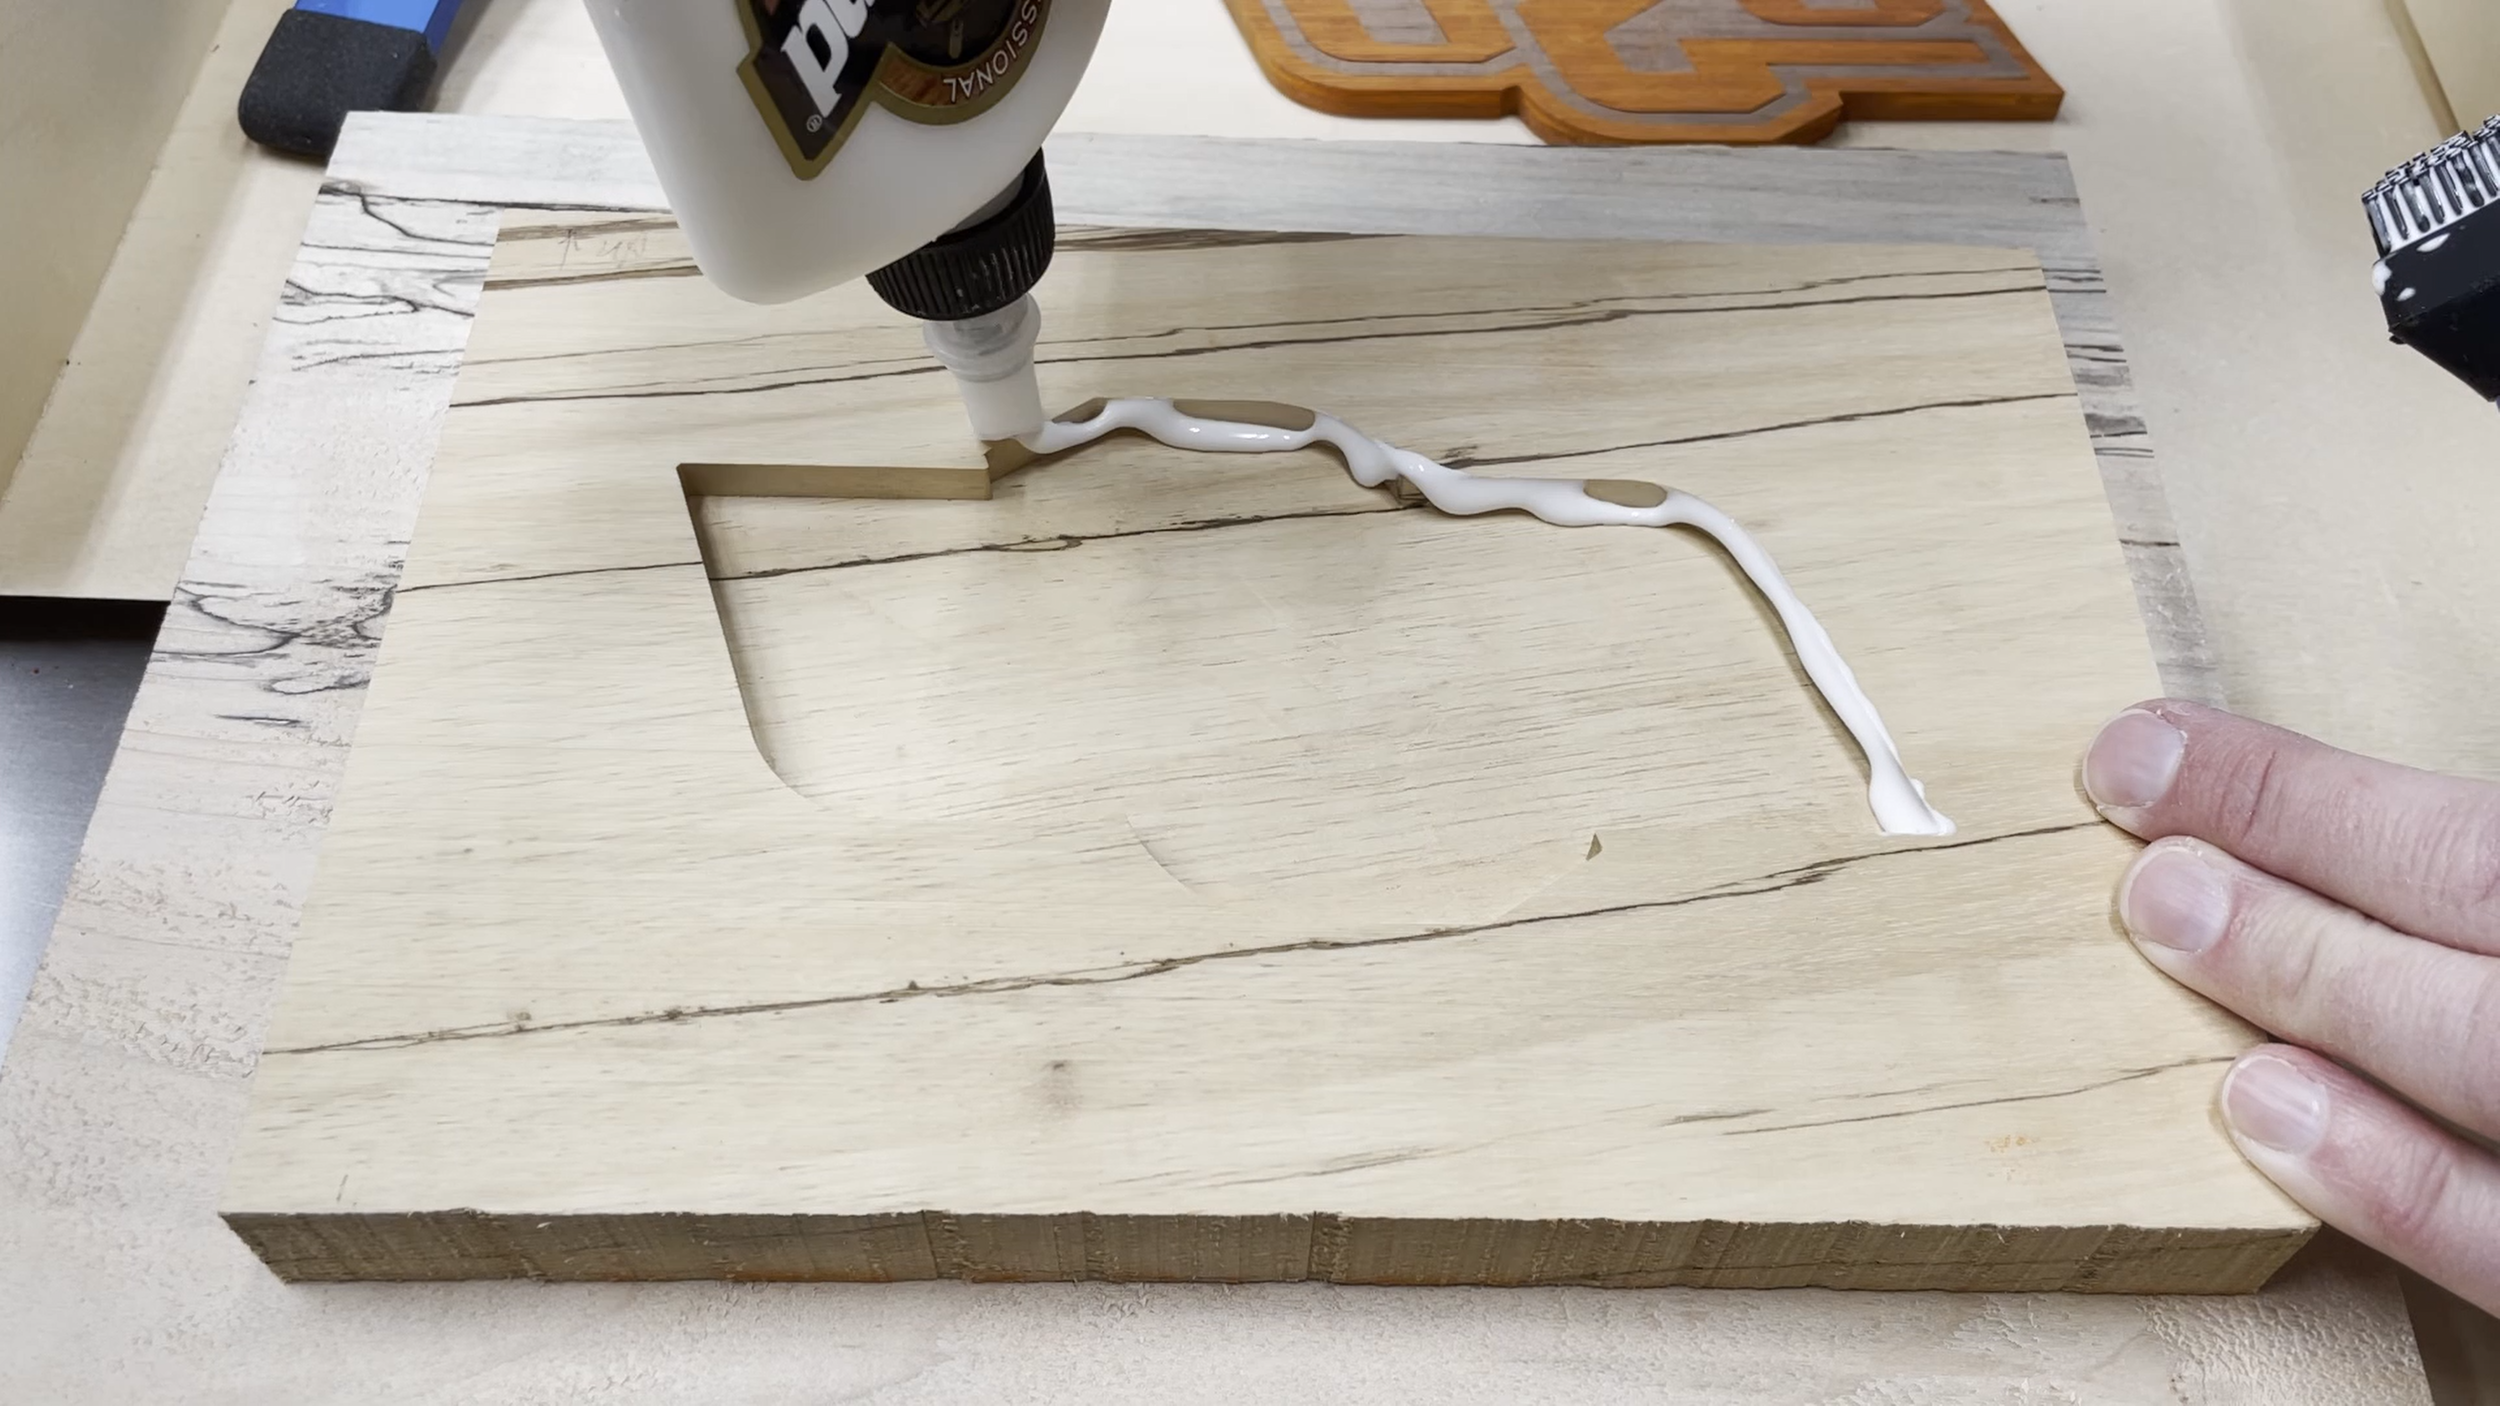
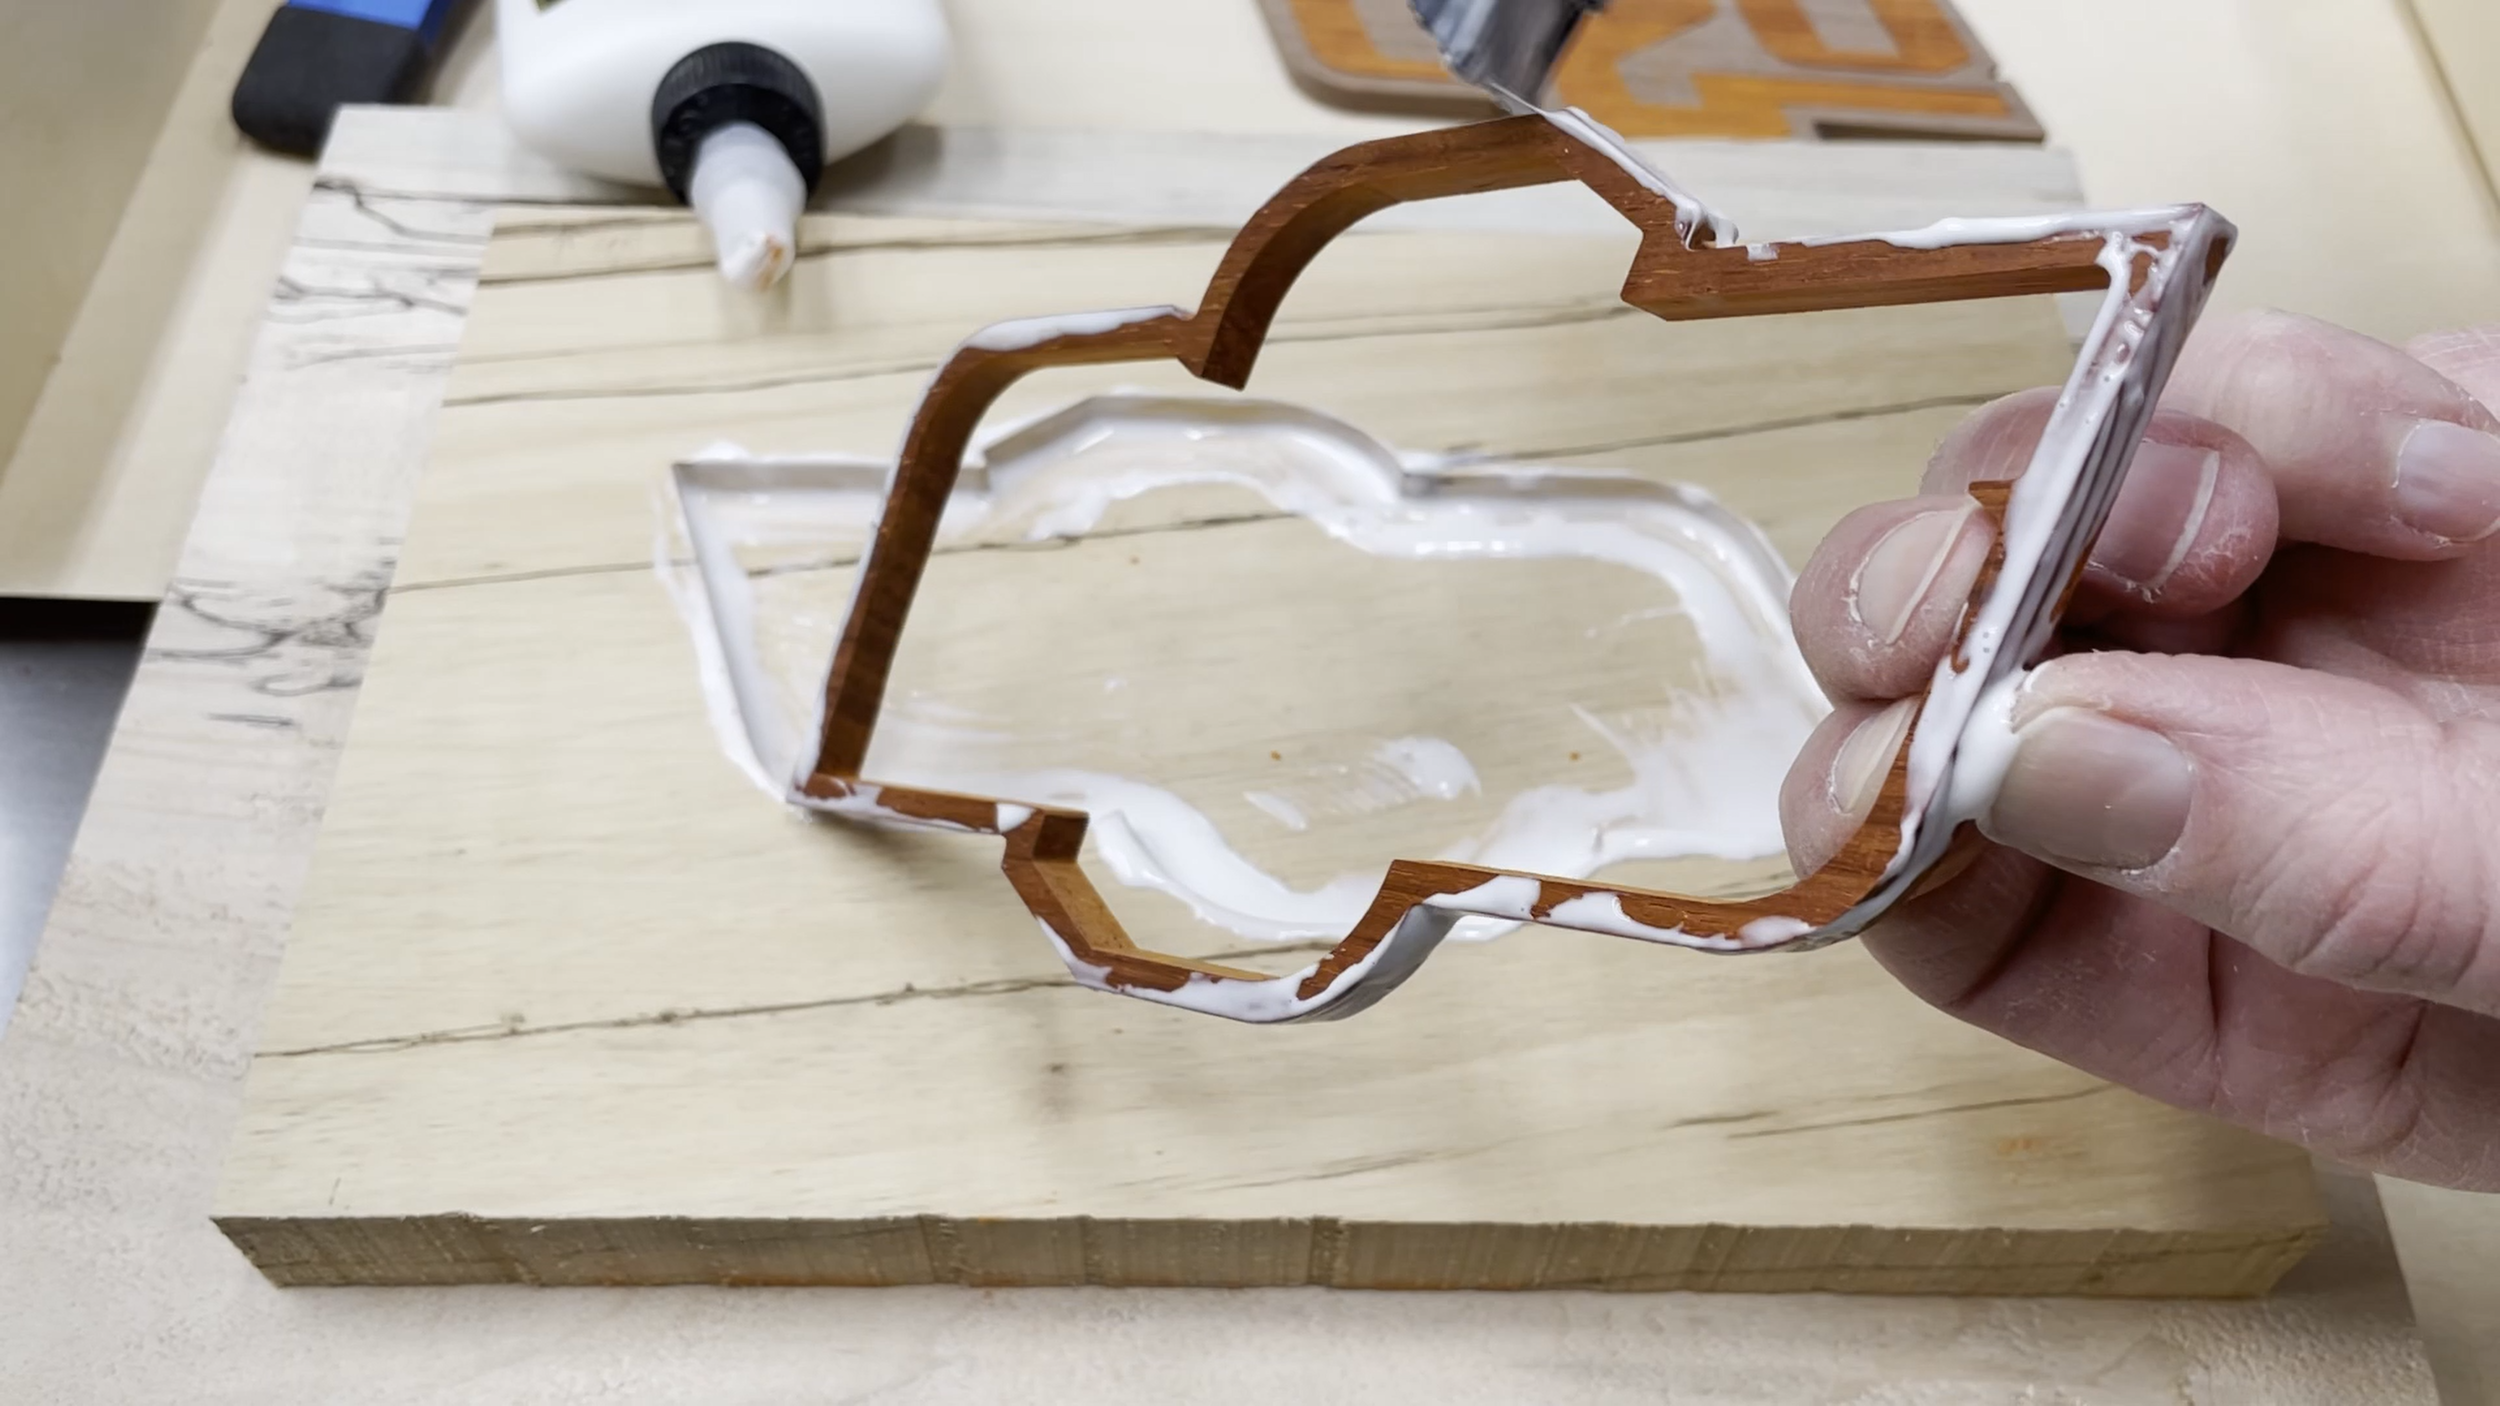
I test fit the pieces together before I glued them into place in the zebrawood. I wanted to make sure they went together without needing too much force.
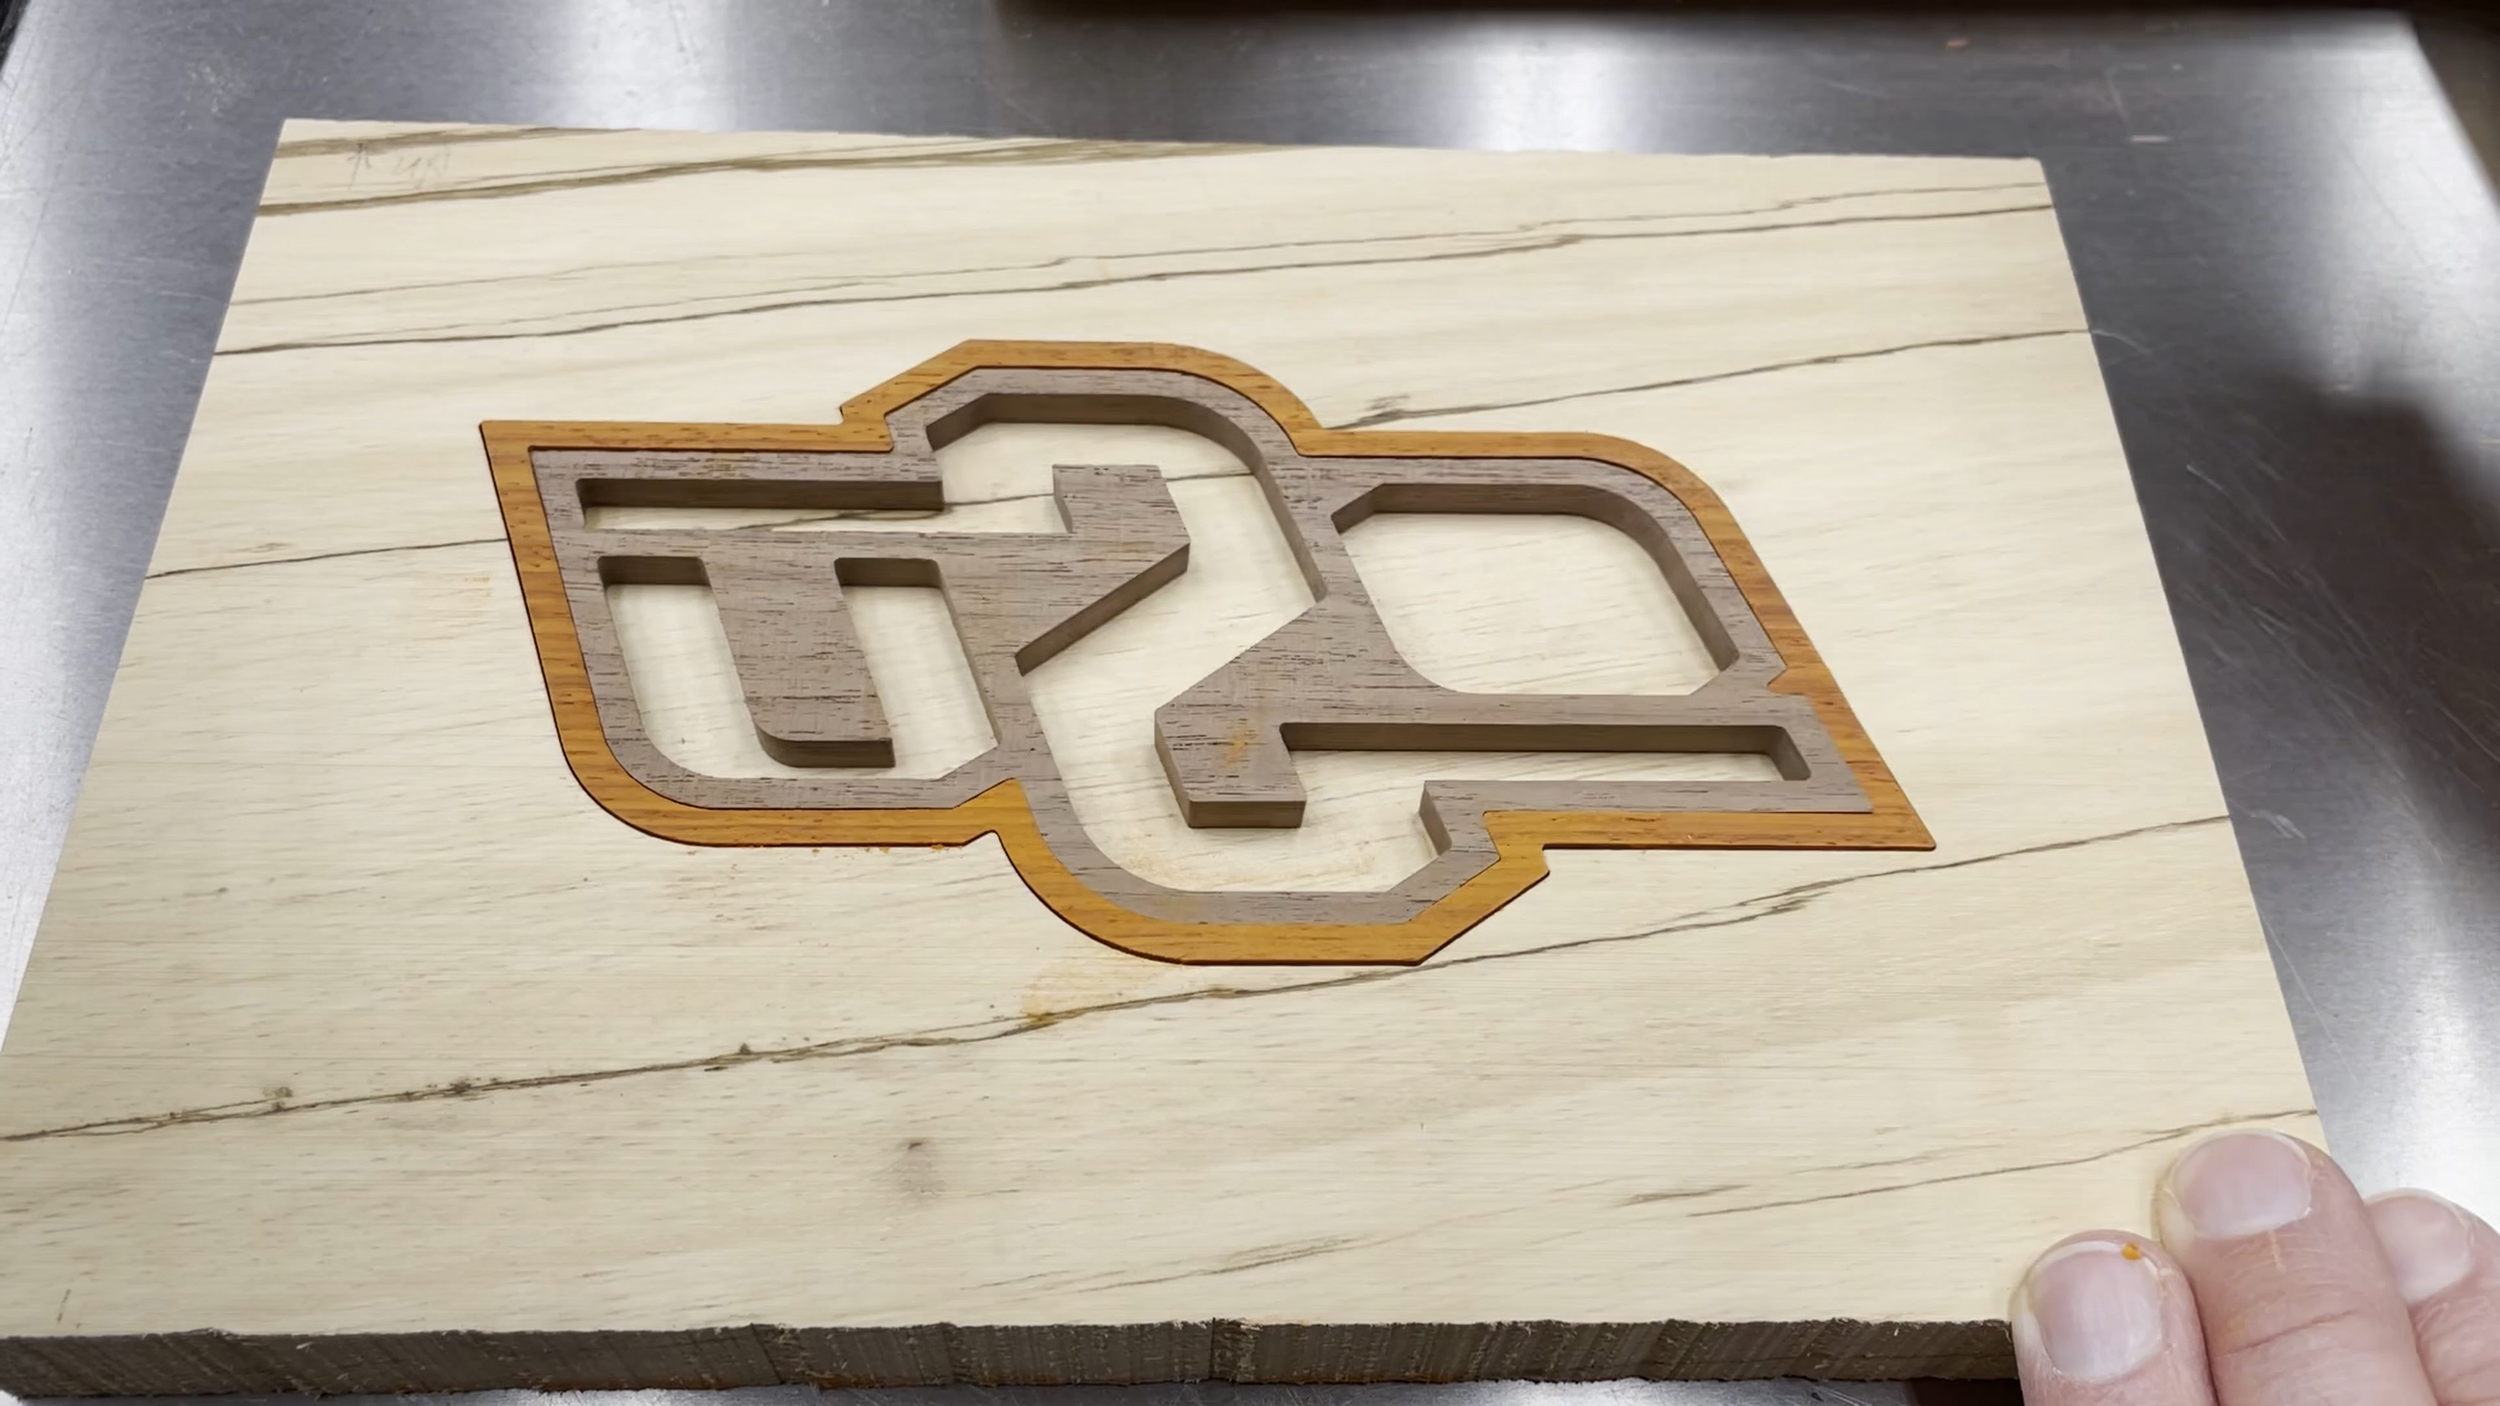
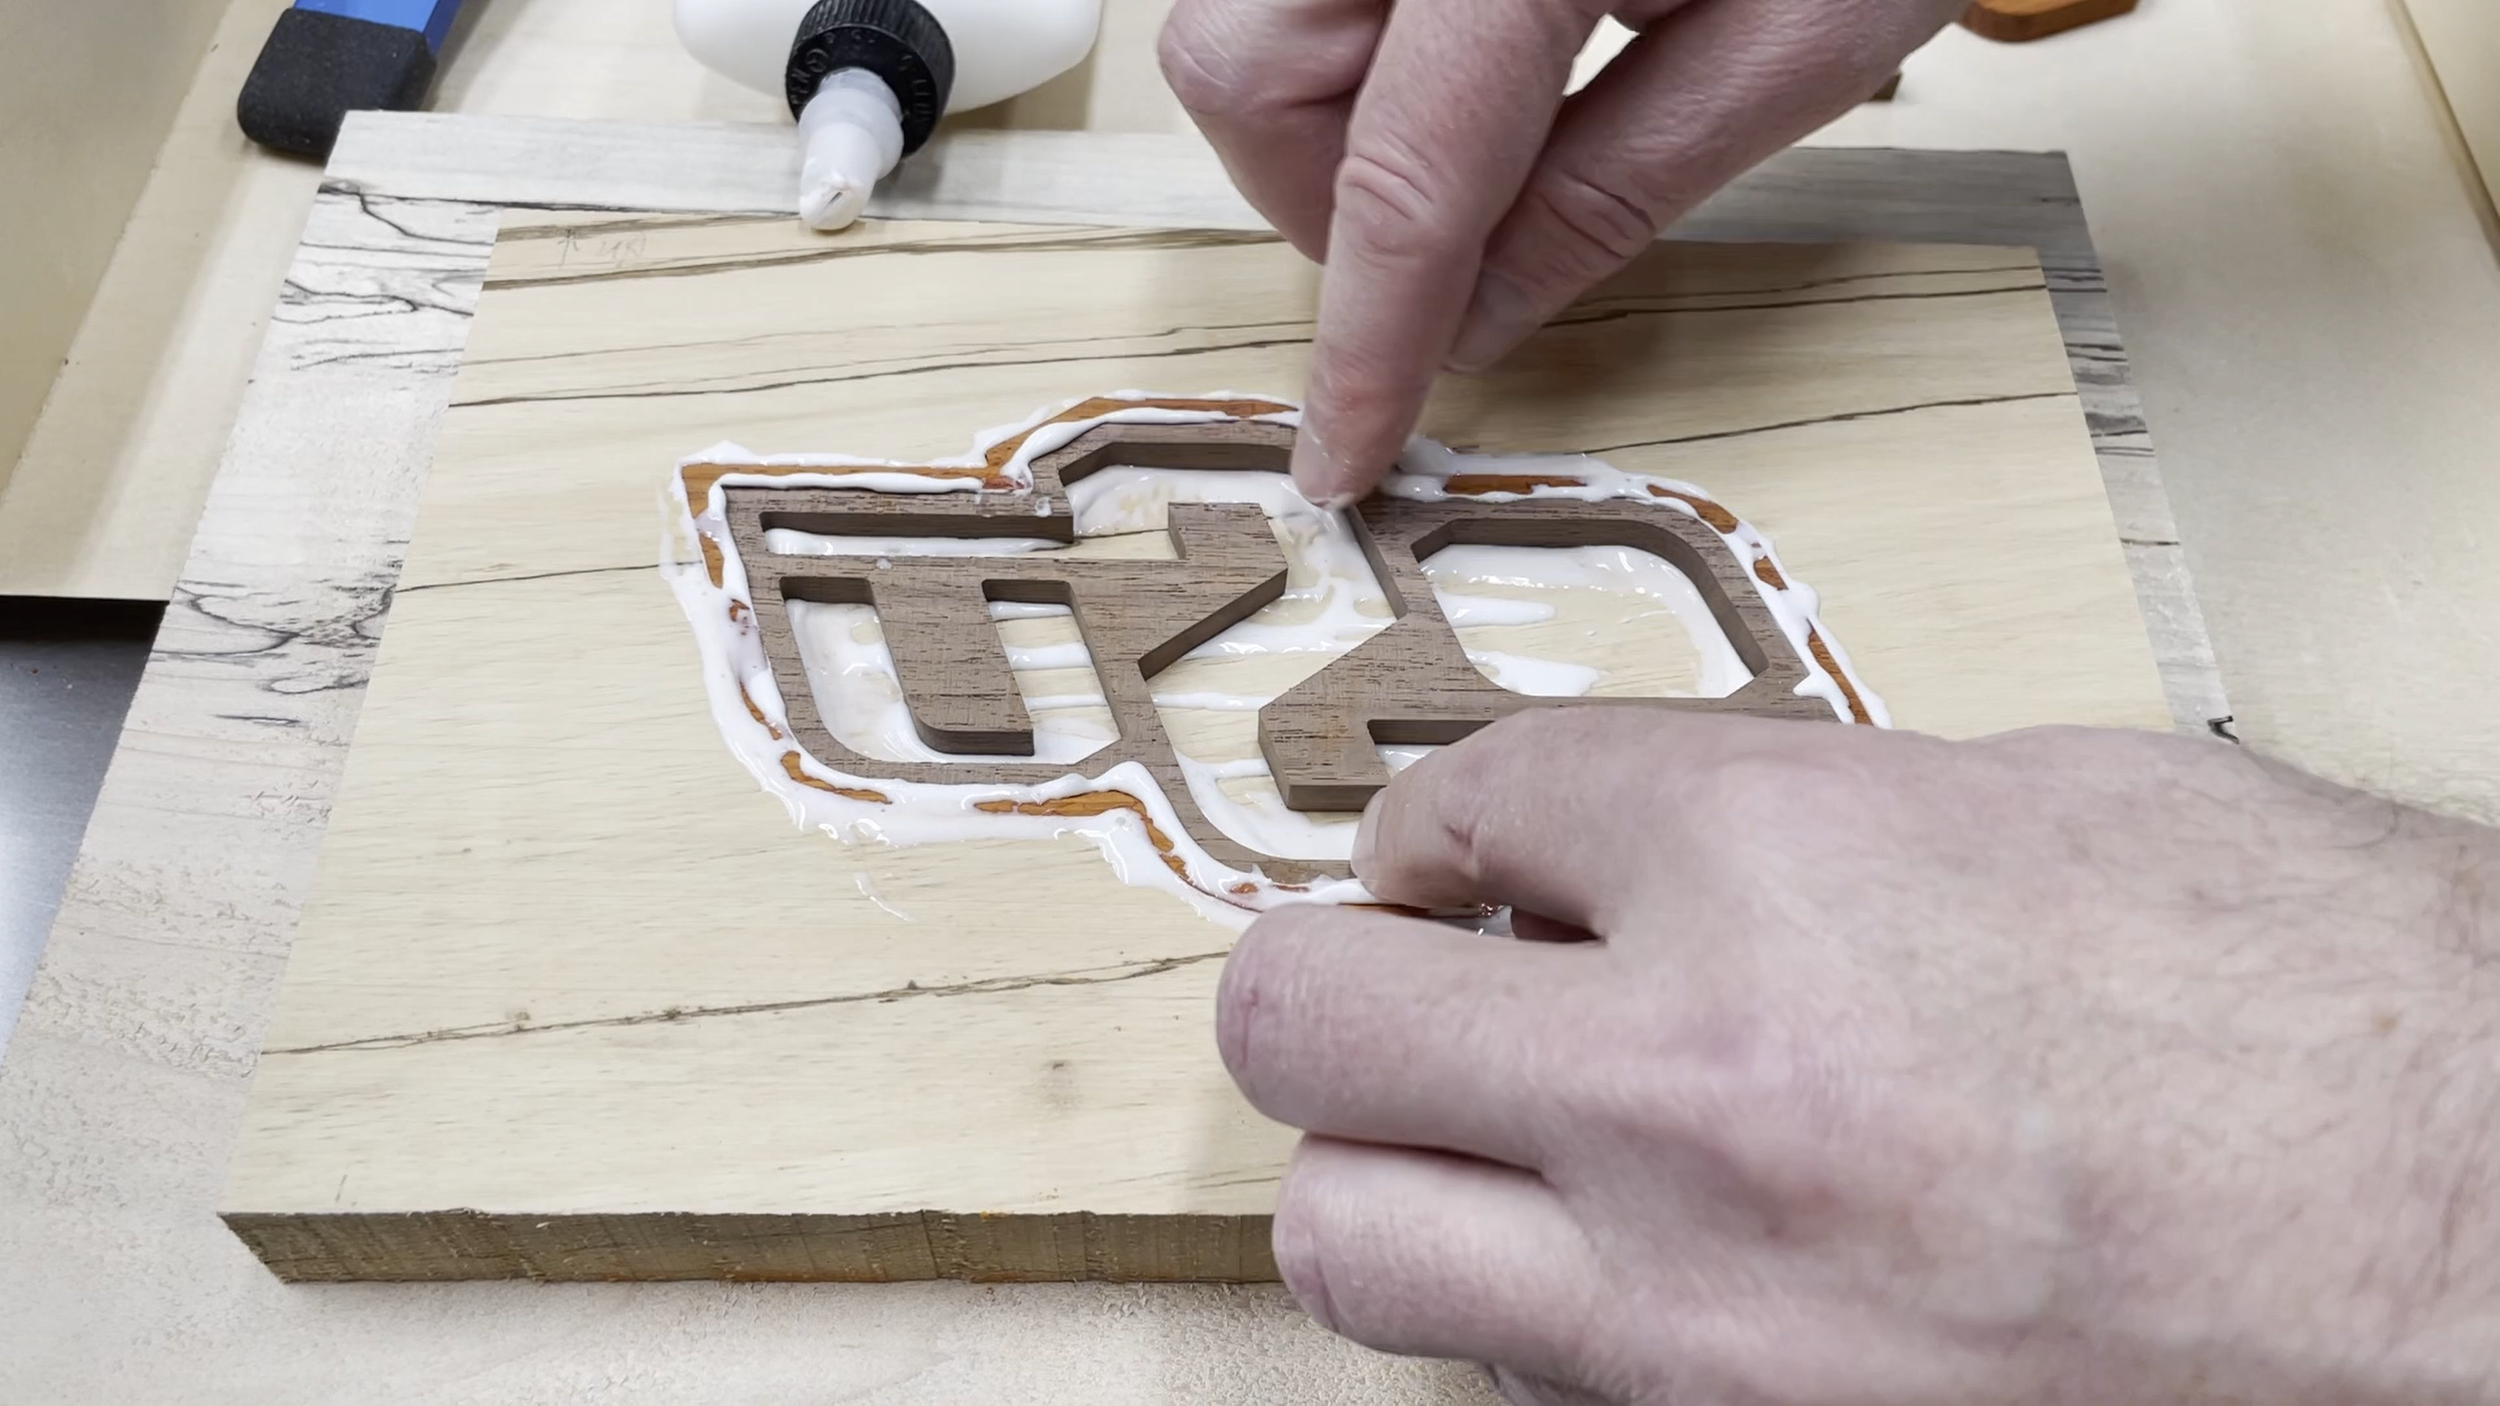
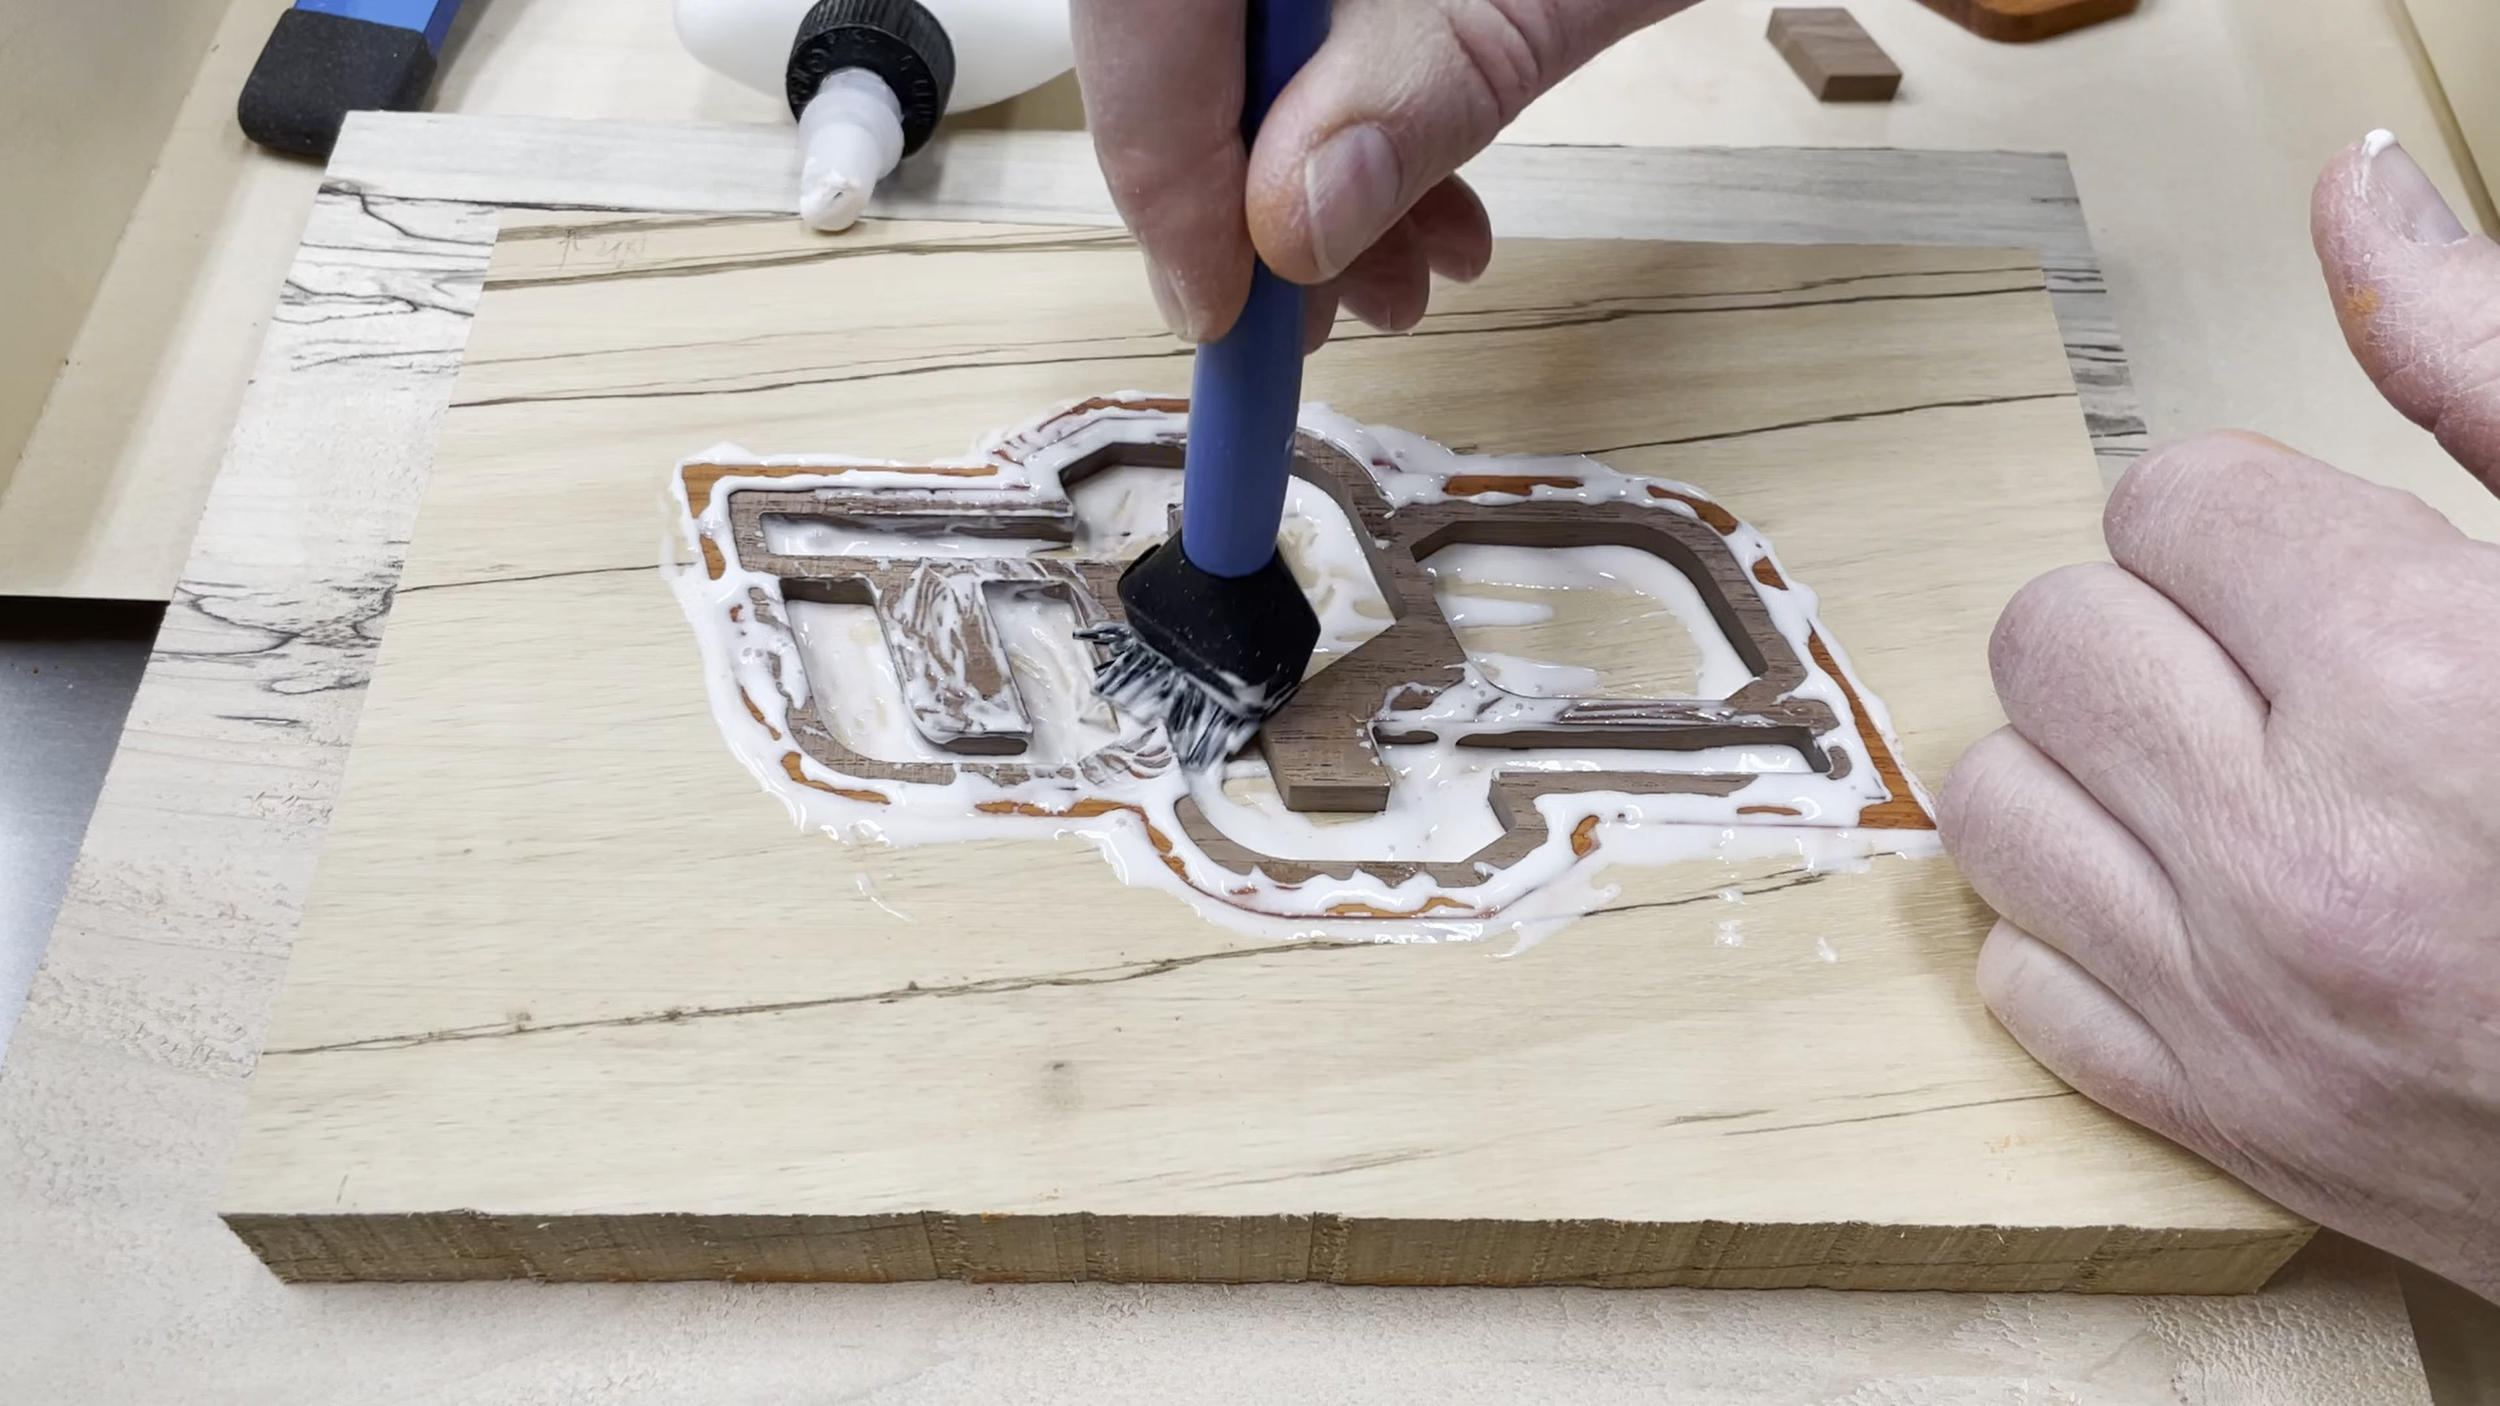
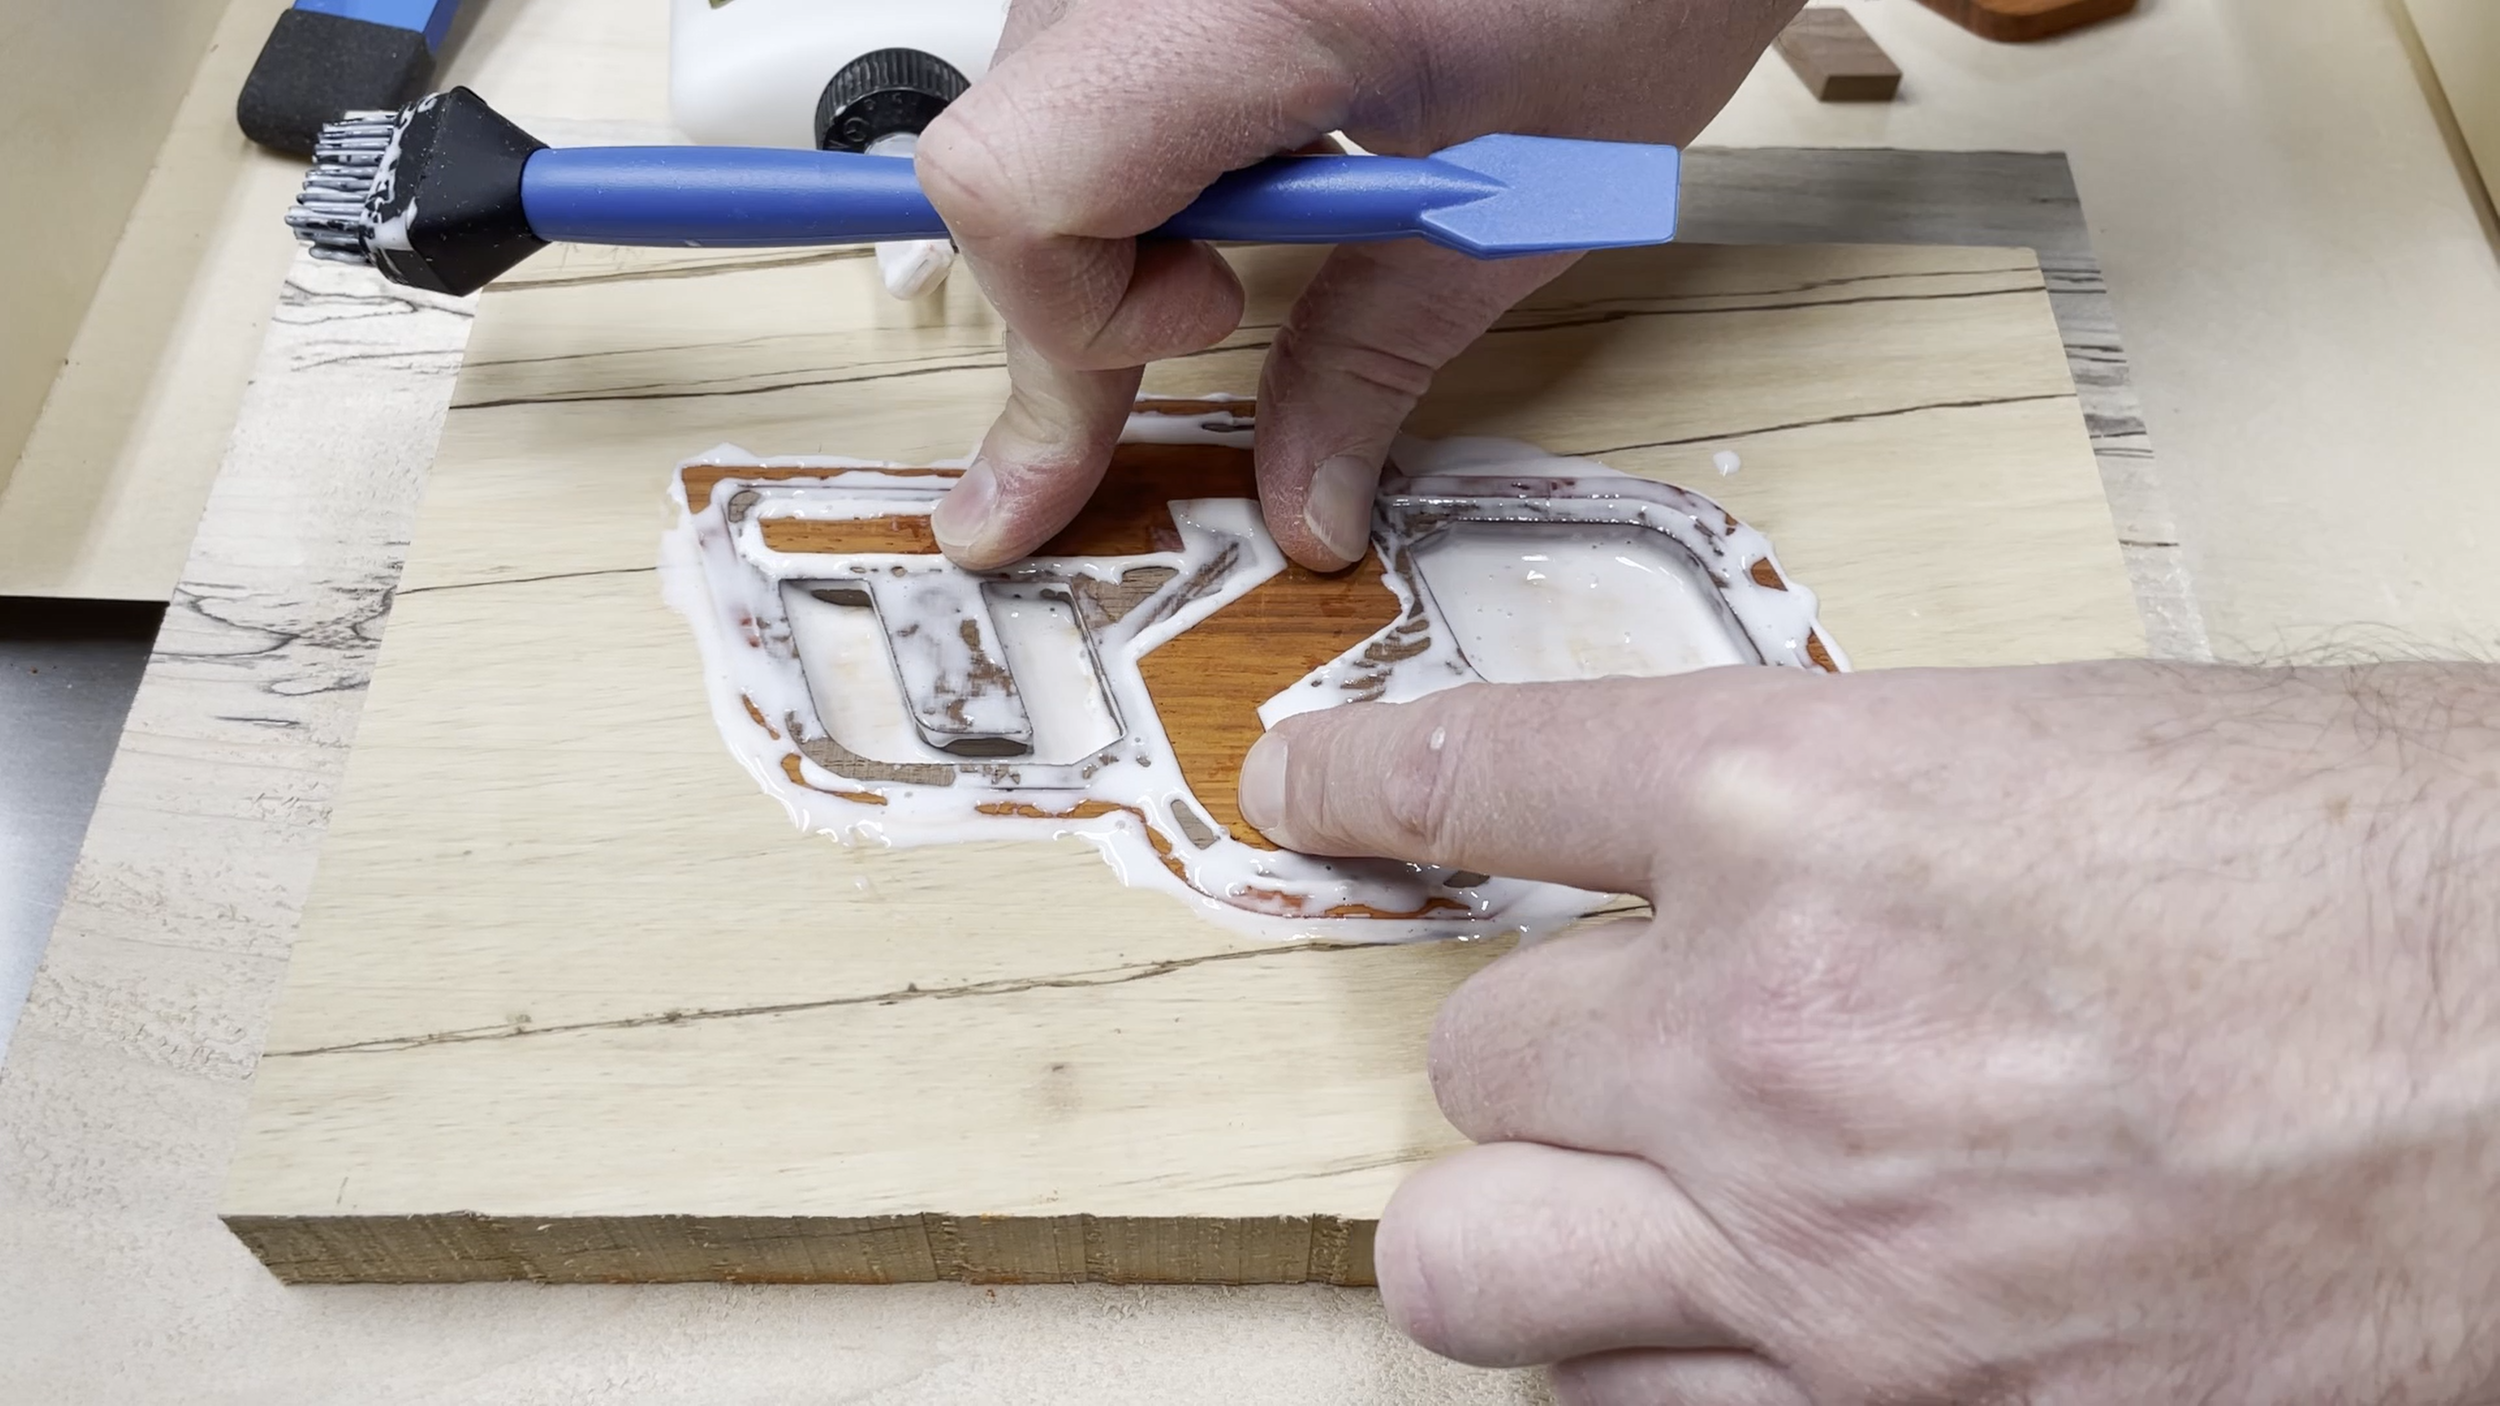
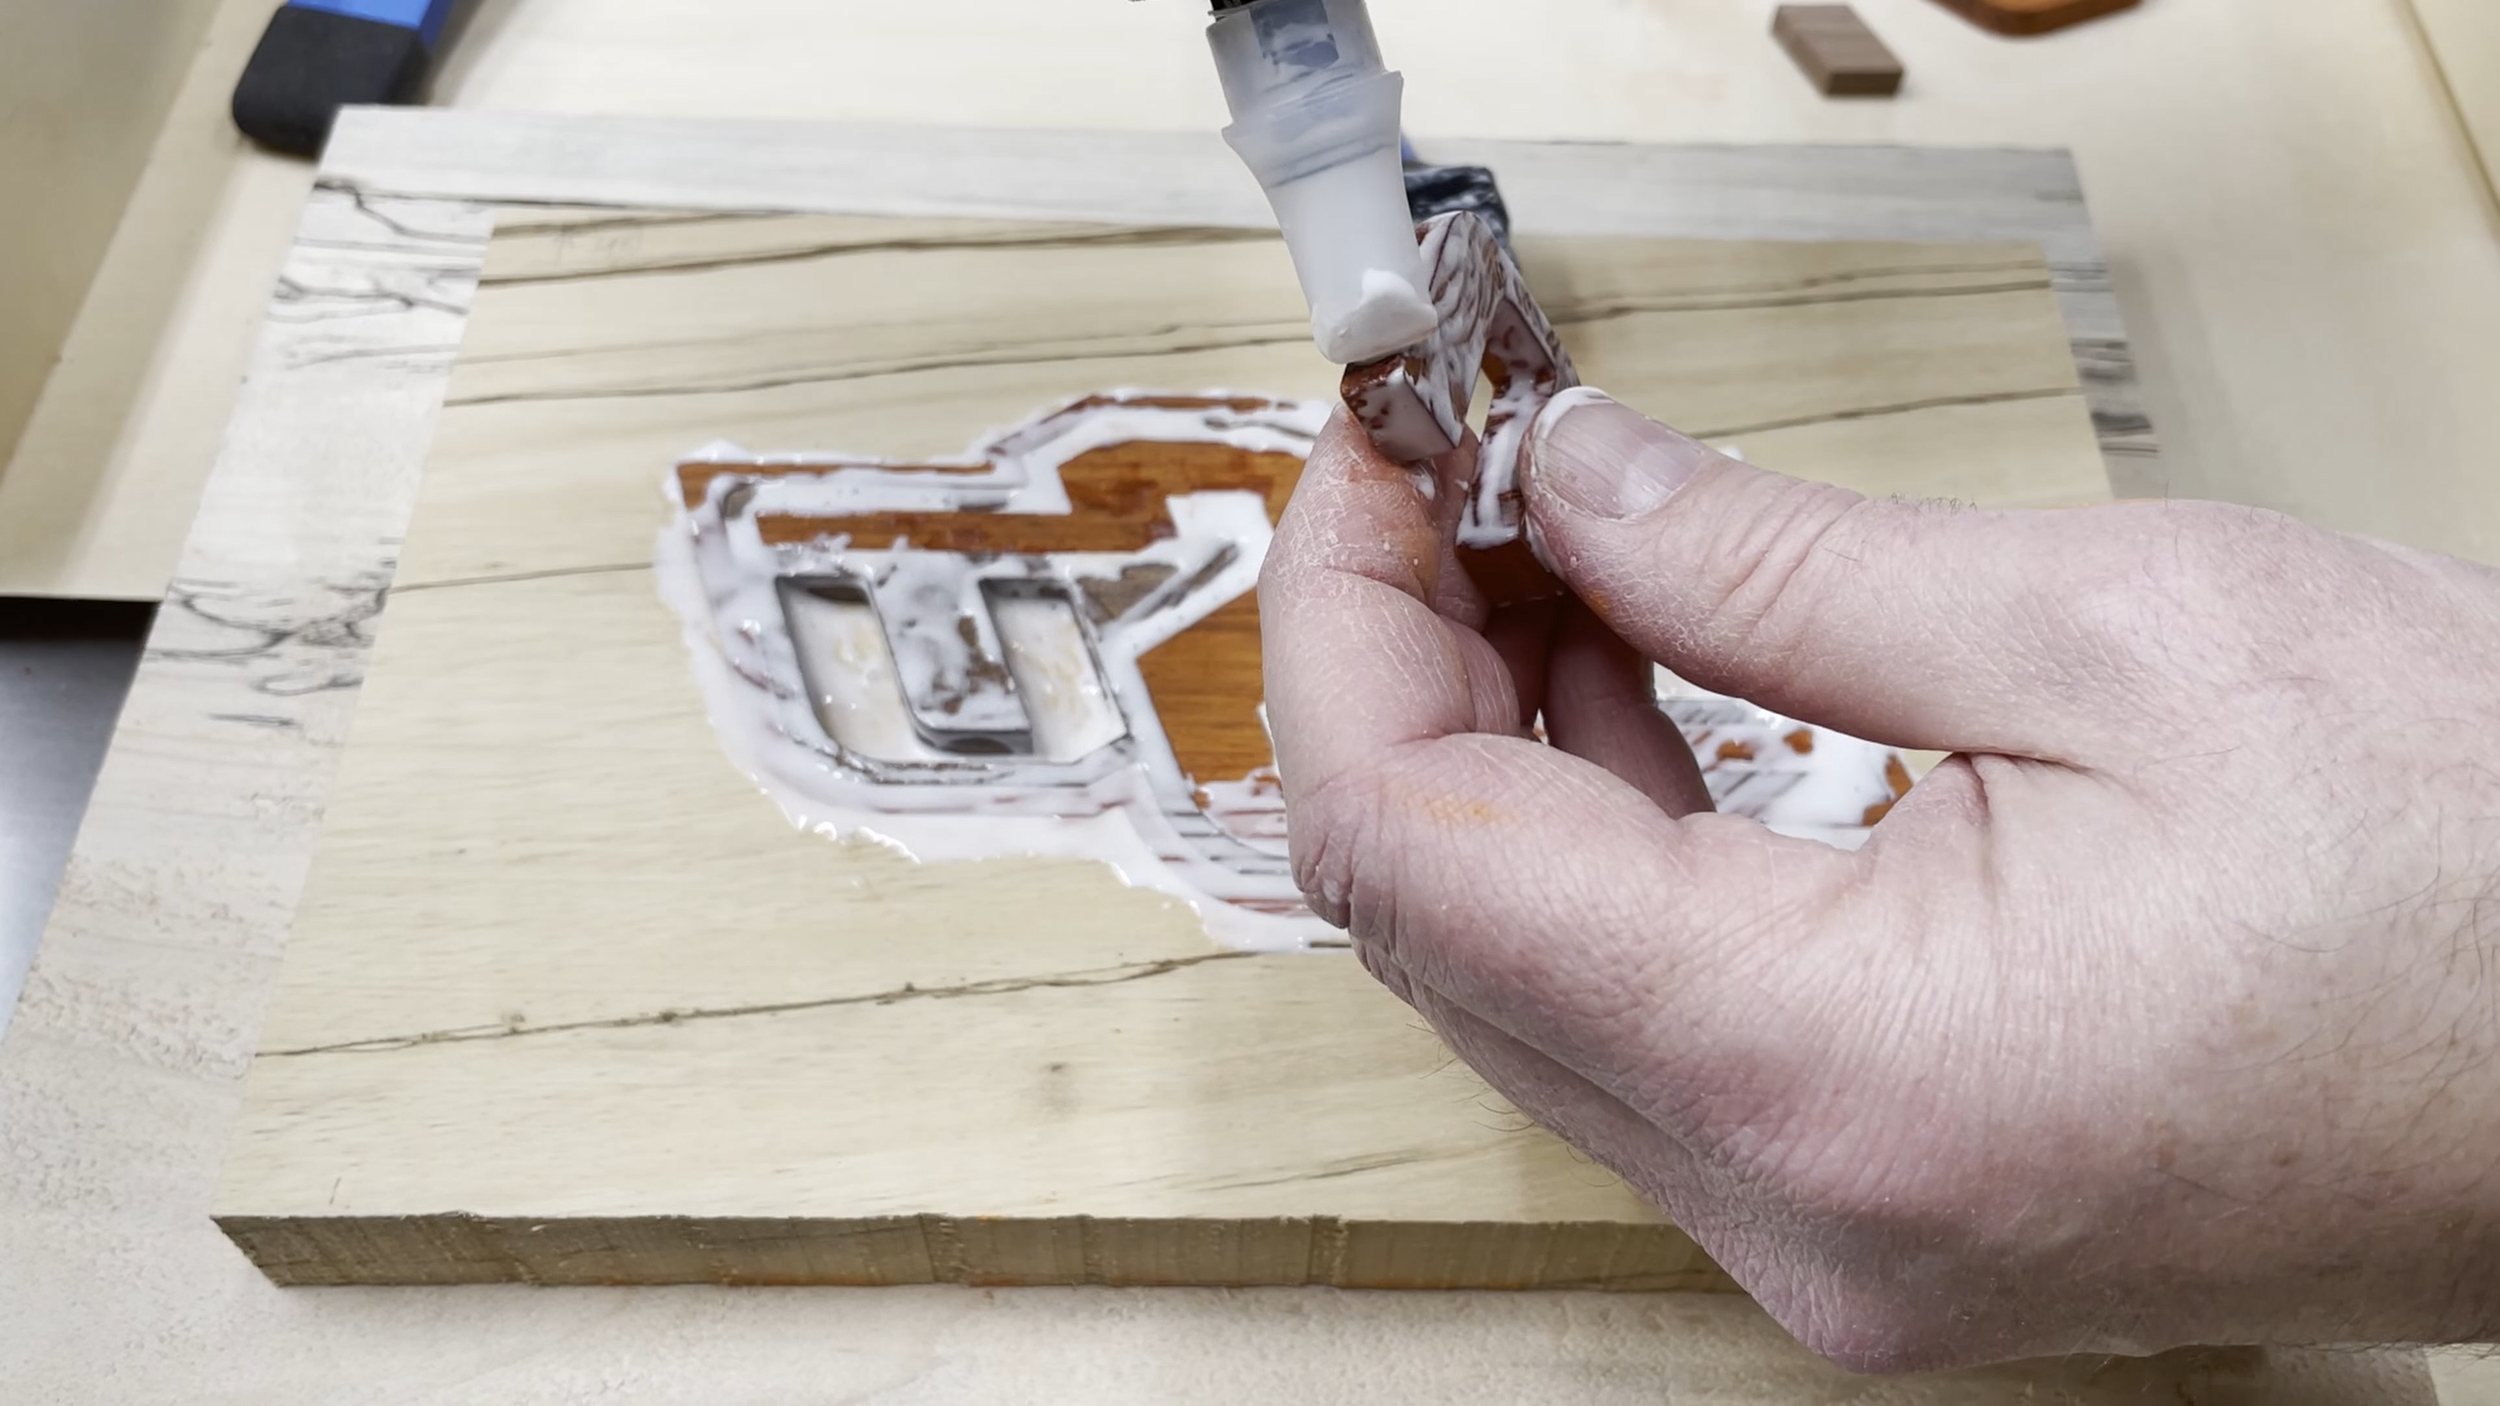
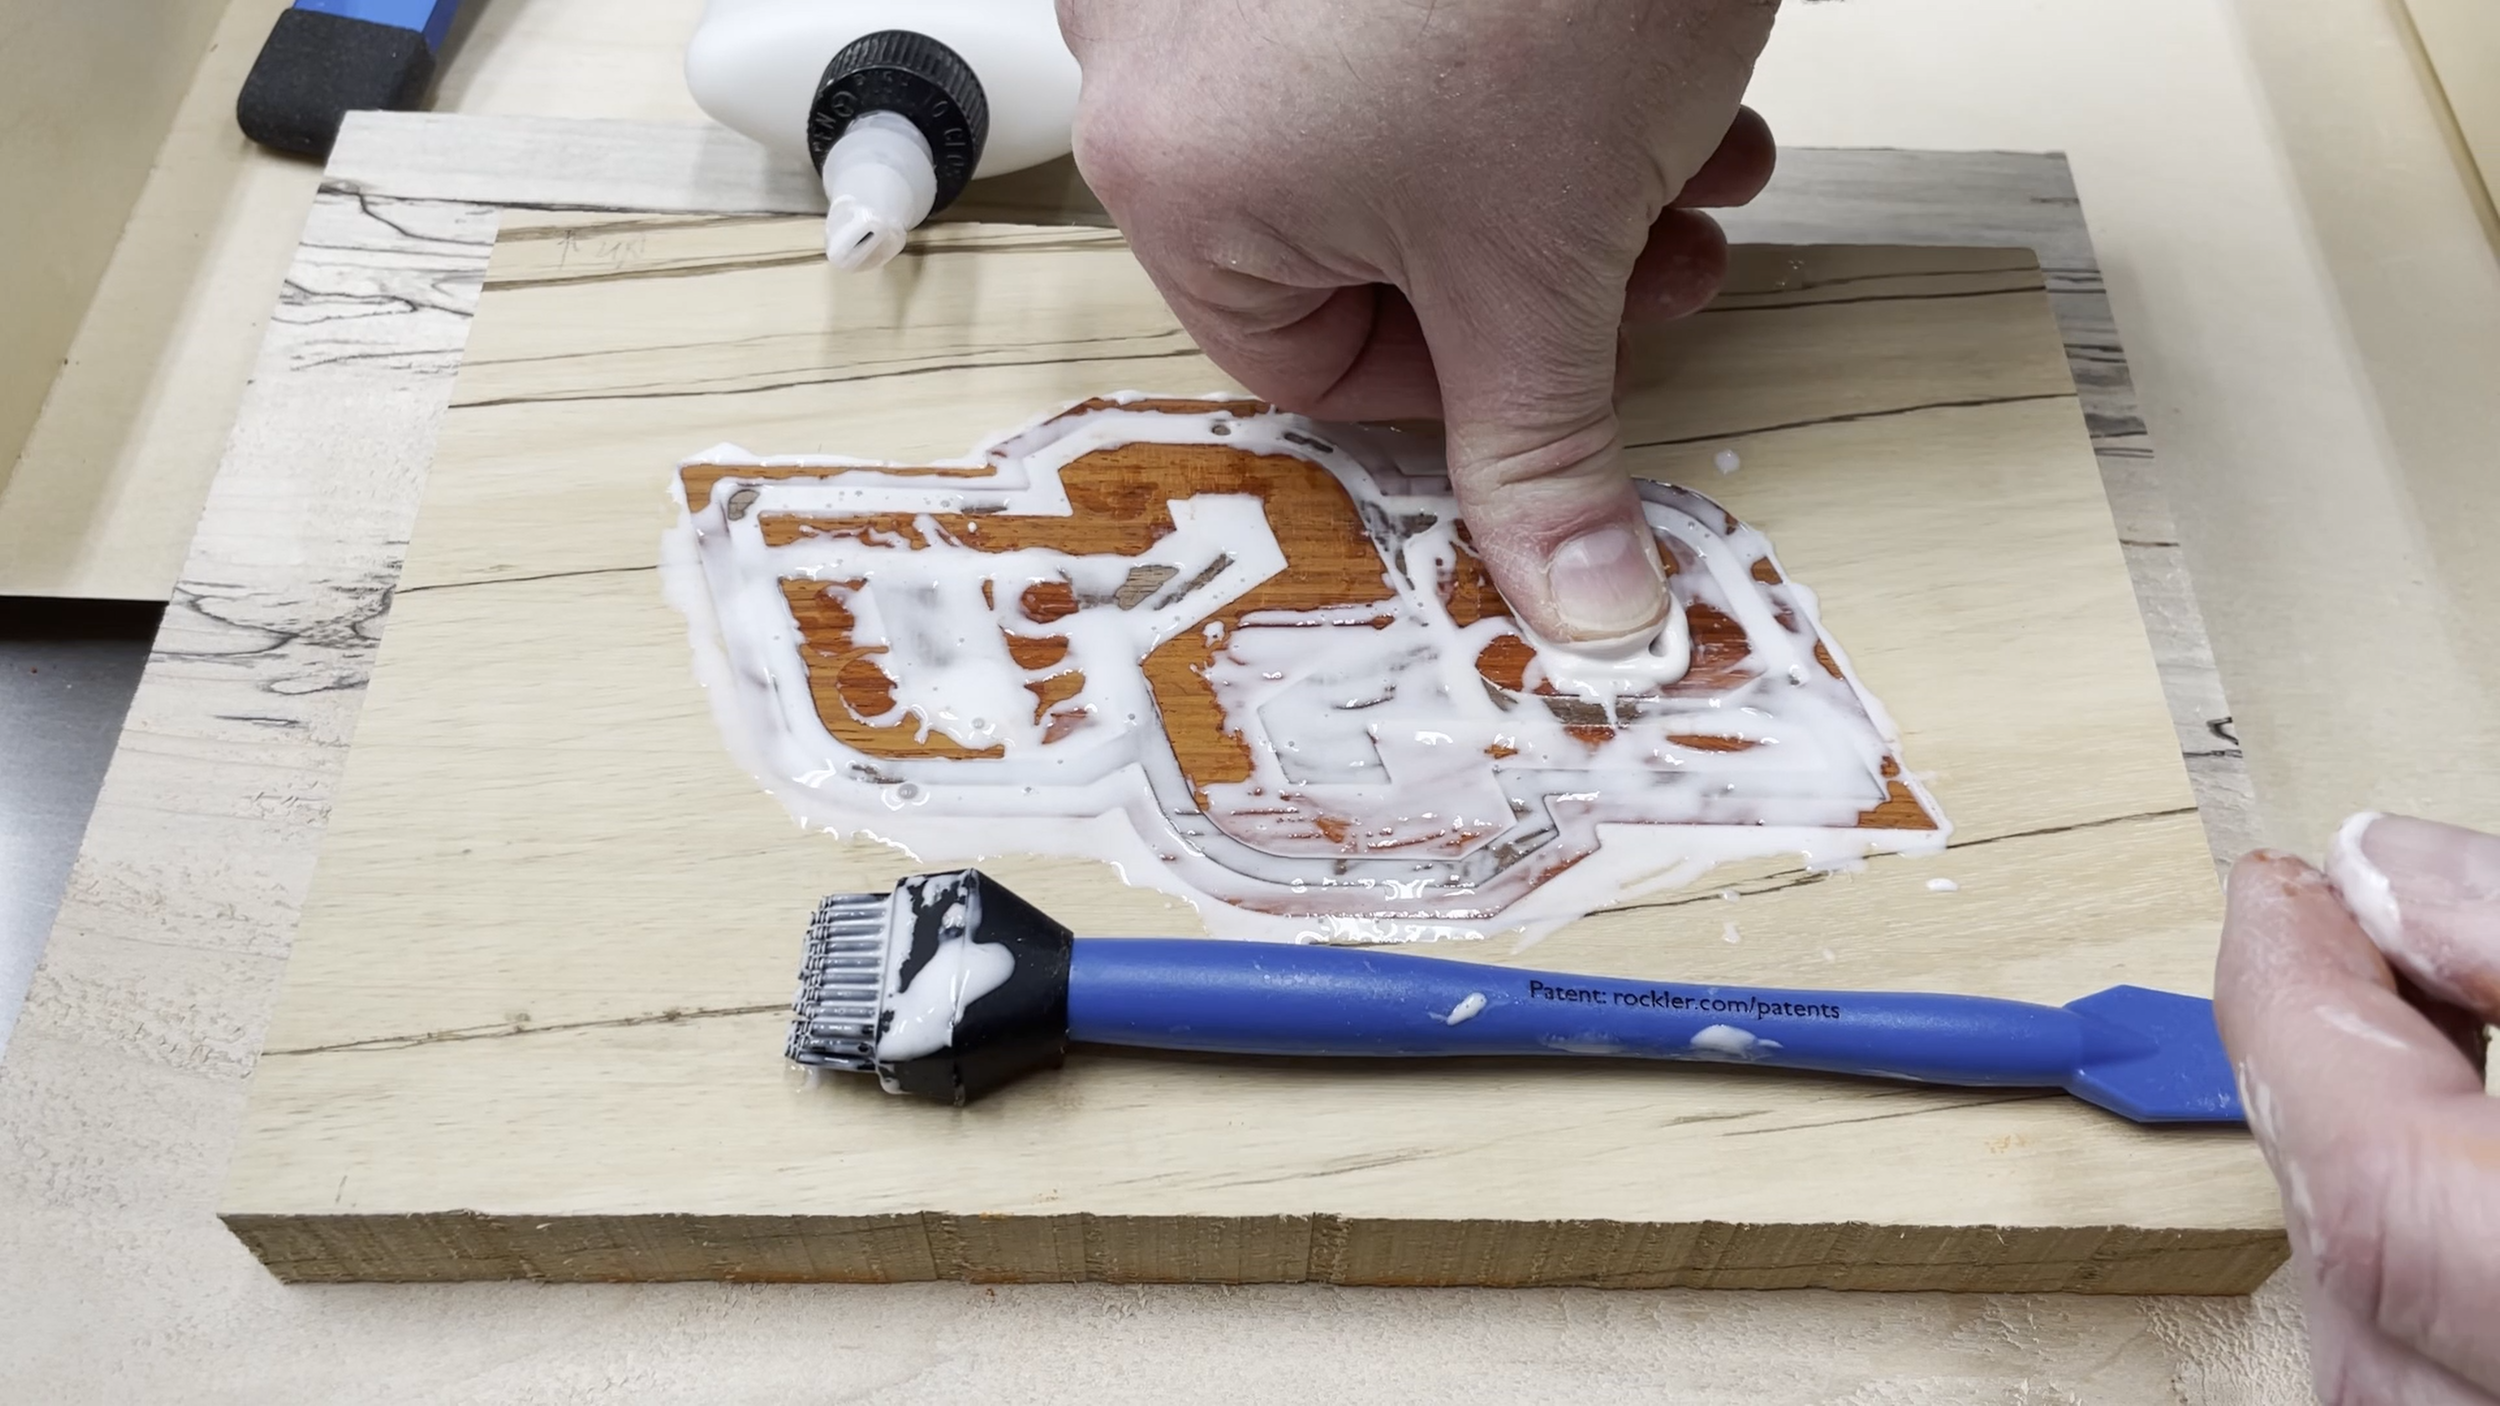
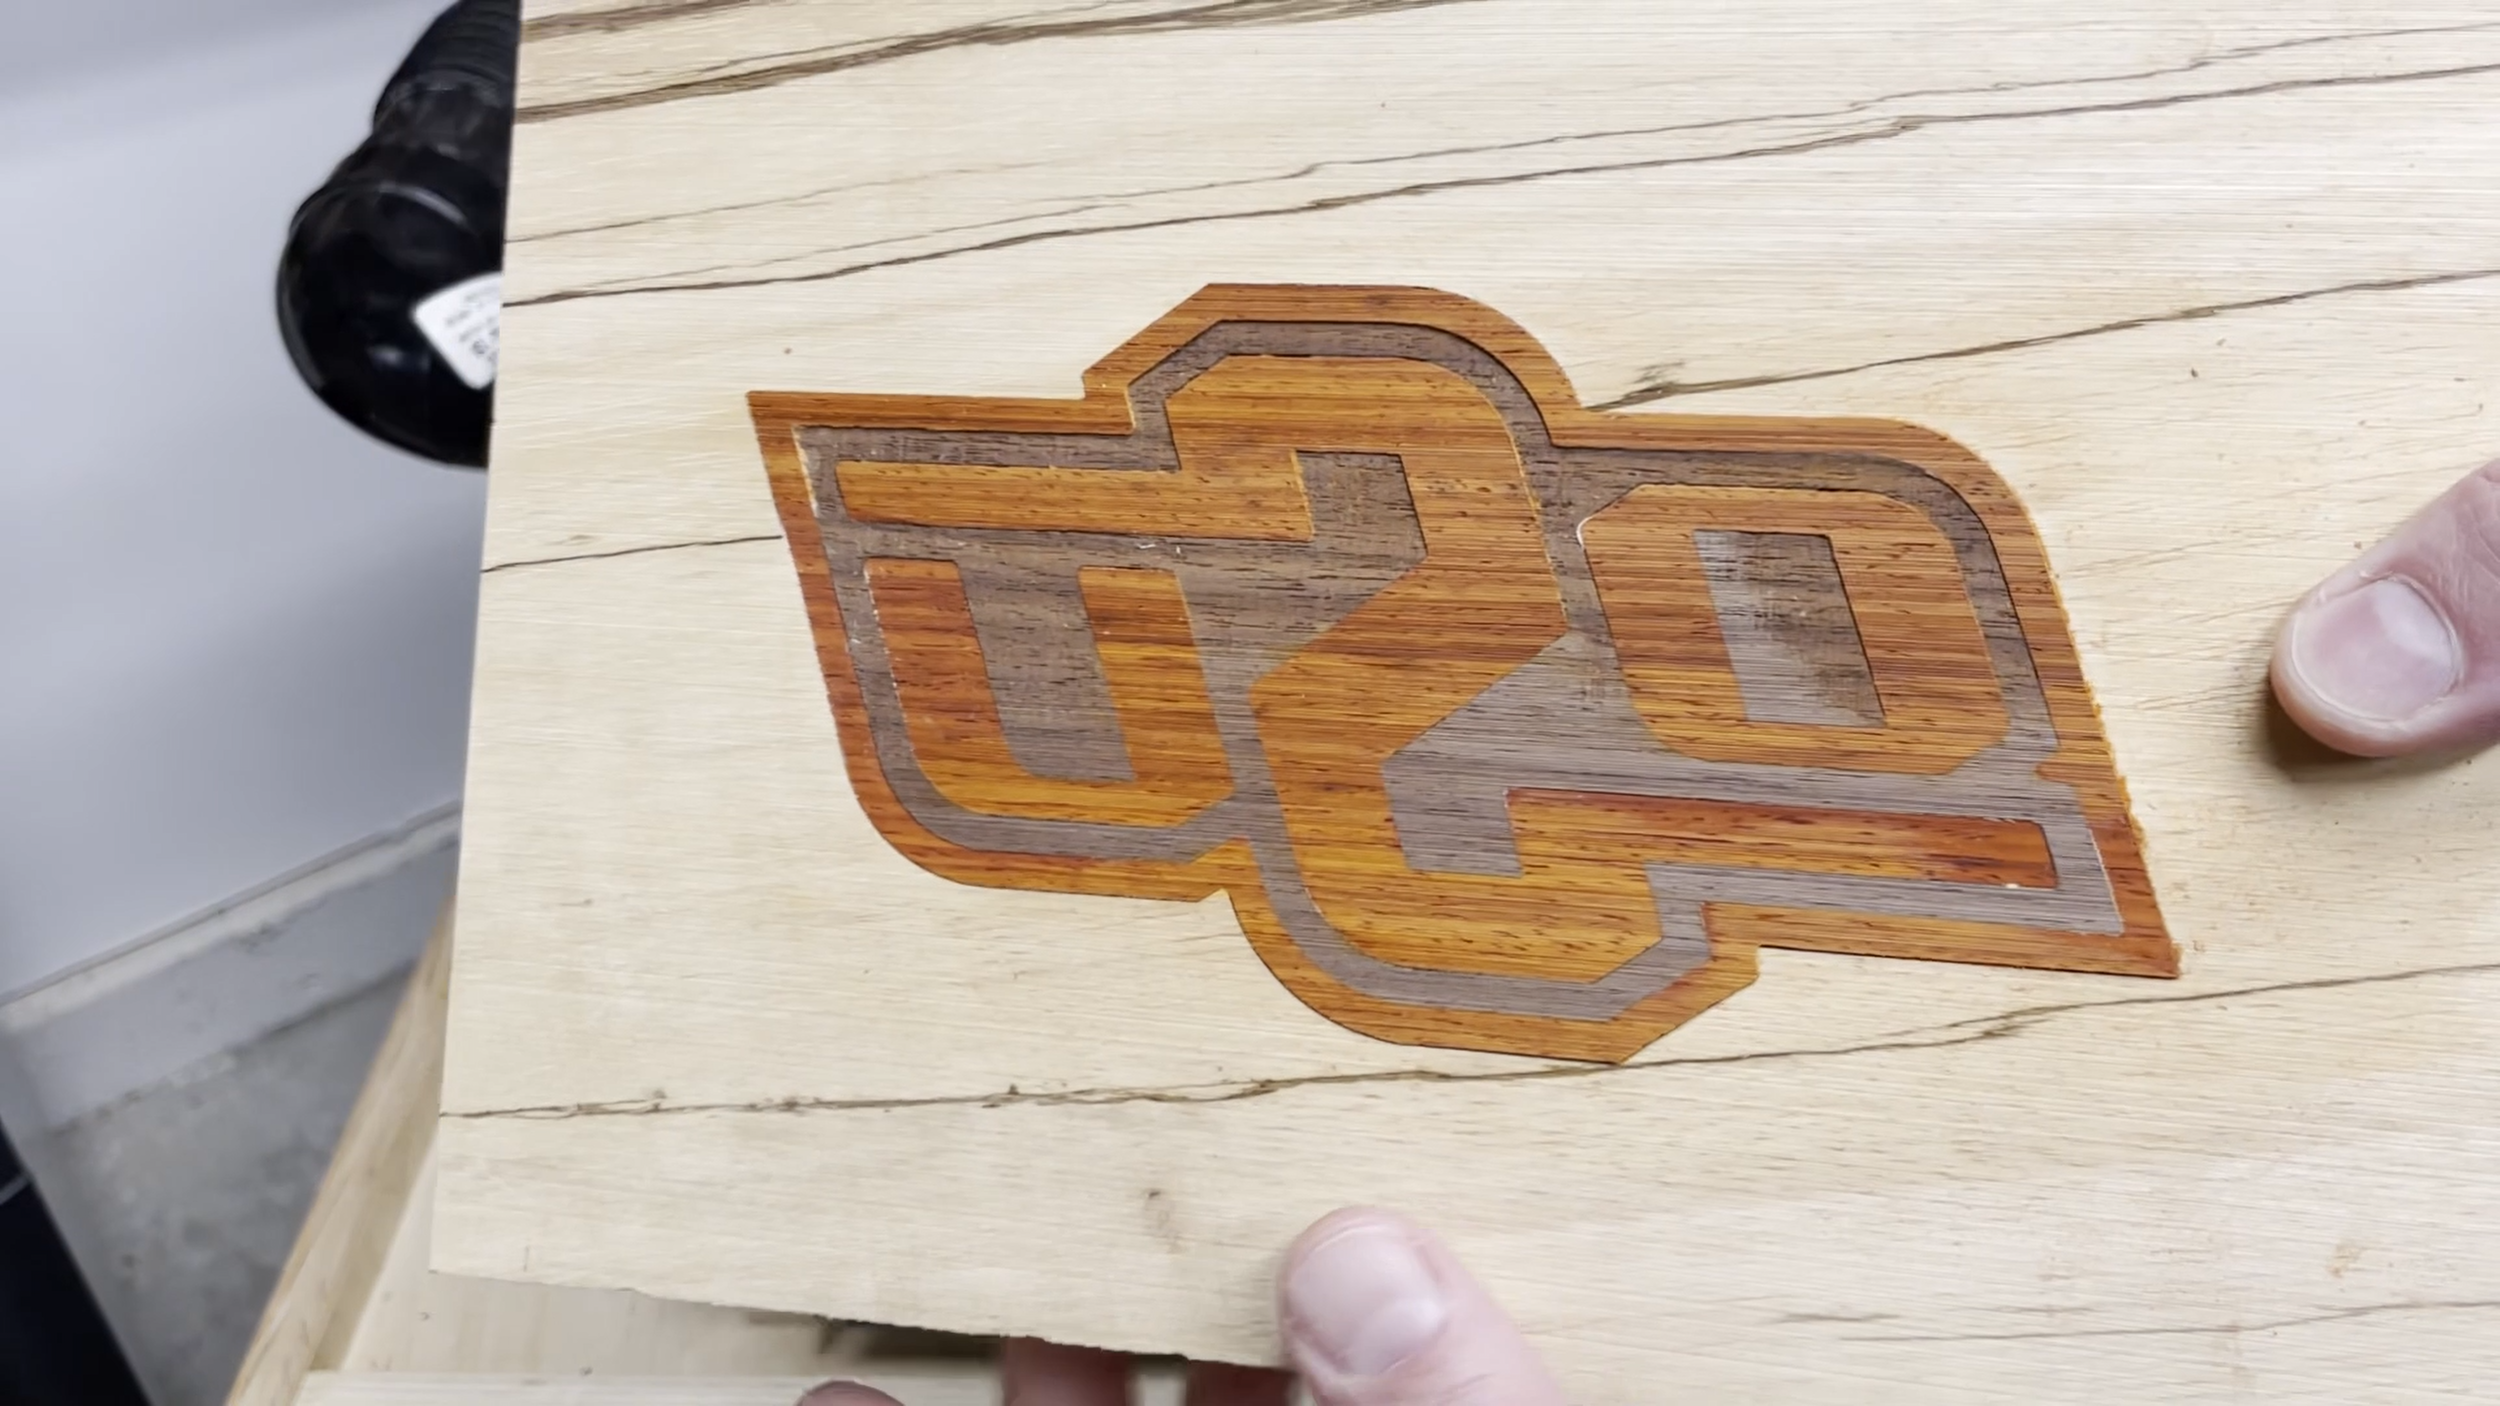
Next I spread plenty of wood glue into the original pocket I cut in the zebrawood and then started placing the logo pieces from the outside in. This worked really well and all of the pieces went into place without issue.
After all of the pieces were glued in place I wiped the excess glue from the surface of the logo. I gave the glue up a day to set up fully before I moved on to the next step.
Step 7: Flatten the Bottom and Top of the Tray
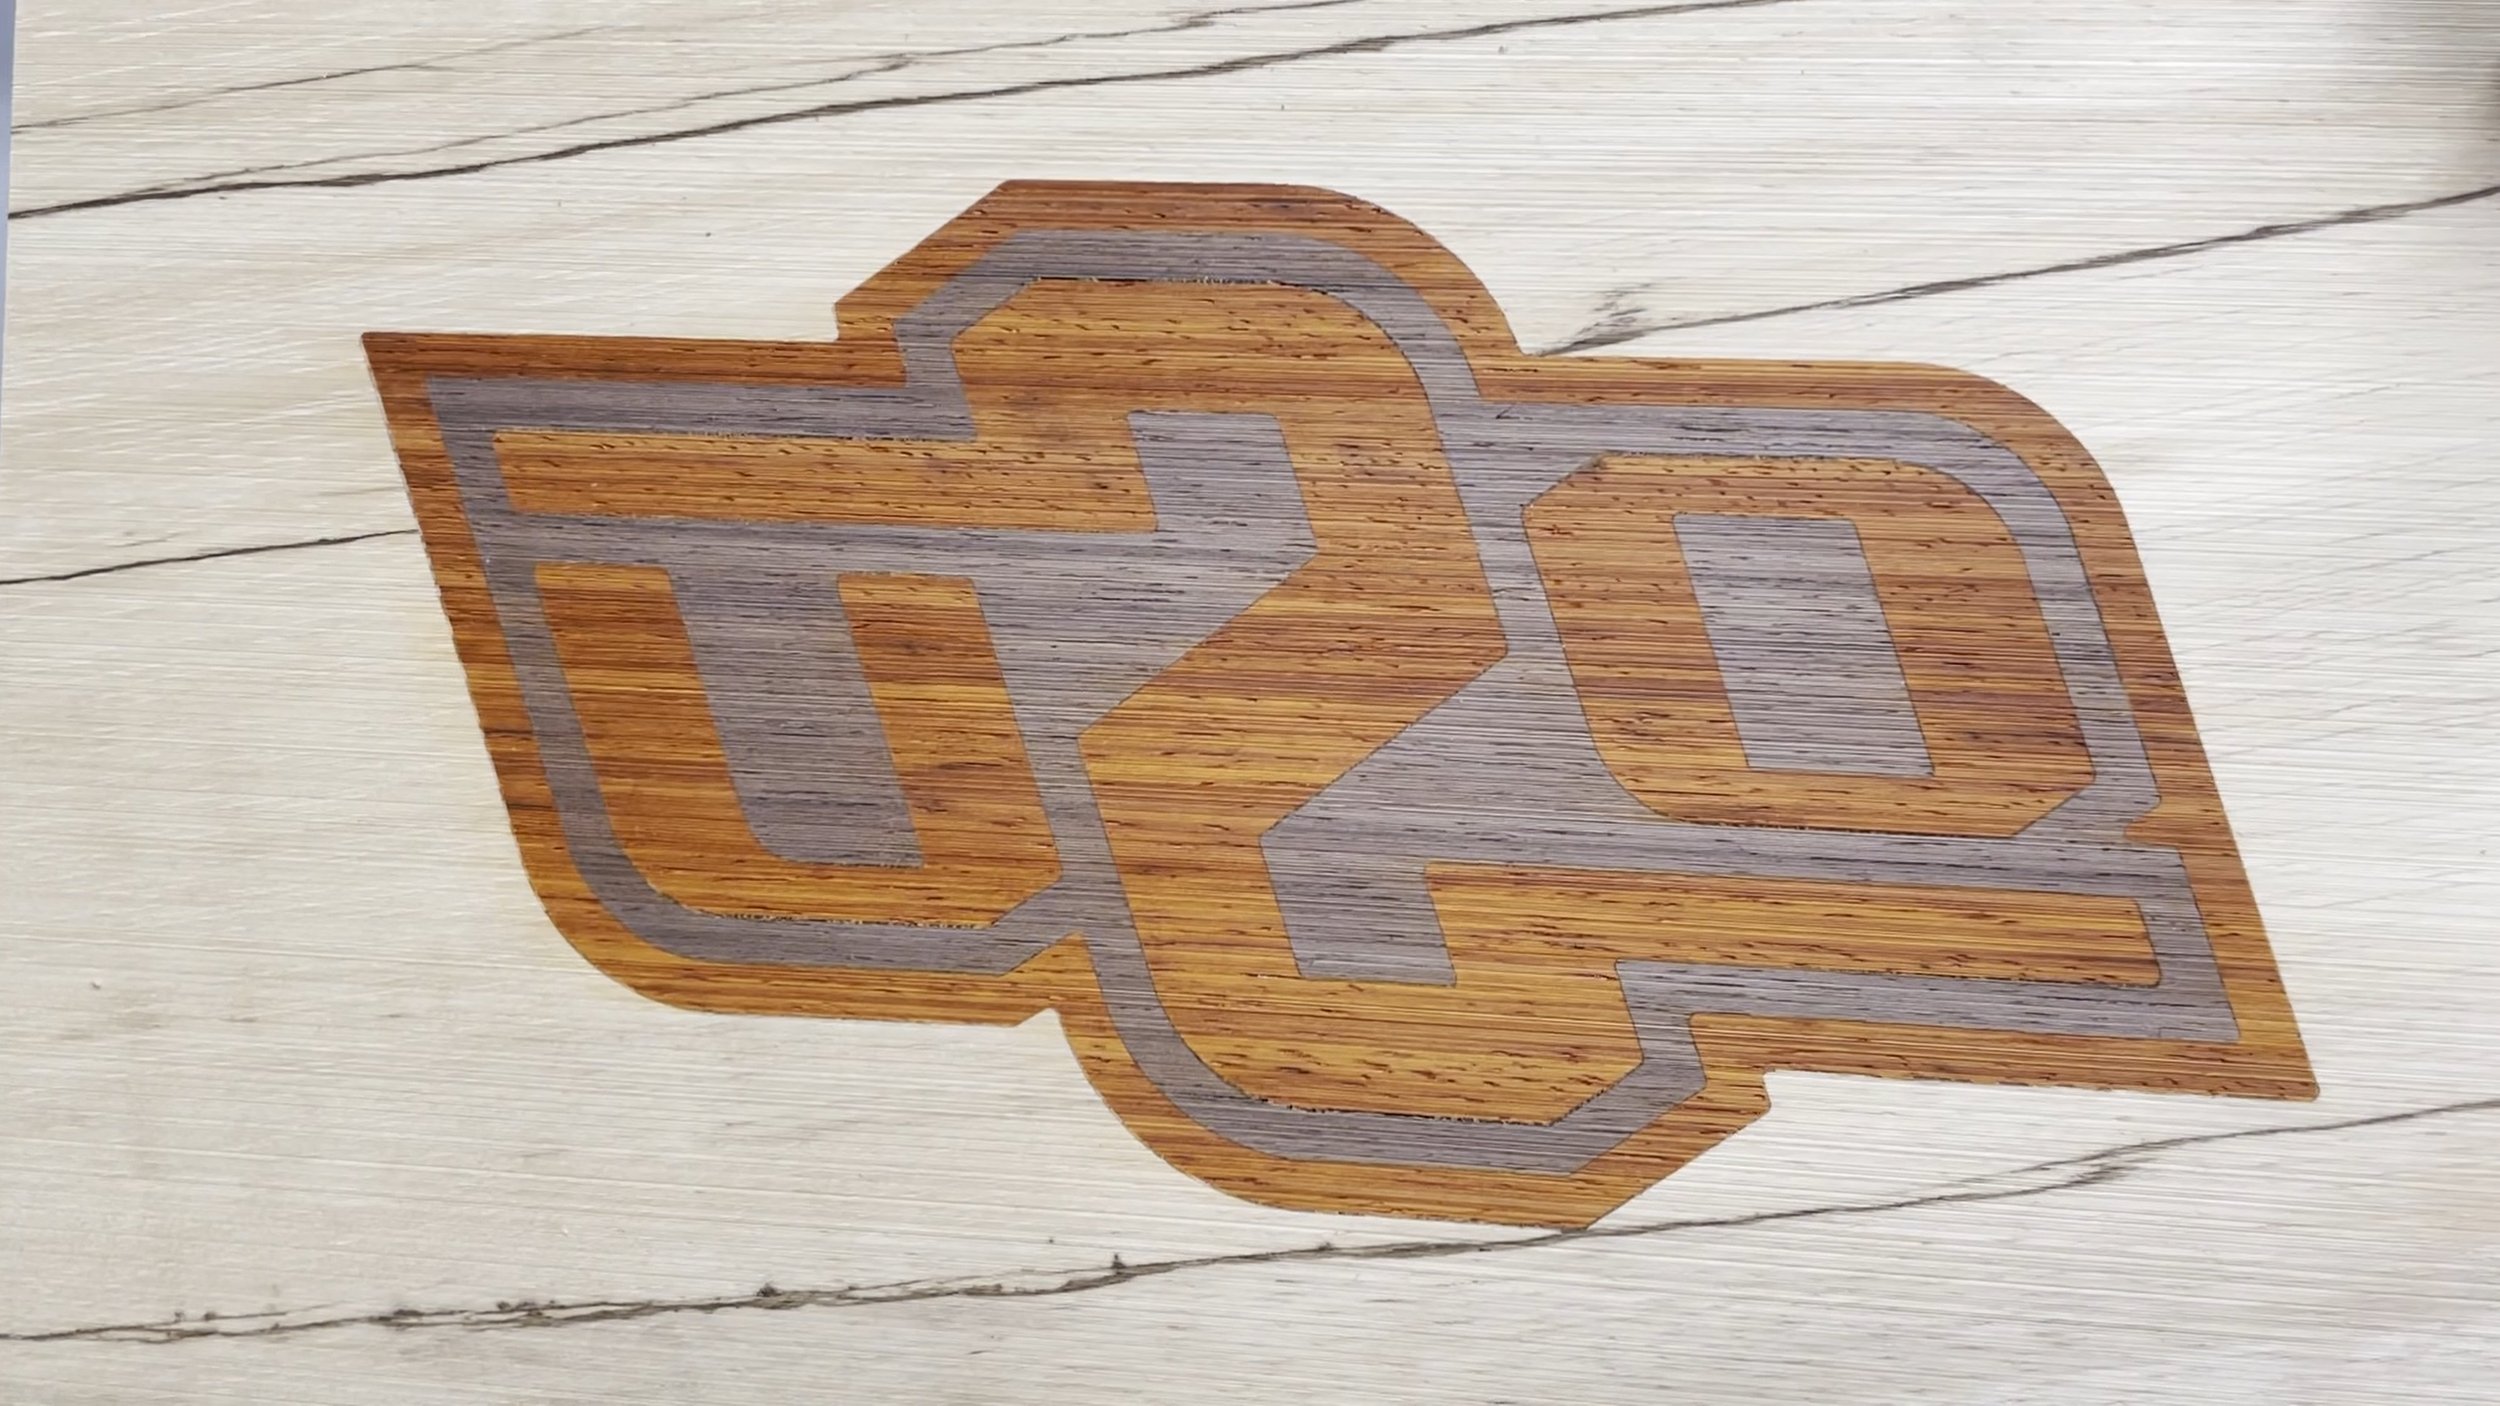
I flattened the bottom of the tray by running it through a drum sander. I ran it through taking very shallow passes and stopped as soon as I was able to take one complete layer off of the bottom of the logo. That way I could maximize the thickness of the logo on the bottom part of the tray. I wanted the bottom of the tray to have a minimum thickness of 1/4".
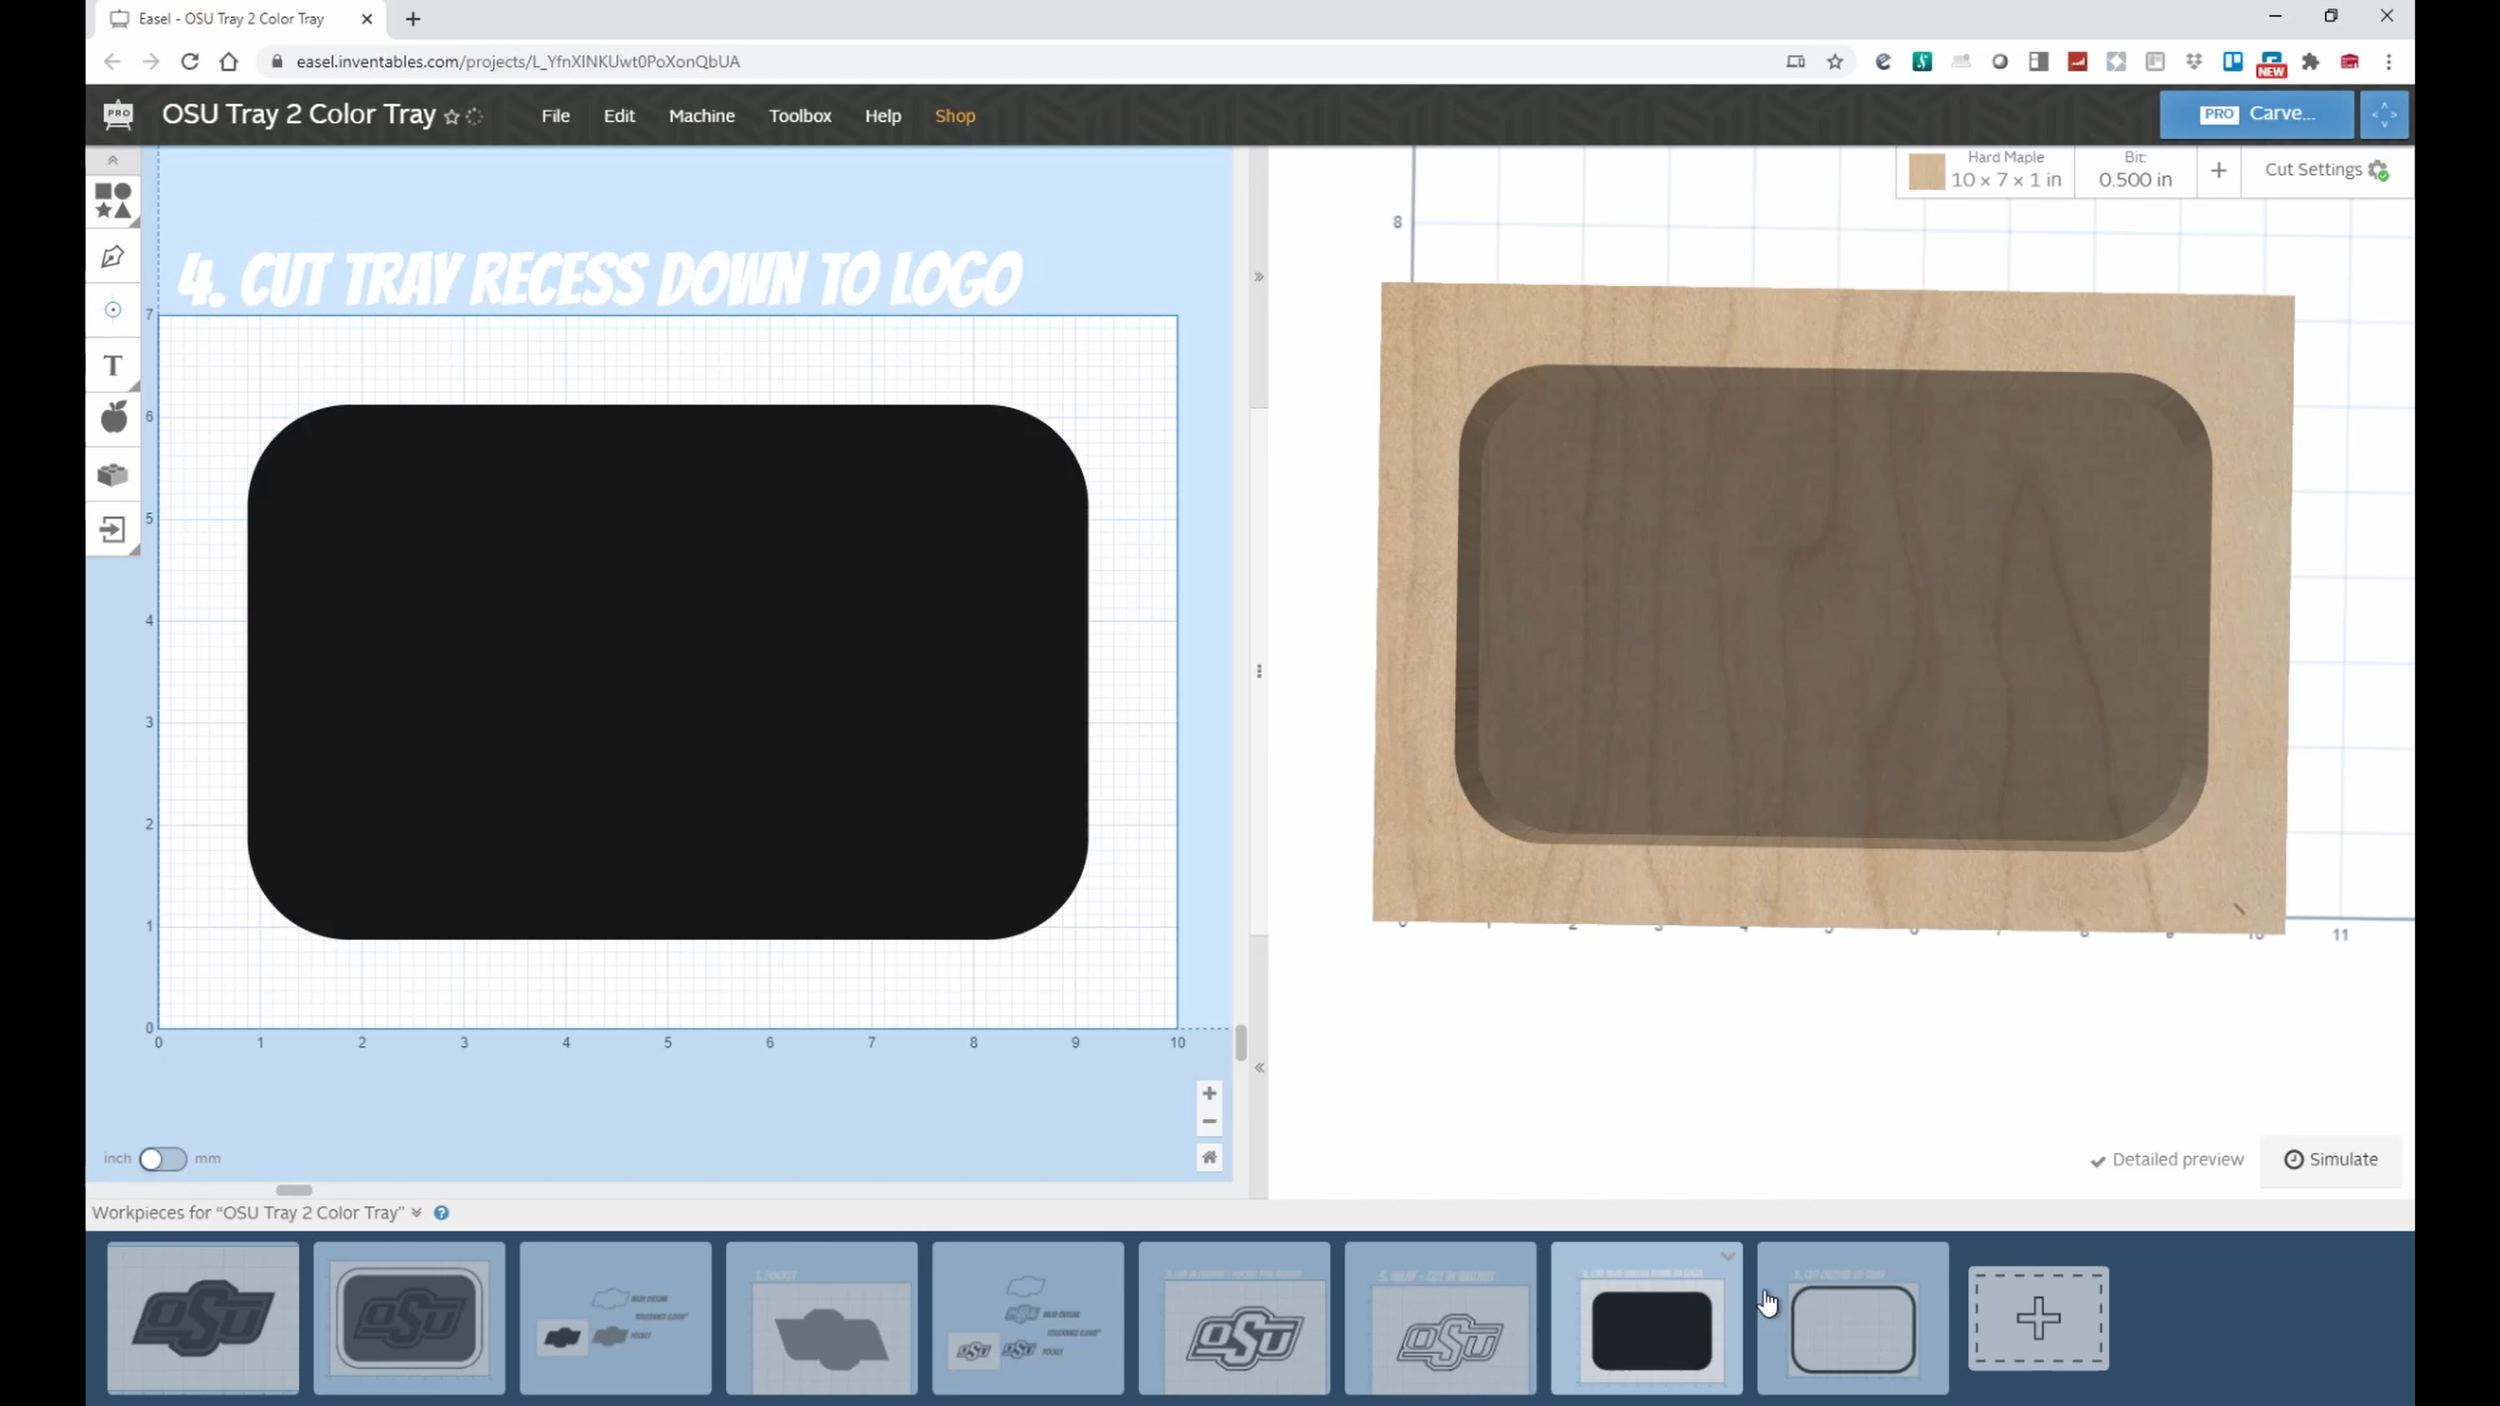
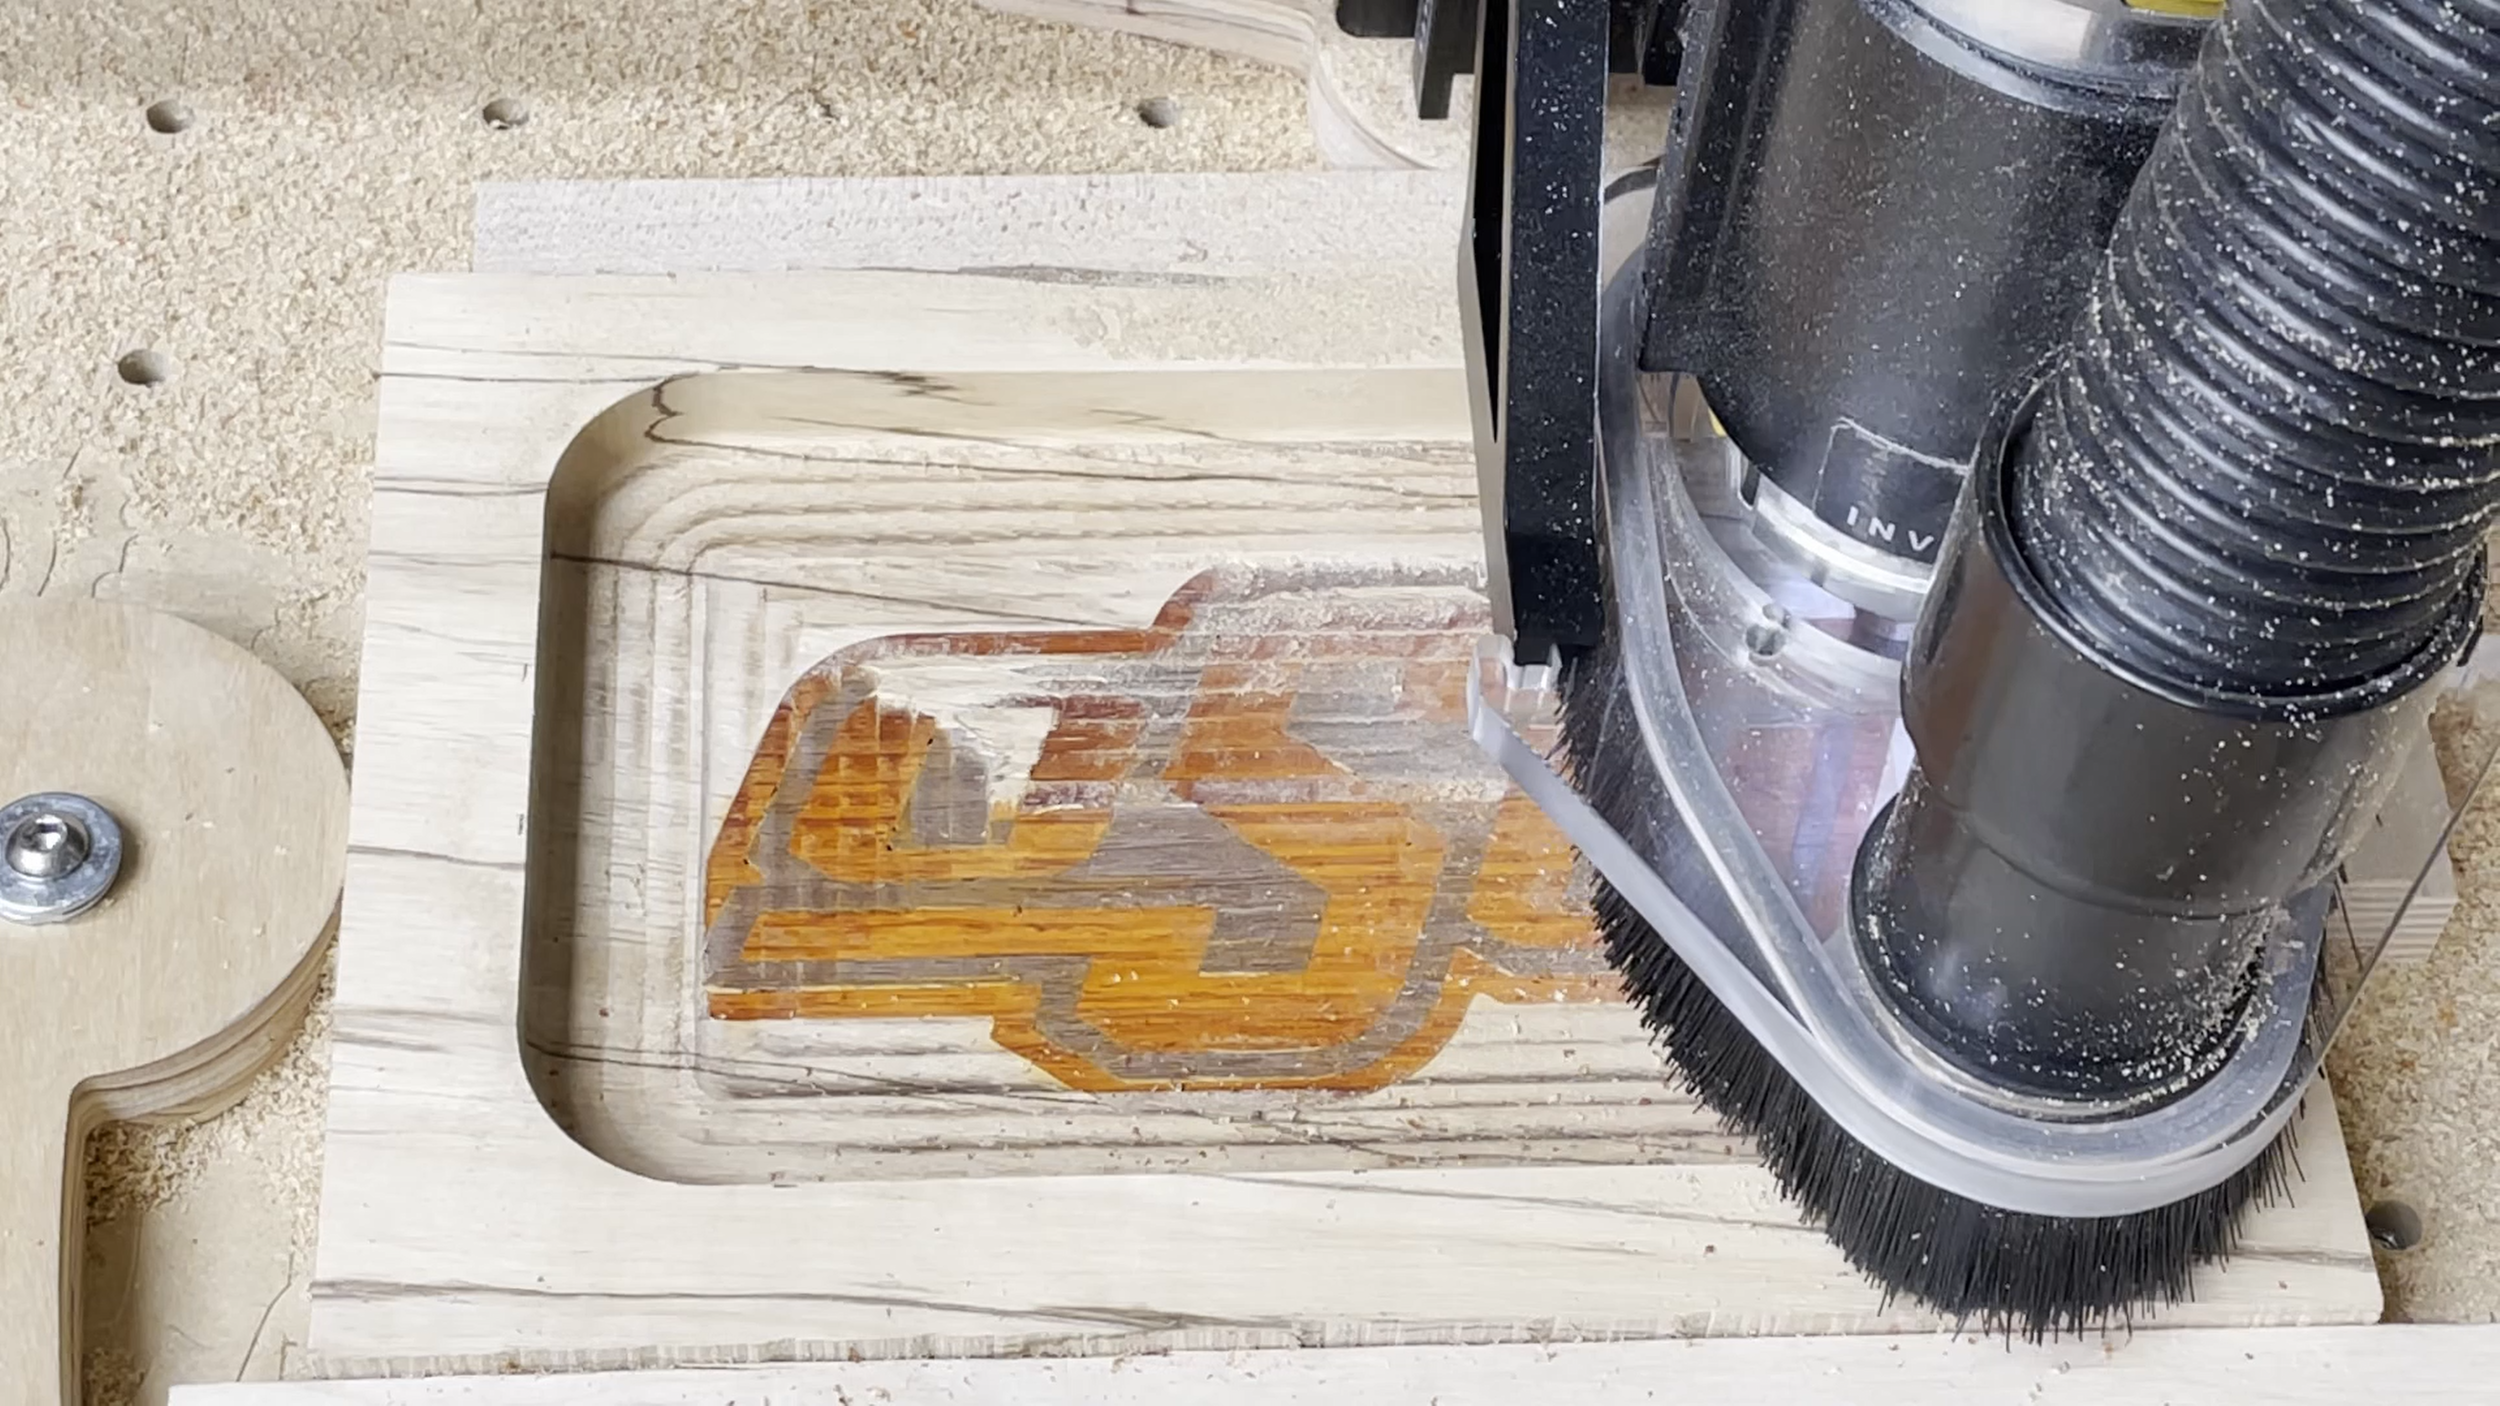
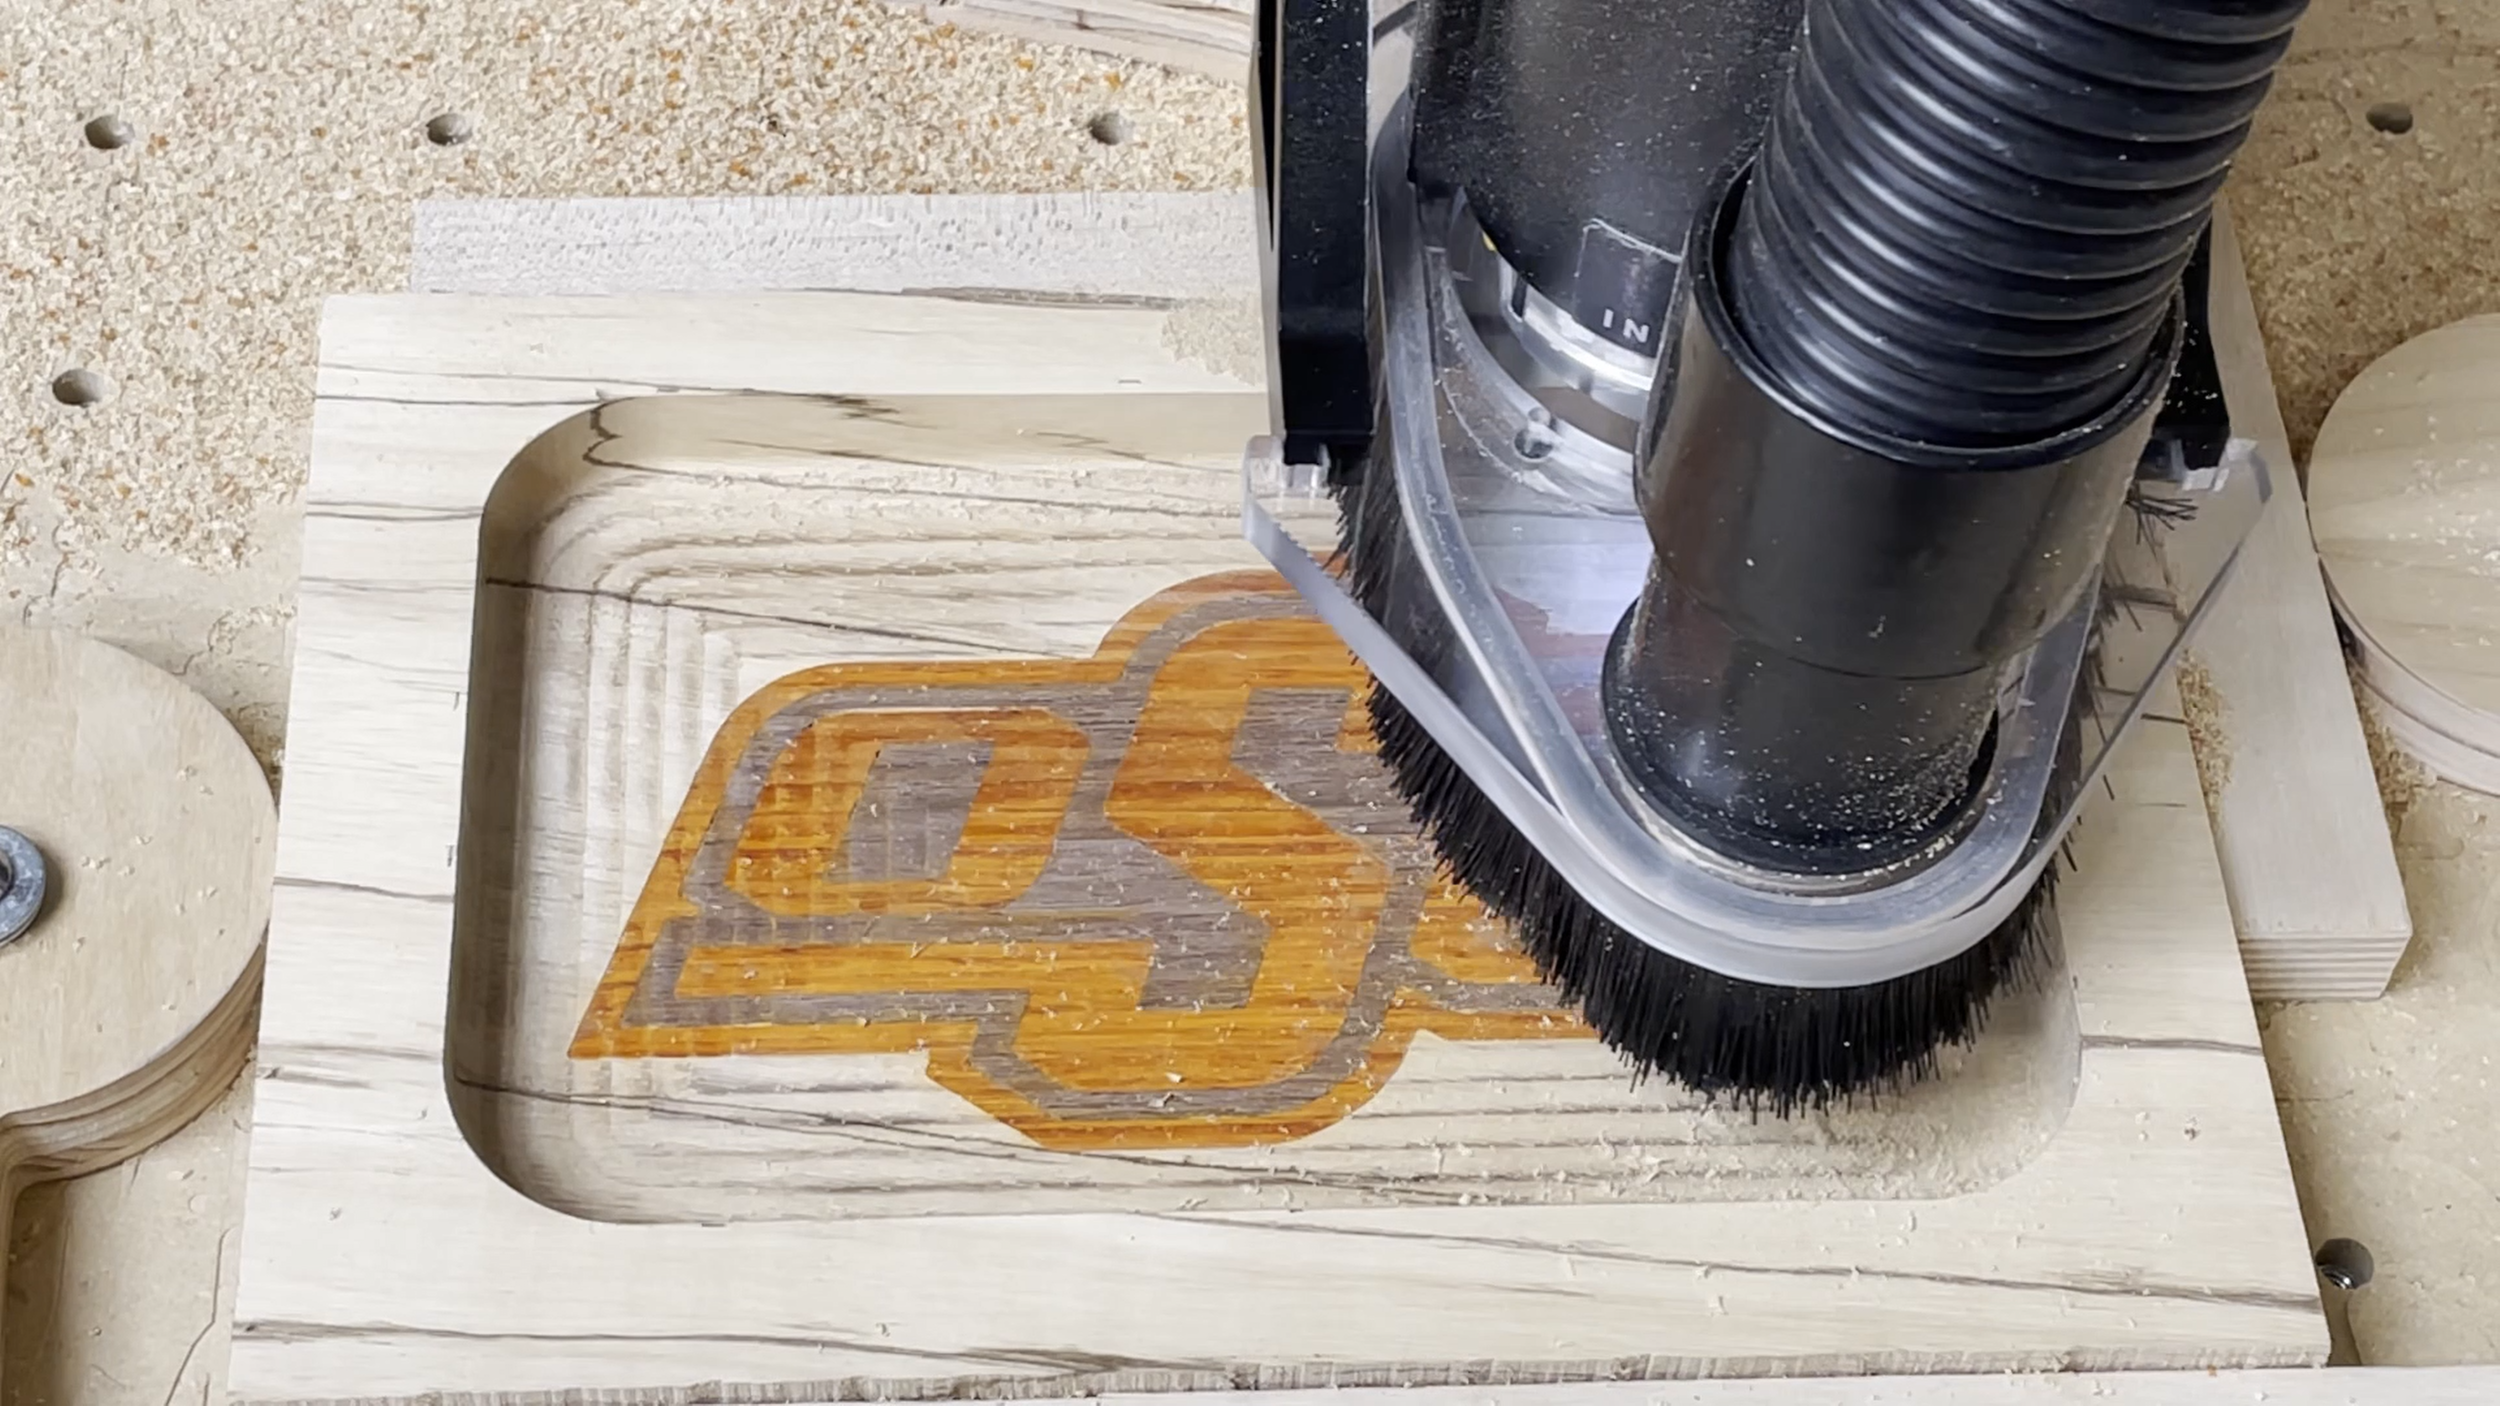
Step 8: Carve the Tray
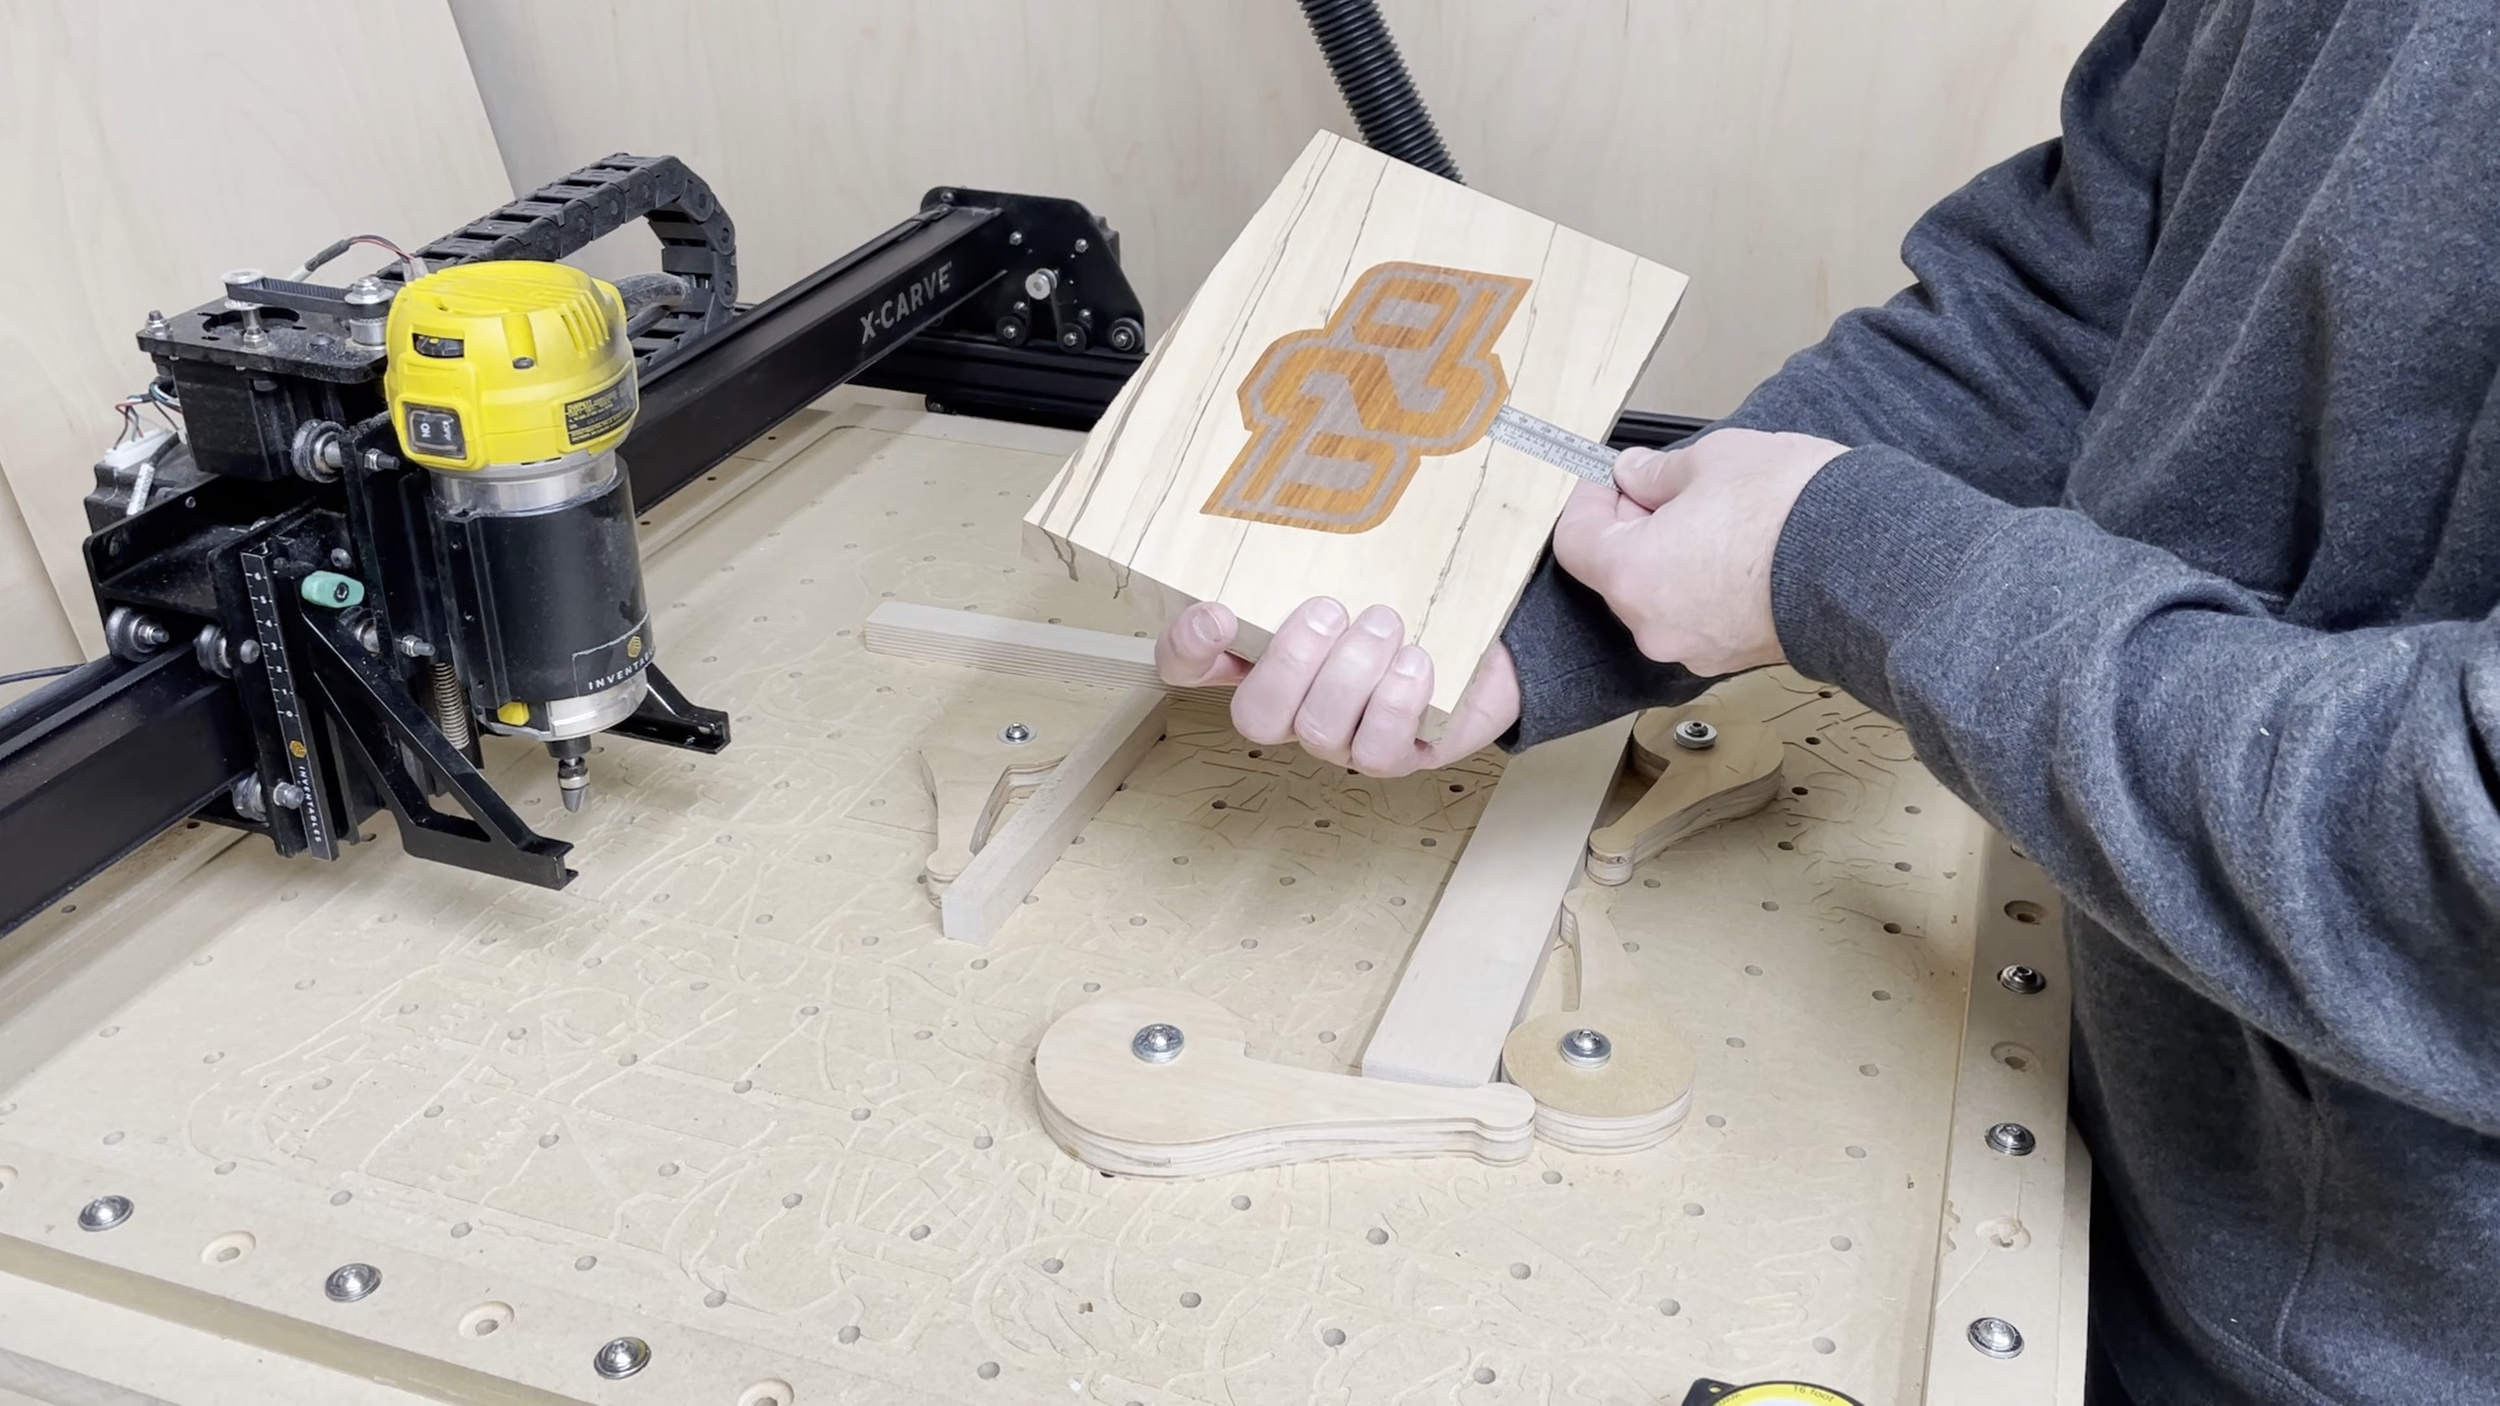
Carving the tray recess in the top of the wood blank is fairly easy to set up since the tray is centered in the wood blank. I double check all of the measurements before placing it in the CNC.
I typically run the bit around the top of the outline of the tray in order to verify the recess for the tray is centered appropriately.
I run the tray bit on the CNC with shallow passes of 0.028 inches per pass so I can keep the thickness of the bottom of the tray as much as possible.
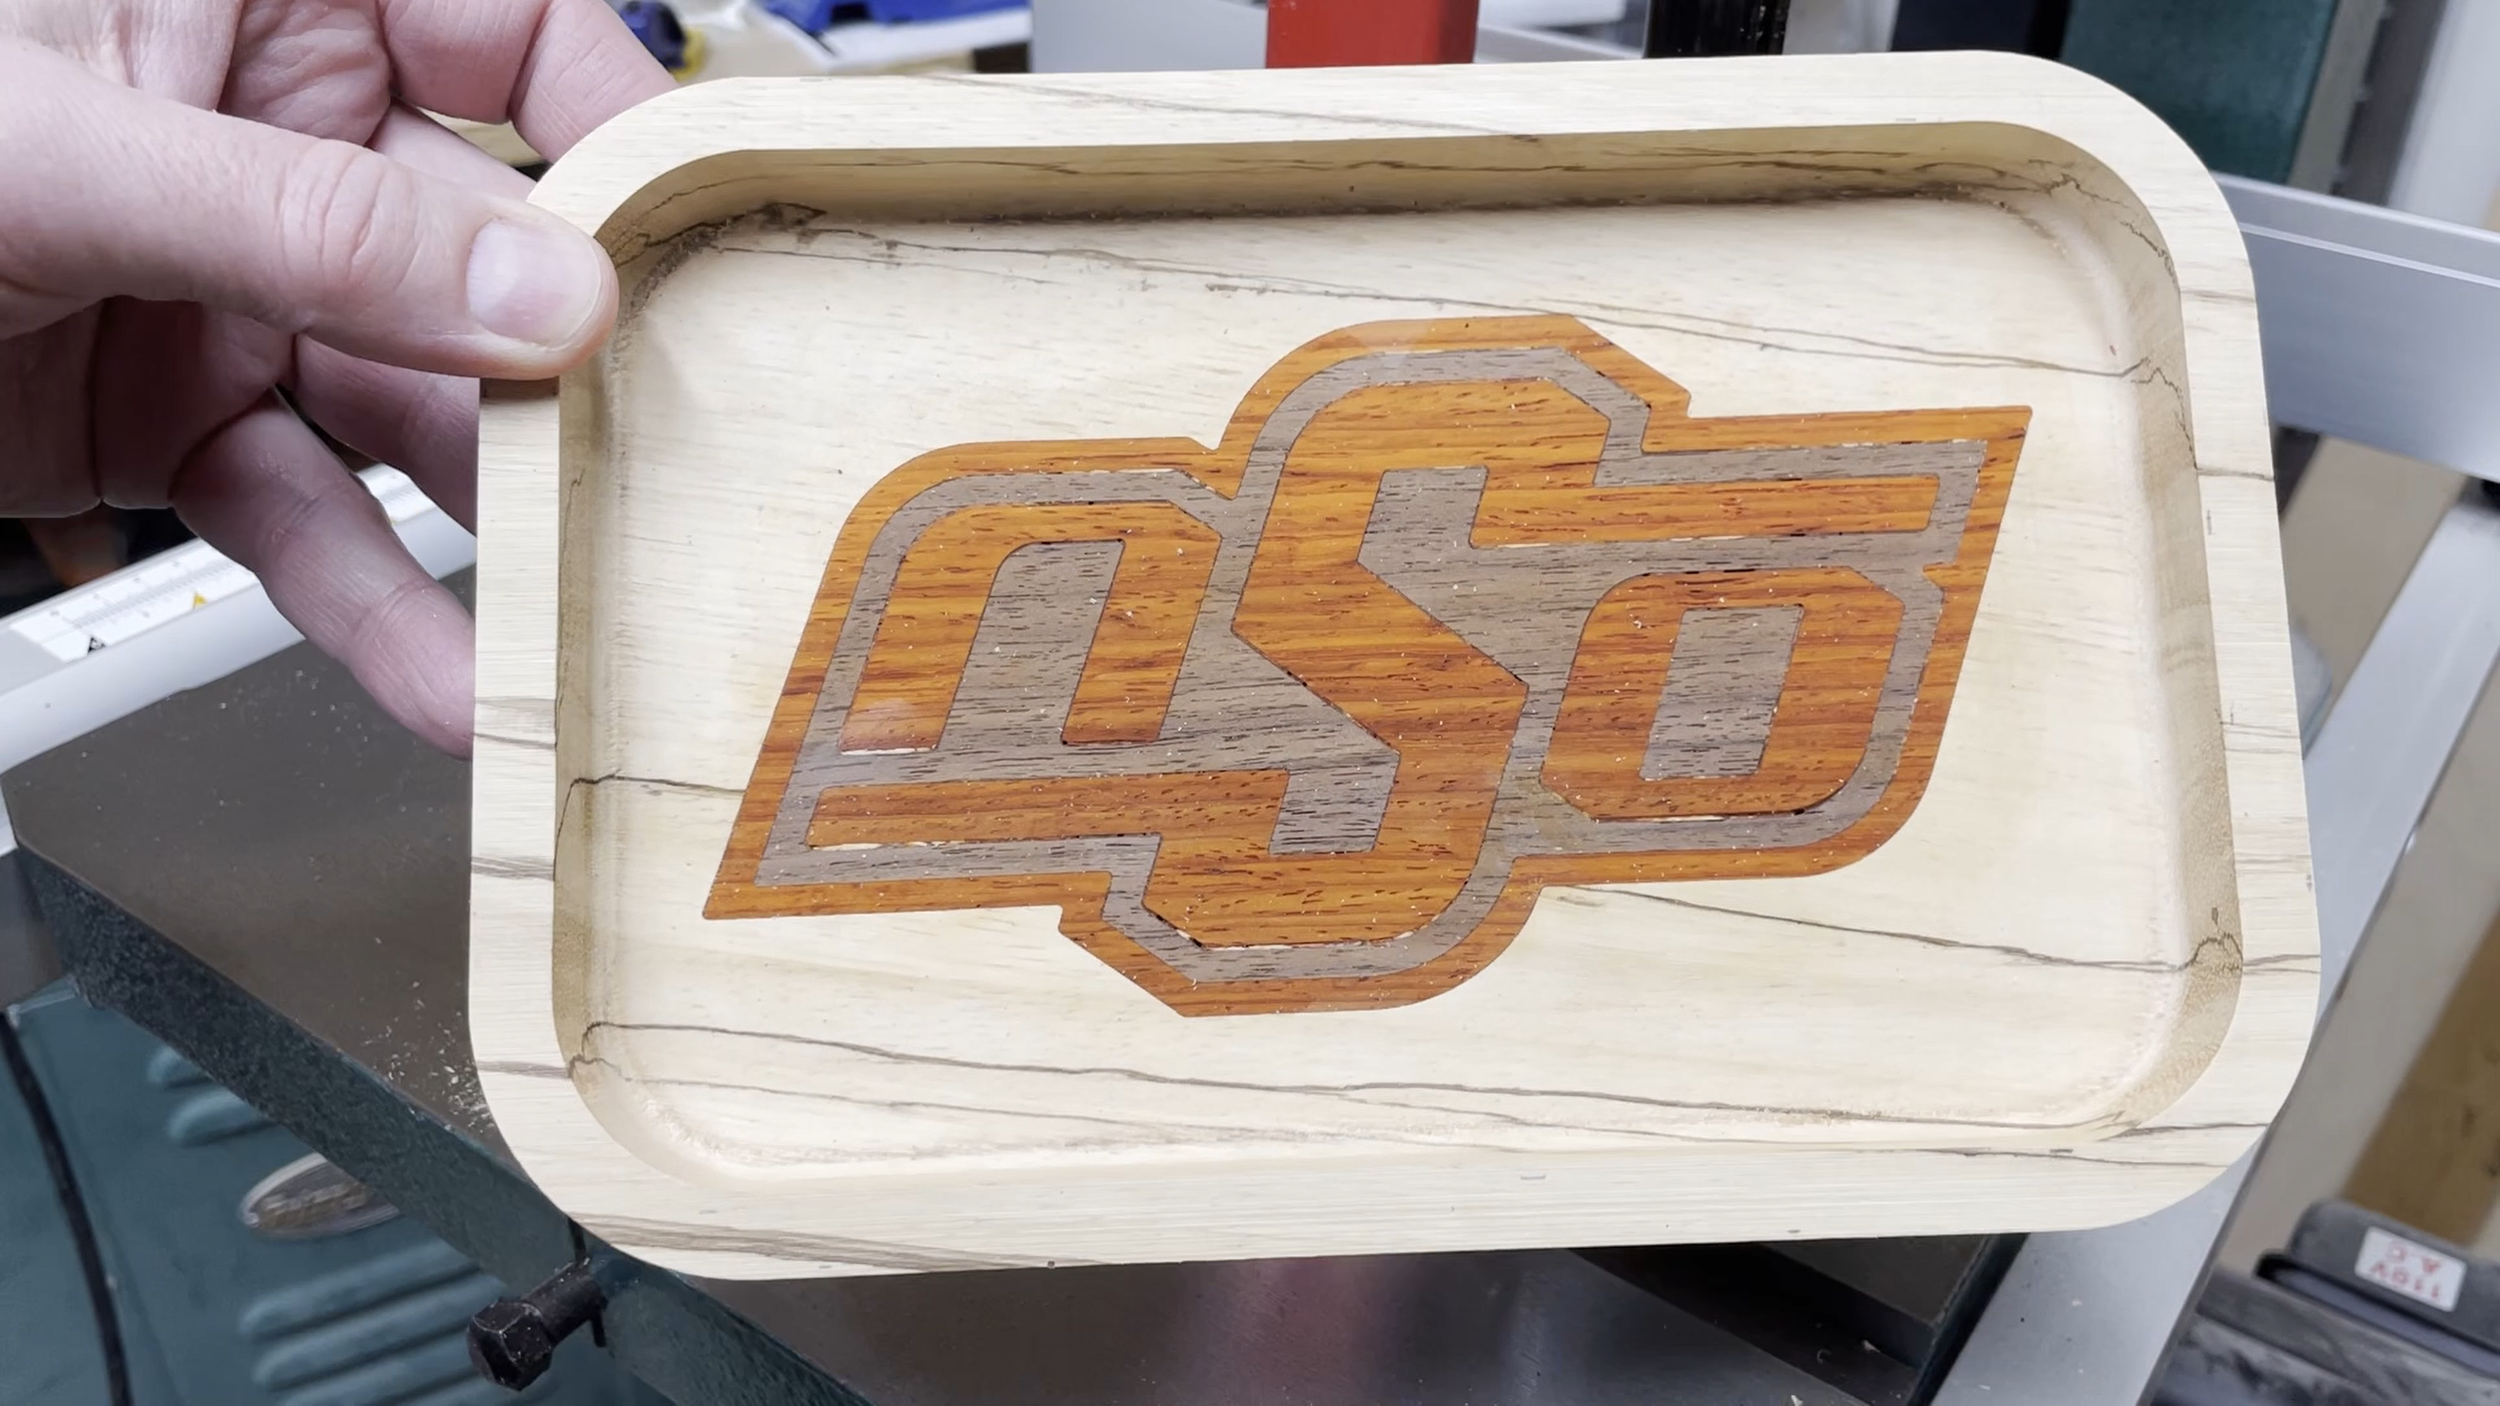
Once I see that the complete logo has been fully exposed I stop the carve as the router is moving from the end of one layer to the start of the next layer of carving. This gives me about 1/4" thickness in the bottom of the tray.

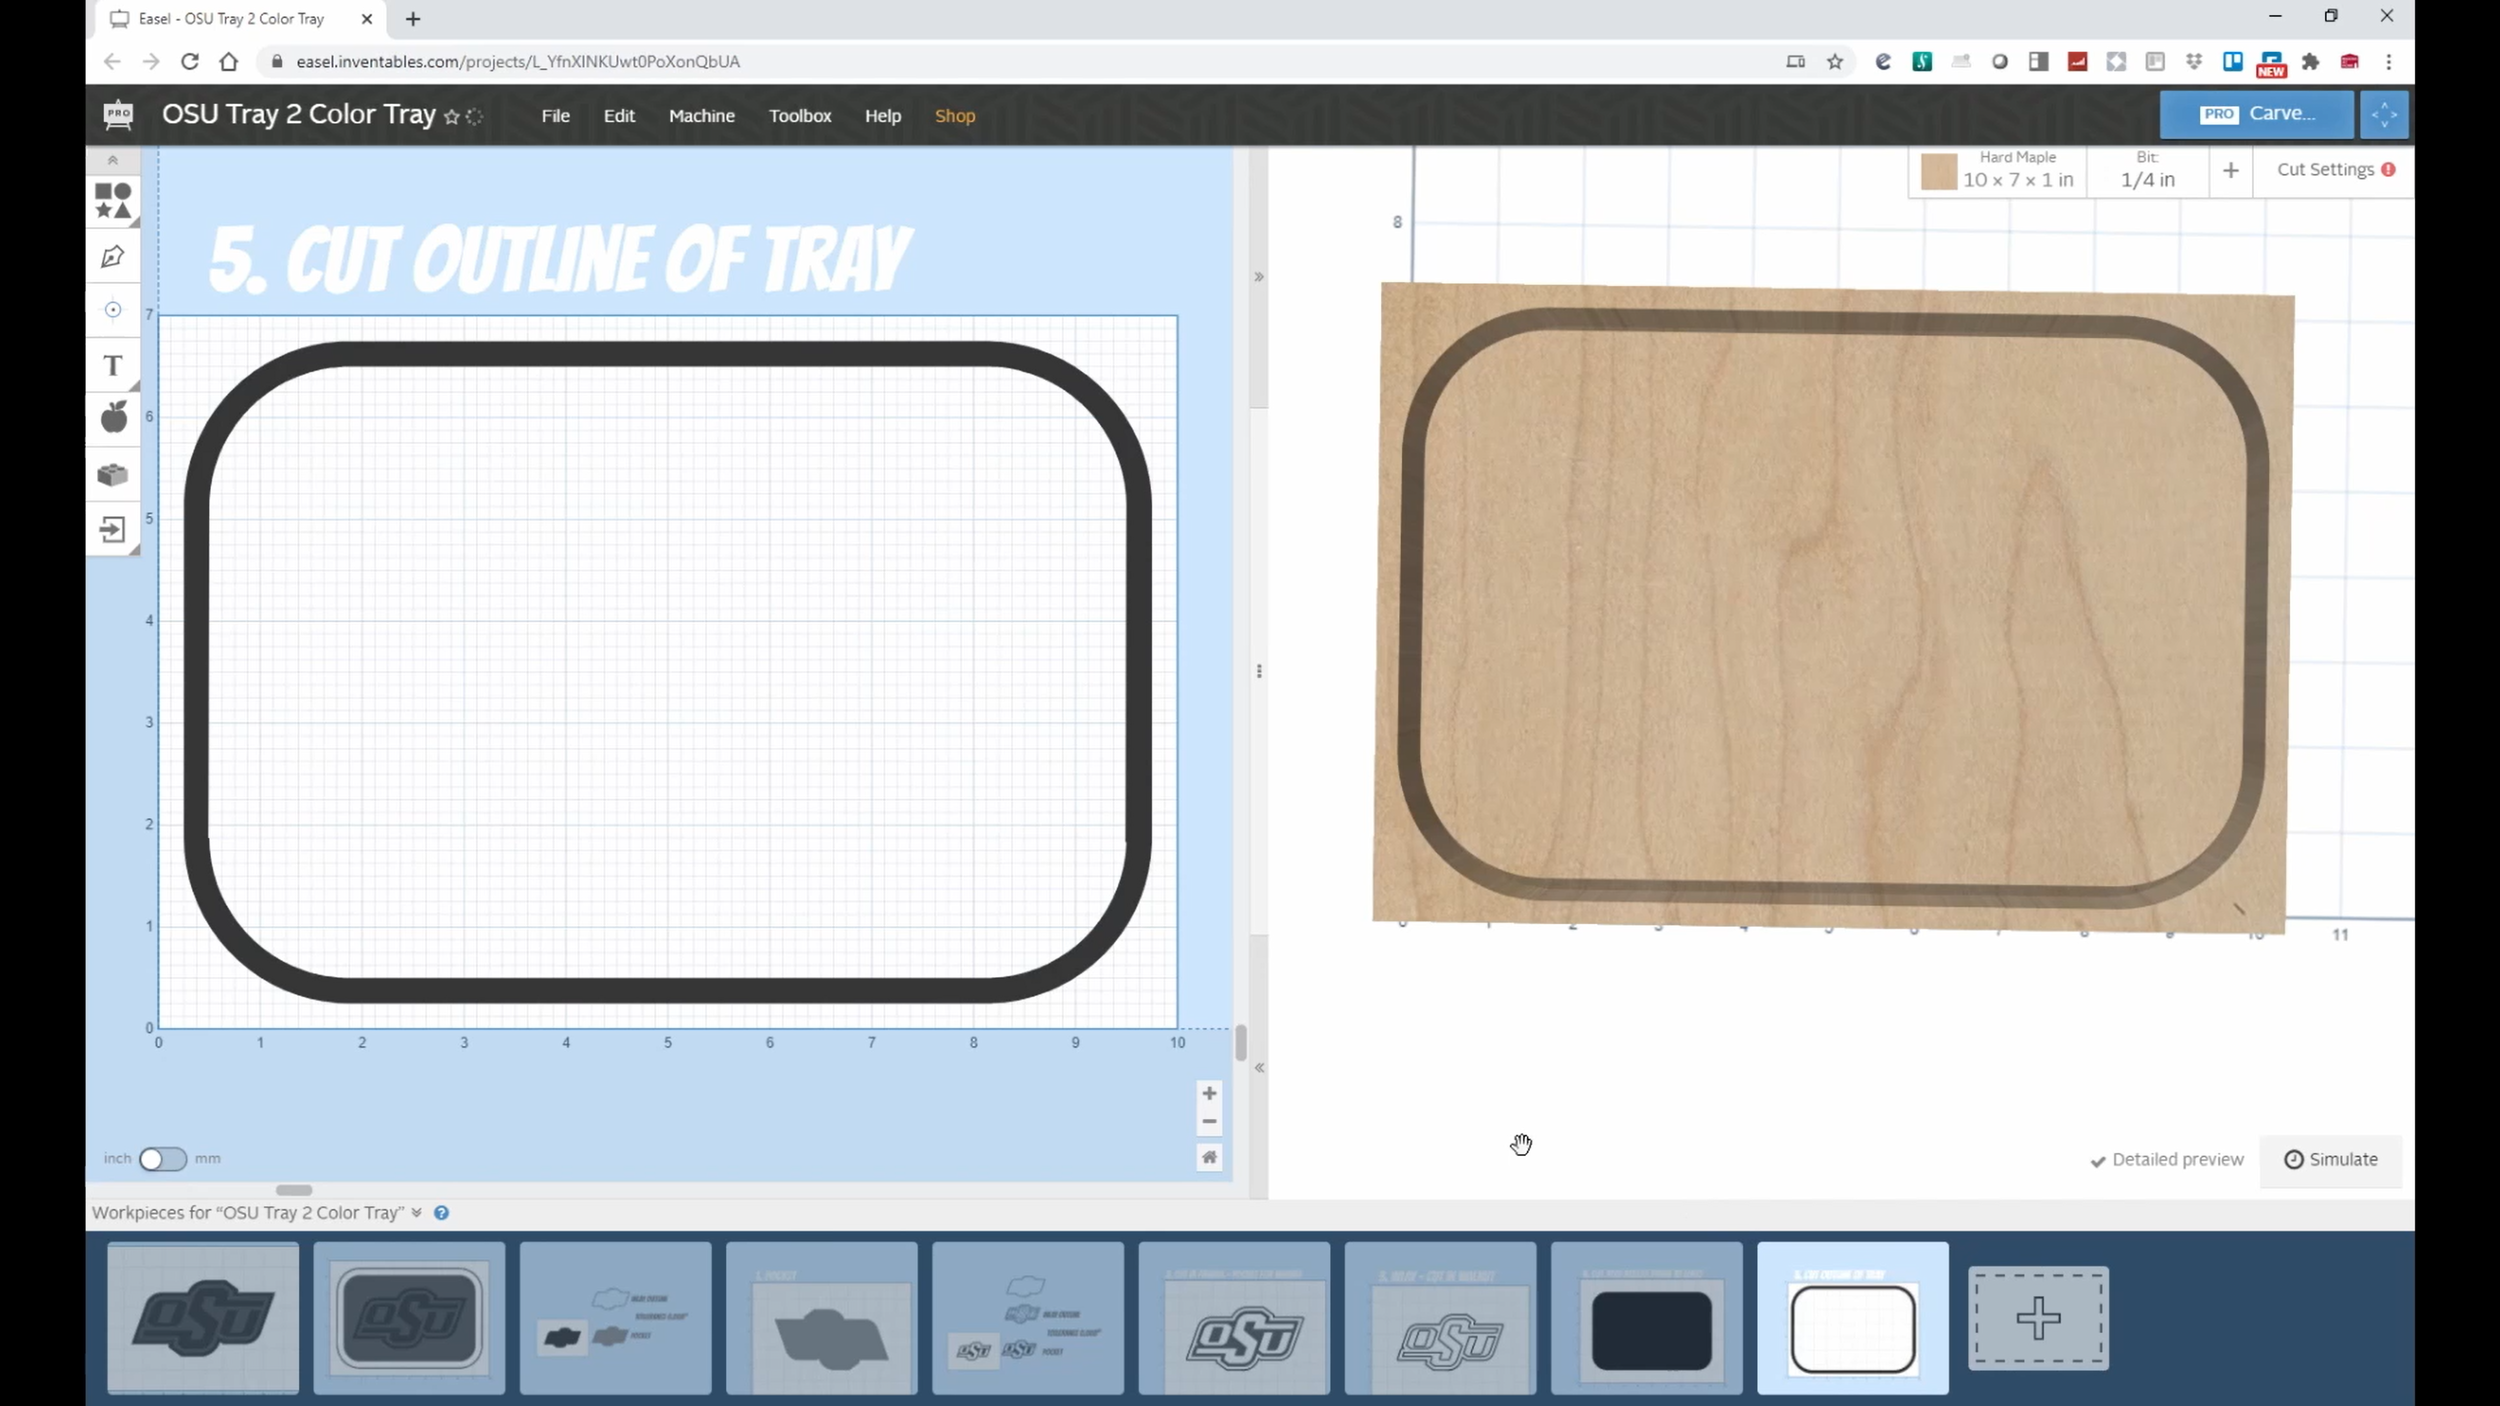
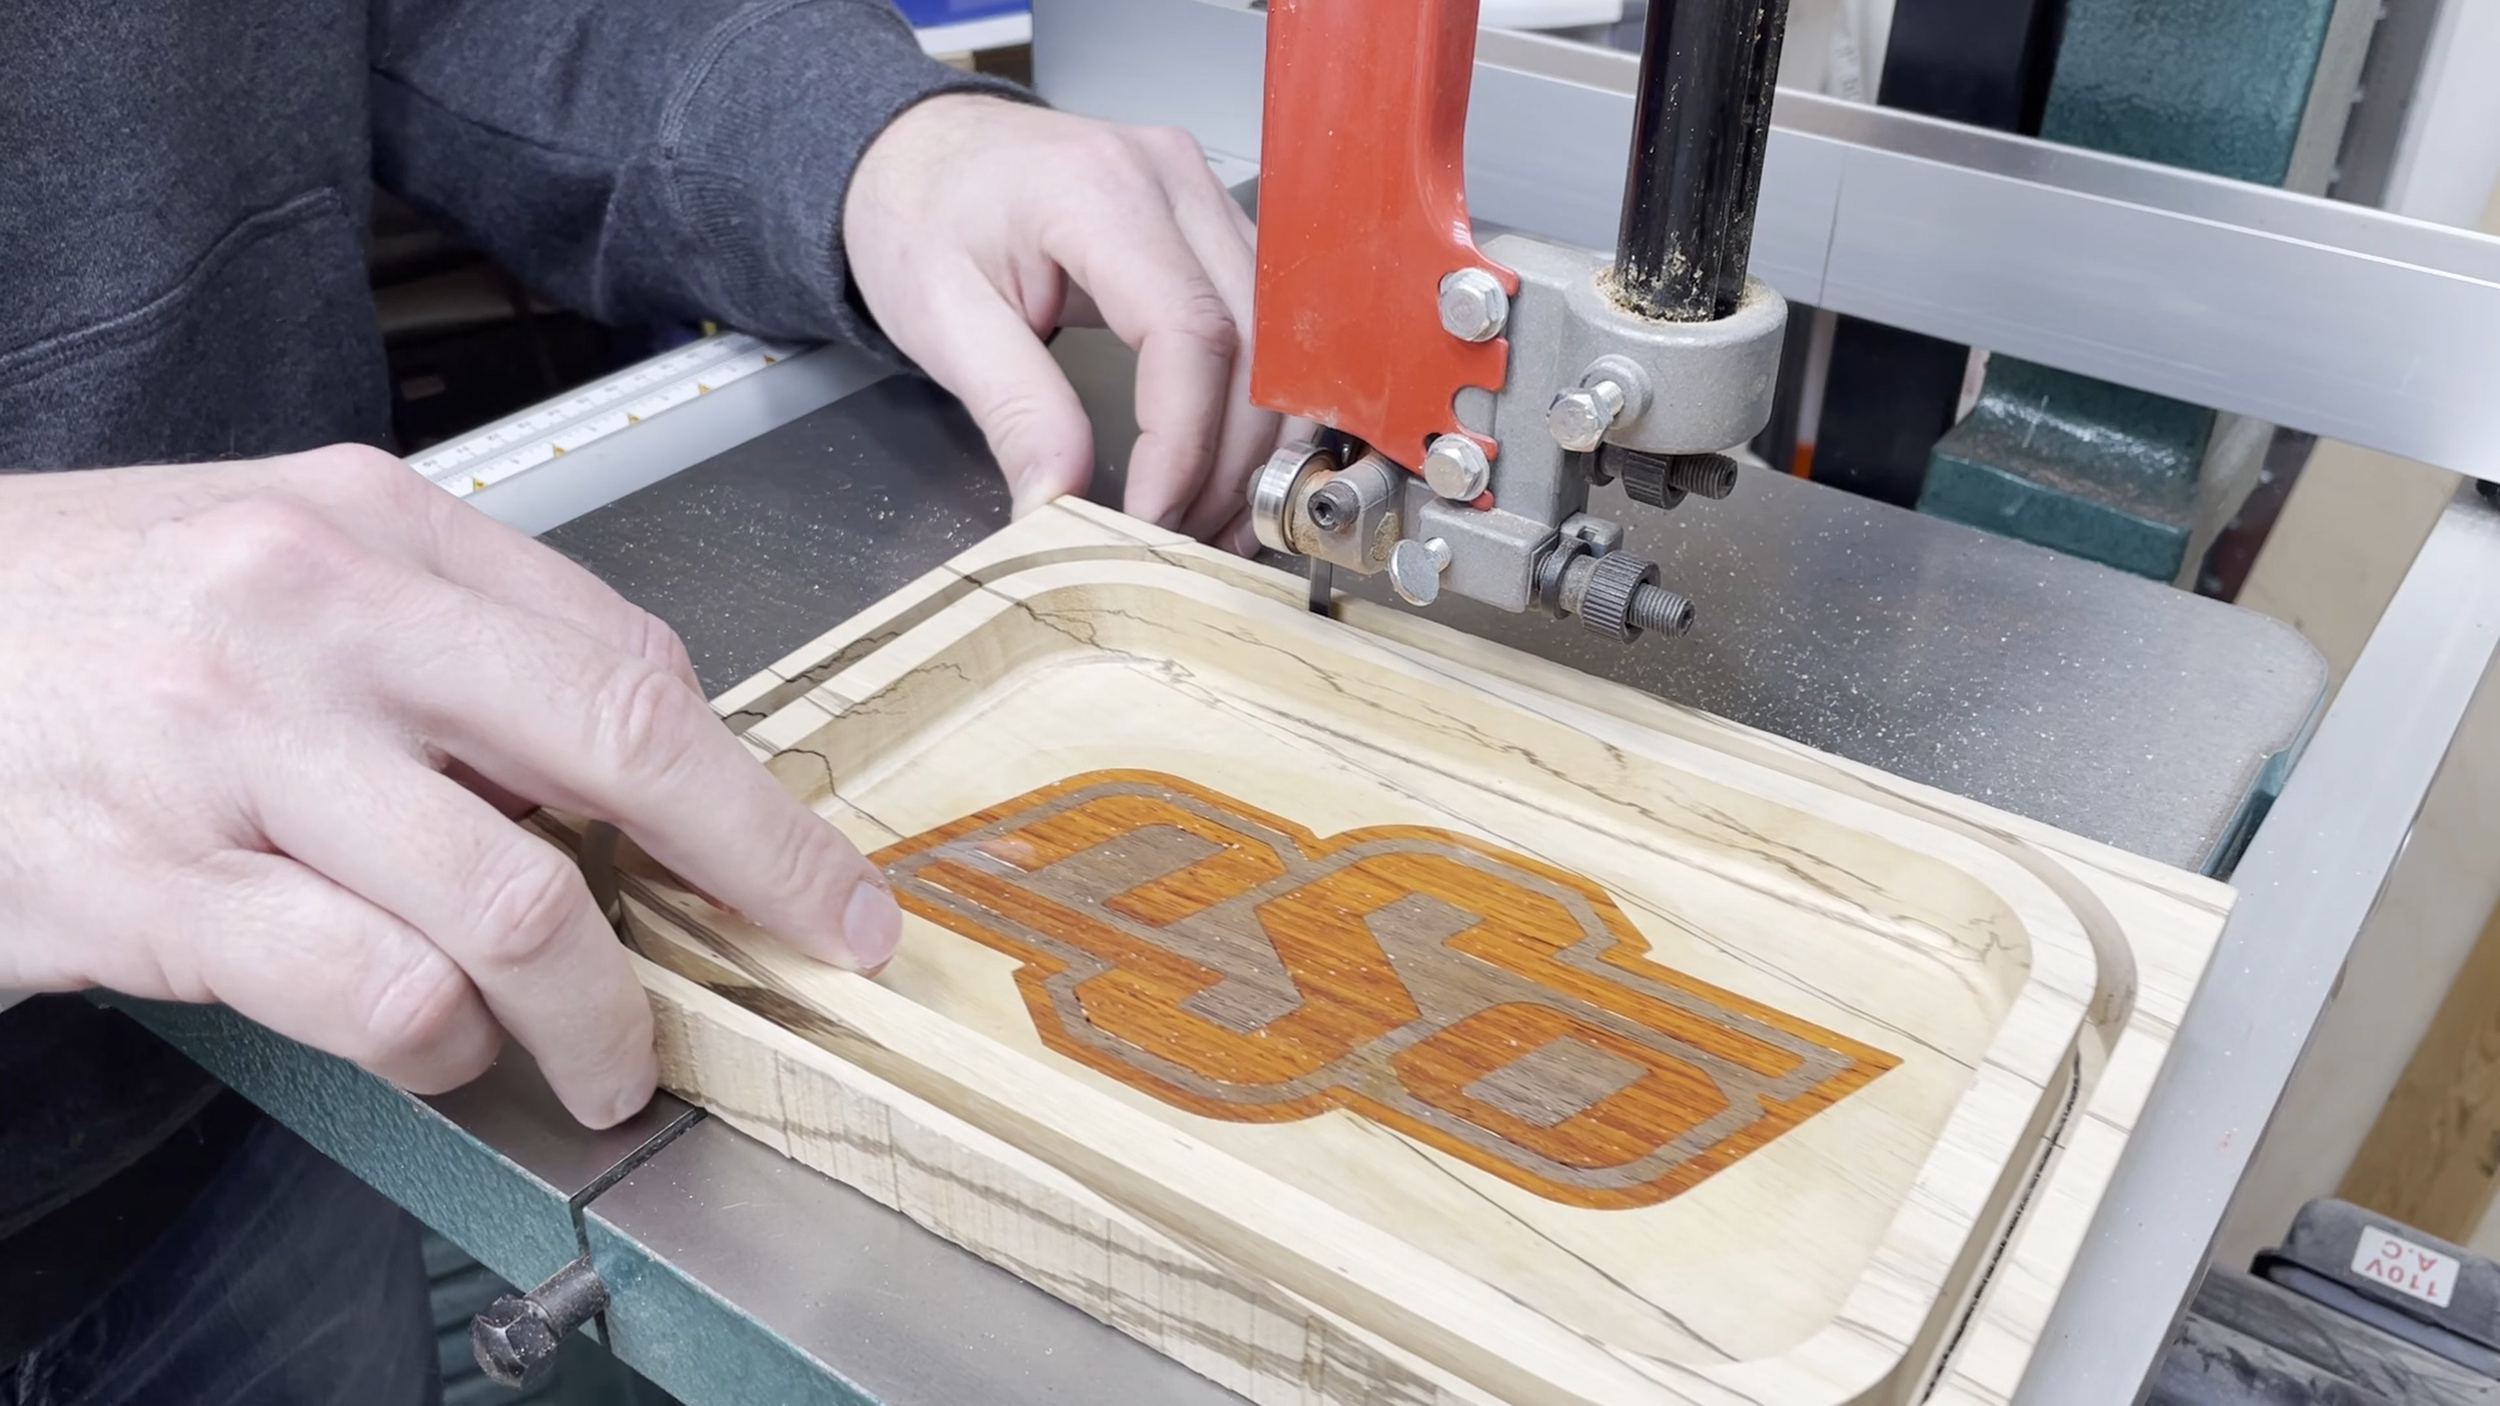
Step 9: Cut the Outline
The final step on the CNC is to cut the trey from the main piece of zebrawood. I used a 1/4" downcutting bit to do this.
In order to keep the tray from coming loose as I cut all the way through the piece of wood, I left 0.05" of material in the cut. This way I could finish cutting the tray out on the band saw. The small bit of wood around the edge of the tray is easily removed in the next step as I round over the edges.
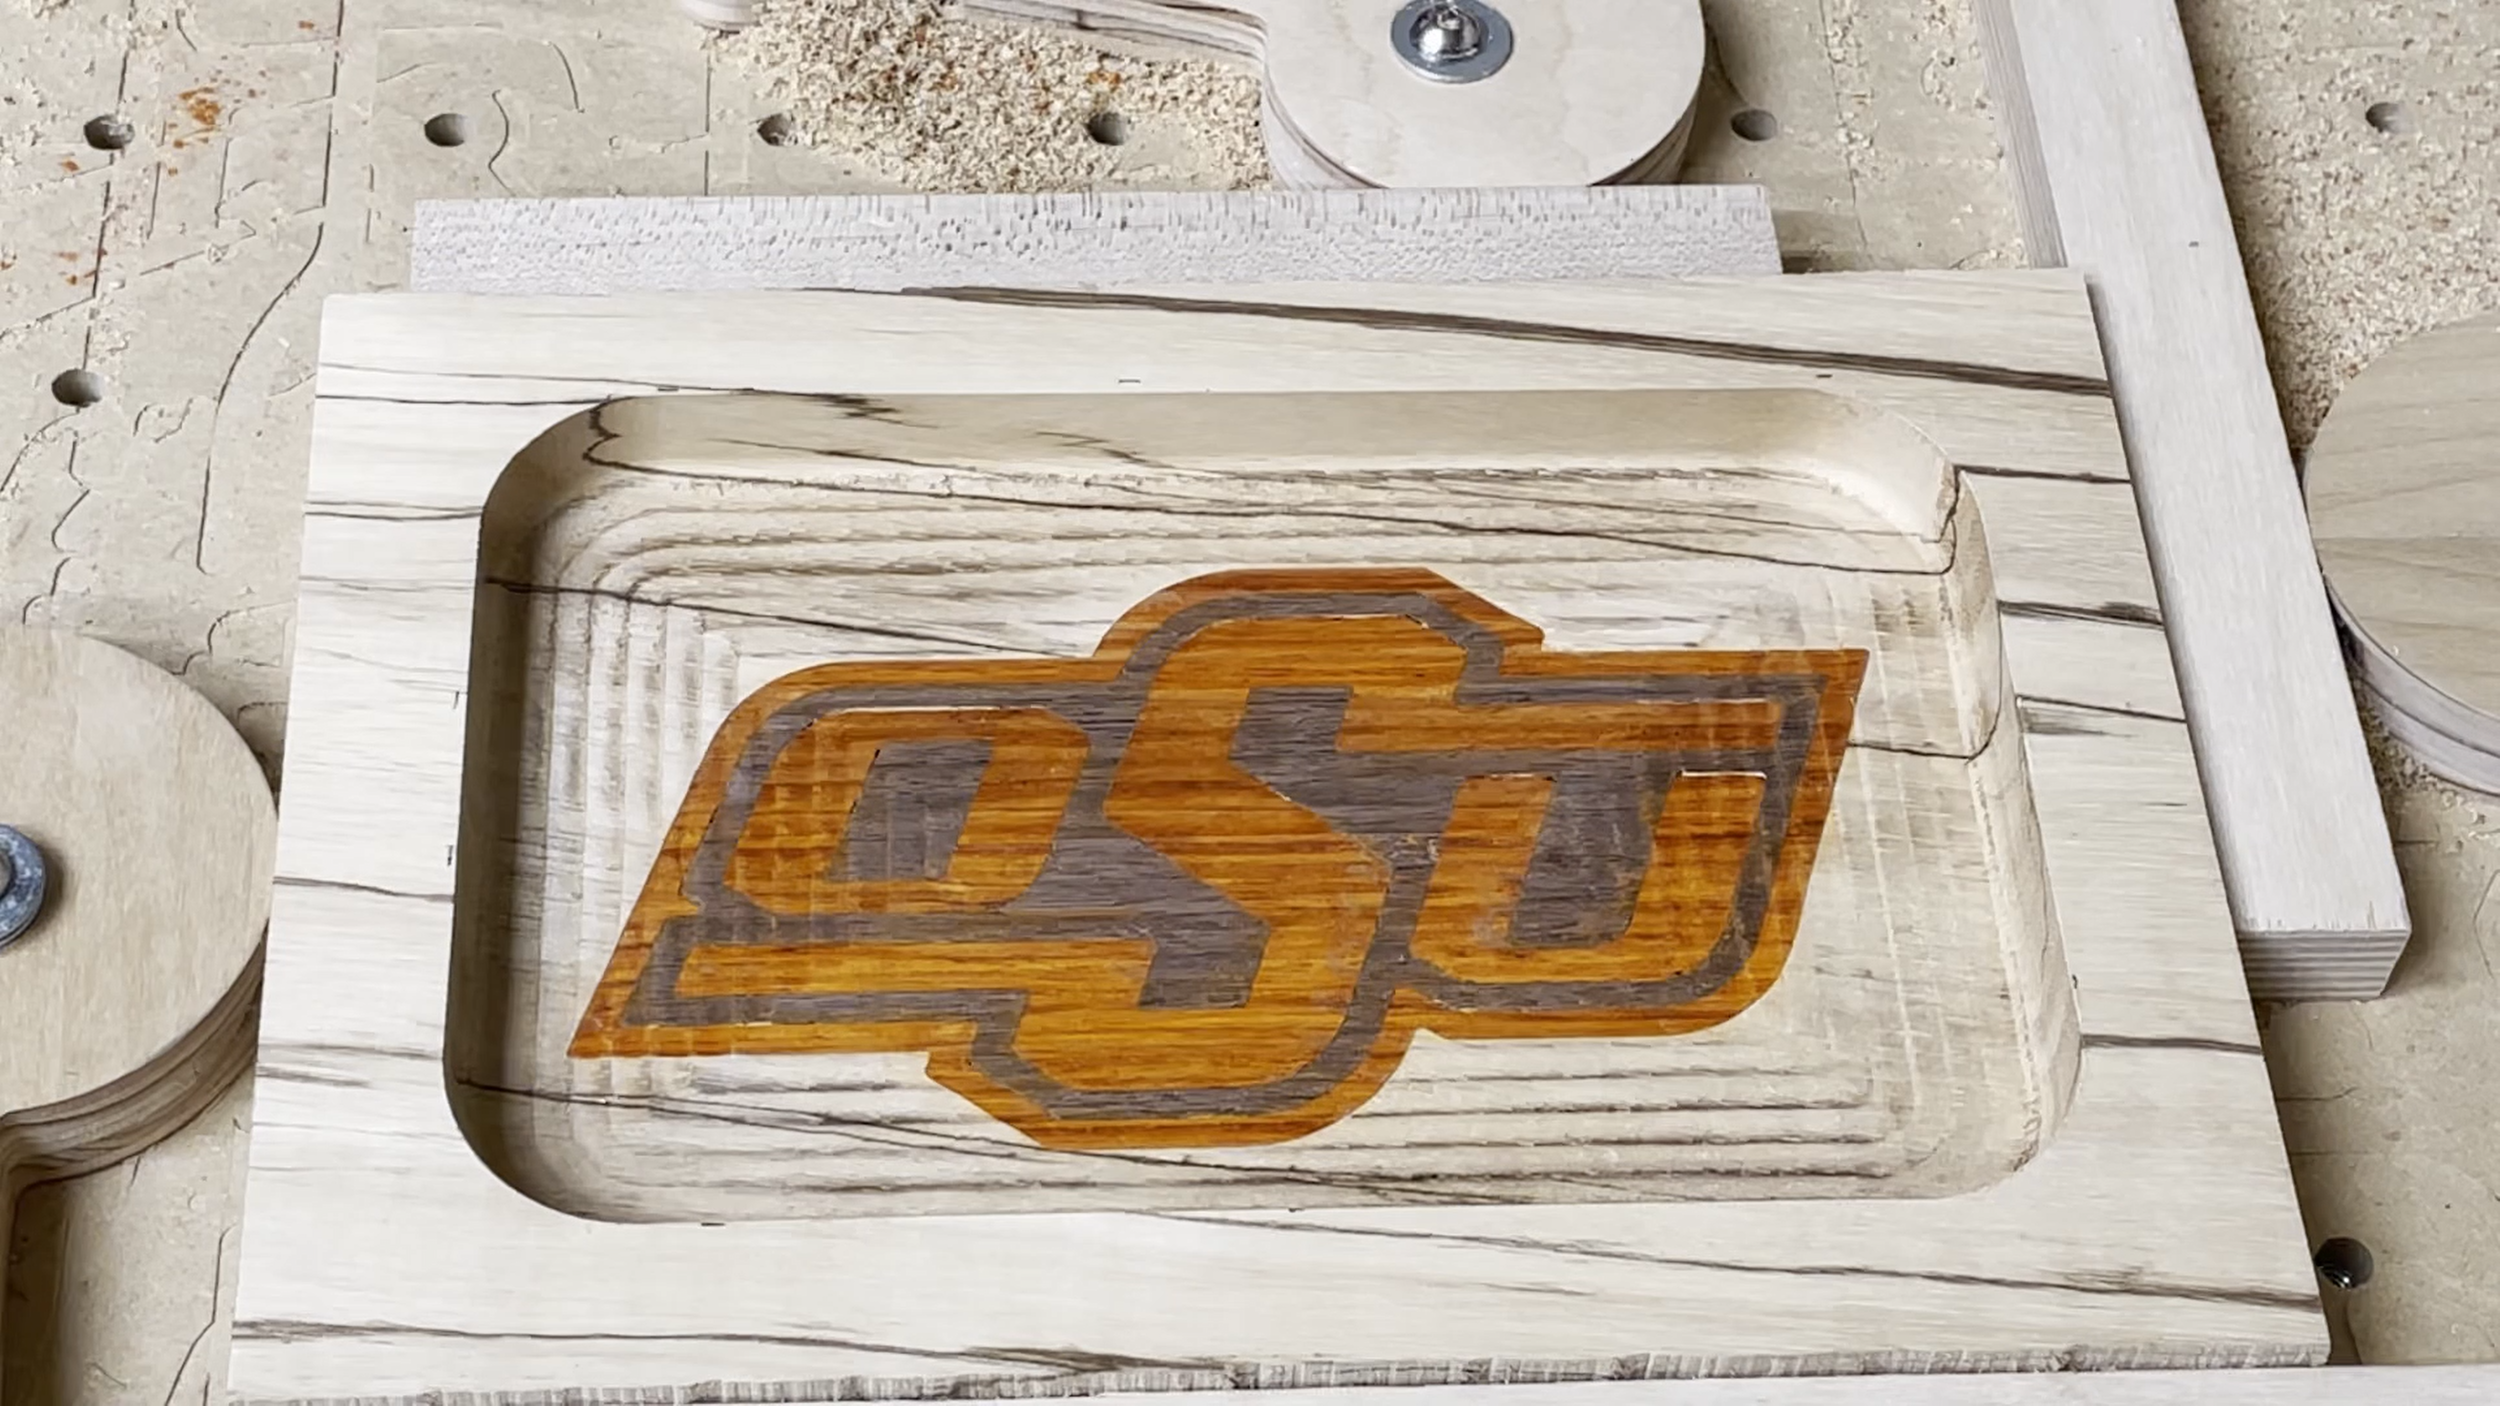
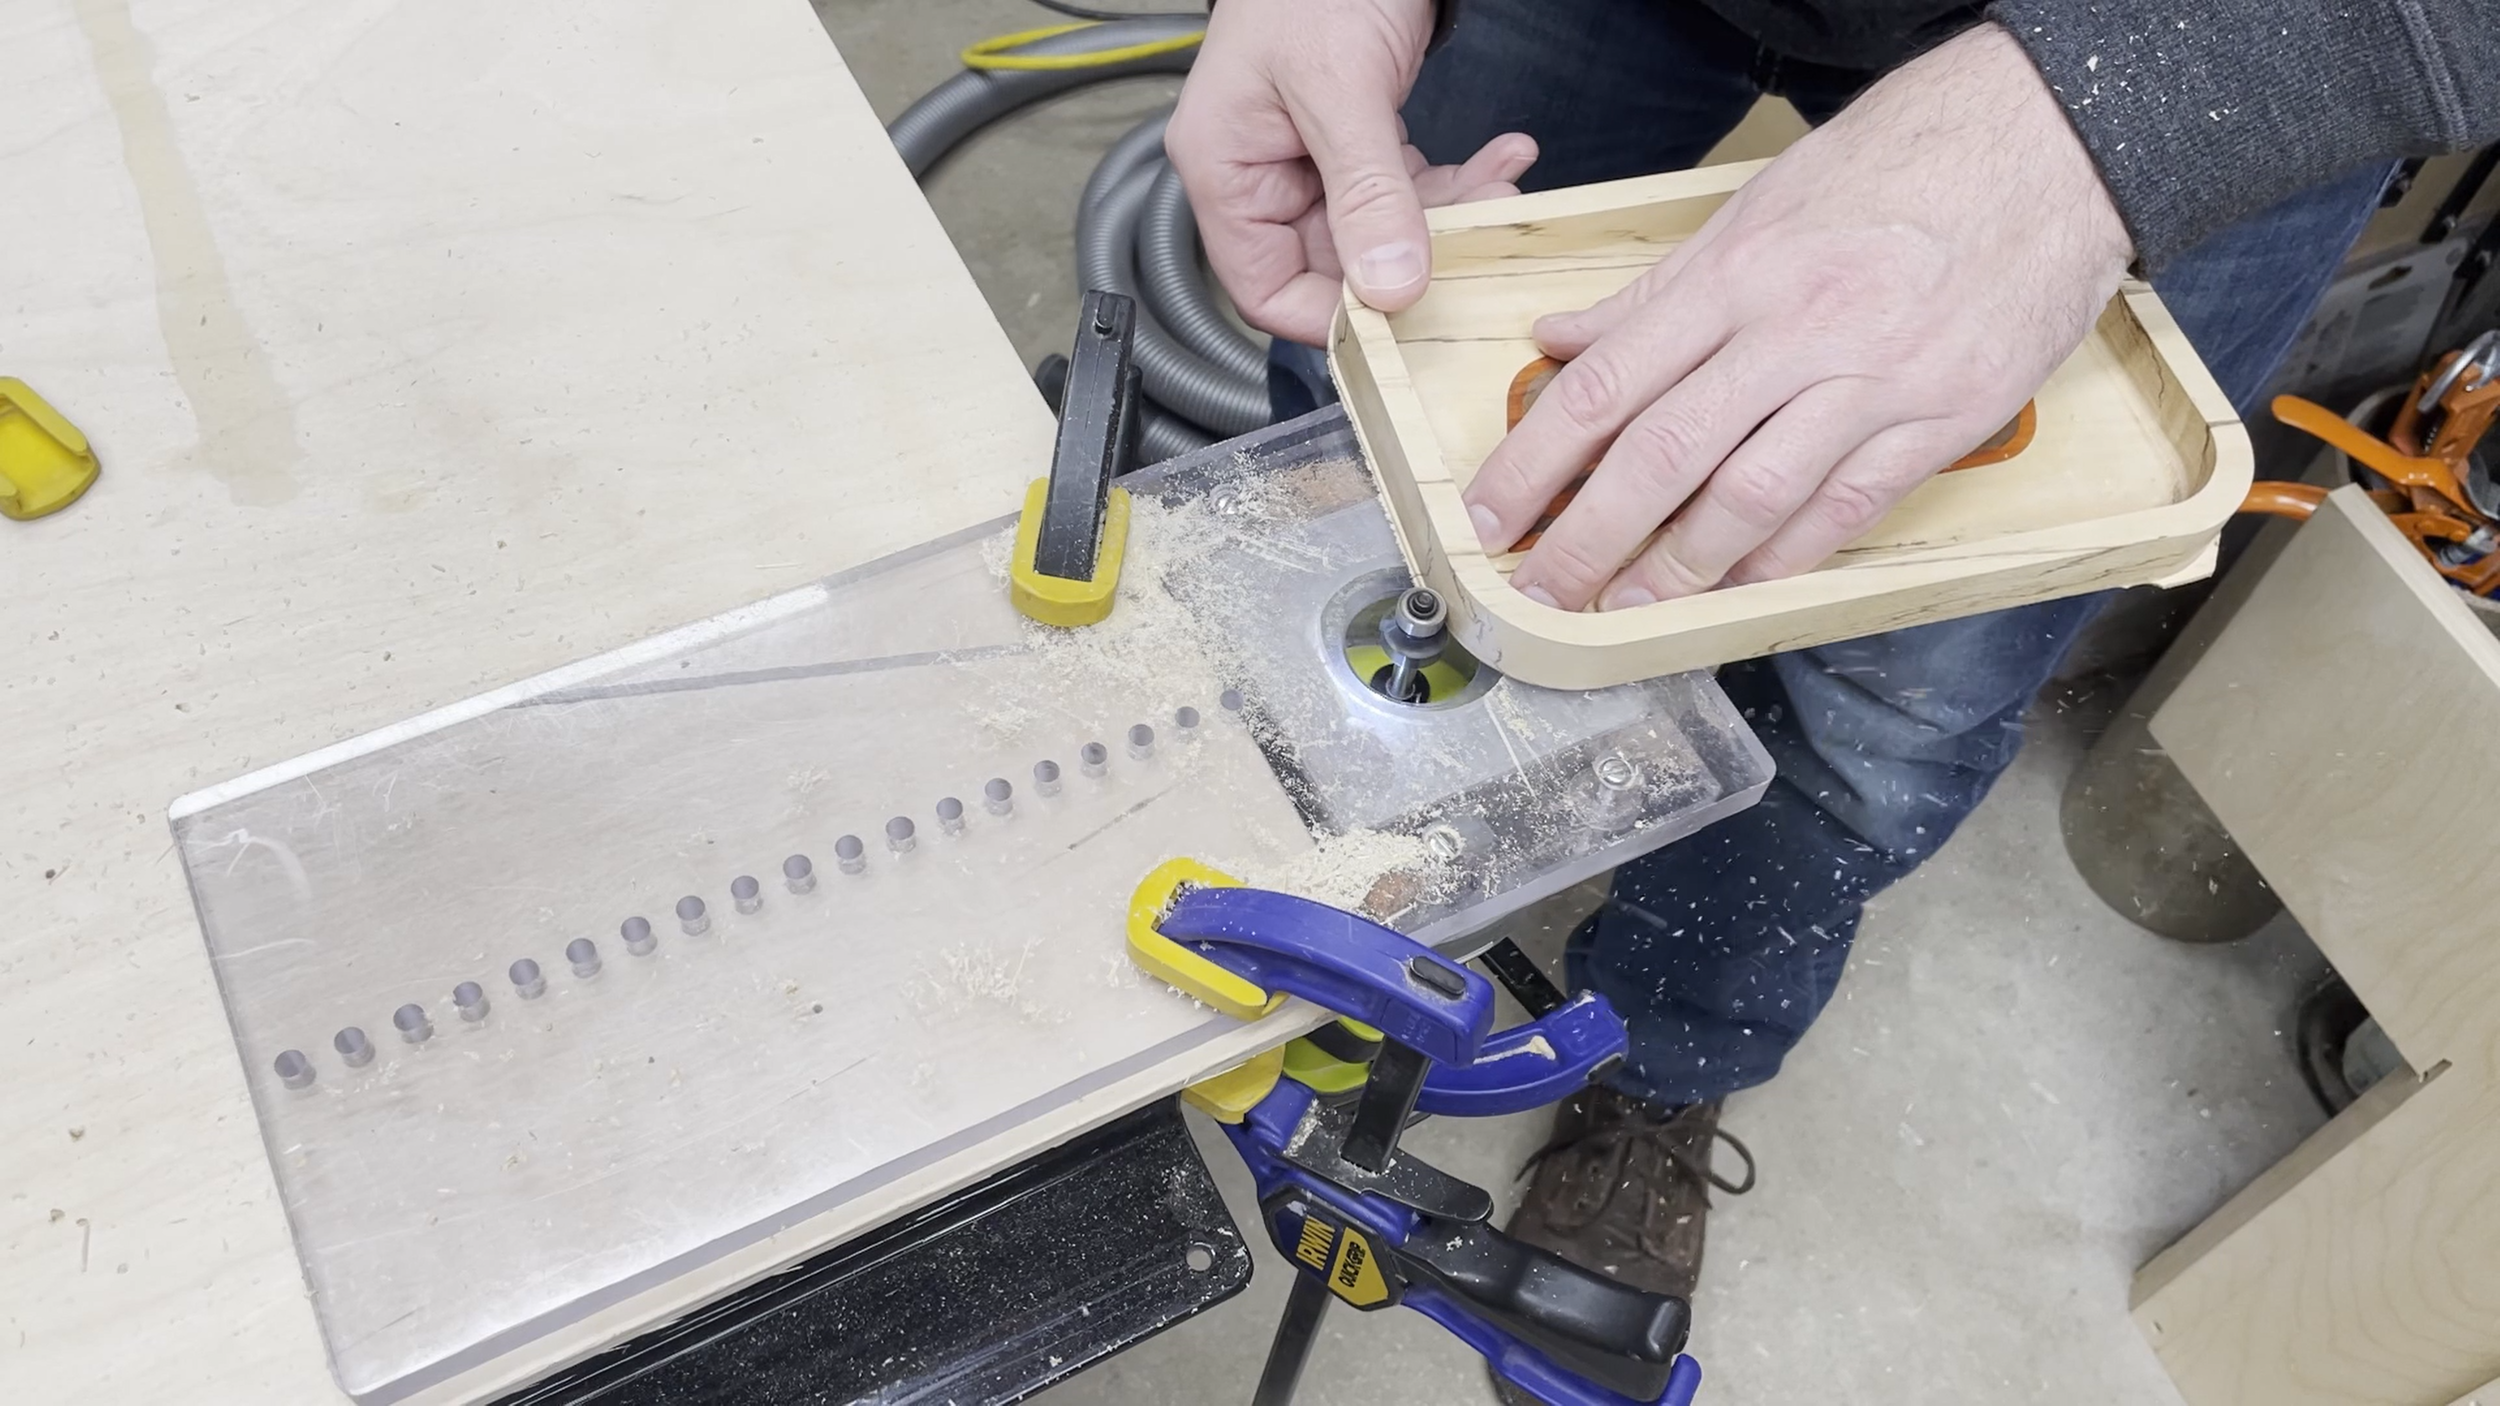
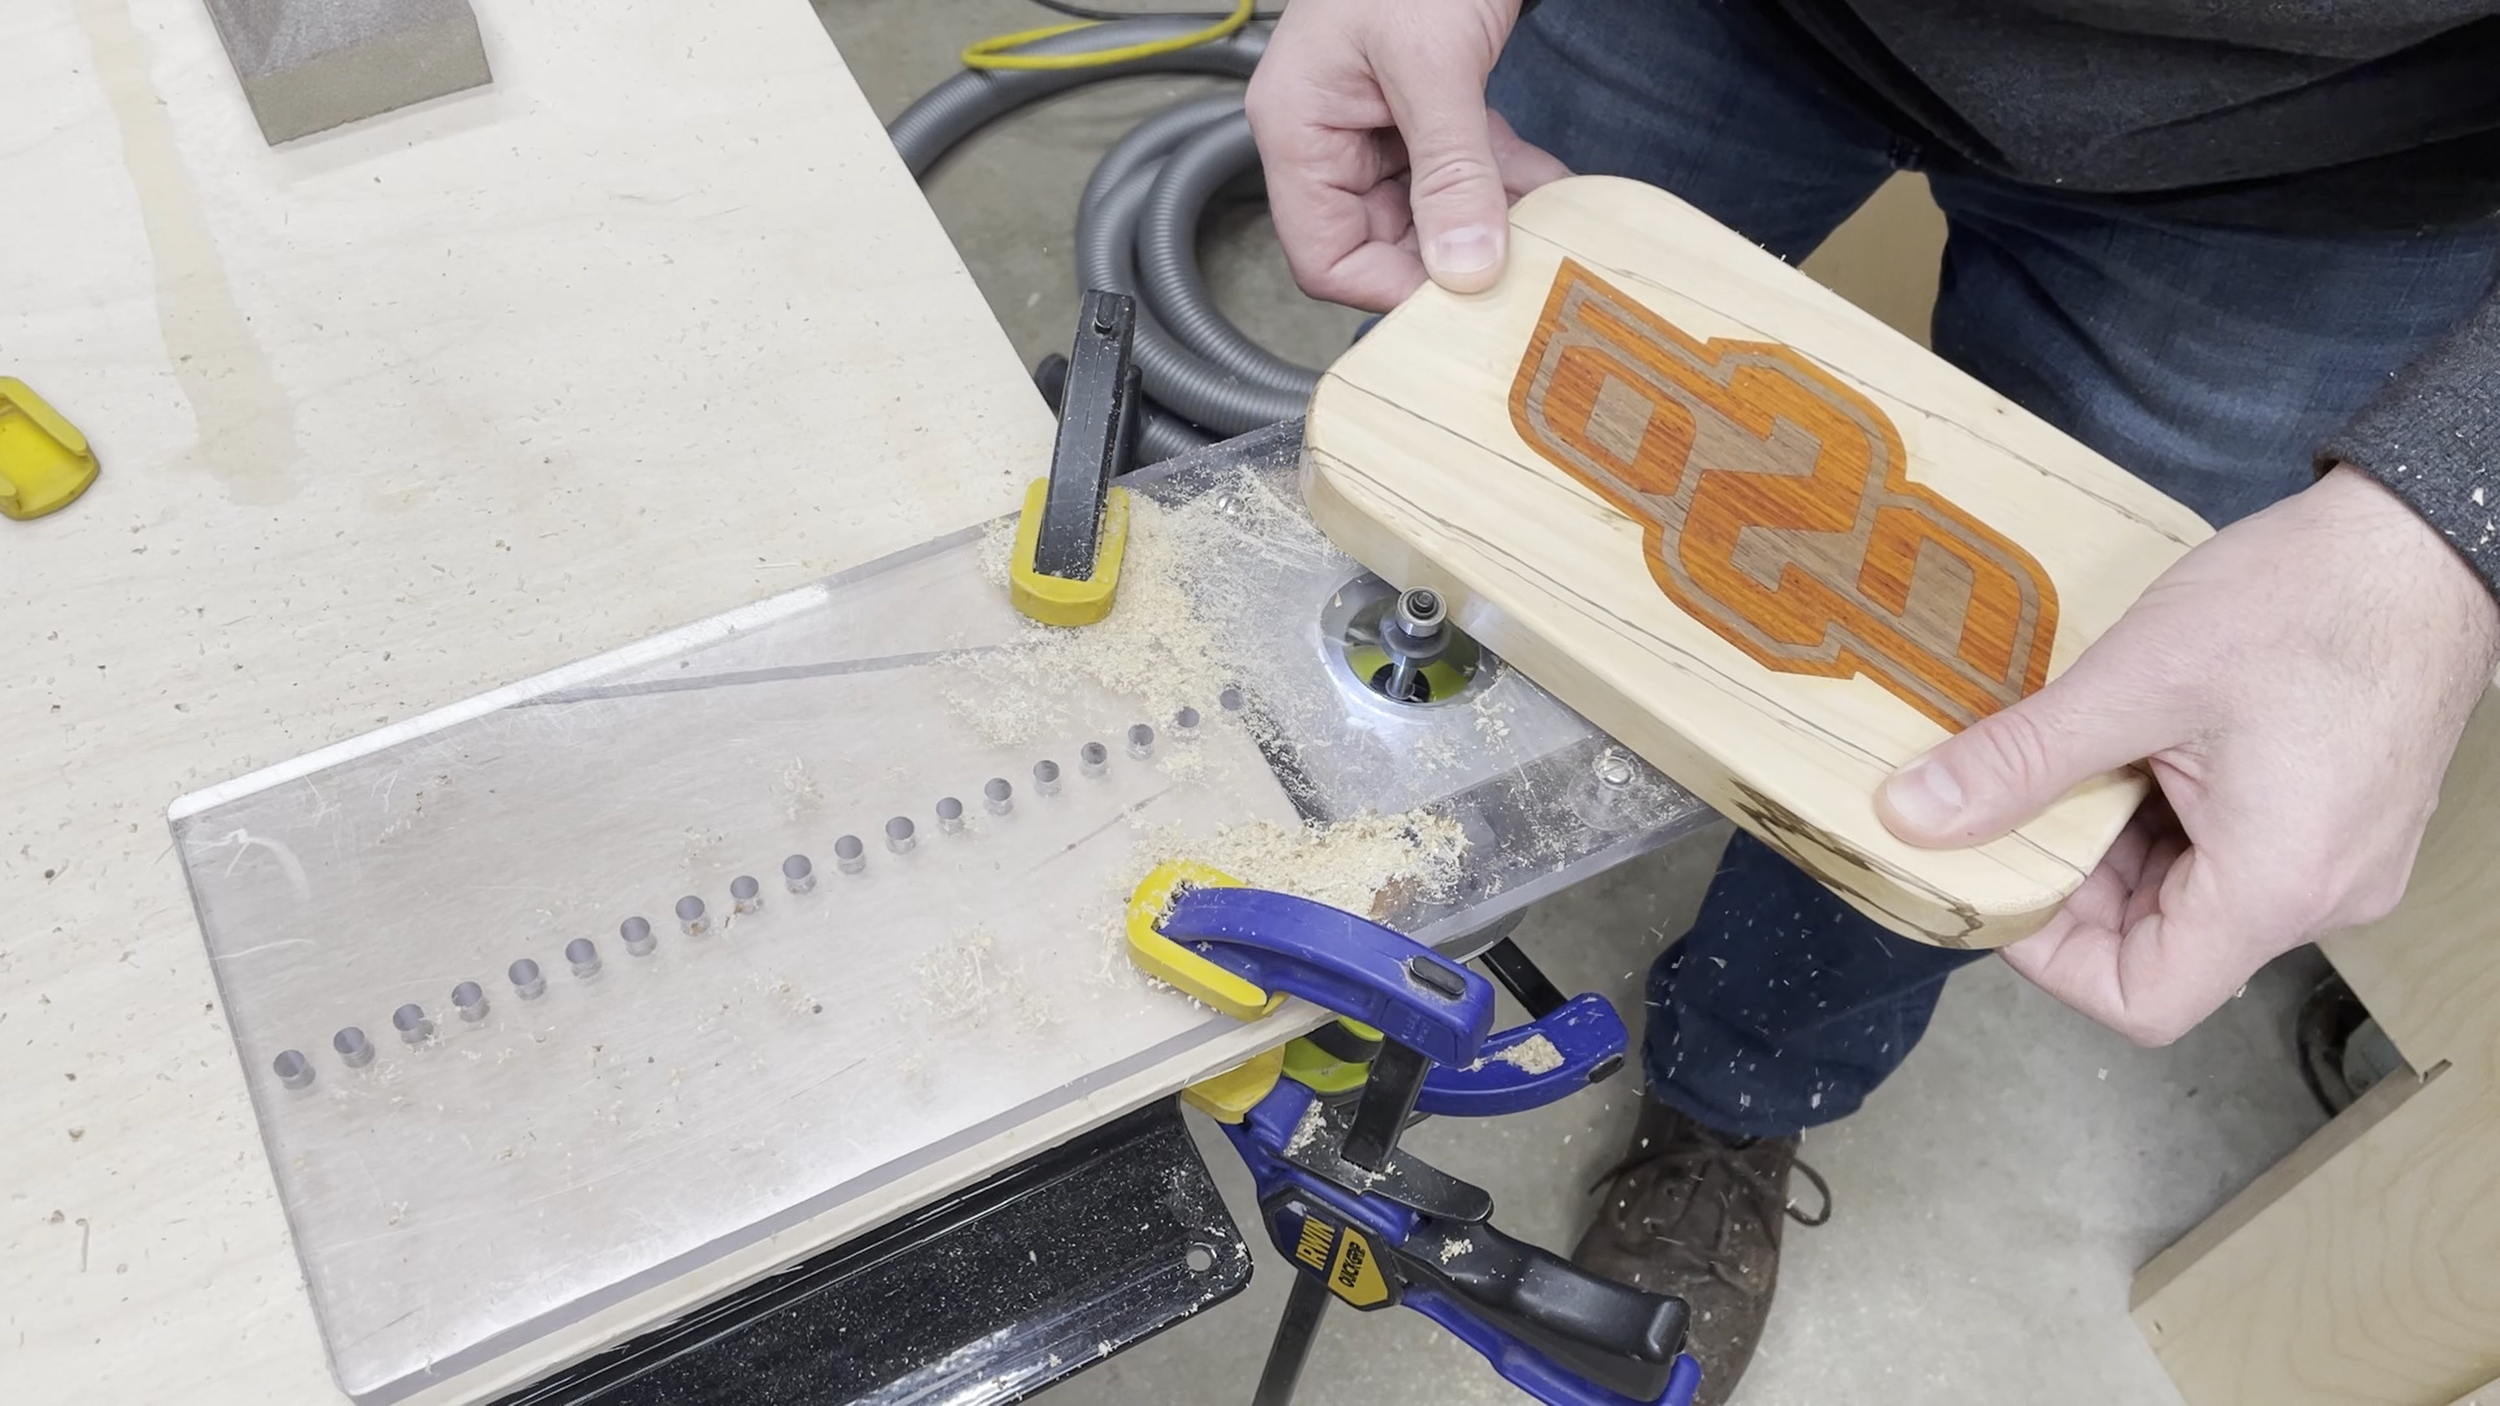
Step 10: Round Over Edges
I used a 1/8" diameter round over bit with a guide bearing in order to round over the edges of the tray. I did this on all of the inside and outside edges as well as the inside top edge of the tray. The outside wall thickness of the tray is 3/8". By using a 1/8" radius round over, the top edge of the tray has a 1/8" wide flat area. This makes for a nice top edge of the tray that isn't too thin and brittle.
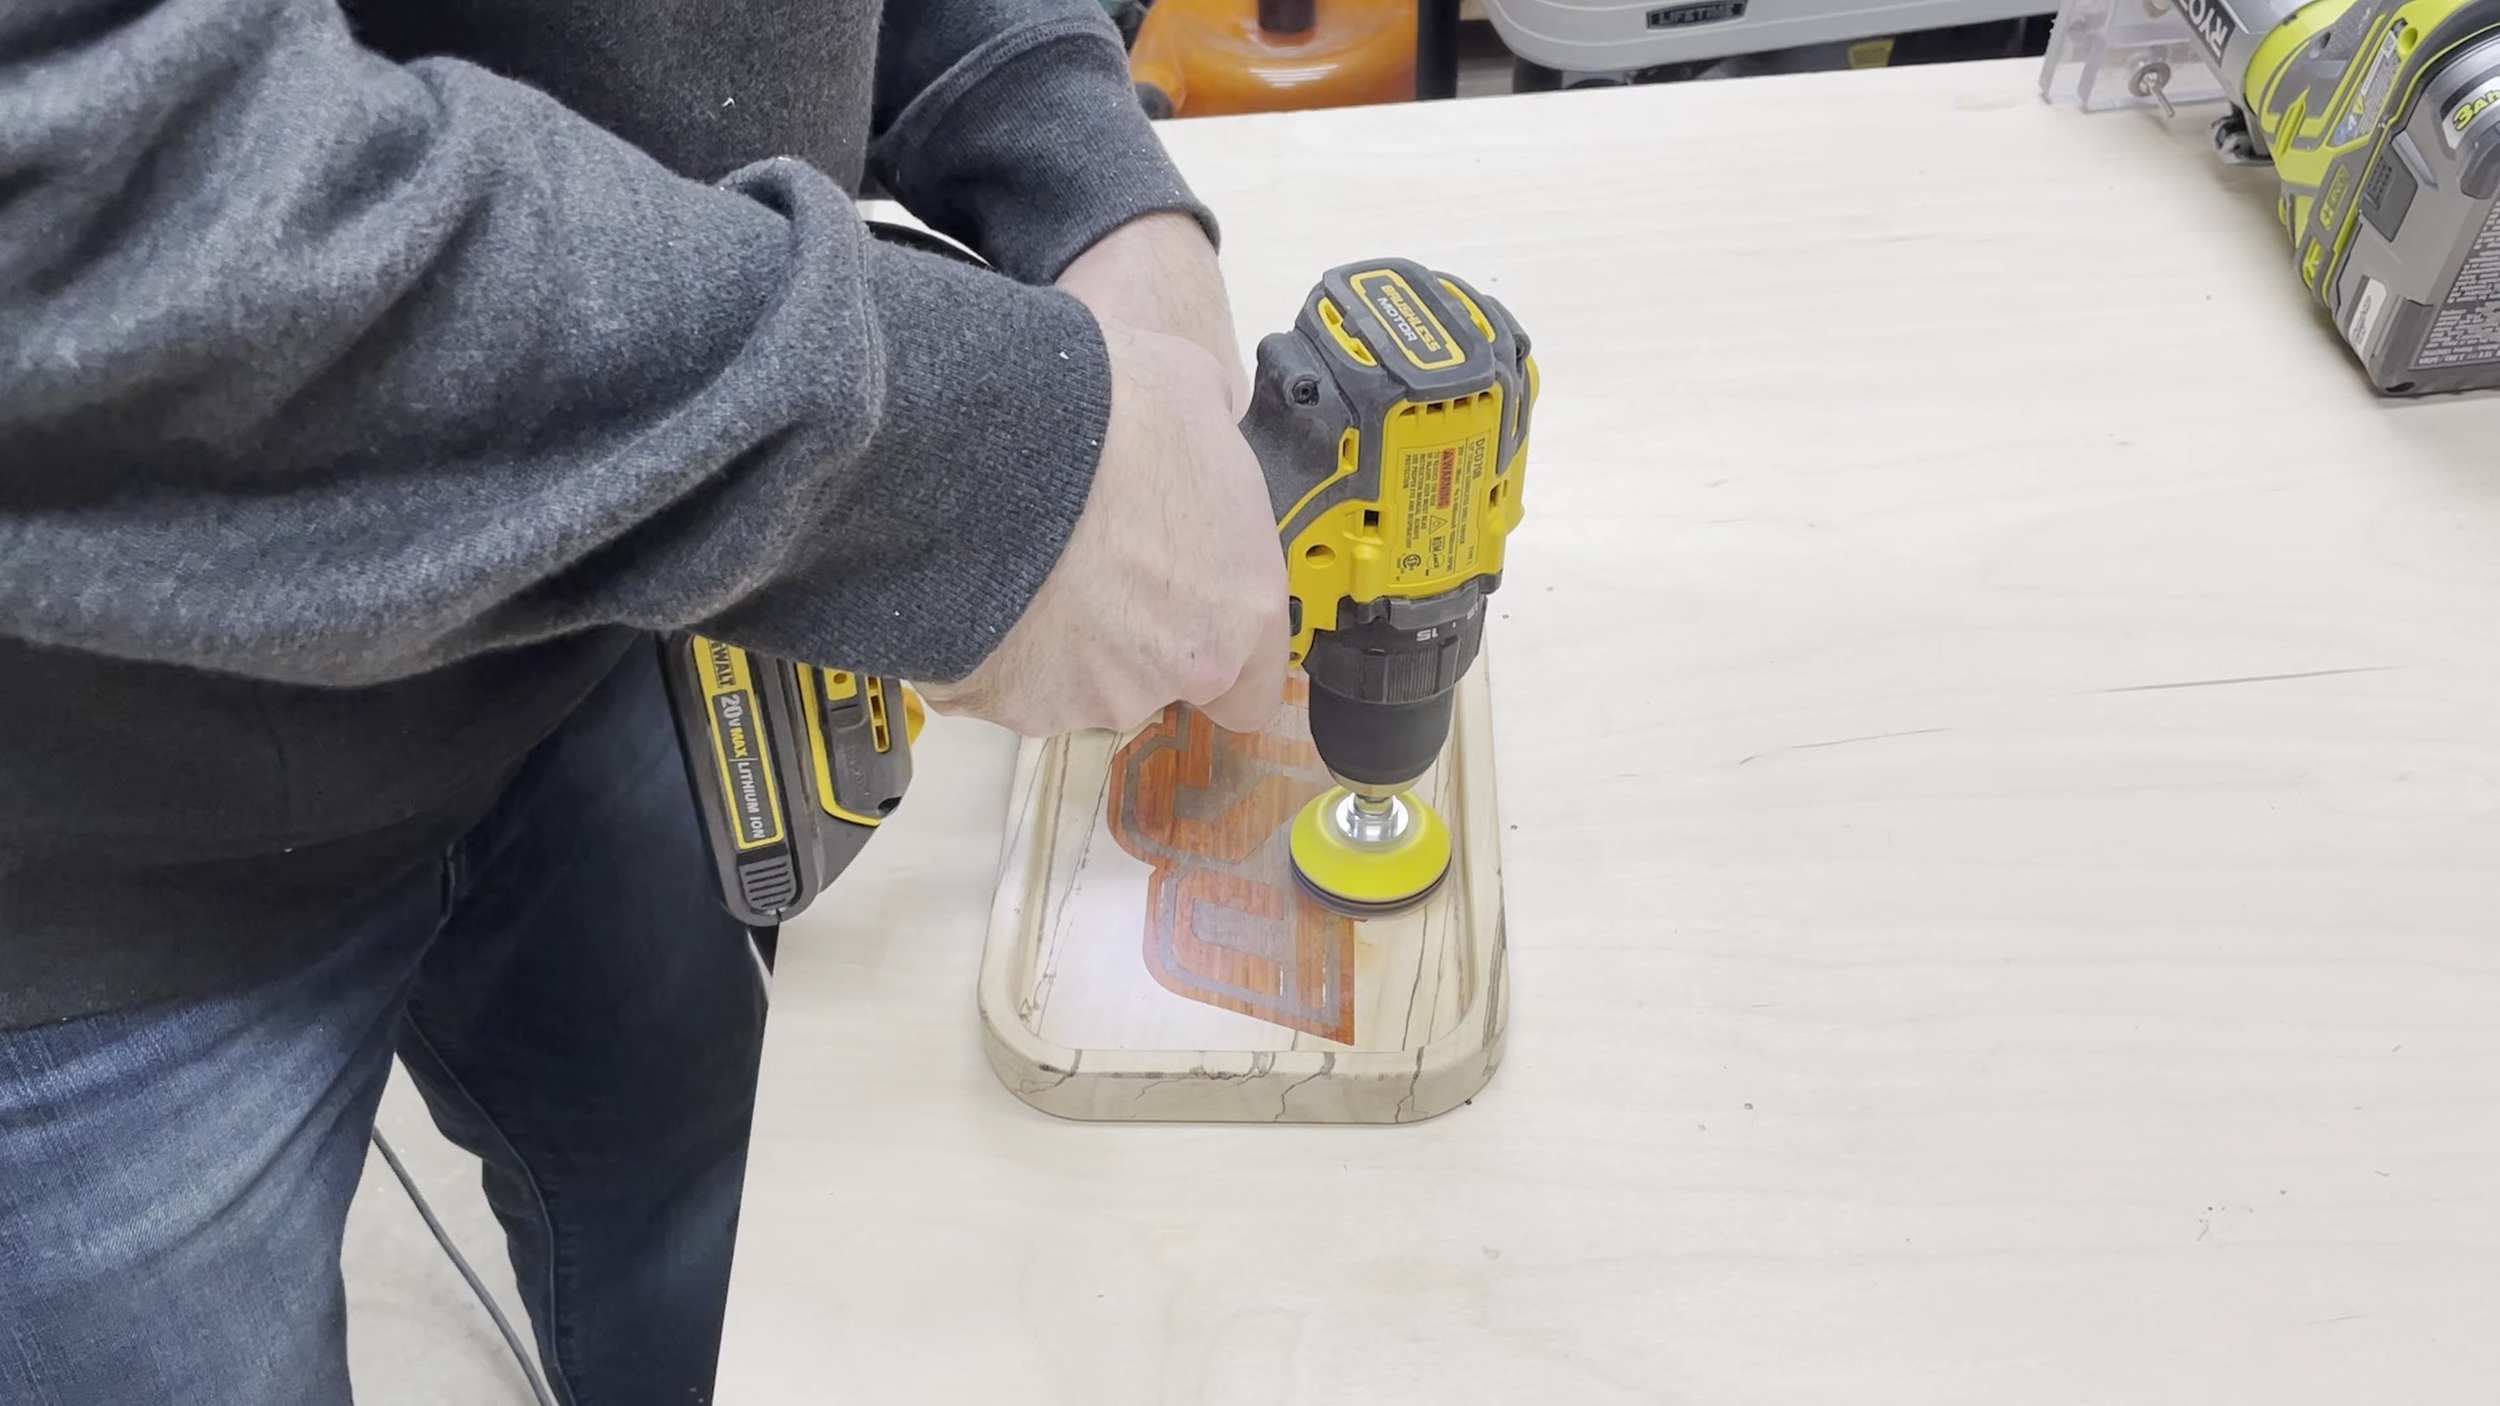
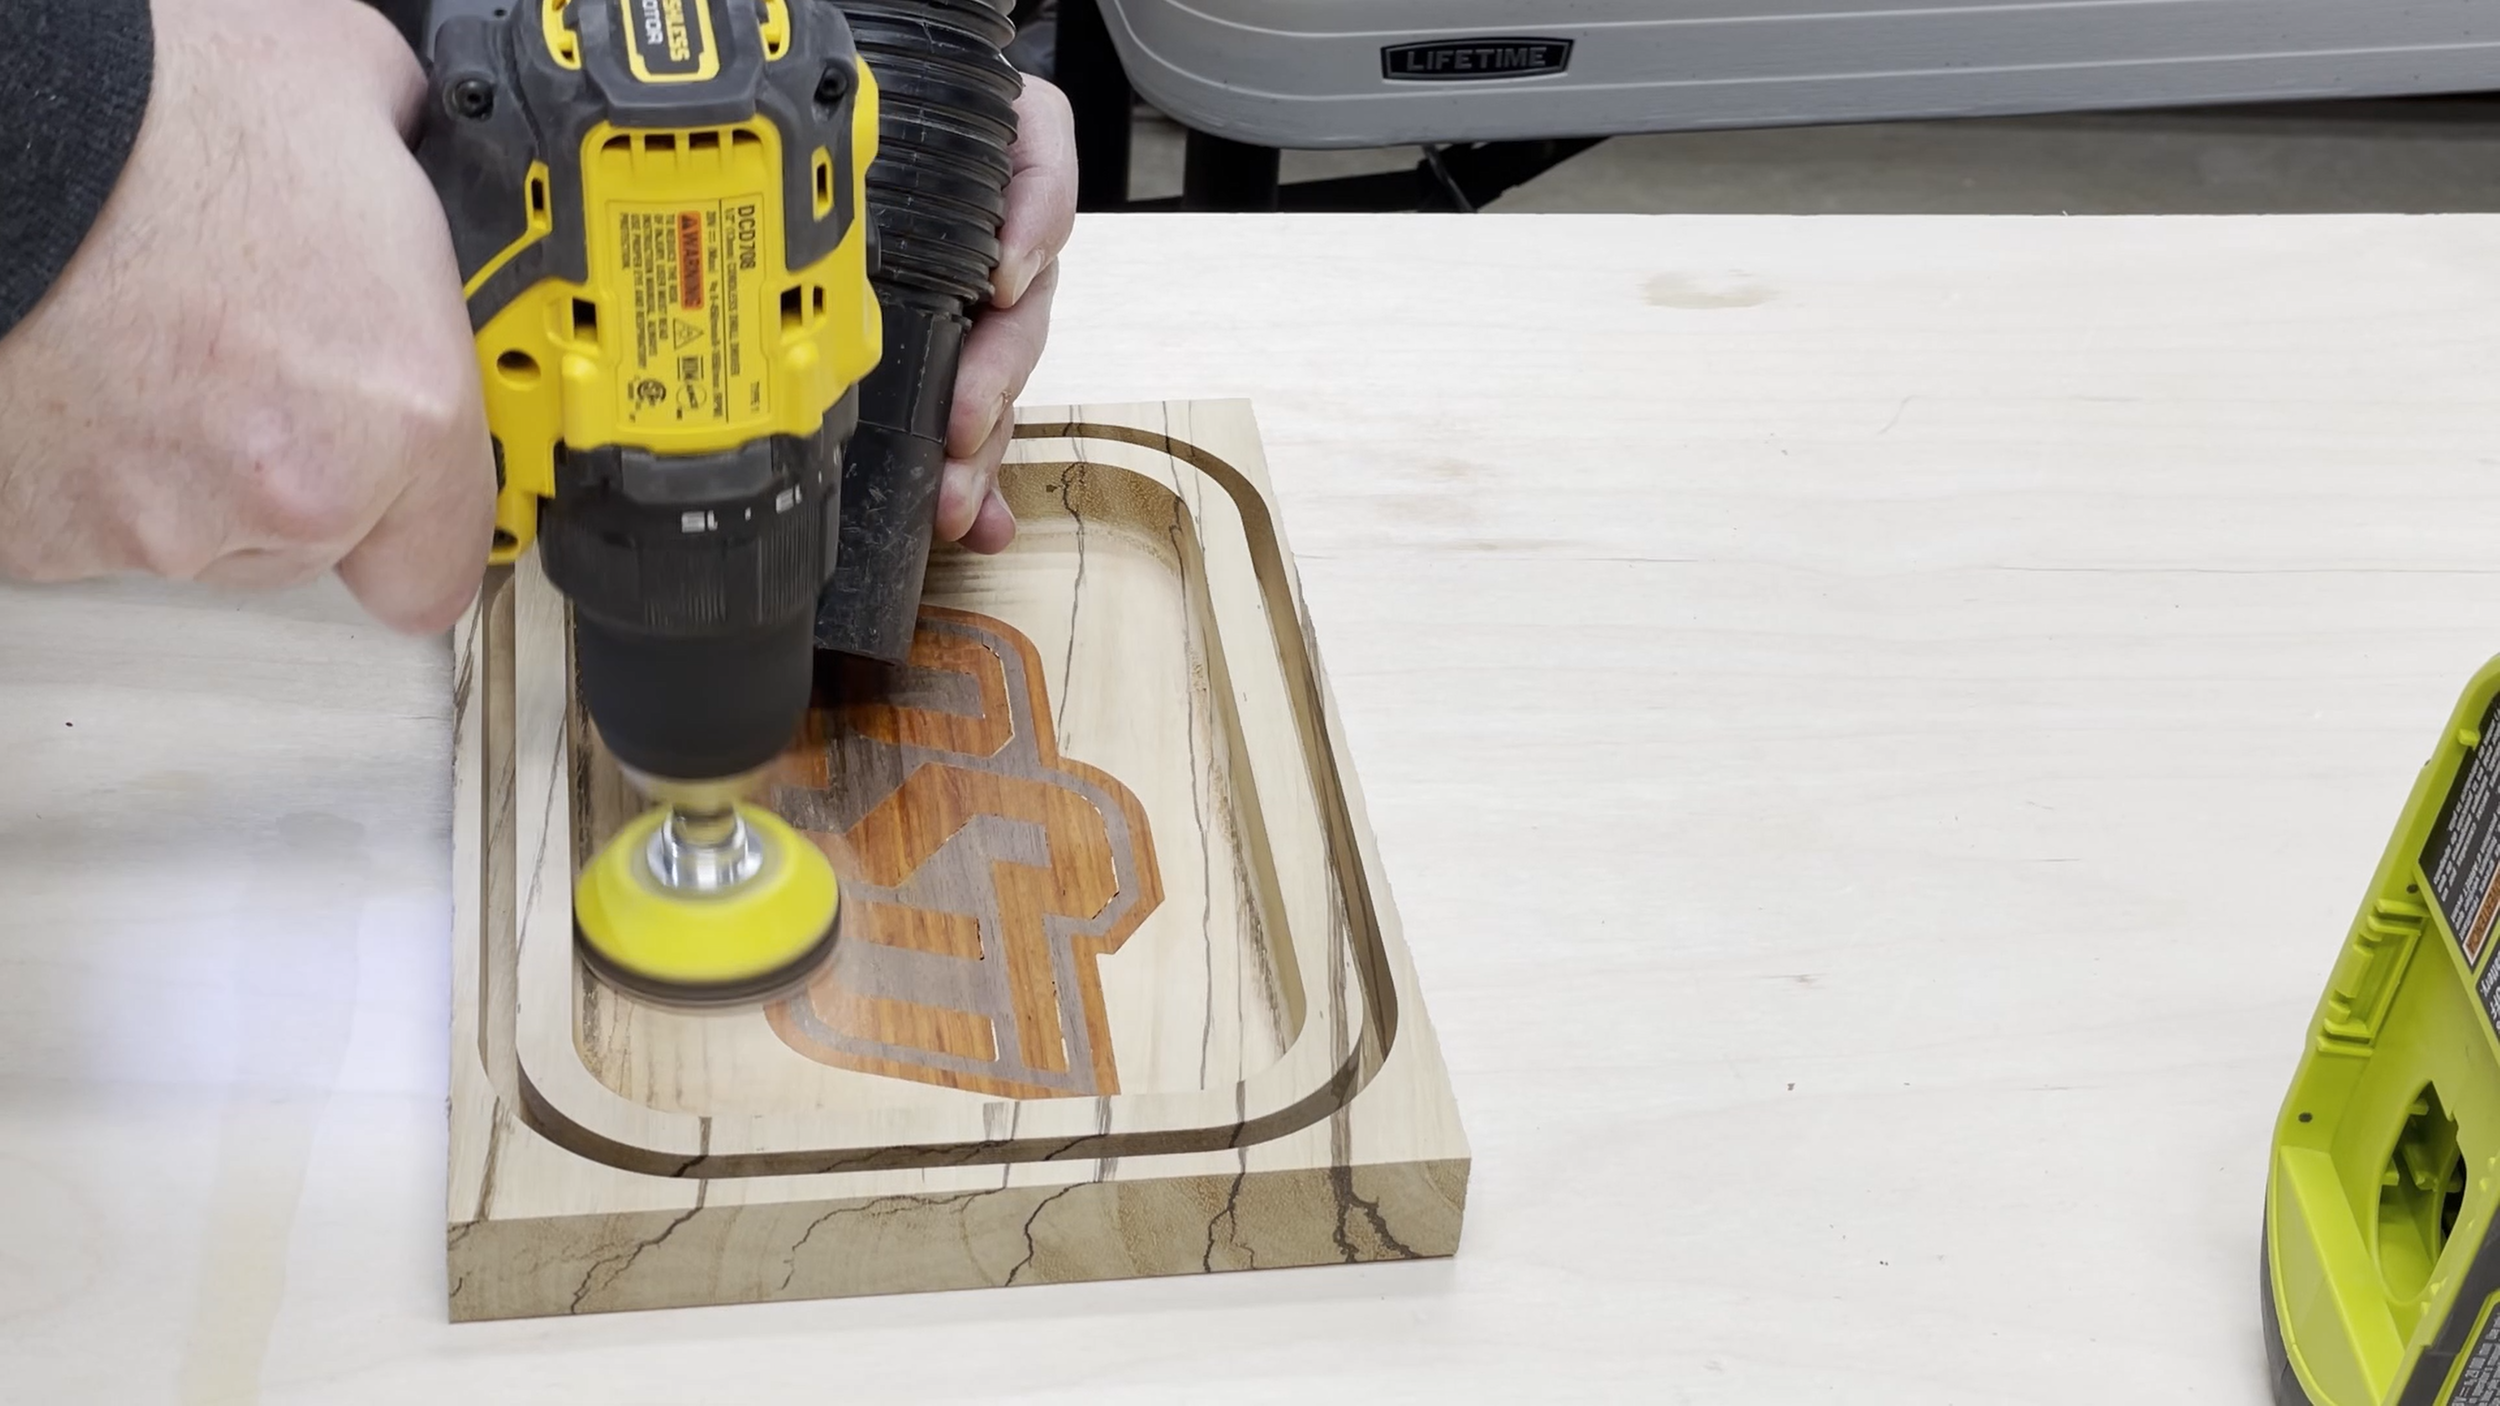
Step 11: Sanding
These projects can take a lot of sanding to clean up the interior of the tray.
Take your time to make sure that you get rid of all of the sanding marks so they don't show up when you apply the finish.
I recommend going through a series of grits going finer and finer to remove the marks from the previous sand paper you used.
Also, try to sand with the grain as much as possible in order to keep the sanding marks across the wood grain to a minimum.
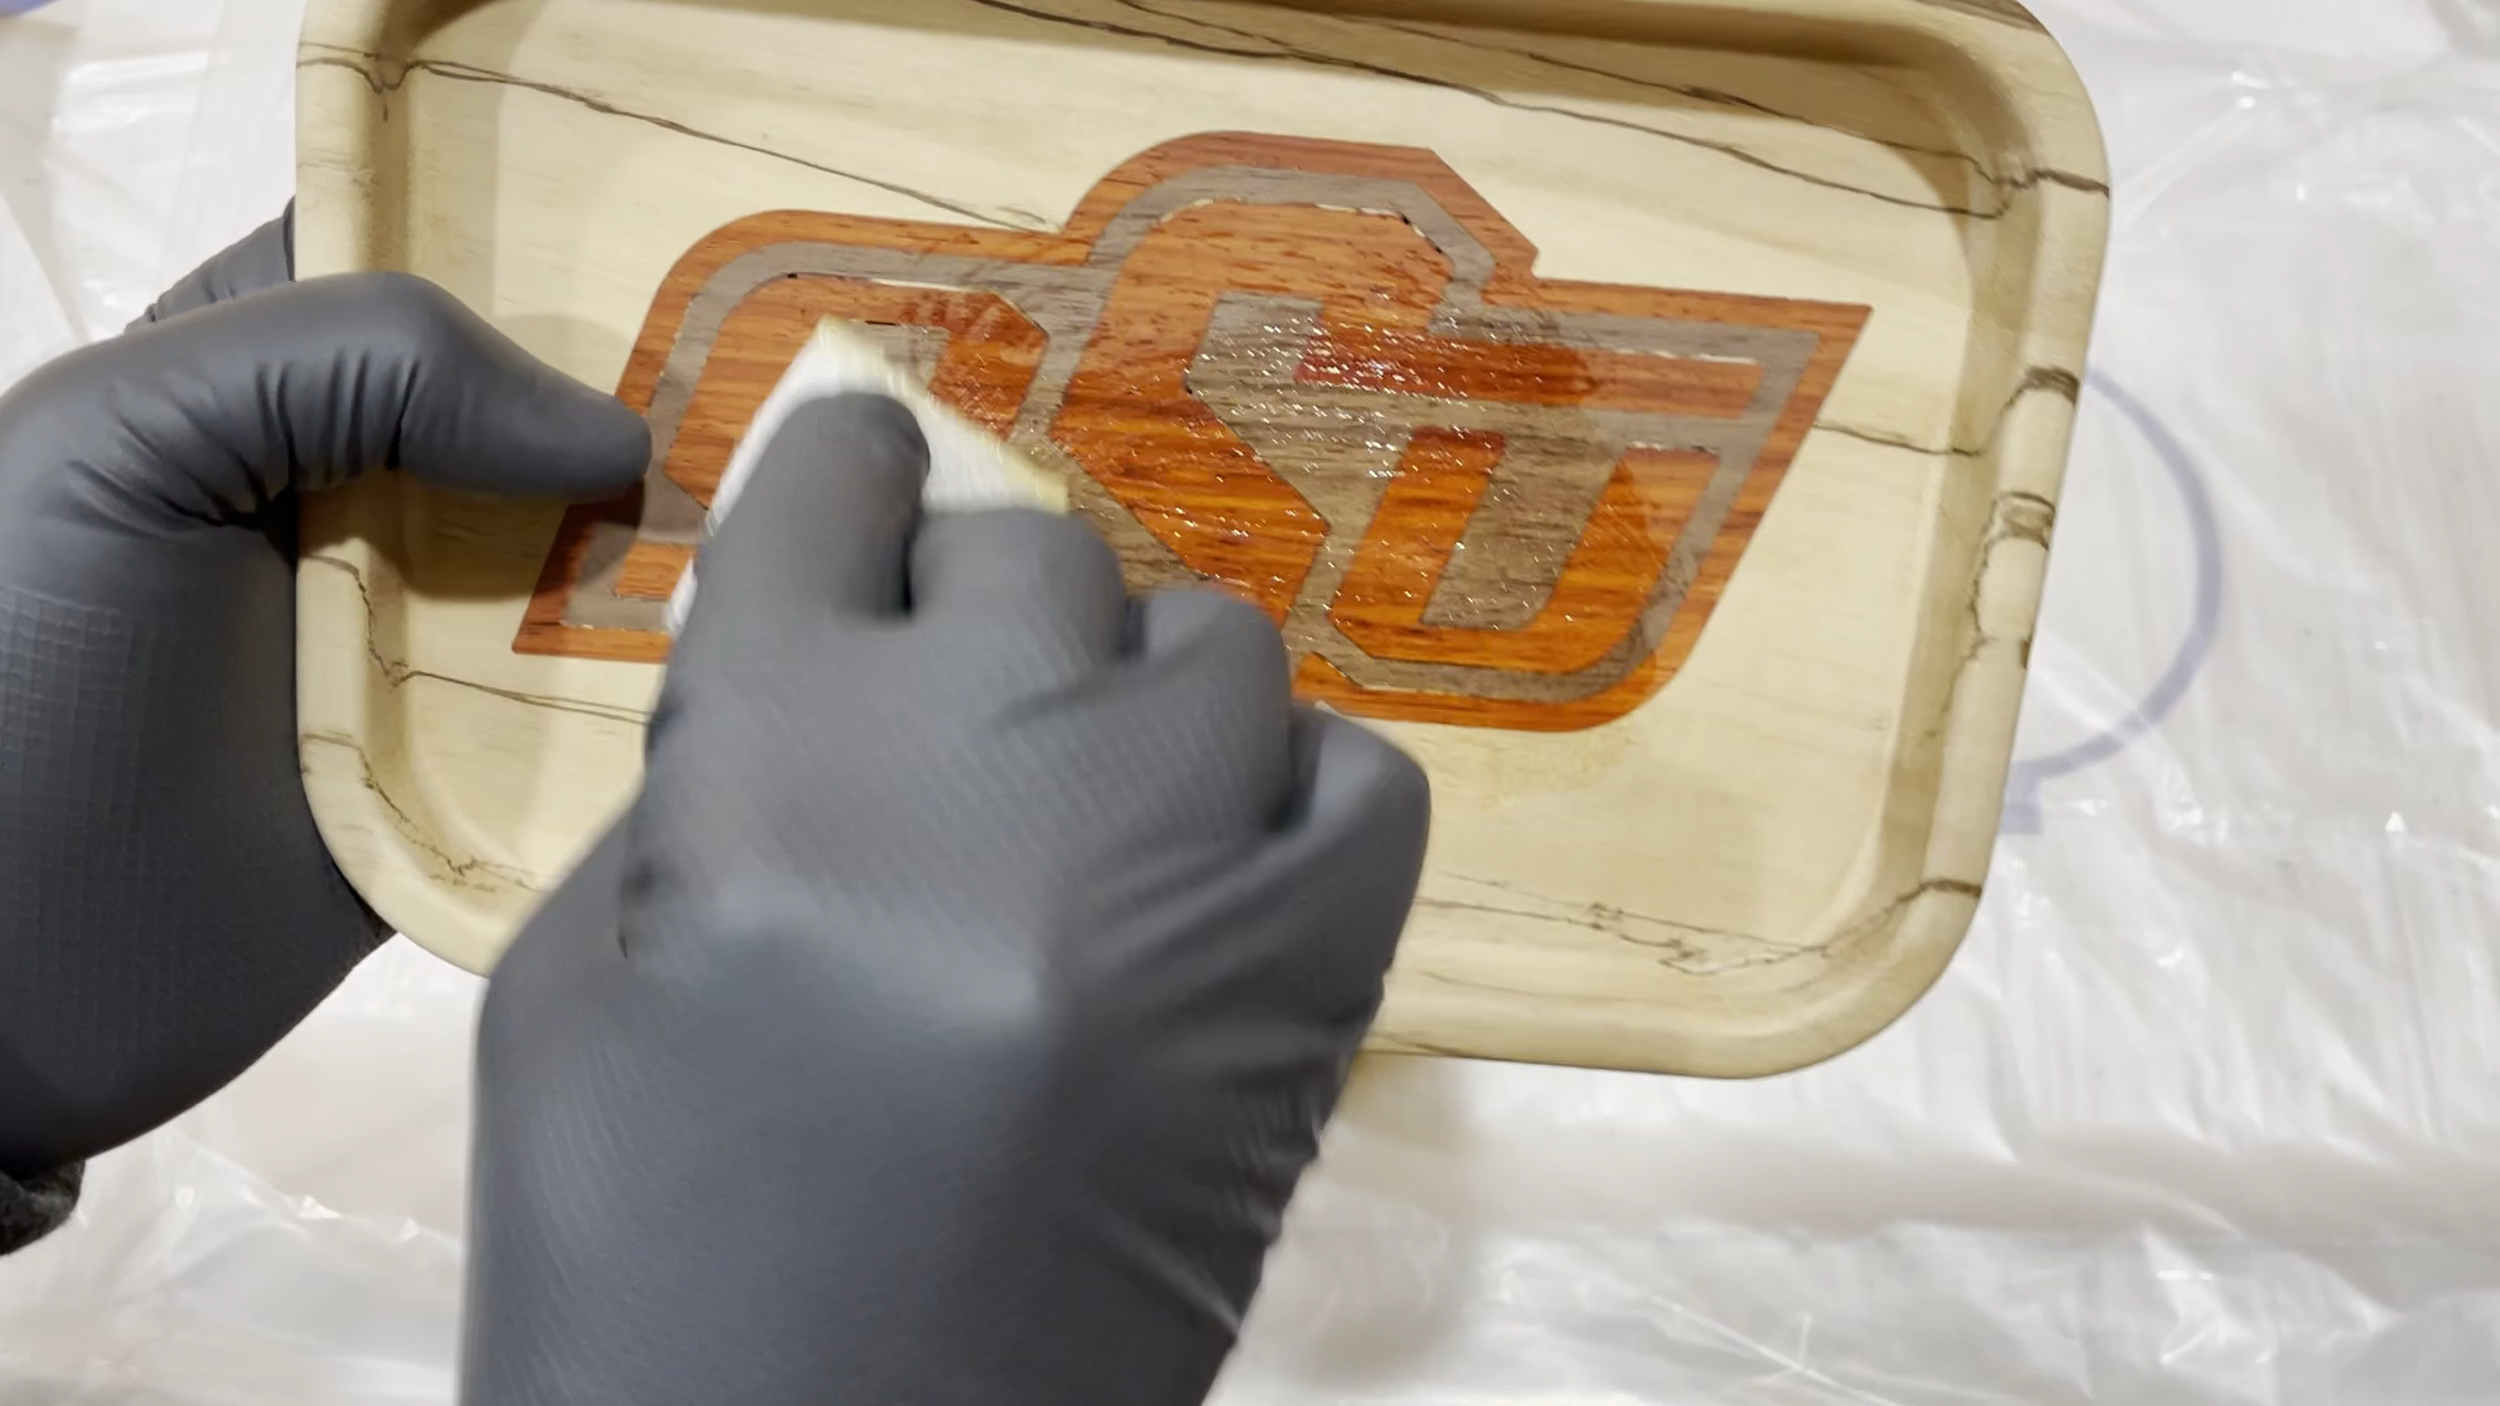
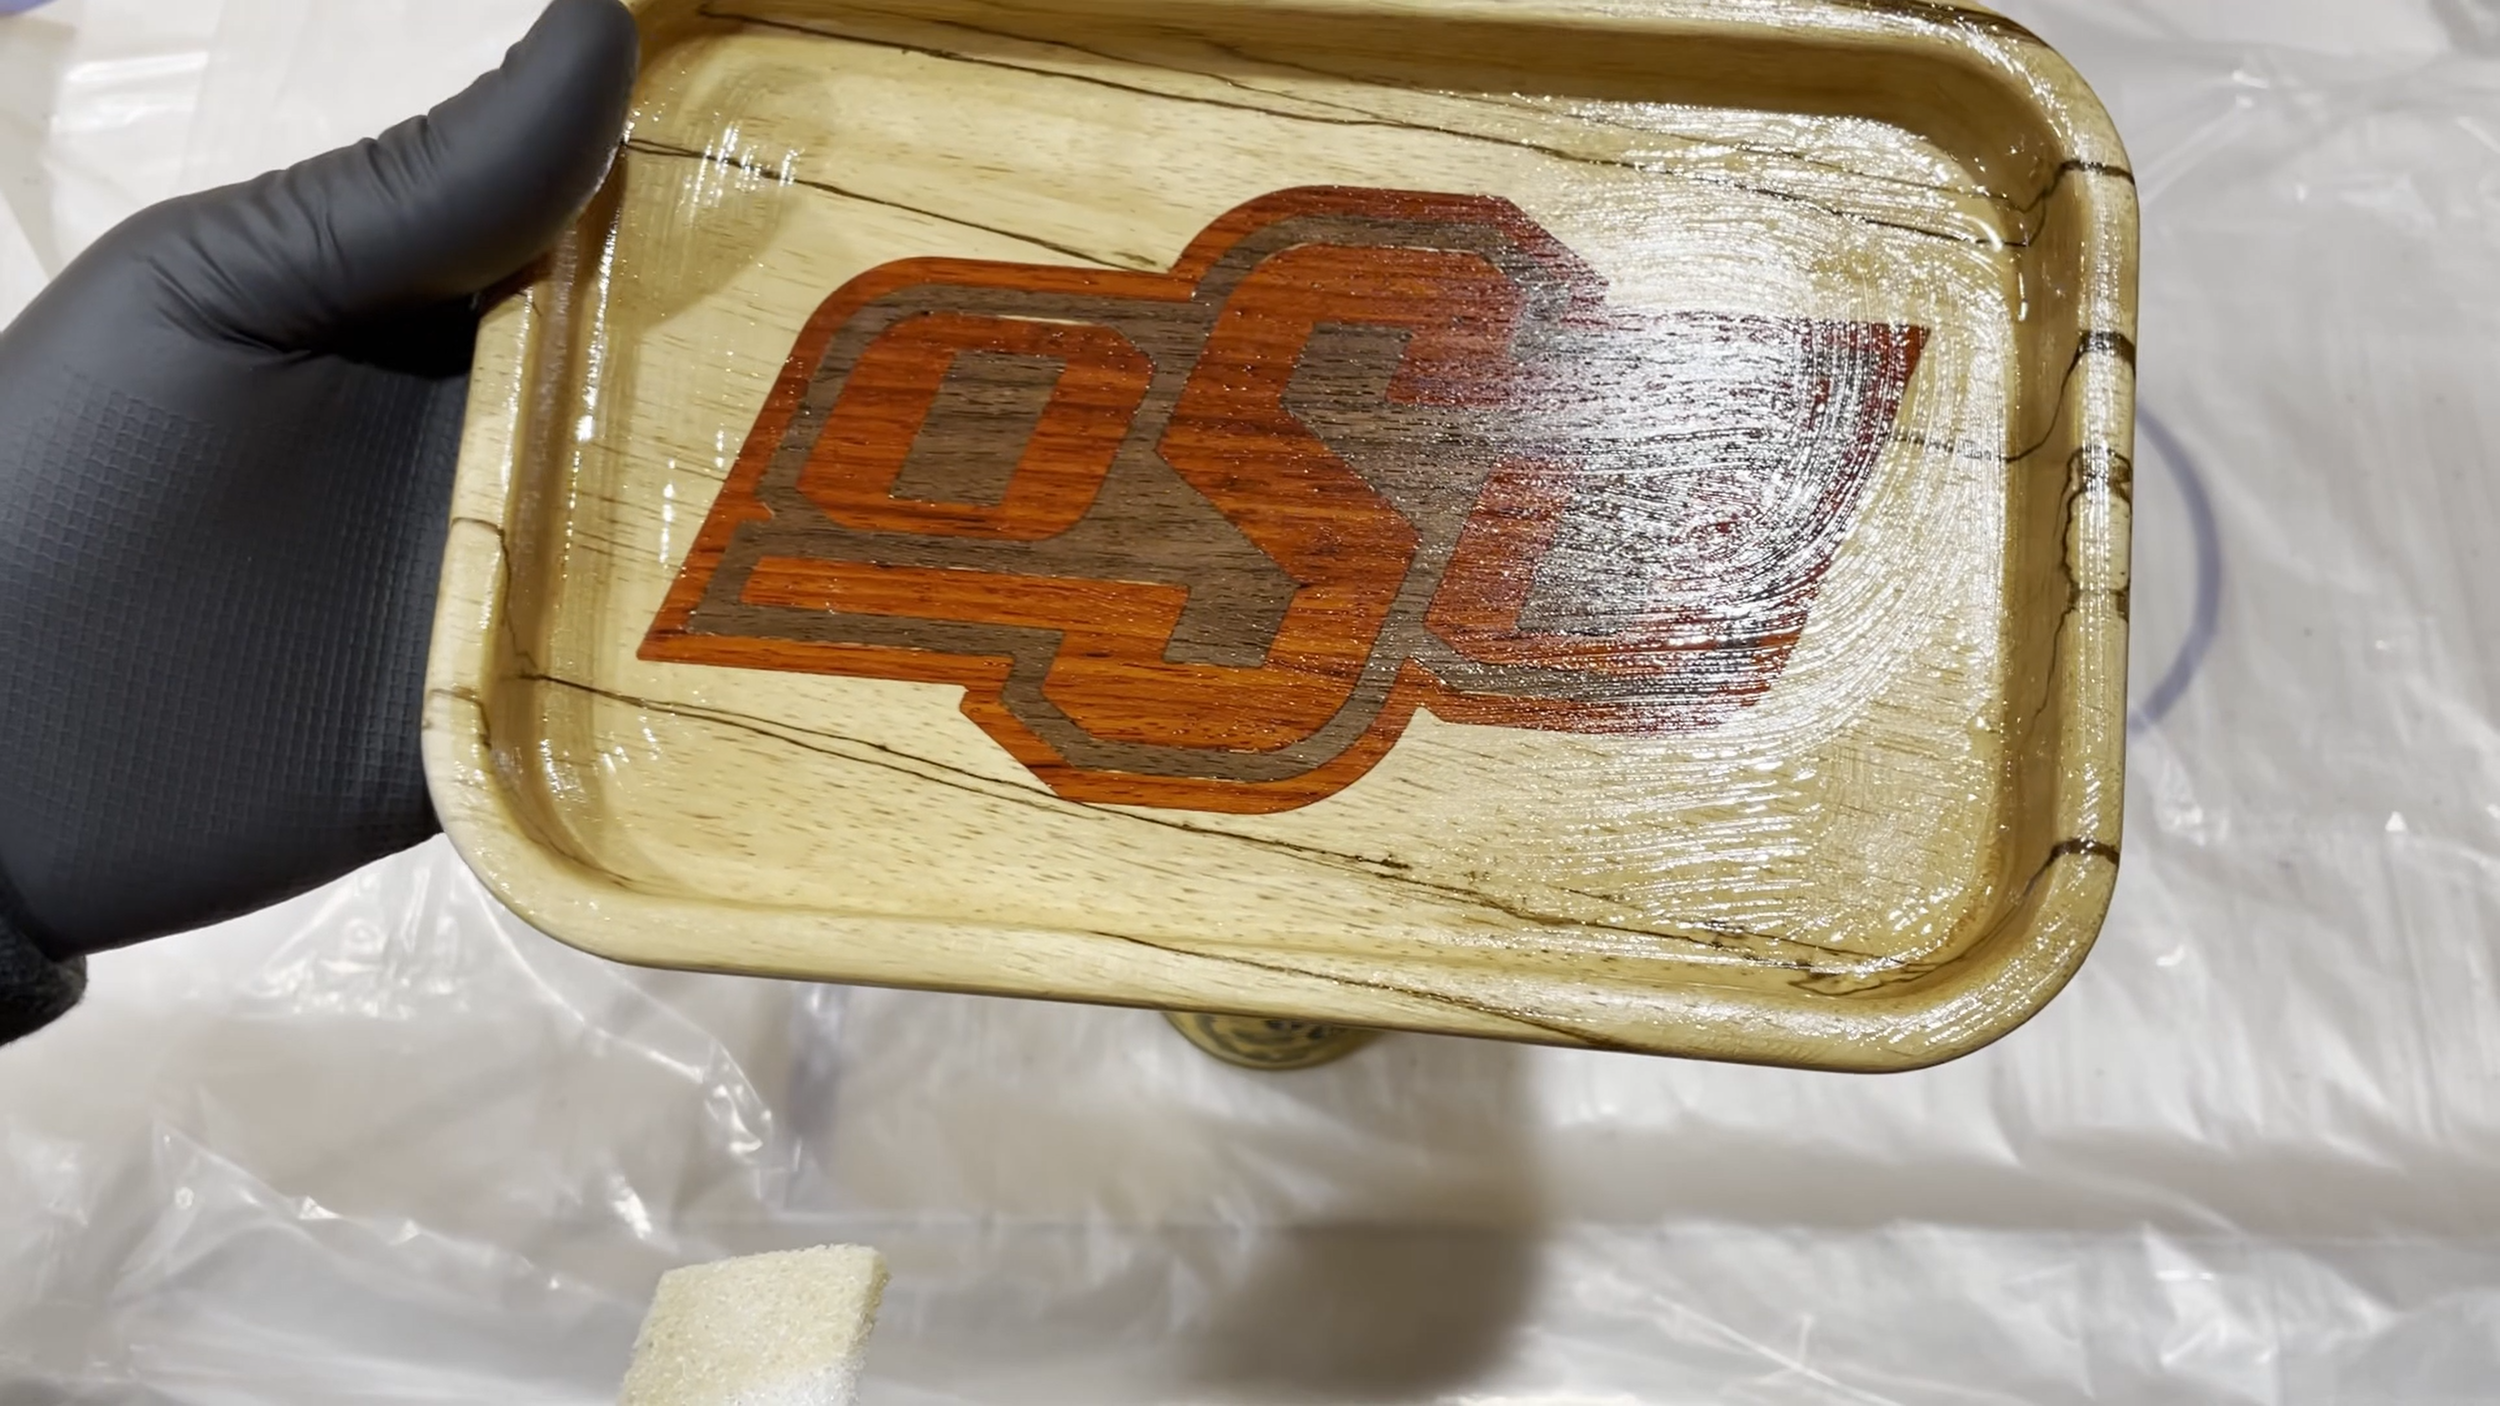
Step 12: Apply Your Finish
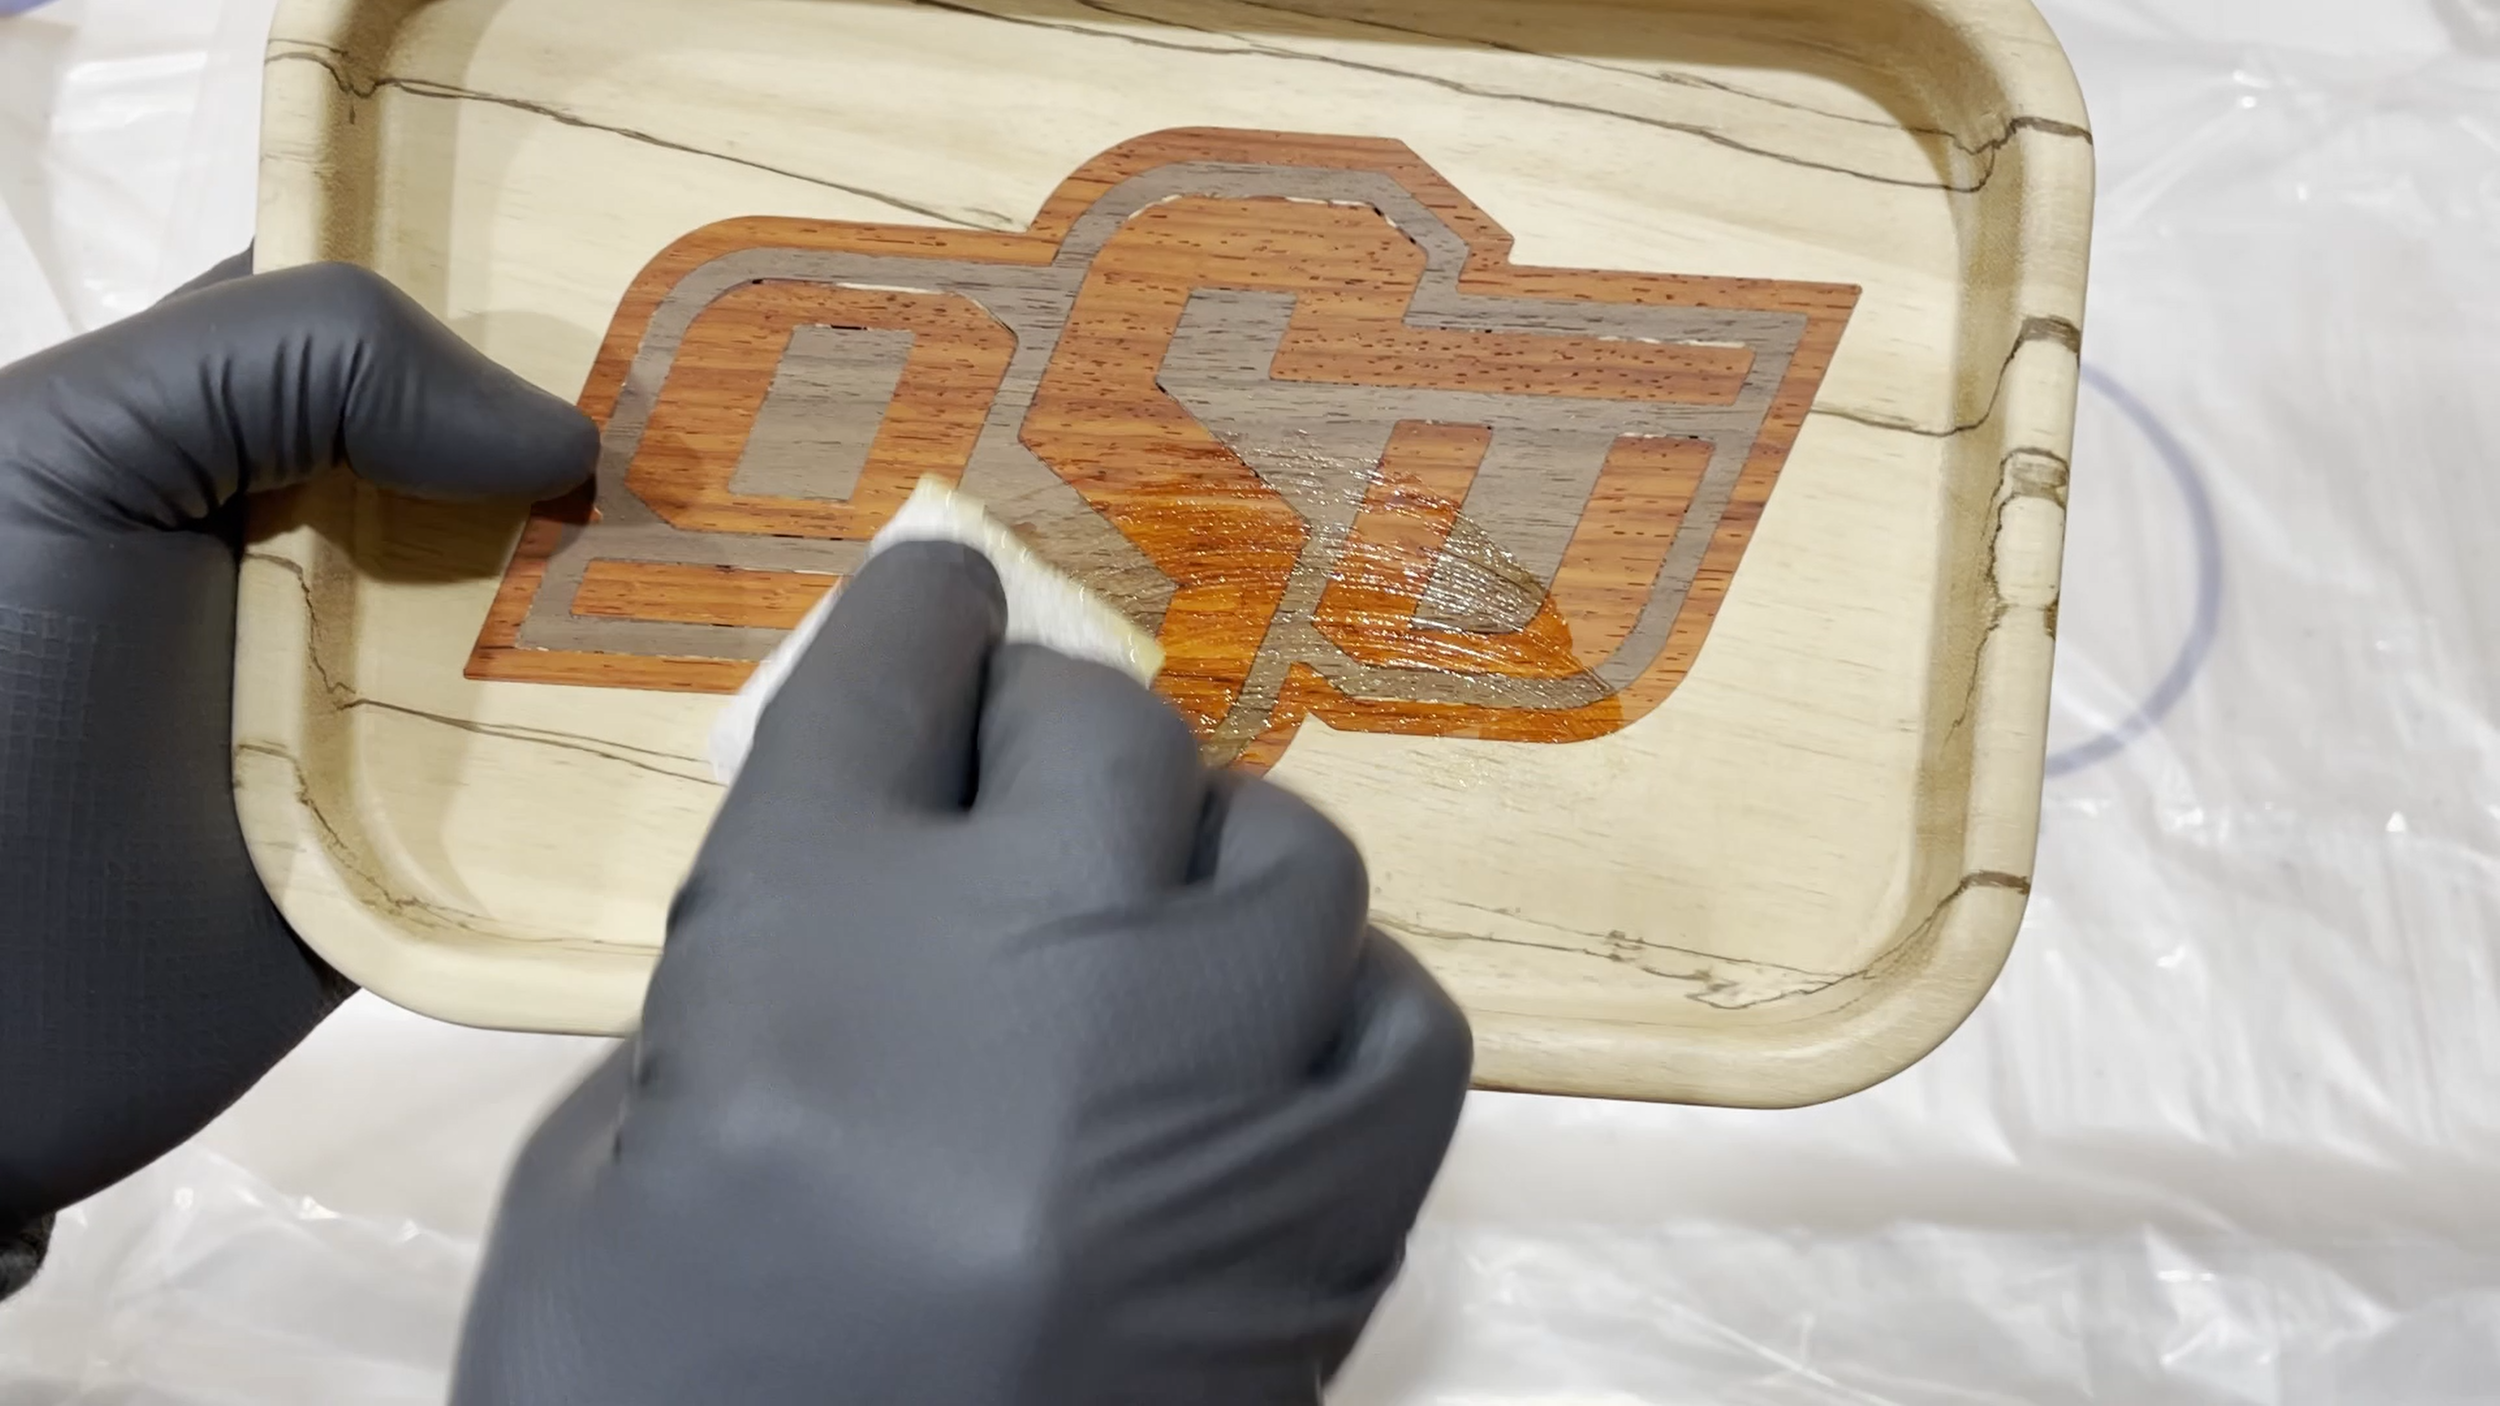
I really like the look and feel of Odie's Oil on these trays. It goes on extremely easy and you just wipe off the excess finish after a short amount of time. A couple coats makes for a great finish that brings out the color in the wood and is easy to reapply if needed.
I use a 3M Scotch-Brite Light Cleansing Pad to rub the Odie's Oil into the surface of the wood. After 15 to 20 minutes I wipe off the excess finish with a clean, dry, lint free cotton cloth or rag.
Step 13: Sit Back and Enjoy
I was really happy with how this tray turned out since is was for a very good friend of mine who went to Oklahoma State University.
I have made several trays in the past where the logo went all the way through the bottom of the tray, but this was the first time I had attempted a two color inlay through the bottom of the tray.
There may be other ways to accomplish the same end result, but this seemed like the best way for me to do it with the tools I had.
Please let me know in in the comments below if you know of another way to do something like this.